兄弟打印机说明书
- 格式:doc
- 大小:4.05 MB
- 文档页数:7
本说明书的内容及本产品的规格如有变更,恕不另行通知。
Brother 公司保留在不另行通知的情况下,对其中所包含的规格和材料进行更改的权利,同时由于信任所引用的材 料所造成的损害(包括结果性损害),包括但不限于印刷上的错误和其他与此出版物相关的错误 Brother 公司将不 承担责任。
本指南中的屏幕图像和打印机图示可能会因您的操作系统或打印机而有所不同。
并非所有型号在所有国家/地区均可用。
版本 D 软件使用说明书Brother QL 系列创建标签附录简介目录商标 ...............................................................................................................................3关于本说明书 .................................................................................................................3本说明书中使用的符号 (3)标签创建概览 ....................................................................................................................4从标签创建到打印 ..........................................................................................................4如何使用适用于 Windows® 的 P-touch Editor ..................................................................6启动 P-touch Editor ........................................................................................................6启动 P-touch Editor 帮助 .............................................................................................10使用其他应用程序创建标签 .........................................................................................12如何使用 P-touch Transfer Manager (仅限 QL-580N / 1050 / 1060N / 720NW ) (仅限 Windows®) .........................................................................................................18启动 P-touch Transfer Manager ..................................................................................18通过 USB 将标签模板从计算机传输到打印机 ..............................................................19备份标签模板 ...............................................................................................................21通过网络将模板传输至打印机(仅限 QL-580N / 1060N / 720NW ) ...........................22如何使用 P-touch Library (仅限 Windows®) ................................................................23启动 P-touch Library ....................................................................................................23搜索标签 ......................................................................................................................23使用 P-touch Transfer Express 传输标签模板(仅限 QL-720NW ) (仅限 Windows®) .........................................................................................................25如何使用 P-touch Editor Lite (仅限 QL-700)(仅限 Windows®) ................................26如何使用 P-touch Editor Lite LAN (仅限 QL-720NW )(仅限 Windows®) ..................29使用[P-touch Update Software ] .................................................................................32将新的标签收集类别下载至 P-touch Editor / 更新 P-touch Editor 软件 .......................32更新 P-touch Editor Lite (仅限 Windows®)/ QL 打印机固件 ...................................34使用 P-touch 模板打印标签(仅限 QL-580N / 1050 / 1060N / 720NW ) .......................36P-touch 模板功能 .........................................................................................................36打印分发至多台打印机的标签(仅限 QL-720NW )(仅限 Windows®) ........................37分布式打印 ...................................................................................................................37如何使用适用于 Macintosh 的 P-touch Editor .................................................................39启动 P-touch Editor ......................................................................................................39启动 P-touch Editor 帮助 (40)目录 . . . . . . . . . . . . . . . . . . . . . . . . . . . . . . . . . . . . . . . . . . . . . . . . . . . . . . . . . . . . . . . . . . . . . . . . . . . . . . . . . . . . . . . . 1简介 . . . . . . . . . . . . . . . . . . . . . . . . . . . . . . . . . . . . . . . . . . . . . . . . . . . . . . . . . . . . . . . . . . . . . . . . . . . . . . . . . . . . . . . .3创建标签 . . . . . . . . . . . . . . . . . . . . . . . . . . . . . . . . . . . . . . . . . . . . . . . . . . . . . . . . . . . . . . . . . . . . . . . . . . . . . . . . . . .4简介创建标签附录从其他应用程序直接打印 ................................................................................................42设置打印机驱动程序 ....................................................................................................42从其他应用程序打印 . (44)附录 . . . . . . . . . . . . . . . . . . . . . . . . . . . . . . . . . . . . . . . . . . . . . . . . . . . . . . . . . . . . . . . . . . . . . . . . . . . . . . . . . . . . . . 42简介创建标签附录简介使用 Brother 标签打印机(以下简称“打印机”)可以快速、方便地打印标签编辑软件P-touch Editor 创建的 自定义标签。
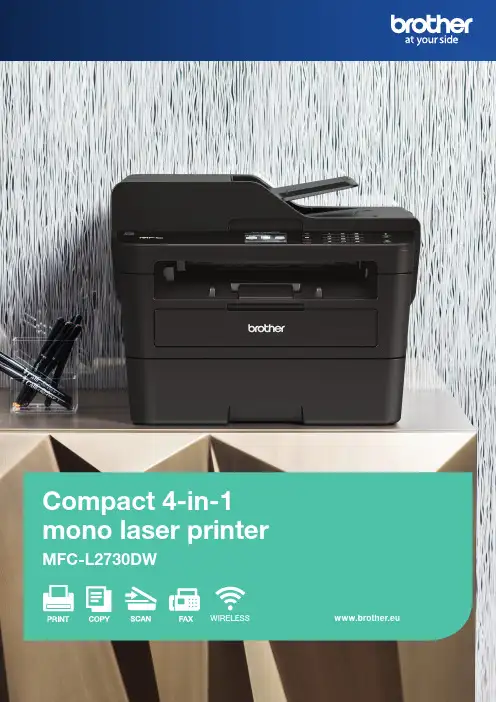
Compact 4-in-1mono laser printerMFC-L2730DWwww.brother.euWIRELESSPerformance designed for businesses of tomorrow Duplicating, digitising and sharing documents has never been easier.The MFC-L2730DW, offers true network capabilities, with wired and wireless connectivity. Documents can be scanned and shared directly to a network folder, making it easy to share and archive.Save time by printing-from and scanning-to popular cloud services directly from the 6.8cm touchscreen including Dropbox, Google Drive™, Evernote, OneNote and more. The most frequently used functions, can be easily created as customshortcuts on the touchscreen.Maximum value for moneyThe MFC-L2730DW comes with a large 1,200 page inbox toner, providing crisp black text every time. Together with a host of feature rich functionality, ensures that your print outs are professional and cost effective.Quiet without compromisePrint quietly without comprising on speed or quality, operating at the lowest decibel in class (under 50dB). All the models throughout the range are designed to sit on your desk, printing quietly at full speed while you work without interruption. Designed to go the distanceBuilt to perform for longer. The MFC-L2730DW, has been designed with you in mind. Made from robust and hardwearing materials and supported by outstanding serviceas standard, providing the peace of mind that your printer will keep on going.1 Approx declared yield value in accordance with ISO/IEC 19752.2 Calculated with 80g/m² paper.3 Windows ® & Mac ® only. GeneralTechnologyElectrophotographic Laser PrinterLaser Classification Class 1 Laser Product (IEC60825-1:2014)Processor 600MHz Memory 128MBWired Network Interface 10Base-T/100Base-TXPrintPrint Speed Standard (A4)Up to 34ppm (pages per minute)Print Speed 2-Sided (A4)Up to 16 sides per minute (8 sheets per minute)ResolutionUp to 1,200 x 1,200 dpi Quiet ModeA mode to reduce the printing noise by reducing the print speed to 13ppmAutomatic 2-Sided Printing Print on to both sides of the paperFPOT (First Print Out Time)Less than 8.5 seconds from ready modeWarm Up TimeLess than 9 seconds from sleep modePrint Languages PCL6, BR-Script3(PostScript ®3TM Language Emulation), PDF version1.7Printer FunctionsN-up Printing 3Reduce up to 2, 4, 9, 16 or 25 A4 pages into just one A4 page(Mac, up to 2, 4, 6, 9, or 16)Poster Printing 4Enlarge 1 A4 page into a poster using 4, 9, 16 or 25 A4 pages Watermark Printing 4Watermark your documents with predefined text or with your own user-defined messagesID Printing 4Add identification to yourprinted documents (date & time, short custom message or PC username)Manual 2-Sided Print 4Manual 2-sided printing(recommended for media not supported by automatic 2-sided print)Booklet Printing 4Print documents in A5booklet format using automatic or manual 2-sided printPrint Profiles 3Store your favourite driver settings as profiles to easily recall themPrint Text In Black 4Converts all text in your documents to black when printedPrint Archive 4An electronic carbon copyfeature that saves an electronic copy of all printed documents as a PDF fileAll specifications correct at the time of printing and are subject to change.Brother is a registered trademark of Brother Printer DriverWindows ®Windows ® 10(32 & 64 bit editions)Windows ® 8(32 & 64 bit editions)Windows ® 7(32 & 64 bit editions)Windows ® Server 2016 (32 & 64 bit editions)*Windows ® Server 2012, 2012R2 & 2008R2* Windows ® Server 2008 (32 & 64 bit editions)*Macintosh 5macOS 10.8.x or greater Linux 5CUPS, LPD/LPRng (32 & 64 bit editions)Embedded Fonts (PCL)66 scalable fonts, 12 bitmap fonts, 16 barcodesEmbedded Fonts (Postscript)66 scalable fontsEmbedded Barcodes (PCL)Code39, Interleaved 2 of 5, FIM (US-PostNet, Post Net (US-PostNet) EAN-8, EAN-13, UPC-A, UPC-E, Codabar, ISBN(EAN), ISBN(UPC-E), Code128(set A, set B, set C), EAN128 (set A, set B, set C), Code93, GS1Databar, MSI* Windows® Server supports network printing onlyWireless Network IEEE 802.11b/g/n Control Panel6.8cm colour touchscreen Local Interface Hi-Speed USB 2.0Shortcuts 12PostScript Universal Printer DriverDriver for Windows ® that enables you to print to any network or locally-connected Brother laser printer that supports PostScript PCL DriverGeneric PCL XL driverAll specifications correct at the time of printing and are subject to change.Brother is a registered trademark of Brother Industries Ltd. Brand product names are Media SpecificationMedia Types & Weights StandardPlain & recycled paper (between 60 - 163g/m 2)Manual feed slotPlain, Recycled, Bond, Label, Envelope,(between 60 - 230g/m 2) 2-sided PrintPlain & recycled paper (between 60 - 105g/m 2)Envelope & Label Printing Yes, from the Manual feel slot: support for 1 envelope / sheetMedia Sizes Standard TrayA4, Letter, A5, A5 (Long Edge), A6, Executive Manual feed slotWidth: 76.2mm to 215.9mm x Length: 127mm to 355.6mm 2-sided Print A4Mobile / Web Based Printing & ScanningBrother iPrint&Scan (Android)Print from, scan to, sendfaxes, preview received faxes, preview copies and check the machine status from an Android deviceBrother iPrint&Scan (iPad / iPhone / iPod)Print from, scan to, send faxes, preview received faxes, preview copies and check the machine status from an iPad / iPhone / iPod TouchBrother iPrint&Scan (Windows ® Phone)Print from and scan to a smart phone running the Windows ® Phone Operating SystemBrother Print&Scan (Windows ® 8,10 & RT)Print from and scan to a Windows ® 8,10 or Windows RT TabletGoogle Cloud Print 2.0Print most common file types from any Google Cloud Print enabled application CreativeCentre 8Download and print Brother CreativeCenter contentApple AirPrintPrint from and scan to most common file types from any AirPrint enabled application Brother Print Service Plugin Print from Android devices without a dedicated App MopriaPrint most common file types from Mopria supported Android devicesWeb Connect 8Print from and scan to without using a PC on Box, Dropbox, Evernote, OneDrive, Google Drive TM OneNoteCopySpeed - (A4)Up to 34cpm(copies per minute)FCOT (First Copy Time Out)Less than 10 seconds from ready mode ResolutionUp to 600 x 600dpiMulti-Copying/Stack/Sort Makes up to 99 copies of each page / Stacks or Sorts Enlargement/Reduction RatioReduce or Increase document sizes from 25% to 400% in 1% incrementsN in 1 CopyingAllows the user to compress 2 or 4 pages on to a single A4 sheet2in1 ID CopyingAllows the user to copy both sides of an ID card to a single A4 sheetGrey Scale256 shades of grey (8 bit)Receipt CopyingProduces clearer copies of receiptsEnlarge Text Copy 8Makes reading copieddocuments easier if the size of the text on the original document is small1 Approx declared yield value in accordance with ISO/IEC 19752.2 Calculated with 80g/m² paper.3 Windows ® & Mac ® only.4 Windows ® only.Standard Paper HandlingPaper Input 2Standard Tray - 250 sheets Manual feed slot - 1 sheetAutomatic Document Feeder (ADF) – 50 SheetsPaper Output 2Face Down - 120 sheets Face Up(Straight Paper Path) - 1 sheet1 Approx declared yield value in accordance with ISO/IEC 19752.2 Calculated with 80g/m² paper.3 Windows ® & Mac ® only.4 Windows ® only.Fleet Management ToolsUnattended Installer 4Ability to centrally deploy and customise our drivers and software MSI Installer 4Modular installers that can be distributed through Active Directory ®BRAdmin Light 4&5LAN/WAN management softwareEmbedded Web ServerWeb based print management software embedded onto the deviceDriver Deployment Wizard 4Easily create print drivers for hassle free deployment over your networkPrintSmart Solutions (optional)PrintSmart Cost Control Monitor and control printing costs for all Brother and 3rd party devicesFor more information on PrintSmart Solutions visit:www.brother.euScanScanner TypeCIS (Contact Image Sensor)Colour & Mono Scanning YesScan Speed Mono23.6ipm (images per minute)Scan Speed Colour7.5ipm (images per minute)Scan Resolution from ADF Up to 600 x 600dpi Scan Resolution from Scanner GlassUp to 1,200 x 1,200dpiInterpolated Scan ResolutionUp to 19,200 x 19,200dpi Colour Depth16,777,216 colour variations (24 bit)Grey Scale256 shades of grey (8 bit)Standard Functions 8Scan to E-mail, OCR, Image, File & FTPScan FeaturesRemove Background, Skip Blank Page 4, ID Scan 4, 1 to 2 Scan 4, Split PDFScan To Microsoft Office 8Scan to Microsoft ® Word, Microsoft ® Excel & Microsoft ® PowerPointScan to Searchable PDFScan documents to searchable PDF filesScan to SharePoint 4&8Scan documents directly into SharePointWindows ® Web Services ScanningScan direct into Windows ®(from Windows ® 7 & onwards) without needing to install a scanner driverScanner DriverWindows ®TWAIN & WIA Windows ® 10(32 & 64 bit editions)Windows ® 8.1(32 & 64 bit editions)Windows ® 8(32 & 64 bit editions)Macintosh 5TWAIN & AirPrintmacOS 10.8.x or greater Linux 5SANE(32 & 64 bit editions)Address BookSpeed Dials200 locations for E-mail addresses and fax numbersGroup DialA combination of up to 20 groups can be stored for broadcastingAll specifications correct at the time of printing and are subject to change.Brother is a registered trademark of Brother Industries Ltd. Brand product names areNetwork and Security Wired NetworkBuilt in Ethernet 10Base-T/100Base-TXNetwork ProtocolsTCP/IP (IPv4 and IPv6)Wired Network SecuritySMTP-AUTH, SNMP v3,SSL/TLS(SMTP,HTTP,IPP)Wireless NetworkIEEE 802.11b/g/n(Infrastructure Mode /Adhoc Mode)Wireless Set-Up SupportWi-Fi Protected Setup (WPS)Wireless ApplicationsVertical PairingE-mail NotificationsAutomatically have the devicesend e-mail alerts when itrequires attention, such aswhen the toner is low orneeds replacingE-mail ReportsReceive usage reports on aregular basis via e-mailIP FilterRestrict which network userscan or cannot access thedevice over the network(IPv4 only)Setting LockSecures access to the devicescontrol panel by locking itIPv4ARP, RARP, BOOTP, DHCP,APIPA(Auto IP), WINS/NetBIOSname resolution, DNSResolver, mDNS, LLMNRresponder, LPR/LPD, CustomRaw Port/Port9100, SMTPClient, IPP/IPPS, FTP Server,SNMPv1/v2c/v3, HTTP/HTTPSserver, TFTP client and server,ICMP, Web Services (Print),SNTP ClientIPv6NDP, RA, DNS resolver, mDNS,LLMNR responder, LPR/LPD,Custom Raw Port/Port9100,IPP/IPPS, SMTP Client, FTPServer, SNMPv1/v2c/v3, HTTP/HTTPS server, TFTP client andserver, ICMPv6, SNTP Client,Web Services (Print)Supplies Inbox Toner700 pages1Standard Yield Toner1,200 pages1 (TN-2410)High Yield Toner3,000 pages1 (TN-2420)Drum (DR-2400)Approx 12,000 pagesCarton ContentsToner cartridge, drum, powersupply cord, driver softwarefor Windows®, Quick Set-UpGuide (PC interface cableNOT included)The frequency of replacementconsumables will varydepending on the complexityof the prints, the percentage ofcoverage, paper size, page perjob, and the type of media.Dimensions and Weights With Carton (WxDxH)410 x 398.5 x 318.5 mm -11.8kgWithout Carton (WxDxH)580 x 517 x 434 mm - 14.7kgDuty Cycles Recommended MonthlyUp to 2,000 pages monthlyprint volume Maximum Monthly6Up to 15,000 pages monthly print volume1 Approx declared yield value in accordance with ISO/IEC 19752.2 Calculated with 80g/m² paper.3 Windows® & Mac® only.4 Windows® only.All specifications correct at the time of printing and are subject to change. Brother is a registered trademark of Brother Industries Ltd. Brand product names areFaxFax Modem33,600bps (Super G3)PC Fax Send 9&3Send faxes directly from your PCPC Fax Receive 9&4Receive faxes directly to your PCAutomatic RedialAutomatic redialling if the recipient fax is busy Telephone IndexAn electronic, alphabetical listing of stored speed dials and group numbersChain DiallingAllows the user to store parts for long dialling sequences in different speed dial locations Distinctive Ring Detection (UK & Denmark only)An external service that allows two or more telephonenumbers shared on a single fixed line and use different ring tonesSpeaker / Ring Volume 3 levels and offFax / Tel SwitchAutomatic recognition of fax and telephone reception Super FineEnables quality transmission of very small print and line drawingsECM(Error Correction Mode)The MFC will detect line errors during fax transmission and resend the page(s) of the document that had an error (recipient machines must share this feature for it to work)Fax ForwardingSends a fax received in memory to another pre-programmed fax numberRemote AccessAllows users to remotely access their machineFax RetrievalAllows remote access to faxes stored in the machine Remote MaintenanceAllows users to maintain their MFC remotelyRemote Set-Up 3Allows users to set-up the MFC from their PCGrey Scale256 shades (8 bit) of grey are available for faxingFax StampAdd the date and time to all received faxesCover PageCreate custom cover pages for outgoing faxesContrastAuto / light / darkEnhanced Remote Activate Transfer a fax call, answered on an extension phone, to the fax machine Delayed Timer Up to 50Quick-ScanApproximately 2.5 seconds per page A4 standard resolution Memory Transmission Up to 500 pages (ITU-T Test Chart, Standard Resolution, JBIG)Out of Paper Reception Up to 500 pages (ITU-T Test Chart, Standard Resolution, JBIG)Dual AccessSend the same fax message to up to 250 separate locations (manual 50 locations)BroadcastingReceive usage reports on a regular basis via e-mail Auto ReductionWhen receiving a single page document longer than A4 (297mm) the fax machine will automatically reduce the message to fit onto a single A4 sheet1 Approx declared yield value in accordance with ISO/IEC 19752.2 Calculated with 80g/m² paper.3 Windows ® & Mac ® only.4 Windows ® only.EnvironmentPower Consumption Printing - 440W (260W in quiet mode), Ready - 42W, Sleep - 6.2W,Deep sleep - 0.6W, Off - 0.03W TEC Value1.348kWh / Week Sound Pressure Level Printing 49dbA,Quiet mode printing 44dbA, ReadyUp to30dbAPower SavingThis enables the printer toconsume less energy when not in useToner SavingThis reduces the toner usage and helps to reduce the total cost of printer ownershipEnergy Star Yes Blue Angel YesNordic Swan Yes GS Mark Yes Eco Mode YesAll specifications correct at the time of printing and are subject to change.Brother is a registered trademark of Brother Industries Ltd. Brand product names areAt Brother, our green initiative is simple. We strive to take responsibility,act respectfully and try to make a positive difference to help build a society where sustainable development can be achieved. We call this N ORD IC E C O L AB EL315025All specifications correct at the time of printing and are subject to change.Brother is a registered trademark of Brother Industries Ltd. Brand product names are registered trademarks or trademarks of their respective companies.。
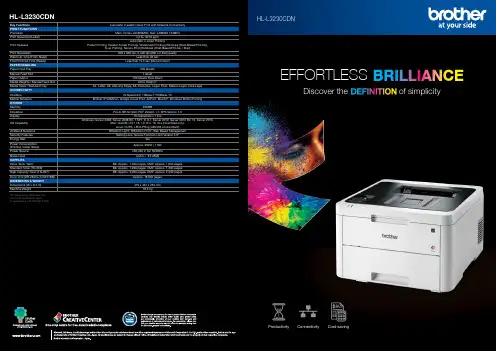
Remarkable ProductivityFast Print SpeedsBoost your productivity with fast colour print speeds of up to 18ppm and first printout times of less than 15.5 seconds.Comprehensive Paper HandlingWith the 250 sheets default paper tray, Brother printers reducethe need for frequent paper reloads. In addition, the single-sheet manual feed slot can handle a greater variety of papersup to 163gsm for your printing convenience.Designed for brilliant, professional colour and optimisedfor greater cost savings, the Brother Colour LED PrinterHL-L3230CDN delivers outstanding colour performanceand value for your every printing need.Optimise Cost-Savings Simplify ConnectivityCut Your Paper Waste by 50%Reduce your paper wastage and expenses withautomatic 2-sided printing.Lower Your Toner CostsAffordable standard yield and high-yield tonercartridges offer lower cost-per-page, and TonerSave Mode uses less toner while producing crispand vibrant printouts.Built-in EthernetEffortlessly set up and start sharing your Brotherprinter with multiple users on your network via itsbuilt-in Ethernet.Print from Your MobileConnect your iPhone, iPad, Android™ or Windows®mobile devices and start printing and scanning viaBrother iPrint&Scan and other compatible mobileapplications.A Proud Legacy of Uncompromising ReliabilityOver A Hundred Years of Customer SatisfactionEven with over a century of customer satisfaction under our belt, we aren’t taking anythingfor granted. All Brother machines have undergone rigorous tests and trials to ensure thatthey will last for years to come. By bringing together traditional Japanese values of quality,service, and integrity with the latest in technological innovation, you can always count onBrother to take your office productivity further.An Award-Winning Track RecordFor 5 years in a row, Brother has won PCmag’s prestigious Business Choice Award. Wehave also won PCmag’s Readers’ Choice Award for an unprecedented 9 years in a row,scoring the highest in overall satisfaction and reliability.We’ve Got Your BackAt Brother, our commitment is to put our customers first, which is why we remaindedicated to you far beyond the purchase dates of our products. This is reflected in theoutstanding service and warranty that you will enjoy with every Brother product.IMPRESSIVE PERFORMANCESTUNNING PRINTS,。
DCP-115C DCP-120C编辑及出版声明本说明书在兄弟工业株式会社监督下编辑出版,说明书中包括最新产品的说明和产品规格。
本说明书内容及产品规格如有更改,恕不另行通知。
Brother公司保留对包含在本说明书中的产品规格和内容做出更改的权利,恕不另行通知,同时由于使用本说明书包含的内容所造成的任何损坏(包括后果),包括但不限于本出版及其他错误,Brother公司将不承担任何责任。
请使用Brother原装墨盒Brother多功能一体机使用特定墨水工作,建议使用原装Brother墨盒以便取得最佳效果。
如果使用其他品牌墨水盒,将不保证取得最佳效果。
不推荐使用除Brother原装墨盒以外的其他墨盒,也不推荐使用其他来源的墨水来填充Brother墨盒。
如果由于使用与本机不兼容或非Brother原装墨盒而对打印头或其他部件造成损坏,都不在保修范围之内。
iii 安全注意事项安全使用本设备请参照此说明,以备日后查阅和维修设备。
警告本使用说明书中大部分图例基于DCP-115C 。
警告本设备必须安装在容易触及的电源插座附近。
在遇到紧急情况时,必须将电源线从电源插座上拔下以完全切断电源。
注意为保持最佳打印质量,我们推荐您使用On/Off(开/关)键来关闭设备。
除非要挪动设备或对设备进行维护,否则请勿将电源线从电源插座上拔下。
如确需切断设备电源,请重新设定设备上的日期和时间。
(请参见快速设置指导手册)iii选择安装位置将设备放置在一个平整、牢固而不易受到振动和撞击的表面上,如桌子。
将设备放置在标准的、已接地的电源插座附近。
同时还应将本设备安装在温度介于10°C至35°C的地方。
注意■避免将设备放置在人员往来频繁的地方。
■避免将设备放置在地毯上。
■请勿将设备放置在加热器、空调、流体、化学制品或冰箱的附近。
■请勿将设备暴露在阳光直射、过热、潮湿或多尘的地方。
■请勿将设备连接到由墙上开关或自动定时器控制的插座上。

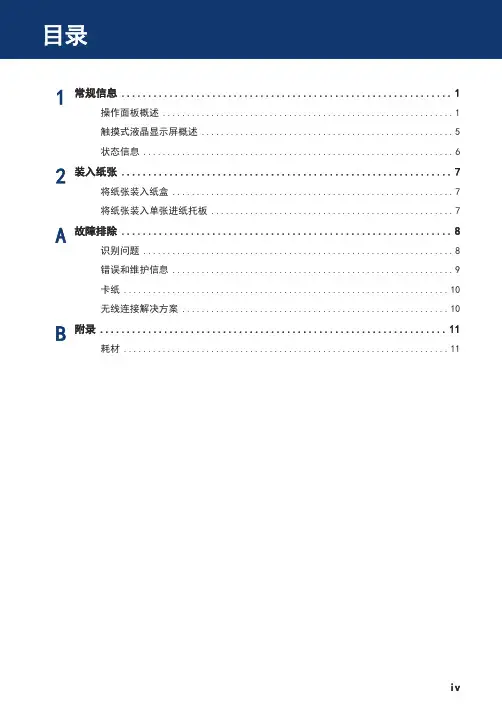
1常规信息 (1)操作面板概述 (1)触摸式液晶显示屏概述 (5)状态信息 (6)2装入纸张 (7)将纸张装入纸盒 (7)将纸张装入单张进纸托板 (7)A故障排除 (8)识别问题 (8)错误和维护信息 (9)卡纸 (10)无线连接解决方案 (10)B附录 (11)耗材 (11)1.液晶显示屏 (LCD)显示相关信息,帮助您设置并使用本设备。
•无线网络型号四级指示器,用于显示使用无线连接时的无线信号强度。
Max2.WiFi 按钮在计算机上启动无线安装程序,然后按 WiFi 按钮。
遵循屏幕提示设置本设备与网络之间的无线连接。
WiFi 指示灯亮起时,表示本 Brother 设备已连接到无线接入点。
WiFi 指示灯闪烁时,表示无线连接中断或本设备正在连接到无线接入点。
3.功能按键OK (确定)按此键可选择显示的选项。
更改设置后,设备返回上一级菜单。
Back (返回)•按此键可返回上一级菜单。
•按此键可在输入数字时选择前一个数字。
a 或b (+ 或 -)•按相应键滚动显示菜单和选项。
•按这些按钮输入或更改字母或数字。
按住 a 或 b 可更快速地滚动。
出现您需要的字母或数字时,按 OK (确定)。
4.Secure (安全)按此键可在输入四位数密码后打印内存中存储的作业。
5.Go (开始)•按此键可清除某些错误信息。
若要清除所有其他错误,请遵循液晶显示屏提示。
•按此键可打印设备内存中剩余的任何数据。
•按此键可选择显示的选项。
更改设置后,设备返回准备就绪模式。
6.Error (错误) 指示灯当液晶显示屏显示错误或重要状态信息时,Error (错误) 指示灯闪烁。
7.Data (数据) 指示灯Data (数据) 指示灯会根据设备状态闪烁。
Data (数据) 指示灯亮起时,表示设备内存中有数据。
Data (数据) 指示灯闪烁时,表示设备正在接收或处理数据。
8.Cancel (取消)•按此键可取消当前设置。
•按此键可取消正在进行的打印作业,并将其从设备内存中清除。
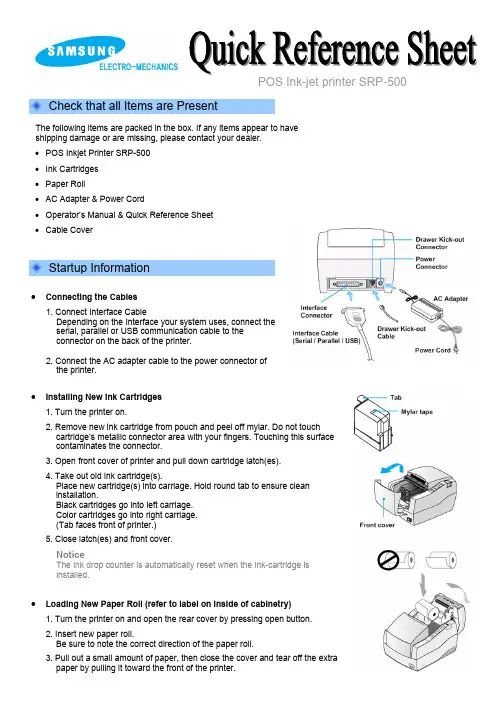
◈ Check that all Items are PresentThe following items are packed in the box. If any items appear to haveshipping damage or are missing, please contact your dealer.POS Inkjet Printer SRP-500• • • • • • Ink CartridgesPaper RollAC Adapter & Power CordOperator’s Manual & Quick Reference SheetCable Cover◈ Startup Information• • • Connecting the Cables1. Connect Interface CableDepending on the Interface your system uses, connect theserial, parallel or USB communication cable to theconnector on the back of the printer.2. Connect the AC adapter cable to the power connector ofthe printer.Installing New Ink Cartridges1. Turn the printer on.2. Remove new ink cartridge from pouch and peel off mylar. Do not touchcartridge’s metallic connector area with your fingers. Touching this surfacecontaminates the connector.3. Open front cover of printer and pull down cartridge latch(es).4. Take out old ink cartridge(s).Place new cartridge(s) into carriage. Hold round tab to ensure cleaninstallation.Black cartridges go into left carriage.Color cartridges go into right carriage.(Tab faces front of printer.)5. Close latch(es) and front cover.NoticeThe ink drop counter is automatically reset when the ink-cartridge isinstalled.Loading New Paper Roll (refer to label on inside of cabinetry)1. Turn the printer on and open the rear cover by pressing open button.2. Insert new paper roll.Be sure to note the correct direction of the paper roll.3. Pull out a small amount of paper, then close the cover and tear off the extrapaper by pulling it toward the front of the printer.◈ Keypad Controls and Indicator LightsMost of the functions of this printer are governed by software, butyou can monitor the printer’s status by looking at the lights on thecontrol panel and for some procedures you will use the buttons.• • Keypad ControlsClean ButtonThe Clean button is used to clean the printer head. (Refer to operator’s manual) Feed ButtonThe feed button is used to feed paper or to start self test and for hexadecimal dump mode. (Refer of operator’s manual)Keypad Indicator LightsPower IndicatorLightThis indicator light is on when the power is turned on. It blinks when the printer is in the self-test printing standby state. Always wait until this indicator light stops blinking before you start using the printer and before you turn it off. Error IndicatorLight When this indicator light is on (but not blinking), it means that the printer is out of paper or almost out of paper or the printer covers are open. When this light is blinking, there is anerror. If you see this light blinking, turn off the printer for a few seconds and then turn itback on. If the light is still blinking, call your supervisor or a service person.Cartridge IndicatorLight (LH/RH) The right indicator is for the right cartridge and the left indicator for the left cartridge. If the printer is a single color printer, the left cartridge indicator will be used.In most cases, the left cartridge is black, and the right is a color.This indicator light (LH/RH) blinks when the cartridge is almost out of ink and stays onwhen the cartridge(s) is removed.◈ Printer Self Testing• Self testThe self test lets you know if your printer is operating properly. It checks the control circuits,printer mechanisms, print quality, ROM version, and DIP switch settings.The test is independent of any other equipment or software, so it is a good idea to run it when you first set up the printer or if you have any trouble. If the self test works correctly, the problem is in the other equipment or the software, not the printer.Running the self test1) M ake sure the printer is turned off and the printer cover is closed properly.2) While holding down the Feed button, turn on the printer and continue to hold until the paper begins to feed. The self test prints the printer settings and cuts the paper and pauses. (The power light blinks.)3) P ress the Feed button to continue printing the rolling ASCII pattern. Repeat for the nozzle pattern, receipt pattern and NV bit image(s).4) The self test mode terminates after printing NV bit image(s) automatically.。
如何进行用Brother一体机进行扫描、复印及打印?在一体机待机状态下,可进行如下操作:1、扫描1-1A4扫描:将纸张翻页放在进纸口,要扫描的内容面朝上,纸张头朝左。
注意:一次不超过20张不能按键一次即正反面都扫描,扫描反面须翻页后再进行扫描一次。
扫描→选择“扫描到PC”→选择“图像”→选择要存档的计算机(自己的计算机名)→更改设置(否)→确定→启动1-2非A4纸张、票据、照片、身份证等扫描:打开上盖,将扫描的内容面朝下,纸张靠近左上(可扫描区域与A4纸张边界相同),放在透明面板上的可扫描区域。
扫描→扫描到PC→图像→选择要存档的计算机(自己的计算机名)→更改设置(否)→确定→启动2、复印2-1A4复印:将纸张翻页放在进纸口,要扫描的内容面朝上,纸张头朝左。
按下启动键。
注意:一次不超过20张,不能一次性正反面全部复印,复印反面须翻页后再进行扫描一次。
2-2 非A4纸张、票据、照片、身份证等复印:打开上盖,将复印的内容面朝下,纸张靠近左上(可扫描区域与A4纸张边界相同),放在透明面板上的可复印区域。
按身份证键→正面朝下,人物图像保持头朝左,与透明面板平行→启动→身份证翻面,放置同一位置→启动按票据键→启动照片→启动3、打印1、单面打印(默认)→启动2、手动双面打印→office中,点击“打印”→选择要打印的范围(如:1,3,5,7,9)→打印A面→取出已打印纸张(按取出的原序),打开机器最下方纸槽,将已印字的一面朝上,字与人呈相反的方向,将纸放进纸槽,打印B面(如:2,4,6,8,10)3、自动双面打印:office中,点击“打印”→选择“属性”→选择“双面打印”→选择“确定”。
(如需单面打印,须选择“属性”→“双面打印”选择“无”→点击确定)。
GTX pro GARMENT PRINTERInstruction ManualPlease be sure to read this manual before using this product.Keep this manual in a safe place for future use.Phillips screwdriver: M3 to M5Disassembling(1) Remove the Cover PANEL SIDE.(2) Remove the Lithium Battery (1) by pulling out the holder in the direction of the arrow.(3) Pickup the Lithium Battery (1) to the direction of the arrow.(1)(1)(1)Thank you very much for buying a BROTHER printer.Before using your new printer, please read the "SAFETY INSTRUCTIONS" and handling instructions carefully.1. Safety indications and their meaningsThis instruction manual and the indications and symbols that are used on the printer itself are provided in order to ensure safe operation of this printer and to prevent accidents and injury to yourself or other people.The meanings of these indications and symbols are given below.IndicationsDANGER The instructions which follow this term indicate situations where failure to follow theinstructions will result in death or serious injury.WARNING The instructions which follow this term indicate situations where failure to follow theinstructions could result in death or serious injury.CAUTION The instructions which follow this term indicate situations where failure to follow theinstructions may result in minor or moderate injury.IMPORTANT The instructions which follow this term indicate situations where failure to follow theinstructions may result in damage to property.NOTE The instructions which follow this term indicate precautions and restrictions for use. Symbols· · · · · This symbol () indicates something that you should be careful of.The picture inside the triangle indicates the nature of the caution that must be taken. (For example, the symbol at left means "beware of injury".)· · · · · This symbol () indicates something that you must not do.· · · · · This symbol () indicates something that you must do.The picture inside the circle indicates the nature of the thing that must be done. (For example, the symbol at left means "you must make a ground connection".)2. Notes on safetyDANGERContact with high voltage sections may lead to a serious injury. Turn off the power, and remove the cover 5 minutes later.MaintenanceBe careful not to get your fingers caught when closing the front cover, otherwise it may result in injury to your fingers.When you mount or replace the head, be careful not to get your hands or fingers caught. Otherwise you may be injured.Do not disassemble the ink pouch. If the ink gets into your eyes or onto your skin, it may cause inflammation. In case of contact with eyes, do not rub but immediately rinse the eyes with water.Do not drink liquids such as the ink, maintenance solution, cleaning solution, pretreatment, or waste. They may cause diarrhea or vomiting.Avoid causing your eyes or skin to make contact with the ink, maintenance solution, cleaning solution, pretreatment or waste. It may cause inflammation. In case of contact with eyes, do not rub but immediately rinse the eyes with water.Keep the liquids out of the reach of children.Be sure to wear protective goggles and gloves when handling the grease, so that it does not get into your eyes or onto your skin.It can cause inflammation. Do not drink or eat the grease. It may cause diarrhea or vomiting.Keep the liquids out of the reach of children.When replacing parts and installing optional accessories, be sure to use only genuine Brother parts. Brother will not be held responsible for any accidents or problems resulting from the use of non-genuine parts.When replacing parts or installing optional accessories, be sure to follow the procedures described in the Instruction Manual. Incorrect procedures could cause injuries or problems.IMPORTANTPrintingDo not move the platen by hand. Otherwise the printer may be mechanically and electrically damaged.Ensure there is adequate space left in front of the printer and avoid placing any objects. The platen may be hit and damaged.NOTEUse the printer in an area which is free from sources of strong electrical noise such as electrical line noise or static electric noise. Sources of strong electrical noise may cause problems with correct operation.Any fluctuations in the power supply voltage should be within ±10% of the rated voltage for the printer. Voltage fluctuations which are greater than this may cause problems with correct operation.The power supply capacity should be greater than the requirements for the printer's power consumption. Insufficient power supply capacity may cause problems with correct operation.In the event of an electrical storm, turn off the power and disconnect the power cord from the wall outlet. Lightning may cause problems with correct operation.This printer has the following warning labels displayed on it.Follow the precautions given on each warning label for your work. When the label is peeled off or illegible, contact the place of purchase.72High temperature warning display<产品中有害物质的名称及含量>型号 有害物质BGTX423H5000032铅 镉 六价铬 汞 多溴联苯 多溴二苯醚 BGTX424H5000032PBDE 部件名称 Pb Cd Cr(VI) Hg PBB框架机制 ○ ○ ○ ○ ○ ○盖板机制 ○ ○ ○ ○ ○ ○台板机制 × ○ ○ ○ ○ ○导轴机制 × ○ ○ ○ ○ ○维护机制 × ○ ○ ○ ○ ○供墨机制 × ○ ○ ○ ○ ○打印头机制 × ○ ○ ○ ○ ○电气部品 × ○ ○ ○ ○ ○操作面板机制 × ○ ○ ○ ○ ○ 配件 ○ ○ ○ ○ ○ ○ 使用手册/其他零件 ○ ○ ○ ○ ○ ○ 包装 × ○ ○ ○ ○ ○框架机制 ○ ○ ○ ○ ○ ○本表格依据SJ/T 11364的规定编制。
兄弟DCP7060d使用说明书(高级功能)一、扫描到电子邮件功能1. 准备工作在开始使用扫描到电子邮件功能之前,请确保您的兄弟DCP7060d已连接至网络,并已安装驱动程序。
同时,请确保您的电子邮件账号信息已正确设置在设备上。
2. 设置扫描到电子邮件(1)按下设备控制面板上的“设置”按钮。
(2)使用方向键选择“扫描设置”,然后按下“OK”按钮。
(3)选择“电子邮件设置”,然后按下“OK”按钮。
(4)输入您的电子邮件地址、SMTP服务器地址、端口号等信息,完成后按下“OK”按钮保存。
3. 执行扫描到电子邮件操作(1)将需要扫描的文件放入扫描仪。
(2)按下控制面板上的“扫描”按钮。
(3)选择“扫描到电子邮件”,然后按下“OK”按钮。
(4)在弹出的界面中,输入收件人电子邮件地址,可添加多个收件人。
(5)选择扫描分辨率和扫描类型,如彩色、黑白等。
(6)按下“开始”按钮,设备将自动发送扫描的文件到指定邮箱。
二、传真功能1. 设置传真号码(1)按下控制面板上的“设置”按钮。
(2)选择“传真设置”,然后按下“OK”按钮。
(3)输入您的传真号码,完成后按下“OK”按钮保存。
2. 发送传真(1)将需要传真的文件放入扫描仪。
(2)按下控制面板上的“传真”按钮。
(3)输入对方传真号码,可添加多个号码。
(4)按下“开始”按钮,设备将自动发送传真。
3. 接收传真(1)当设备接收到传真时,控制面板上的“传真”指示灯会闪烁。
(2)按下“传真”按钮,设备将自动接收传真并打印出来。
三、复印功能(高级设置)1. 多页复印(1)按下控制面板上的“复印”按钮。
(2)设置复印页数,如2份、4份等。
(3)将原稿放入扫描仪,按下“开始”按钮进行复印。
2. 缩放复印(1)按下控制面板上的“复印”按钮。
(2)选择“缩放”功能,根据需求调整缩放比例。
(3)将原稿放入扫描仪,按下“开始”按钮进行复印。
3. 双面复印(1)按下控制面板上的“复印”按钮。
打印纸处理如何装入各种类型的打印纸●选择打印纸来源●调整纸厚调节杆●装入连续纸●选择正确的连续纸规格●装入单页纸●连续纸与单页纸之间的切换打印机软件如何使用打印机软件进行打印●操作系统版本●在Windows 7, XP中使用打印机驱动程序●打印机驱动程序设置概述●取消打印操作面板有关操作面板功能的信息●使用操作面板●关于打印机的默认设置故障排除程序对您可能遇到的问题提供解决方案●使用错误指示灯●问题和解决方法●解决USB问题●清除夹纸●打印自检●表格竖线调直●寻求帮助●保修信息选件和耗材如何使用选件以及有关耗材的信息●更换色带架产品信息有关打印机部件和性能的信息,可查看产品本身、产品包装资料。
●打印机部件●打印机规格●命令表●标准和认证●清洁打印机●运输打印机注意:请妥善保管此说明书。
安装、使用产品前请阅读使用说明。
打印纸处理选择打印纸来源此打印机可在单页纸、连续纸、多联表格纸(1份原件和6份拷贝)。
注意:此打印机对不同的打印纸类型对应两种打印纸来源。
平推进纸和链式进纸。
根据您正在使用的打印纸类型选择不同的打印纸来源。
通过进纸选择杆您可选择打印纸来源。
打印纸来源和打印纸类型有两种打印纸类型和两种打印纸来源。
下表列出显示了打印纸来源和打印纸类型之间的关系,以及* 连续纸包括单页和多联表格纸。
** 单页纸包括单页和多联表格纸设置进纸选择杆设置进纸选择杆可选择您想使用打印机的进纸方式。
进纸选择杆有二个设置位置:送纸器进纸和单页平推进纸器进纸, 见下面样例。
单页进纸位置-可使用平推进纸方式。
送纸器进纸位置-可使用链式送纸方式。
调整纸厚调节杆根据正在使用的打印纸厚度调整纸厚调节杆,您可以得到较好的打印质量。
装入连续纸打印机可以在101.6毫米至254毫米(4.0英寸至10.0英寸)宽的连续纸上打印。
有关连续纸规格的详细信息,参考打印纸。
您可以从送纸器装入连续纸。
使用送纸器装入连续纸当使用后部牵引式送纸器时,较好的方法是将默认设置中的自动撕纸功能设置为开。
兄弟4100、4750、、8600使用说明如何安装:
电话进线插口电话分机线接口220V电源接口
USB打印机线接口并口打印机线接口
送纸稿台
机器放纸纸盒
打印晒鼓晒鼓前门
走纸后盖
兄弟8600的软件安装,本机的所有驱动软件是所以XP系统自带的,不需用按装的,只有把机器的打印机线连接到你的电脑上再连接上220V电源,电脑系统就可以自动找到新硬件,即就可以自动安装软件。
如何传真:请把你要传真的文件放入送纸稿台(一定要放进去),打通对方的传真电话,在听到对方的传真信号后按一下传真件就可以了。
如何收传真:当你在接听到对方的传真电话时,听到对方给出的传真信号后,请按一下传真键即可。
如何使用无纸接收:当你的打印机纸、机器碳粉用完时,如果你有传真需要接收,这时请你步要着急,你按正常收传真时一样,给对方传真信号,这时虽然你所收到的传真不可以打印出来,但机器可以将你收到的传真记忆在自身的内存里面,(一次最多可以无纸接收550页左右),后在你将打印机纸买回、碳粉加好后,你装好了之后机器就可以自动打印出你所收到的传真出来。
如何使用扫描:将你要扫描的文件放如送纸稿台,将你要扫描的面向下,再打开我的电脑里面的扫描仪和照相机下面的扫描仪图标,双击扫描仪图标后面根据你需要选择你所扫描的文件是到文档还是照片里面保存。
如图:
:
请将打印机设为默认打印机,如图:
这是所以机器的说明如果有不详之处请联系我们,
机器的面板主要功能键介绍:
免提键功能键确定键选择键音量大键音量小键接收方式选择键
重拨键停止键传真键复印键。