PS管道混合器安装与使用说明书10版
- 格式:pdf
- 大小:548.83 KB
- 文档页数:12
原版操作说明PS 1000X‑Scan 扫描仪在第一次使用工具之前请务必阅读本操作说明。
应始终将本操作说明与工具保存在一起。
当您将工具交给他人时,请确保一并交付本操作说明。
1有关这些编号请参考相应的示图。
示图可以在折页上找到。
当学习操作说明时,应保持将这些折页打开。
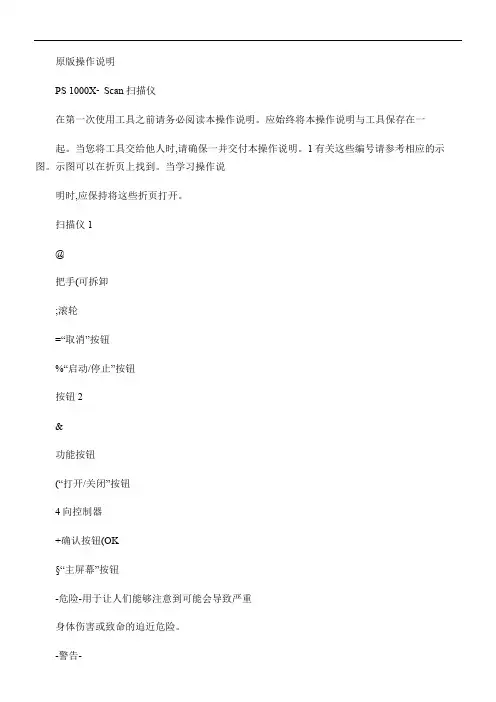
扫描仪1@把手(可拆卸;滚轮=“取消”按钮%“启动/停止”按钮按钮2&功能按钮(“打开/关闭”按钮4向控制器+确认按钮(OK§“主屏幕”按钮-危险-用于让人们能够注意到可能会导致严重身体伤害或致命的迫近危险。
-警告-用于让人们能够注意到可能会导致严重人身伤害或致命的潜在危险情形。
-小心-用于让人们能够注意到可能会导致较小人身伤害、设备损坏或其它财产损失的潜在危险情形。
-注意-用于提醒人们注意操作说明和其它有用信息。
警告符号一般警告符号请在使用之前阅读操作说明。
243PS 1000X-Scan 扫描仪设计用于定位混凝土结构中的物体。
本工具符合章节8中所列指令和标准的要求。
在使用穿地或穿墙式雷达设备之前,用户应检查并确保在附近区域没有敏感的无线电站/系统(机场、无线电观测站等。
这些站点可能是由国家权威机构监管运行的。
若在工具使用地点附近存在这类站点,则应与站点负责人联系,以便在开始扫描前能够就穿地或穿墙式雷达设备的使用达成协议。
阅读工具存储器中存储的操作说明。
a除非已获得事先许可,否则不允许在军事设施、机场、无线电站或天文设施附近操作本工具。
b让儿童远离工作现场。
让其他闲杂人等远离工作区域。
c 打开工具后应检查显示屏。
显示屏应显示喜利得标志和本工具的名称。
用户必须接受随后显示的免责声明,以便可以进入当前项目的主菜单。
d不允许在装有心脏起搏器的人员附近操作本工具。
e 不允许在孕妇附近操作工具。
f快速改变探测条件可能会导致读数不准确。
g不得在医疗器械和设备附近使用本工具。
h不得在工具已定位出物体的所在位置处钻孔。
在其它位置钻孔时,必须考虑钻孔的直径。

10Gig™ SFP+ Direct Attach Copper Cable AssemblyInstallation Guidelines PN533BIntroductionAs virtualization, consolidation, and convergence initiatives continue to expand in Data Centers, so do the demands placed on the physical infrastructure. To meet the needs for higher bandwidth along with lower power interconnects, Panduit® offers 10Gig™ SFP+ Direct Attach Copper Cable Assemblies.This high speed data transport capability is ideal as server virtualization becomes more prevalent. 10Gig interconnects are needed to facilitate effective server utilization to run multiple virtual machines as well as server consolidation. By incorporating 10Gig™ SFP+ Copper Cable Assemblies into the physical infrastructure, organizations can achieve 10Gig performance without additional signal processing or conversion. This provides an ideal low power, low latency 10 Gbps server interconnect option for top of rack switching deployments.Passive 10Gig™ SFP+ Copper Cable Assemblies generally have a reach limitation of 7m (23 ft.), and many network deployments will consist of a mixed copper/fiber solution with Panduit 10Gig™ OM3 fiber. Panduit 10Gig™ SFP+ Direct Attach Copper Cable AssembliesPanduit 10Gig™ SFP+ Copper Cable Assemblies are factory terminated and constructed of high-speed twin-axial shielded cable with SFP+ modular connectors on each end. The cables are compliant to the SFF-8431 specification.The Small Form Factor committee approved and published SFF-8431 in July of 2009, with Panduit® as a member and a signee. The document covers host ports, optical transceivers, and copper cables. Appendix E specifies direct attach copper cable assemblies.These passive cable assemblies offer a low power, low latency, low cost option for a 10Gig interconnect. They may be plugged into SFF-8431 SFP+ compliant ports and are interchangeable with fiber optic transceivers. (Note: some system vendors have designed copper-only or fiber-only SFP+ ports, so be sure to confirm host port capabilities with the active equipment vendor)The Panduit® 10Gig™ SFP+ Direct Attach Cable Assemblies are constructed with high frequency 10 GHz 100 ohm parallel shielded pairs, with two wire pairs in the cable. Panduit® uses 30 AWG for cables less than 4m in length and uses 24 AWG for 4m and longer cables.The connector consists of a paddle card with patent pending circuitry to ensure superior high frequency signal integrity, is housed in a die cast backshell, and incorporates a latching mechanism that allows insertion and de-insertion into the mechanical cage of a host port on the active equipment. The same host port cage can accept optical transceivers or direct attach cable assemblies. The back of the paddle card has pads which form the contacts to the 20 pin host connector inside the cage. The connector has an EMI shroud that provides 360 degrees of contact with the host cage to ensure excellent EMI immunity.Cross-section 2-pair twin-axial cable Panduit® SFP+ connectorStandard Cable Part NumbersPart Number Length* Cable Gauge Nominal Cable O.D. Weight/pcPSF1PXA0.5M** 0.5m (1.6 ft.) 30 AWG 4.1mm (0.161 in.) 0.10 lb.PSF1PXA1M** 1.0m (1.6 ft.) 30 AWG 4.1mm (0.161 in.) 0.13 lb.PSF1PXA1.5M** 1.5m (4.9 ft.) 30 AWG 4.1mm (0.161 in.) 0.16 lb.PSF1PXA2M** 2.0m (6.6 ft.) 30 AWG 4.1mm (0.161 in.) 0.19 lb.PSF1PXA2.5M** 2.5m (8.2 ft.) 30 AWG 4.1mm (0.161 in.) 0.22 lb.PSF1PXA3M** 3.0m (9.8 ft.) 30 AWG 4.1mm (0.161 in.) 0.25 lb.PSF1PXA3.5M** 3.5m (11.5 ft.) 30 AWG 4.1mm (0.161 in.) 0.28 lb.PSF1PXD4M** 4.0m (13.1 ft.) 24 AWG 6.0mm (0.236 in.) 0.49 lb.PSF1PXD4.5M** 4.5m (14.4 ft.) 24 AWG 6.0mm (0.236 in.) 0.50 lb.PSF1PXD5M** 5.0m (16.4 ft.) 24 AWG 6.0mm (0.236 in.) 0.60 lb.PSF1PXD5.5M** 5.5m (17.6 ft.) 24 AWG 6.0mm (0.236 in.) 0.62 lb.PSF1PXD6M** 6.0m (19.7 ft.) 24 AWG 6.0mm (0.236 in.) 0.70 lb.PSF1PXD6.5M** 6.5m (20.8 ft.) 24 AWG 6.0mm (0.236 in.) 0.71 lb.PSF1PXD7M** 7.0m (23.0 ft.) 24 AWG 6.0mm (0.236 in.) 0.81 lb.*Panduit® 10Gig™ SFP+ copper cables have a length tolerance of + .15 - 0m** Add cable color code to end of part number, BU for Blue, WH for White, BL for Black.Cable Length Deployment NoteNote that the Panduit® 10Gig™ SFP+ Direct Attach Cable Assembly lengths are measured from cable connector tip- to-tip. However, much of the connector is inserted into the host port. Therefore one may wish to add approximately 47mm or 1.87 in. to each end or approximately 0.1m total to port-to-port length and cord routing calculations.Connector EEPROMPanduit® 10Gig™ SFP+ Direct Attach Copper Cable Assemblies are intelligent cables. The connector has an integrated EEPROM with information populated in registers that is provided to the active equipment when queried through an I2C bus Most active equipment port allow for interchangeable types of me to be plugged into its ports. The registers in the EEPROM provide a method for the connector to identify itself as an SFP+ passive copper module to allow the active equipment to operate in the proper mode. Other information contained in the memory registers includes vendor name (Panduit), part number, serial number, and cable length in meters.SFP+ Cable Assembly Connector Pin OutSFP+ Pin Assignment DefinitionsContactLogic(1)SymbolPower Sequence Order Description NoteCase Case Note 2 Module case2 1VeeT 1st Module transmitter ground 3 2 LVTTL-O Tx_fault 3rd Module transmitter fault (N/A) 4 3 LVTTL-I Tx_disable 3rd Transmitter disable (N/A)4 4 LVTTL-I/O SDA 3rd 2-wire serial interface data line, same as MOD-DEF25 5 LVTTL-I/O SCL3rd 2-wire serial interface clock, same as MOD-DEF15 6Mod_ABS 3rd Module absent, connected to VeeT or VeeR in module 6 7 LVTTL-I RSO 3rd Rate select 0, optionally controls SFP+ receiver (N/A) 4 8 LVTTL-O Rx_LOS 3rd Receiver loss of signal indication (N/A)4 9LVTTL-IRS13rdRate select 1, optionally controls SFP+ transmitter (N/A)410 VeeR 1st Module receiver ground 311 VeeR 1stModule receiver ground312 CML-O RD- 3rdReceiver inverted data output13 CML-O RD+ 3rdReceiver non-inverted data output14 VeeR 1stModule receiver ground315 VccR 2ndModule receiver 3.3V supply16 VccT 2ndModule transmitter 3.3V supply17 VeeT 1stModule transmitter ground318 CML-I TD+ 3rdTransmitter non-inverted data output19 CML-I TD- 3rdTransmitter inverted data output20 VeeT 1stModule Transmitter Ground3 Notes:1. Labeling as Input (I) and Output (O) are from perspective of the module (cable connector)2. The case makes electrical contact to the host cage before any board edge contacts are made3. The module signal grounds, VeeR and VeeT, should be isolated from the module case4. Tx-fault, Tx_disable, rate select, and loss of signal functions are not implemented in passive copper cable assemblies5. SDA and SCL are the data and clock pins for the I2C interface to the EEPROM on board the module. The registers are defined in SFF-8472.6. Mod_ABS is an output pin to indicate if the module is present in the host port It is connected to ground in the module (cable connector)Installing and Removing 10Gig™ SFP Copper Cable AssembliesTo attach a cable assembly, remove the purple protective EMI cap. Then simply insert the connector end into the cage of the SFP+ host port in the active equipment. Make sure the cable is fully inserted and engaged.ATTENTION: Observe precautions for handling electrostatic sensitive electronic devices when installing this product. Ensure that you are properly grounded with a wrist strap or equivalent while installing10Gig™ SFP+ Copper Cables.To disengage, gently pull the latch release and the cable assembly will easily disengage the port. The Panduit® 10Gig™ SFP+ Direct Attached Copper Cable Assemblies have been designed to fit into high-density belly-to-belly faceplates.Cable ManagementThe weight of large bundles of SFP+ twin-axial cables can exert a significant force along the horizontal plane, and specifically on the host port of the active equipment. If the cable emerges from the rear of the connector at too sharp an angle, excess mechanical stress may be transmitted both along the cable and into the circuit board located inside the connector. Excessive side forces exerted by the cable can also misalign the plug in the equipment-mounted receptacle. These forces may degrade performance or even possibly damage the connector and lead to failure. It is important to observe and maintain proper cable bend radius and equally important to provide adequate and secure strain relief on the cable.In order to help maintain proper bend, it is recommended to pre-form the strain relief bend on the cable before installing. The minimum recommended bend radius is 5X the cable outside diameter (O.D.) for a single time bend and 10X the OD for repeated bends.Cable Wire Gauge O.D. Min. Bend Radius (r)30 AWG 4.1mm (0.16 in.) 20.5mm (0.80 in.)24 AWG 5.6mm (0.22 in.) 28.0mm (1.10 in.)To help manage the weight of bundled cable and ensure they do not sag over time, a cable manager or strain relief bar should be installed to support SFP+ Copper Cable Assemblies and provide strain reliefalong the horizontal plane. Strain relief bars facilitate the correct alignment of cable and connector intothe port, and help installers observe manufacturer and bend radius requirements of cable close to the connector. The strain relief bars also help keep cables routed clear from spaces directly behind server and switch equipment, reducing thermal resistance through the equipment and promote effective cooling and airflow. To ensure long-term reliability, it is recommended to use a rack with integral cable management features such as the Panduit® Net-Access™ Cabinets.Tak-Ty™ Hook and Loop Cable Ties should be used to bundle the cables together and tie them to the strain relief bars and cable managers. This should be done carefully to ensure the cables are firmly in place and will not move, but not so tight as to deform or stress the cable jacketing.Cable Installation Tips and Best PracticesThere are a few practical steps that can be taken during installation to optimize the effectiveness of the layout.▪For overhead cable routing, place the switches near the top of the racks▪For under floor cable routing, place the switches near the bottom of the racks▪Do not route SFP+ Cable Assemblies parallel to power cables, they should only cross at right angles▪Do not route cables in front of fans or air ventilation areas of the rack▪Do not kink cables▪Do not twist connectors▪Use Tak-Ty™ Hook and Loop Cable Ties to secure cables, do not use plastic cable tiesSlack ManagementStandard cables come in 1m (3.3 ft.) increments. Often installers will standardize on a small number of standard lengths to simplify the bill of material. One cannot always anticipate possible infrastructure obstacles on site so it is good practice to estimate long when defining cable lengths. Therefore, it is possible that there will be cable slack and this needs to be managed properly to ensure reliable long term performance. The slack in the cable should be shaped and looped so as not to violate bend radius. Slack or loops should be securely tied in place so they do not slip or sag over time.General Deployment Topology GuidelinesWithin a single 84 in. 45 RU cabinet, conservatively the longest connection will be 7 ft. or 2.1m to reach from the top U to the bottom and approximately 1.5 ft. or 0.45m to route to any port on either end. A 3m cable should be adequate to connect any two ports within a cabinet.84 inches =7 ft. = 2.1m Example cabinet with 2 top of rack switches (ToR) and 20 2U servers with Dual SFP+ NICs total of 40 SFP+ cables Conservatively, longest cable required to reach farthest port is 2.1 + 2.x 0.45 ≈ 3mExample of 3 cabinet Pod with 40 2 RU servers distributed over 3 cabinets with 2 ToR switches in center cabinet requires 80 SFP+ cables with longest cable of 4m Example of 5 cabinet Pod with 80 2 RU servers distributed over 5 cabinets with 4 ToR switches in center cabinet requires 160 SFP+ cables with longest cable of 5m10Gig™ SFP+ Copper Cable Assembly Installation Guidelines PN533BFor Instructions in Local Languagesand Technical Support: /resources/install_maintain.aspE-mail:***********************Phone:866-405-6654Using Middle of Row switching topology, an 8 cabinet row may be achieved with 7m cables. This has two switchcabinets in the center and 3 server cabinets on each side. If all switching were placed in a single center cabinet, a 9 cabinet row with 8 server cabinets may be covered. To enable longer row, fiber and SFP+ optical transceivers arerequired. A hybrid solution of Panduit ®10Gig™ SFP+copper for the inner cabinets and Panduit ®10Gig™ OM3 fiber to the outer cabinets will be the cost effective solution.。

第一节 泵的安装泵的安装的好坏对泵的运行和寿命有重要影响,安装前应仔细阅读泵安装使用说明书有关内容;安装必须按要求仔细进行。
(一)安装要求:一、安装前应确认入口大小是否适当。
二、 应预留电缆出口,方便配线作业;泵安装完成后电缆须适当固定之。
三、 泵入水口至池壁的距离至少50cm以上。
四、 出水管路的重量不能完全作用在泵上,出水管路必须有适当的支撑与固定。
五、 泵安装前,应先检查电压与频率,是否与铭牌标示相符。
六、 请勿任意更换电缆长度,请勿将电缆接头置入水中。
七、 电缆线与链条须分别固定,避免起吊泵时拉扯造成电缆损坏。
八、 必须装水位控制浮球开关,使泵自动操作;保证池水高度不低于水位警戒线。
九、 为使泵运转稳定,浮球装置位置不要靠近池水入口处。
(二)泵的安装(参见图A-图D)一、 确定固定架及固定板的位置在排水管道一侧的池口壁上刻好竖线标记,使得竖线在排水管中心的平面内,依该竖线作为固定架及固定板的安装对称基准。
二、 安装固定架及固定板首先使固定架及固定板的中心线与池口安装基准竖线重合,按其槽距在池口壁钻出膨胀螺钉底孔,插入膨胀螺钉将固定支撑紧固,此刻无需完全拧紧。
对口径50、80、100三种口径的着脱用固定架及固定板,应先将固定板用膨胀螺栓固定于池口壁,然后将固定架安装于固定板上。
三、 安装着脱本体a、把着脱本体放置池底,从固定架上挂一根垂线,并与固定架的中心线重合,根据垂线找正着脱本体的中心线,注意使固定架上的两个圆锥中心和着脱本体上的两个圆锥中心在同一轴上,调整好地脚螺栓的胀锚孔或预留孔的位置。
b、浇筑预留孔,用混凝土浇埋,应保证地脚螺栓的安装位置符合安装图的要求。
四、 安装导管若污水池深小于6m,则根据池深与底座和固定支撑两圆锥体之间的距离,锯好两根导管的长度,分别套入锥体内,并应使导管垂直。
若污水池深大于6m,则应用联管器将长导管和短导管联接起来,并用止动紧定螺钉紧固,以上述方法安装即可。

pssh安装使用目录PSSH安装使用 (1)1PSSH简介 (3)2安装环境 (3)2.1测试服务器描述 (3)3安装PSSH(三台机器都要安装) (3)4配置私钥 (4)5PSSH使用: (6)5.1穿件SERVET.TXT把服务器IP加入 (6)EG: (6)1)执行命令 (6)1 pssh简介在日常工作中,批量管理服务器是个力气活,如果人工一台一台处理,效率低下。
此时,老外写的pssh工具实现了批量管理。
它的原理是先建立ssh私钥认证,然后用pssh工具批量管理。
2 安装环境2.1测试服务器描述1.三台vmware虚拟机,内存均为256M。
2.操作系统: rhel5.53. IP规划p ssh.zi p3 安装pssh(控制机安装)4 配置私钥1) 使用下列脚本批量生成:2) 控制机生产公钥:[root@Proxy opt]# ssh-keygen -t rsaGenerating public/private rsa key pair.Enter file in which to save the key (/root/.ssh/id_rsa):Enter passphrase (empty for no passphrase):Enter same passphrase again:Your identification has been saved in /root/.ssh/id_rsa.Your public key has been saved in /root/.ssh/id_rsa.pub.The key fingerprint is:ef:fb:92:14:0e:f1:37:b1:4c:4a:b2:76:47:55:6b:51 root@Proxy3) 使用下列脚本生成等效性文件:batch_sshkey.sh#!/bin/bashcd /rootcat /root/.ssh/id_rsa.pub > /root/.ssh/authorized_keysfor i in `cat /opt/ip.txt`doip=$(echo "$i"|cut -f1 -d":")password=$(echo "$i"|cut -f2 -d":")expect -c "spawn scp /root/.ssh/authorized_keys /root/remote_operate.sh root@$ip:/tmp/ expect {\"*yes/no*\" {send \"yes\r\"; exp_continue}\"*password*\" {send \"$password\r\"; exp_continue}\"*Password*\" {send \"$password\r\";}}"expect -c "spawn ssh root@$ip "/tmp/remote_operate.sh"expect {\"*yes/no*\" {send \"yes\r\"; exp_continue}\"*password*\" {send \"$password\r\"; exp_continue}\"*Password*\" {send \"$password\r\";}}"Done[root@Proxy opt]# vi ip.txt (前面ip,后面密码:作为分隔)192.168.88.130:xgllpass192.168.88.131:xgllpass4) remote_operate.sh(此脚本放root目录下)#!/bin/bashif [ ! -d /root/.ssh ];thenmkdir /root/.sshficp /tmp/authorized_keys /root/.ssh/5 pssh使用:5.1 穿件servet.txt把服务器IP加入[root@Proxy opt]# more server.txt192.168.88.130192.168.88.131eg:1) 执行命令[root@Proxy opt]# pssh -h /opt/server.txt -l root -P uptime192.168.88.130: 20:59:47 up 14:40, 2 users, load average: 0.00, 0.00, 0.00192.168.88.130: [1] 22:13:26 [SUCCESS] 192.168.88.130 22192.168.88.131: 20:59:42 up 14:34, 2 users, load average: 0.00, 0.00, 0.00192.168.88.131: 192.168.88.131: [2] 22:14:07 [SUCCESS] 192.168.88.131 22pssh -h ip -i "touch /tmp/1.txt"-P是输出来了就直接print出来,不论顺序的。


小灵通干放使用说明东方信联科技有限公司1. 适用范围我公司生产的小灵通干放适用于1900~1920MHz,1900~1915MHz,1900~1910MHz,1893~1910MHz四个频段(分别用A、B、C、D四个字母表示),输出功率为27 dBm 、30 dBm、33 dBm三种类型。
本说明书设计依据:2005年11月《PHS网络室内覆盖系统技术规范》(试行)和2005年8月《云南电信室内电线综合覆盖系统技术规范》(试行)。
2. 主要技术指标2.1工作频率:1893MHz~1920MHz之内频段可选2.2工作带宽:20MHz、17MHz、15MHz、10MHz可选2.3每载波占用带宽:≤288KHz2.4增益:上、下行增益30dB;DGC调节范围:20dB,增益调节步长:1dB;AGC:控制范围20dB.2.5标称功率:按载波数量和每载波输出功率定义干放种类,如下表所示。
以平均每载波输出功率进行链路预算。
2.6输入/输出功率:下行最大输入功率:+10dBm,下行最小输入功率:-2dBm;下行最大输出功率:≤33dBm;上行最大输出功率:≤-10dBm。
2.7噪声系数: < 4dB(上行)2.8矢量幅度误差(EVM)指标要求:RMS矢量误差:≤5%峰值矢量误差:≤10%2.9带内平坦度:≤1dB2.10驻波比:≤1.52.11带内互调衰减:在2载波和4载波标称输出功率下,均满足:≤-45dBc(1dB压缩点);2.12上下行滤波器带外抑制:≥45dBc (偏离工作频带≥±10MHz ) 2.13带外杂散:≤-60dBm/3.84MHz (1920-1980MHz )或≤-71dBm/300kHz (1920-1980MHz ); ≤-60dBm/100kHz (1710-1850MHz ); ≤-36dBm/30KHz(9KHz ~1GHz); ≤-30dBm/30KHz(1GHz ~12.75GHz)。
PS中通道混合器的作用及使用简说先说一下通道亮度与颜色变化的关系:一般规律:在RGB颜色模式中,通道红——越亮,画面就越红(减绿);越暗就越绿(减红);通道绿——越亮,画面就越绿(减品);越暗就越品(减绿);通道蓝——越亮,画面就越蓝(减黄);越暗就越黄(减蓝);现在建一个大小合适的文档,填充中性灰颜色(H=0、S=0%、B=50%或R=G=B=128或#808080等)。
通道混和器的图层。
加全白蒙版,通道混和器就作用于整个某通道;加局部透明蒙版,通道混和器就只作用于某通道的局部透明区域。
在RGB颜色模式下,输出通道只有红(Alt+3)、绿(Alt+4)、蓝(Alt+5)。
在CMYK颜色模式下,输出通道只有青色(Alt+3)、洋红(Alt+4)、黄色(Alt+5)、黑色(Alt+6)。
通道混和器的面板中,红色百分比、绿色百分比、蓝色百分比是指原图通道相对应的通道红、通道绿、通道蓝参与计算的百分比。
比如,在修复通道时,往往是某个通道噪点太多,品质不高;相反,另一个通道的品质很好,色阶丰富、平滑、细腻。
这时,我们就会让品质好的通道,占更多的百分比参与计算,从而得到一个较好的新通道,将原来品质差的通道替换掉。
选择输出通道红(Alt+3),这时面板参数计算得到的新通道就将替换原来的通道红;选择输出通道绿(Alt+4),这时面板参数计算得到的新通道就将替换原来的通道绿;选择输出通道蓝(Alt+5),这时面板参数计算得到的新通道就将替换原来的通道蓝;······规律1:如果通道混和器中,对某通道始终有等式成立:红色百分比%+绿色百分比%+蓝色百分比%=总计100%那么,该通道的中性灰的颜色就会保持不变。
见图2图2在人像调色中,人的肤色往往都比较接近中性灰,所以,就可以用这个办法,先大大改变背景和人物衣服的颜色,而人的肤色改变就很少。
在水墨画效果的调色中,也可以用这个办法,保证中性灰的颜色不变,而改变整个画面的色调等。

管道混合器安装要求
管道混合器的安装要求主要包括以下几个方面:
1. 安装位置:混合器应安装在管道上,位置要方便操作和维护。
同时,需要保证管道上游有足够的直管段作为混合室,以保证混合效果。
2. 安装方向:混合器外壳上通常有进口和出口标识,需要按照标识正确安装,确保介质可以顺利流经。
3. 安装支承:混合器需要通过支架或法兰连接来固定在管道上,以保证其稳定性和安全性。
4. 安装前准备:在安装之前,需要对管道进行清洗和除杂处理,确保管道内部没有杂质或污垢,以免影响混合效果。
同时,也要检查管道的尺寸和材质是否符合混合器的要求。
5. 密封:混合器的连接部分需要进行密封处理,以防止漏液或逆流现象的发生。
常用的密封材料有橡胶垫圈、填料和密封胶等。
6. 排气:在安装完成后,需要对混合器进行排气处理,以确保管道内没有气体阻塞。
7. 调试:安装完成后,需要进行调试和测试,确保混合器的工作效果和参数符合设计要求。
调试过程中需要注意安全,防止介质泄漏或喷射。
总之,管道混合器的安装要求主要是为了保证其正常运行和混合效果,需要按照标准和规范进行安装,并进行相应的测试和调试工作。

GJH型静态混合器安装、维护、操作使用手册地址(ADD):****************邮编(PQ):*****************电话(TEL):****************传真(FAX):**************电邮(E-mail):*******************一、概述静态混合器是给水排水工程中对所投加的混凝剂、助凝剂、消毒剂在管道内作用时混合的装置,它主要用于自来水厂、污水处理厂作原水与混凝剂及消毒药剂等混合用。
具有无需外加动力,混合效果好,水头损失小,构造简单等特点。
是水处理工程的高效混合装置。
二、结构原理GJH型静态混合器分为二级单体及三级单体组成的两种型式。
由二组或三组串联成弧形板呈交叉形组合管道内,当原水与药剂从交叉体流经时,由不同转向的弧形板对流经的水产生分流,交叉及反向旋流三个作用,使药剂与原水充分混合,均匀扩散于整个水体,达到瞬间快速混合的目的,其混合率达90-95%。
三、主要技术参数1.型号说明GJH -□2.规格和性能(见表1)GJH型管式静态混合器规格及性能2. 水头损失与单体数成正比,与流速平方以几何级数递增或递减。
3.外形安装尺寸(见图1、表2)GJH型管式静态混合器安装尺寸(mm)四、安装要求1.混合器安装不受方向限制,可以水平、垂直或用其他组合方式。
2.混合器安装在架空管道时,必须用管道支架固定,埋地管道可安装在检查井内。
3.现场安装时,管道法兰螺孔位置应与混合器法兰螺孔方向一致,加药口设置在上方。
4.加药管口由订货单位按图及表中同规格口径的硬聚氯乙稀管与混合器加药焊接,其焊缝高度为5mm。
5.各种药剂的投加位置应在管道混合器前端,并大于0.3米。
五、订货须知用户订货时应提供管式静态混合器的型号、规格及混合组合体节数(二节或三节),我厂提供产品范围包括二端法兰安装用的所有紧固件。
PSCAD简明使用手册Chapter 1: EMTDC/PSCAD简介 (1 1.1 功能 (11.2 技术背景 (11.3 主要的研究范围 (11.4 目前应用情况 (21.5 各版本限制 (31.6 目前最新版本:PSCAD 第四版 (3 Chapter 2: 安装及License设置 (42.1 安装 (42.2 License设置 (6Chapter 3: PSCAD工作环境 (93.1 术语和定义 (93.1.1 元件 (93.1.2 模块 (103.1.3 工程 (103.2 各工作区介绍 (103.2.1 工作空间窗口 (103.2.2 输出窗口 (143.2.3 设计编辑器 (163.3 工作区设置 (163.4 在线帮助系统 (18 Chapter 4: 基本操作 (194.1 工程 (194.2 元件和模块 (224.2.1 元件 (224.2.2 模块 (254.3 常用工具栏及快捷键 (25 4.3.1常用工具栏 (254.3.2快捷键 (27Chapter 5: 在线绘图和控制 (29 5.1 控制或显示数据的获取 (29 5.2 图形框 (305.3 图、曲线及轨迹 (315.4 在线控制器及仪表 (345.5 几种特殊表计 (365.5.1 XY绘图 (365.5.2多测计 (385.5.3相量计 (39参考文献 (41Chapter 1: EMTDC/PSCAD简介Dennis Woodford博士于1976年在加拿大曼尼托巴水电局开发完成了EMTDC 的初版,是一种世界各国广泛使用的电力系统仿真软件,PSCAD是其用户界面,PSCAD的开发成功,使得用户能更方便地使用EMTDC进行电力系统分析,使电力系统复杂部分可视化成为可能,而且软件可以作为实时数字仿真器的前置端。
可模拟任意大小的交直流系统。
操作环境为:UNIX OS, Windows95, 98,NT等;Fortran 编辑器;浏览器和TCP/IP协议。
Air Control ValvesP2LAX – 1/8" P2LBX – 1/4" P2LCX – 3/8"P2LDX – 1/2"I EM Bar Manifolds, Assemblies & Accessories ................D8222mm Solenoid Pilot Operators & Solenoid Kits .......D83-D84A TEX Complete Valve & Solenoid Pilot Assemblies .........D85Intrinsically Safe & Hazardous Duty Solenoid ..................D86Technical Data ..................................................................D87Electrical Connectors / Accessories ..........................D88-D89DOT Fittings ..............................................................D90-D91Dimensions ................................................................D92-D98Section D/pneu/vikingxBasic Valve Functions ......................................................D74Basic Valve Features ........................................................D75Extreme OperationSolenoid Common Part Numbers ................................D76 Solenoid Model Number Index ....................................D77Remote Air Pilot Common Part Numbers ...................D78 Manual & Remote Air Pilot Model Number Index ........D79Normal OperationSolenoid Common Part Numbers ................................D80Solenoid Model Number Index ....................................D81BOLD ITEMS ARE MOST POPULAR.(Revised 06-25-2012)#12Sol 14#14#12Double Solenoid 3-PositionWith #12 operator energized – inlet port 1 connected to cylinder port 2, cylinder port 4 connected to exhaust port 5.With #14 operator energized – inlet port 1 connected to cylinder port 4, cylinder port 2 connected to exhaust port 3.Closed CenterAll ports blocked in the center position.Vented CenterCylinder ports 2 and 4 connected to exhaust ports 3 and 5 in center position. Port 1 is blocked.Pressurized CenterPressure port 1 connected to cylinder ports 2 and 4, and exhaust ports 3 and 5 blocked in center position.Double Remote Pilot 3-PositionWith #12 operator signaled – inlet port 1 connected tocylinder port 2, cylinder port 4 connected to exhaust port 5.With #14 operator signaled – inlet port 1 connected tocylinder port 4, cylinder port 2 connected to exhaust port 3.Closed CenterAll ports blocked in the center position.Vented CenterCylinder ports 2 and 4 connected to exhaust ports 3 and 5 in center position. Port 1 is blocked.Pressurized CenterPressure port 1 connected to cylinder ports 2 and 4, and exhaust ports 3 and 5 blocked in center position.Pressure Center #14#12Pressure CenterSingle SolenoidSingle Pressure At Inlet Port 1:De-energized position – Solenoid operator #14 de-energized. Pressure at inlet port 1 connected to outlet port 2. Outlet port 4 connected to exhaust port 5.Energized position – Solenoid operator #14 energized. Pressure at inlet port 1 connected to outlet port 4. Outlet port 2 connected to exhaust port 3.Double SolenoidSingle Pressure At Inlet Port 1:Solenoid operator #14 energized last. Pressure at inlet port 1 connected to outlet port 4. Outlet port 2 connected to exhaust port 3.Solenoid operator #12 energized last. Pressure at inlet port 1 connected to outlet port 2. Outlet port 4 connected to exhaust port 5.Single Remote PilotSingle Pressure At Inlet Port 1:Normal position – P ressure at inlet port 1 connectedto outlet port 2. Outlet port 4 connected to exhaust port 5.Operated position – Maintained air signal at port 14.Pressure at inlet port 1 connected to outlet port 4. Outlet port 2 connected to exhaust port 3.Double Remote PilotSingle Pressure At Inlet Port 1:Momentary air signal at port 14 last. Pressure at inlet port 1 connected to outlet port 4. Outlet port 2 connected to exhaust port 3.Momentary air signal at port 12 last. Pressure at inletport 1 connected to outlet port 2. Outlet port 4 connected to exhaust port 5.Materials of Construction• Valve Body: Anodized Aluminum • Spool: Aluminum & Nitrile Rubber • End Caps: Anodized Aluminum • Coils: Thermoplastic• Fasteners: Stainless SteelOperating Temperature• Normal: 14°F to 122°F(-10°C to 50°C)• Xtreme: -40°F to 140°F(-40°C to 60°C)Operating Pressure • Normal: Vacuum to 145 PSIG (Vacuum to 10 bar)• Xtreme:(P2LAX & P2LBX) Vacuum to 232 PSIG (Vacuum to 16 bar) (P2LCX & P2LDX) V acuum to 174 PSIG (Vacuum to 12 bar)P2LAX: 1/8" NPT & BSPP P2LBX: 1/4" NPT & BSPP P2LCX: 3/8" NPT & BSPP P2LDX: 1/2" NPT & BSPP• IP65 Rated • A TEX Option AvailableSolenoids• 2.5 to 7.3 Watt – Conduit, Grommet, 22mm & 30mm 3-Pin (DIN 43650), Hazardous Duty, Intrinsically Safe • 12VDC to 240VACMounting• Inline• IEM Aluminum BarMobile Applications• Viking Xtreme Tested to +5g Shock and Vibration• Solenoids Operate with Wide Voltage T olerance Bands • Corrosion Resistant DesignSingle Solenoid2-PositionDouble Solenoid2-PositionSol 14Center ExhaustSol 12Sol 14All Ports BlockedSol 12Sol 14Double Solenoid3-Position All Ports Blocked 3-Position Center ExhaustBOLD ITEMS ARE MOST POPULAR.Single & Double Solenoid Operated ValvesVacuum to 232 PSIG (Vacuum to 16 bar) -40 °F to 158°F (-40°C to 70°C)NOTE: P2LCX and P2LDX Solenoid Operated Valves have a maximumpressure rating of 175 PSIG (12 bar).HSingle Remote Pilot2-PositionDouble Remote Pilot2-Position#12Double Remote Pilot3-Position All Ports Blocked 3-Position Center Exhaust#14All Ports Blocked#14Center ExhaustExtreme Operating Pressure / TemperatureRemote Air Pilot Model Number IndexBOLD ITEMS ARE MOST POPULAR.Remote Air Pilot Operated ValvesVacuum to 232 PSIG (Vacuum to 16 bar) -40 °F to 158°F (-40°C to 70°C)NOTE: P2LCX and P2LDX Manual & Remote Air Pilot Valves have amaximum pressure rating of 175 PSIG (12 bar).Single Solenoid2-PositionDouble Solenoid2-PositionDouble Solenoid3-Position All Ports Blocked3-Position Center ExhaustSol 14Sol. 14Center ExhaustSol 12Sol 14Sol 12Sol 14Single & Double Solenoid Operated Valves Vacuum to 145 PSIG (Vacuum to 10 bar)14 °F to 122°F (-10°C to 50°C)BOLD ITEMS ARE MOST POPULAR.IEM Bar Manifolds & AccessoriesModel Number Index• Utilizes Inline mount Viking Xtreme Series valves.• Kits include: (1) Manifold, (2) Valve Hold Down Bolts per Station, (3) O-rings per Station.Note: All IEM bar manifolds are 4-Way only with internal pilot airsupply. External pilot supply thru a common “X” port notavailable.Manifold OnlyManifold Assembly## – stationsP2LAXMAXN##NP AAP2LAXMAXN##NP 02 to 12P2LBXMAXN##NP AAP2LBXMAXN##NP 02 to 12P2LCXMAXN##NP AAP2LCXMAXN##NP02 to 12IEM Bar ManifoldsBOLD ITEMS ARE MOST POPULAR.P2LCXP2LBXP2LAXM A X Length Option A) not available on IEM Bar Manifold P2LAX or P2LBX.22mm Solenoid Pilot Operators & CoilsTechnical Information22mm Solenoid Pilot OptionsThe P2FP13*4* (NC) 3/2 solenoid pilot operators are designed for piloting pneumatic control valves with compressed air or other inert gases.The P2FP operator is available for Normal operatingpressures up to 10 bar or the Xtreme maximum operating pressure of 16 bar and wide band voltage tolerances required for mobile applications.Corrosion Resistant DesignThe pilot valve body is manufactured in thermoplastic P A6 material and the core tube brass / stainless steel. The plunger / core is made from stainless steel and the valve seats from FKM.Solenoid Pilot ExhaustThese operators all exhaust out of the top of the core tube which is tapped M5. The standard solenoid nut fitted to the core tube is a diffuser nut which allows the exhaust to escape to atmosphere. This nut also minimizes ingress of dirt into the valve through this port. The alternative plastic knurled nut can be specified (refer to part number system) if the exhaust air needs captured and piped away using the M5 tapped port.Mobile ApplicationsViking Xtreme valves are tested to +5g shock and vibration. Solenoid operated valves are designed to operate with wide voltage tolerance bands within the ambient temperature ranges stated in the technical section.CoilsCoils are wound with enameled copper wire, having atemperature index of 180°C with class F insulation (155°C) and are encapsulated in Thermoplastic resin. When fitted with suitable connector and correct gasket, they give protection to IP65.22mm Solenoid Pilot Operators Manual Override OptionsThe pilot operators can be supplied with locking or non-locking manual override. The standard manual override is the monostable (spring return) extended brass override. Alternatively the bistable (locking) override can be specified as an alternative for the Normal duty 10 bar option.SparesSolenoid operators are available as spares complete with mounting screws and seals. Coils and connectors should be ordered separately unless A TEX certified and intrinsically safe is needed. A TEX certified operators and coils must be ordered together.TransientsInterrupting the current through the solenoid coil produces momentary voltage peaks which, under unfavorableconditions, can amount to several hundred times the rated operating voltage. Normally, these transients do not cause problems, but to achieve the maximum life of relays in the circuit (and particularly of transistors, thyristors and integrated circuits) it is desirable to provide protection by means ofvoltage-dependent resistors (varistors). All connectors / cable plugs with LEDs include this type of circuit protection.MaterialsPilot ValveBody .......................................................................Polyamide Armature T ube:Normal Pilot Operator..................................................BrassExtreme Pilot Operator.................................Stainless Steel Plunger & Core .......................Corrosion resistant Cr-Ni SteelSeals .................................................................FKM (Viton™)Screws .............................................................Stainless SteelCoilEncapsulation Material .....................................ThermoplasticATEXATEX is a European Directive (94/9/EC) valid for products to be used within an explosive atmosphere.Both A TEX certified solenoid, remote pilot and manual operated valves, as well as complete solenoid pilotassemblies are available. See page H13 for a complete list of valves available. For specific information regarding ATEX certification please visit www.parker/pneumatics.22mm Solenoid Pilot Operator & Solenoid KitsModel Number indexBOLD ITEMS ARE MOST POPULARSolenoid Information(Solenoids are rated for continuous duty.)Voltage Enclosure “A”Enclosure “B” to “R”CodeACDCPower Consumption Holding (Amps)Power Consumption Holding (Amps)60Hz 50Hz 422422 3.9VA.147.3VA .3145——12 2.6W .21 4.6W .3747*——12 6.2W .52 5.5W .4648*——24 6.8W .29 6.0W .2549——242.7W.114.8W .2053120110— 4.1VA .04 6.3VA .0557240230—3.7VA.026.4VA.03* Mobile voltages. Solenoid Voltage Characteristics for all coils located on page D87.Option A30mm Square,3-Pin ISO 4400, DIN 43650AOption G & QGrommet, 18" or 72" LeadsOption H & R1/2" Conduit, 18" or 72" LeadsSolenoid Enclosures4Version (-40°C to 70°C).4 Pilot Operator KitsSolenoid KitsOption B22mm Rectangular, 3-Pin DIN, Type B IndustrialAdditional voltages are available upon request. Contact Customer Support for more information.ATEX Valves & Solenoid Pilot AssembliesModel Number IndexATEX Certified Single & Double Solenoid Operated ValvesVacuum to 145 PSIG (Vacuum to 10 bar) 14 °F to 122°F 22mm Coils (Enclosure Option M) -4 °F to 122°F 30mm Coils (Enclosure Option S)ATEX Certified Solenoid Pilot AssembliesP 2F S 1 3 A 3 D NOTE: For A TEX Certified Manual and Remote Air Pilot Valves, build thevalve part number from the model number index on page D79 and add “-EX” following the number.Example: P2LAX591PS-EXNOTE: All Kits include a 3 Meter Sealed Cable with Assembly.Intrinsically Safe Valves, Pilot ConversionTechnical InformationOperator End Cap for Internal Pilot Valve.for Spring Return and External (Remote) Pilot Valve.Hazardous Duty Solenoid Valves (“F” Option)Hazardous Location Class:Class I; Zone I EX, M, II & T4Class I; Div. I, Groups A, B, C, & D Class II & III; Div. I, Groups E, F, & GComes standard with 1/2" conduit connection.Voltage Range = ±10%Ambient T emp. Range = -20°C (-4°F) to 60°C (140°F)Duty Factor = 100%IP65 Rated (with Connected Conduit Connector)Intrinsically Safe Solenoid Valves (“E” Option)Hazardous Location Class:Class I; Groups A, B, C & D Class II; Groups E, F, & G Class III; Div. IFor use in low voltage (24VDC) Intrinsically Safe applications. NO OTHER VOLT AGE IS APPROVED.Comes standard with non-lighted solenoid connector.36mm Coil width.Must be connected to an FM approved Barrier.For dimensions, reference standard solenoid models. Maximum internally piloted valve pressure is 115 PSIG. Pressures to 145 PSIG can be used when external pilot is utilized and pilot pressure is limited to 115 PSIG.T o convert from Internal to External Pilot Valve, simplyremove the (2) fasteners that attach the end cap to the valve body. Rotate the end cap 180° and attach back to the valve body. For single solenoid valves, only the 14-End needs to be rotated. For double solenoid valves, both ends must be converted for proper function.The 12 & 14-Ports are always tapped no matter what Valve Type / Function is selected. For Internal Pilot Function, ports do NOT need to be plugged.Intrinsically Safe Solenoid Pilot Assembly KitsPart Number DescriptionP2FS13N1AE4924VDCOption FHazardous Duty FM / CSANotes:1. Maximum non-hazardous location voltage not to exceed 250V RMS.2. Connect per Barrier Manufacturers instructions.3. Factory Mutual requires connections per ISA RP 12.6 instructions.4. CSA requires “Installation to be in accordance with the Canadian Electrical Code. Part I.”5. The hazardous duty coils are wider in size than size A, B, C & D valves.If mounted on a manifold, the valves need to be staggered to fit.Internal to External Pilot Conversion (Size A & B Only)Flow, Operating Pressure & Response TimesTechnical DataOperating Temperature• Normal...........................................14°F to 122°F (-10°C to 50°C)• Extreme........................................-40°F to 158°F (-40°C to 70°C)Operating PressureMaximum: Normal.....145 PSIG (10 bar)Extreme.....232 PSIG (16 bar)Minimum:22mm 12 & 24VDC - Mobile (47 & 48 Voltage Code)Operating Temperature-40°C+10°C+50°C+70°C4+30 / -25%VDC+30 / -25%VDC+30 / -10%VDC+20 / -10%VDC8+30 / -30%VDC+30 / -25%VDC+30 / -15%VDC+20 / -15%VDC12+30 / -30%VDC+30 / -30%VDC+30 / -15%VDC+20 / -15%VDC16+30 / -30%VDC+30 / -30%VDC+30 / -20%VDC+20 / -20%VDCMinimumInletPressure(bar)30mm 12 & 24VDC - Mobile (47 & 48 Voltage Code)Operating Temperature-40°C+10°C+50°C+70°C4+30 / -30%VDC+30 / -30%VDC+25 / -30%VDC+15 / -30%VDC8+30 / -30%VDC+30 / -30%VDC+25 / -30%VDC+15 / -30%VDC12+30 / -30%VDC+30 / -30%VDC+25 / -30%VDC+15 / -30%VDC16+30 / -30%VDC+30 / -30%VDC+25 / -30%VDC+15 / -30%VDCSolenoid Voltage CharacteristicsNon-mobile Coils+10% / -10% for all Coils with Normal and Extreme OperatorsNote: All table ratings are based on 100% continuous duty and 5G shockvibration. At 50% continuous duty all ratings are +30% / -30% for allTemperatures and Pressures.Mobile Coils - Extreme Pilot Operator22mm 12 & 24VDC - Mobile (47 & 48 Voltage Code)Operating Temperature-10°C+10°C+50°C3+30 / -25% VDC+30 / -20% VDC+25 / -15% VDC6+30 / -30% VDC+30 / -25% VDC+25 / -20% VDC8+30 / -30% VDC+30 / -30% VDC+25 / -25% VDC10+30 / -30% VDC+30 / -30% VDC+25 / -30% VDC30mm 12 & 24VDC - Mobile (47 & 48 Voltage Code)Operating Temperature-10°C+10°C+50°C3+30 / -30% VDC+30 / -30% VDC+25 / -30% VDC6+30 / -30% VDC+30 / -30% VDC+25 / -30% VDC8+30 / -30% VDC+30 / -30% VDC+25 / -30% VDC10+30 / -30% VDC+30 / -30% VDC+25 / -30% VDCMinimumInletPressure(bar)MinimumInletPressure(bar)MinimumInletPressure(bar)Mobile Coils - Normal Pilot OperatorElectrical Connectors / AccessoriesFemale Electrical ConnectorsBronze* LED with surge suppression.Note: Max ø6.5mm cable size required for connector w/o 6' (2m) cord. IP65 rated when properly installed.Exhaust MufflersPipe ThreadPart Number M5P6M-PAC51/8" NPT EM121/4" NPT EM253/8" NPT EM371/2" NPTEM50Plastic SilencersThread Size Part Number A (mm) B (mm)NPTBSPTM5AS-5.43 (11).32 (8)1/8"ASN-6AS-6 1.57 (40).63 (16)1/4"ASN-8AS-8 2.56 (65).83 (21)3/8"ASN-10AS-10 3.35 (85).98 (25)1/2"ASN-15AS-15 3.74 (95)1.18 (30)P6M - Plastic; EM - Sintered BronzeFemale Electrical Connectors / Accessories30mm Square 3-Pin – ISO 4400, DIN 43650A (Use with Enclosure “A”)ConnectorConnector with 6' (2m) CordDescriptionPS2028BPPS2028JCP UnlightedPS203279BP PS2032J79CP*Light – 6-48V , 50/60Hz, 6-48VDC PS203283BP PS2032J83CP*Light – 120V/60Hz PS203283BPN/ALight – 240V/60Hz* LED with surge suppression.Note: Max ø6.5mm cable size required for connector w/o 6' (2m) cord. IP65 rated when properly installed.Engineering Data:Conductors: 2 Poles Plus Ground; Cable Range (Connector Only): 6 to 8mm (0.24 to 0.31 Inch); Contact Spacing: 11mmEngineering Data:Conductors: 2 Poles Plus Ground; Cable Range (Connector Only): 8 to 10mm (0.31 to 0.39 Inch); Contact Spacing: 18mm22mm Rectangular 3-Pin – Type B Industrial (Use with Enclosure “B”)ConnectorConnector with 6' (2m) CordDescriptionPS2429BPPS2429JBP UnlightedPS243079BP PS2430J79BP*Light – 24V60Hz, 24VDC PS243083BP PS2430J83BP*Light – 120V/60Hz PS243087BPN/ALight – 240V/60HzAccessoriesFittings & Exhaust ProtectorsFeatures•• Membrane• SpecificationsOperating Pressure ........................................0 – 150 PSIG (0 to 10 bar, 0 to 1034 kPa)Operating Temperature .......-40°F to 158°F (-40°C to 70°C)Material:Body and Pipe Adapter ...............................................Brass Membrane .................................................FluorocarbonFlow Data (SCFM)Part NumberSize60 PSIG Inlet90 PSIG Inlet125 PSIG InletE900161/8"40.156.575.5E900171/4"44.662.783.5Exhaust ProtectorSpool Service KitsA - 30mm SquareB - H - 1/2" Conduit 18" Leads R - 1/2" Conduit 72" Leads G - Grommet 18" Leads Q - Grommet 72" Leads3-Position Double Solenoid68PMT Male ConnectorPart No.Tube Size Pipe Thread (NPTF)C Hex L 68PMT -4-21/41/81/2 1.0668PMT -4-41/41/49/16 1.1968PMT -4-61/43/83/4 1.2768PMT -6-23/81/83/4 1.3768PMT -6-43/81/43/4 1.4368PMT -6-63/83/83/4 1.3368PMT -6-83/81/27/8 1.3868PMT -8-41/21/47/8 1.7268PMT -8-61/23/87/8 1.5268PMT -8-81/21/27/8 1.4468PMT -10-65/83/81 1.8868PMT -10-85/81/21 1.8868PMT -12-83/41/21-3/162.03169PMNS Male Elbow Non-Swivel 90°Part No.Tube Size PipeThread (NPTF)Wrench Flats LN 169PMNS-2-21/81/83/80.860.68169PMNS-5/32-25/321/83/80.880.68169PMNS-3-23/161/83/80.750.67169PMNS-3-43/161/41/20.740.93169PMT Male Elbow Swivel 90°Part No.Tube Size PipeThread (NPTF)Wrench Flats B Hex LN 169PMT -4-21/41/813/327/160.84 1.21169PMT -4-41/41/413/329/160.84 1.43169PMT -4-61/43/813/3211/160.84 1.43169PMT -6-23/81/89/169/16 1.11 1.41169PMT -6-43/81/49/169/16 1.11 1.58169PMT -6-63/83/89/1611/16 1.11 1.58169PMT -6-83/81/29/167/8 1.11 1.79169PMT -8-41/21/411/165/8 1.27 1.73169PMT -8-61/23/811/163/4 1.27 1.81169PMT -8-81/21/211/167/8 1.27 1.96169PMT -10-65/83/87/83/4 1.53 2.03169PMT -10-85/81/27/87/81.532.18169PMTL Male Elbow Long Non-Swivel 90°Part No.Tube Size PipeThread (NPTF)Wrench Flats BHex L N 169PMTL-6-43/81/49/169/16 1.06 1.63169PMTL-6-63/83/89/167/8 1.19 2.50169PMTL-6-83/81/29/167/8 1.19 2.50169PMTL-8-81/21/211/167/8 1.22 2.50169PMTL-10-85/81/27/87/81.462.5068PM Male ConnectorPart No.Tube Size Pipe Thread (NPTF)C Hex L 68PM-2-11/81/163/820.9368PM-2-21/81/87/160.8868PM-5/32-15/321/163/80.9568PM-5/32-25/321/87/160.7468PM-5/32-45/321/49/160.9968PM-3-13/161/167/160.9568PM-3-23/161/87/160.9268PM-3-43/161/49/161.10FLATS169PMTNS Male Elbow Non-Swivel 90°Part No.Tube Size PipeThread (NPTF)Wrench Flats LN 169PMTNS-4-21/41/81/20.840.72169PMTNS-4-41/41/41/20.840.90169PMTNS-4-61/43/81/20.84 1.06169PMTNS-6-23/81/89/16 1.050.75169PMTNS-6-43/81/49/16 1.050.94169PMTNS-6-63/83/83/4 1.050.94169PMTNS-6-83/81/211/16 1.12 1.26169PMTNS-8-41/21/411/16 1.17 1.06169PMTNS-8-61/23/811/16 1.22 1.06169PMTNS-8-81/21/211/16 1.22 1.26169PMTNS-10-65/83/87/8 1.46 1.11169PMTNS-10-85/81/27/8 1.46 1.32169PMTNS-12-83/41/211.81 1.44171PMT Male Run Tee SwivelPart No.Tube Size PipeThread (NPTF)Wrench Flats CHex L N 171PMT -4-21/41/81/27/16.85 1.25171PMT -4-41/41/41/29/16.85 1.48171PMT -4-61/43/81/211/16.85 1.43171PMT -6-43/81/45/89/16 1.21 1.83171PMT -6-63/83/85/811/16 1.21 1.83171PMT -8-41/21/47/85/8 1.27 1.74171PMT -8-61/23/87/83/4 1.27 1.83171PMT -8-81/21/27/87/81.27 1.99172PMT Male Branch Tee SwivelPart No.Tube Size PipeThread (NPTF)Wrench Flats CHex L N 172PMT -4-21/41/81/27/160.85 1.25172PMT -4-41/41/41/29/160.85 1.43172PMT -6-23/81/85/89/16 1.22 1.66172PMT -6-43/81/45/85/8 1.22 1.83172PMT -6-63/83/85/83/4 1.22 1.83172PMT -8-41/21/47/85/8 1.27 1.73172PMT -8-61/23/87/83/4 1.27 1.79172PMT -8-81/21/27/87/81.27 1.97171PMTNS Male Run Tee Non-SwivelPart No.Tube 1 Size Tube 2 Size PipeThread (NPTF)Wrench Flats L1L2N 171PMTNS-4-41/41/41/415-320.910.910.94171PMTNS-4-6-41/43/81/45/80.93 1.210.97171PMTNS-6-43/83/81/45/8 1.21 1.210.97171PMTNS-6-4-43/81/41/45/8 1.210.930.97171PMTNS-6-4-63/81/43/85/8 1.220.970.93171PMTNS-6-61/23/83/85/8 1.21 1.270.97171PMTNS-6-81/23/81/25/8 1.17 1.27 1.26171PMTNS-8-41/21/21/47/8 1.281.27 1.06172PMTNS Male Branch Tee Non-SwivelPart No.Tube 1 Size Tube 2 Size PipeThread (NPTF)Wrench Flats L1L2N 172PMTNS-4-21/41/41/81/20.910.910.78172PMTNS-6-43/83/81/45/8 1.21 1.210.97172PMTNS-6-4-43/81/41/45/8 1.21.930.97172PMTNS-6-63/83/83/85/8 1.21 1.210.97172PMTNS-6-83/83/81/27/8 1.17 1.17 1.26172PMTNS-8-61/21/23/87/8 1.28 1.28 1.06172PMTNS-8-6-81/23/81/27/8 1.25 1.25 1.25172PMTNS-8-81/21/21/27/8 1.341.251.252P2LAX Inline Valve DimensionsIEM Bar Manifold DimensionsP2LBX Inline Valve DimensionsP2LBX IEM Aluminum Bar Manifold DimensionsP2LCX Inline Valves DimensionsP2LCX IEM Aluminum Bar Manifold DimensionsP2LDX Inline ValvesDimensionsSingle & Double Operators – SolenoidP2LDX (Solenoid)Inches (mm)P2LDX (Remote)Single & Double Operators – Remote PilotGROMMET / FL YING LEADSA 7.64(194)A 19.84(250)A 210.70(273)B 1.89(48)C 1.59 (40.5)D 4.92(125)D 1 5.83(148)E .67(17)E 11.65(42)F 1.34(34)F 11.08(27.5)G .98 (25)H 1.18(30)H 1.49(12.5)H 2.20(5)H 3.51(13)H 4.16(4)J .91(23)J 1.14(3.5)K 2.52(64)K 11.77(45)K 21.65(42)M 1.29 (32.7)N .59(15)P Ø .26Ø (6.6)Q Ø .17Ø (4.4)。
淮安现代有轨电车一期工程通信系统PIS子系统用户手册目录淮安现代有轨电车一期工程 (i)通信系统PIS子系统用户手册 (i)1.PAIS系统介绍 (1)1.1 控制中心 (1)1.2 车辆段 (2)1.3 车站 (2)1.4 PAIS管信息发布平台 (3)1.4.1 系统介绍 (3)1.4.2 系统特点 (5)1.5 PAIS信息发布软件系统管理操作 (5)1.5.1 系统配置 (5)1.5.2 管理用户 (7)1.5.3 角色管理 (8)1.5.4 终端授权 (8)1.5.5 版本升级 (9)1.5.6 日志报表 (9)2.PIS系统操作与配置 (11)2.1 PIS播放列表操作 (11)2.1.1 操作准备 (13)2.1.2 素材管理 (18)2.1.3 素材审核 (20)2.1.4 创建播放列表 (20)2.1.5 添加节目 (21)2.1.6 发布播放列表 (22)2.1.7 播放列表审核 (24)2.1.8 LCD版式设计 (24)2.2 PIS紧急消息发布 (26)2.2.1 普通信息发布 (27)2.2.2 紧急信息 (27)2.3 PIS站台播放控制器配置 (28)2.3.1 安装配置基本环境 (28)2.3.2 安装编译器g++ (30)2.3.3 运行编译qt (30)2.3.4 运行编译vlc (30)2.3.5 安装ekho TTS (31)2.3.6 开机自启动项以及crontab项 (31)2.3.7 配置Client配置文件 (34)2.4 PIS站台LED显示器配置 (35)2.4.1 全彩色LED模组 (35)2.4.2 双基色LED模组 (36)3 典型故障描述与解决方法 (37)3.1全线无ats-pis到站信息 (37)3.2个别正线显示设备显示ats-pis到站信息异常 (37)3.2.1 单个LED显示屏到站信息异常 (38)3.2.2 某个站台LED和LCD到站信息异常 (38)3.3 站台JTC-MP工作异常 (38)3.4 站台LCD黑屏 (39)3.5 传感器上传数据异常 (40)3.5.1 环境监控模块上传数据异常 (40)3.5.2 空调模组上传数据异常 (41)3.6 日常维护操作 (41)3.6.1数据库维护 (41)3.6.2 操作工作站维护 (41)3.7 维护建议 (42)附1:PAIS系统IP地址规划表 (43)附2:HAYG控制中心子系统互联图 (57)1.PAIS系统介绍PIS系统是有轨电车运营商为乘客提供导乘信息的系统。
The Mobius ® Power MIX 100, 200 and 500 combine high performance mixingtechnology with easy-to-use design features. The impeller design and motor feature our proven magnetically coupled NovAseptic ® mixing technology to efficiently mix the most challenging buffers, media, and biopharmaceutical ingredients.Mobius ®Power MIX 100,200 and 500 Single-Use MixersHigh performance mixing technology and ergonomic design featuresFeatures and benefits:• Powerful magnetically coupled impeller designed to efficiently mix the most challenging buffer, media, and biopharmaceutical ingredients • Available in both plastic and jacketed stainless steel for flexibility in biomanufacturing • Broad working volume, from a minimum volume that is approximately 20% of the working volume (size dependent) with maximum volume of 10% over the working volume, for processing flexibility • Doors that open to one half the mixer's diameter for easy bag loading • Stainless steel versions include integrated load cells and temperature sensor • In-process pH and conductivity measurement option • Closed, sterile, and zero deadleg sampling directly from the mixing bag • Monitor & control remotely with Ready To Connect control box • Data collection with 21 CFR Part 11 compliant Chart Recorder optionSpecification SheetThe life science business of Merck operates as MilliporeSigma in the U.S. and Canada.2SpecificationsTank 304L stainless steel 304L stainless steel 304L stainless steel Stand 304L stainless steel 304L stainless steel 304L stainless steel Latch 18-8 stainless steel 18-8 stainless steel 18-8 stainless steel Casters 304 SS with hi-temp Phenolic wheel 304 SS with hi-temp Phenolic wheel 304 SS with hi-temp Phenolic wheel Dimensions L X W 41 x 32 in.(1030 x 810 mm)45 x 37 in.(1140 x 940 mm)55 x 47 in.(1390 x 1190 mm)Height 52 in. (1310 mm)53 in. (1340 mm)62 in. (1560 mm)Weight550 lb (250 kg)720 lb (327 kg)920 lb (417 kg)Minimum working volume (to cover the impeller)10 L 20 L 50 L Minimun sampling volume 20 L 40 L 100 L Maximum working volume 110 L220 L550 LFluid volume in jacket (approx.) 1.2 gal (4.5 L) 1.9 gal (7.2 L)3.5 gal (13.2 L)Heat transfer area of jacket (approx.)7.6 sq. ft (.71 sq. m)12.1 sq. ft (1.1 sq. m)22.7 sq.ft (2.1 sq. m)Maximum operating pressure of jacket90 psi (6.2 bar)90 psi (6.2 bar)90 psi (6.2 bar)Stainless Steel Jacketed Mixers ASME U-1 code stamped OptionalOptionalOptionalMettler-Toledo SWB505 MultiMount™ Load Cells (qty 3)*0–120 kg ±1% FS 0–240 kg ±1% FS 0–600 kg ±1% FS Load Cell Ingress protection rating IP 68IP 68IP 68RTD Temperature Sensor JUMO 0–60 °C ± 1°C 0–60 °C ± 1°C 0–60 °C ± 1°C pH Sensor Hamilton**0–14 pH ±0.1 pH0–14 pH ±0.1 pH0–14 pH ±0.1 pHConductivity Sensor Hamilton**0.2–200 mS/cm ±10% FS 0.2–200 mS/cm ±10% FS 0.2–200 mS/cm ±10% FS Storage temperature 0–40 °C (non-condensing environment)0–40 °C (non-condensing environment)0–40 °C (non-condensing environment)Operating temperature4–60 °C (non-condensing environment)4–60 °C (non-condensing environment)4–60 °C (non-condensing environment)* I ncluded with carriers compatible with Ready To Connect control boxAvailable as an option with the carriers compatible with standard control box ** Only available as an option with the Ready To Connect control boxThe following components are appropriate for the 100 L, 200 L, and 500 L models, both in stainless steel and plastic formatsAdapters SterilEnz™ LDPELuer plugs Kynar® Polyvinylidene FluorideConnectivity CPC® PolysulfoneTubing SiliconePinch clamp PVDFImpeller Neodymium magnets encased in polypropylenePowder port PolyethyleneTC gasket SiliconeTC clamp NylonTC end cap PolypropyleneCup HDPEProbe port HDPEO-ring SiliconePlug PolypropyleneNeedle-free sample port HDPEO-ring SiliconeConductivity and pH sensor (multi-use)EPDM and stainless steel 316L*Maximum operating speed has to be validated for each process and is dependent on volume, viscosity, etc.3Ordering InformationMobius® Power MIX Carriers with standard control boxPlease refer to spare parts list MK_CA7420EN (available on ) 4Single-Use assemblies to fit Mobius®Power MIX Carriers with standard control box100 L PureFlex™MXRA0100B4√Bronze411111121 MXRL0100B4√Bronze4121PureFlex™PlusMXRA0100GPL4√Gold411111121MXRA0100BPL4√Bronze411111121MXRL0100BPL4√Bronze4121200 L PureFlex™MXRA0200G4√Gold411111121MXRA0200B4√Bronze411111121MXRL0200B4√Bronze4121PureFlex™PlusMXRA0200GPL4√Gold411111121MXRA0200BPL4√Bronze411111121MXRL0200BPL4√Bronze4121500 L PureFlex™MXRA0500G2√Gold21121121MXRA0500B2√Bronze21121121MXRL0500B2√Bronze2121PureFlex™PlusMXRA0500GPL2√Gold21121121MXRA0500BPL2√Bronze21121121MXRL0500BPL2√Bronze2121Example of 200 L single-use assembly5Ordering InformationMobius® Power MIX Carriers with Ready To Connect control boxPlease refer to spare parts list MK_CA7420EN (available on ) 6Single-Use assemblies to fit Mobius®Power MIX Carriers with Ready To Connect control box100 L PureFlex™SMXRA0100LS4M√Silver411111112SMXRA0100LB4M√Bronze411111112SMXRL0100LB4M√Bronze4112PureFlex™PlusSMXRA0100LGPL4M√Gold411111112SMXRA0100LSPL4M√Silver411111112SMXRA0100LBPL4M√Bronze411111112SMXRL0100LBPL4M√Bronze4112200 L PureFlex™SMXRA0200LG4M√Gold411111112SMXRA0200LS4M√Silver411111112SMXRA0200LB4M√Bronze411111112SMXRL0200LB4M√Bronze4112PureFlex™PlusSMXRA0200LGPL4M√Gold411111112SMXRA0200LSPL4M√Silver411111112SMXRA0200LBPL4M√Bronze411111112SMXRL0200LBPL4M√Bronze4112500 L PureFlex™SMXRA0500LG2M√Gold21121112SMXRA0500LS2M√Silver21121112SMXRA0500LB2M√Bronze21121112SMXRL0500LB2M√Bronze2112PureFlex™PlusSMXRA0500LGPL2M√Gold21121112SMXRA0500LSPL2M√Silver21121112SMXRA0500LBPL2M√Bronze21121112SMXRL0500LBPL2M√Bronze2112Example of 500 L single-use assembly7Lit. No. SP1800EN00 Ver. 9.03185905/2021© 2021 Merck KGaA, Darmstadt, Germany and/or its affiliates. All Rights Reserved. Merck, the vibrant M, Millipore, Mobius, NovAsepti andPureFlex are trademarks of Merck KGaA, Darmstadt, Germany or its affiliates. All other trademarks are the property of their respective owners. Detailed information on trademarks is available via publicly accessible resources.Merck KGaAFrankfurter Strasse 250 64293 Darmstadt, GermanyFor more information, please visit 。
INSTALLATION GUIDEMAX FUSION PLUS® SHOWER MIXER MXFSPCSMCBEFORE INSTALLATIONMIXER ORIENTATIONPipework MUST be purged before connecting to the mixerSYSTEM REQUIREMENTSOperating Pressures - refer to the Venturi Selection Table on page 2Unequal Pressure - Venturi jet installedOperating PressuresEqual High (Mains) & Equal Low Pressures - Venturi jet removed Operating Hot Water T emperatures Operating Cold Water T emperaturesDo not plug outlet when testing.This shower mixer can be line tested up 1500kPa (217.6psi)WHAT IS IN THE PACKMINIMUM MAXIMUM 36kPa (5.1psi)36kPa (5.1psi)200kPa (29.0psi)1500kPa (217.6psi)1500kPa (217.6psi)55° C 60° C 5° CN/AHot ColdThis mixer is designed to be connected with the hot water supply on the left only and the cold water supply on the right only.If at any point the nut is removed, please ensure that both black lines marked on the cartridge and cartridge nut are aligned when the mixer is in full cold position as shown in figure 1.AS/NZS 3500.1 states that pressures above 500kPa can cause damage from water hammer, reduce the life ofappliances, taps & fittings, cause excessive noise in the system and recommend that a pressure limiting valve (PLV) be fitted.IF YOU HAVE...HOW TO INSTALLWarranty, Maintenance and Care YOUR COPY TO KEEPFelton Industries Limited guarantees these mixers to be free from defects in materials and workmanship for a period of ten (10) years from the date of purchase. Fair wear and tear is expressly excluded. This warranty is e ective for 10 years from the date of purchase for the supply of replacement parts (only) and 5 years from the date of purchase for plumber’slabour relating solely to repairing or replacing the mixer, provided the product is installed by a registered plumber. Y ou must retain proof of purchase of the Mixer (such as an invoice or receipt) and proof of installation by a registered plumber and provide these to Felton on request. This warranty is for manufacturing defects only and does not cover any damage to the product due to abuse, negligence or improper installation. This warranty is given on the understanding that the product is installed by a registered plumber and operated according to Felton’s installation guide and the Australian/New Zealand standard AS/NZS3500. This warranty is provided to persons who are a “consumer” under the Consumer Guarantees Act 1993 only and for use in domestic/residential dwellings only (not for commercial use).At no stage should any surface coatings be cleaned with cleaning agents that contain a corrosive acid or a scouring additive. Surface coatings should be cleaned with liquid detergent or soap and water. Any damage caused through the use of an unsuitable cleaner will not be covered by this warranty. This warranty is subject to any other rights or remedies that you may have under the Consumer Guarantees Act 1993 (or any other applicable legislation) and to Felton’s T erms of Trade.Please fill in the details below, attach your receipt to this installation guide and keep as your proof of purchase.Purchased at: ...............................................................................................................................................................................................................................................................................................Date of purchase: .......................................................................................................................................................................................................................................................................................Installed by: ...................................................................................................................................................................................................................................................................................................TROUBLESHOOTING - SWAPPING OUT THE VENTURI JETSUPGRADING FROM UNEQUAL TO MAINS PRESSUREMAINTENANCE - CLEANING THE FILTERFor technical assistance please ring: 0800 743 358 or (09) 528 0810Felton Industries Limited8 Farmhouse Lane, Glen Innes, Auckland 1072 New Zealand Customer Registration detailsThank you for purchasing a Felton Product for your home.Felton stand behind our products and wish to provide you with the warranty set out below. This warranty is subject to, and in addition to, your rights at law (including under the Consumer Guarantees Act 1993).Thank you for taking the time to fill in this warranty form and sending it o to us.Personal Information*Title: Mr Mrs Ms MissFirst name: ............................................. Surname: ................................Customer/Installation Address: .....................................................................................................................................................................................Suburb: ................................................... City: ..........................................Contact No: (home) .................................................................................. (work) ................................................................................... (mobile) ................................................................................Email: ............................................................................................................House builder’s information*N.B. Please complete this section only if you have purchased a new home from a house builder.Company name: .........................................................................................Location: .......................................................................................................Date of Purchase: ......................................................................................Signature: .....................................................................................................Installing Plumber’s information*First Name .......................................... Surname: ....................................Registration Number: ...............................................................................Date of Installation: ...................................................................................Please ensure that you attach proof of installation by a registered plumber (i.e. an invoice or receipt from the registered plumber).Purchase information*Product Purchased: ..................................................................................Product Name/Code: ...............................................................................Please ensure that you attach proof of purchase (i.e. copy of invoice or receipt).Lifetime Extension WarrantyI confirm that the details set out are correct(and that I have included proof of purchase and installation as requested above) and acknowledge that the warranty is subject to the T erms and Conditions provided (including Felton’s T erms of Trade).Signature: ......................................................................................................Survey Section Gender Male Female Age group Under 2020-2930-39 40-4950-5960+Q1. What was the main reason for your choice of this particular model? Design Price Features/benefits Brand Advertising Recommendation Warranty terms Easy to use QualityQ2. What are some other Plumbing brands that you previously owned?........................................................................................................................................................................................................................................................................................................................................................ Please tick if you are happy to be contacted in the future withinformation about product support, new product information, special o ers or the opportunity to provide feedback. I understand Felton Industries Limited will retain the information I have provided, but will not disclose any personal information to any third party.Thank you for taking the time to fill in this warranty form.Please send it o to:Felton Industries LTD 8 Farmhouse Lane Glen Innes Auckland 1072Lifetime Extension Warranty - Domestic/ResidentialThis warranty is given on the understanding that the product is installed and operated according to the installation guide provided and the Australian/New Zealand standard AS/NZS3500, by a registered plumber.Subject to any other rights or remedies that you may have under the Consumer Guarantees Act 1993 (or any other applicable legislation). Felton Industries Limited agrees to either repair or replace (at Felton’s sole discretion) the Mixer (as defined below) if it is discovered that the Mixer contains a material defect which arose in the course of its manufacture, on and subject to the T erms and Conditions set out below.What Lifetime Extension Warranty does cover:1) This warranty extension applies in respect of Felton sink, basin and shower mixing valves (“Mixer”) which are used in residential/domestic installations only.2) This warranty is for the lifetime of the first registered owner of the residential dwelling in which the Mixer is installed and who completes this warranty card and is nottransferable to any subsequent owner of the dwelling (subject to paragraph 5 under ‘What Lifetime Extension Warranty does not cover).3) This warranty extension covers the repair or replacement only of Mixer parts for a lifetime period provided that you register the purchase and installation of the Mixer with Felton by returning this warranty card to us within 6 months from the date of purchase.4) This warranty extension covers labour relating solely to repairing or replacing theMixer for a period of 5 years from the date of purchase, provided the product is installed by a registered plumber in accordance with Felton’s installation instructions and the Australian/New Zealand standard AS/NZS3500 and you return this warranty card to us within 6 months from the date of purchase.What Lifetime Extension Warranty does not cover:1) This warranty extension does not apply to shower hoses, Designer wall sets, and shower heads nor does it apply to the Feltonmix range of products.2) This warranty will be null and void unless the Mixer is installed by a registeredplumber in accordance with Felton’s installation instructions. A registered plumber is a person registered as a registered plumber with the NZ Plumber Gasfitters and Drainlayers Boar3) This warranty is for manufacturing defects only and the Mixer must not have been damaged by misuse, accident or neglect. Fair wear and tear is expressly excluded.4) This warranty is provided to persons who are a “consumer” under the ConsumerGuarantees Act 1993 and for use in domestic/ residential dwellings in New Zealand only, not for commercial use. It is not transferable and shall apply to the first registered owner of the Mixer only.5) Notwithstanding point 4. above, where the Mixer has been purchased and installed in a residential dwelling by a party that has constructed that dwelling with the intention of sale, this warranty will apply to the first occupier of that home (but shall not apply to any subsequent occupiers of that home).6) Where Felton elects, in its sole discretion, to provide you with a replacement Mixer the cost of freight will be met by you.7) In order for the Lifetime Extension Warranty to apply, you must complete theregistration form and return this warranty card to Felton within 6 months from the date of purchase of the Mixer.8) All repair work covered by this warranty must be performed by an authorised Felton Service Partner, Felton sta member or, provided that approval is first obtained from Felton and an authorisation number is provided to you by Felton, a certified plumber. The Mixer must not have been tampered with or repaired in any other way other than in accordance with these T erms and Conditions.9) Product purchased before 1st of April 2014 is not covered by this warranty.Thank you for purchasing a Felton Product for your home.Felton stand behind our products and wish to provide you with the warranty set out overleaf. In order to obtain a Lifetime Extension Warranty to the standard warranty, please read and follow the terms and conditions of your warranty (on reverse). This warranty is subject to, and in addition to, your rights at law (including under the Consumer Guarantees Act 1993). IMPORTANT: Please keep this warranty and complete the details below for your own records. Keep this with your original purchase documents for any claim under warranty. If you have any queries or require further information on your Felton product, please phone (0800 743 358) or refer to details on the back of this card.For details on Felton products or services please call us on 0800 743 358 or visit us online at NOTE: Service charges may be incurred if warranty conditions are not met.Lifetime Warranty Extension Care YOUR COPY TO KEEPPlease fill in the details below, attach your receipt to this installation guide and keep as your proof of purchase.Purchased at: ................................................................................................................................................Date of purchase: ........................................................................................................................................Installed by: ....................................................................................................................................................。