DataGridView实现数据的快速输入
- 格式:doc
- 大小:27.50 KB
- 文档页数:4

datagridveiw getfirstrow的用法DataGridView.GetFirstRow() 方法用于获取DataGridView 控件中的第一行。
在本文中,我们将逐步回答与该方法相关的问题,以帮助读者更好地理解其用法和功能。
1. DataGridView 控件简介在介绍DataGridView.GetFirstRow() 方法之前,我们首先了解一下DataGridView 控件。
DataGridView 控件是Windows 窗体应用程序中最常用的数据显示控件之一。
它提供了一个灵活和强大的界面来展示和编辑数据表格。
2. DataGridView.GetFirstRow() 方法简介DataGridView.GetFirstRow() 方法是一个实例方法,用于获取DataGridView 控件中的第一行。
它返回一个DataGridViewRow 对象,该对象表示控件中的第一行。
3. 获取第一行的用途和场景在开发应用程序时,经常需要对DataGridView 控件中的数据进行操作。
获取第一行可以帮助我们实现以下功能:- 快速访问表格数据的第一行,以便进行某些特定处理,如删除或编辑。
- 将第一行作为默认选中的行,以提供更好的用户体验。
- 根据第一行的内容设置其他控件的属性或状态,以便与数据的首条记录相关联。
4. 使用DataGridView.GetFirstRow() 方法下面我们将逐步演示如何在代码中使用DataGridView.GetFirstRow() 方法。
# 4.1 准备工作首先,我们需要在Windows 窗体应用程序中添加一个DataGridView 控件,并将其与数据源绑定。
可以通过设计器或者在代码中动态创建DataGridView 控件。
# 4.2 在按钮点击事件中使用GetFirstRow 方法假设我们有一个按钮,点击按钮时将对第一行进行一些特殊处理。
我们可以在按钮的点击事件中使用GetFirstRow 方法来获取第一行,并对其进行处理。
计算机软件中的快速数据输入技巧快速数据输入技巧在计算机软件领域中扮演着重要的角色。
随着信息时代的发展,数据输入已经成为了我们日常工作的重要一环。
本文将介绍一些计算机软件中的快速数据输入技巧,并按类划分为键盘快捷键技巧、文本编辑快速输入技巧、表格数据输入技巧和自动填充技巧。
一、键盘快捷键技巧键盘快捷键是提高数据输入速度的最简单有效的方法之一。
例如,Ctrl+C和Ctrl+V可以分别实现复制和粘贴,通过直接操作键盘就能够完成大量的数据复制粘贴工作。
快捷键技巧还包括使用Ctrl+Z进行撤销操作、Ctrl+S保存文件等常用操作。
二、文本编辑快速输入技巧在编辑文本时,可以使用一些快速输入技巧来提高效率。
首先,快捷键Shift+Home可以选择光标至行首,而Shift+End可以选择光标至行尾。
此外,Ctrl+Shift+左方向键可以选择光标至上一个单词的开头,Ctrl+Shift+右方向键可以选择光标至下一个单词的开头。
这些快速输入技巧可以帮助用户快速选择文本并进行编辑。
三、表格数据输入技巧表格是数据输入中经常使用的工具之一。
对于大量的数据输入,可以使用一些表格数据输入技巧来提高速度和准确性。
例如,使用Tab键可以在表格中快速切换至下一个单元格,使用Enter键可以在表格中快速换行并进入下一行。
此外,可以使用Ctrl+方向键来快速跳转至表格中的某个位置,大大提高了数据输入的速度和准确性。
四、自动填充技巧自动填充技巧是一种非常实用的技巧,可以根据已有的数据自动填充其他相关数据。
例如,在Excel中,可以使用自动填充功能填充日期、序列和公式等,极大地减少了重复输入的工作量。
在办公软件中,还可以使用自动填充技巧来快速输入联系人信息、地址等常用信息,提高数据输入的效率。
五、附加技巧除了上述提到的技巧外,还有一些附加技巧可以进一步提高数据输入的速度和效率。
首先,使用输入法的候选词功能可以快速选择正确的词汇,减少输入错误的几率。

DataGridView在中的操作技巧目录1、取得或者修改当前单元格的内容2、设定单元格只读3、不显示最下面的新行4、判断新增行5、行的用户删除操作的自定义6行、列的隐藏和删除7、禁止列或者行的Resize8、列宽和行高以及列头的高度和行头的宽度的自动调整9、冻结列或行10、列顺序的调整11、行头列头的单元格12、剪切板的操作13、单元格的ToolTip的设置14、右键菜单(ContextMenuStrip的设置15、单元格的边框、网格线样式的设定16、单元格表示值的设定17、用户输入时,单元格输入值的设定18、设定新加行的默认值1、DataGridView取得或者修改当前单元格的内容当前单元格指的是DataGridView焦点所在的单元格,它可以通过DataGridView 对象的Curre ntCell属性取得。
如果当前单元格不存在的时候,返回Noth in g(C#是null[]'取得当前单元格内容MessageBox.Show(DataGridView1.Curre ntCell.Value'取得当前单元格的列In dexMessageBox.Show(DataGridView1.Curre ntCell.Colum nln dex'取得当前单元格的行In dexMessageBox.Show(DataGridView1.Curre ntCell.Rowl ndex另外,使用DataGridView.CurrentCellAddress属性(而不是直接访问单元格来确定单元格所在的行:DataGridView.CurrentCellAddress.Y 和列:DataGridView.Curre ntCellAddress.X。
这对于避免取消共享行的共享非常有用。
当前的单元格可以通过设定DataGridView对象的CurrentCell来改变。
可以通过CurrentCell来设定DataGridView的激活单元格。

C#如何在DataGridView控件中验证数据输⼊实现控件中验证数据输⼊功能主要是利⽤DataGridView控件的公共事件CellValidating和CellEndEdit事件在为当前选定的单元格停⽌编辑模式时发⽣。
本实例判断控件第⼀列中单元格的值是否为空。
在事件中进⾏验证,如果严重失败,将System.Windows.Forms.DataGridViewCellValidatingEventArgs类的Cancel属性设置为True。
这将导致DataGridView控件阻⽌光标离开该单元格。
将该⾏的ErrorText属性设置为解释性字符串,将显⽰错误图标,其⼯具提⽰将保护此错误⽂本。
在CellEndEdit事件处理程序中,将该⾏的ErrorText属性设置为空字符串。
只有当单元格退出编辑模式(如果验证失败,则不能退出单元格)时,才能发⽣。
运动程序,编辑控件的第⼀列,在单元格中不输⼊内容,然后使⽤⿏标单击其他单元格,这样就会提⽰错误!下⾯给出主要代码:Private void dataGridView1_CellValidating(object sender,DataGridViewCellValidatingEventArgs e){If (e.ColumnIndex==0){If(String.IsNullOrEmpty(e.FormattedValue.ToString)){dataGridView1.Rows[e.RowIndex].ErrorText=”单元格第⼀列值不能为空”;e.Cancel=true;}int n = 0;//先转化成int类型,尝试转化if (int.TryParse(e.FormattedValue.ToString(), out n)){//可以的话,再进⼀步范围判断if (n < 1 || n > 100){dataGridView1.Rows[e.RowIndex].Cells[e.ColumnIndex].ErrorText = "必须在1~100之内!";}else{dataGridView1.Rows[e.RowIndex].Cells[e.ColumnIndex].ErrorText = "";}}else{dataGridView1.Rows[e.RowIndex].ErrorText = "请输⼊数字";//转换失败,类型都有问题e.Cancel = true;}}}Private void dataGridView1_CellEndEdit(object sender,DataGridViewCellEventArgs e){dataGridView1.Rows[e.RowIndex].ErrorText=String.Empty;}原⽂链接:把⼀个DataTable或者某个object集合的数据源绑定到DataGridView中,直接通过DataGridView数据录⼊需要进⾏额外的数据验证。

NET中DataGridView数据绑定方法详解
1.使用数据集进行数据绑定
-创建一个数据集对象,并指定相应的表结构。
-从数据库中填充数据到数据集中。
- 将DataGridView的数据源属性设置为数据集中的表。
- 设置DataGridView的自动列生成属性为True,以自动生成列。
2.使用数据表进行数据绑定
数据表是数据集中的一种结构,它由行和列组成。
使用数据表进行数据绑定的步骤如下:
-创建一个数据表对象,并定义列名称和类型。
-从数据库中填充数据到数据表中。
- 将DataGridView的数据源属性设置为数据表。
3. 使用BindingSource进行数据绑定
- 创建一个BindingSource对象。
- 设置BindingSource的DataSource属性为数据源。
- 将BindingSource绑定到DataGridView的数据源属性上。
4.使用数据绑定源进行数据绑定
-创建一个数据绑定源对象,并指定相应的数据源。
- 将数据绑定源绑定到DataGridView的数据源属性上。
5.自定义数据绑定
如果以上方法无法满足需求,还可以使用自定义数据绑定方法。
自定义数据绑定通常涉及以下几个方面:
- 创建一个数据源类,实现数据源接口,如IList、IBindingList或ICollectionView。
- 创建一个继承自DataGridView的自定义控件。
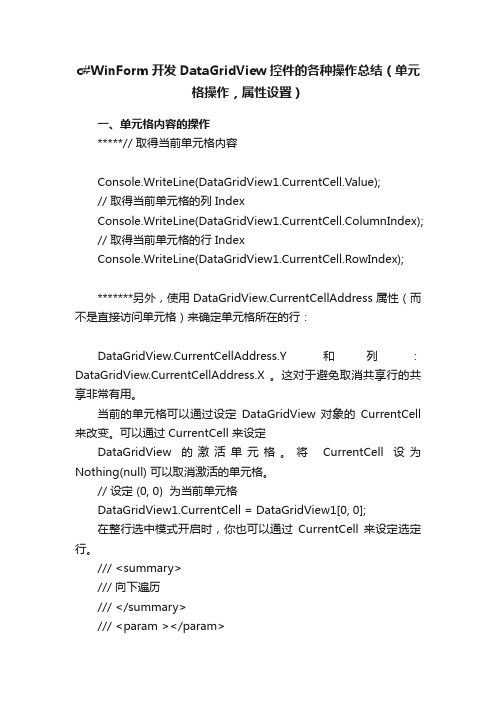
c#WinForm开发DataGridView控件的各种操作总结(单元格操作,属性设置)一、单元格内容的操作*****// 取得当前单元格内容Console.WriteLine(DataGridView1.CurrentCell.Value);// 取得当前单元格的列 IndexConsole.WriteLine(DataGridView1.CurrentCell.ColumnIndex);// 取得当前单元格的行 IndexConsole.WriteLine(DataGridView1.CurrentCell.RowIndex);*******另外,使用 DataGridView.CurrentCellAddress 属性(而不是直接访问单元格)来确定单元格所在的行:DataGridView.CurrentCellAddress.Y 和列:DataGridView.CurrentCellAddress.X 。
这对于避免取消共享行的共享非常有用。
当前的单元格可以通过设定DataGridView 对象的CurrentCell 来改变。
可以通过 CurrentCell 来设定DataGridView 的激活单元格。
将CurrentCell 设为Nothing(null) 可以取消激活的单元格。
// 设定 (0, 0) 为当前单元格DataGridView1.CurrentCell = DataGridView1[0, 0];在整行选中模式开启时,你也可以通过CurrentCell 来设定选定行。
/// <summary>/// 向下遍历/// </summary>/// <param ></param>/// <param ></param>private void button4_Click(object sender, EventArgs e)...{int row = this.dataGridView1.CurrentRow.Index + 1;if (row > this.dataGridView1.RowCount - 1)row = 0;this.dataGridView1.CurrentCell = this.dataGridView1[0, row];}/// <summary>/// 向上遍历/// </summary>/// <param ></param>/// <param ></param>private void button5_Click(object sender, EventArgs e)...{int row = this.dataGridView1.CurrentRow.Index - 1;if (row < 0)row = this.dataGridView1.RowCount - 1;this.dataGridView1.CurrentCell = this.dataGridView1[0, row];}* 注意: this.dataGridView 的索引器的参数是: columnIndex, rowIndex 或是 columnName, rowIndex这与习惯不同。
文章标题:深度解析WPF DataGridView的用法与应用在WPF(Windows Presentation Foundation)开发中,DataGridView是一个非常重要的控件,它能够展示和编辑数据,极大地方便了开发人员的工作。
在本文中,我将深入探讨WPF DataGridView的用法与应用,帮助您更全面、深刻地理解这个主题。
一、WPF DataGridView简介WPF DataGridView是一个灵活、强大的数据展示和编辑控件,它继承自DataGrid类,能够展示结构化数据,并支持数据的增删改查操作。
相比WinForms中的DataGridView,WPF的DataGridView具有更强大的样式定制和数据绑定能力,能够轻松地实现复杂的数据展示和交互功能。
二、WPF DataGridView基本用法在使用WPF DataGridView时,首先需要定义数据源,然后将数据源绑定到DataGridView上。
通过设置列的样式、编辑模式和排序等属性,可以实现对数据的灵活展示和编辑。
另外,通过事件处理和命令绑定,还可以实现对数据的响应式操作,为用户提供更好的交互体验。
三、WPF DataGridView高级用法除了基本的数据展示和编辑功能,WPF DataGridView还支持更多的高级用法,如自定义单元格样式、分组和聚合、多级表头、冻结列和行等功能。
通过这些高级用法,可以实现更复杂的数据展示和交互需求,提升用户体验和系统性能。
四、个人观点和理解就我个人而言,WPF DataGridView是我在WPF开发中使用频率最高的控件之一。
它不仅能够满足基本的数据展示和编辑需求,还能够通过样式定制和事件响应实现更复杂的功能。
我认为深入掌握WPF DataGridView的用法和应用,对于提高开发效率和系统质量都是非常重要的。
总结回顾通过本文的深度解析,相信您对WPF DataGridView的用法和应用已经有了更全面、深刻的理解。
数据控件DataGridView添加、删除和修改数据库中的内容作者:天涯来源:中国自学编程网发布日期:1214063638介绍一个数据控件DataGridView,它是 3.5中新增加的的重要控件。
它是一种网格形式的控件,能以表格的形式显示数据,它的优势是能多行显示数据,在数据库的操作中会经常用到。
(1)打开VS2008,在D:\C#\ch14目录下建立名为DataGridViewTest的Windows应用程序,打开工程,为当前窗体添加控件,如表14-2所示。
表14-2 添加控件列表控件名NameTextDataGridViewdataGridView1ButtonbtnRef更新设置ButtonbtnDelete删除(2)接下来需要设置DadaAdapter和DataSet,方法同上一节一样。
选中DataGridView的DataSource属性。
(3)单击“下一步”按钮,选择“数据连接”图标。
(4)最后一步需要选择数据库对象,本例是要操作StudentInf数据库中的表,所以选择“表”复选框。
(5)设置完毕后,整个程序界面就设置完了。
程序界面设计完毕后,接下来要做的工作就是通过修改dataGridView1中的数据来更新数据库中的内容。
它实现的原理很简单,通过studentInfDataSet把dataGridView1绑定到Class1表,studentInfDataSet处于中间位置,所以在dataGridView1中修改的数据必须要传递到studentInfDataSet后才能改变数据库中的内容。
(1)双击“更新设置”按钮,添加如下代码。
this.sqlDataAdapter1.Update(this.studentInfDataSet);该代码的功能是调用sqlDataAdapter1的Update()方法实现对studentInfDataSet的更新。
(2)按F5键,程序运行以后,对dataGridView1添加一行新的数据,然后单击“更新设置”按钮,完成后关闭程序再打开。
DataGridView做了新的数据显示控件加入到了.Net 05中,其强大的编辑能力让其成为了数据显示中必不可少的控件。
目前对于DataGridView中的更新讲的挺多的,但直接的插入数据好像讲的不是太多,下面就以我的例子说明一下。
1、首先新建一个项目。
2、建立一个数据库连接类LinkDataBase。
因为数据库操作有很多都是重复性工作,所以我们写一个类来简化对数据库的操作。
using System;using System.Collections.Generic;using System.Text;using System.Data;using System.Data.SqlClient;using System.Data.Sql;namespace Test...{class LinkDataBase...{//设置连接字符串private string strSQL;//与数据库连接private string connectionString = "Data Source=Localhost;Initial Catalog=Test;Integr ated Security=True";private SqlConnection myConnection;private SqlCommandBuilder sqlCmdBld;private DataSet ds = new DataSet();private SqlDataAdapter da;public LinkDataBase()...{}//根据输入的SQL语句检索数据库数据public DataSet SelectDataBase(string tempStrSQL, string tempTableName)...{this.strSQL = tempStrSQL;this.myConnection = new SqlConnection(connectionString);this.da = new SqlDataAdapter(this.strSQL, this.myConnection);this.ds.Clear();this.da.Fill(ds, tempStrSQL);//返回填充了数据的DataSet,其中数据表以tempTableName给出的字符串命名return ds;}//数据库数据更新(传DataSet和DataTable的对象)public DataSet UpdateDataBase(DataSet changedDataSet, string tableName)...{this.myConnection = new SqlConnection(connectionString);this.da = new SqlDataAdapter(this.strSQL, this.myConnection);this.sqlCmdBld = new SqlCommandBuilder(da);this.da.Update(changedDataSet, tableName);//返回更新过的数据库表return changedDataSet;}//检索数据库数据(传字符串,直接操作数据库)public DataTable SelectDataBase(string tempStrSQL)...{this.myConnection = new SqlConnection(connectionString);DataSet tempDataSet = new DataSet();this.da = new SqlDataAdapter(tempStrSQL, this.myConnection);this.da.Fill(tempDataSet);return tempDataSet.Tables[0];}//数据库数据更新(传字符串,直接操作数据库)public int UpdateDataBase(string tempStrSQL)...{this.myConnection = new SqlConnection(connectionString);myConnection.Open();SqlCommand tempSqlcommand = new SqlCommand(tempStrSQL, this.myConnection);int intNumber = tempSqlcommand.ExecuteNonQuery();myConnection.Close();return intNumber;}}}上面这段代码很容易理解。
DataGridView中实现复制、剪切、粘贴功能 ⽤户在使⽤WinForms应⽤程序时,为了快速的输⼊数据,通常会在DataGridView与Excle之间进⾏复制、剪切、粘贴操作。
将Excel中的数据复制到DataGridView时,直接使⽤Excel中的复制、剪切功能,需要在DataGridView中实现粘贴功能;将DataGridView中数据复制到DataGridView或Excel中时,需要在DataGridView中实现复制、剪切、粘贴功能。
DataGridView.ClipboardCopyMode 属性被设定为 DataGridViewClipboardCopyMode.Disable 以外的情况时,「Ctrl + C」按下的时候,被选择的单元格的内容会拷贝到系统剪切板内(DataGridView已提供了复制⽅法),可以直接粘贴到Excel 中,但在DataGridView中没有提供粘贴⽅法,需要⾃⼰定义。
以下分别演⽰在DataGridView中实现复制、剪切、粘贴功能:/// <summary>/// 实现复制功能,将DataGridView中选定单元格的值复制到剪贴板中/// </summary>/// <param name="dgv_Test"></param>private void CopyData(DataGridView dgv_Test){Clipboard.SetDataObject(dgv_Test.GetClipboardContent());}/// <summary>/// 实现剪切功能,将DataGridView中选定单元格的值复制到剪贴板中,并将选中的单元格的值清空/// </summary>/// <param name="dgv_Test"></param>private void CutData(DataGridView dgv_Test){//将选定单元格的值复制到剪贴板中Clipboard.SetDataObject(dgv_Test.GetClipboardContent());string clipboardText = Clipboard.GetText(); //获取剪贴板的内容if (string.IsNullOrEmpty(clipboardText)){return;}int colnum = 0;int rownum = 0;for (int i = 0; i < clipboardText.Length; i++){if (clipboardText.Substring(i,1) == "\t"){colnum++;}if (clipboardText.Substring(i,1) == "\n"){rownum++;}}//粘贴板上的数据来源于EXCEL时,每⾏末尾都有\n,来源于DataGridView是,最后⼀⾏末尾没有\nif (clipboardText.Substring(clipboardText.Length-1,1) == "\n"){rownum--;}colnum = colnum / (rownum + 1);//获取当前选中的最后⼀个单元格的列、⾏序号int colIndex = dgv_Test.SelectedCells[0].ColumnIndex;int rowIndex = dgv_Test.SelectedCells[0].RowIndex;for (int i = 0; i <= rownum; i++){for (int j = 0; j <= colnum; j++){dgv_Test.Rows[rowIndex - i].Cells[colIndex - j].Value = "";}}}/// <summary>/// 实现粘贴功能,将剪贴板中的内容粘贴到DataGridView中/// </summary>/// <param name="dgv_Test"></param>private void PasteData(DataGridView dgv_Test){try{string clipboardText = Clipboard.GetText(); //获取剪贴板中的内容if (string.IsNullOrEmpty(clipboardText)){return;}int colnum = 0;int rownum = 0;for (int i = 0; i < clipboardText.Length; i++){if (clipboardText.Substring(i,1) == "\t"){colnum++;}if (clipboardText.Substring(i,1) == "\n"){rownum++;}}//粘贴板上的数据来源于EXCEL时,每⾏末尾都有\n,来源于DataGridView是,最后⼀⾏末尾没有\n if (clipboardText.Substring(clipboardText.Length-1,1) == "\n"){rownum--;}colnum = colnum / (rownum + 1);object[,] data; //定义object类型的⼆维数组data = new object[rownum + 1, colnum + 1]; //根据剪贴板的⾏列数实例化数组string rowStr = "";//对数组各元素赋值for (int i = 0; i <= rownum; i++){for (int j = 0; j <= colnum; j++){//⼀⾏中的其它列if (j != colnum){rowStr = clipboardText.Substring(0, clipboardText.IndexOf("\t"));clipboardText = clipboardText.Substring(clipboardText.IndexOf("\t") + 1);}//⼀⾏中的最后⼀列if (j == colnum && clipboardText.IndexOf("\r") != -1){rowStr = clipboardText.Substring(0, clipboardText.IndexOf("\r"));}//最后⼀⾏的最后⼀列if (j == colnum && clipboardText.IndexOf("\r") == -1){rowStr = clipboardText.Substring(0);}data[i, j] = rowStr;}//截取下⼀⾏及以后的数据clipboardText = clipboardText.Substring(clipboardText.IndexOf("\n") + 1);}//获取当前选中单元格的列序号int colIndex = dgv_Test.CurrentRow.Cells.IndexOf(dgv_Test.CurrentCell);//获取当前选中单元格的⾏序号int rowIndex = dgv_Test.CurrentRow.Index;for (int i = 0; i <=rownum; i++){for (int j = 0; j <= colnum; j++){dgv_Test.Rows[i + rowIndex].Cells[j + colIndex].Value = data[i, j];}}}catch{MessageBox.Show("粘贴区域⼤⼩不⼀致");return;}} //测试代码private void tsmi_Copy_Click(object sender, EventArgs e){CopyData(dgv_PersonInfo);}private void tsmi_Cut_Click(object sender, EventArgs e){CutData(dgv_PersonInfo);}private void tsmi_Paste_Click(object sender, EventArgs e){PasteData(dgv_PersonInfo);}⼀本深⼊了解CLR和.NET Framework的C#经典书籍,值得有⼀定基础的⼈员所拥有,在此推荐给⼤家。
C#利用DataGridView实现数据的快速输入
网络编程2008-03-11 16:04:03 阅读313 评论0 字号:大中小订阅
在做管理软件时,常常需要表格输入功能。
表格输入极大地加快了数据输入,提高了工作效率,当然也提高了软件的竞争性。
笔者最近用C#在做一套CRM时,成功地使用C# 2005里面的表格控件DataGridView 实现了表格输入功能,现在就把具体实现与各位分享:
1. 初始化工作
(1) 在Vs 2005 里面新建一个C# WinForm 应用程序:DataGridViewTest
(2) 在窗体Form1上拖一个DataGridView控件:DataGridView1
(3) 在DataGridView1里添加两个列:
Column1:
类型:DataGridViewComboBoxColumn
HeaderText:时间
DataPropertyName:DutyTime
Column2:
类型:DataGridViewTextBoxColumn
HeaderText:时间
DataPropertyName:DutyTime
(4)在Form1类中添加两个私有属性:
private DataTable m_Table;//输入组合框控件的下拉数据
private DataTable m_DataTable;//与表格绑定的DataTable,即用户输入的最终数据
(5)在Form1类里面定义一个结构体
public struct MyRowData
{
public MyRowData(int no, string enDay, string cnDay)
{
No = no;
EnDay = enDay;
CnDay = cnDay;
}
public int No;
public string EnDay;
public string CnDay;
}
(6) 在Form1的load事件Form1_Load(object sender, EventArgs e) 加上以下初始化代码:
this.dataGridView1.AllowUserToAddRows = true;
this.dataGridView1.AllowUserToDeleteRows = true;
this.dataGridView1.AutoGenerateColumns = false;
DataColumn dc1, dc2, dc3
dc1 = new DataColumn("No", typeof(int));
dc2 = new DataColumn("EnDay", typeof(string));
dc3 = new DataColumn("CnDay", typeof(string));
m_Table.Columns.Clear();
m_Table.Columns.AddRange(new DataColumn[] { dc1, dc2, dc3 });
MyRowData[] Datas = new MyRowData[7]{
new MyRowData( 1,"Monday","星期一"),
new MyRowData( 2,"Tuesday","星期二"),
new MyRowData( 3,"Wednesday","星期三" ),
new MyRowData( 4,"Thursday","星期四" ),
new MyRowData( 5, "Friday","星期五"),
new MyRowData( 6,"Saturday","星期六"),
new MyRowData( 7,"Sunday","星期日")
};
this.m_Table.Rows.Clear();
foreach (MyRowData iData in Datas)
{
this.m_Table.Rows.Add(iData.No, iData.EnDay, Day);
}
DataColumn dataDc1, dataDc2;
dataDc1 = new DataColumn("DutyTime", typeof(int));
dataDc2 = new DataColumn("DutyPerson", typeof(string));
m_DataTable.Columns.Clear();
m_DataTable.Columns.AddRange(new DataColumn[] { dataDc1, dataDc2});
m_DataTable.Rows.Clear();
Column1.DataSource = this.m_Table;
Column1.DisplayMember = "CnDay";
Column1.ValueMember = "No";
this.dataGridView1.DataSource = m_DataTable;
2.消息处理(核心)
protected override bool ProcessCmdKey(ref System.Windows.Forms.Message msg, System.Windows.Forms.Keys keyData) //激活回车键
{
int WM_KEYDOWN = 256;
int WM_SYSKEYDOWN = 260;
bool IsDataGridView1 = false;
if (this.ActiveControl == this.dataGridView1)
{
IsDataGridView1 = true;
}
else
{
if (this.ActiveControl is IDataGridViewEditingControl)
{
if( (this.ActiveControl as IDataGridViewEditingControl).EditingControlDataGridView == this.dataGridView1)
{
IsDataGridView1 = true;
}
}
}
if (IsDataGridView1) //是否处于DataGridView1 上
{
if (msg.Msg == WM_KEYDOWN ¦ msg.Msg == WM_SYSKEYDOWN)
{
switch (keyData)
{
case Keys.Delete:
if (this.dataGridView1.CurrentCell != null
&& this.dataGridView1.CurrentCell.RowIndex < this.m_DataTable.Rows.Count)
{
this.m_DataTable.Rows[this.dataGridView1.CurrentCell.RowIndex].Delete();
this.m_DataTable.AcceptChanges();
}
break;
case Keys.Enter:
if (this.dataGridView1.CurrentCell is DataGridViewComboBoxCell
¦ ¦ this.dataGridView1.CurrentCell is DataGridViewTextBoxCell
)//处于输入格
{
// SendKeys.Send("{F4}");
if (this.ActiveControl is System.Windows.Forms.DataGridViewComboBoxEditingControl
¦ ¦ this.ActiveControl is System.Windows.Forms.DataGridViewTextBoxEditingControl
)
{
SendKeys.Send("{Tab}");
}
else//非输入状态,将转入输入状态
{
if (this.dataGridView1.CurrentCell is DataGridViewTextBoxCell)//快捷按键F2,进入编辑状态{
SendKeys.Send("{F2}");
}
else //combobox,快捷按键F4,弹出下拉框
{
SendKeys.Send("{F4}");
}
}
}
else//处于非输入格
{
SendKeys.Send("{Tab}");
}
return true;
break;
}
}
}
return false;
}。