网页设计关于表单输入框的技巧代码
- 格式:doc
- 大小:12.50 KB
- 文档页数:1
网页制作模板代码首先,我们来看一下HTML模板代码。
HTML是网页的基础语言,通过HTML模板代码,我们可以定义网页的结构和内容。
一个简单的HTML模板代码如下:```html。
<!DOCTYPE html>。
<html>。
<head>。
<title>网页标题</title>。
</head>。
<body>。
<h1>这是一个标题</h1>。
<p>这是一个段落。
</p>。
</body>。
</html>。
```。
在这个模板代码中,我们使用了`<!DOCTYPE html>`来声明文档类型,`<html>`标签定义了整个HTML文档的根元素,`<head>`标签用来包含网页的元信息,比如标题、样式表和脚本等,`<body>`标签则包含了可见的页面内容,比如标题、段落等。
这个模板代码可以作为我们编写网页的基础,根据需要进行修改和扩展。
接下来,我们再来看一下CSS模板代码。
CSS用来控制网页的样式和布局,通过CSS模板代码,我们可以定义网页的外观和风格。
一个简单的CSS模板代码如下:```css。
body {。
background-color: lightblue;}。
h1 {。
color: navy;margin-left: 20px;}。
p {。
font-family: verdana;font-size: 20px;}。
```。
在这个模板代码中,我们使用了`body`选择器来定义整个页面的背景颜色,`h1`选择器定义了标题的颜色和左边距,`p`选择器定义了段落的字体和字号。
这个模板代码可以作为我们设置网页样式的基础,根据需要进行修改和扩展。
最后,让我们来看一下JavaScript模板代码。
JavaScript用来实现网页的交互和动态效果,通过JavaScript模板代码,我们可以定义网页的行为和功能。
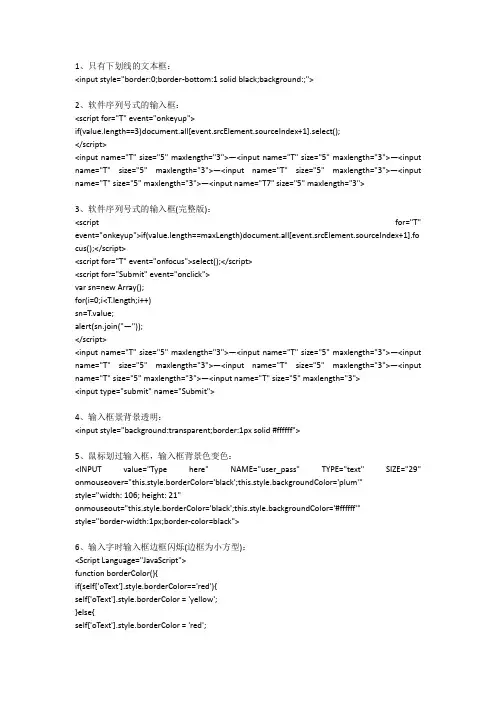
1、只有下划线的文本框:<input style="border:0;border-bottom:1 solid black;background:;">2、软件序列号式的输入框:<script for="T" event="onkeyup">if(value.length==3)document.all[event.srcElement.sourceIndex+1].select();</script><input name="T" size="5" maxlength="3">—<input name="T" size="5" maxlength="3">—<input name="T" size="5" maxlength="3">—<input name="T" size="5" maxlength="3">—<input name="T" size="5" maxlength="3">—<input name="T7" size="5" maxlength="3">3、软件序列号式的输入框(完整版):<script for="T" event="onkeyup">if(value.length==maxLength)document.all[event.srcElement.sourceIndex+1].fo cus();</script><script for="T" event="onfocus">select();</script><script for="Submit" event="onclick">var sn=new Array();for(i=0;i<T.length;i++)sn=T.value;alert(sn.join("—"));</script><input name="T" size="5" maxlength="3">—<input name="T" size="5" maxlength="3">—<input name="T" size="5" maxlength="3">—<input name="T" size="5" maxlength="3">—<input name="T" size="5" maxlength="3">—<input name="T" size="5" maxlength="3"><input type="submit" name="Submit">4、输入框景背景透明:<input style="background:transparent;border:1px solid #ffffff">5、鼠标划过输入框,输入框背景色变色:<INPUT value="Type here" NAME="user_pass" TYPE="text" SIZE="29" onmouseover="this.style.borderColor='black';this.style.backgroundColor='plum'"style="width: 106; height: 21"onmouseout="this.style.borderColor='black';this.style.backgroundColor='#ffffff'"style="border-width:1px;border-color=black">6、输入字时输入框边框闪烁(边框为小方型):<Script Language="JavaScript">function borderColor(){if(self['oText'].style.borderColor=='red'){self['oText'].style.borderColor = 'yellow';}else{self['oText'].style.borderColor = 'red';}oTime = setTimeout('borderColor()',400);}</Script><input type="text" id="oText" style="border:5px dotted red;color:red" onfocus="borderColor(this);" onblur="clearTimeout(oTime);">7、输入字时输入框边框闪烁(边框为虚线):<style>#oText{border:1px dotted #ff0000;ryo:expression_r(onfocus=function light (){with(document.all.oText){style.borderColor=(style.borderColor=="#ffee00"?"#ff0000":"#ffee00 ");timer=setTimeout(light,500);}},onblur=function(){this.style.borderColor="#ff0000";clearTimeo ut(timer)})};</style><input type="text" id="oText">8、自动横向廷伸的输入框:<input type="text" style="huerreson:expression_r(this.width=this.scrollWidth)" value="abcdefghijk">9、自动向下廷伸的文本框:<textarea name="content" rows="6" cols="80" onpropertychange="if(this.scrollHeight>80) this.style.posHeight=this.scrollHeight+5">输入几个回车试试</textarea>一、按钮样式.buttoncss {font-family: "tahoma", "宋体";font-size:9pt; color: #003399;border: 1px #003399 solid;color:#006699;border-bottom: #93bee2 1px solid;border-left: #93bee2 1px solid;border-right: #93bee2 1px solid;border-top: #93bee2 1px solid;background-image:url(../images/bluebuttonbg.gif);background-color: #e8f4ff;cursor: hand;font-style: normal ;width:60px;height:22px;}二、蓝色按钮.bluebuttoncss {font-family: "tahoma", "宋体";font-size: 9pt; color: #003366;border: 0px #93bee2 solid;border-bottom: #93bee2 1px solid;border-left: #93bee2 1px solid;border-right: #93bee2 1px solid;border-top: #93bee2 1px solid;*/background-image:url(../images/blue_button_bg.gif);background-color: #ffffff;cursor: hand;font-style: normal ;}三、红色按钮.redbuttoncss {font-family: "tahoma", "宋体";font-size: 9pt; color: #0066cc;border: 1px #93bee2 solid;border-bottom: #93bee2 1px solid;border-left: #93bee2 1px solid;border-right: #93bee2 1px solid;border-top: #93bee2 1px solid;background-image:url(../images/redbuttonbg.gif);background-color: #ffffff;cursor: hand;font-style: normal ;}四、选择按钮.selectbuttoncss{font-family: "tahoma", "宋体";font-size: 9pt; color: #0066cc;border: 1px #93bee2 solid;border-bottom: #93bee2 1px solid;border-left: #93bee2 1px solid;border-right: #93bee2 1px solid;border-top: #93bee2 1px solid;background-image:url(../images/blue_button_bg.gif);background-color: #ffffff;cursor: hand;font-style: normal ;}五、绿色按钮.greenbuttoncss {font-family: "tahoma", "宋体";font-size: 9pt; color: #0066cc;border: 1px #93bee2 solid;border-bottom: #93bee2 1px solid;border-left: #93bee2 1px solid;border-right: #93bee2 1px solid;border-top: #93bee2 1px solid;background-image:url(../images/greenbuttonbg.gif);background-color: #ffffff;cursor: hand;font-style: normal ;}六、图像按钮.imagebutton{cursor: hand;}七、页面正文body {scrollbar-face-color: #ededf3;scrollbar-highlight-color: #ffffff;scrollbar-shadow-color: #93949f;scrollbar-3dlight-color: #ededf3;scrollbar-arrow-color: #082468;scrollbar-track-color: #f7f7f9;scrollbar-darkshadow-color: #ededf3;font-size: 9pt;color: #003366;overflow:auto;}td { font-size: 12px }th {font-size: 12px;}八、下拉选择框select{border-right: #000000 1px solid;border-top: #ffffff 1px solid;font-size: 12px;border-left: #ffffff 1px solid;color:#003366;border-bottom: #000000 1px solid;background-color: #f4f4f4;}九、线条文本编辑框.editbox{background: #ffffff;border: 1px solid #b7b7b7;color: #003366;cursor: text;font-family: "arial";font-size: 9pt;height: 18px;padding: 1px;}十、多行文本框.multieditbox{background: #f8f8f8;border-bottom: #b7b7b7 1px solid;border-left: #b7b7b7 1px solid;border-right: #b7b7b7 1px solid;border-top: #b7b7b7 1px solid;color: #000000;cursor: text;font-family: "arial";font-size: 9pt;padding: 1px;}十一、阴影风格的表单.shadow {position:absolute;z-index:1000;top:0px;left:0px;background:gray;background-color:#ffcc00;filter : progidximagetransform.microsoft.dropshadow(color=#ff404040,offx=2,offy=2,positives=true);}十二、只显一条横线的输入框.logintxt{border-right: #ffffff 0px solid;border-top: #ffffff 0px solid;font-size: 9pt;border-left: #ffffff 0px solid;border-bottom: #c0c0c0 1px solid;background-color: #ffffff}十三、没有边框的输入框.noneinput{text-align:center;width:99%;height:99%;border-top-style: none;border-right-style: none;border-left-style: none;background-color: #f6f6f6;border-bottom-style: none;。
前端开发中的表单验证与输入限制方式在前端开发中,表单验证和输入限制是非常重要的一环。
通过对用户输入进行验证和限制,可以有效地保证数据的准确性和安全性。
本文将介绍几种常用的表单验证和输入限制方式,旨在帮助前端开发者更好地进行数据处理。
一、输入限制1. 字符长度限制:在输入框中设置最大字符长度,以确保用户输入的字符不会超过所需的长度。
常见的方式是使用HTML5的maxlength属性或JavaScript的字符串长度判断。
2. 数字输入限制:通过设置输入框的type属性为number或tel,可以限制用户只能输入数字或者手机号码。
同时,可以使用正则表达式对输入进行进一步验证。
3. 数值范围限制:对于需要输入具体数值的表单,可以通过设置最小值和最大值来限制用户输入的数值范围。
HTML5的min和max属性可以很方便地实现此功能。
4. 输入格式限制:对于特定格式的输入,如邮箱、电话号码、身份证号等,可以使用正则表达式来验证用户输入是否符合规定的格式。
通过JavaScript的正则表达式方法,可以对输入进行匹配,并及时给出提示或错误信息。
二、表单验证1. 必填项验证:对于必须填写的表单项,一定要进行验证,以确保用户不能提交空的或者无效的数据。
可以通过设置required属性来实现前端的必填项验证。
2. 数据类型验证:对于需要输入特定数据类型的表单项,如邮箱、电话号码等,可以使用正则表达式或者相关的JavaScript库进行数据类型验证。
这样可以避免用户误输入或非法输入。
3. 密码验证:对于需要输入密码的表单,通常需要进行密码强度验证。
可以通过使用正则表达式或者相关的密码验证库,根据设定的规则判断密码的强度,并在用户输入时给出相应的提示。
4. 重复输入验证:对于需要重复输入的表单项,如密码确认、手机号码确认等,应确保用户两次输入的值一致。
可以通过使用JavaScript来比较两次输入的值,如果不一致则给出提示。
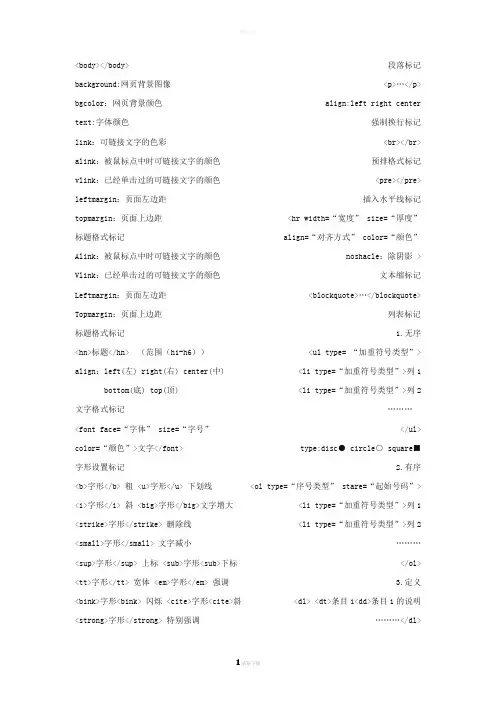
<body></body> 段落标记background:网页背景图像<p>…</p> bgcolor:网页背景颜色align:left right center text:字体颜色强制换行标记link:可链接文字的色彩<br></br> alink:被鼠标点中时可链接文字的颜色预排格式标记vlink:已经单击过的可链接文字的颜色<pre></pre> leftmargin:页面左边距插入水平线标记topmargin:页面上边距<hr width=“宽度” size=“厚度”标题格式标记align=“对齐方式” color=“颜色”Alink:被鼠标点中时可链接文字的颜色noshacle:除阴影 > Vlink:已经单击过的可链接文字的颜色文本缩标记Leftmargin:页面左边距<blockquote>…</blockquote> Topmargin:页面上边距列表标记标题格式标记 1.无序<hn>标题</hn> (范围(h1-h6))<ul type= “加重符号类型”> align:left(左) right(右) center(中) <li type=“加重符号类型”>列1 bottom(底) top(顶) <li type=“加重符号类型”>列2 文字格式标记………<font face=“字体” size=“字号”</ul> color=“颜色”>文字</font> type:disc● circle○ square■字形设置标记 2.有序<b>字形</b> 粗 <u>字形</u> 下划线<ol type=“序号类型” stare=“起始号码”> <i>字形</i> 斜 <big>字形</big>文字增大<li type=“加重符号类型”>列1 <strike>字形</strike> 删除线<li type=“加重符号类型”>列2 <small>字形</small> 文字减小………<sup>字形</sup> 上标 <sub>字形<sub>下标</ol> <tt>字形</tt> 宽体 <em>字形</em> 强调 3.定义<bink>字形<bink> 闪烁 <cite>字形<cite>斜<dl> <dt>条目1<dd>条目1的说明<strong>字形</strong> 特别强调………</dl>文字滚动标记<img>的图像标记<marquee>文字滚动</marquee> <img> behavior(滚动方式):alternate(交替) sic:图片的路径 scroll(往复) slide(一次) longdesc:详细说明bgcolor:背景颜色alt:替代说明direction(滚动方向):up(上) down(下) width和height:图片的宽和高 left(左) right(右) border:图片外围边框的宽度height和width:滚动的区域hspace和vspace:水平和垂直方向空白loop:循环的次数值是-1 align:left right center scrollamount:滚动的速度加快<img>的视频标记scrolldelay:滚动的速度延迟src:静态图像的路径hspace和vspace:滚动的水平垂直空间dynsrc:视频的路径表格标记loop:infinite或-1(反复播放) <table> start(设置何时播放视频文件):fileopen和mouseover <caption>表格标题</caption>→align controls:加播放控制条<tr>→align和valign loopdelay:两次播放的间隔<th>表头1</th> <th>表头2</th>…背景音乐标记</tr> <bgsound> <tr> src:音乐地址 loop:次数(-1) <td>(width和nowrap)表项1</td>…多媒体标记<embed></embed> </tr> src:多媒体的地址………height和width:播放的区域<table> hidden:播放面板的显示和隐藏值true和false summary:简要说明 bgcolor:表格的背景颜色autostart:是否自动播放(true和false) background:表格的背景图像 border:表格线的粗细loop:是否循环(true和false) width和height表格的宽和高 align:左、右、中超链接标记valign:顶、(middle)中、底 bordercolor:表格线的颜色<a>…</a> nowrap:禁止表格单元格内的内容自动换行href:链接到的目标的地址rowspan=n n=1 为一行单元格target:链接的目标窗口colspan=n n=1 为一列的合并self(原) blank(新) parent(上) top(整)1.表单标记<form><form name= “form_name” method=“method” action=“url” enctype=“value”target=“target_win”>……</form>name:设置表单的名称 method=处理程序从表单中获得信息的方式其取值为get和postaction:定义表单处理程序(asp、cgi等程序)的位置(相对位置或绝对位置)enctype:设置表单资料的编码方式 target:设置返回信息的显示窗口2.输入标记<input><input name=“field_name” type=“type_name”>name:设置输入区域的名称type:设置输入区域的类型(有10种)①文本域text(maxlength:文本域的最大输入字符 size:文本域的宽度 value:初始默认值)②密码域password(maxlength:密码域的最大输入字符 size:密码域的宽度)③文件域file(input type=“file”)④复选框checkbox((checked)表示此项被默认选中 value:选中项目后传送到服务器端的值)⑤单选框radio(同4)⑥普通按钮button(value值代表显示在按钮上的文字)⑦“提交”按钮submit(value=“button_text”)⑧“重设”按钮reset(value=“button_text”)⑨图像域image(src:设置图片的路径)⑩隐藏域hidden(input type=“hidden”)3.菜单和列表的标记<select>和<option><select name=“name” size=“value” multiple><option value=“value” selected>选项一<option value=“value”>选项二………</select>size:显示的选项数目(multiple:不用赋值就可以直接加入到标记中,就成多选了)<optiop>→value:用来给<optiop>指定的选项赋值这个值是要传送到服务器上的(selected):指定初始默认的选项4.文本框标记<textarea><textarea></textarea>name:名称 rows:设置文本框的行数 cols:文本框的列数1.框架集标记<frameset><framese cols=“value,value,…” rows=“value,value,…” framespacing=“value”bordercolor=“color_value”>……</frameset>cols:左右分割窗口(用“,”分割) rows:上下分割(用“,”分割)framespacing:框架集的边框宽度bordercolor:框架集的边框颜色2.框架标记<frame src=“file_name” name=“frame_name” scrolling=“value” noresize>…</frame>src:框架显示的文件路径 name:框架的名称(用来供超文本链接标记)scrolling:滚动条是否显示值(yes , no , auto)3.不支持框架标记<noframes>………</noframes>css1.css称为“层叠样式表”或“级联样式表”2.css的基本语法:html标记{标记属性:属性值;标记属性:属性值;…}列如:b,i,h1{color:red}3.css的实现方法(有三种)①在head内实现(叫内部样式表他写在html的<head></head>里面的)内部样式表要用style标记(<style type=“text/css”> h1{color:red}</style>)②在body内实现(叫内嵌样式他在body中实现,主要是在标记中引用,只对所在的标记中有效)③在文件外实现(叫外部样式表)<link href=“style.css” rel=“stylesheet”>4.三种css实现方法的比较样式的优先级依次是内嵌样式,内部样式表,外部样式表使用外部样式时相对于前两种有以下优点:②样式代码可以复用,一个外部css文件,可以被多个网页共用②便于修改,只需修改css文件,不用修改每个网页③提高了网页的显示速度欢迎您的下载,资料仅供参考!致力为企业和个人提供合同协议,策划案计划书,学习资料等等打造全网一站式需求。

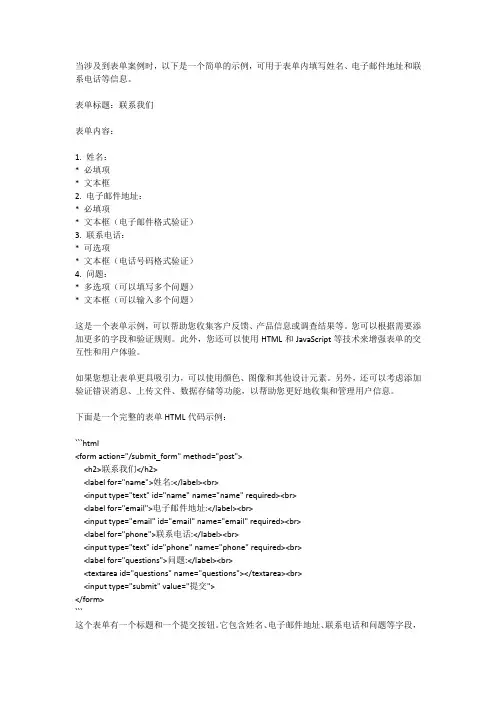
当涉及到表单案例时,以下是一个简单的示例,可用于表单内填写姓名、电子邮件地址和联系电话等信息。
表单标题:联系我们表单内容:1. 姓名:* 必填项* 文本框2. 电子邮件地址:* 必填项* 文本框(电子邮件格式验证)3. 联系电话:* 可选项* 文本框(电话号码格式验证)4. 问题:* 多选项(可以填写多个问题)* 文本框(可以输入多个问题)这是一个表单示例,可以帮助您收集客户反馈、产品信息或调查结果等。
您可以根据需要添加更多的字段和验证规则。
此外,您还可以使用HTML和JavaScript等技术来增强表单的交互性和用户体验。
如果您想让表单更具吸引力,可以使用颜色、图像和其他设计元素。
另外,还可以考虑添加验证错误消息、上传文件、数据存储等功能,以帮助您更好地收集和管理用户信息。
下面是一个完整的表单HTML代码示例:```html<form action="/submit_form" method="post"><h2>联系我们</h2><label for="name">姓名:</label><br><input type="text" id="name" name="name" required><br><label for="email">电子邮件地址:</label><br><input type="email" id="email" name="email" required><br><label for="phone">联系电话:</label><br><input type="text" id="phone" name="phone" required><br><label for="questions">问题:</label><br><textarea id="questions" name="questions"></textarea><br><input type="submit" value="提交"></form>```这个表单有一个标题和一个提交按钮。
网页设计代码大全Background refers to the background image of a webpage。
while bgcolor refers to the background color。
Text refers to the color of the font。
while link。
alink。
XXX clickable text。
XXX has been clicked。
XXX。
XXX to the left and top margins of the webpage.The format for titles is XXX。
where n ranges from h1 toh6.The align attribute can be set to left。
right。
center。
bottom。
or top。
To format text。
use the text tag。
To modify the font。
use tags such as。
for bold。
for underline。
for italic。
for larger text。
and。
XXXTo create paragraphs。
use the。
tag and set the align attribute to left。
right。
or center。
To force a line break。
use。
Preformatted text can be created using the。
tag。
Horizontal lines can be inserted using the。
tag。
with attributes such as width。
size。
align。
and color。
To create a XXX。
use the。
tag。
For lists。
unordered lists can be created using the。
html输入输出的语句
HTML不是一种编程语言,它是一种标记语言,用于创建Web页面。
HTML中有一些标签可以用于输入和输出不同类型的信息。
以下是一些HTML标签的例子:
1.输入文本框: <input type="text" />
2.输入密码框: <input type="password" />
3.输入单选框: <input type="radio" />
4.输入复选框: <input type="checkbox" />
5.输入下拉菜单: <select> <option>选项1</option> <option>选项2</option> </select>
6.输出文本: <p>这是一个段落。
</p>
7.输出图像: <img src="image.jpg" />
8.输出链接: <a href="*****://***.*****.***/">链接文本</a>
以上标签的属性可以根据需要进行添加和修改,以满足不同的表单和网页需求。
此外,HTML还允许嵌套这些标签,可用于创建更复杂的网页元素。
网页设计常用HTML代码在今天的互联网时代,网页设计非常重要,因为它是我们如何展示自己、品牌或产品的重要途径之一。
HTML (超文本标记语言) 是构建网站的基本语言,它通常用于创建文本、图像、音频和视频等元素,以及定义网页的框架和格式。
在本文中,我们将讨论一些网页设计中常用的HTML代码。
1. 标题标签标题标签用于定义网页的标题,在HTML 中有六个级别的标题(h1-h6)。
通常,使用h1 标签来表示最重要的标题,其余的标题级别按其重要性递减。
将标题标签用于网页设计不仅可以提高页面的可读性和搜索引擎优化(SEO),而且可以快速引起读者的注意。
2. 段落标签段落标签(p)用于定义文本的段落,它是网页设计中的常用标签之一。
段落标签使文本易于阅读,并使其更具可读性。
在使用段落标签时,建议将文章分成短段落,以便读者更容易地消化内容。
3. 图像标签图像标签是用于在网页上显示图片的标签,它使网页设计更加生动有趣。
通过使用图像标签,可以向访问页面的用户展示产品、品牌或其他信息。
图像标签通常使用src 属性来定义图片源文件的URL 地址。
4. 超链接标签超链接标签(a)用于定义文本或图像的链接。
这使得用户可以在不离开页面的情况下访问其他页面或站点。
超链接标签可以用href 属性来设置链接地址。
5. 列表标签HTML 中有两种类型的列表标签:有序列表(ol) 和无序列表(ul)。
有序列表使用数字或字母来标记每个列表项,而无序列表使用符号来表示每个列表项。
列表标签可以使网页设计更加可读,并帮助网页访问者快速浏览内容。
6. 表格标签表格标签用于在网页上显示数据、信息或图像。
表格标签最常用于创建网页中的布局和排版。
使用表格标签可以使网页更加组织化和易于阅读,也有助于提高用户体验。
7. 表单标签表单标签用于创建网站上的表单,如登录、注册、订阅和反馈等。
表单标签通常使用input 标签来向用户收集信息。
常用的input 标签包括文本框、密码框、单选框、复选框和上传文件等。
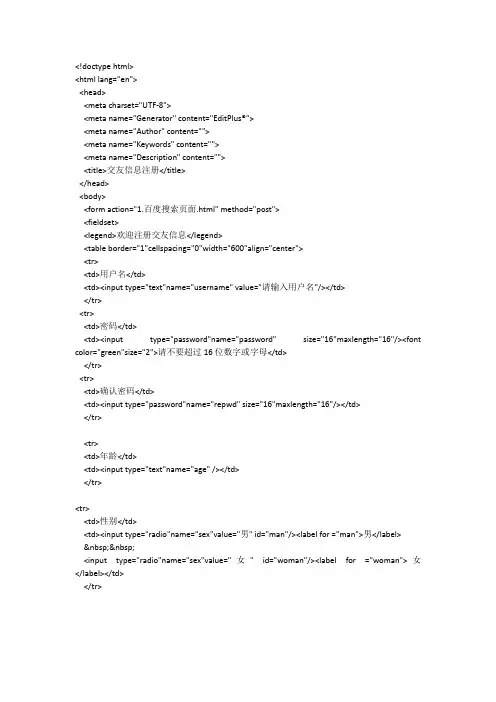
<!doctype html><html lang="en"><head><meta charset="UTF-8"><meta name="Generator" content="EditPlus®"><meta name="Author" content=""><meta name="Keywords" content=""><meta name="Description" content=""><title>交友信息注册</title></head><body><form action="1.百度搜索页面.html" method="post"><fieldset><legend>欢迎注册交友信息</legend><table border="1"cellspacing="0"width="600"align="center"><tr><td>用户名</td><td><input type="text"name="username" value="请输入用户名"/></td></tr><tr><td>密码</td><td><input type="password"name="password" size="16"maxlength="16"/><font color="green"size="2">请不要超过16位数字或字母</td></tr><tr><td>确认密码</td><td><input type="password"name="repwd" size="16"maxlength="16"/></td></tr><tr><td>年龄</td><td><input type="text"name="age" /></td></tr><tr><td>性别</td><td><input type="radio"name="sex"value="男" id="man"/><label for ="man">男</label> <input type="radio"name="sex"value="女" id="woman"/><label for ="woman">女</label></td></tr><tr><td>城市</td><td><select name="city"><option selected="selected"value="黄山">黄山</option><option value="合肥">合肥</option><option value="上海">上海</option><option value="北京">北京</option></select></td></tr><td>城市中的地区</td><td><select name="city"><optgroup label="黄山"><option selected="selected"value="屯溪">屯溪</option><option value="休宁">休宁</option><option value="歙县">歙县</option><optgroup /><optgroup label="合肥"><option value="蜀山区">蜀山区</option><option value="包河区">包河区</option><option value="瑶海区">瑶海区</option><optgroup /></select></td><tr><td>爱好</td><td><input type="checkbox"name="hobby"value="文学" />文学 <input type="checkbox"name="hobby"value="音乐" />音乐 <input type="checkbox"name="hobby"value="运动" />运动 </td></tr><tr><td>交友对象</td><td><select name="aim"size="4" /><option value="朋友">朋友</option><option value="恋人">恋人</option><option value="同行">同行</option><option value="其他">其他</option></td></tr><tr><td>照片上传</td><td><input type="file"name="photo"size="30" /></td></tr><tr><td>个人简介</td><td><textarea name="introduction" rows="10"cols="30" ></textarea></td></tr><tr><td colspan="2"><input type="submit"value="注册"/><input type="reset"value="重置"/><input type="button"value="确定"onclick="alert('核对信息完成后点击注册完成注册!');"/> <input type="image"src="pic/button.png"align="right"/></td></tr></table></fieldset></form></body></html>。
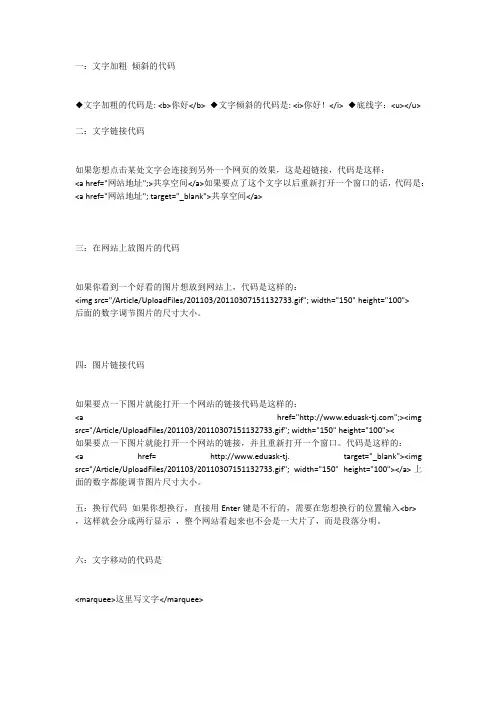
一:文字加粗倾斜的代码◆文字加粗的代码是:<b>你好</b>◆文字倾斜的代码是:<i>你好!</i>◆底线字:<u></u>二:文字链接代码如果您想点击某处文字会连接到另外一个网页的效果,这是超链接,代码是这样:<a href="网站地址";>共享空间</a>如果要点了这个文字以后重新打开一个窗口的话,代码是:<a href="网站地址";target="_blank">共享空间</a>三:在网站上放图片的代码如果你看到一个好看的图片想放到网站上,代码是这样的:<img src="/Article/UploadFiles/201103/20110307151132733.gif";width="150"height="100">后面的数字调节图片的尺寸大小。
四:图片链接代码如果要点一下图片就能打开一个网站的链接代码是这样的:<a href="";><img src="/Article/UploadFiles/201103/20110307151132733.gif";width="150"height="100"><如果要点一下图片就能打开一个网站的链接,并且重新打开一个窗口。
代码是这样的:<a href=ask-tj.target="_blank"><img src="/Article/UploadFiles/201103/20110307151132733.gif";width="150"height="100"></a>上面的数字都能调节图片尺寸大小。
html input 标签的用法HTML(HyperText Markup Language)是一种用于创建网页结构的标记语言,而 input 标签则是 HTML 中最常用的表单元素之一。
在这篇文章中,我们将探讨 HTML input 标签的用法,以及它的不同属性和类型。
1. 基本用法在 HTML 中,input 标签用于创建表单输入字段,它允许用户在网页中输入文本、选择选项或上传文件。
下面是 input 标签的基本用法:```html<input type="text" name="username" placeholder="请输入用户名"> ```在上面的例子中,type 属性被设置为 "text",这表示创建了一个文本输入框。
name 属性用于标识输入字段,并在提交表单时将其值与用户输入的内容一起发送到服务器。
placeholder 属性用于在输入框中显示灰色的提示文本,告诉用户应该输入什么内容。
2. 输入类型input 标签有多种不同的输入类型,每种类型都有其特定的用途和限制。
下面是一些常见的输入类型:- Text(文本):用于输入单行文本。
- Password(密码):用于输入密码,在用户输入时显示为隐藏字符。
- Number(数字):用于输入数字。
- Email(电子邮件):用于输入电子邮件地址,并在提交表单时进行验证。
- Checkbox(复选框):用于选择多个选项。
- Radio(单选按钮):用于选择一个选项。
- File(文件):用于上传文件。
以下是一些示例:```html<input type="password" name="password" placeholder="请输入密码"> <input type="number" name="age" min="18" max="99"><input type="email" name="email" required><input type="checkbox" name="interests" value="sports">体育<input type="radio" name="gender" value="male">男<input type="file" name="avatar">```3. 必填属性有时候,我们希望用户必须填写某些表单字段,以确保数据的完整性和准确性。
网页设计input的用法一、input标签的基本介绍和用法在网页设计中,为了与用户进行交互并获取用户输入的信息,可以使用input 标签。
input标签是HTML语言中最常用、最基础的表单元素之一。
它可以创建多种类型的输入字段,根据不同的type属性值的设定,可以实现输入文本、数字、日期等各种形式的数据。
1.1 文本输入框最常见且普遍被使用的是文本输入框。
使用<input>元素时,默认展示一个单行文本框,并允许用户通过键盘输入文本信息。
例如,在登录页面中,我们通常会看到需要填写用户名和密码的文本输入框。
1.2 数字输入框除了文本输入框外,<input>元素还支持number类型。
该类型只允许用户输入数字,并且可以通过min和max属性来限制允许输入的数值范围。
1.3 日期选择器另一个常见的应用是日期选择器。
HTML5提供了date类型来支持直接选择日期。
在支持该功能的浏览器中,弹出日历供用户选择所需日期。
二、input标签属性及相关应用技巧在使用<input>元素时,除了type属性以外还有其他一些非常有用和重要的属性可以使得表单更加灵活且适应各种不同场景的要求。
2.1 required属性required属性用于标识某个输入字段是否为必填项,如果用户没有填写相关内容就提交表单,则会触发浏览器的默认提示信息。
此属性可以让开发者避免一些重要信息的遗漏,并提高数据的完整性和准确性。
2.2 placeholder属性placeholder属性用于在输入框未获得焦点时展示一段默认的提示文本。
这样可以帮助用户更好地理解需要输入的内容,并提供良好的用户体验。
2.3 pattern属性pattern属性可以使用正则表达式来对用户的输入进行限制和验证。
通过设定合适的正则表达式,我们可以检查并筛选出符合特定格式要求(如邮箱、手机号等)的输入值。
2.4 autocomplete属性autocomplete属性设置后,浏览器会自动保存已经填写过的数据,并在下次填写相同字段时自动显示历史记录。
html中input用法HTML中input标签用于在用户界面中创建可输入的表单元素,比如文本框、复选框、单选框、按钮等。
以下是一些input标签的常见用法:1. 创建文本框:```<input type="text" name="username">```2. 创建密码框:```<input type="password" name="password">```3. 创建复选框:```<input type="checkbox" name="fruit" value="apple"> Apple<input type="checkbox" name="fruit" value="banana"> Banana```4. 创建单选框:```<input type="radio" name="gender" value="male"> Male<input type="radio" name="gender" value="female"> Female```5. 创建按钮:```<input type="button" value="Submit" onclick="submitForm()"> ```6. 创建文件上传按钮:```<input type="file" name="file">```这些只是input标签的一部分用法,实际上还有更多属性和类型可以使用。
DW输入框代码一、概述DW(Dreamweaver,梦想家)是一款广泛应用于网页设计和开发的集成开发环境(IDE)。
DW提供了丰富的开发工具和功能,其中之一就是输入框的代码。
输入框是网页中用户可以输入内容的交互元素之一。
通过输入框,用户可以在表单中输入文本、数字、密码等信息,并将其提交到服务器。
DW提供了多种方式来创建输入框,并为其添加样式和功能。
本文将介绍DW中创建输入框的代码,包括输入框的HTML代码和CSS样式。
二、HTML代码在DW中创建输入框的HTML代码非常简单。
使用<input>标签并设置其type属性为text即可创建一个文本输入框。
<input type="text">此代码将创建一个默认样式的文本输入框。
用户可以在输入框中输入文本,并将其提交到服务器。
如果想要创建其他类型的输入框,可以使用不同的type属性值。
下面是一些常见的输入框类型及其对应的type属性值:•文本输入框:type="text"•密码输入框:type="password"•数字输入框:type="number"•邮箱输入框:type="email"•日期输入框:type="date"除了type属性,还可以使用其他属性来修改输入框的行为和样式。
例如,使用placeholder属性可以设置输入框中的提示文本,使用required属性可以设置输入框为必填项。
下面是一个示例,演示了如何创建一个带有提示文本的必填邮箱输入框:<input type="email" placeholder="请输入邮箱" required>三、CSS样式DW提供了丰富的CSS样式功能,可以用来美化输入框,并为其添加功能。
通过设置输入框的CSS样式,可以修改输入框的尺寸、颜色、边框等外观属性。
html js 简单表单实例HTML和JavaScript是网页开发中常用的技术。
在这篇文章中,我们将学习如何使用HTML和JavaScript创建一个简单的表单实例。
表单是网页上用于收集用户输入信息的元素,比如用户名、密码、电子邮件等。
我们将使用HTML中的`<form>`元素以及JavaScript中的事件处理程序来实现这个任务。
首先,让我们创建一个HTML文件,并在其中添加一个表单元素。
在`<body>`标签中,添加以下代码:```html<h1>简单表单实例</h1><form id="myForm"><label for="name">姓名:</label><input type="text" id="name" name="name" required><br><label for="email">电子邮件:</label><input type="email" id="email" name="email" required><br><input type="submit" value="提交"></form>```在上面的代码中,我们创建了一个具有两个文本输入框和一个提交按钮的表单。
每个输入框都有一个唯一的`id`属性和一个`name`属性。
`id`属性用于标识元素,而`name`属性用于在提交表单时识别输入的值。
现在,我们需要使用JavaScript为表单添加事件处理程序。
我们希望当用户点击提交按钮时,执行一个函数来处理表单数据。
在WEB测试中,经常会碰到很多表单输入框,大体有两种,一种是数值型文本框,一种是字符型的普通文本输入框。
上次提到了测试用例共享能提高测试人员的工作效率,节省时间,我们可以将这种普遍的校验提取出来放入公共库。
针对普通的文本输入框,通常要检查以下几点:1、输入中英文空格2、输入超长字符3、输入字符串中间含空格4、输入首尾空格5、输入特殊字符6、输入html格式语言7、输入特殊字符串NULL,null8、输入正常字符串用例设计:参数说明:<<<title>>>为输入框的标题,<<<maxlen>>>为该标题的最大长度step 1: <<<title>>>输入英文空格expect: 当<<<title>>>必填项时,提示“<<<title>>>不能为空”,当是非必填项时保存后内容自动清空step 2: <<<title>>>输入中文空格expect: 当<<<title>>>必填项时,提示“<<<title>>>不能为空”,当是非必填项时保存后内容自动清空step 3: <<<title>>>输入超过<<<maxlen>>>个汉字expect: 提示“<<<title>>>不能超过<<<maxlen>>>个字符”step 4: <<<title>>>输入超过<<<maxlen>>>个英文字符expect: 提示“<<<title>>>不能超过<<<maxlen>>>个字符”step 5: <<<title>>>输入超过<<<maxlen>>>个中英文字符expect: 提示“<<<title>>>不能超过<<<maxlen>>>个字符”step 6: <<<title>>>输入字符串中含空格expect: 保存成功step 7: <<<title>>>输入字符串首尾含空格expect: 自动过滤左右空格,保存成功step 8: <<<title>>>输入特殊字符,如~!@#$%^&*()_+|\=-`{}[];’”:,./?<>expect: 保存成功,显示无异常step 9: <<<title>>>输入html格式字符,如<br><script>alert(/x ss/)</script>expect: 保存成功,显示无异常step 10: <<<title>>>输入NULL或null字符串expect: 保存成功step 11: <<<title>>>输入普通字符串expect: 保存成功其中,8-10为无限制情况,有的特殊输入框对这些是敏感的有限制的,则预期结果也是不一样的,expect:提示<<<title>>>不能输入….针对费用类的数值型输入框:条件:demcial(x,y) ,界面显示小数点到y位通常要检查以下几点:1、输入英文空格2、输入中文空格3、输入字符中含有A~Z或a~z或者~!@#$%^&*()_+|\=-`{}[];’”:,./?<>4、输入整数首位为05、输入整数末位为06、输入正数值7、输入负数值8、输入09、输入小数10、输入小数末位为011、输入的小数点多于一个12、输入超长数值13、输入数字只有一个小数点,小数点左边>(x-y)个有效位14、输入数字只有一个小数点,小数点右边>Y个有效位15、输入数字只有一个小数点,小数位数小于<y个有效位16、输入数字只有一个小数点,小数位数=y个有效位用例设计:参数说明:<<<title>>>为输入框的标题,<<<maxlen>>>为该标题的最大长度step 1: <<<title>>>输入英文空格expect: 提示<<<title>>>不能为空格step 2: <<<title>>>输入中文空格expect: 提示<<<title>>>不能为空格step 3: <<<title>>>输入字符中含有A~Z或a~z或者~!@#$%^&*()_+|\=-`{}[];’”:,./?<> expect: 提示<<<>>>只能为数值step 4: <<<title>>>输入0010expect:保留有效数据,10.00保存成功step 5: <<<title>>>输入10expect: 10.00保存成功注:对应检查点的5和6step 6: <<<title>>>输入-10expect: -10.00保存成功step 7: <<<title>>>输入0expect: 0.00保存成功step 8: <<<title>>>输入0.50expect: 保留有效位数0.50 注:对应检查点的8,9,16step 9:<<<title>>>输入0.5.5expect: 提示<<<title>>>最多只能有一个小数点step 10:<<<title>>>输入(<<<maxlen>>>+1)的数值expect:提示有效位数值不能超过x位step 11:<<<title>>>输入[<<<x>>>-<<<y>>>+1].[<<<y>>>] expect: 提示小数点左边不能超过(x-y)个有效位step 12:<<<title>>>输入[<<<x>>>-<<<y>>>].[<<<y>>>+1] expect: 如果有限制,提示小数点右边不能超过Y个有效位,如果未限制,四舍五入后保存step 13:<<<title>>>输入[<<<x>>>-<<<y>>>].[<<<y>>>]expect: [<<<x>>>-<<<y>>>].[<<<y>>>]保存成功。
本文列举了一些关于网页设计关于表单输入框的技巧代码。
1.取消按钮按下时的虚线框
在input里添加属性值hideFocus或者HideFocus=true
2.只读文本框内容
在input里添加属性值readonly
3.防止退后清空的TEXT文档(可把style内容做做为类引用)
<INPUTstyle=behavior:url(#default#savehistory);type=textid=oPersistInput>
4.ENTER键可以让光标移到下一个输入框
<inputonkeydown="if(event.keyCode==13)event.keyCode=9">
5.只能为中文(有闪动)
<inputonkeyup="value=value.replace(/[-~]/g,'')"onkeydown="if(event.keyCode==13)event.key Code=9">
6.只能为数字(有闪动)
<inputoonKeyPress="if((event.keyCode<48||event.keyCode>57))event.returnValue=false ">
8.只能输入英文和数字(有闪动)
<inputonkeyup="value=value.replace(/[/W]/g,'')"onbeforepaste="clipboardData.setData('text',cl ipboardData.getData('text').replace(/。