交换路由命令大全1
- 格式:doc
- 大小:222.50 KB
- 文档页数:8

华为路由器交换机常用命令一、设备管理命令1.登录管理命令- ssh [ip地质] -p [端口号]:通过SSH协议登录设备。
- telnet [ip地质]:通过Telnet协议登录设备。
- logout:退出设备。
2.用户管理命令- display current-configuration:显示当前设备配置信息。
- save:保存当前配置。
- undo save:取消保存的配置。
- super:切换到超级用户模式。
- user-interface console 0:配置控制台终端的参数。
- user-interface vty 0 4:配置远程登录终端的参数。
3.设备操作命令- reboot:重启设备。
- reset saved-configuration:恢复出厂配置。
- display version:显示设备的硬件和软件版本信息。
- display device:显示设备的基本信息。
- display interface[接口名称]:显示指定接口信息。
- display ip routing-table:显示IP路由表信息。
二、网络配置命令1.IP配置命令- interface [接口名称]:进入指定接口。
- ip address [IP地质] [子网掩码]:配置接口IP地质。
- undo ip address:取消接口IP地质配置。
- ip route-static [目标网络] [子网掩码] [下一跳地质]:配置静态路由。
- undo ip route-static [目标网络] [子网掩码] [下一跳地质]:取消静态路由配置。
2.VLAN配置命令- vlan [VLAN ID]:创建指定VLAN。
- quit:退出VLAN配置模式。
- interface vlan [VLAN ID]:进入指定VLAN接口。
- ip address [IP地质] [子网掩码]:为VLAN接口配置IP地质。
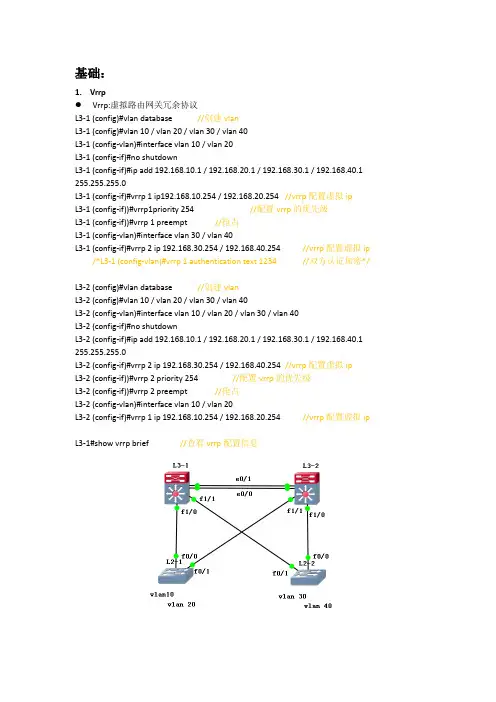
基础:1.VrrpVrrp:虚拟路由网关冗余协议L3-1 (config)#vlan database //创建vlanL3-1 (config)#vlan 10 / vlan 20 / vlan 30 / vlan 40L3-1 (config-vlan)#interface vlan 10 / vlan 20L3-1 (config-if)#no shutdownL3-1 (config-if)#ip add 192.168.10.1 / 192.168.20.1 / 192.168.30.1 / 192.168.40.1 255.255.255.0L3-1 (config-if)#vrrp 1 ip192.168.10.254 / 192.168.20.254 //vrrp配置虚拟ipL3-1 (config-if))#vrrp1priority 254 //配置vrrp的优先级L3-1 (config-if))#vrrp 1 preempt //抢占L3-1 (config-vlan)#interface vlan 30 / vlan 40L3-1 (config-if)#vrrp 2 ip 192.168.30.254 / 192.168.40.254 //vrrp配置虚拟ip /*L3-1 (config-vlan)#vrrp 1 authentication text 1234 //双方认证加密*/L3-2 (config)#vlan database //创建vlanL3-2 (config)#vlan 10 / vlan 20 / vlan 30 / vlan 40L3-2 (config-vlan)#interface vlan 10 / vlan 20 / vlan 30 / vlan 40L3-2 (config-if)#no shutdownL3-2 (config-if)#ip add 192.168.10.1 / 192.168.20.1 / 192.168.30.1 / 192.168.40.1 255.255.255.0L3-2 (config-if)#vrrp 2 ip 192.168.30.254 / 192.168.40.254 //vrrp配置虚拟ipL3-2 (config-if))#vrrp 2 priority 254 //配置vrrp的优先级L3-2 (config-if))#vrrp 2 preempt //抢占L3-2 (config-vlan)#interface vlan 10 / vlan 20L3-2 (config-if)#vrrp 1 ip 192.168.10.254 / 192.168.20.254 //vrrp配置虚拟ipL3-1#show vrrp brief //查看vrrp配置信息HsrpRouter (config)#interface fa0/1 ip 192.168.1.3 255.255.255.0 //进入端口配置ipRouter (config-if)#standby 2 //创建组Router (config-if)#standby 2 ip 192.168.1.254 //组添加ipRouter (config-if)#standby priority 200 //设置优先级,默认优先级100Router (config-if)#standby 2 preempt //抢占Router (config-if)#standby timers 3-10 //虚拟报文时间间隔Router (config-if)#standby 2 tranck fa0/0 //跟踪上行端口Router#show standby brief //查看热备份配置信息2.Mstp:多生成树协议Switch (config)#spanning-tree //启动生成树协议Switch (config)#spanning-tree mode mstp //设置生成树模式是mstpSwitch (config)#vlan 10Switch (config-vlan)#exitSwitch (config)#vlan 20Switch (config-vlan)#exitSwitch (config)#spanning-tree mst 1 priority 4096 //生成树组1的优先级设为4096 Switch (config)#spanning-tree mstconfigwration //进入生成树配置模式Switch (config)#instance 1 vlan 10,20 //把vlan10,20添加到组13.链路聚合L3-1 (config)#interface port-channel 1 //创建组L3-1 (config-if)#no shutdownL3-1(config-if)#switchport mode trunkL3-1(config-if)#interface fa1/13 //进入三层交换机间相连接口L3-1(config-if)#channel-group 1 mode on //添加到组中L3-1 (config-if)#switchport mode trunkL3-1 (config-if)#no shutdownL3-1 (config-if)#interface fa1/14L3-1 (config-if)#channel-group 1 mode onL3-1 (config-if)#switchport mode trunkL3-1 (config-if)#no shutdownL3-2(config)#interface port-channel 1 //创建组L3-2(config-if)#no shutdownL3-2(config-if)#switchport mode trunkL3-2(config-if)#interface fa1/13 //进入三层交换机间相连接口L3-2(config-if)#channel-group 1 mode on //添加到组中L3-2(config-if)#switchport mode trunkL3-2(config-if)#no shutdownL3-2(config-if)#interface fa1/14L3-2(config-if)#channel-group 1 mode onL3-2(config-if)#switchport mode trunkL3-2(config-if)#no shutdown4.VLAN(vtp)●Vtp(truch接口):Switch(config)#Vtpnamezjq //vtp命名zjqSwitch(config)#vtp password 123456 //设置vtp密码Switch(config)#vtp mode server(client) //vtp的模式设置为服务器或者客户端Switch(config)#interface FastEthernet0/1Switch(config)#switchport mode trunk //接口模式设置为trunk●配置vlanSwitch(config)#Vlan databaseSwitch(config)#Vlan 10 name xingzhengbuSwitch(config)#Switchport access vlan 10Switch(config)#Ip address 192.168.80.254 255.255.255.05.Tftp//打开tftp服务器,获取ip地址L2-1>enL2-1#copy startup-configtftp //Address of remote host []?172.16.25.0Destination filename [config.text]?zhangjq.txt6.telnet:远程登录Switch(config)#hostname silence //修改设备名称Switch(config)#intvlan 1Switch(config-if)#ip add 192.168.1.1 255.255.255.0 //设置管理交换机的IP地址Switch(config-if)#no shutdown //启用接口Switch(config)#enable secret 123456 //配置进入特权模式的密码为123456 Switch(config)#line vty 0 15//进入VTY端口,允许16台电脑同时远程登录Switch(config-line)#pass cisoco //设置Telnet的登录密码为ciscoSwitch(config-line)#login //允许Telnet登录7.管理VLAN扩展:1.路由引入(ospf)●静态路由配置(Static):要到达的网段Nwtwork:192.168.3.0/24设置下一跳Next Hop:192.168.1.2Router(config)#ip route 0.0.0.0 0.0.0.0 fa0/1●动态路由RIP:公布自己有的网段192.168.2.0/192.168.3.0OSPF:开放式最短路径协议Router(config)#router ospf 1 //启动OSPF协议,进程号Router(config)#network 192.168.1.0 0.0.0.255 area 0 //公布自己有的网段,划分区域Router(config)#do show iproute //查看路由表修改链路的开销1.Router(config-if)#bandwidth bamdwidth-kbps //修改接口的带宽参数2.Router(config-if)#ipospf cost “加数字”//命令则直接将链路开销设置为特定值并免除了计算过程2.DHCP的配置:动态主机配置协议L3-1(config)#vlan 10 //创建vlanL3-1(config-if)#intvlan 10L3-1(config-if)#ip add 192.168.10.1 255.255.255.0L3-1(config-if)#no shutdownL3-1 (config)#service dhcp //启动dhcpL3-1 (config)#ipdhcp pool <name> //建立地址池L3-1 (config)#network <network-number><mask> //动态分配ip的网段和MAC地址L3-1 (config)#default-router <ip-address> //为dhcp客户设置默认网关L2-1 (config)#interface fa0/0L2-1 (config-if)#sw mode trunkL2-1 (config-if)no shutdownL2-1 (config)#interface fa0/15L2-1 (config-if)#switchport mode accessL2-1 (config-if)#switchport access vlan 10 //绑定vlan 10L2-1 (config-if)no shutdownPC(config)#no ip routing //取消路由功能PC(config)#interface fa0/0PC(config-if)#ip add dhcpPC(config)#default gateway <ip-address>PC#show interface fa0/03.无线路由器AP>ap-mode fatAP>enAP#config tAP(config)#vlan 10AP(config-vlan)#exitAP(config)#service dhcpAP(config)#ipdhcp pool zhangjqAP(dhcp-config)#network 192.168.10.0 255.255.255.0AP(dhcp-config)#dns-server 10.20.5.1AP(dhcp-config)#default-router 192.168.10.254AP(dhcp-config)#interface gigabitEthernet0/1AP(config-if-GigabitEthernet 0/1)#encapsulation dot1Q 10 //封装vlan10AP(config-if-GigabitEthernet 0/1)#interface BVI 10AP(config-if-BVI 6)#ip add 192.168.10.254 255.255.255.0AP(config-if-BVI 6)#exitAP(config)#dot11 wlan10AP(dot11-wlan-config)#vlan10AP(dot11-wlan-config)#broadcast-ssidAP(dot11-wlan-config)#ssidzhangjqAP(dot11-wlan-config)#exitAP(config)#interface dot11radio 1/0AP(config-if-Dot11radio 1/0)#encaosulation dot1Q 10AP(config-if-Dot11radio 1/0)#mac-mode fatAP(config-if-Dot11radio 1/0)#channel 1AP(config-if-Dot11radio 1/0)#wlan-id 1AP(config-if-Dot11radio 1/0)#ip router 0.0.0.0 0.0.0.0 192.168.1.254AP(config)#intwlansec 10AP(config-if-wlansec 10)#security wpa enableAP(config-if-wlansec 10)#security wpa ciphers aes enableAP(config-if-wlansec 10)#4.ACL:访问控制列表标准控制列表:Router(config)#access-list 1 permit 192.168.2.0 0.0.0.255 //创建控制列表允许2网段可以访问,<1-99>标准访问控制列表;<100-199>扩展访问控制列表Router(config)#access-list 1 permit 192.168.1.0 0.0.0.255Router(config)#access-list 1 deny 192.168.0.0 0.0.0.255 //创建控制列表拒绝0网段可以访问,反向子网掩码Router(config)#interface se3/0 //进入se3/0Router(config-if)#ip access-group 1 out //把访问控制列表应用到接口Se3/0扩展控制列表:<才需要填写目标ip>Router(config)#access-list 101 permit ip 192.168.2.0 0.0.0.255 10.0.0.0 0.255.255.255 //创建控制列表允许源ip访问目标ip,能访问web和ping通Router(config)#access-list 101 permit tcp 192.168.1.0 0.0.0.255 10.0.0.0 0.255.255.255 eq www //创建控制列表允许源ip访问目标ip的80端口,能访问web不能ping通Router(config)#access-list 101 permit icmp 192.168.0.0 0.0.0.255 10.0.0.0 0.255.255.255 //创建控制列表允许源ip访问目标ipRouter(config)#interface se3/0Router(config-if)#ip access-group 101 outSe3/0●使用ACL保护路由安全Router(config)#access-list 1 permit 192.168.1.0 0.0.0.255Router(config)#line vty 0 15Router(config)#access-class 1 inRouter(config)#password hanlg5.NAT:地址转换●静态NAT(出口路由配置,私网地址转换成公网地址)Router(config)#ipnat inside source static【静态】私网ip公网(外)ip //内部网转换为外部网地址Router(config)#interface f0/1Router(config-if)#ipnat outside //绑定对外接口Router(config)#interface f0/2Router(config-if)#ipnat inside //绑定对内接口●动态NATRouter>enRouter#config tRouter(config)#access-list 10 permit 10.0.0.0 0.0.0.255Router(config)#ipnat pool zhangjq 131.107.0.1 131.107.0.6 netmask 255.255.255.0 Router(config)#ipnat inside source list 10 pool zhangjqRouter(config)#interface se0/0Router(config-if)#ipnat outsideRouter(config-if)#interface fa0/1Router(config-if)#ipnat insideRouter(config-if)#endRouter(config-if)#show ipnat translations●超载NAT(PAT)Router>enRouter#config tRouter(config)#access-list 10 permit 10.0.0.0 0.0.0.255Router(config)#ipnat pool zhangjq 131.107.0.1 131.107.0.1netmask 255.255.255.0 Router(config)#ipnat inside source list 10 pool zhangjqoverloadRouter(config)#interface se0/0Router(config-if)#ipnat outsideRouter(config-if)#interface fa0/1Router(config-if)#ipnat insideRouter(config-if)#endRouter(config-if)#show ipnat translations6.802.1xL2-1 (config)#aaa new-model //启动aaa服务L2-1 (config)#aaa authentication dot1x default group radius //认证802.1x,启用默认列表default,采用radius认证方式L2-1 (config)#dot1x authentication default //启用default列表应用L2-1 (config)#radius-server host 172.16.32.2 //配置radius服务器地址L2-1 (config)#radius-server key 123456 //设置交换机和服务器之间的密码L2-1 (config)#dot1x auth-mode chap //身份验证的加密方式改为chapL2-1 (config)#interface range fa0/1 - 22 //进入交换机的下行接口L2-1 (config-if)#dot1x port-control auto //在端口启用802.1x绑定vlanL2-1(config)#interface fa0/0L2-1(config)#switchport mode accessL2-1(config)#switchport access vlan10●打错Switch(config)#no ip domain-lookup●配置单臂路由Router(config)#inter fa0/0.10 //创建虚拟接口Router(config-subif)#encapsulation dot1Q 10 //封装(vlan)协议Router(config-subif)#ip address 192.168.1.1 255.255.255.0 //添加网关Router(config-subif)#no shutdown●路由引入Router(config-if)#default-information originate●回环路由(虚构一条路)Router(config)#int loopback 回环路由号Ip route 0.0.0.0 0.0.0.0 loopback 0●交换机端口安全配置Switch (config)#interface fastsernet0/1 //进入端口配置模式Switch (config-if)#speed 10 //设置端口速率为10Mbit/s,{10|100|auto}Switch (config-if)#duplex half //设置端口为半双工,{half|full|auto}Switch (config-if)#no shutdown //启用端口Switch (config-if)#switchport mode access //设置当前端口为access,交换机端口安全功能只能在access接口进行配置Switch (config-if)#switchport port-security //打开当前端口安全功能,默认关闭端口安全功能Switch (config-if)#switchportport-security maximum 10 //设置端口安全地址的最大个数,最大安全地址个数是128个Switch (config-if)#switchport port-security violation shutdown //配置处理违例的方式,默认处理方式为protectSwitch (config-if)#switchport port-security mac-address 0007.EC56.5906 //配置安全地址Switch (config-if)#endSwitch#show port-security interface fastethernet0/1 //查看0/1的端口安全配置信息,<Half-duplex,10Mb/s //已设置为半双工,10Mbit/s>Switch#show port-security //查看所有安全端口的统计信息●光电复用口L3-1 (config)#interface gi0/26L3-1 (config-GigabitEthernet 0/26) #medium-type fiberL3-2 (config)#interface gi0/26L3-2 (configGigabitEthernet 0/26)#medium-type fiber●防火墙设置步骤1.路由模式(安全)下设置2.接口IP地址设置3.路由(默认路由)4.安全策略、安全规则(nat、包过滤、ip映射、端口映射)端口映射:nat的一种,把内网端口转换成外网端口(内网的服务器ip加上端口号映射到外网ip地址)Ip映射:静态natNat:防火墙上做nat,就是要使内网用户可以访问外网QOS(服务质量)路由器的CBWFQ配置Router(config)#class-map http_ftp //创建一个分类表,并进入分类表模式Router(config-cmap)#match protocol httpRouter(config-cmap)#match protocol ftpRouter(config-cmap)#exitRouter(config)#policy-map zhangjq //创建一个策略表,并进入策略表模式Router(config-pmap)#class http_ftp //建立一个分类表,并进入策略分类表模式Router(config-pmap-c)#bandwidth 512Router(config-pmap-c)#exitRouter(config-pmap)#class class-defaultRouter(config-pmap-c)#endRouter(config)#interface fa0/1Router(config-if)#service-policy output zhangjq //在端口上应用一个策略表Router(config-if)#endRouter#show policy-mapIPSec配置R1(config)#ip route 0.0.0.0 0.0.0.0 10.1.1.1 //添加默认路由,设置下一条R1(config)#crypto isakmp policy 11 //设置IKE策略的优先级R1(config-isakmp)#encryption 3des //配置加密方式[des,3des,aes]R1(config-isakmp)#hash md5 //检验完整性,数字签名方法[md5,sha]R1(config-isakmp)#authentiaction pre-share //采用预共享密钥的认证方式R1(config)#crypto isakmp key passwd address 10.1.14.60 //协商的共享密码R1(config)#crypto ipsec transform-set one esp-3des esp-md5-hmac //配置转换集[ike配置参数转换成IPSec]R1(config)#access-list 101 permit ip 172.16.0.0 0.0.255.255 192.168.0.0 0.0.255.255//创建访问控制列表R1(config)#access-list 111 deny ip 192.168.10.0 0.0.0.255 192.168.20.0 0.0.0.255R1(config)#access-list 111 permit ip any anyR1(config)#ip nat inside source list 111 interface fa0/1R1(config)#cryptomap my 10 ipsec-isakmp //创建加密图my,序号10R1(config-crypto-map)#set peer 10.1.14.60 //标识对方路由器IP地址R1(config-crypto-map)#set transform-set one //启用转换集R1(config-crypto-map)#match address 101 //启用ACLR1(config-crypto-map)#interface FastEthernet0/0R1(config-if)#crypto map my //启用映射R1#show crypto isakmp sa //查看配置结果IKE配置配置映射Show crypto isakmpPpp:由被验方发起单向:被验证方:Route0r#config tRouter0(config)#interface Serial0/0/0Router0(config-if)#ip address 192.168.1.1 255.255.255.0 Router0(config-if)#no shutdownRouter0(config-if)#encapsulation pppRouter0(config-if)#ppp pap sent-username r0 password 123456验证方:Router1>enableRouter1#configure terminalRouter1(config)#interface Serial0/0/0Router1(config-if)#ip address 192.168.1.2 255.255.255.0 Router1(config-if)#no shutdownRouter1(config)#username r0 password 0 123456Router1(config-if)#encapsulation ppp双向:Router3>enRouter3#config tRouter3(config)#username r4 password 0 123456Router3(config)#int se2/0Router3(config-if)#encapsulation pppRouter3(config-if)#ppp pap sent-username r3 password 123456Router4>enRouter4#config tRouter4(config)#username r3 password 0 123456Router4(config)#int se3/0Router4(config-if)#encapsulation pppRouter4(config-if)#ppp pap sent-username r4 password 123456Chap(密码要求一致):chap是由验方发起,发送随机数报文查找数据库密码,随机数+密码返回验方单向:被验证方:Router>enableRouter#configure terminalRouter(config)#hostname R1R0(config)#interface Serial0/0/0R0(config-if)#no shutdownR0(config-if)#ip address 192.168.1.1 255.255.255.0R0(config-if)#encapsulation ppp //封装pppR0(config)#username R1 password 0 123456 //建立本地用户组验证方:Router>enableRouter#configure terminalRouter(config)#hostname R1R1(config)#interface Serial0/0/0R1(config-if)#no shutdownR1(config-if)#ip address 192.168.1.2 255.255.255.0R1(config-if)#encapsulation ppp //封装pppR1(config-if)#ppp authentication chapR1(config)#username R0 password 0 123456 //建立本地用户组双向:被验证方:Router>enableRouter#configure terminalRouter(config)#hostname R1R0(config)#interface Serial0/0/0R0(config-if)#no shutdownR0(config-if)#ip address 192.168.1.1 255.255.255.0R0(config-if)#encapsulation pppR1(config-if)#ppp authentication chapR0(config)#username R1 password 0 123456验证方:Router>enableRouter#configure terminalRouter(config)#hostname R1R1(config)#interface Serial0/0/0R1(config-if)#no shutdownR1(config-if)#ip address 192.168.1.2 255.255.255.0R1(config-if)#encapsulation pppR1(config-if)#ppp authentication chapR1(config)#username R0 password 0 123456Ospf ppp模式配置:Router0>enableRouter0#configure terminalRouter0(config)#interface Serial0/0/0Router0(config-if)#encapsulation pppRouter0(config-if)#ip ospf network point-to-point Router0(config-if)#no shutdownRouter0(config-if)#exitRouter0(config)#router ospf 1Router0(config-router)#net 10.1.1.0 0.0.0.255 area 0 Router0(config-router)#endRouter1>enableRouter1#configure terminalRouter1(config)#interface Serial0/0/0Router1(config-if)#no shutdownRouter1(config-if)#encapsulation pppRouter1(config-if)#ip ospf network point-to-point Router1(config-if)#no shutdownRouter1(config-if)#exitRouter1(config)#router ospf 1Router1(config-router)#network 20.1.1.0 0.0.0.255 area 0 Router1(config-router)#endRouter1#Show ip ospf neighbor帧中继Router3>enableRouter3#configure terminalRouter3(config)#interface Serial2/0Router3(config-if)#no shutdownRouter3(config-if)#encapsulation frame-relayRouter3(config-if)#frame-relay lmi-type ciscoRouter3(config-if)#exitRouter3(config)#int s2/0.1 point-to-pointRouter3(config-subif)#ip add 192.168.2.3 255.255.255.0 Router3(config-subif)#frame-relay interface-dlci 302 Router3(config)#int se2/0.2 point-to-pointRouter3(config-subif)#ip add 192.168.3.3 255.255.255.0 Router3(config-subif)#frame-relay interface-dlci 301Router1>enableRouter1#configure terminalRouter1(config)#interface Serial2/0Router1(config-if)#no shutdownRouter1(config-if)#encapsulation frame-relayRouter1(config-if)#frame-relay lmi-type ciscoRouter1(config-if)#exitRouter1(config)#int s2/0.1 point-to-pointRouter1(config-subif)#ip add 192.168.1.1 255.255.255.0 Router1(config-subif)#frame-relay interface-dlci 102 Router1(config)#int se2/0.2 point-to-pointRouter1(config-subif)#ip add 192.168.3.1 255.255.255.0 Router1(config-subif)#frame-relay interface-dlci 103Router2>enableRouter2#configure terminalRouter2(config)#interface Serial2/0Router2(config-if)#no shutdownRouter2(config-if)#encapsulation frame-relayRouter2(config-if)#frame-relay lmi-type ciscoRouter2(config-if)#exitRouter2(config)#int s2/0.1 point-to-pointRouter2(config-subif)#ip add 192.168.1.2 255.255.255.0Router2(config-subif)#frame-relay interface-dlci 201Router2(config)#int se2/0.2 point-to-pointRouter2(config-subif)#ip add 192.168.2.2 255.255.255.0Router2(config-subif)#frame-relay interface-dlci 203Dhcp:DHCP(Dynamic Host Configuration Protocol,动态主机配置协议),基于Client/Server工作模式,DHCP服务器为需要动态获取IP地址的客户端分配IP地址及网关、dns等其它参数开启dhcp服务R1(config)#service dhcp //开启dhcp功能配置dhcp地址池R1(dhcp-config)#network 192.168.1.0 255.255.255.0 //可以分配的地址范围192.168.1.1~192.168.1.254R1(dhcp-config)#dns-server 10.2.50.1 //配置DNSR1(dhcp-config)#default-router 192.168.1.1 //配置网关地址/*R1(config)#ip dhcp excluded-address 192.168.1.1 192.168.1.10//192.168.1.1~192.168.1.10不被dhcp分配*/静态路由就是手工配置的路由,使得数据包能够按照预定的路径传送到指定的目标网络R1(config)#ip route 192.168.2.0 255.255.255.0 192.168.3.2 //目标地址是192.168.2.0/24的数据包,转发给192.168.3.2R2(config)#ip route 192.168.1.0 255.255.255.0 192.168.3.1 //目标地址是192.168.1.0/24的数据包,转发给192.168.3.1R1#show ip route //查看路由R2#show ip route //查看路由RIP(Routing Information Protocol)路由协议采用距离向量算法,是一种距离向量协议。

基础命令练习1.模式Router> //用户模式Router# //特权模式(也叫enable 模式)Router(config-if)# //接口模式Router(config-router)# //router 模式Router(config-line)# //line 模式Router(config-subif)# //子接口模式2.模式切换Router> //用户模式Router>enable //在用户模式敲入enable 进入特权模式(也叫enable 模式)Router#disable //在特权模式敲入disable 退出到用户模式Router>enable //在用户模式敲入enable 进入特权模式Router#configure terminal //在特权模式敲入configure terminal 进入到配置模式Router(config)#interface ethernet 0/0 //在配置模式敲入“interface+接口类型+接口编号”进入接口模式Router(config-if)#exit //敲入exit 退出接口模式Router(config)#router rip //敲入“router + 路由协议”进入router 模式Router(config-router)#exit //退出router 模式Router(config)#line console 0 //进入line 模式Router(config-line)#end //从line 模式退出(任何时候敲入end 会退出到特权模式)Router#conf tRouter(config)#interface ethernet 0/0.1 //进入子接口模式Router(config-subif)#end //任何时候敲入end 会退出到特权模式Router#2.为路由器定义名称router(config)#hostname xxx(xxx 为我们定义的名称)Router(config)#host fxhfxh(config)#定义路由器的名称为FXH,那么对路由器定义名称,是为了区别我们所操作所有设备的不同.3.为路由器添加特权密码router(config)#enable password sss(sss 为我们定义的明文密码)router(config)#enable secret cisco (cisco 为我们定义的密文密码)router(config)#service password-encryption //对口令进行加密,加密console 口或VTY 或是enable password 设置的密码,密码不再显示明文4.不执行DNS 解析router(config)#no ip domain-lookup (这条命令的作用是:当我们在执行命令错误的时候,路由器会认为这条命令没有错误,它只是一个域名的形式,那么他会给你解析,这样,很浪费我们宝贵的时间5.配置路由器,使得控制台端口不会中止你的连接。

思科交换机路由器命令大全思科交换机和路由器命令大全本文档为思科交换机和路由器命令的最新最全范本,供参考使用。
以下是详细的命令列表,包括每个命令的说明和用法。
一、接口配置命令1、ip address:设置接口的IP地质示例:ip address 192.168.1.1 255.255.255:02、no shutdown:启用接口示例:no shutdown3、duplex:设置接口的双工模式示例:duplex auto4、speed:设置接口的速度示例:speed 1005、exit:退出接口配置模式示例:exit二、VLAN命令1、vlan database:进入VLAN数据库模式示例:vlan database2、vlan id name:创建VLAN并设置名称示例:vlan 10 name VLAN-103、vlan id:删除VLAN示例:no vlan 104、show vlan:显示VLAN信息示例:show vlan5、exit:退出VLAN数据库模式示例:exit三、路由命令1、ip route:设置静态路由示例:ip route 192.168.2:0 255.255.255:0 192.168.1.22、router rip:启用RIP路由协议示例:router rip3、network:将网络添加到RIP路由表中示例:network 10:0:0:04、redistribute:将静态路由或其他路由协议添加到RIP路由表中示例:redistribute static5、exit:退出路由配置模式示例:exit四、ACL命令1、access-list:创建标准或扩展ACL示例:access-list 10 permit 192.168.1:0 0:0:0.2552、ip access-group:应用ACL到接口示例:ip access-group 10 in3、show access-lists:显示ACL信息示例:show access-lists4、exit:退出ACL配置模式示例:exit五、SNMP命令1、snmp-server community:设置SNMP团体字符串示例:snmp-server community public RO2、snmp-server enable traps:启用SNMP陷阱示例:snmp-server enable traps3、snmp-server host:配置SNMP陷阱接收主机示例:snmp-server host 192.168.1.1004、exit:退出SNMP配置模式示例:exit六、SSH命令1、ip ssh version:设置SSH协议版本示例:ip ssh version 22、crypto key generate rsa:RSA密钥对示例:crypto key generate rsa3、username:创建新的本地用户示例:username admin privilege 15 password password1234、exit:退出SSH配置模式示例:exit七、其他命令1、show running-config:显示当前配置示例:show running-config2、copy running-config startup-config:将当前配置保存到启动配置中示例:copy running-config startup-config3、reload:重新启动设备示例:reload4、exit:退出CLI命令行模式示例:exit本文档涉及附件:1、无附件本文所涉及的法律名词及注释:1、ACL(Access Control List):访问控制列表,用于控制网络流量的进出。
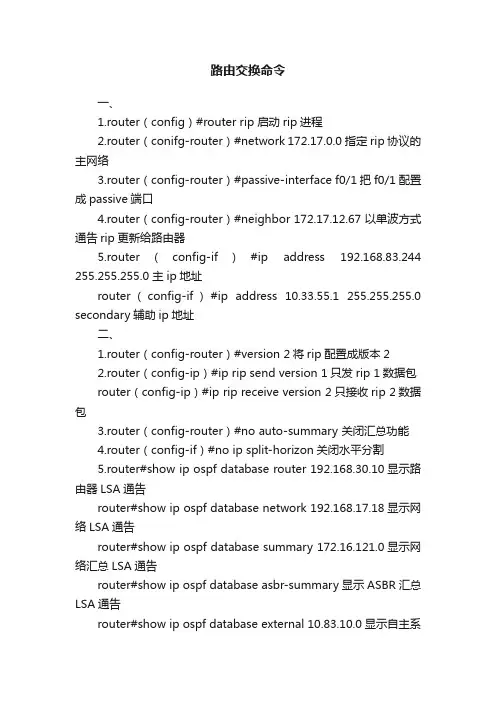
路由交换命令一、1.router(config)#router rip 启动rip进程2.router(conifg-router)#network 172.17.0.0指定rip协议的主网络3.router(config-router)#passive-interface f0/1把f0/1配置成passive端口4.router(config-router)#neighbor 172.17.12.67 以单波方式通告rip更新给路由器5.router(config-if)#ip address 192.168.83.244 255.255.255.0 主ip地址router(config-if)#ip address 10.33.55.1 255.255.255.0 secondary辅助ip地址二、1.router(config-router)#version 2将rip配置成版本22.router(config-ip)#ip rip send version 1只发rip 1数据包router(config-ip)#ip rip receive version 2只接收rip 2数据包3.router(config-router)#no auto-summary 关闭汇总功能4.router(config-if)#no ip split-horizon关闭水平分割5.router#show ip ospf database router 192.168.30.10显示路由器LSA通告router#show ip ospf database network 192.168.17.18显示网络LSA通告router#show ip ospf database summary 172.16.121.0显示网络汇总LSA通告router#show ip ospf database asbr-summary显示ASBR汇总LSA通告router#show ip ospf database external 10.83.10.0显示自主系统外部LSA通告router#show ip ospf database nssa-external显示NSSA外部LSA通告三、1.router(config)#router ospf 10配置ospf进程id2.router(config)#interface loopback0router(config-if)#ip address 192.168.10.1 255.255.255.0配置loopback0接口3.router(config-router)#area 1 stub 配置stub区域4.router(config-router)#area 1 stub no-summary配置totally stubby区域5.router(config-router)#area 1 nssa配置nssa区域6.router(config-router)#area 25 range 172.16.0.0 255.240.0.0 配置地址汇总7.router(config-router)#area 100 virtual-link 192.168.100.33 配置虚链路四、1.router(config)#standby 172 ip 172.16.10.254加入备份组172 指定虚拟IP 地址2.router(config-if)#standby 47 priority 150配置HSRP的优先级1503.router(config-if)#standby 47 preempt 配置HSRP的占先权4.router(config-if)#standby 47 ip time 2 9 2表示HELLO时间,9表示保持时间5.router(config)#interface s06.router(config-if)#standby 47 track s0 100配置跟踪端口s0并在端口down时减少1007.router#show standby brief 查看HSRP的状态8.router#no debuge all关闭调试功能五、1.router(config-if)#ip access-group 1 in 访问列表的入router(config-if)#ip access-group 1 out访问列表的出2.router(config)#access-list 1 premit 192.168.10.0 0.0.0.255 允许192.168.10.0的网段通过router(config)#access-list 1 deny 192.168.10.0 2.0.0.255 拒绝192.168.10.2的主机通过3.router(config)#access-list 1 premit any ;any表示0.0.0.0 255.255.255.255router(config)#access-list 1 premit host 172.30.16.29 ;host 表示0.0.0.04.router(config)#access-list 101 deny tcp 172.16.4.0 0.0.0.255 172.16.3.0 0.0.0.255 eq 21拒绝来自172.16.4.0去往172.16.3.0的FTP流量5.router(config)#ip access-list extended cisco创建名为cisco的命名访问控制列表六、静态地址转换1.配置外部端口的IP地址Router(config)#interface s0Router(config-if)#ip address 61.159.62.129 255.255.255.2482.配置内部端口的IP地址Router(config)#interface e0Router(config-if)#ip address 192.168.100.1 255.255.255.03.静态地址转换Router(config)#ip nat inside source static 192.168.100.2 61.159.62.1304.在内部和外部端口上启用NATRouter(config)#interafce s0Router(config-if)#ip nat outsideRouter(config)#interafce e0Router(config-if)#ip nat inside七、动态NAT配置1.配置外部端口的IP地址Router(config)#interface s0Router(config-if)#ip address 61.159.62.129 255.255.255.2482.配置内部端口的IP地址Router(config)#interface e0Router(config-if)#ip address 192.168.100.1 255.255.255.03.定义内部网络允许访问外部网络Router(config)#access-list 1 permit 192.168.100.0 0.0.0.2554.定义合法的IP地址池Router(config)#ip nat pool chen 61.159.62.129 61.159.62.190 netmask 255.255.255.2485.实现网络地址转换Router(config)#ip nat inside source list 1 pool chen6.在内部和外部端口上启用NATRouter(config)#interafce s0Router(config-if)#ip nat outsideRouter(config)#interafce e0Router(config-if)#ip nat inside八、PAT的配置1.配置外部端口的IP地址Router(config)#interface s0Router(config-if)#ip address 61.159.62.129 255.255.255.2482.配置内部端口的IP地址Router(config)#interface e0Router(config-if)#ip address 192.168.100.1 255.255.255.03.定义内部网络允许访问外部网络Router(config)#access-list 1 permit 192.168.100.0 0.0.0.2554.定义合法的IP地址池Router(config)#ip nat pool chen 61.159.62.129 61.159.62.190 netmask 255.255.255.2485.实现复用IP地址转换Router(config)#ip nat inside source list 1 pool chen overload6.在内部和外部端口上启用NATRouter(config)#interafce s0Router(config-if)#ip nat outsideRouter(config)#interafce e0Router(config-if)#ip nat inside1. 在基于IOS的交换机上设置主机名/系统名:switch(config)# hostname hostname2.在基于IOS的交换机上设置登录口令:switch(config)# enable password level 1 password在基于CLI的交换机上设置登录口令:switch(enable) set passwordswitch(enable) set enalbepass3.在基于IOS的交换机上设置远程访问:switch(config)# interface vlan 1switch(config-if)# ip address ip-address netmaskswitch(config-if)# ip default-gateway ip-address在基于CLI的交换机上设置远程访问:switch(enable) set interface sc0 ip-address netmask broadcast-addressswitch(enable) set interface sc0 vlanswitch(enable) set ip route default gateway4.在基于IOS的交换机上启用和浏览CDP信息:switch(config-if)# cdp enableswitch(config-if)# no cdp enable为了查看Cisco邻接设备的CDP通告信息:switch# show cdp interface [type modle/port]switch# show cdp neighbors [type module/port] [detail]在基于CLI的交换机上启用和浏览CDP信息:switch(enable) set cdp {enable|disable} module/port为了查看Cisco邻接设备的CDP通告信息:switch(enable) show cdp neighbors[module/port] [vlan|duplex|capabilities|detail]5.基于IOS的交换机的端口描述:switch(config-if)# description description-string基于CLI的交换机的端口描述:switch(enable)set port name module/number description-string6.在基于IOS的交换机上设置端口速度:switch(config-if)# speed{10|100|auto}在基于CLI的交换机上设置端口速度:switch(enable) set port speed moudle/number {10|100|auto} switch(enable) set port speed moudle/number {4|16|auto}7.在基于IOS的交换机上设置以太网的链路模式:switch(config-if)# duplex {auto|full|half}在基于CLI的交换机上设置以太网的链路模式:switch(enable) set port duplex module/number {full|half}8.在基于IOS的交换机上配置静态VLAN:switch# vlan databaseswitch(vlan)# vlan vlan-num name vlaswitch(vlan)# exitswitch# configure teriminalswitch(config)# interface interface module/numberswitch(config-if)# switchport mode accessswitch(config-if)# switchport access vlan vlan-numswitch(config-if)# end在基于CLI的交换机上配置静态VLAN:switch(enable) set vlan vlan-num [name name]switch(enable) set vlan vlan-num mod-num/port-list9. 在基于IOS的交换机上配置VLAN中继线:switch(config)# interface interface mod/portswitch(config-if)# switchport mode trunkswitch(config-if)# switchport trunk encapsulation {isl|dotlq} switch(config-if)# switchport trunk allowed vlan remove vlan-listswitch(config-if)# switchport trunk allowed vlan add vlan-list 在基于CLI的交换机上配置VLAN中继线:switch(enable) set trunk module/port [on|off|desirable|auto|nonegotiate]Vlan-range [isl|dotlq|dotl0|lane|negotiate]10.在基于IOS的交换机上配置VTP管理域:switch# vlan databaseswitch(vlan)# vtp domain domain-name在基于CLI的交换机上配置VTP管理域:switch(enable) set vtp [domain domain-name]11.在基于IOS的交换机上配置VTP 模式:switch# vlan databaseswitch(vlan)# vtp domain domain-nameswitch(vlan)# vtp {sever|cilent|transparent}switch(vlan)# vtp password password在基于CLI的交换机上配置VTP 模式:switch(enable) set vtp [domain domain-name] [mode{ sever|cilent|transparent }][password password]12. 在基于IOS的交换机上配置VTP版本:switch# vlan databaseswitch(vlan)# vtp v2-mode13. 在基于IOS的交换机上启动VTP剪裁:switch# vlan databaseswitch(vlan)# vtp pruning14.在基于IOS的交换机上配置以太信道:switch(config-if)# port group group-number [distribution{source|destination}]15.在基于IOS的交换机上调整根路径成本:switch(config-if)# spanning-tree [vlan vlan-list] cost cost16.在基于IOS的交换机上调整端口ID:switch(config-if)# spanning-tree[vlan vlan-list]port-priority port-priority17. 在基于IOS的交换机上修改STP时钟:switch(config)# spanning-tree [vlan vlan-list] hello-time secondsswitch(config)# spanning-tree [vlan vlan-list] forward-time seconds` switch(config)# spanning-tree [vlan vlan-list] max-age seconds18. 在基于IOS的交换机端口上启用或禁用Port Fast 特征:switch(config-if)#spanning-tree portfast19. 在基于IOS的交换机端口上启用或禁用UplinkFast 特征:switch(config)# spanning-tree uplinkfast [max-update-rate pkts-per-second]20. 为了将交换机配置成一个集群的命令交换机,首先要给管理接口分配一个IP地址,然后使用下列命令: switch(config)# cluster enable cluster-name21. 为了从一条中继链路上删除VLAN,可使用下列命令:switch(enable) clear trunk module/port vlan-range22. 用show vtp domain 显示管理域的VTP参数.23. 用show vtp statistics显示管理域的VTP参数.24. 在Catalyst交换机上定义TrBRF的命令如下:switch(enable) set vlan vlan-name [name name] type trbrf bridge bridge-num[stp {ieee|ibm}]25. 在Catalyst交换机上定义TrCRF的命令如下:switch (enable) set vlan vlan-num [name name] type trcrf{ring hex-ring-num|decring decimal-ring-num} parent vlan-num26. 在创建好TrBRF VLAN之后,就可以给它分配交换机端口.对于以太网交换,可以采用如下命令给VLAN分配端口:switch(enable) set vlan vlan-num mod-num/port-num27. 命令show spantree显示一个交换机端口的STP状态.28. 配置一个ELAN的LES和BUS,可以使用下列命令:ATM (config)# interface atm number.subint multiointATM(config-subif)# lane serber-bus ethernet elan-name29. 配置LECS:ATM(config)# lane database database-nameATM(lane-config-databade)# name elan1-name server-atm-address les1-nsap-addressATM(lane-config-databade)# name elan2-name server-atm-address les2-nsap-addressATM(lane-config-databade)# name …30. 创建完数据库后,必须在主接口上启动LECS.命令如下:ATM(config)# interface atm numberATM(config-if)# lane config database database-nameATM(config-if)# lane config auto-config-atm-address31. 将每个LEC配置到一个不同的ATM子接口上.命令如下:ATM(config)# interface atm number.subint multipointATM(config)# lane client ethernet vlan-num elan-num32. 用show lane server 显示LES的状态.33. 用show lane bus显示bus的状态.34. 用show lane database显示LECS数据库可内容.35. 用show lane client显示LEC的状态.36. 用show module显示已安装的模块列表.37. 用物理接口建立与VLAN的连接:router# configure terminalrouter(config)# interface media module/portrouter(config-if)# description description-stringrouter(config-if)# ip address ip-addr subnet-maskrouter(config-if)# no shutdown38. 用中继链路来建立与VLAN的连接:router(config)# interface module/port.subinterfacerouter(config-ig)# encapsulation[isl|dotlq] vlan-numberrouter(config-if)# ip address ip-address subnet-mask39. 用LANE 来建立与VLAN的连接:router(config)# interface atm module/portrouter(config-if)# no ip addressrouter(config-if)# atm pvc 1 0 5 qsaalrouter(config-if)# atm pvc 2 0 16 ilnirouter(config-if)# interface atm module/port.subinterface multipointrouter(config-if)# ip address ip-address subnet-maskrouter(config-if)# lane client ethernet elan-numrouter(config-if)# interface atm module/port.subinterface multipointrouter(config-if)# ip address ip-address subnet-namerouter(config-if)# lane client ethernet elan-namerouter(config-if)# …40. 为了在路由处理器上进行动态路由配置,可以用下列IOS命令来进行:router(config)# ip routingrouter(config)# router ip-routing-protocolrouter(config-router)# network ip-network-numberrouter(config-router)# network ip-network-number41. 配置默认路由:switch(enable) set ip route default gateway42. 为一个路由处理器分配VLANID,可在接口模式下使用下列命令:router(config)# interface interface numberrouter(config-if)# mls rp vlan-id vlan-id-num43. 在路由处理器启用MLSP:router(config)# mls rp ip44. 为了把一个外置的路由处理器接口和交换机安置在同一个VTP 域中:router(config)# interface interface numberrouter(config-if)# mls rp vtp-domain domain-name45. 查看指定的VTP域的信息:router# show mls rp vtp-domain vtp domain name46. 要确定RSM或路由器上的管理接口,可以在接口模式下输入下列命令:router(config-if)#mls rp management-interface47. 要检验MLS-RP的配置情况:router# show mls rp48. 检验特定接口上的MLS配置:router# show mls rp interface interface number49. 为了在MLS-SE上设置流掩码而又不想在任一个路由处理器接口上设置访问列表:set mls flow [destination|destination-source|full]50. 为使MLS和输入访问列表可以兼容,可以在全局模式下使用下列命令:router(config)# mls rp ip input-acl51. 当某个交换机的第3层交换失效时,可在交换机的特权模式下输入下列命令:switch(enable) set mls enable52. 若想改变老化时间的值,可在特权模式下输入以下命令:switch(enable) set mls agingtime agingtime53. 设置快速老化:switch(enable) set mls agingtime fast fastagingtime pkt_threshold54. 确定那些MLS-RP和MLS-SE参与了MLS,可先显示交换机引用列表中的内容再确定:switch(enable) show mls include55. 显示MLS高速缓存记录:switch(enable) show mls entry56. 用命令show in arp显示ARP高速缓存区的内容。
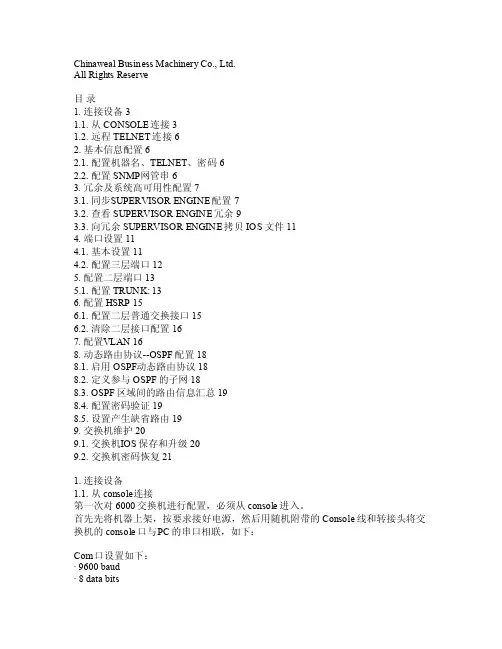
Chinaw eal B usine ss Ma chine ry Co., Lt d.Al l Rig hts R eserv e目录1.连接设备31.1. 从CO NSOLE连接 31.2.远程TEL NET连接 62.基本信息配置 62.1.配置机器名、TELN ET、密码 62.2. 配置SNMP网管串 63. 冗余及系统高可用性配置73.1. 同步S UPERV ISORENGIN E配置73.2.查看SU PERVI SOR E NGINE冗余 93.3.向冗余SU PERVI SOR E NGINE拷贝IOS文件 114. 端口设置114.1. 基本设置 114.2.配置三层端口 125. 配置二层端口135.1. 配置TRUNK: 136. 配置HSRP156.1. 配置二层普通交换接口156.2. 清除二层接口配置 167. 配置V LAN 168.动态路由协议--OS PF配置188.1. 启用OSPF动态路由协议 188.2. 定义参与OS PF的子网 188.3. O SPF区域间的路由信息汇总198.4. 配置密码验证198.5. 设置产生缺省路由 199. 交换机维护 209.1.交换机I OS保存和升级 209.2.交换机密码恢复211.连接设备1.1.从con sole连接第一次对6000交换机进行配置,必须从cons ole进入。
首先先将机器上架,按要求接好电源,然后用随机附带的Co nsole线和转接头将交换机的conso le口与P C的串口相联,如下:C om口设置如下:· 9600 baud·8 data bits·N o par ity · 2 s top b its检查电源无误后,开电,可能会出现类似下面的显示,按黑粗体字回答:Sy stemBoots trap, Vers ion 6.1(2)Copy right (c)1994-2000by ci sco S ystem s, In c.c6k_sup2 pro cesso r wit h 131072 K bytes of m ain m emoryrom mon 1 > bo ot sl ot0:c6sup22-jsv-mz.121-5c.EX.b inS elf d ecomp ressi ng th e ima ge :######################################################################################################################### ############################################################################### ############################################################################### ############################################################################### #######[OK] Re stric ted R ights Lege ndU se, d uplic ation, ordiscl osure by t he Go vernm ent i ssub jectto re stric tions as s et fo rth i n sub parag raph(c) o f the Comm ercia l Com puter Soft ware- Res trict edRi ghtsclaus e atFAR s ec. 52.227-19 a nd su bpara graph(c)(1) (ii) o f the Righ ts in Tech nical Data andCompu terS oftwa re cl auseat DF ARS s ec. 252.227-7013.c iscoSyste ms, I nc.170 We st Ta smanDrive SanJose, Cali forni a 95134-1706C iscoInter netwo rk Op erati ng Sy stemSoftw are IOS (tm) M SFC2Softw are (C6MSF C2-BO OT-M), Ver sion12.1(3a)E4, EAR LYDE PLOYM ENT RELEA SE SO FTWAR E (fc1)Co pyrig ht (c) 1986-2000 bycisco Syst ems,Inc.Compi led S at 14-Oct-00 05:33 b y eaa rmasImage text-base: 0x30008980, d ata-b ase:0x303B6000cis co Ca t6k-M SFC2(R7000) pr ocess or wi th 114688K/16384K by tes o f mem ory.Proce ssorboard ID S AD04430J9KR7000 CPU at 300Mhz, Imp lemen tatio n 39, Rev2.1,256KB L2,1024K B L3CacheLast rese t fro m pow er-onX.25 soft ware, Vers ion 3.0.0.509K byte s ofnon-v olati le co nfigu ratio n mem ory.16384K byt es of Flas h int ernal SIMM (Sec tor s ize 512K).Pre ss RE TURNto ge t sta rted!---Syste m Con figur ation Dial og ---Wou ld yo u lik e toenter theiniti al di alog? [yes]: no回答:N O,进入手工配置,在route r>下,输入enab le回车,进入全局模式1.2.远程tel net连接当完成交换机配置,并起给交换机配置了管理地址,就可以直接采用远程te lnet登陆进入交换机了,但是必须先配置linevty的密码和ena ble密码才能允许远程登陆。

交换机路由器命令大全(结合配置实例)交换机路由器命令大全(结合配置实例)交换机和路由器是计算机网络中常用的网络设备,用于实现数据包的转发和路由选择。
在实际应用中,我们需要使用命令来配置交换机和路由器的各项参数。
本文将给出交换机和路由器常用命令的大全,并结合实际配置示例进行说明。
一、交换机命令1. 查看交换机基本信息查看交换机型号、固件版本、序列号等基本信息:show version2. 配置交换机端口设置交换机接口的速率、全双工模式等参数:interface interface_namespeed speed_valueduplex {full | half}3. 查看交换机端口状态查看交换机端口的连接状态、速率、工作模式等信息:show interfaces status4. 配置交换机VLAN创建VLAN和端口关联,实现VLAN的隔离和管理:vlan vlan_idname vlan_nameinterface interface_name5. 查看交换机MAC表显示交换机学习到的MAC地址和对应的端口:show mac-address-table6. 配置交换机链路聚合将多个物理端口绑定为一个逻辑端口,提高带宽和冗余性:interface port-channel channel_numberdescription description_textswitchport mode trunk/access7. 交换机Spanning Tree配置配置交换机的Spanning Tree协议参数,避免网络环路:spanning-tree vlan vlan_idpriority priority_value二、路由器命令1. 查看路由表显示路由器的路由表,包括直连路由、静态路由和动态路由表项:show ip route2. 配置静态路由手动配置路由器的静态路由表,指定目的网络和下一跳信息:ip route destination_network subnet_mask next_hop_ip3. 配置路由器接口配置路由器的接口参数,包括IP地址、子网掩码、描述等:interface interface_nameip address ip_address subnet_maskdescription description_text4. 配置路由器OSPF协议配置路由器之间的OSPF动态路由协议,实现网络的动态路由选择:router ospf process_idnetwork network_address wildcard_mask area area_number5. 配置路由器ACL配置路由器的访问控制列表,用于控制数据包的流量:access-list access_list_number permit/deny source destination6. 配置路由器NAT配置路由器的网络地址转换功能,实现内网与外网的互通:interface interface_nameip nat inside/outside三、配置实例1. 配置交换机端口接口GigabitEthernet0/1配置为100Mbps全双工模式:interface GigabitEthernet0/1speed 100duplex full2. 配置交换机VLAN创建VLAN10,将接口GigabitEthernet0/1划分到VLAN10:vlan 10name VLAN10interface GigabitEthernet0/13. 配置路由器接口将接口GigabitEthernet0/0配置为192.168.1.1/24的IP地址:interface GigabitEthernet0/0ip address 192.168.1.1 255.255.255.0description LAN interface4. 配置静态路由配置路由器的静态路由表,将目的网络192.168.2.0/24指向下一跳192.168.1.2:ip route 192.168.2.0 255.255.255.0 192.168.1.25. 配置路由器ACL设置访问控制列表,允许源IP地址为192.168.1.0/24的流量通过:access-list 1 permit 192.168.1.0 0.0.0.2556. 配置路由器NAT设置路由器的NAT,将内部接口GigabitEthernet0/1地址转换为公网地址:interface GigabitEthernet0/1ip nat inside以上是交换机和路由器常用命令的大全以及配置实例。

路由交换命令路由交换命令大全进入console口进行本地配置用户模式xx>enable n特权模式xx#configure terminal全局配置模式 xx(config)#interface [f|s] n/m 进入接口配置模式xx(config-if)#,下面是由店铺为大家整理的路由交换命令大全,喜欢的可以收藏一下!了解更多详情资讯,请关注店铺!「基础配置」进入console口进行本地配置用户模式 xx>enable n特权模式xx#configure terminal全局配置模式xx(config)#interface [f|s] n/m进入接口配置模式xx(config-if)#进入(子)接口模式后配置IP(config-if)#ip addr A.B.C.D 子网掩码激活接口(config-if)#no shutdown配置速度(config-if)#speed {auto|10|100}配置接口工作模式(config-if)#duplex {auto|half|full}配置时钟(串行口DCE端)(config-if)#clock rate n反向操作(删除配置)no + 命令在换回接口上配多个ip(config-if)#ip addr A.B.C.D 子网掩码(config-if)#ip addr A.B.C.D 子网掩码secondary查看所有配置#show running-config路由器关闭路由功能充当主机(config)#no ip routing为路由器设置网关(config)#ip default-gateway ip地址改机器名字(config)#hostname yy控制线路超时(config)#line n(config-line)#exec-timeout 0 0关闭域名解析功能(config)#no ip domain-lookup开启路由器http功能(config)#ip http server(config)#username xxx password yyy(config)#username xxx secret yyy(config)#enable secret yyy启用密码加密服务(config)#service password-encryption yyy开启路由器https功能(config)#ip http secure-server开启路由器远程登录功能(config)#line vty 0 4(config)#login local或者(config)#no login(config)#enable n登录时使用命令 telnet A.B.C.D「交换机」查看mac地址表#show mac-address-table绑定静态mac地址(config)#mac-address-table static H.H.H vlan n interface fx/x #show arp在主机上使用arp -a查看arp信息开启交换机端口安全(防止连接主机恶意发送随机mac填满mac地址表)(conifg)#switchport port-security(conifg)#switchport ?#show port-security int fx/x恢复(config)#errdisable recovery为交换机vlan1配置管理ip(conifg)#int vlan 1(config-if)#ip addr A.B.C.D 子网掩码(config-if)#no shut「交换机vlan」查看vlan #show vlan-switch或是#show vlan创建vlan #vlan database(vlan)#vlan n将端口加入到vlan中(config-if)#switchport access vlan n给允许多个vlan的接口打trunk(config-if)#switchport mode trunk「单臂路由vlan」路由器上配置子接口实现不同vlan之间通信,先必须激活其父接口,另外IP不允许重复(config)#interface fx/x.x(config-subif)#encapsulation dot1q vlan-id(config-subif)#ip addr A.C.D.E 子网掩码(config-subif)#no shut「使用三层交换机交换虚拟接口」交换机上配置虚拟交换接口实现不同vlan之间通信,先必须在交换机上添加对应vlan(config)#int vlan n(config-if)#ip addr A.B.C.D 子网掩码(config-if)#no shut在删除时,务必先删除交换虚拟接口,再删对应vlan「VTP」配置VTP模式#vlan database(vlan)#vtp {server|client|transparent}只有域名和密码完全一样的路由器之间才能同步vlan信息(vlan)#vtp domain <域名>(vlan)#vtp password <密码>打开VTP裁剪(vlan)#vtp pruning退出激活(vlan)#exit「端口聚合」创建R1(config)#interface port-channel 1(config-if)#switchport trunk encapsulation dot1q(config-if)#switchport mode trunk将指定接口加入聚合组内#int range f x/x-x #channel-group 1 mode on查看聚合接口#show etherchannel summary 「生成树协议」基于vlan的'生成树可防止环路开启生成树协议(STP默认是开启的,可省略)(config)#spanning-tree vlan n修改生成树协议优先级(根网桥:mac最小、优先级最小)(config)#spanning-tree vlan n priority m交换机和主机之间连接的端口开启portfast,可防止主机发送BPDU伪造数据(config-if)#spanning-tree portfast查看生成树#show spanning-tree [vlan n]「静态路由」查看协议#show ip protocols查看路由表#show ip route添加静态路由(以默认路由举例)(config)#ip route 0.0.0.0 0.0.0.0 {出接口|下一跳ip}浮动静态路由(备份链路,在原链路失效后起作用)(config)#ip route 0.0.0.0 0.0.0.0 出接口 AD管理距离静态黑洞路由(config)#ip route 192.168.0.0 255.255.0.0 null 0 「RIP距离矢量路由,动态路由」配置RIP宣告直连网段(config)#router rip(config-router)#network 网段更改为版本2(config-router)#version {2|1}关闭自动汇总(如果被其他网路隔开时,最好关闭自动汇总)(config-router)#no auto-summary设置被动接口(只接受更新,不宣告自己)(config-router)#passive-interface 接口单播更新(只和指定的ip交换路由信息)(config-router)#neighbor ip地址清除路由表内容#clear ip route *「OSPF链路状态路由,动态路由」配置OSPF宣告直连网路(config)#router ospf <进程号>(config-router)#router-id <任意ip地址>(config-router)#network <ip网段> <反掩码> area n重启OSPF进程#clear ip ospf process查看接口的OSPF信息#show ip ospf interface查看邻居表#show ip ospf neighbor查看链路数据表#show ip ospf database <?>。
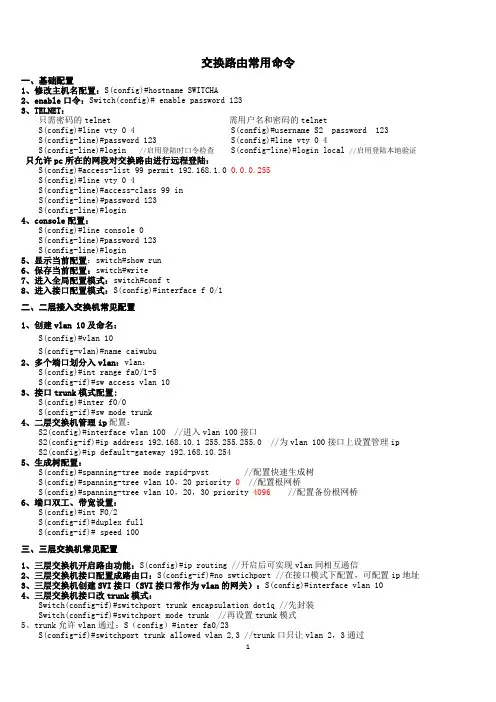
交换路由常用命令一、基础配置1、修改主机名配置:S(config)#hostname SWITCHA2、enable口令:Switch(config)#enable password1233、TELNET:只需密码的telnet需用户名和密码的telnetS(config)#line vty04S(config)#username S2password123S(config-line)#password123S(config)#line vty04S(config-line)#login//启用登陆时口令检查S(config-line)#login local//启用登陆本地验证只允许pc所在的网段对交换路由进行远程登陆:S(config)#access-list99permit192.168.1.00.0.0.255S(config)#line vty04S(config-line)#access-class99inS(config-line)#password123S(config-line)#login4、console配置:S(config)#line console0S(config-line)#password123S(config-line)#login5、显示当前配置:switch#show run6、保存当前配置:switch#write7、进入全局配置模式:switch#conf t8、进入接口配置模式:S(config)#interface f0/1二、二层接入交换机常见配置1、创建vlan10及命名:S(config)#vlan10S(config-vlan)#name caiwubu2、多个端口划分入vlan:vlan:S(config)#int range fa0/1-5S(config-if)#sw access vlan103、接口trunk模式配置:S(config)#inter f0/0S(config-if)#sw mode trunk4、二层交换机管理ip配置:S2(config)#interface vlan100//进入vlan100接口S2(config-if)#ip address192.168.10.1255.255.255.0//为vlan100接口上设置管理ip S2(config)#ip default-gateway192.168.10.2545、生成树配置:S(config)#spanning-tree mode rapid-pvst//配置快速生成树S(config)#spanning-tree vlan10,20priority0//配置根网桥S(config)#spanning-tree vlan10,20,30priority4096//配置备份根网桥6、端口双工、带宽设置:S(config)#int F0/2S(config-if)#duplex fullS(config-if)#speed100三、三层交换机常见配置1、三层交换机开启路由功能:S(config)#ip routing//开启后可实现vlan间相互通信2、三层交换机接口配置成路由口:S(config-if)#no swtichport//在接口模式下配置,可配置ip地址3、三层交换机创建SVI接口(SVI接口常作为vlan的网关):S(config)#interface vlan104、三层交换机接口改trunk模式:Switch(config-if)#switchport trunk encapsulation dot1q//先封装Switch(config-if)#switchport mode trunk//再设置trunk模式5、trunk允许vlan通过:S(config)#inter fa0/23S(config-if)#switchport trunk allowed vlan2,3//trunk口只让vlan2,3通过S(config-if)#switchport trunk allowed vlan all//trunk口允许所有的vlan通过四、路由器常见配置1、ip地址设置:router(config-if)#ip address192.168.1.1255.255.255.0//接口模式下配置2、静态路由配置:router(config)#ip route192.168.1.0255.255.255.010.1.1.1{f0/0}//下一跳地址可替换为出接口3、默认路由配置:router(config)#ip route0.0.0.00.0.0.010.1.1.14、浮动静态路由作为备份路由:R(config)#ip route172.16.20.0255.255.255.010.10.10.4R(config)#ip route172.16.20.0255.255.255.010.10.10.6100//路由开销值100比默认值1大,作为备份路由5、路由可达,有去有回。
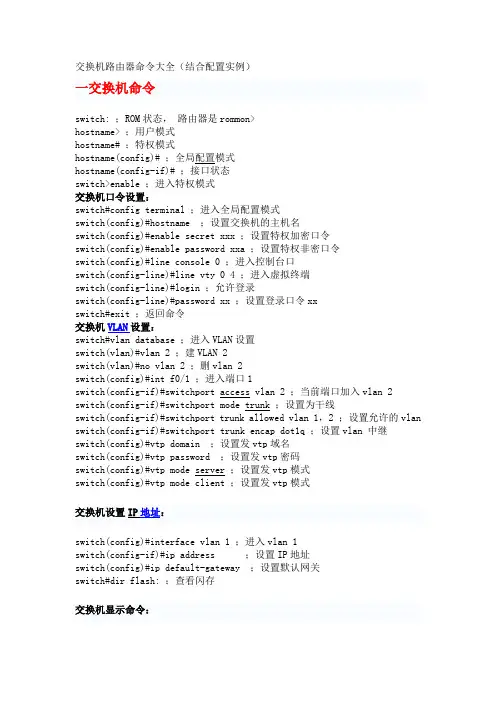
交换机路由器命令大全(结合配置实例)一交换机命令switch: ;ROM状态,路由器是rommon>hostname> ;用户模式hostname# ;特权模式hostname(config)# ;全局配置模式hostname(config-if)# ;接口状态switch>enable ;进入特权模式交换机口令设置:switch#config terminal ;进入全局配置模式switch(config)#hostname ;设置交换机的主机名switch(config)#enable secret xxx ;设置特权加密口令switch(config)#enable password xxa ;设置特权非密口令switch(config)#line console 0 ;进入控制台口switch(config-line)#line vty 0 4 ;进入虚拟终端switch(config-line)#login ;允许登录switch(config-line)#password xx ;设置登录口令xxswitch#exit ;返回命令交换机VLAN设置:switch#vlan database ;进入VLAN设置switch(vlan)#vlan 2 ;建VLAN 2switch(vlan)#no vlan 2 ;删vlan 2switch(config)#int f0/1 ;进入端口1switch(config-if)#switchport access vlan 2 ;当前端口加入vlan 2 switch(config-if)#switchport mode trunk ;设置为干线switch(config-if)#switchport trunk allowed vlan 1,2 ;设置允许的vlan switch(config-if)#switchport trunk encap dot1q ;设置vlan 中继switch(config)#vtp domain ;设置发vtp域名switch(config)#vtp password ;设置发vtp密码switch(config)#vtp mode server ;设置发vtp模式switch(config)#vtp mode client ;设置发vtp模式switch(config)#interface vlan 1 ;进入vlan 1switch(config-if)#ip address ;设置IP地址switch(config)#ip default-gateway ;设置默认网关switch#dir flash: ;查看闪存交换机显示命令:switch#write ;保存配置信息switch#show vtp ;查看vtp配置信息switch#show run ;查看当前配置信息switch#show vlan ;查看vlan配置信息switch#show interface ;查看端口信息switch#show int f0/0 ;查看指定端口信息二、路由器命令路由器显示命令:router#show run ;显示配置信息router#show interface ;显示接口信息router#show ip route ;显示路由信息router#show cdp nei ;显示邻居信息router#reload ;重新起动路由器口令设置:router>enable ;进入特权模式router#config terminal ;进入全局配置模式router(config)#hostname ;设置交换机的主机名router(config)#enable secret xxx ;设置特权加密口令router(config)#enable password xxb ;设置特权非密口令router(config)#line console 0 ;进入控制台口router(config-line)#line vty 0 4 ;进入虚拟终端router(config-line)#login ;要求口令验证router(config-line)#password xx ;设置登录口令xxrouter(config)#(Ctrl+z) ;返回特权模式router#exit ;返回命令路由器配置:router(config)#int s0/0 ;进入Serail接口router(config-if)#no shutdown ;激活当前接口router(config-if)#clock rate 64000 ;设置同步时钟router(config-if)#ip address ;设置IP地址router(config-if)#ip address second ;设置第二个IProuter(config-if)#int f0/0.1 ;进入子接口router(config-subif.1)#ip address ;设置子接口IProuter(config-subif.1)#encapsulation dot1q ;绑定vlan中继协议router(config)#config-register 0x2142 ;跳过配置文件router(config)#config-register 0x2102 ;正常使用配置文件router#reload ;重新引导静态路由:ip route ;命令格式router(config)#ip route 2.0.0.0 255.0.0.0 1.1.1.2 ;静态路由举例router(config)#ip route 0.0.0.0 0.0.0.0 1.1.1.2 ;默认路由举例动态路由:router(config)#ip routing ;启动路由转发router(config)#router rip;启动RIP路由协议。
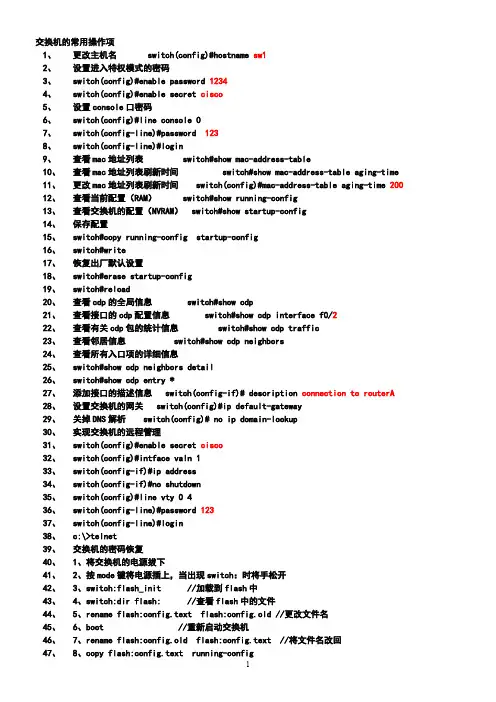
交换机的常用操作项1、更改主机名 switch(config)#hostname sw12、设置进入特权模式的密码3、switch(config)#enable password 12344、switch(config)#enable secret cisco5、设置console口密码6、switch(config)#line console 07、switch(config-line)#password 1238、switch(config-line)#login9、查看mac地址列表 switch#show mac-address-table10、查看mac地址列表刷新时间 switch#show mac-address-table aging-time11、更改mac地址列表刷新时间 switch(config)#mac-address-table aging-time 20012、查看当前配置(RAM) switch#show running-config13、查看交换机的配置(NVRAM) switch#show startup-config14、保存配置15、switch#copy running-config startup-config16、switch#write17、恢复出厂默认设置18、switch#erase startup-config19、switch#reload20、查看cdp的全局信息 switch#show cdp21、查看接口的cdp配置信息 switch#show cdp interface f0/222、查看有关cdp包的统计信息 switch#show cdp traffic23、查看邻居信息 switch#show cdp neighbors24、查看所有入口项的详细信息25、switch#show cdp neighbors detail26、switch#show cdp entry *27、添加接口的描述信息 switch(config-if)# description connection to routerA28、设置交换机的网关 switch(config)#ip default-gateway29、关掉DNS解析 switch(config)#no ip domain-lookup30、实现交换机的远程管理31、switch(config)#enable secret cisco32、switch(config)#intface valn 133、switch(config-if)#ip address34、switch(config-if)#no shutdown35、switch(config)#line vty 0 436、switch(config-line)#password 12337、switch(config-line)#login38、c:\>telnet39、交换机的密码恢复40、1、将交换机的电源拔下41、2、按mode键将电源插上,当出现switch:时将手松开42、3、switch:flash_init //加载到flash中43、4、switch:dir flash: //查看flash中的文件44、5、rename flash:config.text flash:config.old //更改文件名45、6、boot //重新启动交换机46、7、rename flash:config.old flash:config.text //将文件名改回48、9、enable password cisco //重新设置密码49、10、write //保存50、创建vlan方法一51、switch#vlan database52、switch(vlan)#vlan 10 name sc53、switch(vlan)#exit54、创建vlan方法二55、switch(config)#vlan 1056、switch(config-vlan)#name sc57、删除vlan方法一58、switch(vlan)#no vlan 1059、switch(vlan)#exit60、删除vlan方法二 switch(config)#no vlan 1061、删除vlan方法三 switch#delete vlan.dat62、将端口加入到vlan中 switch(config-if)#switchport access vlan 1063、将一组连续的端口加入到vlan中64、switch(config)# interface range f0/1 – 565、switch(config-if-range)#switchport access vlan 1066、将端口从vlan中删除67、switch(config-if)#no switchport access vlan 1068、switch(config-if)#switchport access vlan 169、switch(config-if-range)#no switchport access vlan 1070、switch(config-if-range)#switchport access vlan 171、查看所有vlan的摘要信息 switch#show vlan brief72、查看指定vlan的信息73、switch#show vlan id 1074、Cisco 2600路由器的基本操作75、从用户模式进入特权模式76、router>enable77、router#78、从特权模式进入全局配置模式79、router#config terminal80、router(config)#81、为路由器配置主机名82、router(config)#hostname teacher83、teacher(config)#84、进入路由器的以太口配置模式85、teacher(config)#interface fastethernet 0/086、teacher(config_if)#87、查看Cisco 2600路由器的串口状态88、router#show interface serial 0/089、serial 0/0 is up ,line protocol is up90、可操作状态………serial 0/0 is up ,line protocol is up91、连接问题…………serial 0/0 is up ,line protocol is down92、接口问题…………serial 0/0 is down ,line protocol is down93、禁用状态…………serial 0/0 is administratively down ,line protocol is down94、静态路由的实现96、A(config)#interface f0/097、255.0A(config-if)#no shutdown98、A(config)#interface f0/199、255.0A(config-if)#no shutdown100、101、102、配置默认路由 route(config)#ip route 0.0.0103、查看路由表104、router#show ip route105、其中C代表直连的网络,S代表静态的路由,S*代表默认的路由106、为Cisco 2600路由器配置密码107、配置控制台密码108、router (config)#line console 0109、router (config-line)#login110、router (config-line)#password cisco111、配置特权模式密码 router (config)#enable password cisco112、配置安全的加密密码 router (config)#enable secret 1234113、配置路由器标识 router(config)#banner motd $This is Aptech company’s Router! Please don’t change the configuration whithout permissions$114、对所有密码进行加密 router (config)#service password-encryption115、配置超时 router(config)#line console 0116、router(config-line)#exec-timeout 0 0 //第一个0代表分钟,第二个0代表秒117、显示同步 router(config)#line console 0118、router(config-line)#logging synchronous119、配置禁用DNS router(config)#no ip domain-lookup120、利用三台路由器实现静态路由和默认路由121、122、路由器密码恢复123、重启路由器按124、rommon 1>confreg 0x2142125、rommon 2>reset126、重启后选择no127、router>enable128、router#copy startup-config running-config129、router#config terminal130、router(config)#enable password cisco131、router(config)#config-register 0x2102132、router#copy running-config startup-config133、router#reload134、单臂路由——实现不同vlan之间的通信V L A N1135、136、1137、switch#vlan database138、switch(vlan)#vlan 2139、switch(vlan)#vlan 3140、2、将端口加入vlan141、switch(config)#interface range f0/6 -8142、switch(config-if-range)#switchport access vlan 2143、switch(config-if-range)# interface range f0/9 -11144、switch(config-if-range)#switchport access vlan 3145、3、配置trunk switch(config)#interface f0/12146、switch(config-if)#switchport mode trunk147、4、配置路由器的子接口封装dot1q,并设置IP地址148、router(config)#interface f0/0.1149、router(config-subif)#encapsulation dot1q 1150、router(config-subif)#ip address151、router(config-subif)#no shut152、router(config)#interface f0/0.2153、router(config-subif)#encapsulation dot1q 2154、router(config-subif)#ip address155、router(config-subif)#no shut156、router(config)#interface f0/0.3157、router(config-subif)#encapsulation dot1q 3158、router(config-subif)#ip address159、router(config-subif)#no shut160、router(config)#interface f0/0161、router(config-if)#no shut162、5、设置pc的IP地址和默认网关163、0RIP版本V1和V2 的区别164、RIP v1165、发送路由更新时不携带子网掩码,属于有类路由协议167、 RIP v2168、 发送路由更新时携带子网掩码,属于无类路由协议169、170、 RIP V1的配置routerA(config)#interface f0/0routerA(config-if)#no shutdownrouterA(config-if)#interface f0/1routerA(config-if)# ip address 10.0.0routerA(config-if)#no shutdownrouterB(config)#interface f0/0routerB(config-if)#no shutdownrouterB(config)#interface f0/12routerB(config-if)#no shutdownrouterC(config)#interface f0/0routerC(config-if)#no shutdownrouterC(config)#interface f0/1routerC(config-if)#no shutdown2、在路由器上启动RIP 进程,并宣告网络号:routerA(config)#router riprouterB(config)#router riprouterC(config)#router rip3、验证配置是否正确1)查看路由表router#show ip route2)查看路由协议配置router#show ip protocol3)打开RIP 协议调试命令192.168.1.0/24 .14、在PC上设置IP地址、子网掩码、默认网关,用ping命令测试连通性49.RIP V2的配置10.1.1.0/24配置步骤:1routerA(config-if)#no shutdownrouterB(config)#interface f0/0routerB(config-if)#ip address 10.routerB(config-if)#no shutdownrouterB(config)#interface f0/1routerB(config-if)#ip addressrouterB(config-if)#no shutdownrouterC(config)#interface f0/0routerC(config-if)#ip addressrouterC(config-if)#no shutdownrouterC(config)#interface f0/11routerC(config-if)#no shutdown2、在路由器上配置RIP V2 路由协议routerA(config)#router riprouterA(config-router)#version 2routerA(config-router)#no auto-summaryrouterB(config)#router riprouterB(config-router)#version 2routerB(config-router)# no auto-summaryrouterB(config-router)#networkrouterC(config)#router riprouterC(config-router)# version 2routerC(config-router)# no auto-summaryrouterC(config-router)#network3、验证配置是否正确1)查看路由表2)查看路由协议配置router#show ip protocol3)打开RIP协议调试命令router#debug ip rip4、在PC上设置IP地址、子网掩码、默认网关,用ping命令测试连通性178、上传路由器上的IOS179、router#show flash //查看IOS文件名180、router#copy flash tftp181、182、Address or name of remote host []?183、184、下载IOS到路由器185、router#copy tftp flash186、上传路由器上配置文件187、router#copy nvram:startup-config tftp:188、Address or name of remote host []?Destination filename [router-config]? startup-config下载配置文件到路由器router#copy tftp:startup-config nvramC2600路由器IOS被删除的恢复方法:1、ctrl+breakrommon 1>IP_ADDRESS=rommon 2rommon 3>DEFAULT_GATEWAY=rommon 4>TFTP_SERVER=rommon 5rommon 6>tftpdnld。
华为路由器交换机配置命令大全华为路由器交换机配置大全1XXX华为路由器交换机配置命令大全一、计算机命令#shutdown-hnow;关机#init 0;关机#logout;用户注销#login;用户登录#ifconfig;显示IP地址#ifconfig eth0 netmask;设置IP地址#ifconfig eht0 netmask down;禁用IP地址#route add 0.0.0.0 gw;设置网关#route del 0.0.0.0 gw;删除网关#route add default gw;设置网关#route del default gw;删除网关#route;显示网关#ping;发ECHO包#telnet;远程登录二、XXX路由器交换机配置命令:交换机命令[Quidway]dis cur;显示当前配置[Quidway]display current-configuration;表现当前配置[Quidway]display interfaces;显示接口信息[Quidway]display vlan;表现vlan信息[Quidway]display version;显示版本信息[Quidway]super password;修改特权用户密码[Quidway]sysname;交流机定名[Quidway]interface vlan x;进入接口视图[Quidway-Vlan-interfacex]ip address 10.65.1.1 255.255.0.0;配置VLAN的IP地址[Quidway]Ip route-static 0.0.0.0 0.0.0.0 10.65.1.2;静态路由=网关[Quidway]rip;rip协议[Quidway]local-user ftp[Quidway]user-interface vty 0 4;进入假造终端[S3026-ui-vty0-4]authentication-mode password;设置口令模式[S3026-ui-vty0-4]set authentication-mode password simple 222;设置口令[S3026-ui-vty0-4]user privilege level 3;用户级别[Quidway]vlan3;创建VLAN[Quidway]monitor-port;指定镜像端口[Quidway]port mirror;指定被镜像端口[Quidway]port mirror int_list observing-port int_type int_num;指定镜像和被镜像[Quidway]description string;指定VLAN描述字符[Quidway]description;删除VLAN描述字符[Quidway]display vlan[vlan_id];检察VLAN设置[Quidway]stp{enable|disable};设置天生树,默许封闭[Quidway]stp priority 4096;设置交换机的优先级[Quidway]stp root{primary|secondary};设置为根或根的备份[SwitchA-vlanx]isolate-user-vlan enable;设置主vlan所以设置PVID为所属vlanid,设置可以互通的vlan为untagged.3、XXX路由器交流机配置敕令:路由器敕令[Quidway]display version;表现版本信息[Quidway]display current-configuration;表现当前配置[Quidway]display interfaces;显示接口信息[Quidway]display ip route;表现路由信息[Quidway]sysname aabbcc;变动主机名[Quidway]super password ;设置口令[Quidway]interface serial0;进入接口华为路由器交换机配置大全3[Quidway-serial0]ip address;配置端口IP地址[Quidway-serial0]undo shutdown;激活端口[Quidway]link-protocol hdlc;绑定hdlc协议[Quidway]user-interface vty 0 4[Quidway-ui-vty0-4]authentication-mode password[Quidway-ui-vty0-4]set authentication-mode password simple 222[Quidway-ui-vty0-4]user privilege level 3[Quidway-ui-vty0-4]quit[Quidway]debugging XXX;显示所有信息[Quidway]debugging XXX;调试事件信息[Quidway]debugging XXX;表现包的信息四、XXX路由器交换机配置命令:静态路由:[Quidway]ip route-static{interfacenumber|nexthop}[value][reject|blackhole]例如:[Quidway]ip route-static 129.1.0.0 16 10.0.0.2[Quidway]ip route-static 129.1.0.0 255.255.0.0 10.0.0.2[Quidway]ip route-static 129.1.0.0 16 Serial2[Quidway]ip route-static 0.0.0.0 0.0.0.0 10.0.0.25、XXX路由器交流机配置敕令:静态路由:[Quidway]rip;设置静态路由[Quidway]rip work;设置工作允许[Quidway]ri pinput;设置入口允许[Quidway]rip output;设置出口允许[Quidway-rip]network 1.0.0.0;设置交换路由网络[Quidway-rip]network all;设置与所有网络交换[Quidway-rip]peer ip-address;[Quidway-rip]summary;路由聚合[Quidway]rip version 1;设置事情在版本1[Quidway]rip version 2 multicast;设版本2,多播体式格局[Quidway-Ethernet0]rip split-horizon;水平分隔[Quidway]XXX;配置路由器的ID[Quidway]ospf enable;启动OSPF协议[Quidway-ospf]import-routedirect;引入直联路由[Quidway-Serial0]ospf enable area;配置OSPF地区六、XXX路由器交换机配置命令:标准访问列表命令格式如下:acl[match-orderconfig|auto];默许前者按次婚配。
交换机路由器常用命令交换机和路由器是网络中非常重要的设备,熟练掌握它们的常用命令对于网络管理和故障排除至关重要。
下面为您介绍一些交换机和路由器常用的命令。
一、交换机常用命令1、`enable` 命令这个命令用于进入特权模式。
在特权模式下,可以执行更多高级的配置和管理操作。
2、`configure terminal` 命令输入此命令后,可以进入全局配置模式,对交换机的整体参数进行设置。
3、`interface` 命令通过`interface` 加上接口类型和编号,例如`interface ethernet0/1` ,可以进入特定接口的配置模式,对该接口的参数进行详细配置。
4、`vlan` 命令`vlan` 相关的命令用于创建、删除和配置 VLAN(虚拟局域网)。
比如`vlan 10` 创建 VLAN 10 ,`name VLAN10` 为 VLAN 10 命名。
5、`show vlan` 命令用于查看交换机上已创建的VLAN 信息,包括VLAN 编号、名称、端口成员等。
6、`show interfaces` 命令此命令可以查看交换机各个接口的状态、速率、双工模式等详细信息。
7、`port trunk allowpass vlan` 命令在配置 trunk 链路时,使用该命令允许特定的 VLAN 通过 trunk 链路。
8、`spanningtree` 命令用于配置生成树协议,防止网络环路。
例如`spanningtree moderstp` 可以设置生成树的模式为快速生成树。
二、路由器常用命令1、`enable` 命令同样用于进入特权模式。
2、`configure terminal` 命令进入全局配置模式。
3、`interface` 命令例如`interface fastethernet 0/0` ,进入特定的接口配置模式。
4、`ip address` 命令为接口配置 IP 地址,如`ip address 19216811 2552552550` 。
路由器和交换机命令大全路由器和交换机是计算机网络中常用的设备,它们在数据传输和网络管理中发挥着重要的作用。
掌握路由器和交换机的命令是网络管理和故障排除的基本要求。
本文将为您提供常见的路由器和交换机命令大全,以帮助您更好地理解和应用这些设备。
一、路由器命令1. show ip route:显示路由表中的所有路由信息。
2. show interfaces:显示接口的状态和统计信息。
3. show running-config:显示当前路由器的配置信息。
4. show version:显示路由器的硬件和软件版本信息。
5. configure terminal:进入全局配置模式。
6. interface interface-name:进入指定接口的配置模式。
7. ip address ip-address subnet-mask:为接口配置IP地址和子网掩码。
8. ip route destination-network subnet-mask next-hop:配置静态路由。
9. access-list access-list-number {deny | permit} source destination:配置访问控制列表。
10. clear arp-cache:清除路由器的ARP缓存。
11. debug {protocols | ip | interface}:启用某个调试功能来监控网络流量或接口状态。
二、交换机命令1. show interfaces:显示接口的状态和统计信息。
2. show mac-address-table:显示交换机的MAC地址表。
3. show running-config:显示当前交换机的配置信息。
4. show vlan:显示交换机的VLAN信息。
5. configure terminal:进入全局配置模式。
6. interface interface-name:进入指定接口的配置模式。
华为路由器、交换机配置命令大全华为路由器配置命令大全:一、登录华为路由器控制台1:使用PuTTY或其他SSH客户端登录到华为路由器:```ssh admin<路由器IP地址>```2:输入登录密码进行验证。
二、基本配置命令1:设置主机名:```sysname <主机名>```2:配置管理接口:```interface GigabitEthernet0/0/0ip address <IP地址> <子网掩码>```3:配置VLAN接口:```interface Vlanif <VLAN ID>ip address <IP地址> <子网掩码>```三、路由相关配置命令1:静态路由配置:```ip route-static <目标网络> <子网掩码> <下一跳地址> ```2:动态路由配置:```router ospf <进程ID>router-id <路由器ID>network <网络地址> <子网掩码> area <区域ID>3: BGP路由配置:```bgp <AS号码>router-id <路由器ID>peer <对端IP地址> as-number <对端AS号码>```四、安全配置命令1:配置防火墙规则:```acl number <ACL编号>rule <规则序号> permit source <源地址> destination <目的地址>rule <规则序号> deny source <源地址> destination <目的地址>```2:开启SSH服务:ssh server enable```3:配置AAA认证:```aaalocal-user <用户名> password irreversible-cipher <加密密码>authorization-attribute user-role network-admin```五、NAT配置命令1:配置静态NAT:```interface GigabitEthernet0/0/0nat outbound <内部接口> <外部接口>```2:配置动态NAT:nat address-group <地址组名>address <内部地址> <外部地址>```3:配置PAT:```interface GigabitEthernet0/0/0nat address-group <地址组名>```附件:1:示例配置文件(附件1)2:路由器接口图(附件2)法律名词及注释:1:主机名:路由器的标识名称。
华为路由器交换机配置命令大全华为路由器交换机配置命令大全一、登录与认证命令1.Telnet 登录命令2.SSH 登录命令3.Console 登录命令4.用户认证命令二、设备管理命令1.设备信息查看命令2.设备参数配置命令3.设备重启命令4.设备保存配置命令三、接口配置命令1.查看接口状态命令2.配置接口描述命令3.配置接口IP地质命令4.配置接口MTU命令5.开启/关闭接口命令四、路由配置命令1.配置静态路由命令2.配置默认路由命令3.配置动态路由命令4.查看路由表命令5.清空路由表命令五、VLAN 配置命令1.配置VLAN命令2.配置端口VLAN命令3.配置VLAN接口命令六、交换机功能配置命令1.配置端口镜像命令2.配置链路聚合命令3.配置交换机端口安全命令4.配置交换机QoS命令七、安全配置命令1.配置访问控制列表命令2.配置NAT命令3.配置防火墙命令4.配置SSL VPN命令附录:附件:1.示例配置文件2.常见问题解答法律名词及注释:1.Telnet:一种远程登录协议,用于远程连接路由器或交换机进行管理和配置。
2.SSH:Secure Shell,一种用于远程登录的网络协议,提供安全的数据通信和用户认证方式。
3.Console:一种通过串口连接设备进行本地登录的方式。
4.VLAN:Virtual Local Area Network,虚拟局域网,将不同的物理分组划分到不同的逻辑分组中,实现逻辑分离。
5.MTU:Maximum Transmission Unit,最大传输单元,指数据链路层上一次发送的帧的最大长度。
6.NAT:Network Address Translation,网络地质转换,用于在私有网络和公共网络之间进行通信的转换技术。
7.QoS:Quality of Service,服务质量,用于在网络通信中对不同数据流进行优先级和带宽控制。
H3C交流机设置装备摆设敕令大全【2 】1.system-view 进入体系视图模式2.sysname 为装备定名3.display current-configuration 当前设置装备摆设情形4. language-mode Chinese|English 中英文切换5.interface Ethernet 1/0/1 进入以太网端口视图6. port link-type Access|Trunk|Hybrid 设置端口拜访模式7. undo shutdown 打开以太网端口8. shutdown 封闭以太网端口9. quit 退出当前视图模式10. vlan 10 创建VLAN 10并进入VLAN 10的视图模式11. port access vlan 10 在端口模式下将当前端口参加到vlan 10中12.port E1/0/2 to E1/0/5 在VLAN模式下将指定端口参加到当前vlan中13.port trunk permit vlan all 许可所有的vlan经由过程H3C路由器1.system-view 进入体系视图模式2.sysname R1 为装备定名为R13.display ip routing-table 显示当前路由表4. language-mode Chinese|English 中英文切换5.interface Ethernet 0/0 进入以太网端口视图6. ip address 192.168.1.1 255.255.255.0 设置装备摆设IP地址和子网掩码7. undo shutdown 打开以太网端口8. shutdown 封闭以太网端口9. quit 退出当前视图模式10. ip route-static 192.168.2.0 255.255.255.0 192.168.12.2 description To.R2 设置装备摆设静态路由11. ip route-static 0.0.0.0 0.0.0.0 192.168.12.2 description To.R2 设置装备摆设默认的路由H3C S3100 SwitchH3C S3600 SwitchH3C MSR 20-20 Router############################################################################### ###########1.调剂超级终端的显示字号;2.捕获超级终端操作敕令行,以备日后查对;3. language-mode Chinese|English 中英文切换;4.复制敕令到超级终端敕令行,粘贴到主机;5.交流机消除设置装备摆设 :<H3C>reset save ;<H3C>reboot ;6.路由器.交流机设置装备摆设时不能失落电,连通测试前必定要检讨收集的连通性,不要犯最低级的错误.7.192.168.1.1/24 等同192.168.1.1 255.255.255.0;在设置装备摆设交流机和路由器时, 192.168.1.1 255.255.255.0 可以写成:192.168.1.1 248.装备定名规矩:地名-装备名-系列号例:PingGu-R-S3600###########################################################################H3C华为交流机端口绑定根本设置装备摆设2008-01-22 13:401,端口 MACa)AM敕令应用特别的AM User-bind敕令,来完成MAC地址与端口之间的绑定.例如:[SwitchA]am user-bind mac-address 00e0-fc22-f8d3 interface Ethernet 0/1设置装备摆设解释:因为应用了端口参数,则会以端口为参照物,即此时端口E0/1只许可PC1上彀,而应用其他未绑定的MAC地址的PC机则无法上彀.但是PC1应用该MAC地址可以在其他端口上彀.b)mac-address敕令应用mac-address static敕令,来完成MAC地址与端口之间的绑定.例如:[SwitchA]mac-address static 00e0-fc22-f8d3 interface Ethernet 0/1 vlan 1[SwitchA]mac-address max-mac-count 0设置装备摆设解释:因为应用了端口进修功效,故静态绑定mac后,需再设置该端口mac进修数为0,使其他PC接入此端口后其mac地址无法被进修.2,IP MACa)AM敕令应用特别的AM User-bind敕令,来完成IP地址与MAC地址之间的绑定.例如:[SwitchA]am user-bind ip-address 10.1.1.2 mac-address 00e0-fc22-f8d3设置装备摆设解释:以上设置装备摆设完成对PC机的IP地址和MAC地址的全局绑定,即与绑定的IP地址或者MAC地址不同的PC机,在任何端口都无法上彀.支撑型号:S3026E/EF/C/G/T.S3026C-PWR.E026/E026T.S3050C.E050.S3526E/C/EF.S5012T/G.S5024Gb)arp敕令应用特别的arp static敕令,来完成IP地址与MAC地址之间的绑定.例如:[SwitchA]arp static 10.1.1.2 00e0-fc22-f8d3设置装备摆设解释:以上设置装备摆设完成对PC机的IP地址和MAC地址的全局绑定. 3,端口 IP MAC应用特别的AM User-bind敕令,来完成IP.MAC地址与端口之间的绑定.例如:[SwitchA]am user-bind ip-address 10.1.1.2 mac-address 00e0-fc22-f8d3 interface Ethernet 0/1设置装备摆设解释:可以完成将PC1的IP地址.MAC地址与端口E0/1之间的绑定功效.因为应用了端口参数,则会以端口为参照物,即此时端口E0/1只允许PC1上彀,而应用其他未绑定的IP地址.MAC地址的PC机则无法上彀.但是PC1应用该IP 地址和MAC地址可以在其他端口上彀.###############################################################[S2016-E1-Ethernet0/1]mac-address max-mac-count 0;进入到端口,用敕令mac max-mac-count 0(端口mac进修数设为0)[S2016-E1]mac static 0000-9999-8888 int e0/1 vlan 10;将0000-9999-8888绑定到e0/1端口上,此时只有绑定mac的pc可以经由过程此口上彀,同时E0/1属于vlan 10就如许,ok了,不过上面两个敕令次序不能弄反,除非端口下没有接pc#################################################################dis vlan 显示vlanname text 指定当前vlan的名称undo name 撤消[h3c] vlan 2[h3c-vlan2]name test vlandis users 显示用户dis startup 显示启动设置装备摆设文件的信息dis user-interface 显示用户界面的相干信息dis web users 显示web用户的相干信息.header login 设置装备摆设登陆验证是显示信息header shellundo headerlock 锁住当前用户界面acl 拜访掌握列表 acl number inbound/outbound[h3c]user-interface vty 0 4[h3c-vty0-4] acl 2000 inboundshutdown:封闭vlan接口undo shutdown 打开vlan接口封闭vlan1 接口[h3c] interface vlan-interface 1[h3c-vlan-interface] shutdownvlan vlan-id 界说vlanundo valn vlan-iddisplay ip routing-tabledisplay ip routing-table protocol staticdisplay ip routing-table statisticsdisplay ip routing-table verbose 查看路由表的全体具体信息interface vlan-interface vlan-id 进入valnmanagement-vlan vlan-id 界说治理vlan号reset ip routing-table statistics protocol all 消除所有路由协定的路由信息.display garp statistics interface GigabitEthernet 1/0/1 显示以太网端口上的garp统计信息display voice vlan status 查看语音vlan状况[h3c-GigabitEthernet1/0/1] broadcast-suppression 20 许可接收的最大广播流量为该端口授输才能的20%.超出部分丢弃.[h3c-GigabitEthernet1/0/1] broadcast-suppression pps 1000 每秒许可接收的最大广播数据包为1000传输才能的20%.超出部分丢弃.display interface GigabitEthernet1/0/1 查看端口信息display brief interface GigabitEthernet1/0/1 查看端口扼要设置装备摆设信息display loopback-detection 用来测试环路测试是否开启display transceiver-information interface GigabitEthernet1/0/50 显示光口相干信息duplex auto/full/half[h3c]interface GigabitEthernet1/0/1[h3c-GigabitEthernet1/0/1]duplux auto 设置端口双工属性为自协商port link-type access/hybrid/trunk 默以为accessport trunk permit vlan all 将trunk扣参加所有vlan中reset counters interface GigabitEthernet1/0/1 清晰端口的统计信息speed auto 10/100/1000display port-security 查看端口安全设置装备摆设信息am user-bind mac-addr 00e0-fc00-5101 ip-addr 10.153.1.2 interface GigabitEthernet1/0/1 端口ip 绑定display arp 显示arpdisplay am user-bind 显示端口绑定的设置装备摆设信息display mac-address 显示交流机进修到的mac地址display stp 显示生成树状况与统计信息[h3c-GigabitEthernet1/0/1]stp instance 0 cost 200 设置生成树实例0上路径开销为200stp cost 设置当前端口在指定生成树实例上路径开销.instance-id 为0-16 0表cist 取值规模1-200000< h3c> display system-guard ip-record 显示防进击记载信息.system-guard enable 启用体系防进击功效display icmp statistics icmp流量统计display ip socketdisplay ip statisticsdisplay acl allacl number acl-number match-order auto/configacl-number (2000-2999 是根本acl 3000-3999是高等acl为治理员预留的编号)rule deny/permit protocal拜访掌握[h3c] acl number 3000[h3c-acl-adv-3000]rule permit tcp source 129.9.0.0 0.0.255.255 destination 202.38.160.0 0.0.255.255 destination-port eq 80 (界说高等acl 3000,许可129.0.0/16网段的主机向202.38.160/24网段主机拜访端口80)rule permit source 211.100.255.0 0.255.255.255rule deny cos 3 souce 00de-bbef-adse ffff-ffff-fff dest 0011-4301-9912 ffff-ffff-ffff(制止mac地址00de-bbef-adse发送到mac地址0011-4301-9912且802.1p优先级为3的报文经由过程)display qos-interface GigabitEthernet1/0/1 traffic-limit 查看端口上流量端口速度限制line-rate inbound/outbound target-rateinbound:对端口吸收报文进行速度限制outbound: 对端口发送报文进行速度限制target-rate 对报文限制速度,单位kbps 千兆口inbound规模1-1000000 outbound规模20-1000000undo line-rate撤消限速.[h3c]interface GigabitEthernet1/0/1[h3c-GigabitEthernet1/0/1]line-rate outbound 128 限制出去速度为128kbpsdisplay arp | include 77display arp count 盘算arp表的记载数display ndp 显示交流机端口的具体设置装备摆设信息.display ntdp device-list verbose 收集装备具体信息display lockdisplay users display cpu display memory display fan display device display power。
交换机的常用操作项1、更改主机名 switch(config)#hostname sw12、设置进入特权模式的密码switch(config)#enable password 1234switch(config)#enable secret cisco3、设置console口密码switch(config)#line console 0switch(config-line)#password 123switch(config-line)#login4、查看mac地址列表 switch#show mac-address-table5、查看mac地址列表刷新时间 switch#show mac-address-table aging-time6、更改mac地址列表刷新时间 switch(config)#mac-address-table aging-time 2007、查看当前配置(RAM) switch#show running-config8、查看交换机的配置(NVRAM) switch#show startup-config9、保存配置switch#copy running-config startup-configswitch#write10、恢复出厂默认设置switch#erase startup-configswitch#reload11、查看cdp的全局信息 switch#show cdp12、查看接口的cdp配置信息 switch#show cdp interface f0/213、查看有关cdp包的统计信息 switch#show cdp traffic14、查看邻居信息 switch#show cdp neighbors15、查看所有入口项的详细信息switch#show cdp neighbors detailswitch#show cdp entry *16、添加接口的描述信息 switch(config-if)# description connection to routerA17、设置交换机的网关 switch(config)#ip default-gateway 192.168.1.118、关掉DNS解析 switch(config)#no ip domain-lookup19、实现交换机的远程管理switch(config)#enable secret ciscoswitch(config)#intface valn 1switch(config-if)#ip address 192.168.1.100 255.255.255.0switch(config-if)#no shutdownswitch(config)#line vty 0 4switch(config-line)#password 123switch(config-line)#loginc:\>telnet 192.168.1.10020、交换机的密码恢复1、将交换机的电源拔下2、按mode键将电源插上,当出现switch:时将手松开3、switch:flash_init //加载到flash中4、switch:dir flash: //查看flash中的文件5、rename flash:config.text flash:config.old //更改文件名6、boot //重新启动交换机7、rename flash:config.old flash:config.text //将文件名改回8、copy flash:config.text running-config9、enable password cisco //重新设置密码10、write //保存21、创建vlan方法一switch#vlan databaseswitch(vlan)#vlan 10 name scswitch(vlan)#exit22、创建vlan方法二switch(config)#vlan 10switch(config-vlan)#name sc23、删除vlan方法一switch(vlan)#no vlan 10switch(vlan)#exit24、删除vlan方法二 switch(config)#no vlan 1025、删除vlan方法三 switch#delete vlan.dat26、将端口加入到vlan中 switch(config-if)#switchport access vlan 1027、将一组连续的端口加入到vlan中switch(config)# interface range f0/1 – 5switch(config-if-range)#switchport access vlan 1028、将端口从vlan中删除switch(config-if)#no switchport access vlan 10switch(config-if)#switchport access vlan 1switch(config-if-range)#no switchport access vlan 10switch(config-if-range)#switchport access vlan 129、查看所有vlan的摘要信息 switch#show vlan brief30、查看指定vlan的信息switch#show vlan id 1031、Cisco 2600路由器的基本操作从用户模式进入特权模式router>enablerouter#从特权模式进入全局配置模式router#config terminalrouter(config)#为路由器配置主机名router(config)#hostname teacherteacher(config)#进入路由器的以太口配置模式teacher(config)#interface fastethernet 0/0teacher(config_if)#32、查看Cisco 2600路由器的串口状态router#show interface serial 0/0 serial 0/0 is up ,line protocol is up 可操作状态………serial 0/0 is up ,line protocol is up 连接问题…………serial 0/0 is up ,line protocol is down 接口问题…………serial 0/0 is down ,line protocol is down 禁用状态…………serial 0/0 is administratively down ,line protocol is down33、 静态路由的实现router(config)#hostname A A(config)#interface f0/0A(config-if)#ip address 192.168.1.1 255.255.255.0A(config-if)#no shutdownA(config)#interface f0/1 A(config-if)#ip address 192.168.2.1 255.255.255.0A(config-if)#no shutdownA(config)#ip route 192.168.3.0 255.255.255.0 192.168.2.2B(config)#ip route 192.168.1.0 255.255.255.0 192.168.2.134、 配置默认路由 route(config)#ip route 0.0.0.0 0.0.0.0 下一跳地址35、 查看路由表router#show ip route其中C 代表直连的网络,S 代表静态的路由,S*代表默认的路由36、 为Cisco 2600路由器配置密码配置控制台密码router (config)#line console 0router (config-line)#loginrouter (config-line)#password cisco37、 配置特权模式密码 router (config)#enable password cisco38、 配置安全的加密密码 router (config)#enable secret 123439、 配置路由器标识 router(config)#banner motd $This is Aptech company ’s Router! Please don ’t change the configuration whithout permissions $40、 对所有密码进行加密 router (config)#service password-encryption41、 配置超时 router(config)#line console 0router(config-line)#exec-timeout 0 0 //第一个0代表分钟,第二个0代表秒42、 显示同步 router(config)#line console 0router(config-line)#logging synchronous43、 配置禁用DNS router(config)#no ip domain-lookup44、 利用三台路由器实现静态路由和默认路由45、路由器密码恢复重启路由器按Ctrl+Break 键进入ROM Monitor 模式rommon 1>confreg 0x2142rommon 2>reset重启后选择norouter>enable 192.168.1.1 192.168.2.2 192.168.2.1 192.168.3.1 192.168.1.10 192.168.3.10router#copy startup-config running-configrouter#config terminalrouter(config)#enable password ciscorouter(config)#config-register 0x2102router#copy running-config startup-configrouter#reload46、单臂路由——实现不同vlan之间的通信V L A N11switch#vlan databaseswitch(vlan)#vlan 2switch(vlan)#vlan 32、将端口加入vlanswitch(config)#interface range f0/6 -8switch(config-if-range)#switchport access vlan 2switch(config-if-range)# interface range f0/9 -11switch(config-if-range)#switchport access vlan 33、配置trunk switch(config)#interface f0/12switch(config-if)#switchport mode trunk4、配置路由器的子接口封装dot1q,并设置IP地址router(config)#interface f0/0.1router(config-subif)#encapsulation dot1q 1router(config-subif)#ip address 192.168.0.1 255.255.255.0router(config-subif)#no shutrouter(config)#interface f0/0.2router(config-subif)#encapsulation dot1q 2router(config-subif)#ip address 192.168.1.1 255.255.255.0router(config-subif)#no shutrouter(config)#interface f0/0.3router(config-subif)#encapsulation dot1q 3router(config-subif)#ip address 192.168.2.1 255.255.255.0router(config-subif)#no shutrouter(config)#interface f0/0router(config-if)#no shut5、设置pc的IP地址和默认网关47、0RIP版本V1和V2 的区别RIP v1发送路由更新时不携带子网掩码,属于有类路由协议发送路由更新时,目标地址为广播地址:255.255.255.255RIP v2发送路由更新时携带子网掩码,属于无类路由协议发送路由更新时,目标地址为组播地址:224.0.0.948、RIP V1的配置配置步骤:1、配置路由器接口IP地址routerA(config)#interface f0/0routerA(config-if)#ip address 192.168.1.1 255.255.255.0 routerA(config-if)#no shutdownrouterA(config-if)#interface f0/1routerA(config-if)# ip address 10.0.0.2 255.0.0.0 routerA(config-if)#no shutdownrouterB(config)#interface f0/0routerB(config-if)#ip address 10.0.0.1 255.0.0.0 routerB(config-if)#no shutdownrouterB(config)#interface f0/1routerB(config-if)#ip address 20.0.0.2 255.0.0.0 routerB(config-if)#no shutdownrouterC(config)#interface f0/0routerC(config-if)#ip address 20.0.0.1 255.0.0.0 routerC(config-if)#no shutdown 192.168.2.0/24192.168.1.0/24routerC(config)#interface f0/1routerC(config-if)#ip address 192.168.2.2 255.255.255.0routerC(config-if)#no shutdown2、在路由器上启动RIP进程,并宣告网络号:routerA(config)#router riprouterA(config-router)#network 10.0.0.0routerA(config-router)#network 192.168.1.0routerB(config)#router riprouterB(config-router)#network 10.0.0.0routerB(config-router)#network 20.0.0.0routerC(config)#router riprouterC(config-router)#network 20.0.0.0routerC(config-router)#network 192.168.2.03、验证配置是否正确1)查看路由表router#show ip route2)查看路由协议配置router#show ip protocol3)打开RIP协议调试命令router#debug ip rip4、在PC上设置IP地址、子网掩码、默认网关,用ping命令测试连通性49.RIP V2的配置10.1.1.0/24 192.168.1.0/24配置步骤:1、配置各路由器接口IP地址routerA(config)#interface f0/0routerA(config-if)#ip address 10.1.1.1 255.255.255.0routerA(config-if)#no shutdownrouterA(config-if)#interface f0/1routerA(config-if)# ip address 192.168.1.1 255.255.255.0 routerA(config-if)#no shutdownrouterB(config)#interface f0/0routerB(config-if)#ip address 10.1.2.1 255.255.255.0routerB(config-if)#no shutdownrouterB(config)#interface f0/1routerB(config-if)#ip address 192.168.1.2 255.255.255.0routerB(config-if)#no shutdownrouterC(config)#interface f0/0routerC(config-if)#ip address 192.168.1.3 255.255.255.0routerC(config-if)#no shutdownrouterC(config)#interface f0/1routerC(config-if)#ip address 192.168.2.1 255.255.255.0routerC(config-if)#no shutdown2、在路由器上配置RIP V2 路由协议routerA(config)#router riprouterA(config-router)#version 2routerA(config-router)#no auto-summaryrouterA(config-router)#network 10.0.0.0routerA(config-router)#network 192.168.1.0routerB(config)#router riprouterB(config-router)#version 2routerB(config-router)# no auto-summaryrouterB(config-router)#network 10.0.0.0routerB(config-router)#network 192.168.1.0routerC(config)#router riprouterC(config-router)# version 2routerC(config-router)# no auto-summaryrouterC(config-router)#network192.168.1.0routerC(config-router)#network 192.168.2.03、验证配置是否正确1)查看路由表router#show ip route2)查看路由协议配置router#show ip protocol3)打开RIP协议调试命令router#debug ip rip4、在PC上设置IP地址、子网掩码、默认网关,用ping命令测试连通性49、上传路由器上的IOSrouter#show flash //查看IOS文件名router#copy flash tftpSource filename []? c2600-ik8o3s-mz.122-11.T.binAddress or name of remote host []? 192.168.1.11Destination filename [c2600-ik8o3s-mz.122-11.T.bin]?下载IOS到路由器router#copy tftp flash上传路由器上配置文件router#copy nvram:startup-config tftp:Address or name of remote host []? 192.168.1.11Destination filename [router-config]? startup-config下载配置文件到路由器router#copy tftp:startup-config nvramC2600路由器IOS被删除的恢复方法:1、ctrl+breakrommon 1>IP_ADDRESS=192.168.0.100 //路由器接口地址rommon 2>IP_SUBNET_MASK=255.255.255.0rommon 3>DEFAULT_GATEWAY=192.168.0.100rommon 4>TFTP_SERVER=192.168.0.254rommon 5>TFTP_FILE=c2600-ik8o3s-mz.122-11.T.binrommon 6>tftpdnld。