Cisco路由器交换机安全配置
- 格式:doc
- 大小:30.50 KB
- 文档页数:6
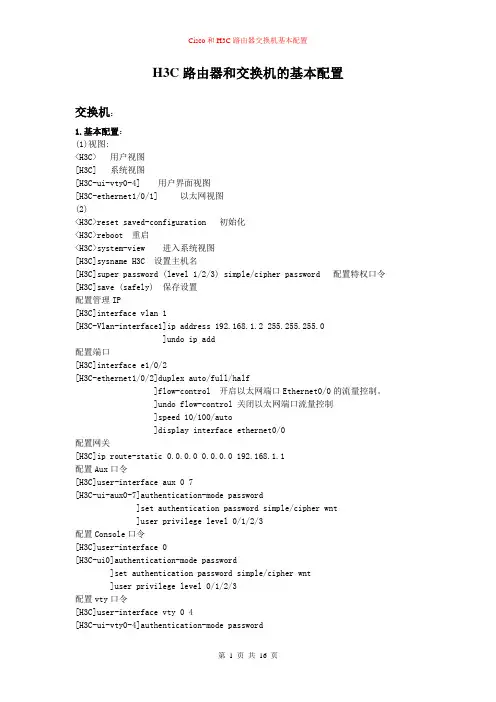
H3C路由器和交换机的基本配置交换机:1.基本配置:(1)视图:<H3C> 用户视图[H3C] 系统视图[H3C-ui-vty0-4] 用户界面视图[H3C-ethernet1/0/1] 以太网视图(2)<H3C>reset saved-configuration 初始化<H3C>reboot 重启<H3C>system-view 进入系统视图[H3C]sysname H3C 设置主机名[H3C]super password (level 1/2/3) simple/cipher password 配置特权口令[H3C]save (safely) 保存设置配置管理IP[H3C]interface vlan 1[H3C-Vlan-interface1]ip address 192.168.1.2 255.255.255.0]undo ip add配置端口[H3C]interface e1/0/2[H3C-ethernet1/0/2]duplex auto/full/half]flow-control 开启以太网端口Ethernet0/0的流量控制。
]undo flow-control 关闭以太网端口流量控制]speed 10/100/auto]display interface ethernet0/0配置网关[H3C]ip route-static 0.0.0.0 0.0.0.0 192.168.1.1配置Aux口令[H3C]user-interface aux 0 7[H3C-ui-aux0-7]authentication-mode password]set authentication password simple/cipher wnt]user privilege level 0/1/2/3配置Console口令[H3C]user-interface 0[H3C-ui0]authentication-mode password]set authentication password simple/cipher wnt]user privilege level 0/1/2/3配置vty口令[H3C]user-interface vty 0 4[H3C-ui-vty0-4]authentication-mode password]set authentication password simple/cipher wnt]user privilege level 0/1/2/3查看的命令[H3C]display history-command[H3C]display version[H3C]display current-configuration[H3C]display saved-configuration[H3C]display interface[H3C]display ip interface[H3C]display interface ethernet(0/0)[H3C]display ip host 显示域名解析表2.telnet(1)基于vty[H3C]ip host hostname ip-address 静态域名解析]display ip host[H3C]interface vlan 1[H3C-Vlan-interface1]ip address 192.168.1.2 255.255.255.0]quit[H3C]user-interface vty 0 4[H3C-ui-vty0-4]authentication-mode password (none/password/scheme) ]set authentication password simple/cipher wnt]user privilege level 0/1/2/3]quit<H3C>(按Ctrl+]键,断开telnet)>(按Ctrl+K键,断开telnet)[H3C]display users all]display users 显示连接本地的telnet会话]display tcp status 显示当前建立的所有TCP链接情况(2)基于用户Switch[H3C]interface vlan 1[H3C-Vlan-interface1]ip address 192.168.1.2 255.255.255.0]quit[H3C]local-user bob[H3C-luser-bob]password simple/cipher wnt]service-type telnet level 0/1/2/3]quit[H3C]super password simple/cipher wnt[H3C]user-interface vty 0 4[H3C-ui-vty0-4]authentication-mode scheme]quit[H3C]domain system[H3C-isp-system]authentication default local<H3C>telnet IP3.vlan(1)可用命令[H3C](undo) vlan 3[H3C-Vlan3]name wnt]description gongsi](undo)port ethernet1/0/2 to ethernet1/0/5 把e1/0/2、3、4、5加入vlan 3]port ethernet1/0/6 ethernet1/0/10 把e1/0/6和e1/0/10加入vlan 3]port ethernet1/0/12]save (safely)]undo name/description]return/quit[H3C]display brief interface ethernet 查看端口属于哪个Vlan[H3C]display brief interface vlan-interface 查看有几个Vlan[H3C]display ip interface brief 查看Vlan信息[H3C]display ip interface vlan-interface 3 查看已配置IP的Vlan信息 [H3C]display ip interface 查看配置IP的Vlan[H3C]display vlan all[H3C]display interface vlan-interface[H3C]interface vlan 0001[H3C-Vlan-interface1]ip address 192.168.1.2 255.255.255.0]undo ip add]return/quit[H3C]interface e1/0/5[H3C-ethernet1/0/5]port access vlan 2(2)单个交换机+Vlan间路由[H3C]vlan 2[H3C-vlan2]name caiwu]port e1/0/3 to e1/0/6]quit[H3C]vlan 3[H3C-vlan3]name kaifa]port e1/0/8 to e1/0/10]quit[H3C]interface vlan 2[H3C-vlan-interface2]ip add 192.168.1.1 255.255.255.0]quit[H3C]interface vlan 3[H3C-vlan-interface3]ip add 192.168.2.1 255.255.255.0]quit(3)Vlan间路由SwitchA[H3C]vlan 2[H3C-vlan2]name caiwu]port e1/0/2 to e1/0/3]quit[H3C]vlan 3[H3C-vlan3]name kaifa]port e1/0/4 to e1/0/5]quit[H3C]interface e1/0/1[H3C-ethernete1/0/1]port link-type trunk]port trunk permit vlan all[H3C]display vlan allRouterA[H3C]interface e0/0[H3C-ethernet0/0]undo ip address[H3C]interface e0/0.2[H3C-ethernet0/0.2]vlan-type dot1q vid 2]ip address 192.168.1.1 255.255.255.0 ]interface e0/0.3e0/0.3]vlan-type dot1q vid 3]ip address 192.168.2.1 255.255.255.0 HostA :192.168.1.2 GW:192.168.1.1HostB :192.168.2.2 GW:192.168.2.1HostA:ping 192.168.2.2路由器:1.基本配置:(1)视图:<H3C> 用户视图[H3C] 系统视图[H3C-ui-vty0-4] 用户界面视图[H3C-ethernet1/0/1] 以太网视图[H3C-serial1/0/0.1] 子接口视图[H3C-ospf] ospf协议视图[H3C-rip] rip协议视图[H3C-serial1/0/0] [H3C-serial1/0/0:1] 同/异步串口视图[H3C-async1/0/0] 异步视图(2)修改系统时间<H3C>clock datatime 11:20:30 2009/11/16[H3C]display clock<H3C>reset saved-configuration 初始化<H3C>reboot 重启<H3C>system-view[H3C]sysname H3C 设置主机名[H3C]super password (level 1/2/3) simple/copher password 配置特权口令[H3C]save (safely) 保存设置配置端口[H3C]interface e0/0[H3C-ethernet0/0]ip address 192.168.1.1 255.255.255.0]duplex auto/full/half]flow-control 开启以太网端口Ethernet0/0的流量控制。
Cisco 路由器及交换机安全加固法则网络层面的安全主要有两个方面,一是数据层面的安全,使用ACL等技术手段,辅助应用系统增强系统的整体安全;二是控制层面的安全,通过限制对网络设备自身的访问,增强网络设备自身的安全性。
数据层面的安全在拙著《网络层权限访问控制――ACL详解》已经较为系统的讨论。
本文主要集中讨论控制层面即设备自身的安全这部分,仍以最大市场占有率的思科设备为例进行讨论。
一、控制层面主要安全威协与应对原则网络设备的控制层面的实质还是运行的一个操作系统,既然是一个操作系统,那么,其它操作系统可能遇到的安全威胁网络设备都有可能遇到;总结起来有如下几个方面:1、系统自身的缺陷:操作系统作为一个复杂系统,不论在发布之前多么仔细的进行测试,总会有缺陷产生的。
出现缺陷后的唯一办法就是尽快给系统要上补丁。
Cisco IOS/Catos与其它通用操作系统的区别在于,IOS/Catos需要将整个系统更换为打过补丁的系统,可以查询取得cisco最新的安全公告信息与补丁信息。
2、系统缺省服务:与大多数能用操作系统一样,IOS与CatOS缺省情况下也开了一大堆服务,这些服务可能会引起潜在的安全风险,解决的办法是按最小特权原则,关闭这些不需要的服务。
3、弱密码与明文密码:在IOS中,特权密码的加密方式强加密有弱加密两种,而普通存取密码在缺省情况下则是明文;4、非授权用户可以管理设备:既可以通过telnet\snmp通过网络对设备进行带内管理,还可以通过console与aux口对设备进行带外管理。
缺省情况下带外管理是没有密码限制的。
隐含较大的安全风险;5、 CDP协议造成设备信息的泄漏;6、 DDOS攻击导致设备不能正常运行,解决方案,使用控制面策略,限制到控制层面的流量;7、发生安全风险之后,缺省审计功能。
二、 Cisco IOS加固对于(4)T之后的IOS版本,可以通过autosecure命令完成下述大多数功能,考虑到大部分用户还没有条件升级到该IOS版本,这里仍然列出需要使用到的命令行:1、禁用不需要的服务:no ip http server 0.0.055access-list 99 deny any log ntp acess-group peer 98 99 in1.1.1 anyaccess-list 110 deny p 2.2.2 any.....access-list 110 deny p 3.3.3 any限制所有其它流量access-list 110 permit ip any any!class-map control-plane-limitmatch access-group 110!policy-map control-plane-policyclass control-plane-limitpolice 32000 conform transmit exceed drop!control-planeservice-policy input control-plane-policy三、 Cisco CatOS加固1、禁用不需要的服务:set cdp disable //禁用cdpset ip http disable //禁用http server,这玩意儿的安全漏洞很多的2、配置时间及日志参数,便于进行安全审计:set logging timestamp enable //启用log时间戳set logging server //向发送logset logging server //向发送log!set timezone PST-8 //设置时区set ntp authenticate enable //启用NTP认证set ntp key 1 md5 uadsf //设置NTP认证用的密码,使用MD5加密。
Cisco交换机配置总结一、用户及本地、远程登录配置1、创建用户Cisco#configure terminalCisco(config)#username admin secret ****** //建议用secret2、本地验证Cisco(config)#enable secret netadmin3、远程登录Cisco(config)#line vty 0 15Cisco(config-line)#login localCisco(config-line)#logging synchronous //同步显示,可不配二、Vlan配置1、创建vlanCisco(config)#vlan 10Cisco(config-vlan)#name xxx //给vlan取名Cisco(config-vlan)#no shutCisco(config-vlan)#exit2、配置IPCisco(config)#int vlan 10 //进入vlan接口Cisco(config-if)#ip add 192.168.0.254 255.255.255.0 //配IP,二层交换机的非管理vlan不需要配IPCisco(config-if)#no shut3、将多个端口一次性划到一个vlanHRBSH(config)#int range fa0/1 - 16 //进入多个端口HRBSH(config-if-range)#switchport access vlan 10三、Trunk配置HRBSH (config)#int gigabitEthernet 0/1HRBSH (config)#switchportHRBSH (config-if)#switchport trunk encapsulation dot1q //三层交换机需要配置HRBSH (config-if)#switchport mode trunkHRBSH (config-if)#switchport trunk allowed 85,95四、保存配置HRBSH#copy run to configHRBSH#wrHRBSH#copy run tftp //导出配置五、系统维护更改设备名:hostname查看vlan:show vlan查看当前配置:show run查看接口信息:show interface帮助:show ?删除某条配置:no查看arp表: show arp查看mac表:show mac-六、Cisco 2900系列密码破解⒈连接交换机的console口到终端或PC仿真终端。
今天主要是说思科路由器的一些设备配置思科IOS什么叫IOS,其实他相当于微软件操作系统,不过他是运行在思科路由器与交换机上面的一个系统IOS的一些基本功能:运载网络协议和功能对产生高速流量的设备进行连接增加网络安全性提供网络的可扩展性来简易网络的增长和冗佘问题可靠的连接网络资源一般可以通过三种方法进行IOS路由器的CONSOLE口,用于本地的也就是说用PC上面的COM口接到路由器上面的控制口还有就是通过MODEM连接aux口,用于远程,还有就是VTY线路来telnet一般我们用得最多的就是通过控制台,还有就是telnet那么一台路由器从开机要经过那些过程呢,其实跟一台PC差不多,首先加电以后,硬件自检,再是定位并载IOS文件最后一步是定位并运行配置文件最后一步完成,那么这个设备就算完成了可以正常工作了开机自检不需要说了吧那么重点在引导上面这个在考试中也会考到的如果加电自检没有问题,那么IOS存在的话,将从它的闪存(flash memory)查找与加载IOS 到ram中(以前的2500系列的不加载到RAM中的,直接从flash运行)flash是一种电子可擦除只读存储器,如果加载IOS也是成功的,那么他会在非容失性(NVRAM)中查找启动配置文件,startup-config 如果没有找到任何的启动配置文件,那么路由器将进入到setup模式中。
setup模式一看名字就知道,是一种安装模式这种模式可以对路由器进行一些配置但是一般最好不要用这种配置模式,一般在进入这种模式之前会有提示出现command-line interface你输入yes就是进入这种配置模式,如果输入no,那么你就进入了用户模式在setup模式中,[]代表默认设置,你可以使用ctrl+C随时退出setup模式[路由器的所有模式如下:用户模式,特权模式,(也可叫特机模式)全局配置模式,(也可叫配置模式)端口配置模式,(也可叫接口模式)子接口配置模式,线路配置模式,路由配置模式](用户模式)我们重点是进入路由器以后,就是一种用户模式如果你不进入setup模式就是进入了用户模式Router>这是用户模式的提示符,。
CISCO交换机路由器配置手册王国栋编著……………… 目录………………交换机1、cisco 2950 交换机2、cisco 1950 交换机3、VLAN 间的通信路由器一、路由器配置1、路由器基本配置2、路由器的密码恢复3、恢复出厂设置4、备份IOS5、恢复IOS6、备份路由器配置7、静态路由的配置8、RIP路由协义配置9、IGRP路由协议配置10、EIGRP路由协议配置11、ospf路由协议基本配置12、点到点链路上的ospf13、广播链路上的ospf14、基于区域的ospf简单口今及MD5认证15、多区域的OSPF16、OSPF末节区域和完全末节区域17、OSPF命令汇总二、ACL NAT DHCP1、标准访问控制列表(Access Control Iists ) (list 列表)2、扩展访问控制列表(Access Control Iists ) (list 列表)3、命名ACL4、NAT(network address translation)网络地址翻译(1)、静态NAT配置(2)、动态NAT(3)、PAT(端口地址转换)配置5、DHCP (dynamic host configuration protocol) 动态主机配置协议三、远程接入、VPN1、HDLC (高级数据链路控制high-level data link control)2、路由器serial端口的基本配置3、PPP(1)、PPP的PAP认证(2)、PPP的CHAP认证4、帖中继(1)、帧中继基本配置(2)、点对多点帧中继(3)、|点对点帧中继上的RIP协议5、DDN(Digital Data Network 数字数据网)和数字链路6、ISDN7、ADSL Asymmetrical digital subscriber loop 非对称数字用户环路8、VPN 虚专用网络(Virtual Private Networks)交换机部分一、交换机配置图:二、环境说明:S2950-1 S2950-2 为12端口快速以太网交换机三、配置实例:1、cisco 2950 交换机//switch>enable//进入特权模式//switch #configure terminal//进入全局配置模式//switch (config)#hostname s2950-1//给交换机命名为S2950-1enable password 123456//设置密码ip address 192.168.0.1 255.255.255.0ip default-gateway 192.168.0.254ip domain-name //设置IP 、网关和域名ip name-server 200.0.0.1//设置域名服务器interface fastethernet 0/1//进入端口配置模式//s2950-1 (config-if)#speed auto//将接口速率设置成自适应(默认)//speed 100 10 auto//将接口速率设置成10/100自适应duplex full//将接口设置成全双功(默认)//duplex full falf autoend//s2950-1#copy running-config startup-config//保存配置文件valn database//从特权模式进入VLAN配置子模式//s2950-1 (vlan)#vtp server//VTP就是VLAN中继协议//设置交换机为VTP服务模式//vtp server client transparentvtp domain name-vtp-server//设置管理域的域名为name-vtp-server//创建管理域并命名end//s2950-1#configure terminal//s2950-1 (config)#interface fastethernet 0/1//s2950-1 (config-if)#switchport mode trunk//将端口fastethernet0/1设置为主干端口end//s2950-1#vlan database//s2950-1 (vlan)#//进入VLAN 配置模式valn 2 name namevlan-2//创建VLAN 2 并命名为namevlan-2//交换机默认所有未配置VLNA的交换机均为VLAN 1 //所以这里从VLAN 2 开始设置valn 3 name namevlan-3//创建VLAN 3并命名为namevlan-3valn 4 name namevlan-4valn 5 name namevlan-5exit//s2950-1#configure terminal//s2950-1 (config)#interface fastethernet 0/2//s2950-1 (config-if)#switchport mode access//设置当前端口为静态VLAN模式switchport access vlan 2//把当前端口分配给V ALN 2exit//s2950-1 (config)#interface fastethernet 0/3//s2950-1 (config-if)#switchport mode accessswitchport access vlan 3exit//s2950-1 (config)#interface fastethernet 0/4//s2950-1 (config-if)#switchport mode accessswitchport access vlan 4exit//s2950-1 (config)#interface fastethernet 0/5//s2950-1 (config-if)#switchport mode accessswitchport access vlan 5end//s2950-1#copy running-config startup-config//writeshow running-config//show vtp status//show vlan//show interface//show interface brief//show version2、cisco 1950 交换机//switch>enable//switch #configure terminal//switch (config)#hostname s2950-1enable password 123456username text1 password text2ip address 192.168.0.1 255.255.255.0ip default-gateway 192.168.0.254ip domain-name ip name-server 200.0.0.1interface fastethernet 0/1//s1950-1 (config-if)#speed auto//speed 100 10 autoduplex full//duplex full falf autoend//s1950-1#copy running-config startup-config//s1950-1#configure terminal//s1950-1 (config)#vtp server//在配置模式下设置交换机为VTP服务器//vtp server client transparent//也可以根据需要将交换机设置为VTP客户模式,或透明模式vtp domain name-vtpserver//创建VTP管理域并设置域名为name-vtpserverend//S1950VTP这块配置内容和s2950不一样//s1950-1#configure terminal//s1950-1 (config)#interface fastethernet 0/1//s1950-1 (config-if)#trunk on//设置VLAN主干端口//trunk on|off|desirable|autoEnd//trunk 的内容和S2950不一样//s1950-1#vlan database//s1950-1 (vlan)#valn 2 name namevlan-2//创建VLAN 2 并命名为namevlan-2//交换机默认所有未配置VLNA的交换机均为VLAN 1 ,//所以这里从VLAN 2 开始设置valn 3 name namevlan-3valn 4 name namevlan-4valn 5 name namevlan-5exit//s1950-1#configure terminal//s1950-1 (config)#interface fastethernet 0/2//s1950-1 (config-if)#vlan-membership static namevlan-2//划分VLAN端口//将本端口设置为namevlan-4的成员//S1950这块配置内容和s2950不一样exit//s1950-1 (config)#interface fastethernet 0/3//s1950-1 (config-if)#vlan-membership static namevlan-3exit//s1950-1 (config)#interface fastethernet 0/4//s1950-1 (config-if)#vlan-membership static namevlan-4exit//s1950-1 (config)#interface fastethernet 0/5//s1950-1 (config-if)#vlan-membership static namevlan-5end//s1950-1#copy running-config startup-configshow running-config//show vtp status//show vlan//show interface//show ip interface brief//显示所有接口的简短信息//show version3、VLAN间的通信(1)、利用三层交换机实现VLAN间的通信拓朴图:配置实例:S2950#vlan databaseS2950(vlan)#vlan 2 name namevlan-2S2950(vlan)#vlan 3 name namevlan-3S2950(vlan)#exitS2950#configure terminalS2950(config)#interface fastethernet 0/5S2950(config-if)#switchport mode accessS2950(config-if)#switchport access vlan 2S2950(config-if)#exitS2950(config)#interface fastethernet 0/6S2950(config-if)#switchport mode accessS2950(config-if)#switchport access vlan3S2950(config-if)#exitS2950(config)#ip routing//打开三层交换机的路由功能S2950(config)#interface vlan 2//将VLAN当成一个接口进行配置S2950(config-if)#no shutdownS2950(config-if)#ip address 192.168.0.1 255.255.255.0 S2950(config-if)#exitS2950(config)#interface vlan 3S2950(config-if)#no shutdownS2950(config-if)#ip address 192.168.1.1 255.255.255.0S2950(config-if)#endS2950#show ip router//由于是在同一三层交换机上,用show ip router 可以看到自动生存的路由表(2)、利用路由器实现VLAN间的通信配置拓朴图:配置实例:S2950#vlan databaseS2950(vlan)#vlan 2S2950(vlan)#vlan 3S2950(vlan)#exitS2950#configure terminalS2950(config)#interface fastehernet 0/1S2950(config-if)#switchport mode accessS2950(config-if)#switchport access vlan 2S2950(config-if)#exitS2950(config)#interface fastethernet 0/6S2950(config-if)#switchport mode accessS2950(config-if)#switchport access vlan 3S2950(config-if)#exitS2950(config)#(end)RouterA(config)#interface ethernet 0RouterA(config-if)#no shutdownRouterA(config-if)#ip address 192.168.0.1 255.255.255.0 RouterA(config-if)#exitRouterA(config)#interface ethernet 1RouterA(config-if)#no shutdownRouterA(config-if)#ip address 192.168.1.1 255.255.255.0 RouterA(config-if)#endRouterA#show ip route//可以看到由路器自动生成的两条路由表路由器部分一、路由器配置1、路由器基本配置(1)路由器基本的配置拓扑图:(2)、环境说明:Cisco 1605路由器(3)、配置实例://Router>enable//Router#configure terminal//Router(config)#enable password text1//enable secret texe2hostname R1no ip domain lookup//不用DNS 解析主机IPinterface fastethernet 0/1//R1605-1(config-if)#ip address 192.168.0.2 255.255.255.0no shutdownexit//R1605-1 (config)#interface fastethernet 0/2//R1605-1 (config-if)#ip address 192.168.0.2 255.255.255.0no shutdownexit//R1605-1 (config)#ip route 0.0.0.0 0.0.0.0 192.168.1.2//配置默认路由//no ip route 0.0.0.0 0.0.0.0 192.168.1.2ip routing//起动路由功能//R1605-1(config)#line vty 0 4//VTY是路由器给远程登陆准备的虚拟端口//0 4表示可以同时打开5个会话//line vty 0 4是进入VTY端口(也就是同时充许5个会话登陆),对VTY端口//进行配置//R1605-1(config-line)#password 123456//设置telnet登陆时使用的密码//no password 这样就不能从telnet登陆了.(当你no password 取消掉了密码,//telnet会拒绝连接,这样就关闭了telnet)//要想明确禁止从telnet登陆最好使用ACL关闭23端口login//要求输入密码方能从telnet远程登陆,//no login 不使用密码就可以从telnet登陆end//R1605-1#write//copy running-config startup-config ,保存配置end//R1605-1#Show running-config//show version//show interface//show ip interface brief//显示所有接口的简短信息//show ip route//traceroute ip 192.168.3.1//show ip arp//show ip rip database//show runing-configexit2、路由器的密码恢复(1)、密码恢复的基本原理对CISCO的网络设备进行密码恢复的主要武器是配置注册码。
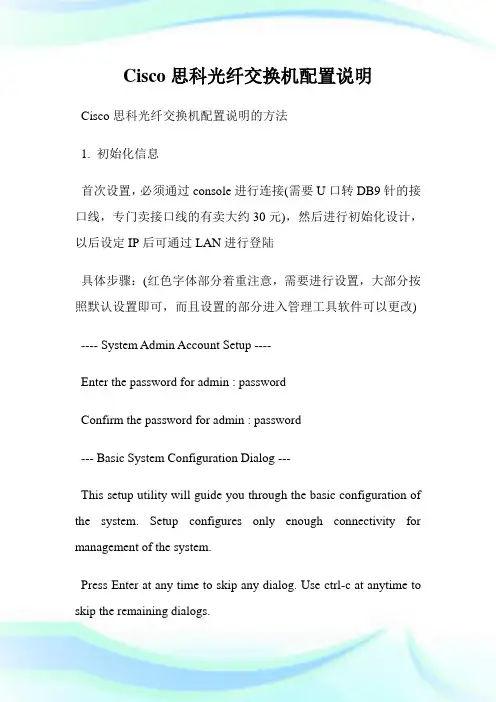
Cisco思科光纤交换机配置说明Cisco思科光纤交换机配置说明的方法1. 初始化信息首次设置,必须通过console进行连接(需要U口转DB9针的接口线,专门卖接口线的有卖大约30元),然后进行初始化设计,以后设定IP后可通过LAN进行登陆具体步骤:(红色字体部分着重注意,需要进行设置,大部分按照默认设置即可,而且设置的部分进入管理工具软件可以更改) ---- System Admin Account Setup ----Enter the password for admin : passwordConfirm the password for admin : password--- Basic System Configuration Dialog ---This setup utility will guide you through the basic configuration of the system. Setup configures only enough connectivity for management of the system.Press Enter at any time to skip any dialog. Use ctrl-c at anytime to skip the remaining dialogs.Would you like to enter the basic configuration dialog (yes/no): y Create another login account (yes/no) [n]:Configure read-only SNMP community string (yes/no) [n]: Configure read-write SNMP community string (yes/no) [n]:Enter the switch name: Pxx-MDS-x (where xx is your pod number and x is the switch number; for example:P01-MDS-1)Continue with Out-of-band (mgmt0) management configuration? (yes/no) [y]:Mgmt0 IPv4 address : 10.0.x.y (where x is your pod number and y is 5 for MDS-1 and 3 for MDS-2)(客户)0.16Mgmt0 IPv4 netmask : 255.255.255.0Configure the default gateway? (yes/no) [y]:IPv4 address of the default gateway : 10.0.x.254 (where x is your pod number)Configure advanced IP options? (yes/no) [n]:Enable the telnet service? (yes/no) [y]:Enable the ssh service? (yes/no) [n]:Configure the ntp server? (yes/no) [n]:Configure default switchport interface state (shut/noshut) [shut]: (注意一下)noshutConfigure default switchport trunk mode (on/off/auto) [on]:Configure default zone policy (permit/deny) [deny]:Enable full zoneset distribution (yes/no) [n]:NOTE:初始设定的配置对新的VSAN起作用,即原始VSAN1无这些配置解决办法:1 zone default-zone permit VSAN2 新建NEW VSAN2 将port转移VSAN2里面。
CISCO交换机基本配置和使用概述CISCO交换机是一种常用的网络设备,用于构建局域网(Local Area Network,LAN)。
它可以通过物理线路的连接,将多台计算机或其他网络设备连接到同一个网络中,实现数据的传输和共享。
CISCO交换机的基本配置包括IP地址的配置、VLAN的配置、端口配置、安全性配置等。
接下来,我们将对这些配置进行详细说明。
首先,IP地址的配置是CISCO交换机的基本操作之一。
通过配置IP地址,我们可以对交换机进行管理和监控。
具体的配置步骤如下:1. 进入交换机的配置模式。
在命令行界面输入"enable"命令,进入特权模式。
2. 进入全局配置模式。
在特权模式下输入"configure terminal"命令,进入全局配置模式。
3. 配置交换机的IP地址。
在全局配置模式下输入"interfacevlan 1"命令,进入虚拟局域网1的接口配置模式。
然后输入"ip address 192.168.1.1 255.255.255.0"命令,配置交换机的IP地址和子网掩码。
4. 保存配置并退出。
在接口配置模式下输入"exit"命令,返回到全局配置模式。
然后输入"exit"命令,返回到特权模式。
最后输入"copy running-config startup-config"命令,保存配置到闪存中。
其次,VLAN的配置是CISCO交换机的关键配置之一。
通过配置VLAN,我们可以将交换机的端口划分为不同的虚拟局域网,实现数据的隔离和安全。
1. 进入交换机的配置模式。
同样,在特权模式下输入"configure terminal"命令,进入全局配置模式。
2. 创建VLAN。
在全局配置模式下输入"vlan 10"命令,创建一个编号为10的VLAN。
思科交换机路由基本配置命令常用命令1.配置接口:interface {interface_type} {interface_number}2.配置IP地址:ip address {IP_address} {subnet_mask}3.配置默认网关:ip default-gateway {default_gateway_IP}4.开启接口:no shutdown5.配置路由协议:router {routing_protocol}6.配置路由器ID:router-id {router_ID}7.配置路由信息:network {network_address} {subnet_mask}8.配置静态路由:ip route {destination_network} {subnet_mask}{next-hop_IP}9.配置动态路由:router {routing_protocol} {network_address}10.保存配置:copy running-config startup-config注意:上述命令仅作为参考,具体配置应根据实际环境和设备型号进行调整。
下面是一些基本的 Cisco 交换机路由配置命令:1.配置 hostname: hostname <name>2.配置 IP 地址: interface <interface> 后进入接口模式,再输入 ipaddress <ip address> <subnet mask>3.配置默认路由: ip route 0.0.0.0 0.0.0.0 <next hop IP>4.启用路由协议: router <protocol> (例如: router rip)5.配置路由连接: network <network address> (例如: network192.168.1.0)6.查看路由表: show ip routeCisco 交换机路由配置步骤1.进入配置模式:configure terminal2.配置 IP 地址和子网掩码:interface [interface-name] ; ip address[ip-address] [subnet-mask]3.配置默认路由:ip route 0.0.0.0 0.0.0.0 [next-hop-IP-address]4.启用路由协议:router [protocol-name] (如:router ospf)5.配置路由协议参数: [protocol-name] [process-id] (如:ospf 1)6.配置路由连接:network [network-address] [wildcard-mask] area[area-id] (如:network 192.168.1.0 0.0.0.255 area 0)7.保存配置:copy running-config startup-config8.退出配置模式:exit。
思科路由器、交换机的基本管理教程随着Internet的高速发展,网络规模不断膨胀,对于从事网络专业的学生熟练掌握路由器和交换机的配置已显得十分重要。
接下来是小编为大家收集的思科路由器、交换机的基本管理教程方法,希望能帮到大家。
思科路由器、交换机的基本管理教程的方法管理路由器和交换机的方法以及命令主要分为一下几个方面:1、了解命令行的模式。
2、配置接口的IP地址以及相关的路由条目。
3、路由器、交换机密码的管理。
4、远程管理路由器、交换机。
5、系统IOS的备份与恢复。
一、了解命令行的模式1)用户模式默认进入的是用户模式,在该模式下用户受到极大的限制,只能用来查看一些统计信息。
route> #路由器的用户模式switch> #交换机的用户模式2)特权模式在用户模式输入“enable”(可简写为“en”)命令就可以进入特权模式,在特权模式下可以查看并修改路由器或交换机的配置。
route>enable #也可以输入en进入特权模式route#switch>enswitch#在特权模式下常用的命令解释如下:show version :查看系统IOS版本show running-config :查看当前的配置信息copy running-config startup-config :保存当前的配置或者使用 writeerase startup-config :删除以保存的配置show startup-config :查看保存好的配置show mac-address-table :查看交换机的mac地址表show int 接口名称:查看接口的信息show arp :查看ARP缓存表show ip route :查看路由表信息show ip int brief :查看所有接口的IP地址信息。
no ip domain-lookup :禁用DNS查询line con 0exec-timeout 0 0 :不超时连接logging synchronous :不启用时间同步,信息不打断输入命令3)全局模式在特权模式下输入“config terminal”(可简写为conf t)命令就可以进入全局模式,用户在该模式下可以修改路由器或交换机的全局配置。
cisco路由器三层交换机简单环境配置实例随着Internet的高速发展,网络规模不断膨胀,对于从事网络专业的学生熟练掌握路由器和交换机的配置已显得十分重要。
接下来是小编为大家收集的cisco路由器三层交换机简单环境配置实例方法,希望能帮到大家。
cisco路由器三层交换机简单环境配置实例:一、网络拓扑图:二、配置命令:1、路由器的配置:interface FastEthernet0/0ip address 10.66.88.222 255.255.255.0ip nat outsideduplex autospeed autointerface FastEthernet0/1ip address 192.168.1.1 255.255.255.0ip nat insideduplex autospeed autointerface Vlan1no ip addressshutdownip nat inside source list 1 interface FastEthernet0/0 overload ip classlessip route 192.168.2.0 255.255.255.0 192.168.1.222ip route 192.168.3.0 255.255.255.0 192.168.1.222access-list 1 permit 192.168.0.0 0.0.255.255三、三层交换机的配置:hostname L3-SWip dhcp pool vlan2poolnetwork 192.168.3.0 255.255.255.0 default-router 192.168.3.1dns-server 202.101.172.35ip dhcp pool vlan1poolnetwork 192.168.2.0 255.255.255.0 default-router 192.168.2.1dns-server 202.101.172.35interface FastEthernet0/1no switchportip address 192.168.1.222 255.255.255.0 duplex autospeed autointerface FastEthernet0/2 switchport mode trunkinterface FastEthernet0/5 switchport mode trunkinterface Vlan1ip address 192.168.2.1 255.255.255.0 interface Vlan2ip address 192.168.3.1 255.255.255.0 ip classlessip route 0.0.0.0 0.0.0.0 192.168.1.1四、二层交换机的配置:1、switch0的配置:hostname sw0interface FastEthernet0/1 switchport mode trunkinterface FastEthernet0/2 switchport mode access2、switch1的配置:hostname sw1interface FastEthernet0/1switchport mode trunkinterface FastEthernet0/2switchport access vlan 2switchport mode access看了“cisco路由器三层交换机简单环境配置实例”还想看:1.思科交换机基本配置实例讲解2.三层交换机配置的实例教程3.cisco路由器怎么在虚拟环境下配置三层交换4.cisco2960交换机的简单配置5.交换机配置基础及实例讲解6.思科三层交换机与路由器的比较方法7.思科交换机配置教程详解。
使用的是cisco网络设备操作系统命令,其他厂商设备应该相差不远,实验使用的设备时cisco catalyst1912交换机和cisco 2621路由器。
终端的IP配置命令:Ipconfig /ip IP地址子网掩码;Ipconfig /dg 网关IP常用的交换机的配置命令:交换机工作在OSI 模型的第二层(数据链路层), 地址学习, 转发过滤, 消除循环是交换机的三个主要功能。
有三种模式,“>”用户模式,“#”特权模式,“(CONFIG)#”全局模式.从用户模式进入特权模式:enable从特权模式进入全局模式:configure terminal,在特权模式下输入disable或者exit 回到用户模式,其他模式类似。
从全局模式进入端口模式:interface e0/1。
switch: ;ROM状态,路由器是rommon>hostname> ;用户模式hostname# ;特权模式hostname(config)# ;全局配置模式hostname(config-if)# ;接口状态用户模式(>)下:可以查看一些基本的配置信息。
特权模式(#)下:show ip 查看交换机的IP地址。
Show interface 查看所有端口的配置信息show interfaces Ethernet 0/1 查看E0/1口的信息Show interface e0/1 查看e0/1端口的配置信息。
show version 查看系统硬件的配置,软件版本号等。
show port ;(CatOS)显示每个端口的简要信息(号、VLAN、双工、…)show interface ;(IOS)show trunk ;(CatOS)显示中继信息(模式、封装、允许端口、剪裁、…)show interface trunk ;(IOS)show spantree 45 ;(CatOS)显示端口的STP模式、类型、状态、速端口、…) show spanning-tree 45 ;(IOS)Show running-config (show running也可以)查看当前正在运行的配置信息全局模式//配置模式((config)#):设置交换机名:hostname[交换机名]如:hostname switch1设置交换机的IP地址:ip address [ip address ][netmask]如ip address 172.16.0.1 255.255.0.0设置交换机的缺省网关:ip default-gatway [ip address]如:ip default-gatway 172.16.0.1设置密码enable password level [1-15] [passwork]1-15 表示级别,1表示设置登录时的密码,15设置进入全局模式的密码。
思科交换机安全配置(包括A A A、端口安全、A R P安全、D H C P侦听、日志审计流量限制)-标准化文件发布号:(9456-EUATWK-MWUB-WUNN-INNUL-DDQTY-KII网络拓扑图如下:根据图示连接设备。
在本次试验中,具体端口情况如上图数字标出。
核心交换机(core )设置为s1或者SW1,汇聚层交换机(access)设置为s2或者SW2。
IP 地址分配:Router:e0: 192.168.1.1Core:f0/1: 192.168.1.2Svi接口:Core vlan10: 172.16.10.254Vlan20: 172.16.20.254Vlan30: 172.16.30.254Access vlan10: 172.16.10.253Vlan20: 172.16.20.253Vlan30: 172.16.30.253服务器IP地址:192.168.30.1Office区域网段地址:PC1:192.168.10.1PC2:192.168.10.2路由器清空配置命令:enerase startup-configReload交换机清空配置命令:enerase startup-configdelete vlan.datReload加速命令:enconf tno ip domain lookupline con 0exec-timeout 0 0logging synhostname一、OFFICE 区域地址静态分配,防止 OFFICE 网络发生 ARP 攻击,不允许OFFICE 网段 PC 互访;STUDENTS 区域主机输入正确的学号和密码后接入网络,自动获取地址,阻止STUDENTS网段地址发生ARP攻击;1、基本配置SW1的配置:SW1(config)#vtp domain cisco //SW1配置vtp,模式为server,SW2模式为clientSW1(config)#vtp password sovandSW1(config)#vtp mode serverSW1(config)#vlan 10SW1(config)#int range f0/3,f0/4 //链路捆绑SW1(config-if-range)#Channel-protocol pagpSW1(config-if-range)#Channel-group 10 mode onSW1(config)#int port-channel 10 //链路设置为trunk模式,封装802.1q协议,三层交换机默认没有封装该协议SW1(config-if)#switchport trunk encapsulation dot1qSW1(config-if)#switchport mode trunkSW2配置:SW2(config)#vtp domain ciscoSW2(config)#vtp password sovandSW2(config)#vtp mode clientSW2(config)#int range f0/3,f0/4SW2(config-if-range)#Channel-protocol pagpSW2(config-if-range)#Channel-group 10 mode onCreating a port-channel interface Port-channel 10SW2(config)#int port-channel 10SW2(config-if)#switchport trunk encapsulation dot1qSW2(config-if)#switchport mode trunkSW2(config)#int f0/1 //把f0/1,f0/2划入vlan10SW2(config-if)#switchport mode accessSW2(config-if)#switchport access vlan 10SW2(config-if)#int f0/2SW2(config-if)#switchport mode accessSW2(config-if)#switchport access vlan 102、vlan aclOffice区域禁止PC机互访:使用show int e0/0命令查看mac地址SW2(config)#mac access-list extended macaclSW2(config-ext-macl)#permit host 0007.8562.9de0 host 0007.8562.9c20 //要禁止双向通信SW2(config-ext-macl)#permit host 0007.8562.9c20 host 0007.8562.9de0SW2(config)#vlan access-map vmap 10 //禁止pc间的通信SW2(config-access-map)#match mac add macaclSW2(config-access-map)#action dropSW2(config)#vlan access-map vmap 20 //对其他数据放行,不然pc机无法ping 通svi口、网关SW2(config-access-map)#action forwardSW2(config)#vlan filter vmap vlan-list 10未使用VLAN ACL时pc1可以ping通pc2,如下图:使用VLAN ACL时pc1可以无法ping通pc2,如下图:3、Office区域静态配置ip地址时采用的ARP防护:配置如下:SW2(config)#ip arp inspection vlan 10SW2(config)#arp access-list arplistSW2(config-arp-nacl)#permit ip host 192.168.10.1 mac host 0007.8562.9de0 //ip地址与mac地址对应表SW2(config-arp-nacl)#permit ip host 192.168.10.2 mac host 0007.8562.9c20SW2(config-arp-nacl)#ip arp inspection filter arplist vlan 10SW2(config)#int port-channel 10SW2(config-if)#ip arp inspection trust注意:配置静态arp防护(用户主机静态配置地址,不是通过DHCP获取地址),需要新建ip与mac映射表,不然pc1无法ping通svi口4、OSPF与DHCP全网起OSPF协议,使pc1可以ping通路由器。
…………………………………………………………………Cisco交换机相关设置…………………………………………………………………一、常用设置SW 〉用户模式SW 〉enable 进入特权模式SW # 特权模式SW # config terminal 进入全局配置模式SW(config)# 全局配置模式SW(config)# enable password 123 设置特权非加密密码为123 SW(config)# enable secret 123 设置特权加密密码为123 SW # show running-config (或sh run )查看当前配置SW # wr 保存当前配置SW(config)#no ip domain lookup 关闭域名查找SW(config)# hostname huarun 将交换机名改为huarun SW # reload 重启交换机二、端口配置1,基本配置(以端口1为例)SW(config)# interface fastethernet 0/1 进入交换机1端口(百兆)SW(config-if) # speed 10/100/auto 速率为10M/100M/自动SW(config-if) # duplex full/half/auto 模式为全双工/半双工/自动SW(config-if) # description caiwu 对端口描述SW(config-if) # end 退出端口配置SW# sh interface fastethernet 0/1 查看端口1的配置情况2,端口与主机MAC地址绑定(以端口1为例)SW(config)# interface fastethernet 0/1SW(config-if)# switchport mode accessSW(config-if)# switchport port-securitySW(config-if)# switchport port-security maximum 1SW(config-if)# switchport port-security mac-address mac地址3,端口镜像(端口1为目的端口——即监听端口;端口2和端口3为源端口——即被监听端口)SW(config)# interface fastethernet 0/1SW(config-if)# port monitor fastethernet 0/2SW(config-if)# port monitor fastethernet 0/34,端口汇聚(又叫做端口聚合)(以交换机的1口和2口为例)SW(config)# interface fastethernet 0/1SW(config-if)# switchport mode trunk(如果有多个vlan,需要配置,没有的话就不用了)SW(config-if)# speed 100SW(config-if)# duplex fullSW(config-if)# channel-group 1 mode onSW(config)# interface fastethernet 0/2SW(config-if)# switchport mode trunkSW(config-if)# speed 100SW(config-if)# duplex fullSW(config-if)# channel-group 1 mode on或者SW(config)#interface range fastethernet 0/1 -2SW(config-range-if)# speed 100SW(config-range-if)# duplex fullSW(config-range-if)# channel-group 1 mode on三、HSRP配置(hot standby router protocol)以华润地产为例:2台3750交换机,就一个vlan——默认的vlan1,路由器接2台3750交换机(做HSRP),每台3750都与内网汇聚交换机(huawei)相连接。
实验一口令和主机名设置1. 口令和设备名设置添加一个交换机或一个路由器,先对交换机进行操作,双击SwitchAswitch>enpassword: ;第一次密码为空,直接回车switch#conf t ;进入全局配置模式switch(config)#hostname swa ;设置交换机名swa(config)#enable secret aaa ;设置特权加密口令为aaaswa(config)#enable password aax ;设置特权非密口令为aaxswa(config)#line console 0 ;进入控制台口(Rs232)状态swa(config-line)#login ;允许登录swa(config-line)#password aa ;设置登录口令aaswa(config-line)#line vty 0 4 ;进入虚拟终端virtual ttyswa(config-line)#login ;允许登录swa(config-line)#password a ;设置登录口令aswa(config-line)#exit ;返回上一层swa(config)#exit ;返回上一层swa#sh run ;看配置信息swa#exit ;返回命令swa>enpassword: ;哪一个口令可以通过双击ROA对路由器进行与交换机类似的设置。
2. 清除口令清除交换机口令,实际中是在开机时按住交换机上的mode钮,本模拟机按Ctrl+Break。
口令请除,可以重新配置口令了。
清除路由器口令,实际中是在开机时上电时,按Ctrl+Break,本模拟机按Ctrl+Break。
参考操作如下:双击RouterA 。
先配置路由的特权口令:router>enpassword: ;第一次密码为空,直接回车router#conf t ;进入全局配置模式router(config)#enable secret aaa ;设置特权加密口令为aaarouter(config)#exit ;返回router#exitrouter>enpassword:aaarouter#清除路由器的口令是在假设口令丢失情况下使用的方法,具体的操作是开机进入rommon状态,打开寄存器配置开关:router#reload ;重新启动,按Ctrl+Break rommon>rommon>confreg 0x2142 ;跳过配置,26xx 36xx 45xxrommon>reset;重新引导,等效于重开机router>enpassword:router#conf trouter(config)#enable secret bbb ;设置特权加密口令为aaarouter(config)#config-register 0x2102 ;正常使用配置文件router(config)#exitrouter#exitrouter>enpassword:bbbrouter#在实际工作中一般要备份路由器的配置文件,当系统有问题时将配置文件复原。
Cisco路由器、交换机配置命令详解使用软件思科模拟器1.交换机支持的命令:交换机基本状态:(路由器是Router)switch: ;ROM状态,hostname〉;用户模式 hostname# ;特权模式hostname(config)# ;全局配置模式 hostname(config-if)# ;接口状态交换机口令设置:switch〉enable ;进入特权模式switch#config terminal ;进入全局配置模式switch(config)#hostname 〈hostname〉;设置交换机的主机名switch(config)#enable password xxa ;设置特权非密口令交换机VLAN设置:switch#vlan database ;进入VLAN设置switch(vlan)#vlan 2 ;建VLAN 2 switch(vlan)#no vlan 2 ;删vlan 2 switch(config)#int f0/1 ;进入端口1switch(config-if)#switchport access vlan 2 ;当前端口加入vlan 2switch(config-if)#switchport mode trunk ;设置为干线交换机设置IP地址:switch(config)#interface vlan 1 ;进入vlan 1switch(config-if)#ip address 〈IP〉〈mask〉;设置IP地址switch(config)#ip default-gateway 〈IP〉;设置默认网关交换机显示命令:switch#write ;保存配置信息 switch#show run ;查看当前配置信息switch#show vlan ;查看vlan配置信息 switch#show interface ;查看端口信息switch#show int f0/0 ;查看指定端口信息2. 路由器支持的命令:路由器显示命令:router#show run ;显示配置信息router#show interface ;显示接口信息 router#show ip route ;显示路由信息router#show cdp nei ;显示邻居信息 router#reload ;重新起动路由器口令设置:router〉enable ;进入特权模式router#config terminal ;进入全局配置模式router(config)#hostname 〈hostname〉;设置交换机的主机名router(config)#enable secret xxx ;设置特权加密口令router(config)#enable password xxb ;设置特权非密口令router#exit ;返回命令路由器配置:router(config-if)#no shutdown ;激活当前接口router(config-if)#ip address 〈ip〉〈netmask〉;设置IP地址router(config-if)#ip address 〈ip〉〈netmask〉 second ;设置第二个IProuter#reload ;重新引导静态路由:ip route 〈ip-address〉〈subnet-mask〉〈gateway〉;命令格式router(config)#ip route 2.0.0.0 255.0.0.0 1.1.1.2 ;静态路由举例router(config)#ip route 0.0.0.0 0.0.0.0 1.1.1.2 ;默认路由举例。
Cisco路由器交换机安全配置
1. DDOS攻击
2. 非法授权访咨询攻击。
口令过于简单,口令长期不变,口令明文创送,缺乏强认证机制。
….
利用Cisco Router和Switch能够有效防止上述攻击。
二、爱护路由器
2.1 防止来自其它各省、市用户Ddos攻击
最大的威逼:Ddos, hacker操纵其他主机,共同向Router访咨询提供的某种服务,导致Router利用率升高。
如SMURF DDOS 攻击确实是用最简单的命令ping做到的。
利用IP 地址欺诈,结合ping就能够实现DDOS攻击。
防范措施:
应关闭某些缺省状态下开启的服务,以节约内存并防止安全破坏行为/攻击
以上均差不多配置。
防止ICMP-flooging攻击
以上均差不多配置。
除非在专门要求情形下,应关闭源路由:
Router(config-t)#no ip source-route
以上均差不多配置。
禁止用CDP发觉邻近的cisco设备、型号和软件版本
如果使用works2000网管软件,则不需要此项操作
此项未配置。
使用CEF转发算法,防止小包利用fast cache转发算法带来的Router 内存耗尽、CPU利用率升高。
Router(config-t)#ip cef
2.2 防止非法授权访咨询
通过单向算法对“enable secret”密码进行加密
应该操纵到VTY的接入,不应使之处于打开状态;Console应仅作为最后的治理手段:
2.3
三、爱护网络
3.1防止IP地址欺诈
黑客经常冒充地税局内部网IP地址,获得一定的访咨询权限。
在省地税局和各地市的W AN Router上配置:
防止IP地址欺诈--使用基于unicast RPF(逆向路径转发)
包发送到某个接口,检查包的IP地址是否与CEF表中到达此IP地址的最佳路由是从此接口转发,若是,转发,否则,丢弃。
注意:通过log日志能够看到内部网络中哪些用户试图进行IP地址欺诈。
此项已配置。
防止IP地址欺诈配置访咨询列表
防止外部进行对内部进行IP地址
防止内部对外部进行IP地址欺诈
四、爱护服务器
关于地税局内部的某些Server,如果它不向各地提供服务能够在总局核心Cisco Router上配置空路由。
ip route 130.1.1.1 255.255.255.255.0 null
在W AN Router上配置CBAC,cisco状态防火墙,防止Sync Flood攻击
在W AN Router 上配置IDS入侵检测系统
五、网络运行监视
配置syslog server,将日志信息发送到syslog server上
Syslog Server纪录Router的平常运行产生的一些事件,如广域口的up, down
, OSPF Neighbour的建立或断开等,它对统计Router的运行状态、流量的一些状态,电信链路的稳固有专门重要的意义,用以指导对网络的改进。
(责任编辑:zhaohb)。