vcenter权限管理设置方法
- 格式:docx
- 大小:1.44 MB
- 文档页数:11
VMware vCenter Converter Standalone用户指南vCenter Converter Standalone 4.3在本文档被更新的版本替代之前,本文档支持列出的每个产品的版本和所有后续版本。
要查看本文档的更新版本,请访问/cn/support/pubs。
ZH_CN-000369-00VMware vCenter Converter Standalone 用户指南2 VMware, Inc.最新的技术文档可以从VMware 网站下载:/cn/support/pubs/VMware 网站还提供最近的产品更新信息。
您如果对本文档有任何意见或建议,请把反馈信息提交至:docfeedback@版权所有 © 2008–2010 VMware, Inc. 保留所有权利。
本产品受美国和国际版权及知识产权法的保护。
VMware 产品受一项或多项专利保护,有关专利详情,请访问 /go/patents-cn 。
VMware 是 VMware, Inc. 在美国和/或其他法律辖区的注册商标或商标。
此处提到的所有其他商标和名称分别是其各自公司的商标。
VMware, Inc.3401 Hillview Ave.Palo Alto, CA 北京办公室北京市海淀区科学院南路2号融科资讯中心C 座南8层/cn 上海办公室上海市浦东新区浦东南路 999 号新梅联合广场 23 楼/cn 广州办公室广州市天河北路 233 号中信广场 7401 室/cn目录关于本文档51VMware vCenter Converter Standalone 简介7通过 Converter Standalone 迁移7Converter Standalone 组件8物理机的克隆和系统配置8数据克隆操作类型13将 Converter Standalone 与虚拟机源和系统映像结合使用15受转换影响的系统设置16虚拟硬件更改162系统要求17受支持的操作系统17安装空间要求18受支持的源类型19受支持的目标类型21配置 VirtualCenter 用户的权限22Converter Standalone 对 IPv6 的支持22转换的 TCP/IP 和 UDP 端口要求23Windows 操作系统的远程热克隆的要求243安装和卸载 Converter Standalone27在 Windows 上执行本地安装27在 Windows 中执行客户端-服务器安装28在 Windows 中执行命令行安装29Windows 安装的命令行选项30在 Windows 中修改 Converter Standalone 30在 Windows 中修复 Converter Standalone 32在 Windows 中卸载 Converter Standalone32连接到远程 Converter Standalone Server334转换物理机或虚拟机35启动向导进行转换36选择要转换的源计算机36为新虚拟机选择目标41配置目标虚拟机的硬件44配置目标虚拟机上的软件54配置转换任务58检查摘要并提交转换任务63VMware, Inc. 3VMware vCenter Converter Standalone 用户指南5配置虚拟机65保存 Sysprep 文件65启动配置向导66选择要配置的源计算机66选择要配置的选项68检查和提交配置任务726管理转换和配置任务73管理任务列表中的任务73索引794 VMware, Inc.关于本文档《VMware vCenter Converter Standalone 用户指南》提供了有关安装和使用 VMware® vCenter ConverterStandalone 4.3 的信息。
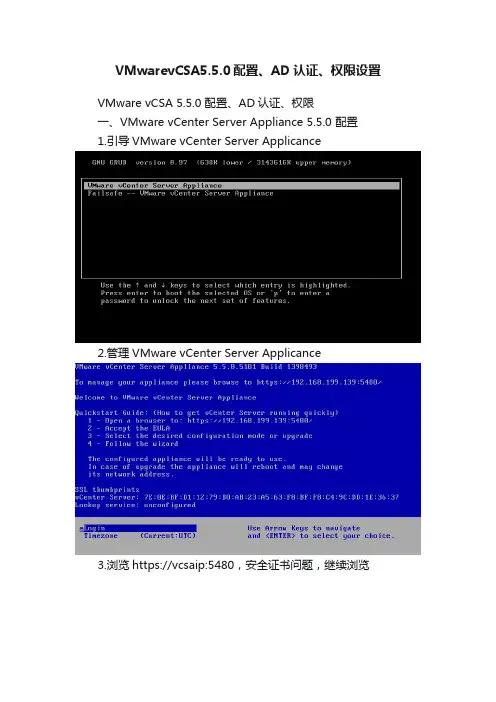
VMwarevCSA5.5.0配置、AD认证、权限设置VMware vCSA 5.5.0 配置、AD认证、权限一、VMware vCenter Server Appliance 5.5.0 配置1.引导VMware vCenter Server Applicance2.管理VMware vCenter Server Applicance3.浏览https://vcsaip:5480,安全证书问题,继续浏览4.用户名root密码vmware登录5.接受许可证协议,下一步6.使用默认设置进行配置,下一步7.查看配置,开始8.配置完成,关闭9.vCenter Server摘要10.设置主机名、默认网关、DNS、IP,保存设置11.浏览https://vcsaip:9443,安全证书问题,继续浏览12.用户名***************************,密码vmware,登录13.查看Single Sign-On标识源14.查看Single Sign-On用户15.查看vCenter Serve管理员1.查看域名2.查看活动目录计算机,没有项目3.启用活动目录,保存设置4.错误:无效主机名,FQDN是必须的5.重新设置主机名,保存设置6.启用活动目录成功7.查看活动目录计算机三、VMware vCenter Server Appliance 5.5.0 权限1. 查看活动目录用户,Administrator2. 用户名***************************登录,添加标识源3.标识源设置,测试连接成功,确定4.查看添加的标识源5.查看AD域用户Administrator6.vCenter Server添加权限7.添加用户。
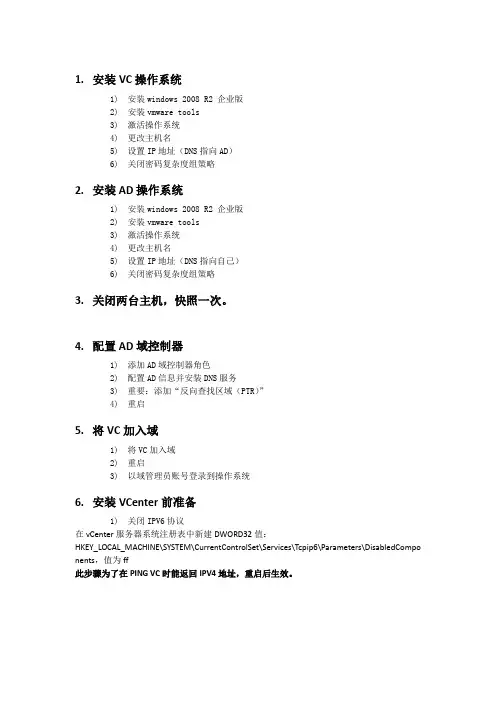
1.安装VC操作系统1)安装windows 2008 R2 企业版2)安装vmware tools3)激活操作系统4)更改主机名5)设置IP地址(DNS指向AD)6)关闭密码复杂度组策略2.安装AD操作系统1)安装windows 2008 R2 企业版2)安装vmware tools3)激活操作系统4)更改主机名5)设置IP地址(DNS指向自己)6)关闭密码复杂度组策略3.关闭两台主机,快照一次。
4.配置AD域控制器1)添加AD域控制器角色2)配置AD信息并安装DNS服务3)重要:添加“反向查找区域(PTR)”4)重启5.将VC加入域1)将VC加入域2)重启3)以域管理员账号登录到操作系统6.安装VCenter前准备1)关闭IPV6协议在vCenter服务器系统注册表中新建DWORD32值:HKEY_LOCAL_MACHINE\SYSTEM\CurrentControlSet\Services\Tcpip6\Parameters\DisabledCompo nents,值为ff此步骤为了在PING VC时能返回IPV4地址,重启后生效。
2)关闭防火墙7.安装VCenter数据库SQL2008+SP31)安装Framework 3.5 SP12)安装SQL主程序3)安装SP3补丁4)建立用于存放数据库的目录5)建立SSO数据库RSA通过脚本此脚本在vCenter安装光盘中提供。
6)建立VC数据库VCDB通过脚本此脚本在vCenter安装光盘中提供。
在SQL2008非R2版本中,vmware提供的脚本需要删除部份内容,否则脚本执行会报错。
以下是修改过的脚本内容。
VC5.1 vcdb.txt------------------------------------------------------------------------------use [master]goCREATE DATABASE [VCDB] ON PRIMARY(NAME = N'vcdb', FILENAME = N'C:\vcdb\VCDB.mdf' , SIZE = 4000KB , FILEGROWTH = 10% ) LOG ON(NAME = N'vcdb_log', FILENAME = N'C:\vcdb\VCDB.ldf' , SIZE = 1000KB , FILEGROWTH = 10%) COLLATE SQL_Latin1_General_CP1_CI_ASgouse VCDBgosp_addlogin @loginame=[vpxuser], @passwd=N'admin@123', @defdb='VCDB', @deflanguage='us_english'goALTER LOGIN [vpxuser] WITH CHECK_POLICY = OFFgoCREATE USER [vpxuser] for LOGIN [vpxuser]goCREATE SCHEMA [VMW]goALTER USER [vpxuser] WITH DEFAULT_SCHEMA =[VMW]gosp_addrolemember @rolename = 'db_owner', @membername = 'vpxuser'goif not exists (SELECT name FROM sysusers WHERE issqlrole=1 AND name = 'VC_ADMIN_ROLE') CREATE ROLE VC_ADMIN_ROLE;GRANT ALTER ON SCHEMA :: [VMW] to VC_ADMIN_ROLE;GRANT REFERENCES ON SCHEMA :: [VMW] to VC_ADMIN_ROLE;GRANT INSERT ON SCHEMA :: [VMW] to VC_ADMIN_ROLE;GRANT CREATE TABLE to VC_ADMIN_ROLE;GRANT CREATE VIEW to VC_ADMIN_ROLE;GRANT CREATE Procedure to VC_ADMIN_ROLE;if not exists (SELECT name FROM sysusers WHERE issqlrole=1 AND name = 'VC_USER_ROLE') CREATE ROLE VC_USER_ROLEgoGRANT SELECT ON SCHEMA :: [VMW] to VC_USER_ROLEgoGRANT INSERT ON SCHEMA :: [VMW] to VC_USER_ROLEgoGRANT DELETE ON SCHEMA :: [VMW] to VC_USER_ROLEgoGRANT UPDATE ON SCHEMA :: [VMW] to VC_USER_ROLEgoGRANT EXECUTE ON SCHEMA :: [VMW] to VC_USER_ROLEgosp_addrolemember VC_ADMIN_ROLE , [vpxuser]gosp_addrolemember VC_USER_ROLE , [vpxuser]gouse MSDBgoCREATE USER [vpxuser] for LOGIN [vpxuser]gosp_addrolemember @rolename = 'db_owner', @membername = 'vpxuser'goif not exists (SELECT name FROM sysusers WHERE issqlrole=1 AND name = 'VC_ADMIN_ROLE') CREATE ROLE VC_ADMIN_ROLE;gogrant select on msdb.dbo.syscategories to VC_ADMIN_ROLEgogrant select on msdb.dbo.sysjobsteps to VC_ADMIN_ROLEgoGRANT SELECT ON msdb.dbo.sysjobs to VC_ADMIN_ROLEGOGRANT EXECUTE ON msdb.dbo.sp_add_job TO VC_ADMIN_ROLEgoGRANT EXECUTE ON msdb.dbo.sp_delete_job TO VC_ADMIN_ROLEgoGRANT EXECUTE ON msdb.dbo.sp_add_jobstep TO VC_ADMIN_ROLEgoGRANT EXECUTE ON msdb.dbo.sp_update_job TO VC_ADMIN_ROLEgoGRANT EXECUTE ON msdb.dbo.sp_add_jobserver TO VC_ADMIN_ROLEgoGRANT EXECUTE ON msdb.dbo.sp_add_jobschedule TO VC_ADMIN_ROLEgoGRANT EXECUTE ON msdb.dbo.sp_add_category TO VC_ADMIN_ROLEgosp_addrolemember VC_ADMIN_ROLE , [vpxuser]go--------------------------------------------------------------------------------------------------------------------删除脚本中两个USER和两个OR开头的语句。
接下来我们需要在DNS服务器中建立实验环境中各个主机的DNS记录。
首先我们来建立VC的DNS记录。
(15)在DNS管理工具中右击我们刚才建立的区域,在弹出的快捷菜单中选择"新建主机"项,如图3-131所示。
(16)在"新建主机"对话框中输入VC的名称和IP地址,然后单击"添加主机"按钮完成VC的DNS记录建立。
随后再继续为ESX1 Server建立对应的DNS记录()。
我们还需要更改VC的DNS后缀,否则在DNS事件中总会出现如图3-133所示的警告信息。
(17)在"系统属性"对话框中选择计算机名选项卡,单击其中的"更改"按钮对主机DNS 后缀进行更改,如图3-134所示。
完成更改并重启VC后,我们的DNS设置工作就告一段落了。
此外,要记得在完成DNS 设置后,修改实验主机连接到VMnet1的虚拟网卡设置,将10.0.1.1设置为它的DNS服务器。
下面还需要为VC的运行安装并配置数据库。
VC支持SQL Server 2000~2005以及Oracle 9i R2和Oracle 10g R2的各个版本。
在VC的早期版本中,甚至还支持Microsoft Access 作为其后台数据库。
既然VC支持如此之多的数据库平台软件,我们应该选择哪一款作为它的后台数据库呢?根据作者实践经验,选用SQL Server 2000的标准版本是最为合适的,不论是软件成本还是硬件成本以及拥有成本,它都是目前最佳的选择。
这是为什么呢?首先,SQL Server 2000相对于SQL Server 2005可以节省大量的磁盘空间以及内存资源。
对于SQL Server 2000,我们分配给它512MB的内存通常就可以很好地运行了;而对于SQL Server 2005,则最好分配给它1GB以上的内存才可保证其流畅运行。
而SQL Server相对于Oracle的产品,其管理界面更简单,维护也相对简单得多。
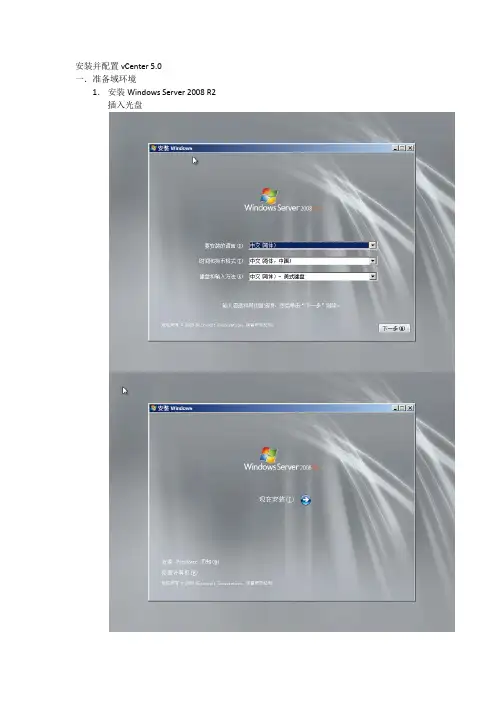
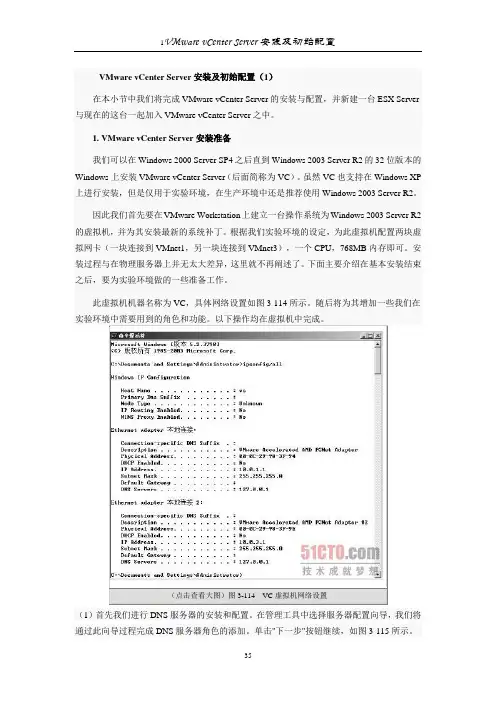
安装并配置vCenter 5.0一.准备域环境1.安装Windows Server 2008 R2 插入光盘选择企业版下一步选择“高级”,再选择需要安装的磁盘开始安装安装期间服务器会自动重启首次登陆需要修改密码安装vmware tools(vmware虚拟化环境),选择典型安装安装完毕后重启服务器配置网络激活服务器(联系网络班组开通访问微软的权限)2.安装dc服务使用dcpromo命令一步步安装域控,并添加dns服务注意DNS必须增加反解(vmware所有机器需要解析到正确的FQDN)二.准备数据库环境1.安装或利旧oracle数据库(UTF-8)2.建vpxadmin schema使用系统帐户登录SQL*Plus 会话。
运行脚本,位于vCenter Server 安装软件包的/<installationdirectory>/vpx/dbschema/DB_and_schema_creation_scripts_oracle.txt 文件中。
CREATE TABLESPACE "VPX" DATAFILE 'C:\Oracle\ORADATA\VPX\VPX.dbf' SIZE2048M AUTOEXTEND ON NEXT 16M;对于其他系统安装,更改vpx.dbf 文件的目录路径。
创建一个用户,如vpxAdmin,用于通过ODBC 访问表空间。
CREATE USER vpxadmin IDENTIFIED BY vpxadmin DEFAULT TABLESPACE vpx;可以向该用户授予dba 权限,或者向其授予下列权限。
grant connect to <user>grant resource to <user>grant create view to <user>grant create sequence to <user>grant create table to <user>grant create materialized view to <user>grant execute on dbms_lock to <user>grant execute on dbms_job to <user>grant unlimited tablespace to <user>三.安装及配置vCenter服务器1.安装oracle客户端如果是Windows 2008 Server 服务器,请先修改安装目录内的refhost.xml文件:增加<OPERATING_SYSTEM><VERSION VALUE=”6.1”></OPERATING_SYSTEM>运行setup选择InstantClient编辑位于C:\Oracle\Oraxx\NETWORK\ADMIN 目录下的tnsnames.ora 文件VPX =(DESCRIPTION =(ADDRESS_LIST =(ADDRESS=(PROTOCOL=TCP)(HOST=hostname)(PORT=1521)))(CONNECT_DATA =(SERVICE_NAME = VPX)))2.创建系统DSN开始—管理工具—数据源(ODBC)创建系统DSN3.安装vcenter server插入光盘选择安装vcenter server注意的是选择数据库时请选择刚才建立的oracle数据库使用端口情况(主用)接着配置JVM内存配置,以及极大规模情况下配置安装后注意:对于Oracle Instant 客户端,检查vCenter Server tomcat 目录(<vCenterinstalllocation>\Infrastructure\tomcat\lib)是否存在ojdbc5.jar(不同的oracle版本可能是ojdbc14.jar)如果不存在,从<Install location>\app\Administrator\product\11.1.0\<instance_name>\sqldeveloper\jdbc\lib 下复制4.安装web client server端口配置:安装完成自动打开管理界面网页https://localhost:9443/admin-app/访问此页面需要Adobe Flash Player 10.1以上打开后,首先注册vcenter server四.配置链接模式1.安装oracle客户端2.安装vc模式(以链接模式安装)确保能解析到主用fqdn。

vCenter管理⼀、vCenter资源管理指南1.1 管理CPU资源可以为虚拟机配置⼀个或多个虚拟处理器,每个处理器均具有⾃⼰的寄存器和控制结构集合。
当调度虚拟机时,会调度其虚拟处理器在物理处理器上运⾏。
VMkernel 资源管理器在物理CPU 上调度虚拟CPU,从⽽管理虚拟机对物理CPU 资源的访问。
ESX⽀持最多具有⼋个虚拟处理器的虚拟机。
1.1.1 查看处理器信息1)在vSphere Client 中,选择主机,然后单击配置选项卡。
2)选择处理器。
可以查看有关物理处理器数量和类型以及逻辑处理器数量的信息。
3)(可选)还可以通过单击属性禁⽤或启⽤超线程。
1.2 管理内存资源使⽤vSphere Client,可以查看有关内存分配设置的信息并对其进⾏更改。
为了有效管理内存资源,还必须熟悉内存开销、闲置内存消耗以及ESX主机回收内存的⽅式。
当管理内存资源时,可以指定内存分配。
如果未⾃定义内存分配,则ESX主机使⽤适合⼤多数情况的默认值。
1.2.1 查看内存分配信息可以使⽤vSphere Client 查看有关当前内存分配的信息。
可以查看有关总内存的信息和可⽤于虚拟机的内存信息。
在ESX 中,还可以查看分配给服务控制台的内存。
1)在vSphere Client 中,选择⼀台主机,然后单击配置选项卡。
2)单击内存。
字段描述总计该主机的总物理内存。
系统ESX系统使⽤的内存。
ESX⾄少使⽤50 MB 系统内存⽤于VMkernel,并使⽤额外内存⽤于设备驱动程序。
该内存在ESX已加载且⽆法配置时分配。
虚拟化层实际所需的内存取决于主机上PCI(外围组件互连)设备的数量和类型。
有些驱动程序需要40 MB,⼏乎是基本系统内存的两倍。
ESX主机还尝试使⼀些内容⼀直保持可⽤,以便⾼效处理动态分配请求。
ESX设置⼤约6% 的内存来供正在运⾏的虚拟机使⽤。
虚拟机由选定主机上运⾏的虚拟机使⽤的内存。
主机的⼤多数内存都⽤于正在运⾏的虚拟机。
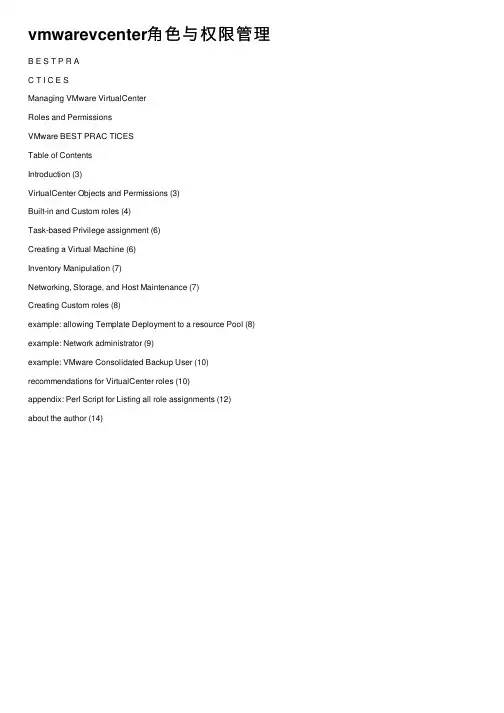
vmwarevcenter⾓⾊与权限管理B E S T P R AC T I C E SManaging VMware VirtualCenterRoles and PermissionsVMware BEST PRAC TICESTable of ContentsIntroduction (3)VirtualCenter Objects and Permissions (3)Built-in and Custom roles (4)Task-based Privilege assignment (6)Creating a Virtual Machine (6)Inventory Manipulation (7)Networking, Storage, and Host Maintenance (7)Creating Custom roles (8)example: allowing Template Deployment to a resource Pool (8) example: Network administrator (9)example: VMware Consolidated Backup User (10) recommendations for VirtualCenter roles (10)appendix: Perl Script for Listing all role assignments (12)about the author (14)VMware BEST PRAC TICESTry to define a role using the smallest number of privileges possible, so that security and control over your environment can be maximized. In the virtual machine creation example, the minimum number of privileges required to enable virtual machine creation is three:Virtual Machine > Inventory > CreateVirtual Machine > Configuration > Add New DiskResource > Assign VM to Resource PoolBecause the same role can be applied to any VMware Infrastructure object, one way to ensure that the fewest privilegesare granted is to create multiple roles, each of which is targeted at a specific set of tasks, then grant each user or group the appropriate role on the appropriate object. For example, in the case of the custom Developer role, you can choose to split this across three roles:Deploy Template — One role allows only deploymentfrom a template.Create Virtual Machine — Another role allows creationof a virtual machine and virtual disk in a datacenter orfolder.Interact with Virtual Machine — The third role allowsassigning a virtual machine to a resource pool and inter-action with a virtual machine.Then you can grant a user the Deploy Template role on template folder BuildA, the Create Virtual Machine role on datacenter East, and the Interact with Virtual Machine role on resource pool Dev.As a corollary to the previous guideline, note that you can grant only one explicit role to a user on a virtual machine, but two different roles might apply implicitly through propaga-tion. In the example given above, you can apply the Create Virtual Machine role to a folder and also apply the Interact with Virtual Machine role to a resource pool. The user then has a union of these privileges on any virtual machine thatis in the folder as well as in the resource pool. This means,for example, that if you want to allow a user to both create avirtual machine and interact with it, without depending onindirect privileges through propagation, you must use a rolethat combines the two sets of privileges.Try to give the roles names that explicitly indicate what eachrole allows, to make their purposes clear. The examples aboveillustrate this point.Use folders to contain the scope of permissions. For example,if you want to limit the templates from which users candeploy new virtual machines, you can put the allowed tem-plates into a folder, then apply the Deploy Template role onthis folder for the users.Because of membership in different groups, and the unionof privileges inherited from them, it might not always beobvious what privileges are granted to a user on an object.However, Active Directory does not allow the inspection of auser’s group memberships unless the user is logged in. Oneway around this restriction is to inspect all the role assign-ments on all objects, then cross-reference them with a knownlist of group memberships of users. The VI Client allows youto see the roles assigned for objects individually, but by usingthe VMware Infrastructure SDK, you can obtain this informa-tion for all objects at once in a more straightforward manner. Appendix A shows an example of a Perl script that uses theVI Perl Toolkit and generates a list of objects with the roles assignments associated with each one. You can use this script as a starting point and modify it to suit your needs.Any user who has the ability to generate a virtual machineor template can potentially initiate a denial-of-service attackby completely filling up a datastore with virtual disk files,whether purposefully or inadvertently. The specified privilegesthat allow this are:Virtual Machine > Configuration > Add New DiskVirtual Machine > Provisioning > Deploy TemplateVirtual Machine > Provisioning > Create Templatefrom Virtual MachineVirtual Machine > Provisioning > Clone TemplateIf you are uncomfortable granting a user this ability to filla datastore, you must enable a more trusted individual togenerate virtual machines or templates on behalf of this user..11VMware BEST PRAC TICESappendix: Perl Script for Listing all role assignmentsThe Perl script shown in Listing 1 makes use of the VMware Infrastructure Perl Toolkit to query VirtualCenter for a list ofall the roles assigned to every object in the inventory. The resulting list should be cross-referenced with the known set of group memberships in your Active Directory environment. An example of the output is shown in Listing .You can save the output as a CSV file, then open it in a spreadsheet or other program for additional processing or analysis. In order to run this script, you must have the VMware Infrastructure Perl Toolkit installed on a system that also has Perl installed. You can find the toolkit at /doc/d82dbee76bd97f192379e924.html / projects/viperltoolkit/.Listing 1: Script to Query VirtualCenter for Roles#!/usr/bin/perl -w# Permission Export Utility v1.0# Contribution by: Karl Rumelhart (krumelhart@/doc/d82dbee76bd97f192379e924.html )## For each for each type of managed entity, HostSystem, VirtualMachine, Datacenter,# Folder, ComputeResource (i.e. host or cluster), and ResourcePool, this script# retrieves all objects of that type and then all permissions that are set on the# objects. It prints out the Object Type, Object Name, User/Group, and Role in comma # separated value format. This can be piped to a file (“> foo.csv” in windows) and# opened with Excel.# Version History:# V1.00 - (22 Dec 2006)use strict;use Getopt::Long;use VMware::VIRuntime;my %opts = (service_url => undef,userid => undef,password => undef);GetOptions (\%opts,“service_url=s”,“userid=s”,“password=s”);if( !defined ($opts{service_url} && $opts{userid} && $opts{password} ) ) {help();exit (1);}1VMware BEST PRAC TICES# loginVim::login(service_url => $opts{service_url}, \user_name => $opts{userid}, password => $opts{password});# the authorization manager is the key to getting permission infomy $auth_mgr = Vim::get_view(mo_ref => Vim::get_service_content()->authorizationManager); # Get all roles and put them in a hash so we can easily get the name corresponding to# a roleIdmy %role_hash;my $role_list = $auth_mgr->roleList;foreach (@$role_list) {$role_hash{$_->roleId} = $_->name;}# Heading for csv columnsprint “Object Type, Object Name, User/Group, Role” . “\n”;# for each type of managed entity run through all objects of that type and all# permissions defined on that object and print out the corresponding Object Type,# Object Name, User/Group, Rolemy @obj_types = (‘HostSystem’, ‘VirtualMachine’, ‘Datacenter’, ‘Folder’, \‘ComputeResource’, ‘ResourcePool’);foreach my $this_type (@obj_types){my $obj_views = Vim::find_entity_views(view_type => $this_type);foreach (@$obj_views) {my $obj_name = $_->name;my $perm_array = $auth_mgr->RetrieveEntityPermissions(entity => $_, inherited => 1); foreach(@$perm_array) {# print object type and nameprint $this_type . “, “ . $obj_name . “, “;# print user/group and roleprint $_->principal . “, “ . $role_hash{$_->roleId} . “\n”;}}}# logoutVim::logout();1VMware BEST PRAC TICESsub help {my $help_text = <<’END’;USAGE:printperms.pl --service_url --userid --passwordExample:perl printperms.pl --service_url https://localhost/sdk/vimService --useridadministrator --password mypasswordThe output will be in csv format. Pipe to a file to open with Excel.ENDprint $help_text;}Listing 2: Sample Output Listing Roles‘Object Type’,’Object Name’,’User/Group’,’Role’HostSystem,/doc/d82dbee76bd97f192379e924.html ,Administrators,Admin HostSystem,/doc/d82dbee76bd97f192379e924.html ,Administrators,AdminVirtualMachine,CRM Server,Administrators,AdminVirtualMachine,CRM Server,VCUser,VirtualMachinePowerUserVirtualMachine,Webserver2,Administrators,AdminVirtualMachine,Webserver2,VCUser,VirtualMachinePowerUserabout the authorCharu Chaubal is technical marketing manager at VMware,where he specializes in enterprise datacenter manage-ment. Previously, he worked at Sun Microsystems, wherehe had more than seven years’ experience designing anddeveloping distributed resource management and gridinfrastructure software solutions. He has also developed anddelivered training courses on grid computing to a varietyof customers and partners in the United States and abroad.Chaubal received a Bachelor of Science in Engineeringfrom the University of Pennsylvania and a Ph.D. from theUniversity of California at Santa Barbara, where he studiedthe numerical modeling of complex fluids. He is the authorof numerous publications and several patents in the fieldsof datacenter automation and numerical price optimization.AcknowledgmentsThe author would like to thank the following for their valuableinput: Doug Clark, Karl Rummelhart1Revision: 20070404 Item: BP-017-PRD-01-01 VMware, Inc. 3145 Porter Drive Palo Alto CA 94304 USA Tel 650-475-5000 Fax 650-475-5001 /doc/d82dbee76bd97f192379e924.html ? 2007 VMware, Inc. All rights reserved. Protected by one or more of U.S. Patent Nos. 6,397,242, 6,496,847, 6,704,925, 6,711,672, 6,725,289, 6,735,601, 6,785,886, 6,789,156, 6,795,966, 6,880,022, 6,961,941, 6,961,806, 6,944,699, 7,069,413; 7,082,598 and 7,089,377; patents pending. VMware, the VMware “boxes” logo and design, Virtual SMP and VMotion are registered trademarks or trademarks of VMware, Inc. in the United States and/or other jurisdictions. All other marks and names mentioned herein may be trademarks of their respective companies.。
vcenter的利用方式
vCenter是VMware公司推出的一款虚拟化管理平台,它为企业
提供了集中式管理虚拟化基础设施的能力。
利用vCenter,企业可
以更加高效地管理其虚拟化环境,提高资源利用率,简化管理流程,增强安全性等。
以下是vCenter的利用方式:
1. 虚拟机管理,vCenter允许管理员在一个集中的界面中管理
和监控虚拟机的创建、部署、迁移和删除。
管理员可以轻松地对虚
拟机进行快照、克隆和模板化,从而简化虚拟机的管理和维护。
2. 资源调度和负载均衡,vCenter可以帮助管理员对虚拟化环
境中的资源进行有效的调度和负载均衡,确保各个物理服务器的资
源得到充分利用,从而提高整个虚拟化环境的性能和稳定性。
3. 自动化管理,vCenter提供了丰富的自动化管理功能,例如
自动化的虚拟机部署、配置管理、性能优化和故障恢复等,帮助管
理员节省时间和精力,提高管理效率。
4. 安全性管理,vCenter提供了安全审计、访问控制和权限管
理等功能,帮助管理员确保虚拟化环境的安全性,防止未经授权的
访问和操作。
5. 性能监控和报告,vCenter可以实时监控虚拟化环境的性能指标,并生成各种报告,帮助管理员及时发现和解决性能问题,优化虚拟化环境的性能。
总之,vCenter是一个功能强大的虚拟化管理平台,通过其丰富的功能和集中化的管理界面,可以帮助企业更加高效地管理其虚拟化基础设施,提高资源利用率,降低管理成本,增强安全性,从而推动业务的发展和创新。
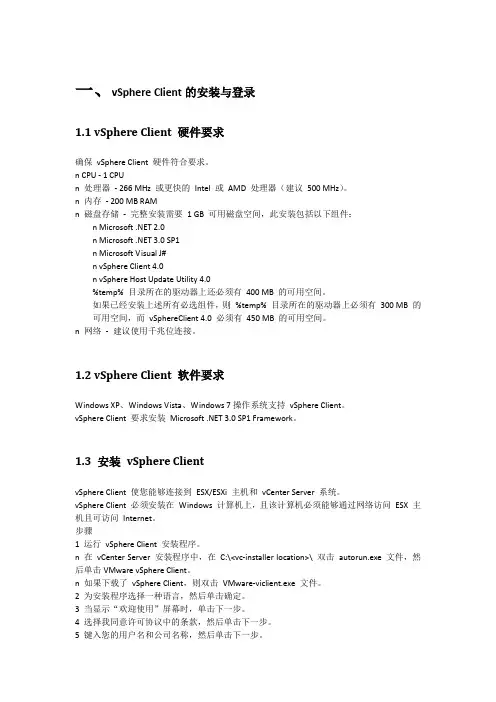
一、vSphere Client的安装与登录1.1 vSphere Client 硬件要求确保vSphere Client 硬件符合要求。
n CPU - 1 CPUn 处理器- 266 MHz 或更快的Intel 或AMD 处理器(建议500 MHz)。
n 内存- 200 MB RAMn 磁盘存储- 完整安装需要1 GB 可用磁盘空间,此安装包括以下组件:n Microsoft .NET 2.0n Microsoft .NET 3.0 SP1n Microsoft Visual J#n vSphere Client 4.0n vSphere Host Update Utility 4.0%temp% 目录所在的驱动器上还必须有400 MB 的可用空间。
如果已经安装上述所有必选组件,则%temp% 目录所在的驱动器上必须有300 MB 的可用空间,而vSphereClient 4.0 必须有450 MB 的可用空间。
n 网络- 建议使用千兆位连接。
1.2 vSphere Client 软件要求Windows XP、Windows Vista、Windows 7操作系统支持vSphere Client。
vSphere Client 要求安装Microsoft .NET 3.0 SP1 Framework。
1.3 安装vSphere ClientvSphere Client 使您能够连接到ESX/ESXi 主机和vCenter Server 系统。
vSphere Client 必须安装在Windows 计算机上,且该计算机必须能够通过网络访问ESX 主机且可访问Internet。
步骤1 运行vSphere Client 安装程序。
n 在vCenter Server 安装程序中,在C:\<vc-installer location>\ 双击autorun.exe 文件,然后单击VMware vSphere Client。
VMware vSphere esxi中的用户权限与角色角色:各种角色定义了对此角色可操作细节的权限组合用户权限:用户权限是对esxi中的对象实例(如esxi主机,虚拟机,存储,网络等)进行权限的分配。
通过在这些对象上绑定“用户+角色”来限定每个用户或用户组可以对此对象的操作权限。
1,在没有vSphere center 的时候,用户和角色都是通过vmware client联机在每台esxi上分别进行设置的,每个主机上的用户和角色都是各自独立的。
2,在使用了vSphere center 的时候如果esxi主机已被加入到center中,此时所有用户和权限都是统一定义和安排的。
与上面不同的时候,由于vSphere center是安装在一台windows server 64位操作系统中的,所以vmware直接使用windows server中定义的域用户(如果有活动目录)或本地用户的数据库来作为自身管理和登陆用户的数据库来使用的,所以你在center上你找不到添加用户的地方,因为用户是在windows server系统上创建的。
3,vSphere center 中VMware默认定义了几个角色,分别是:无权访问只读管理员虚拟机超级用户(示例)虚拟机用户(示例)资源池管理员(示例)WMware Consolidated Backup用户(示例)数据存储使用者(示例)其中,[无权访问],[只读]和[管理员] 这三个是无法被删除的,其它可以被删除。
在需要创建自定义角色时,你可以直接对上面这些角色进行克隆,克隆出新的角色后再编辑角色,修改相应的权限。
也可以直接添加角色进行权限的定义。
下面说一下在vSphere center中如何让用户或用户组只能控制其被允许的虚拟机的开关机和连接主机上存储的权限。
1,创建一个角色。
在vSphere center中选择[系统管理]-->[角色],然后克隆[虚拟机用户(示例)]这个角色为一个新的角色——[虚拟机用户+访问存储],然后编辑此角色,在编辑角色的窗口中,勾选[数据存储]下面的[浏览数据存储]。
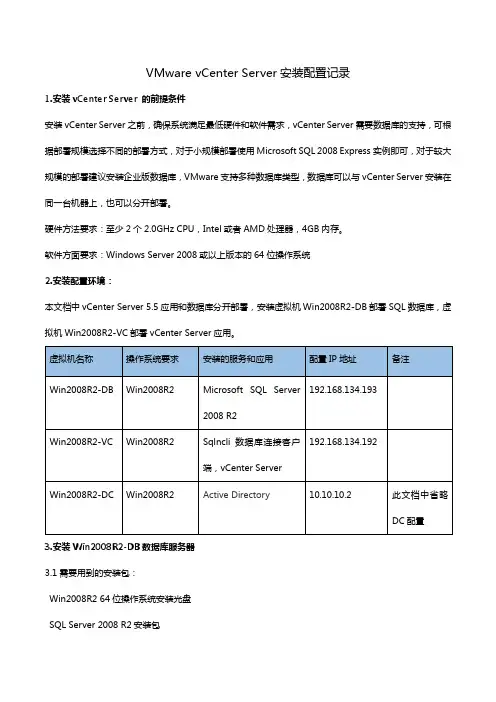
VMware vCenter Server安装配置记录1.安装vCenter Server 的前提条件安装vCenter Server之前,确保系统满足最低硬件和软件需求,vCenter Server需要数据库的支持,可根据部署规模选择不同的部署方式,对于小规模部署使用Microsoft SQL 2008 Express实例即可,对于较大规模的部署建议安装企业版数据库,VMware支持多种数据库类型,数据库可以与vCenter Server安装在同一台机器上,也可以分开部署。
硬件方法要求:至少2个2.0GHz CPU,Intel或者AMD处理器,4GB内存。
软件方面要求:Windows Server 2008或以上版本的64位操作系统2.安装配置环境:本文档中vCenter Server 5.5应用和数据库分开部署,安装虚拟机Win2008R2-DB部署SQL数据库,虚拟机Win2008R2-VC部署vCenter Server应用。
3.安装Win2008R2-DB数据库服务器3.1需要用到的安装包:Win2008R2 64位操作系统安装光盘SQL Server 2008 R2安装包3.2.安装一台虚拟机,操作系统为Win2008R2 64位,计算机命名为:Win2008R2-DB,具体步骤此处省略3.3为Win2008R2-DBDB虚拟机安装SQL Server2008R2程序。
手动创建一个数据库vCenter_db,用于vCenter Server应用程序连接,具体步骤此处省略。
4.安装Win2008R2-VC服务器4.1需要用到的安装包Win2008R2 64位操作系统安装光盘SQL Server 2008 R2安装包中的sqlncli.msiVMware-VIMSetup-all-5.5.0-1312299.iso4.2 安装vCenter Server服务器需要满足的条件安装vCenter Server 5.5的虚拟机一定要安装Win2008R2 64位操作系统,要不然在安装时会提示:此处理器类型不支持该安装程序包。
通过vCenter划分账号实现分级管理
使用Putty或Secure CRT等工具SSH2登陆到192.168.254.120上
通过vSphere client登陆,找到需要zjw用户管理的虚拟机,右击【添加权限】
选择角色权限为【虚拟机用户】,再在【用户和组】中单击【添加】按钮;
在【搜索】栏输入zjw点击搜索,找到该账号后选中该账号,点击【添加】随后点击【确认】按钮,完成权限的添加。
随后通过vSphere client客户端登陆vCenter,账号密码使用新建的zjw;
此时,该账号登陆后能看到的只是该虚拟机,所能操作的包括虚拟机的开机、关机、重启和挂载光驱镜像文件等,决定该账号的权限在角色中具体编辑。
1. 简介使用用户、组、角色和权限可控制哪些用户可以访问vSphere 受管对象以及他们可以执行哪些操作。
vCenter Server 和ESX/ESXi 主机根据分配给用户的权限确定用户的访问级别。
vCenter Server 和ESX/ESXi 主机凭借用户名、密码和权限组合这一机制对用户的访问权限进行验证并授予其执行操作的权限。
服务器和主机将维护授权用户及分配给每个用户的权限的列表。
特权定义执行操作和读取属性所需的基本个人权限。
ESX/ESXi 和vCenter Server 使用一组特权或角色来控制哪些用户或组可以访问特定的vSphere 对象。
ESX/ESXi 和vCenter Server 提供一组预定角色。
您也可以创建新的角色。
特别注意的是:在ESX/ESXi 主机上分配的特权和角色与在vCenter Server 系统上分配的特权和角色是相互独立的。
当使用vCenter Server 管理主机时,只有通过vCenter Server 系统分配的特权和角色可用。
如果使用vSphere Client直接连接主机,则只有直接在主机上分配的特权和角色可用。
2. VSPHERE 用户/组用户是经过授权可登录主机或vCenter Server 的个人。
多个用户可以在同一时间从不同的vSphere Client 会话访问vCenter Server 系统。
vSphere 未明确限制具有相同身份验证凭据的用户同时访问vSphere 环境并在其中执行操作。
单独管理在vCenter Server 系统上定义的用户和在单个主机上定义的用户。
即使主机和vCenter Server 系统的用户列表似乎有共同的用户(例如,称为devuser 的用户),也应将这些用户视为碰巧拥有相同名称的独立用户。
vCenter Server 中的devuser 属性(包括权限和密码等)与ESX/ESXi 主机上的devuser 属性相互独立。
1、主机正常关机连接(1)所有的虚拟机关机后,将主机设置为维护模式。
图1-2(3)将图1-3选项去掉后,关机。
图1-3(4)关机后的主机如图1-4图1-4(5)主机开机OK后,连接主机,vcenter接管该主机。
注:服务器系统启动后会自动连接,特殊情况下手动进行连接。
如图1-5图1-52、虚拟机动态或手动迁移不成功时,查看主机“配置”--“网络”中的vSwitch属性的vmotion功能是否打开。
(1)如图2-1、2-2(2)将属性对应的vmotion功能打开如图2-3图2-1图2-2图2-33、安装系统(虚拟机)的不同方式。
如图3-1图3-1(1)连接G:、I:为本地客户端光驱设备。
(2)连接本地磁盘上的ISO镜像,即将本地ISO镜像挂载上面安装(3)连接主机设备:为主机自带的光驱设备(4)连接数据存储上的ISO镜像:可以将本地客户端的ISO镜像上传至数据存储。
这里新建了一个OS_soft,用于存放ISO镜像。
如图3-2、3-3相对而言,第(4)种方式要方便快捷。
图3-2图3-34、虚拟机模板自定义规范(1)“主页”--“自定义规范管理器”图4-1(2)新建“自定义规范”图4-2(3)自定义名称、NetBIOS名称(使用虚拟机名字)、产品密钥(可省略)、系统密码图4-3 图4-4 图4-5图4-6(4)运行一次(不添加)、网络(典型即可)图4-7图4-8(5)工作组(默认即可)如图4-9、生成新的ID(必选)如图4-10图4-9图4-105、删除不用的虚拟机,释放所占空间,“从磁盘中删除”。
如图5-1(请谨慎操作!)图5-16、虚拟机编辑设置(1)虚拟机编辑设置必选在虚拟机关机的状态下才能生效。
7、克隆、转化虚拟机、部署虚拟机、快照(以做好的08R2模板为例)(1)克隆:克隆一个一模一样的虚拟机系统。
(2)转化成虚拟机:将该模板变为一个虚拟机。
(3)部署虚拟机:可按照“部署规范”生成新的虚拟机。
Vcenter权限管理设置方法1.添加用户
可通过两种方式添加.一个是添加本地用户,另外一个是添加域用户.
1.1添加本地用户
1)在vcenter的系统下点击计算机,右键点击管理
2)打开管理控制台,选择用户
3)在右侧点击右键,选择”新用户”
4)填写用户名及密码,点击创建.即创建完成新用户.
5)创建好的用户如下
1.2创建域用户
1)打开域控服务器,点击”开始”,选择管理您的服务器
2)选择管理Active Directory中的用户和计算机.
3)选择Users
4)点击右键新建—用户
5)添加用户名
6)点击下一步,填写密码.
7)点击下一步,点击完成,即可完成用户的创建
2.在vcenter里添加角色1)打开vcenter界面,选择角色项
2)点击添加角色.
3)输入角色名称及赋予该角色的权限.点击确定.
3.给用户分配相应的角色,权限.
1)选择需要给用户所分配的虚拟机,主机,集群等.以选择主机为例.
右键选择,添加权限
2)点击添加用户
3)选择刚才所建用户,点击添加,然后点击确定.
3)选择分配给该虚拟机的角色,此处选择虚拟机管理员.点击确定
4)至此,我们就可以看到在权限这一栏里,多了user这个用户的权限及角色.通过该用户登录
vcenter,即获得赋予其的权限。
安装和配置指南vCenter Orchestrator 4.0ZH_CN-000192-00安装和配置指南2 VMware, Inc.最新的技术文档可以从VMware 网站下载:/cn/support/pubs/VMware 网站还提供最近的产品更新信息。
您如果对本文档有任何意见或建议,请把反馈信息提交至:docfeedback@版权所有 © 2009 VMware, Inc. 保留所有权利。
本产品受美国和国际版权及知识产权法的保护。
VMware 产品受一项或多项专利保护,有关专利详情,请访问 /go/patents-cn 。
VMware 是 VMware, Inc. 在美国和/或其他法律辖区的注册商标或商标。
此处提到的所有其他商标和名称分别是其各自公司的商标。
VMware, Inc.3401 Hillview Ave.Palo Alto, CA 94304 北京办公室北京市海淀区科学院南路2号融科资讯中心C 座南8层/cn 上海办公室上海市浦东新区浦东南路 999 号新梅联合广场 23 楼/cn 广州办公室广州市天河北路 233 号中信广场 7401 室/cn目录关于本文档51VMware vCenter Orchestrator 简介7Orchestrator 平台的主要功能特征7Orchestrator 用户角色和相关任务8Orchestrator 架构92Orchestrator 系统要求11Orchestrator 的硬件要求11Orchestrator 支持的操作系统11支持的目录服务11Orchestrator 支持的浏览器12Orchestrator 数据库要求123随 vCenter Server 安装 Orchestrator13在 Microsoft Windows 上安装 Orchestrator134升级 vCenter Server 之后升级 Orchestrator 应用程序155Orchestrator 数据库设置17在 Windows 上启用 Oracle 数据库支持17在 Windows 上启用 MySQL 数据库支持18MySQL 数据库参数196配置 Orchestrator21启动 Orchestrator 配置服务21登录 Orchestrator 配置界面22更改默认密码22配置网络连接23默认配置端口23导入 vCenter SSL 证书24配置 LDAP 设置25生成 LDAP 连接 URL25指定浏览凭据26定义 LDAP 查询方式27设置连接超时28密码加密和哈希机制28配置数据库连接29VMware, Inc. 3安装和配置指南服务器证书30创建自签署服务器证书30获取由证书颁发机构签署的服务器证书30导出服务器证书31更改自签署服务器证书32配置默认插件32定义默认 SMTP 连接33配置 SSH 插件34配置 vCenter 4.0 插件34Orchestrator 服务器的访问权限35导入 vCenter Server 许可证35启动 Orchestrator 服务器36设置服务超时参数36导出 Orchestrator 配置37Orchestrator 配置文件37导入 Orchestrator 配置38配置事件和执行的最大数目38安装应用程序39启动已发布的 Web 视图40定义服务器日志级别40索引414 VMware, Inc.关于本文档《VMware vCenter Orchestrator 4.0 安装和配置指南》提供有关如何安装、升级和配置VMware® vCenter Orchestrator 的信息和说明。
Vcenter权限管理设置方法1.添加用户
可通过两种方式添加.一个是添加本地用户,另外一个是添加域用户.
1.1添加本地用户
1)在vcenter的系统下点击计算机,右键点击管理
2)打开管理控制台,选择用户
3)在右侧点击右键,选择”新用户”
4)填写用户名及密码,点击创建.即创建完成新用户.
5)创建好的用户如下
1.2创建域用户
1)打开域控服务器,点击”开始”,选择管理您的服务器
2)选择管理Active Directory中的用户和计算机.
3)选择Users
4)点击右键新建—用户
5)添加用户名
6)点击下一步,填写密码.
7)点击下一步,点击完成,即可完成用户的创建
2.在vcenter里添加角色1)打开vcenter界面,选择角色项
2)点击添加角色.
3)输入角色名称及赋予该角色的权限.点击确定.
3.给用户分配相应的角色,权限.
1)选择需要给用户所分配的虚拟机,主机,集群等.以选择主机为例.
右键选择,添加权限
2)点击添加用户
3)选择刚才所建用户,点击添加,然后点击确定.
3)选择分配给该虚拟机的角色,此处选择虚拟机管理员.点击确定
4)至此,我们就可以看到在权限这一栏里,多了user这个用户的权限及角色.通过该用户登录
vcenter,即获得赋予其的权限。