卡西欧CT-640说明书
- 格式:pdf
- 大小:11.31 MB
- 文档页数:11
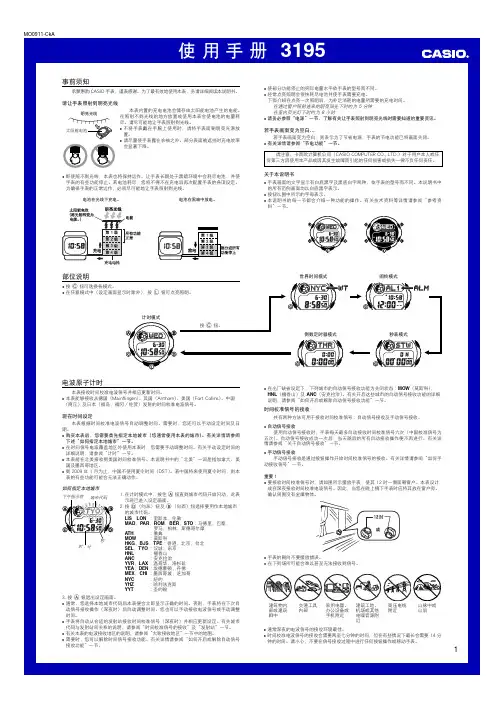
MA0911-CkB;使用手册5083(OC);感谢您选购CASIO手表;本表未设对应UTC时差–3.5小时的城市代码;电力水平;通过查看计时模式中x秒针的转动状态可以了解手表的;?若x秒针以通常每秒跳一次的状态转动,则电力为第;电力水平指针的转动状态;12;正常;x秒针每两秒钟跳一次;(基准位置);x秒针停止;z时针及c分针停止在12时位置;功能状态所有功MA0911-CkB使用手册5083 (OC)感谢您选购CASIO手表。
本表未设对应UTC时差–3.5小时的城市代码。
因此,电波计时功能不能正确显示加拿大纽芬兰的时间。
请注意,卡西欧计算机公司(CASIO COMPUTE R CO., LTD.)对于用户本人或任何第三方因使用本产品或因其发生故障而引起的任何损害或损失一律不负任何责任。
电力水平通过查看计时模式中x秒针的转动状态可以了解手表的电力水平。
? 若x秒针以通常每秒跳一次的状态转动,则电力为第1级。
? 若x秒针每两秒钟跳一次,则电力为第2级,已很低了。
请尽快让手表照射光线进行充电。
电力水平指针的转动状态12正常。
x秒针每两秒钟跳一次。
(基准位置)。
n日期返回1x秒针停止。
z时针及c分针停止在12时位置。
功能状态所有功能正常。
鸣音、时间校准电波信号接收功能停止所有功能停止。
关于本说明书按钮操作使用图中所示的字母A至D表示。
3各指针的功能时针z 秒针x 分针c左子盘针:指示目前的星期及功能。
v右子盘针:根据目前模式以24小时时制指示时间。
b 日期n? 电池电力下降到第3级时,所有功能都停止,但手表将继续内部保持计时约一周。
若在此期间将电池充满电,指针将自动转动至正确时间处并恢复正常计时。
一周后,所有设定(包括计时)都将被清除。
再次对电池进行充电将使所有设定返回初始出厂缺省值。
电力恢复模式当电力由于闹铃音在短时间内过度使用而突然下降到一定水平以下时,手表将进入电力恢复模式并暂时停止指针的运作。
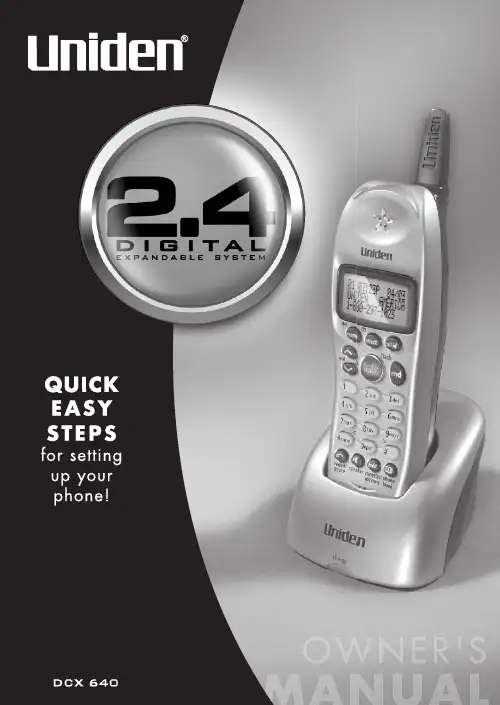
WelcomeCongratulations on your purchase of the Uniden DCX640 optional handset and charger. This additional handset is for use with the DCT64 2.4GHz Digital Spread Spectrum series (DCT646, DCT648, DCT6465, DCT6485), model numbers may vary. Each model within this series will support up to 4 handsets. You can place a fully featured cordless handset anywhere in your home as long as you have AC power is available to connect the handset charging cradle.IMPORTANTThe DCX640 additional handset will not operate unless it has been registered to the main base unit of the cordless model you are expanding. This manual describes only the instructions specific to the additional handset. For detailed operation, refer to the owner’s manual supplied with the cordless telephone you are expanding (see “Expanding Your Phone”).To purchase additional handsets (DCX640), visit our web site at .Checking the Package ContentsMake sure you have received the following items in the package.If any of these items are missing or damaged, contact the Uniden Parts Department.•Cordless Handset•Charging Cradle•Battery Pack (BT-446)(Capacity: 800 mAH, 3.6V)•AC Adapter (AD-310)(INPUT: 120V AC 60Hz) (OUTPUT: 9V DC 210 mA)•Beltclip•This Owner’s Manual•Other Printed MaterialUniden Parts Department at (800) 554-3988Hours: M-F 8:00 a.m. to 5:00 p.m. CST.or visit our website atInstall the Rechargeable Battery Pack into the HandsetFollow these steps before using your cordless handset:•Make sure the handset is registered to main base unit.•Fully charge the battery pack.1Press down on the handset batterycase cover (use the finger indentionfor a better grip) and slide the coverdownward to remove.2Plug the battery pack connector (rednotches fit into the grooves of thejack only one-way.) Match the wirecolors to the polarity label in thebattery compartment, and push theconnector in until you hear a click.3jack will remain in place.4Place the battery case cover back onthe handset by sliding it upwardsuntil it clicks into place.5Place the handset in the chargingsupplied with your phone.through the Uniden Parts Department.(See page 2.)•Recharge your handset on a regularbasis by returning the handset to thecharger after each phone call.Rechargeable Nickel-Metal-Hydride BatteriesMust Be Recycled or Disposed of ProperlyBattery InformationLow battery alertWhen the batteries are very low and need to be charged, the phone is programmed to eliminate functions in order to save power.The batteries need to be charged when:- The empty battery icon appears.- Low Battery appears in the display.If the phone is in standby mode, none of the keys will operate.If you are on a call, complete your conversation as quickly as possible, and return the handset to the charging cradle.Cleaning the battery charging contactsTo maintain a good charge, it isimportant to clean the chargingcontacts on both the handset andthe charger once a month. Usingthe charging contacts. Then makesure to go back over the chargingcontacts with a dry cloth beforereturning the handset to thecharger to charge.Caution: Do not use paint thinner, benzene, alcohol, or other chemical products. Doing so may discolor the surface of the telephone and damage the finish.Connect the Charger1Connect the AC adapter to the DCIN 9VAC wall outlet.2Set the charger on a desk orthe charger with the keypadfacing forward.3Make sure the charge LED illuminates. If the LED does not illuminate, check to see that the AC adapter is plugged in and that the handset makes good contact with the charger charging contacts.Use only the supplied AD-310 AC adapter. Do not useany other AC adapter.Place the charger close to the AC outlet so that you canunplug the AC adapter easily.Register the HandsetYOU NEED TO REGISTER THE DCX640 TO THE MAIN BASE BEFORE USE! 1Before registering the handset,for 15-20 hours.2Place the extra handsetin the main base unit toDCT646 series main base.)3While the handset is registering,Handset Registeringappear in the LCD. WhenRegistration Completeis displayed, the handset hasbeen registered to the base.If Registration Failedappears, please try thesesteps again.The handset can be registered when the main base is instandby mode.Standby Mode - The handset is not in use and talk/flashhas not been pressed.Using the DCX640 with the Integrated Answering DeviceIf the original unit has a built-in answering system, you can check your new messages, skip, repeat, or delete your messages with the DCX640 handset. For more detailed instructions, see the owner’s manual supplied with the original unit.1)Press select/ on the handset in standby mode.2)After the announcement, enter a command in the following list within30 seconds.3)To quit, hang up or press end.If you press end before the answering system answers, the phonewill return to standby mode.When the answering system does not answer within 6 seconds, youwill hear a beep and the phone will return to standby mode.When you receive a call, remote operation is canceled.I.C. NoticeTERMINAL EQUIPMENTNOTICE: This equipment meets the applicable Industry Canada Terminal Equipment Technical Specifications. This is confirmed by the registration number. The abbreviation, IC, before the registration number signifies that registration was performed based on a Declaration of Conformity indicating that Industry Canada technical specifications were met. It does not imply that Industry Canada approved the equipment.NOTICE: The Ringer Equivalence Number (REN) for this terminal equipment is marked on the equipment itself. The REN assigned to each terminal equipment provides an indication of the maximum number of terminals allowed to be connected to a telephone interface. The termination on an interface may consist of any combination of devices subject only to the requirement that the sum of the Ringer Equivalence Numbers of all the devices does not exceed five.RADIO EQUIPMENTThe term “IC:” before the radio certification number only signifies that Industry Canada technical specifications were met.Operation is subject to the following two conditions: (1) this device may not cause interference, and (2) this device must accept any interference, including interference that may cause undesired operation of the device. “Privacy of communications may not be ensured when using this telephone.”THE FCC WANTS YOU TO KNOWChanges or modifications to this product not expressly approved by Uniden, or operation of this product in any way other than as detailed by the owner's manual, could void your authority to operate this product.Uniden works to reduce lead content in our PVC coated cords in our products and accessories. Warning!The cords on this product and/or accessories contain lead, a chemical known to the State of California to cause birth defects or other reproductive harm. Wash hands after handling. Command Function Command Function 1Repeat a Message6Answering System On2Playing incoming Messages7Memo Record/Stop3Skipping a Message8Greeting Message Record/Stop4Deleting a Message9Answer System Off5Stop Operation0Help GuidanceOne Year Limited WarrantyImportant: Evidence of original purchase is required for warranty service.WARRANTOR: UNIDEN AMERICA CORPORATION (“Uniden”)ELEMENTS OF WARRANTY: Uniden warrants, for one year, to the original retail owner, this Uniden Product to be free from defects in materials and craftsmanship with only the limitations or exclusions set out below. WARRANTY DURATION: This warranty to the original user shall terminate and be of no further effect 12 months after the date of original retail sale. The warranty is invalid if the Product is (A) damaged or not maintained as reasonable or necessary, (B) modified, altered, or used as part of any conversion kits, subassemblies, or any configurations not sold by Uniden, (C) improperly installed, (D) serviced or repaired by someone other than an authorized Uniden service center for a defect or malfunction covered by this warranty, (E) used in any conjunction with equipment or parts or as part of any system not manufactured by Uniden, or (F) installed or programmed by anyone other than as detailed by the owner’s manual for this product.STATEMENT OF REMEDY: In the event that the product does not conform to this warranty at any time while this warranty is in effect, warrantor will either repair or replace the defective unit and return it to you without charge for parts, service, or any other cost (except shipping and handling) incurred by warrantor or its representatives in connection with the performance of this warranty. Warrantor may replace the unit with a new or refurbished unit. THE LIMITED WARRANTY SET FORTH ABOVE IS THE SOLE AND ENTIRE WARRANTY PERTAINING TO THE PRODUCT AND IS IN LIEU OF AND EXCLUDES ALL OTHER WARRANTIES OF ANY NATURE WHATSOEVER, WHETHER EXPRESSED, IMPLIED OR ARISING BY OPERATION OF LAW, INCLUDING, BUT NOT LIMITED TO ANY IMPLIED WARRANTIES OF MERCHANTABILITY OR FITNESS FOR A PARTICULAR PURPOSE. THIS WARRANTY DOES NOT COVER OR PROVIDE FOR THE REIMBURSEMENT OR PAYMENT OF INCIDENTAL OR CONSEQUENTIAL DAMAGES. Some states do not allow this exclusion or limitation of incidental or consequential damages so the above limitation or exclusion may not apply to you.LEGAL REMEDIES: This warranty gives you specific legal rights, and you may also haveother rights which vary from state to state. This warranty is void outside the United States of America and Canada.PROCEDURE FOR OBTAINING PERFORMANCE OF WARRANTY: If, after following the instructions in the owner’s manual you are certain that the Product is defective, pack the Product carefully (preferably in its original packaging). The Product should include all parts and accessories originally packaged with the Product. Include evidence of original purchase and a note describing the defect that has caused you to return it. The Product should be shipped freight prepaid, by traceable means, to warrantor at:Uniden America CorporationParts and Service Division4700 Amon Carter Blvd.Fort Worth, TX 76155(800) 297-1023, 8 a.m. to 5 p.m. Central, Monday through FridayMay be covered under one or more of the following U.S. patents:4,523,0584,595,7954,797,9165,381,4605,426,6905,434,9055,491,7455,493,6055,533,0105,574,7275,581,5985,650,7905,660,2695,661,7805,663,9815,671,2485,696,4715,717,3125,732,3555,754,4075,758,2895,768,3455,787,3565,794,1525,801,4665,825,1615,864,6195,893,0345,912,9685,915,2275,929,5985,930,7205,960,3585,987,3306,044,2816,070,0826,125,2776,253,0886,314,2786,418,209。
卡西欧,保证书篇一:卡西欧casio手表中文使用说明书卡西欧casio手表中文使用说明书关于说明书的内容如有变更恕不另行通知。
卡西欧手表无法保证本网站提供的说明书是最新版本。
卡西欧手表使用说明方法:注:卡西欧手表说明书一般是全球统一的多国文字版,由于功能简单的缘故,一般简单类的指针表都没有中文,所有有液晶数字显示的电子表都有中文的。
如果在以下列表中找不到您所要的型号,请参见以下卡西欧手表基本使用方法日期设置拨一半出来,大部分都是逆时针(往人的方向)调日期(有些型号是相反方向的)拔出表把(表冠)至第一格转动表把(表冠)设置日期调校好所需要日期后,把表把(表冠)向内推入原位调日期的时间请在早上6点至早上10点调.日期不要夜晚调,否则会日夜相反,如果当天白天调后可能当天晚上不变的,要第二天晚上才变,变的时间是零点至六点默认所有月的天数都是31天,小月要手调常用石英或机械手表的a位:石英手表的正常工作位置或机械手表上弦和正常工作位置;B位:无日历手表调校时间的位置或单历/双历手表快速调校日历和星期的位置,顺时针拨星期,逆时针快拨日期;c位:日历手表调校时间和慢拨星期、日历的位置自动计时码表调教办法示自动计时码表大秒针为计时针,按选择按钮开始计时再按此按钮即停止计时,按微调按钮可归零拉表冠到c位置,用按钮微调,计时针归零时间和星期设置拨到最外面调时间,转24小时可调星期.当秒针在12点位置上时,把出表把(表冠)至第二格秒针会停止转动表把(表冠)调动指针,从而设置星期。
星期设置完后,细心设置时间,并确认好上午或者下午调校好所需的时间后,把表把(表冠)向内推入原位篇二:自制卡西欧手表说明书a158wa-1JFa○B○c○按○a看日期按○B倒计时闹钟按○c选模式,按一下:调闹钟,按两下:秒表计时,按三下:调时间和日期【调闹钟】按○B切换,哪里闪,再按○a调整,注意出现P时,表示下午。
调整完,按○c完事关闹钟、关整点报时,在闹钟模式下直接按○a切换【调时间和日期】按○B切换,哪里闪,再按○a调整,顺序是秒-分-时-日期-循环。
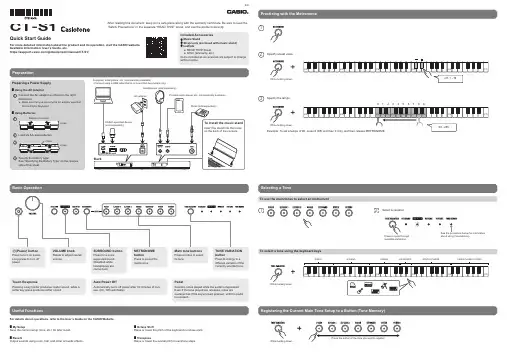
Practicing with the Metronome12Specify a beat value.(C2)(C3)(C5)(C6)(C7)(C4)−+off, 1 - 16While holding down...3Specify the tempo.Example: To set a tempo of 80, press 8 (D5) and then 0 (C4), and then release METRONOME.(C2)(C3)(C5)(D5)(E5)(C6)(C7)(C4)(D4)(E4)(F4)(G4)(A4)(B4)012345678920 - 255While holding down...CT -S1Quick Start GuideFor more detailed information about the product and its operation, visit the CASIO website.Available Information: User’s Guide, etc.https:///global/en/emi/manual/CT-S1/ENPreparationBasic Operation Useful FunctionsFor details about operations, refer to the User’s Guide on the CASIO Website. ■My SetupSave the current setup (tone, etc.) for later recall.■ReverbOutput sounds using room, hall, and other acoustic effects.■Octave ShiftRaise or lower the pitch of the keyboard in octave units. ■TransposeRaise or lower the overall pitch in semitone steps.Selecting a ToneTo use the main tones to select an instrument12Select a variation.Press to cycle through available variations.See the procedure below for information about using Tone Memory.To select a tone using the keyboard keys(C2)(C3)(C5)(C6)(C7)(C4)While holding down...PIANOE.PIANOORGANKEYBOARDSYNTH/OTHERSCASIO CLASSIC TONESRegistering the Current Main Tone Setup to a Button (Tone Memory)While holding down...Press the button of the tone you want to register.Included Accessories●Music Stand●Strap Lock (enclosed with music stand) ●Leaflets●READ THIS! Sheet ●Other (Warranty, etc.)Items included as accessories are subject to change without notice.After reading this document, keep it in a safe place along with the warranty certificate. Be sure to read the “Safety Precautions” in the separate “READ THIS!” sheet, and use the product correctly.Preparing a Power Supply■Using the AC Adaptor1Connect the AC adaptor as shown in the rightillustration.●Make sure that you use only the AC adaptor specified for this Digital Keyboard.■Using Batteries1OpenBottom of console2Load six AA-size batteries.3TabsClose4Specify the battery type.See “Specifying the Battery Type” on the reverse side of this sheet.Computer, smartphone, etc. (commercially available)• C onnect using a USB cable that is no more than two meters long.AC adaptorHeadphones (sold separately)Portable audio player, etc. (commercially available)Pedal (sold separately)BackTo install the music standInsert the stand into the holes on the back of the console.CASIO-specified device (sold separately)Auto Power OffAutomatically turns off power after 30 minutes of non-use. (On, Off switchable)PedalSustains notes played while the pedal is depressed. Even if the keys played are released, notes aresustained as if the keys remain pressed, until the pedal is released.Touch ResponsePressing a key harder produces louder sound, while a softer key press produces softer sound.P (Power) buttonPress to turn on power. Long-press to turn off power.METRONOME buttonPress to sound the metronome.Main tone buttonsPress a button to select its tone.TONE VARIATION buttonPress to change to a different variation of the currently selected tone.SURROUND buttonPress for a more expanded sound. (Disabled while headphones are connected.)VOLUME knobRotate to adjust overall volume.Playing with Two Layered Tones 1(C2)(C3)(C5)(C6)(C7)(C4)While holding down...Off/OnLayers the tones.Low tone: Off High tone: On2(C2)(C3)(C5)(C6)(C7)(C4)(C2)(C3)(C5)(C6)(C7)(C4)While holding down...Select the tone to layer.PIANO E.PIANO ORGAN KEYBOARD SYNTH/OTHERS CASIO CLASSIC TONESKeeping FUNCTION depressed, press the tone you want to layer.Playing with Touch Response(C2)(C3)(C5)(C6)(C7)(C4)While holding down...Off, 1 (Light), 2 (Normal), 3 (Heavy)One low tone: Off One high tone: Light Two high tones: Normal Three high tones: HeavyOff: No Touch Response.Light: Louder notes with lighter touch than Normal.Normal: Normal Touch Response.Heavy: Louder notes require a heavier touch than Normal.Product SpecificationsModel: CT-S1BK/CT-S1WE/CT-S1RD Keyboard: 61 keysTouch Response: 3 levels, Off Maximum Polyphony: 64 notesTone Functions: 61 preset tones; Main tone buttons; Layer; Sustain; Tone Memory Effects: Reverb (24 types, Tone, Off); Chorus; Delay; DSP Metronome: Bell sound off, 1 to 16 beats; Tempo Range: 20 to 255Demo Function: 1 demo song; 10 piano demo songs Function Volume Adjustment: MetronomeMIDI Recorder: Real-time Recording, Playback; Number of Songs: 1; Capacity: Approximately 40,000 notesOther Functions: Transpose (±1 octave, –12 to 0 to +12 semitones); Octave Shift (±3 octaves); Tuning (A4 = 415.5 to 465.9 Hz; Default = 440.0 Hz); Scales (17 preset scales)APP Function: iOS, Android supported (connected via the USB terminal)MIDI: 16-channel multi-timbre receiveInput/Output Terminals: PHONES/OUTPUT jack: Stereo mini jack (3.5mm); AUDIO IN jack: Stereo mini jack (3.5mm) (Input impedance: 10kΩ, Input sensitivity: 200mV);USB TO HOST port: micro B; USB TO DEVICE port: Type A; PEDAL jack: Standard jack (6.3mm) (pedal sustain, sostenuto, soft, metronome)Power Jack: 9.5VDCPower Supply: 2-way power supply; Auto Power Off (30-minute trigger time; Can be disabled)Batteries: 6 AA-size alkaline batteries or AA-size rechargeable nickel metal hydride batteries; Approximately 3 hours (alkaline batteries) or approximately 3 hours (nickel metal hydride batteries) continuous operation * *Measured values while using eneloop batteries. eneloop is a trademark of Panasonic Corporation.●Actual continuous operation time may be shorter due to battery type, performance type, and usage environment.●Specifying the wrong battery type can cause incorrect display of the battery level and sudden loss of power.AC Adaptor: AD-E95100L (JEITA Standard, with unified polarity plug)Speakers: 13 cm × 6 cm (oval) × 2 (Output: 2.5W+2.5W)Power consumption: 9.5V =7.5WDimensions: 93.0(W) × 25.8(D) × 8.3(H) cm (36 5/8 × 10 3/16 × 3 1/4 inch)Weight: Approximately 4.5 kg (9.9 lbs) (Excluding batteries)Specifications and designs are subject to change without notice.●Any reproduction of the contents of this manual, either in part or its entirety, is prohibited. Except for your own, personal use, any other use of the contents of this manual without the consent of CASIO is prohibited under copyright laws.●IN NO EVENT SHALL CASIO BE LIABLE FOR ANY DAMAGES WHATSOEVER (INCLUDING, WITHOUT LIMITATION, DAMAGES FOR LOSS OF PROFITS,BUSINESS INTERRUPTION, LOSS OF INFORMATION) ARISING OUT OF THE USE OF OR INABILITY TO USE THIS MANUAL OR PRODUCT, EVEN IF CASIO HAS BEEN ADVISED OF THE POSSIBILITY OF SUCH DAMAGES.●The contents of this manual are subject to change without notice.●Company and product names used in this manual may be registered trademarks of others.Declaration of ConformityModel Number: CT-S1Trade Name: CASIO COMPUTER CO., LTD.Responsible party: CASIO AMERICA, INC.Address: 570 MT. PLEASANT AVENUE, DOVER, NEW JERSEY 07801Telephone number: 973-361-5400This device complies with Part 15 of the FCC Rules, Operation is subject to the following two conditions:(1) This device may not cause harmful interference, and (2) this device must accept any interference received, including interference that may cause undesired operation.A labels rating is affixed to the bottom of the product.Functions Not Covered in This ManualThese instructions provide general information about main functions. For more detailed information, refer to the “User’s Guide”.https:///global/en/emi/manual/CT-S1/The “User’s Guide” includes information on the topics listed below.●Saving a Setup (My Setup) ●Playing with Reverb●Changing the Pitch in Octave Units (Octave Shift)●Changing the Pitch in Semitone Units (Transpose)●Playing with a More Expanded Sound (Surround)●Changing the Scale (Scale Tuning) ●OtherSpecifying the Battery Type(C2)(C3)(C5)(C6)(C7)(C4)While holding down...Alkaline/Nickel metal hydrideOne tone: Alkaline batteriesTwo tones: Rechargeable nickel metal hydride batteriesPlaying with Sustain(C2)(C3)(C5)(C6)(C7)(C4)Low tone: Off High tone: OnWhile holding down...Off/OnRecording Your Performance1Flashing2Play what you want to record.3Stop recording.4Play back again.This starts recording.This automatically starts playback.Press multiple times until playback starts.Returning Settings to Their Initial Factory Defaults (Initialization)This causes a re-start.(C2)(C3)(C5)(C6)(C7)(C4)(C2)(C3)(C5)(C6)(C7)(C4)While holding down...Long-press. (To get ready)Press again. (To execute)Keeping FUNCTION depressed, press again.MA2011-A Printed in China C。
T H A N K Y O U Y O U R R E C E I P T C A L L A G A I N ! G R O C E R Y D A I R Y H .B .A .F R OZ E N F O O D D E LI C A T E S S EN PCR-T2000ELECTRONIC CASH REGISTER USER'S MANUAL CI Canada Casio PCR-T2000 users and programming ManualIntroduction & ContentsIntroduction & Contents (4)Getting Started (7)Remove the cash register from its box (7)Remove the tape holding parts of the cash register in place (7)Install the three memory backup batteries (7)Install receipt/journal paper (9)Plug the cash register into a wall outlet (11)Insert the mode key marked “PGM” into the mode switch (11)Turn the mode key to the “REG” position (11)Set the date (12)Set the time (12)Tax table programming (13)Programming for the U.S. tax tables procedure (13)Programming for Canadian tax tables procedure (14)Introducing PCR-T2000 (16)General guide (16)Roll paper, Receipt On/Off key, Mode key, Drawer, Drawer lock (16)Mode switch (17)Lock/unlock the multipurpose tray (18)Displays (19)Keyboard (20)Basic Operations and Setups (22)How to read the printouts (22)How to use your cash register (23)Displaying the time and date (24)Preparing coins for change (24)Preparing and using department keys (25)Registering department keys (25)Programming department keys (27)Registering department keys by programming data (28)Preparing and using PLUs (29)Programming PLUs (29)Registering PLUs (30)Preparing and using discounts/premiums (31)Programming discounts/premiums (31)Registering discounts/premiums (32)Preparing and using reductions (33)Programming for reductions (33)Registering reductions (34)Calculating the merchandise subtotal (35)Registering charge and check payments (36)Registering returned goods in the REG mode (37)Registering returned goods in the RF mode (38)Registering money received on account (39)Registering money paid out (39)Making corrections in a registration (40)No sale registration (42)Printing the daily sales reset report (43)Convenient Operations and Setups (44)Clerk control function (44)Clerk sign on and sign off (44)4EI n t r o d u c t i o n & C o n t e n t s 5E Post-finalization receipt format, General printing control, Compulsory, Machine features ..45About post-finalization receipt.........................................................................................45Programming general printing control.............................................................................46Programming compulsory and clerk control function......................................................47Programming read/reset report printing control..............................................................48Setting a store/machine number .........................................................................................48Programming to clerk ..........................................................................................................49Programming clerk number ............................................................................................49Programming trainee status of clerk...............................................................................49Programming descriptors and messages. (50)Programming report descriptor, grand total, special character, report title, receipt message and clerk name (50)Report descriptor (50)Clerk name, Grand total, special character, Report title (51)Receipt message (52)Programming department key descriptor........................................................................52Programming PLU descriptor .........................................................................................53Programming function key descriptor .............................................................................54Programming receipt message/logo stamp control function...........................................54Entering characters .............................................................................................................55Using character keyboard...............................................................................................55Entering characters by code...........................................................................................56Department key feature programming.................................................................................57Batch feature programming ............................................................................................57Individual feature programming ......................................................................................58PLU feature programming ...................................................................................................59Batch feature programming ............................................................................................59Individual feature programming ......................................................................................60Percent key feature programming........................................................................................63Registering manual tax...................................................................................................64Currency exchange programming .......................................................................................65Currency exchange rate programming ...........................................................................65Currency exchange feature programming ......................................................................65Other function key feature programming .............................................................................68Cash, Charge, Check key...............................................................................................68Minus key, Received on account, Paidout key, #/No sale key, No sale key ....................69Calculator functions.............................................................................................................70About the daylight saving time.............................................................................................71Printing read/reset reports...................................................................................................72Reading the cash register's program...................................................................................78Troubleshooting (81)When an error occurs..........................................................................................................81When the register does not operate at all ...........................................................................82In case of power failure .......................................................................................................83When the L sign appears on the display .............................................................................83User Maintenance and Options (84)To replace journal paper (84)To replace receipt paper (85)Options (85)Specifications (86)Index (87)。
TNC的控制器TNC的控制器視覺顯示單元上的按鍵按鍵功能選擇分割畫面配置在加工模式與程式編輯模式之間切換顯示用於選擇螢幕上功能的軟鍵在軟鍵列之間切換文字數字鍵盤按鍵功能檔案名稱,註解DIN/ISO 程式編輯機械操作模式按鍵功能手動操作電子手輪使用手動資料輸入定位程式執行,單一單節程式執行,完整序列程式編輯模式按鍵功能程式編輯程式模擬程式/檔案管理,TNC功能按鍵功能選擇或刪除程式與檔案,外部資料傳輸定義程式呼叫,選擇工件原點及加工點表格選擇MOD功能顯示NC錯誤訊息的說明文字,呼叫TNCguide顯示所有目前錯誤訊息顯示計算器導覽鍵按鍵功能移動反白直接進入單節、循環程式及參數功能進給率與主軸轉速的電位計進給速率主軸轉速循環程式、子程式及程式段落重複按鍵功能定義接觸式探針循環程式定義與呼叫循環程式對於子程式編輯及程式段落重複進行輸入及呼叫標籤在程式內輸入程式停止符號刀具功能按鍵功能在程式內定義刀具資料呼叫刀具資料程式編輯路徑移動按鍵功能接近/離開輪廓FK 自由輪廓程式編輯直線極座標的圓心/極點利用圓心做圓弧加工具有半徑的圓含切線連接的圓弧切角/角落圓角特殊功能按鍵功能顯示特殊功能選擇格式內下一個標籤上/下一個對話方塊或按鈕輸入並編輯座標軸與數字按鍵功能. . .選擇座標軸或在程式當中輸入. . .數字小數點/倒反代數符號使用極座標輸入/增量值Q參數程式編輯/Q參數狀態儲存來自計算機的實際位置或數值NO ENT忽略對話問題,刪除字元確認輸入與重新對話總結單節,並離開輸入清除數字輸入或TNC錯誤訊息停止對話、刪除程式段落TNC的控制器基本原則有關本手冊有關本手冊本手冊內使用的符號說明如下。
要進行任何變更,或發現任何錯誤?我們持續努力改善我們的文件, 請將您的問題傳送至下列電子郵件位址: *************************。
TNC機型、軟體與特性TNC機型、軟體與特性此手冊說明由TNC搭配以下NC之軟體編號所包含的功能及特性。
使 用 手 册 3195MO0911-CkA事前须知承蒙惠购 CASIO 手表,谨表感谢。
为了最有效地使用本表,务请详细阅读本说明书。
请让手表照射到明亮光线本表内置的充电电池会储存由太阳能电池产生的电能。
在照射不到光线的地方放置或使用本表会使电池的电量耗尽。
请尽可能地让手表照射到光线。
•不将手表戴在手腕上使用时,请将手表面朝明亮光源放置。
•请尽量使手表露在衣袖之外。
部分表面被遮挡时充电效率会显著下降。
ll l l l l l l l ll明亮光线太阳能电池电池在光线下充电。
电池在黑暗中放电。
•即使照不到光线,本表也将保持运作。
让手表长期处于黑暗环境中会耗尽电池,并使手表的有些功能停止。
若电池耗尽,您将不得不在充电后再次配置手表的各项设定。
为确保手表的正常运作,必须尽可能地让手表照射到光线。
•使部分功能停止的实际电量水平依手表的型号而不同。
•经常点亮照明会很快耗尽电池并使手表需要充电。
下面介绍在点亮一次照明后,为补足消耗的电量所需要的充电时间。
在透过窗户照射进来的明亮阳光下时约为 5 分钟在室内荧光灯下时约为 8 小时•请务必参照“电源”一节,了解有关让手表照射到明亮光线时需要知道的重要资讯。
若手表画面变为空白若手表画面变为空白,则表示为了节省电源,手表的节电功能已将画面关闭。
•有关详情请参阅“节电功能”一节。
请注意,卡西欧计算机公司(CASIO COMPUTER CO., LTD.)对于用户本人或任何第三方因使用本产品或因其发生故障而引起的任何损害或损失一律不负任何责任。
关于本说明书•手表画面的文字显示有白底黑字及黑底白字两种,依手表的型号而不同。
本说明书中的所有范例画面均以白底黑字表示。
•按钮以图中所示的字母表示。
•本说明书的每一节都会介绍一种功能的操作。
有关技术资料等详情请参阅“参考资料”一节。
倒数定时器模式秒表模式闹铃模式▲世界时间模式▲▲▲部位说明•按 C 钮可选换各模式。
•在任意模式中(设定画面显示时除外),按 L 钮可点亮照明。
卡西小方块白敬亭使用说明
卡西欧g-shock小方块的使用说明书:
1、按卡西欧g-shock手表左下键,可以调整城市时间,把城市时间选为BJS即可,中国使用的就是北京时间,选择中国时区就选择北京时区即可。
2、如果想要调整到中国的时间,除了北京时间之外,也可以调整到HKG,代替香港时区的时间。
3、一般卡西欧g-shock手表都会有说明书,按照说明书调节时间即可。
4、调节卡西欧g-shock手表的方法:
第一步:按住左上键三秒钟,等手表开始闪烁之后,按右上键调整时间,等时间变成BJS。
第二步:按一下左下键,夏令时DST就会呈关闭状态,再按左下键,如果时间是12H按右下键变成24H。
通过左下键切换功能,知道时间确定。
如果时间不正确,可以按右边的上下键进行加减,调好之后按左上键退出。
5、调节卡西欧g-shock手表时间的时候,不要在21:00PM-3:00AM之间操作,这段时间是手表齿轮齿合度比较低的时候,频繁的操作手表会对卡西欧内部的零件造成损坏。
卡西欧手表 str-800使用说明书卡西欧手表是日本卡西欧公司旗下的产品,卡西欧手表最大的特色就是具有一定的创新性,具有多功能的特色技术,比如说具有太阳能驱动、强韧机芯和多马达驱动等。
既然手表这么优质,说明其功能也甚是复杂,靠几个按钮组合怎么才能使用这么多功能,我们就要用到卡西欧手表说明书了,方便理解,小编总结了一下卡西欧手表说明书指南给大家,让我们来看看卡西欧手表说明书指南吧。
一、卡西欧如何设定闹铃时间1.在闹铃模式中,使用D钮选择要设定的闹铃直至其闹铃画面出现为止。
要设定一次鸣响闹铃时,显示闹铃编号为AL1至AL4的画面之一。
要设定间歇闹铃时,显示表示有SNZ的画面。
间歇闹铃会每隔5分钟鸣响1次。
2.选择了要设定的闹铃后,按住A钮直至闹铃时间的时数位在画面中闪动。
此表示现已进入设定画面。
此时该闹铃会自动开启。
3.按C钮选择时数位或分数位(闪动)。
4.选择了要设定的项目后,使用D(+)钮及B(-)钮更改闪动中的设定值。
使用12小时时制设定闹铃时间时,注意必须正确设定上午(无指示符)或下午(指示符P)。
5.按A钮退出设定画面。
卡西欧手表说明书指南二、数字时间及日期使用计时模式可以设定及查阅当前时间及日期的数字显示。
设定数字时间时,您还可以设定夏令时间(DST)、本地城市代码(您通常使用本表时所在城市的代码),以及12/24小时时制。
本表预设有一些城市代码,各城市分别代表其所在时区。
设定数字时间时,选择正确的本地城市代码很重要。
若您的居住地未包含在预设城市代码中,则请选择与您的居住地时区相同的预设城市代码。
注意世界时间模式中所有城市的时间都根据您在计时模式中设定的数字时间及日期进行计算及显示。
正确设定本地城市的时间及日期后,通过改变计时模式中的本地城市代码便可使手表以其他城市的时间计时。
三、卡西欧如何为计时模式的数字时间选换夏令时间及标准时间1.在计时模式中,按住A钮直至秒数位开始闪动。
此表示现已进入设定画面。
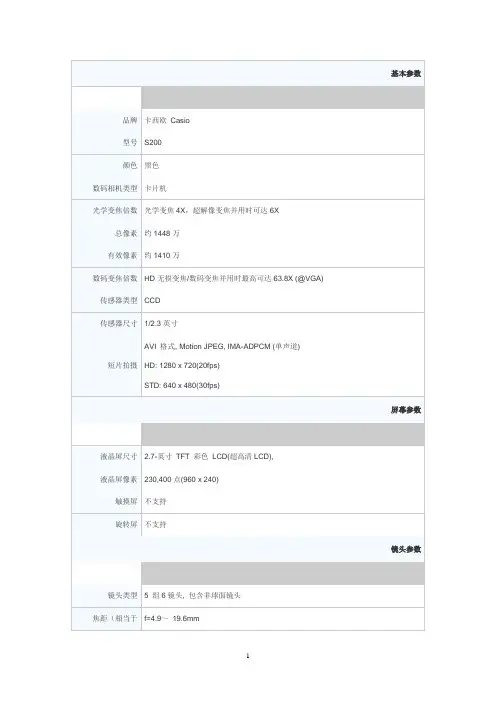
卡西欧quartz手表说明书产品参数:名称:卡西欧quartz手表显示屏:1.2英寸双层LCD,彩色TFT LCD(360 × 360像素)触摸屏:静电容式触摸屏其他:麦克风,振动电池类型:锂离子电池充电时间:在常温下约3小时(必须使用专用充电线)存储器:4 GB内存,768 MB RAM充电方式:磁压接充电端口防水性能:20个大气压防水*1产品特点:1、耐冲击,20个大气压防水:本手表可以承受在极限运动中遇到的恶劣条件。
本手表也是实现20个大气压防水的首款卡西欧智能手表。
可以在进行有强烈冲击的极限运动、海上运动等时佩戴本手表。
2、内置多个传感器:本手表内置有GPS、气压传感器、加速度计、陀螺仪、磁传感器和光学传感器(PPG 心率)。
因此能测量多种不同类型活动的数据(测量的数据依活动类型而不同)。
3、双层显示屏带来的表现力和认读性能:本手表内置彩色和黑白双层显示屏。
高分辨率的彩色显示屏表现力高,而耗电少的黑白显示屏在户外的认读性能优越。
注意事项:1、在充电过程中,手表和AC适配器变热,这不表示发生了故障。
2、电池电量充足时尽量不要充电。
电池电量变少时再充电能延长手表充电电池的寿命。
充满电时建议拔下充电线。
请注意,下述充电方式会导致充电电池过早劣化。
3、在充满电的状态或接近充满电的状态下频繁充电。
4、请勿在本手表或充电线沾有水时进行充电。
沾有水时,请擦干水分,完全干燥后再进行充电。
5、请勿在湿气、灰尘、金属异物微粒多的地方,经常有振动的地方,以及固定电话、电视机、收音机的附近进行充电。
6、本手表的充电线插头中有磁铁,吸附上含铁的颗粒时可能无法充电。
如果充电端口或充电线被泥沙弄脏,则请完全清除端口和充电线上的泥沙之后再进行充电。
7、在极寒或极热的地区,手表可能会无法充电或无法充满电。
请在10℃至35℃之间的温度环境中对手表进行充电。
全自动机械腕表使用说明书朋友们好!由于很多朋友不大明白全自动机械手表的使用!(以下全是机械手表的说明,石英类电子式手表就请不要看了)。
必定中国人对奢侈品没有外国人熟!国内除了少有的几个大城市外,很多地方对手表的保养、爱护、使用、流通的认识度及场所太少了。
为了你心爱的腕表能长命百岁,故障率极少的运行故请各位买家耐心看完本文。
谢谢!!虽然你手表在你手中可以任意所为(如调节及按钮等)表面上看起来没什么事,也能正常调表,表也能常运行,但是这样很可能对你的手表进行了慢性或隐性的伤害!至少是使用是违反操作规则的!很多不负责任的卖家也就不说或是他们也不大懂,因为他们只知道售表对表的内部结构不大了解,同时也看不懂或根本看不到机芯厂的外文说明书。
因为他们处在销售链的下游的零售。
故以后请大家不要这么随便调节!无论是瑞士机芯还是日本机芯,四针(四针,六针等称呼是指这只手表表镜内大针小针的总数是多少支)以下的手表相对简单,大家了解一下下文中表的动力及防水问题,故障问答就是了,其他的文字可不看了!下面1-2是介绍4针以上的多针机械表调节及使用方法!。
4针以上的多针机芯手表相对要注意一下了!目前市场上的全自动机械表不管你的手表用的是日本机芯还是瑞士机芯!他们都自有自己的调节点,当然各厂的不一样的,要看官方的资料及白皮书了。
日本机芯大多在8点40(左右误差5分钟都行)!白天和晚上的都可以,但最佳点是白天的8点40.瑞士机7点50左右.德国机芯8点45左右(以上调节点都是多针机芯需要按钮的调节点)3针表没有调节点不用看1—2条1。
下而就以出货量最大的日本机为例(其他国机芯原理大多一样可借鉴)、当你要调整日期,星期,月份等功能时。
请先把当前时间调到8点40分左右(一定要顺时针调节,不能反时针调)左右再进行按钮调节(日期,星期,月份等,调完后再把表时间调回正常时间。
(换句话说只要你想按钮就先得把时间调到8点40)。
这样能使机芯的寿命大大延长,和故障极大的减少。
卡西欧ct625电子琴说明书
1、开琴
先把电子琴通上电源,再用2指把电源开关按钮POWER按一下,关琴时再一次按下开关按钮即可关闭电源。
2、选择卡西欧单指和弦CASIO CHORD
注意:按下奏法方式钮MODE可以选择卡西欧单指和弦,和弦控制还有多指和弦FINGERED、全键盘和弦FULL RANGE CHORD。
电子琴本身贮存了各种和弦,在和弦状态下只需通过手指在键盘伴奏区上按规律弹奏便能起到很好的和声效果。
3、选择音色
注意:琴上标有TONE处便是音色选择部分,按下音色按钮后通过电子琴音色目录找到音色名称在数字区按下相对应的数字。
4、选择节奏
注意是电子琴的一种自动伴奏装置,琴上标有RHYTHM处便是节奏选择部分,选择方法同音色。
5、确定速度
注意:按下速度钮可调节节奏速度。
琴上标有TEMPO处便是速度选择部分,它有两个小按钮。
一个是箭头向上的按钮,按下去速度显示便会相应增加,另一个是箭头向下的按钮,按下去速度显示便会相应减少。
还有一种最快的方法就是只须按下其中任意一个小按钮,再到数字区按下速度相对应的数字就可以。
6、调整伴奏音量
注意:伴奏音量ACCOMP VOLUME是用来调整节奏乐的音量大小。
选择方法同速度。
7、打开同步起动
按下同步起动SYNCHRO按钮,红灯闪亮,左手弹奏伴奏键盘,节奏和和弦同时发声。
8、演奏
注意:左右手同时演奏乐曲,右手弹奏主旋律,左手配对应的和弦。
9、停止
按下停止STOP按钮自动节奏会马上关闭。
卡西欧钟表保证书编号篇一:卡西欧手表命名规则卡西欧手表命名规则手表型号组成一般为:系列缩写+编号+手表表带、表盘颜色代码例如:G-7700-1dRG为G-SHocK系列缩写,7700为编号,1dR中的1代表其表带、表盘的颜色为黑色。
手表颜色划分:1-黑色2-蓝色3-绿色4-红色、粉色、橙色5-褐色6-紫色7-白色8-银、灰色9-黄、金色例如:EF-508d-1aEF代表系列:EF是Edifice指针系列,mSG是女士商务系列,BG 是Baby-G女士系列,G是G-Shock男士系列,SHn是Sheen淑女系列。
508是此系列中固定的代码,代表着其独特的机芯、功能、外形等等,购买时看明白说明就可以了,无需更多了解。
d代表了表带:d代表钢表带,L代表皮表带,如果没有标明则通常是塑料或者树脂表带,Bd代表黑离子涂层钢表带,V代表织物,LV 代表织物和皮革混合。
另外,这段数字也应用于特殊的几年款中,例如世界杯纪念款、情侣系列等等。
数字1代表了表盘的颜色。
通常,1是黑色,2是蓝色,3是绿色,4是红色,7是白色,这是最常见的几种。
a一般没有特殊含义,常常在表盘颜色相近时,附加a、B等等字母加以区分,例如,BG-169-4,按照分析,4应该是红色,但红有不同深浅的红,有的是深红,有的是粉红,此时,a、B、c则代表了不同的红,购买时请看清大图。
卡西欧手表型号解释卡西欧手表的型号由五部分组成,例如:PRG-130GB-1VPRG代表系列:PRG是PRoTREK登山系列。
ocw是ocEanUS电波指针系列,mRG代表G-SHocK最高等级(也是卡表最高级),EF是Edifice指针系列,mSG是女士商务系列,BG是Baby-G女士系列,G是G-Shock男士系列,Shn是Sheen淑女系列.130是此系列中固定的代码,代表着其独特的机芯、功能、外形等等,购买时看明白说明就可以了,无需更多了解;GB代表了表带:GBG应该是代表双层尼龙B代表弹性表带。