海尔智能家居产品
- 格式:docx
- 大小:14.95 KB
- 文档页数:14

《海尔的高端智慧家庭解决方案》摘要:电博会上,海尔智家展示了智慧客厅、智慧厨房、智慧卧室、智慧浴室等5大生活空间,全屋空气、全屋用水等高端智慧解决方案也在展区内—并展示,据了解,下半年,海尔智家还将在青岛建10家体验中心,方便青岛市民体验、购买海尔成套智慧家庭解决方案,据介绍,之所以能形成这样的智慧生活体验,得益于海尔智慧家庭以“用户为中心”的基本思路所形成的成套、定制、迭代三大差异化优势张雅乔海尔所展示的全套智慧家庭显示出,其所定义的“智慧生活”,不是单纯的家电间的智能控制与互联,而是基于消费者的个性化需求与对美好生活的诉求,为消费者提供成套的智慧生活解决方案。
7月19日,2019中国国际消费电子博览(简称“电博会”)在青岛国际会展中心开幕。
此次电博会以“物联+智慧家”为主题,展会上,众多品牌纷纷展示各自在智慧生活领域的创新产品与解决方案。
率先抢占物联网风口的海尔,推出了极具体验感的全套智慧家庭,为消费者展示高端智慧家庭解决方案。
随着产业的智能化,“物联网”等科技词汇早已注入传统行业,万物互联和移动互联正在改变人们的生活方式,“智能+生活”正成为社会发展的必然趋势,随之,众多品牌纷纷打出“智慧生活”概念,不仅为自身产品找到新的价值增长点,提升产品溢价,更丰富了人们对“理想生活”的想象。
众多品牌纷纷布局“智慧生活”领域,海尔有何亮点?电博会上,海尔所展示的全套智慧家庭显示出,其所定义的“智慧生活”,不是单纯的家电间的智能控制与互联,而是基于消费者的个性化需求与对美好生活的诉求,为消费者提供成套的智慧生活解决方案。
智慧生活,不止于“互联”展会现场的海尔智慧厨房交互体验区,工作人员带领参观者体验海尔智慧厨房全套家电为消费者所带来的美好生活体验。
在此之前,参观者在浴室里体验了体脂称后,来到厨房,冰箱的智能大屏上立刻显示出参观者的体重、体脂、肌肉含量等信息,并提供专为参观者身材和体质量身定制的健康菜单。
安装说明安装说明安装说明部件标识、能效水效等级使用说明010302040507点燃的香烟及其它燃烧物严禁投入坐便盖内,否则可能会引起火灾。
严禁自行拆解、修理或改造产品,否则可能会引起火灾或触电。
严禁将水、洗涤剂、尿液或其它液体浇于机身或电源插头上,否则可能会引起火灾或触电。
严禁用湿手触摸电源插头,否则可能会引起触电。
严禁使用电源延长线或松脱不稳的电源插座,否则可能会引起火灾或触电。
请勿用手指或其他物品放入或者堵塞暖风出风口,否则可能会引起烫伤、触电或烧毁。
产品通电时,不得将产品侧放或倒置,否则可能会引起火灾或烧毁。
身体、感知、智力能力缺陷或经验和常识缺乏的人(包括儿童),需要监护人在场方能使用本产品。
请勿让儿童玩耍本产品。
本产品接地线必须符合规定的施工方式,三级接地结构必须可靠接地,否则禁止使用该产品。
本产品使用AC 220V/50HZ 电源;为确保使用安全,插座及其连接电线必须能承受10A 以上的电流。
安装时必须使用随机附带的新软管组件,旧软管组件不能重复利用。
安装、拆卸、维修及保养产品时,必须拔下电源插头,关闭供水阀门。
预防因冻结而造成的损坏,请实施保暖措施;如室温低于0℃,建议将产品内水放光,防止产品内部冻裂。
长时间不使用时,请您拔出插头,将过滤器、产品内的水放光。
安装结束前,切勿给产品供水或供电。
器具报废后,请交给具有资质的专业回收公司或机构处理,不应随便丢弃,以避免对环境造成危害。
如果电源软线损坏,为了避免危险,请立刻切断电源,并联系海尔客户服务热线4006999999,由海尔认证的服务机构更换。
打雷时,请拔出电源插头。
请勿将产品放置在水中或易掉入水中的位置。
请勿操作已经掉入水中或浸水的产品,并立刻拔掉电源插头。
请勿对产品施加强力或冲击,不要站在座圈、便盖上,不要放置重物,不要用力按压或倚靠在便盖上,以免损坏产品。
侧手柄不可作为扶手使用,否则有损坏危险。
请勿使用香蕉水、汽油、药水及洗涤剂、杀虫剂、厕所清洁剂和硬毛刷清洁本产品。


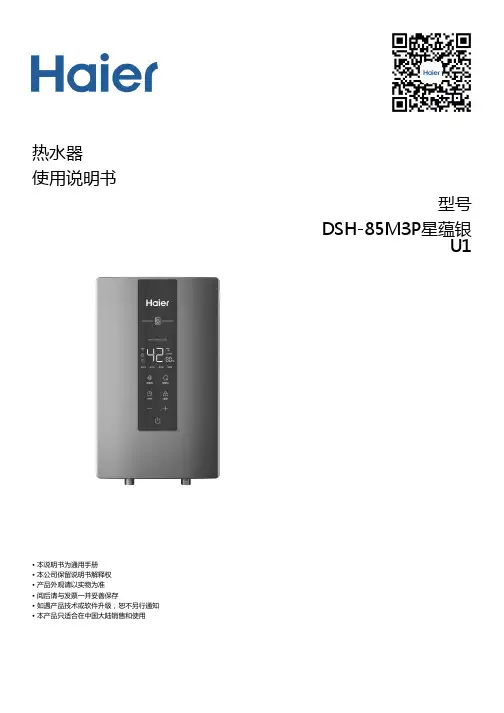
热水器使用说明书型号DSH-85M3P星蕴银U1• 本说明书为通用手册• 本公司保留说明书解释权• 产品外观请以实物为准• 阅后请与发票一并妥善保存• 如遇产品技术或软件升级,恕不另行通知• 本产品只适合在中国大陆销售和使用1. 产品介绍1 1.1. 产品部件1 1.1.1. 外观1 1.1.2. 电气原理图11.2. 技术数据22. Wi-Fi连接3 2.1. 应用下载32.2. 绑定流程33. 使用说明5 3.1. 注意事项5 3.1.1. 电气方面5 3.1.2. 使用方面6 3.1.3. 维护方面10 3.2. 安装指南10 3.2.1. 装箱单10 3.2.2. 安装注意事项10 3.2.3. 安装方法10 3.3. 控制面板13 3.3.1. 控制面板133.3.2. 功能介绍144. 售后服务16 4.1. 用户须知16 4.1.1. 用户须知16 4.2. 疑难解答16 4.2.1. 疑难解答16 4.3. 清洗保养17 4.3.1. 清洗保养17 4.4. 保修说明17 4.4.1. 保修说明17 4.5. 一键报修181. 产品介绍1.1. 产品部件1.1.1. 外观1.1.2. 电气原理图1.2. 技术数据注以上参数(重量)允许误差范围为±10%产品型号DSH-85M3P星蕴银U1额定电源220V~ 50Hz额定功率(W)8500额定压力(MPa)0.6设置温度(℃)30℃~55℃防水等级IPX4安装条件电线要求(mm²)≥6电表要求(A)≥10(40)空气开关(A)≥40机身尺寸(mm)438*258*502. Wi-Fi连接2.1. 应用下载请扫描机身二维码,下载并安装“海尔智家”APP。
请到应用市场搜索“海尔智家”关键词,下载并安装“海尔智家”APP。
2.2. 绑定流程智能热水器连接Wi-Fi后可实现远程设备控制、运行状态查看等智慧功能。
①连接前准备一台无线路由器(符合820.11b/g/n协议);路由器已连接外网(可正常连接外部网站等);支持Android或iOS系统的智能手机/平板电脑一部;下载并安装APP:可通过扫描机身二维码根据提示操作下载,或在应用市场搜索“海尔智家”下载。


海尔智家心得(通用5篇)海尔智家心得篇1海尔智家是一个充满智慧和创新的家居科技品牌,其产品和解决方案旨在让人们的生活更加便利、舒适和智能。
以下是我的心得体会:1.用户体验至上:海尔智家的产品设计和功能都是以用户为中心的,旨在提供最佳的使用体验。
例如,他们的智能空调可以与智能音箱无缝连接,用户可以通过语音控制空调的运行,这大大提高了生活的便利性。
2.家居智能化:海尔智家的解决方案可以轻松实现家居智能化,用户可以通过手机或智能设备控制家中的电器和设备,实现自动化控制和节能。
例如,智能照明系统可以根据房间内的光线强度自动调节灯的亮度,节省能源。
3.环保和可持续发展:海尔智家的产品和解决方案都注重环保和可持续发展,例如他们的智能洗衣机可以自动检测衣物的材质和脏污程度,选择最合适的洗涤方式,减少浪费和污染。
4.创新科技:海尔智家不断推出创新的家居科技产品,例如他们的智能冰箱可以与智能音箱连接,用户可以通过语音控制冰箱的温度和存储方式,也可以在手机上查看冰箱内的食物库存,为人们的生活带来更多的便利和乐趣。
总的来说,海尔智家通过提供优质的产品和解决方案,让人们的生活更加智能、便利和舒适,同时也注重环保和可持续发展,推动了家居科技的发展。
海尔智家心得篇2标题:海尔智家体验之旅:科技与家居的完美融合自从我开始接触海尔智家以来,我对家电的认知已经发生了翻天覆地的变化。
以前,我只是简单地将家电看作是生活的工具,而现在,我深感它们已经变成了家庭中不可或缺的一部分。
一开始,我只是被海尔智家的产品所吸引。
从智能冰箱到智能空调,从智能热水器到智能洗衣机,海尔的家电产品都以其卓越的性能和极致的设计赢得了我的尊重。
然而,真正让我感到震撼的是,这些看似独立的家电产品,通过海尔智家的中央智能系统,能够实现真正的联动。
例如,当我在准备烹饪时,智能冰箱可以提示我当前的食材库存,而智能空调则可以适当地调整室内的温度。
这种体验让我深感惊喜,因为我不再需要担心家电产品的独立使用,而是可以通过一个平台,享受到所有家电带来的便利。
智能家居公司排行【篇一:智能家居公司排行】近年来智能家具被越来越多的人所熟知,它利用综合布线技术,通信技术等等开发出适合家居使用的智能家居产品。
智能家居以家居的安全性、便利性、舒适性为目的,提倡环保节能的家居理念。
接下来随欧派小编看看十大智能家居品牌排行榜,一起来了解下吧。
十大智能家居品牌排行榜之一:海尔 u-home 海尔 u-home 是海尔集团在物联网时代推出的美好住居生活解决方案,它采用有线与无线网络相结合的方式,把所有设备通过信息传感设备与网络连接,从而实现了“ 家庭小网”、“ 社区中网”、“ 世界大网”的物物互联,并通过物联网实现了 3c 产品、智能家居系统、安防系统等的智能化识别、管理以及数字媒体信息的共享。
海尔u-home 用户在世界的任何角落、任何时间,均可通过打电话、发短信、上网等方式与家中的电器设备互动,畅享“ 安全、便利、舒适、愉悦”的高品质生活。
十大智能家居品牌排行榜之二:索博因索博因在智能家居和电力线通讯领域的不断创新和领导地位而闻名世界。
在智能家居远景的激励下,索博员工致力于帮助您与所想和所需的人实现简捷的而真智能的智能家居。
我们通过向您提供最佳的产品、最好的体验、强大的销售网络和全方面的服务来实现这个目标。
索博是世界智能家居为数不多的集标准智能家居协议与产品生产的企业之一,拥用全球性的业务和影响力。
十大智能家居品牌排行榜之三:快思聪快思聪品牌于1971年成立;(crestron)总部设立于美国新泽西rockleigh拥有五万平方尺的现代化设备,是快思聪集团的销售、推广、财务及技术中心。
而于新泽西cresskill的生产厂房亦已扩展至五万平方尺,为全球供应先进的遥控设备。
快思聪在洛杉矶、乔治亚州、芝加哥、墨西哥、香港、新加坡、吉隆坡、北京、上海、广州及布鲁塞尔设有分公司,专为当地的经销商及用户提供客户服务、培训、技术及销售的支持。
十大智能家居品牌排行榜之四:霍尼韦尔具有120多年历史的霍尼韦尔是世界自动化控制技术的领导者。
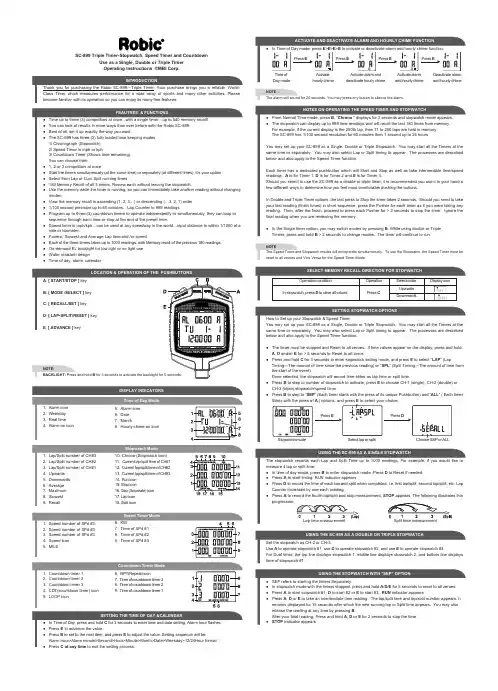
SC-899 Triple Timer-Stopwatch, Speed Timer and CountdownUse as a Single, Double or Triple Timer Operating Instructions ©MBI Corp.INTRODUCTIONThank you for purchasing the Robic SC-899—Triple Timer. Your purchase brings you a reliable, World-Class Timer which measures performance for a wide array of sports and many other activities. Please become familiar with its operation so you can enjoy its many fine features:●Time up to three (3) competitors at once...with a single timer…up to 540 memory recall! ●You can look at results in more ways than ever before with the Robic SC-899. ●Best of all, set it up exactly the way you want.●The SC-899 has three (3) fully loaded time keeping modes:1/ Chronograph (Stopwatch);2/ Speed Timer in mph or kph3/ Countdown Timer (Shows time remaining). You can choose from:●1, 2 or 3 competitors at once●Start the timers simultaneously (at the same time) or separately (at different times), it’s your option ●Select from Lap or Cum Split running times●180 Memory Recall of all 3 timers, Review each without leaving the stopwatch.●Use the memory while the timer is running, so you can immediately take another reading without changing modes.●View the memory recall in ascending (1, 2, 3…) or descending (…3, 2, 1) order ●1/100 second precision up to 60 minutes. Lap Counter to 999 readings.●Program up to three (3) countdown timers to operate independently or simultaneously, they can loop or sequence through each time or stop at the end of the preset time.●Speed timer in mph/kph…can be used at any speedway in the world…input distance to within 1/1000 of a mile or kilometer.●Fastest, Slowest and Average Lap time and /or speed●Each of the three timers takes up to 1000 readings, with Memory recall of the previous 180 readings. ●On-demand EL backlight for low light or no light use ●Water resistant design●Time of day, alarm, calendarSETTING THE TIME OF DAY &CALENDAR● In Time of Day, press and hold C for 3 seconds to enter time and date setting, Alarm hour flashes.●Press E to advance the value.●Press B to set to the next item, and press E to adjust the value. Setting sequence will be:Alarm hour>Alarm minute>Second>Hour>Minute>Month>Date>Weekday>12/24Hour format ●Press C at any time to exit the setting process.NOTE:The alarm will sound for 20 seconds. You may press any button to silence the alarm.NOTES ON OPERATING THE SPEED TIMER AND STOPWATCH●From Normal Time mode, press B , “Chrono ” displays for 2 seconds and stopwatch mode appears.●The stopwatch can display up to 999 time readings and will recall the last 180 times from memory.For example, if the current display is the 250th lap, then 71 to 250 laps are held in memory.The SC-899 has 1/100 second resolution for 60 minutes then 1 second up to 24 hours You may set up your SC-899 as a Single, Double or Triple Stopwatch. You may start all the Timers at the same time or separately. You may also select Lap or Split timing to appear. The processes are described below and also apply to the Speed Timer function.Each timer has a dedicated pushbutton which will Start and Stop as well as take intermediate time/speed readings. A is for Timer 1, D is for Timer 2 and E is for Timer 3.Should you select to use the SC-899 as a double or triple timer, it is recommended you use it in your hand a few different ways to determine how you feel most comfortable pushing the buttons.In Double and Triple Timer options, the last press to Stop the timer takes 2 seconds. Should you need to take your last reading (finish times) in short sequence, press the Pusher for each timer as if you were taking any reading. Then, after the finish, proceed to press each Pusher for > 2 seconds to stop the timer. Ignore the final reading when you are reviewing the memory.●In the Single timer option, you may switch modes by pressing B . While using double or Triple Timers, press and hold B > 2 seconds to change modes. The timer will continue to run.NOTE :The Speed Timer and Stopwatch modes will not operate simultaneously. To use the Stopwatch, the Speed Timer must be reset to all zeroes and Vice Versa for the Speed Timer Mode.USING THE SC-899 AS A DOUBLE OR TRIPLE STOPWATCHSet the stopwatch as CH-2 or CH-3.Use A to operate stopwatch #1, use D to operate stopwatch #2, and use E to operate stopwatch #3.For Dual timer, the top line displays stopwatch 1, middle line displays stopwatch 2, and bottom line displays time of stopwatch #1.USING THE STOPWATCH WITH "SEP" OPTION●SEP refers to starting the timers Separately:●In stopwatch mode with the timers stopped, press and hold A /D /E for 5 seconds to reset to all zeroes. ●Press A to start stopwatch #1, D to start #2 or E to start #3. RUN indicator appears.●Press A , D or E to take an intermediate time reading. The lap/split time and lap/split number appears. It remains displayed for 15 seconds after which the new running lap or Split time appears. You may also release the reading at any time by pressing B .After your final reading, Press and hold A , D or E for 2 seconds to stop the time. ●STOP indicator appears.●ALL refers to starting the timers Simultaneously:●In stopwatch mode with the timers stopped, press and hold A /D /E for 5 seconds to reset to all zeroes. ●Press A to start stopwatches #1, #2, and #3. RUN indicator appears.●Press A , D or E to take an intermediate time reading. The lap/split time and lap/split number appears. It remains displayed for 15 seconds after which the new running lap or Split time appears. You may also release the reading at any time by pressing B .After your final reading, Press and hold A , D or E for 2 seconds to stop the time. ●STOP indicator appears.You may access the Recall function at any time, whether the timer is running or stopped. To return to current timing and take a split, simply press the button associated with the timer TO TAKE A READING.Press C at any time to access the Memory recall. Continue to Press or Hold C to review the readings in this sequence:Fastest lap/split of stopwatch #1, #2 and #3--->Slowest lap #1, #2 and #3---> Average Lap time #1, #2 and #3--->Recall up to previous 180 readings for each stopwatch #1, #2 and #3 The recall will occur in the order you selected, up or down.●From Normal Time mode, press B twice, “Speed ” displays for 2 seconds and Speed Timer mode appears. ●The speed timer can display up to 999 time & Speed readings and will recall the last 180 times from memory. For example, if the current display is the 250th lap, then 71 to 250 laps are held in memory. The SC-899 has 1/100 second resolution for 60 minutes then 1 second up to 24 hours A speed timer computes speed of an object by timing it over a known distance and computing the speed in MPH or KPH. You must input a distance for the Speed Timer to operate. If no distance is entered, the SC-899 speed timer will not operate.Lap Speed, time and number will appear in this mode.You may set up your SC-899 as a Single, Double or Triple Speed Timer. You may start all the Timers at the same time or separately. You may also select Lap or Split timing to appear. The processes are described below and also apply to the Speed Timer function.Each timer has a dedicated pushbutton which will Start and Stop as well as take intermediate time/speed readings. A is for Timer 1, D is for Timer 2 and E is for Timer 3.In Double and Tripe Timer options, the last press to Stop the timer takes 2 seconds. Should you need to take your last reading (finish times) in short sequence, press the Pusher for each timer as if you were taking any reading. Then, after the finish, proceed to press each Pusher for > 2 seconds to stop the timer. Ignore the final reading when you are reviewing the memory.●In the Single timer option, you may switch modes by pressing B . While using double or Triple Timers, pressand hold B > 2 seconds to change modes. The timer will continue to run.●To set up your speed timer, make certain all values are reset to zeroes. If time values appear, Stop thetiming and reset by Holding A , D and E for 5 seconds each.●Press and hold C for 3 seconds to enter speed timer setting mode, unit digit (KM/MILE) appears flashing.Press E to adjust it.●Press B to step the next unit of measure, and press E to adjust it.The setting sequence will be: KM/MILE--> hundreds of distance--> tens of distance-->units of distance--> tenths of Distance-->hundredths of distance--> thousandths of distance-->SPd (Speed timer) -1 for single speed timer--2 for double speed timer –3 for triple speed timer-->SEP starts timers Separately--ALL starts timers simultaneously.●Press C at any time to confirm and exit the setting process.The Speed Timer computes speed as a function of time over distance. If you wish to measure 4 lap time and speed, proceed as follows: ●In speed timer mode, press C to clear the values.●Press A to start counting, with “RUN ” indicator appears.●Press D to record the time you spend on each lap when you finish first lap, second lap and third lap. The speed in MPH/KPH, lap time and lap number will appear. The running time of the current lap will appear in the lower row of the display for each lap.●Press A to record the fourth and final lap; "STOP " indicator appears.Set the SC-899 as a Double or Triple Speed Timer.●Use A to operate speed timer #1, use D to operate speed timer #2, and use E to operate speed timer #3. Pressing the button associated with each timer at the completion of the lap will display the lap speed, time and number. Upon completion Press and hold the pusher for > 2 seconds to stop timing. Do this after your final Lap reading.●For Double Speed timer, the top line displays speed and lap # of timer 1, middle line displays speed and lap # of timer 2, and bottom line displays Lap time of speed timer #1.SEP refers to starting the timers Separately:●In speed mode with the timers stopped, press and hold A /D /E for 5 seconds to reset to all zeroes. ●Press A to start stopwatch #1, D to start #2 or E to start #3. RUN indicator appears.●Press A , D or E to take an intermediate time reading. The lap/speed & time and lap number appears. It remains displayed for 15 seconds after which the new running lap or Split time appears. You may also release the reading at any time by pressing B .After your final reading, Press and hold A , D or E for 2 seconds to stop the time.●STOP indicator appears.ALL refers to starting the timers Simultaneously:●In speed timer mode with the timers stopped, press and hold A /D /E for 5 seconds to reset to all zeroes. ●Press A to start stopwatches #1, #2, and #3. RUN indicator appears.●Press A , D or E to take an intermediate time reading. The lap speed & time and lap number appears. It remains displayed for 15 seconds after which the new running lap or Split time appears. You may also release the reading at any time by pressing B .After your final reading, Press and hold A , D or E for 2 seconds to stop the time ●STOP indicator appears.You may access the Recall function at any time, whether the timer is running or stopped. To return to currenttiming and take a split, simply press the button associated with the timer TO TAKE A READING.Press C at any time to access the Memory recall. Continue to Press or Hold C to review the readings in this sequence:Fastest lap/split of stopwatch #1, #2 and #3--->Slowest lap #1, #2 and #3---> Average Lap time #1, #2 and #3--->Recall up to previous 180 readings for each stopwatch #1, #2 and #3 The recall will occur in the order you selected, up or down.●In Time of Day mode, press B two times, “ Countdown ” displays for 2 seconds and enter countdown timer mode. Bracket under CDT#1 flashes.●If time of timers is 00hour 00minute 00second, timer function is deactivated.●The maximum time to set for each timer is 23hours 59minutes 59seconds 9/10second.●Counting accuracy is 1/10second.●In countdown timer mode, press and hold C for 3 seconds to enter countdown timer setting mode, “SEP/LOOP” flashes.●Press E to select SEP(Separate) or LOOP.●Press B to step to the next item, and press E to select the items.●Press B to step to hours of CDT #1, and press E to select hours. Repeat it to set time for countdown timers.Press C at any time to exit setting.Setting sequence will be: SEP(Separate)/LOOP>STOP/RPT(Repeat)> CDT#1 hours >CDT#1 minutes >CDT#1 seconds> CDT#1 1/10 seconds> CDT#2 hours> CDT#2 minutes> CDT#2 seconds> CDT#21/10 seconds CDT#3 hours> CDT#3 minutes> CDT#3 seconds>CDT#3 1/10 secondsNOTE:You must select the Countdown Timer Sequence while the timers have stopped and been reset. You cannot change the sequence while the timers are active.TO OPERATE AS A SINGLE TIMER● Activate only CDT #1, CDT #2 or CDT #3. Press A to start or to stop the countdown timer. ●When timer is counting down, press A to stop, the time remaining will be displayed.●Press A to Stop and Restart the Countdown Timer as often as necessary.●Press D to clear the remaining time and reset to the pre-set time.NOTE:After setting LOOP and STOP for single timer, when timer counts to 00hour 00minute 00second, the timer utters beep sound and timer stops.Countdown Timer with SEP (Separate) and STOP Options.●In countdown timer mode, press A to start running timers.●Timers stop when their time counts down to all zeroes.Countdown Timer with SEP (Sarate) and RPT (Repeat) Options●In countdown timer mode, press A to start Counting down timers.●Upon completion, (all zeroes), the countdown sequence will repeat automatically.●Press A to Stop and Restart the timers as necessary.Countdown Timer with LOOP and STOP Options●Press A to activate CDT#1. When CDT#1 counts down to all zeroes, the completion beep tone will sound.●Then CDT#2 starts running. When CDT#2 counts down to all zeroes, the completion beep tone will sound.●Then CDT#3 starts running. When CDT#3 counts down to all zeroes, the completion beep tone will sound.. All timers stop counting down and Rest to their pre-set time.Using the Countdown Timer with LOOP and RPT options●Press A to activate CDT#1. When CDT#1 counts down to all zeroes, the completion beep tone will sound.●Then CDT#2 starts running. When CDT#2 counts down to all zeroes, the completion beep tone will sound.●Then CDT#3 starts running. When CDT#3 counts down to all zeroes, the completion beep tone will sound.●Then sequence through the Loop is CDT#1>CDT#2>CDT#3>CDT#1.●Pressing A at any time will stop and restart the timers as necessary.NOTE :Completion Alarm Beep sounds for 20 seconds if the preset time is more than one minute. Under 1 minute, the completion alarm sounds for one second.ACTIVATING THE BACKLIGHTIn any mode, press and hold B for 3 seconds will turn on backlight for 5 seconds. Use the backlight only as necessary to save on the battery life.BATTERY REPLACEMENTIf there is no display on the LCD or the display becomes dim, remove the screws at the back of the unit and replace with a new CR2032 battery at once.NOTE:Attention! Please dispose of the used unit or battery in an ecologically safe manner.Robic SC-899 and SC-889Stroke Rate CalculationStroke rate calculation is achieved by timing one, two or three stroke cycles. By entering the respective value, the Robic timer will display the rate in Strokes per MinuteMode into the “SPEED” modeYou may calculate stroke rate based on one, two or three stroke cycles. Since we are not interested in MPH/KPH, we will disregard those indicators.Following the instructions in the “Enter Distance” section, please enter the following values for their respective stroke cycles:One (1) stroke cycle . . . please enter 0.017Two (2) stroke cycles . . . please enter 0.034Three (3) stroke cycles . . . please enter 0.050To measure stroke rate, simply START the timer by pressing the appropriate pushbutton at the beginning of the cycle.STOP the timer by pressing the pushbutton again at the completion of the cycle.The number displayed in the upper row of the display is the Stroke Cycle Rate per Minute.Take as many readings as necessary. The Average and Fastest rates can be displayed by pressing “F”.Unscrew the screws anticlockwise with a screwdriver and remove the cover. Press the clip down and the battery pops out. If not, keep pressing the clip down, meanwhile use a sharp pin to lever the battery away.®Robic timer SC-899 / SC-889 SC-877 How to replace the battery+CR2032the side with “+ CR2032” should face outwards. Replace the lanyard and thecover, and screw the screwsback.Learn more about sports equipment on our website.。

海尔智能家居海尔智能家居了解海尔智能家居简介畅享“安全、便利、舒适、愉悦”的高品质生活。
我们对海尔智能家居生活的描述是这样的:“身在外,家就在身边;回到家,世界就在眼前”。
海尔智能家居公司,隶属于海尔集团,企业注册资金1.8亿,是全球智能化产品的研发制造基地。
公司以提升人们的生活品质为己任,提出了“让您的家与世界同步”的新生活理念,不仅仅为用户提供个性化产品,还面向未来提供多套智能家居解决方案及增值服务。
公司倡导的这种全新生活方式被认为是未来家庭的发展趋势,多次得到党和国家领导人的高度评价。
公司先后建立了强大的U-home研发团队和世界一流的实验室。
拥有含近二十名博士在内的高素质智能家电专业设计团队,从事智能家电、数字变频、无线高清、音视频解码、网络通信等芯片以及UWB、蓝牙、RF、电力载波等技术的研发,并整合全球资源网络,与多家国际知名企业建立联合开发试验室,提出了智能家居、远程医疗、网络超市、故障反馈、智能安防、智能酒店等解决方案。
在智能家电的研制和生产方面公司拥有多项专利和自主专有技术,负责起草家庭网络国家标准并提报国际标准。
编辑本段市场发展概况智能家居是IT技术(特别是计算机技术)、网络技术、控制技术向传统家电产业渗透发展的必然结果。
由社会背景之层面来看,近年来信息化的高度发展,通信的自由化与高层次化,业务量的急速增加与人类对工作环境的安全性、舒适性、效率性要求的提高,造成家居智能化的需求大为增加,在科学技术方面,由于计算机控制技术的发展与电子信息通信技术的成长,也促成了智能家居的诞生。
智能家居是一个多功能的技术系统,包括可视对讲、家庭内部的安全防范、家居综合布线系统、照明控制、家电控制、室内环境状况监测和设备控制、远程的视频监控、声音监听、家庭的影音系统,还有包括远程医疗、远程教学等。
家居智能化包含的内容比较多,而且国内目前的产品总线制、电力线载波、无线等方式,在网络连接方面基本上洒用总线制联网、电话联网或者通过以太网方式来实现。
引言概述:海尔智家2146(二)是海尔智家系列的最新款智能家居产品,它融合了最先进的科技技术,为消费者打造了一个完全智能化的居家生活体验。
本文将从五个大点来详细阐述海尔智家2146(二)的特点和优势。
正文内容:一、智能家居控制中心1.海尔智家2146(二)作为智能家居控制中心具有的主要特点;2.支持的智能设备和配件;3.高度智能化的控制和操作系统;4.安全性和隐私保护的考虑;5.用户友好的界面和人机交互体验。
二、智能家电产品1.家庭智能化电器的种类;2.海尔智家2146(二)的智能家电产品线;3.基于物联网的智能家电控制;4.能源管理和环保特点;5.智能家电产品对生活品质的提升。
三、智能安全系统1.海尔智家2146(二)的智能安全系统功能和特点;2.安防监控、入侵报警和紧急情况处理;3.智能门锁、智能摄像头和智能烟雾报警器的应用;4.远程监控和智能化安全提醒;5.高度自动化和智能化的家庭安全。
四、智能照明系统1.海尔智家2146(二)的智能照明系统特点;2.定时开关和场景设置;3.情景模式和色温调节;4.节能和环保特点;5.照明系统的个性化定制。
五、智能家庭娱乐1.海尔智家2146(二)的智能家庭娱乐系统;2.多媒体中心和影音设备;3.家庭影院的体验和效果;4.语音控制和智能配乐;5.互联网服务和智能家庭娱乐的未来发展趋势。
总结:海尔智家2146(二)作为一款完全智能化的智能家居产品,具有智能家居控制中心、智能家电产品、智能安全系统、智能照明系统和智能家庭娱乐系统等五个大的特点和优势。
它为用户提供了一个全新的居家生活体验,不仅提高了居住的舒适性、便利性和安全性,还能有效节约能源、保护环境。
海尔智家2146(二)的发展代表了智能家居行业的未来发展方向,为智能家居行业的普及和推广做出了应有的贡献。
引言概述:海尔智家2146——未来智能家居的领航者智能家居已成为当今社会的热门话题之一。
随着科技的不断进步,越来越多的人开始关注智能家居产品的发展和应用。
U—home家庭智能化解决方案智慧屋前言下班路上,拿起手机轻轻一按,热水器已经提前启动,为您舒舒服服的冲个热水澡做好准备/空调已按您的指令自动打开,一进家门就是一个清凉的世界,舒适宜人,,一身清爽之后,拿起智能遥控器,随心操控各类设备,畅快的享受数码高清大片带来的震撼/躺在软软的床上,遥控灯光让环境变得温柔,远离一天的嘈杂,享受此时属矛自己的静谧,,入睡之前,窗帘在遥控器的指令下徐徐拉上,带着刚才满眼的星光和您一同入梦…..海尔U-Home[智慧屋]带您走入更便捷的科技生活系统拓扑图注:带⑩的设备为海尔U-homer智慧屋】标配产昌系统功能通过每个房间的控制,生活情调尽在掌握,享受便捷生活系统功能在客厅等处通过进行各种场景操作,繁杂操作一键控制,享受简单生活系统功能通过上网、手机短信实现远程控制,舒适无需等待,享受快捷生活!灯光控制、窗帘、投影幕控制、小家电控制、其他品牌家电控制、Haier网络家电的控制系统功能对于,或者大户型用户,网关的无线覆盖能力不足时,可以通过增加网关中继的方式,延长无线控制的范围。
每个网关最多可以接8个网关中继,智能遥控器可以下载在家庭网络中心注册的所有设备,但是只能控制无线覆盖范围内的设备。
网关中继不能中继遥控器的信号。
同一智能遥控器可以控制不同楼层无线覆盖的设备。
系统特点1.自动场景控制功能通过智能遥控器的场景控制,在你想看高清电影时,自动关闭窗帘、关闭灯光、打开网络投影仪和音响设备,从HTPC中播放高清大片,让你在品鉴视听盛宴的同时免除了繁琐的操作。
当你看完大片后,再按遥控器的正常模式,自动将窗帘打开、灯光打开、关闭网络投影仪和音响设备。
2.无线通讯方式通过RF无线通讯将系统中各个部分链接为一个系统,而又不用布置繁琐的线束,使用方便,不用提前布线,不会限制家电摆放位置。
3.单火线供电方式的开关单火线方式与传统的开关相同,完全可以将您已将安装的传统开关换成智能开关,不用任何改动即可享受智能化带来的便利与舒适。
设备明细名称:家庭网络中心型号:WG-ZROIW功能简介:·可以集中控制多种设备,最多可以添加16个设备;·可以实现生活场景的选择,最多可以添加8个场景;·可以定制设备关联状态,实现家电之间的联动;·支持手机短信远程控制家电;·支持远程网络控制家电;·支持wifi无线路由;技术参数:·电源:12VDC电源适配器;·通讯方式:无线779MHz,空旷50米;·默认安装方式:·桌面放置(高于地面60cm,不要离墙面太近)产品尺寸:·110×180×30mm注意事项:·一个场景最多可添加8条控制命令;·灯光窗帘的场景控制要先按照情景的模式拍照后,统一加入场景中;·某些地区运营商会屏蔽掉路由功能,此种情况下请自行购买一款在本地区不受限制的家庭网络中心接在前面即可;·每个家庭网络中心可配最多8个网关中继和8个智能遥控器;设备简介名称:智能遥控器型号:HK-31YWS·一个遥控器控制多种设备,最多可以添加16个设备;·一键实现生活场景的选择,最多可以添加10个场景;·智能遥控器可以通过【网关组网】方式与家庭网络中心配合使用,每个家庭网络中心最多可同时支持8个智能遥控器技术参数:·电源:锂电池供电,5Vdc电源适配器充电;·通讯方式:无线779MHz,空旷50米;·显示方式:2时TFT屏安装方式:·桌面放置产品尺寸:·60×150×28mm(遥控器)注意事项:·一个场景最多可添加8条控制命令;·灯光窗帘的场景控制要先按照情景的模式拍照后,统一加入场景中;·USB线只是用来充电用;·充电底座的天线、按键是预留的,目前没有用;设备简介名称:迷你遥控器型号:HK-30YW功能简介:·可以控制智能开关、智能插座、窗帘的开关;·4个单控按键;·1个全关按键技术参数:·电源:3V纽扣电池,待机时间6~12个月;·无线通讯方式:433MHz安装方式:·放置在桌面产品尺寸:·92×53×7 mm注意事项:·每个窗帘的控制占2个命令,所以如果全部是窗帘控制,则只能控制2路;·全关命令不控制窗帘和插座;·对好码后,全关命令自动生效,无需拍照;·如果遥控灵敏度降低,则观察指示灯,如果指示灯点亮时间短,则表明电池电量不足,请更换电池;设备简介名称:网关中继型号:MK-GTZ01功能简介:·增强家庭网络中心的779信号传输距离,与家庭网络中心之间通过网线连接,走TCP/IP协议,与设备端通过779模块无线通讯;·每个家庭网络中心最多同时支持8个网关中继;技术参数:·电源5VDC,:·无线通讯方式:779MHz安装方式:产品尺寸:·壁挂或者桌面放置(可86盒壁挂).96×120×28mm(天线长度88mm)注意事项:·设备注册时,在家庭网络中心设备注册界面点击【从中继添加】则自动绕过家庭网络中心模块,从中继模块添加设备;·如果在两个模块交界点,请先将不希望添加上的网关中继断电,添加好设备后,再上电;·如果家庭网络中心的有线口不够用,可以通过HUB来扩展;·网关中继只是扩展家庭网络中心的779模块通讯能力,无法扩展WIFI; ·网关中继不支持智能遥控器的扩展;设备简介名称:协议转换器型号:HR-OIWW功能简介:·RF779转433信号,实现灯光、窗帘、插座的集中控制;·每个协议转换器最多可集中控制60个设备;·可实现8个情景的控制;·可实现灯光的全开全关控制;技术参数:·电源:外接9VDC电源适配器;·无线通讯方式:779MHz,433MHz安装方式:·壁挂式安装或者放置在桌面(高于地面60cm)产品尺寸:·75×110×37mm注意事项:·每个窗帘的控制占2个命令,所以如果全部是窗帘控制,则每个协议转换器最多可以控制30个窗帘;·全开全关命令不控制窗帘和插座;·对好码后,全开全关命令自动生效,无需拍照;·情景操作需要先进行情景拍照;设备简介名称:红外转发器型号:HR-OIAW(玻璃面板)功能简介:·RF779转IR信号,实现红外设备的集中控制;·360。
覆盖控制;·带有红外学习功能,最多可学习95个指令;技术参数:·电源:220VAC;·无线通讯方式:779MHz安装方式:·标准86盒安装(根据实际情况可选择吸顶安装或者墙壁安装)产品尺寸:*86×86×48mm注意事项:·由于红外信号有方向性,也不能穿透阻碍物,在实际安装中需要注意角度,可能某些设备因角度问题无法控制;·有些红外设备的按键是连续码方式(如有些电视的音量键),这种情况下学习的只是其中一段码,会出现控制失灵的现象;·在安装中,请注意人、物的阻挡导致无法控制的情况;设备简介名称:智能开关(单键)型号:HK-30PICW(玻璃面板)HK-28PICW(有机玻璃面板)haier功能简介:·触摸感应按键,荧光图案,夜间指示;·可实现1路灯光的开关控制;·单火线控制方式,直接替代传统机械开关,无需重新布线;技术参数:·电源电压:176~264VAC;·无线通讯方式:433MHz;·额定负载:大于15W,小于400W;安装方式:产品尺寸:·标准86盒安装.86×86×34mm注意事项:·有最小负载要求,小于最小负载会出现开关不稳定或者无法正常控制的情况;·遥控之前,需要进行对码,每路开关可以与5个不同的遥控器对码,每个遥控器对应5个按键命令和5个情景命令:·28系列,不带荧光指示;·某些节能灯在关闭状态会出现闪烁现象:*LED灯不适用于单火开关,会出现无法控制的现象;·上电时处于关闭状态;设备简介名称:智能开关(单键)型号:HK-30PICWA(玻璃面板)功能简介:灯带专用·触摸感应按键,荧光图案,夜间指示;·可实现l路灯光的开关控制;·单火线控制方式,直接替代传统机械开关,无需重新布线;·适用于灯带等大冲击电流的负载;技术参数:·电源电压:176~264VAC;·无线通讯方式:433MHz;·额定负载:大于20W,小于1000W;安装方式:产品尺寸:·标准86盒安装.86×86×34mm注意事项:·有最小负载要求,小于最小负载会出现开关不稳定或者无法正常控制的情况;·遥控之前,需要进行对码,每路开关可以与5个不同的遥控器对码,每个遥控器对应5个按键命令和5个情景命令;·某些节能灯在关闭状态会出现闪烁现象;·LED灯不适用于单火开关,会出现无法控制的现象;·上电时处于关闭状态;设备简介名称:智能开关(单键调光)型号:HK-30TICW(玻璃面板)功能简介: HK-28TICW(有机玻璃面板)·触摸感应按键,荧光图案,夜间指示;·可实现1路灯光的开关控制,亮度调节控制,亮度调节分8级;·单火线控制方式,直接替代传统机械开关,无需重新布线;·适用于白炽灯、射灯等,具有软启动功能,实现渐亮渐暗;·具有温度保护功能,温度过高则调节亮度或关闭负载;技术参数:·电源电压:176~264VAC;·无线通讯方式:433MHz;·额定负载:大于10W,小于500w;安装方式:产品尺寸:·标准86盒安装*86×86×34mm注意事项:·有最小负载要求,小于最小负载会出现开关不稳定或者无法正常控制的情况;·遥控之前,需要进行对码,每路开关可以与5个不同的遥控器对码,每个遥控器对应5个按键命令和5个情景命令;·上电时处于关闭状态;设备简介名称:智能开关(双键)型号:HK-30P2CW(玻璃面板)HK-28P2CW(有机玻璃面板)haier功能简介:·触摸感应按键,荧光图案,夜间指示;·可实现2路灯光的开关控制;·单火线控制方式,直接替代传统机械开关,无需重新布线;技术参数:·电源电压:176~264VAC;·无线通讯方式:433MHz;·额定负载:大于10W×2,小于400W×2;安装方式:产品尺寸:·标准86盒安装.86×86×34mm注意事项:·有最小负载要求,小于最小负载会出现开关不稳定或者无法正常控制的情况;·遥控之前,需要进行对码,每路开关可以与5个不同的遥控器对码,每个遥控器对应5个按键命令和5个情景命令;·28系列,不带荧光指示;·某些小功率节能灯在关闭状态会出现闪烁现象;*LED灯不适用与单火开关,会出现无法控制的现象;设备简介名称:窗帘控制器型号:HK-30DICW(玻璃面板)HK-28DICW(有机玻璃面板)haier功能简介:·触摸感应按键,荧光图案,夜间指示;·可实现抽头电机的逻辑控制(同时只能打开1路负载);·单火线控制,串联在电机回路中,布线简单;技术参数:·电源电压:176~264VAC;·无线通讯方式:433MHz;·额定负载:大于10W,小于400W;安装方式:产品尺寸:·标准86盒安装*86×86×34mm注意事项:·串联在电路中使用,有最小负载要求,小于最小负载会出现开关不稳定或者无法正常控制的情况;·遥控之前,需要进行对码,每个窗帘控制器可以对5个不同的遥控器,每个遥控器对应5个按键命令和5个情景命令;*28系列是专供型号,不带荧光指示;·可以实现电动窗帘、电动幕、卷帘门等电动设备的控制;设备简介名称:智能插座型号:HK-30CIW(玻璃面板)功能简介:·自带按键,可控制负载通断;通断状态指示;·内置433通信模块,支持迷你遥控器控制一路负载通断;·通过协议转换器,支持智能遥控器或家庭网络中心遥控;技术参数:·电源:220VAC;最大负载:2000W·无线通讯方式:433MHz安装方式:·标准86盒安装产品尺寸:*86×86×34mm注意事项:·遥控之前,需要进行对码,每个智能插座可对20个码(可以是20个不同的遥控器,每个一个按键;也可以是一个遥控器的20个按键);·上电初始状态是断开状态;·插座有可能安装在大型电器的后面,有可能造成遥控信号不灵敏;·投影仪、电脑、电磁炉等不能直接断电的设备不适用;智能开关图案色系智能开关优点标准86盒尺寸一即使原来是两个并排的机械开关也完全可以用智能开关替代钢化玻璃面板一抗弯强度是普通玻璃的3-5倍,抗冲击强度是普通玻璃的5-10倍夜晚荧光指示一光致储能夜光粉,在夜晚缓慢发光,可持续5到10个小时智能开关优点超薄设计一高出墙面总高度小于8mm,视觉厚度小于5mm防触电结构一获得专利的防触电结构设计专用天线槽一从结构上专门设计了天线槽,既保证了生产的规范性,保证产品品质也增加了美观度身在外,家就在身边回到家夕世界就在眼前。