东芝笔记本电脑使用手册
- 格式:rtf
- 大小:823.42 KB
- 文档页数:10
笔记本电脑 用户指南本出版物的内容将定期变动,恕不另行通知。
更改的内容将会补充到本出版物,且会在本手册发行新版本时予以付梓印刷。
本公司不做任何明示或默许担保,包括本手册内容的适售性或符合特定使用目的。
在下列预留的空白处,记录下型号、序列号、购买日期及购买地点。
型号及序列号可以在电脑外贴的标签上找到。
与电脑元件相关的资料应包括序列号、型号及购买信息。
型号:__________________________________序列号:________________________________购买日期:______________________________购买地点:______________________________版权所有 © 2003保留所有权利笔记本电脑用户指南2003 年 3月第 1 版笔记本电脑所有商标和注册商标的所有权皆归其所属公司所有。
目录iii 前言 vii 连接电脑vii 保养和维护ix 1 熟悉您的电脑1电脑概述3正视图 3俯视图4左视图 6右视图 6后视图7底视图 8产品特性9显示屏11状态指示灯12键盘13特殊键13符合人体工程学的键盘17触摸板18快速执行键20存储设备21硬盘21光驱21闪存插槽23连接选项24以太网(Ethernet),局域网(LAN)24传真/数据调制解调器24无线通信25快速红外线26音频27超级 DJ 控制面板28保护您的笔记本电脑30使用保安锁孔30密码31目录iv目录2 使用电池组33电池组35电池组特性35安装和取出电池组35为电池组充电37检测电池组电量37延长电池使用寿命37电量不足告警38电源管理39高级配置和电源接口393 外设和选用部件41外接式显示器43使用同步显示43S-video44外接式键盘45外接式定点设备46打印机47音频设备48PC 卡49 PC 卡插槽49记忆棒/加密数字(SD)combo 插槽51USB 设备52IEEE 1394 设备53选用部件54备用供电设备54重要部件升级55内存升级55硬盘升级564 携带电脑57与桌面设备断开连接59携带您的电脑59准备您的电脑59出席较短会议须携带的设备59出席较长会议须携带的设备59携带电脑回家59准备您的电脑60须携带的物品60特别注意事项60布置家庭办公室60携带电脑进行长途旅行61准备您的电脑61v 须携带的物品61特别注意事项61携带电脑进行国际旅行61准备您的电脑61须携带的设备62特别注意事项625 软件63系统软件65 Launch Manager65BIOS Utility66关于密码676 疑难解答69常见问题71出错信息74A 规格79B 声明85vi目录vii 前言本款超薄便携式笔记本电脑融合了最新的移动技术。
Toshiba Global Commerce Solutions 使用手册4818-T10目录目录 (2)安全讯息 (3)1.硬件配置 (4)1.1.包装内容 (4)1.2.快速一览 (5)1.3.基本接口设备安装 (6)1.4.更换 M.2 固态硬盘 (SSD) (14)1.5.更换内存模块 (15)1.6.调整倾斜角度 (16)1.7.启动设备 (16)2.输入/输出定义 (17)2.1.串行端口 (17)2.2.电子钱柜端口 (18)3.设备用于壁挂 (20)3.1.挂前准备 (20)3.2.安全信息 (20)3.3.在拆卸立座支架之前 (20)3.4.拆卸立座支架 (21)3.5.安装壁挂支架(VESA) (24)4.重新安装设备回立座支架 (25)4.1.准备 (25)4.2.安全信息 (25)4.3.在拆卸壁挂支架之前 (25)4.4.拆卸壁挂支架 (26)5.规格 (30)5.1.基本规格 (30)5.2.选购项目 (31)6.尺寸 (33)版权声明 (34)非无线产品声明 (34)2安全讯息Before installing this product, read Safety Information.Antes de instalar este produto, leia as Informações de Segurança.Pred instalací tohoto produktu si prectete prírucku bezpecnostních instrukcí.Læs sikkerhedsforskrifterne, før du installerer dette produkt.Lees voordat u dit product installeert eerst de veiligheidsvoorschriften.Ennen kuin asennat tämän tuotteen, lue turvaohjeet kohdasta SafetyInformation. Avant d'installer ce produit, lisez les consignes de sécurité.Vor der Installation dieses Produkts die Sicherheitshinweise lesen.Prima di installare questo prodotto, leggere le Informazioni sulla Sicurezza.Les sikkerhetsinformasjonen (Safety Information) før du installerer dette produktet.Antes de instalar este produto, leia as Informações sobre Segurança.Antes de instalar este producto, lea la información de seguridad.Läs säkerhetsinformationen innan du installerar den här produkten.341. 1.硬件配置1.1. 包装内容1. 设备一台2. RJ50转DB9 COM 的串行端口转接器缆线两条3. 电源整流器一台4. 手册指南DVD 一片1.2. 快速一览正视图LED指示灯:当电源打开时,电源指示灯呈现绿色。
EPA E NERGY S TAR ® (MFD)美国环保部署(EPA) 已经推广了一项非强制性计划E NERGY S TAR 计划,鼓励广泛和自觉运用能增加工作空间、改善产品性能和防止污染的能效工艺。
作为E NERGY S TAR 的合作伙伴,东芝泰格公司已决定使本型号复合机满足E NERGY S TAR 准则中对能效的要求。
E NERGY S TAR 准则中对这类E NERGY S TAR 多功能复合机有“Sleep Mode”(睡眠模式)的性能要求,即一段时间不工作之后自动使复合机进入睡眠模式。
数码复合机也必须自最后一次使用起的一段时间之后自动切换至自动节能模式中。
特别说明地是,该复合机符合以下要求。
e-STUDIO230/230s/280/280s 复合机(基本型号)“自动节能模式”-在“自动节能模式”中,复合机(e-STUDIO230/230s)功耗小于 93.55W/(e-STUDIO280/280s)小于112.8W。
“自动节能模式”的默认时间 -“自动节能模式”的默认时间为 15 分钟。
“睡眠模式”复合机在“睡眠模式”下的耗电量少于 15 瓦。
“睡眠模式”默认时间-“睡眠模式”的默认时间为 40 分钟。
e-STUDIO230/230s/280/280s 复合机/打印机 + 传真机模式(多功能模式)“自动节能模式”-在“自动节能模式”中,复合机(e-STUDIO230/230s)功耗小于138.55W/(e-STUDIO280/280s)小于157.80W。
“自动节能模式”的默认时间 -“自动节能模式”的默认时间为 15 分钟。
“睡眠模式”复合机在“睡眠模式”下的耗电量(e-STUDIO230/230s)小于 80 W/(e-STUDIO280/280s)小于95W。
“睡眠模式”默认时间-“睡眠模式”的默认时间为 40 分钟。
注 1-“睡眠模式”和“自动节能模式”的默认设置可以更改。
Safety.book Page 1 Friday, March 24, 2017 4:35 PMђ㣓⭫㝇 ⭞⭞ 䈭䰻䈱Safety.book Page 2 Friday, March 24, 2017 4:35 PMSafety.book Page 3 Friday, March 24, 2017 4:35 PM3目录简介 (5)安全使用电脑、组件和附件 (6)电源 (6)通信 (12)主机 (14)系统/外设 (20)如何更舒适地使用电脑 (25)良好的工作姿势 (25)使用外接键盘、鼠标或显示器操作电脑 (26)打字方式 (27)休息及变换工作任务 (27)移动过程中使用电脑的提示 (27)搬运电脑 (27)寻求额外的帮助 (28)检查清单 (28)您购买的电脑系统可能会带有包含最先进的数据存储技术的可刻录和/或可擦写光盘驱动器及相关软件。
同其它新技术一样,您必须先阅读并遵循随附的或以电子方式提供的相关用户指南和/ 或手册中所有的设置及使用指引。
如果不这样做,该产品可能不能正常运行并且您可能会丢失数据或遭受其它损害。
东芝、其附属公司及供应商并不保证本产品的所有运转都不受干扰或无错误。
您同意对由于使用本产品而引起的任何商业、利润、程序、数据或可移动存储媒体的损害或损失,即使已经被告知此可能性,东芝、其附属公司及供应商不应承担任何责任。
为求准确,出版时东芝公司已反复验证提供的信息,但是该信息有可能加以改动,恕不另行通知。
该使用指南或其它的任何书面材料及信息中的描述仅仅是一般性的指导,而不是向您承诺的任何保证。
对任何直接或间接地由于使用指南条款中技术或印刷的错误或遗漏引起的损害,东芝公司不承担任何责任。
在任何情况下,不管是基于民事侵权或与此相关的合同还是其他方面的理由,由于使用指南、其他信息或使用引起的任何意外的、因果的、特殊的或典型的损害,东芝公司不承担任何责任。
Safety.book Page 4 Friday, March 24, 2017 4:35 PM4商标Wi-Fi是Wi-Fi Alliance的注册商标。
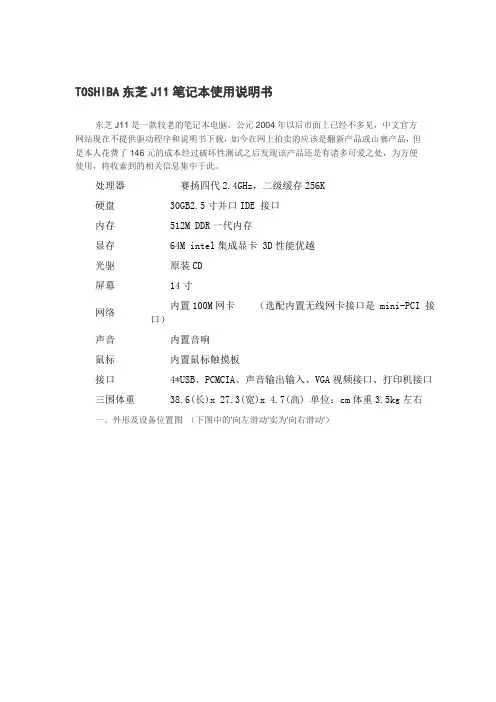
TOSHIBA东芝J11笔记本使用说明书东芝J11是一款较老的笔记本电脑,公元2004年以后市面上已经不多见,中文官方网站现在不提供驱动程序和说明书下载,如今在网上拍卖的应该是翻新产品或山寨产品,但是本人花费了146元的成本经过破坏性测试之后发现该产品还是有诸多可爱之处,为方便使用,将收索到的相关信息集中于此。
处理器赛扬四代2.4GHz,二级缓存256K硬盘30GB2.5寸并口IDE 接口内存512M DDR一代内存显存64M intel集成显卡 3D性能优越光驱原装CD屏幕14寸网络内置100M网卡(选配内置无线网卡接口是 mini-PCI 接口)声音内置音响鼠标内置鼠标触摸板接口4*USB、PCMCIA、声音输出输入、VGA视频接口、打印机接口三围体重38.6(长)x 27.3(宽)x 4.7(高) 单位:cm体重3.5kg左右一、外形及设备位置图(下图中的'向左滑动'实为'向右滑动')背面图及设备位置示意上图为国人不屑的原日文键盘;下图为拆换后的标准键盘。
二、BIOS的操作方法开机按ESC出现如下对话:根据提示按F1键进入,空格键修改选中项。
笔记本的bios没多少设置,建议不要动进入第二页方法是Fn+PageDown(PgDu 向后翻页,PgUp向前翻页),PageDown是方向键的下键。
改完保存用Fn+End ,End是方向键的向右键。
设定启动顺序可不进入BIOS在开机后出现的第一个画面时,按住F2键显示引导菜单:在Toshiba大红字下方有一排设备示意,用方向键选择“返回、光驱、软盘、网络、硬盘”来引导操作系统;点亮第二个光碟模样的图标,回车!就从光驱启动了。
三、FN功能键大全(必须要安装驱动程序才能实现,其实用不了这么多,最常用的只有三个左右)左手两指同时按下Shift键和Fn键(有一个小灯会亮)Fn键+M键“改写”与“插入”功能转换Fn键+>键删除Fn+F11切换小键盘数字区(有一个小灯会亮),在正常情况下,切换一次到数字键,再切换一下解除。
笔记本电脑使用注意事项笔记本电脑属于精密的设备,需要仔细而正确地使用。
尽管笔记本电脑的设计以及测试保证了它在普通环境的耐用性和可靠的功能,您仍然需要掌握一些正确的使用方法及注意事项。
1.忌摔、严禁挤压笔记本电脑的第一大戒就是摔,笔记本电脑一般都装在便携包中,放置时一定要把包放在稳妥的地方,特别提醒的是不要将任何硬物(如充电器、鼠标等)放在屏幕上,可放在电脑底板下。
注意电脑放在包中时一定要把包的拉链拉上,或拉链打开后就一定要将电脑取出来。
另外,由于笔记本电脑是要经常带着走的,所以免不了会磕磕碰碰,而笔记本电脑又确实经不起磕碰,因此要格外小心。
不要使用过小或过紧的箱子或手提包来装笔记本电脑。
内部的压力可能会损坏笔记本电脑。
使用优质的笔记本电脑包,会为笔记本电脑提供安全的保护。
在电脑使用过程中,千万不能在开机的状态下移动电脑,以免不小心发生碰撞,损坏硬盘;更不能将电脑抱到床上或腿上使用,以免电脑主板变形,而且夹物会卷入电脑中,缩短电脑使用寿命。
2.怕脏一方面,笔记本电脑经常会被带到不同的环境中去使用,比台式机更容易被弄脏;另一方面,由于笔记本电脑非常精密,因此比台式机更不耐脏,所以需要你精心呵护。
所以切忌在笔记本前吃东西,尤其是饼干类的容易掉渣的食品,很容易掉到笔记本键盘缝隙中去。
此外,大部分笔记本电脑的便携包是不防水的,所以如果你经常背着笔记本电脑外出,就得有一些防雨措施。
3.怕水、怕潮湿笔记本显然是十分怕水的,无论是主机还是电源线。
不要在潮湿的地方使用本本,那样的话回有水分进入LCD内部,这个对寿命影响很大。
喝水的时候一定要小心,不要将水或咖啡等洒在键盘上。
一旦笔记本浸水,要立刻关机并拔掉电源及电池,如有外接光驱、软驱等都一齐拔掉。
确认笔记本完全干了才能再次开机。
可以使用纸巾将水吸出,如使用风扇吹的话,要注意不要离键盘过近并注意风的温度以免过热将键盘烤变形。
4.注意温差在冬天和夏天,进出有暖气或空调的房间时的温差会导致“结露现象”发生,如果此时给LCD通电,会导致液晶电极腐蚀,造成永久性的损害。
简介感谢惠购 KM-2560/KM-3060。
本操作手册旨在帮助您正确操作机器、执行日常保养以及在需要时采取简单的故障排除措施,以便可以始终使用处于良好工作状态的机器。
请在首次使用机器前阅读本操作手册,然后将其保管在机器附近,以便查阅。
附带的手册本机附带以下手册。
请在需要时参阅这些手册。
操作手册(本手册)介绍如何装入纸张,基本复印、打印和扫描操作以及故障排除。
高级操作手册深入介绍复印、打印和扫描功能以及初始设定。
操作手册i本手册中使用的安全规范本手册章节以及本机上标识的符号为安全警告,旨在保护用户、他人与周围的物体,并确保机器的使用正确、安全。
这些符号及其含义如下。
符号U 符号表示相关章节含有安全警告。
具体注意要点在符号内标出。
符号表示相关内容含有禁止操作的信息。
具体禁止操作内容在符号内标出。
z 符号表示相关部位含有必须操作的信息。
具体要求操作内容在符号内标出。
若操作手册的安全警告无法辨识,或操作手册遗失(在这种情况下用户需自行承担手册更换费用),请与维修服务人员联系,索取新的手册。
警告:表示若对相关要点不引起充分重视或不正确执行,则可能会导致严重人身伤害,甚至死亡。
小心:表示若对相关要点不引起充分重视或不正确执行,则可能会导致人身伤害,或机械损坏。
....[一般警告]....[触电危险警告]....[高温警告]....[禁止操作警告]....[禁止拆解]....[要求操作警示]....[拔下电源插头]....[本机务必使用有接地连接的插座]目录目录小心/警告标签 . . . . . . . . . . . . . . . . . . . . . . . . . . . . . . . . . . . . . . . . . . . . . . . . . . . . . . . . . . . . . . . . . . . . . .iv安装注意事项 . . . . . . . . . . . . . . . . . . . . . . . . . . . . . . . . . . . . . . . . . . . . . . . . . . . . . . . . . . . . . . . . . . . . . . . . v使用注意事项 . . . . . . . . . . . . . . . . . . . . . . . . . . . . . . . . . . . . . . . . . . . . . . . . . . . . . . . . . . . . . . . . . . . . . . .vii关于复印/扫描的合法性限制 . . . . . . . . . . . . . . . . . . . . . . . . . . . . . . . . . . . . . . . . . . . . . . . . . . . . . . . . xiii法律和安全信息 . . . . . . . . . . . . . . . . . . . . . . . . . . . . . . . . . . . . . . . . . . . . . . . . . . . . . . . . . . . . . . . . . . . . .xiv1部件名称机器 . . . . . . . . . . . . . . . . . . . . . . . . . . . . . . . . . . . . . . . . . . . . . . . . . . . . . . . . . . . . . . . . . . . . . . . . . . . . . . 1-2操作面板 . . . . . . . . . . . . . . . . . . . . . . . . . . . . . . . . . . . . . . . . . . . . . . . . . . . . . . . . . . . . . . . . . . . . . . . . . . 1-52使用前的准备工作确定连接方法并准备电缆 . . . . . . . . . . . . . . . . . . . . . . . . . . . . . . . . . . . . . . . . . . . . . . . . . . . . . . . . . . . . 2-3连接电缆 . . . . . . . . . . . . . . . . . . . . . . . . . . . . . . . . . . . . . . . . . . . . . . . . . . . . . . . . . . . . . . . . . . . . . . . . . . 2-5设定日期和时间 . . . . . . . . . . . . . . . . . . . . . . . . . . . . . . . . . . . . . . . . . . . . . . . . . . . . . . . . . . . . . . . . . . . . 2-8配置网络(LAN 电缆连接). . . . . . . . . . . . . . . . . . . . . . . . . . . . . . . . . . . . . . . . . . . . . . . . . . . . . . . . . 2-10访问 COMMAND CENTER(命令中心)(网络和传送的设定). . . . . . . . . . . . . . . . . . . . . . . . . . . 2-12TCP/IP 设定. . . . . . . . . . . . . . . . . . . . . . . . . . . . . . . . . . . . . . . . . . . . . . . . . . . . . . . . . . . . . . . . . . . . . . . 2-13发送电子邮件 . . . . . . . . . . . . . . . . . . . . . . . . . . . . . . . . . . . . . . . . . . . . . . . . . . . . . . . . . . . . . . . . . . . . . 2-15用户登录管理 . . . . . . . . . . . . . . . . . . . . . . . . . . . . . . . . . . . . . . . . . . . . . . . . . . . . . . . . . . . . . . . . . . . . . 2-27安装软件 . . . . . . . . . . . . . . . . . . . . . . . . . . . . . . . . . . . . . . . . . . . . . . . . . . . . . . . . . . . . . . . . . . . . . . . . . 2-30选择初始画面 . . . . . . . . . . . . . . . . . . . . . . . . . . . . . . . . . . . . . . . . . . . . . . . . . . . . . . . . . . . . . . . . . . . . . 2-31更改语言 . . . . . . . . . . . . . . . . . . . . . . . . . . . . . . . . . . . . . . . . . . . . . . . . . . . . . . . . . . . . . . . . . . . . . . . . . 2-33装纸 . . . . . . . . . . . . . . . . . . . . . . . . . . . . . . . . . . . . . . . . . . . . . . . . . . . . . . . . . . . . . . . . . . . . . . . . . . . . . 2-34装入原稿 . . . . . . . . . . . . . . . . . . . . . . . . . . . . . . . . . . . . . . . . . . . . . . . . . . . . . . . . . . . . . . . . . . . . . . . . . 2-473基本操作开机/关机 . . . . . . . . . . . . . . . . . . . . . . . . . . . . . . . . . . . . . . . . . . . . . . . . . . . . . . . . . . . . . . . . . . . . . . . . 3-2节能模式和自动节能模式 . . . . . . . . . . . . . . . . . . . . . . . . . . . . . . . . . . . . . . . . . . . . . . . . . . . . . . . . . . . . 3-4睡眠和自动睡眠 . . . . . . . . . . . . . . . . . . . . . . . . . . . . . . . . . . . . . . . . . . . . . . . . . . . . . . . . . . . . . . . . . . . . 3-5调节操作面板角度 . . . . . . . . . . . . . . . . . . . . . . . . . . . . . . . . . . . . . . . . . . . . . . . . . . . . . . . . . . . . . . . . . . 3-6触摸面板显示屏 . . . . . . . . . . . . . . . . . . . . . . . . . . . . . . . . . . . . . . . . . . . . . . . . . . . . . . . . . . . . . . . . . . . . 3-7复印 . . . . . . . . . . . . . . . . . . . . . . . . . . . . . . . . . . . . . . . . . . . . . . . . . . . . . . . . . . . . . . . . . . . . . . . . . . . . . . 3-8打印-从应用程序打印 . . . . . . . . . . . . . . . . . . . . . . . . . . . . . . . . . . . . . . . . . . . . . . . . . . . . . . . . . . . . . 3-24发送 . . . . . . . . . . . . . . . . . . . . . . . . . . . . . . . . . . . . . . . . . . . . . . . . . . . . . . . . . . . . . . . . . . . . . . . . . . . . . 3-26指定目的地 . . . . . . . . . . . . . . . . . . . . . . . . . . . . . . . . . . . . . . . . . . . . . . . . . . . . . . . . . . . . . . . . . . . . . . . 3-42使用文件夹 . . . . . . . . . . . . . . . . . . . . . . . . . . . . . . . . . . . . . . . . . . . . . . . . . . . . . . . . . . . . . . . . . . . . . . . 3-45打印可移动 USB 存储器中存储的文件. . . . . . . . . . . . . . . . . . . . . . . . . . . . . . . . . . . . . . . . . . . . . . . . . 3-56取消/查看/更改作业 . . . . . . . . . . . . . . . . . . . . . . . . . . . . . . . . . . . . . . . . . . . . . . . . . . . . . . . . . . . . . 3-58检查剩余墨粉和纸张 . . . . . . . . . . . . . . . . . . . . . . . . . . . . . . . . . . . . . . . . . . . . . . . . . . . . . . . . . . . . . . . 3-63快速设置画面 . . . . . . . . . . . . . . . . . . . . . . . . . . . . . . . . . . . . . . . . . . . . . . . . . . . . . . . . . . . . . . . . . . . . . 3-644选购设备选购设备概述 . . . . . . . . . . . . . . . . . . . . . . . . . . . . . . . . . . . . . . . . . . . . . . . . . . . . . . . . . . . . . . . . . . . . . . 4-2送稿器 . . . . . . . . . . . . . . . . . . . . . . . . . . . . . . . . . . . . . . . . . . . . . . . . . . . . . . . . . . . . . . . . . . . . . . . . . . . . 4-4供纸盒 . . . . . . . . . . . . . . . . . . . . . . . . . . . . . . . . . . . . . . . . . . . . . . . . . . . . . . . . . . . . . . . . . . . . . . . . . . . . 4-4内置装订器 . . . . . . . . . . . . . . . . . . . . . . . . . . . . . . . . . . . . . . . . . . . . . . . . . . . . . . . . . . . . . . . . . . . . . . . . 4-5原稿装订器 . . . . . . . . . . . . . . . . . . . . . . . . . . . . . . . . . . . . . . . . . . . . . . . . . . . . . . . . . . . . . . . . . . . . . . . . 4-9作业分离器 . . . . . . . . . . . . . . . . . . . . . . . . . . . . . . . . . . . . . . . . . . . . . . . . . . . . . . . . . . . . . . . . . . . . . . . . 4-9传真组件 . . . . . . . . . . . . . . . . . . . . . . . . . . . . . . . . . . . . . . . . . . . . . . . . . . . . . . . . . . . . . . . . . . . . . . . . . 4-11数据备份组件 . . . . . . . . . . . . . . . . . . . . . . . . . . . . . . . . . . . . . . . . . . . . . . . . . . . . . . . . . . . . . . . . . . . . . 4-11ii操作手册目录安全组件(USB 设备) . . . . . . . . . . . . . . . . . . . . . . . . . . . . . . . . . . . . . . . . . . . . . . . . . . . . . . . . . . . . . 4-11PDF 升级组件(USB 设备). . . . . . . . . . . . . . . . . . . . . . . . . . . . . . . . . . . . . . . . . . . . . . . . . . . . . . . . . 4-115保养清洁 . . . . . . . . . . . . . . . . . . . . . . . . . . . . . . . . . . . . . . . . . . . . . . . . . . . . . . . . . . . . . . . . . . . . . . . . . . . . . . 5-2更换墨粉盒和废粉盒 . . . . . . . . . . . . . . . . . . . . . . . . . . . . . . . . . . . . . . . . . . . . . . . . . . . . . . . . . . . . . . . . 5-76故障排除解决故障 . . . . . . . . . . . . . . . . . . . . . . . . . . . . . . . . . . . . . . . . . . . . . . . . . . . . . . . . . . . . . . . . . . . . . . . . . . 6-2针对错误信息的解决措施 . . . . . . . . . . . . . . . . . . . . . . . . . . . . . . . . . . . . . . . . . . . . . . . . . . . . . . . . . . . . 6-5清除卡纸 . . . . . . . . . . . . . . . . . . . . . . . . . . . . . . . . . . . . . . . . . . . . . . . . . . . . . . . . . . . . . . . . . . . . . . . . . 6-12附录字符输入方法 . . . . . . . . . . . . . . . . . . . . . . . . . . . . . . . . . . . . . . . . . . . . . . . . . . . . . . . . . . . . . . . . . . 附录-2输入简体中文 . . . . . . . . . . . . . . . . . . . . . . . . . . . . . . . . . . . . . . . . . . . . . . . . . . . . . . . . . . . . . . . . . . 附录-4输入英语 . . . . . . . . . . . . . . . . . . . . . . . . . . . . . . . . . . . . . . . . . . . . . . . . . . . . . . . . . . . . . . . . . . . . . 附录-11纸张 . . . . . . . . . . . . . . . . . . . . . . . . . . . . . . . . . . . . . . . . . . . . . . . . . . . . . . . . . . . . . . . . . . . . . . . . . 附录-15规格 . . . . . . . . . . . . . . . . . . . . . . . . . . . . . . . . . . . . . . . . . . . . . . . . . . . . . . . . . . . . . . . . . . . . . . . . . 附录-16索引 . . . . . . . . . . . . . . . . . . . . . . . . . . . . . . . . . . . . . . . . . . . . . . . . . . . . . . . . . . . . . . . . . . . . . . . . . . 索引-1操作手册iii小心/警告标签出于安全考虑,本机以下位置贴有小心/警告标签。
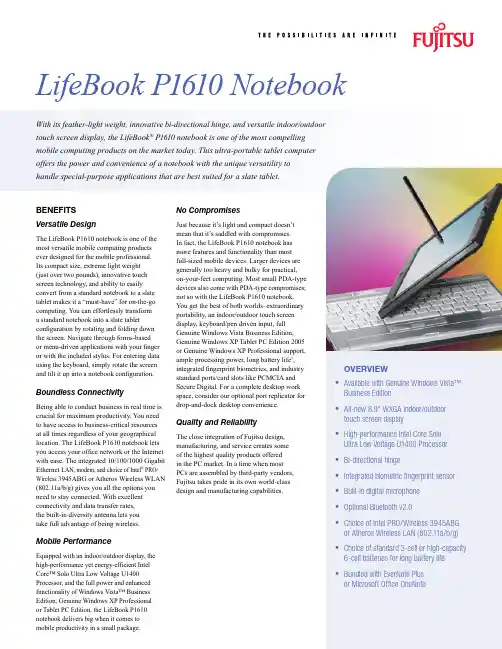
With its feather-light weight, innovative bi-directional hinge, and versatile indoor/outdoor touch screen display, the LifeBook ® P1610 notebook is one of the most compelling mobile computing products on the market today. This ultra-portable tablet computer offers the power and convenience of a notebook with the unique versatility to handle special-purpose applications that are best suited for a slate tablet.BENEFITSVersatile DesignThe LifeBook P1610 notebook is one of the most versatile mobile computing products ever designed for the mobile professional. Its compact size, extreme light weight (just over two pounds), innovative touch screen technology, and ability to easily convert from a standard notebook to a slate tablet makes it a “must-have” for on-the-go computing. You can effortlessly transform a standard notebook into a slate tabletconfiguration by rotating and folding down the screen. Navigate through forms-based or menu-driven applications with your finger or with the included stylus. For entering data using the keyboard, simply rotate the screen and tilt it up into a notebook configuration.Boundless ConnectivityBeing able to conduct business in real time is crucial for maximum productivity. You need to have access to business-critical resources at all times regardless of your geographical location. The LifeBook P1610 notebook lets you access your office network or the Internet with ease. The integrated 10/100/1000 Gigabit Ethernet LAN, modem, and choice of Intel ® PRO/Wireless 3945ABG or Atheros Wireless WLAN (802.11a/b/g) gives you all the options you need to stay connected. With excellent connectivity and data transfer rates, the built-in diversity antenna lets you take full advantage of being wireless.Mobile PerformanceEquipped with an indoor/outdoor display, the high-performance yet energy-efficient Intel Core™ Solo Ultra Low V oltage U1400 Processor, and the full power and enhanced functionality of Windows Vista™ Business Edition, Genuine Windows XP Professional or Tablet PC Edition, the LifeBook P1610 notebook delivers big when it comes to mobile productivity in a small package.No CompromisesJust because it’s light and compact doesn’t mean that it’s saddled with compromises. In fact, the LifeBook P1610 notebook has more features and functionality than most full-sized mobile devices. Larger devices are generally too heavy and bulky for practical, on-your-feet computing. Most small PDA-type devices also come with PDA-type compromises; not so with the LifeBook P1610 notebook. You get the best of both worlds–extraordinary portability, an indoor/outdoor touch screen display, keyboard/pen driven input, full Genuine Windows Vista Business Edition, Genuine Windows XP Tablet PC Edition 2005 or Genuine Windows XP Professional support, ample processing power, long battery life 1, integrated fingerprint biometrics, and industry standard ports/card slots like PCMCIA and Secure Digital. For a complete desktop work space, consider our optional port replicator for drop-and-dock desktop convenience.Quality and ReliabilityThe close integration of Fujitsu design, manufacturing, and service creates some of the highest quality products offered in the PC market. In a time when most PCs are assembled by third-party vendors, Fujitsu takes pride in its own world-class design and manufacturing capabilities.OVERVIEWAvailable with Genuine Windows Vista™ Business Edition All-new 8.9" WXGA indoor/outdoor touch screen display High-performance Intel Core Solo Ultra Low Voltage U1400 Processor Bi-directional hingeIntegrated biometric fingerprint sensor Built-in digital microphone Optional Bluetooth v2.0Choice of Intel PRO/Wireless 3945ABG or Atheros Wireless LAN (802.11a/b/g) Choice of standard 3-cell or high-capacity 6-cell batteries for long battery life Bundled with EverNote Plus or Microsoft Office OneNote••••••••••(24/7):Battery life estimates reflect the results of BAPCo Productivity Workloads performed systems with battery life setting enabled on XP operating systems. Actual battery life vary based on screen brightness, applications DVD Writer, LAN, wireless LAN or One gigabyte (GB) = one billion bytes; accessible The internal modems on all Fujitsu notebooks Fujitsu Computer Systems Corporation are only for use with telephone systems in selected including the United States and than 56Kbps due to the current FCC regulations for products purchased in North, Central, and After 90 days, the user must purchase subscription from Symantec to download latest the Fujitsu logo, and LifeBook are registered of Fujitsu Limited. Centrino, Intel, Intel the Centrino logo and the Intel logo trademarks or registered trademarks of Intel or its subsidiaries in the United States other countries. Microsoft, Windows Vista, and are either registered trademarks or of Microsoft Corporation in the United registered trademark of Atheros Communications. Inc. All other trademarks mentioned herein the property of their respective owners. Product data represents Fujitsu design objectives is provided for comparative purposes; actual may vary based on a variety of factors.。
【让你更了解东芝】东芝笔记本Fn功能键大全FN功能键大全--TOSHIBA篇最近好多朋友问我东芝的快捷键,也确实,好多图标普通客户都看不懂它们代表的功能,整理了一下,有任何东芝方面的问题朋友们都可以加我qq:2455417FN+ESC:静音,再次按则取消静音恢复原有音量FN+F1:清空屏幕,阻止他人访问数据.FN+F2:切换电源管理主题FN+F3:将机器置于等待状态FN+F4:将机器置于休眠状态FN+F5:切换显示器FN+F6:降低屏幕亮度FN+F7:增加屏幕亮度FN+F8:开启无线网卡信号(但不适用于R100)FN+F9:启用或禁用内置触摸板的鼠标FN+F10:将部分右侧的字母键变成方向键(键帽下方左侧的符号)FN+F11:将部分右侧的字母键变成数字键(键帽下方右侧的符号)FN+F12:相当于按下Scroll Lock键FN+Home:相当于按下Pause键FN+End:相当于按下Break键FN+1:减低音量FN+2:增加音量FN+空格键:切换屏幕分辨率到800X600Toshiba拥有所有笔记本电脑中最复杂的FN组合键,多达18个,从ESC到F12都排列得满满当当……不少用户用了好久还记不住:),不过一旦你用熟练了,它们的功能是很强大的。
按下Fn+F1将清空屏幕,阻止他人访问数据。
为了恢复屏幕显示和初始设定,请按任意键或点击Touch Pad。
如果设定了屏幕保护密码,则会出现一个对话框,输入屏幕保护密码然后点击确定。
如未设置密码,按任意键或点击Touch Pad后屏幕即可恢复。
FN+F2可以直接切换你预设的电源主题,主题将以你预设的图标小时出现,按一下F2切换一次,这样就不必点击数次鼠标到电源管理程序里面去找了。
FN+F9可以禁用或者启用内置触摸板鼠标,这个功能在使用外接鼠标的时候很实用,可以避免打字时不小心触动内置触摸板鼠标。
FN+F10和FN+F11这两个功能键比较奇特,在键盘右侧的字母键下方都印刷着两个字符,左边的是符号,右边的是数字,排列方式分别对应数字小键盘上的符号和数字,当按下FN+F10的时候,字母键将打出左侧标识的符号,当按下FN+F11的时候,按图中这些字母键则将打出右侧标识的数字,呵呵!很复杂是不是,亲手试一下你会发现其实这种方式也很方便的。
Satellite M100东芝Satellite M100 系列笔记本电脑用户手册版权版权«=OMMS=东芝公司版权所有。
保留所有权利。
根据版权法,未经东芝公司事先书面许可,不得以任何方式翻印本手册。
对使用本手册所含信息而导致的专利侵权后果,本公司将不承担任何责任。
《东芝=p~íÉääáíÉ=jNMM=系列笔记本电脑用户手册》OMMS=年=Q=月第一版音乐、电影、计算机程序及数据库等的所有权和版权受版权法保护。
对上述已获版权的材料的复制仅限于个人或家庭使用目的。
如果超出上述限制,在未获版权所有者许可的情况下复制(包括转换数据格式)或修改上述材料,以及通过网络传输或分发上述材料,将造成对版权或个人权利的侵害,并可能因此遭到损害索赔和L或承担刑事责任。
使用本产品来复制已获版权的作品或进行其他活动时,请务必遵守版权法。
请注意,如果出于营利目的在咖啡厅或宾馆等地使用本产品的屏幕模式切换功能(如宽屏模式、宽屏缩放模式等)显示放大的图片L视频或公开展示这些材料,可能会侵害所有者受版权保护的权利。
声明本手册之准确性已经过验证和复核。
其中所含关于=p~íÉääáíÉ=jNMM=系列笔记本电脑的说明和描述,在本手册出版时是准确的。
但是,以后的电脑及手册可能变动,恕不另行通知。
对由电脑和手册之间的错误、遗漏或差异直接或间接引起的损失,东芝概不承担责任。
商标f_j=是注册商标,f_j=m`、lpLO和mpLO=是=fåíÉêå~íáçå~ä=_ìëáåÉëë=j~ÅÜáåÉë`çêéçê~íáçå(国际商用机器公司)的商标。
东芝l750笔记本如何设置U盘启动
东芝作为世界第一台笔记本电脑的创造者,以其先行的产品及理念和精湛的技术实力,受到了广大消费者的喜爱,那么东芝l750笔记本如何设置U盘启动呢?下面店铺就为大家带来了东芝l750笔记本设置U盘启动的方法。
东芝l750笔记本设置U盘启动方法
一、制作一个u深度u盘启动盘,
二、查询有关东芝笔记本电脑的u盘启动快捷键信息F12。
1、将准备好的u深度u盘启动盘连接上电脑,重启电脑,在显示器中出现东芝logo的时候按下键盘上F12键即可,如下图所示:
2、接着,电脑便会进入到启动项顺序选择窗口,我们利用键盘上的“↑”“↓”方向键选择USB开头的选项,按回车键执行,如下图所示:
3、选择完成后电脑则会进入到u深度u盘启动盘主菜单界面,如下图所示:。