Flex 4 最佳集成实践
- 格式:doc
- 大小:145.00 KB
- 文档页数:17


在Flex4.0中使用正则表达式正则表达式可以高效地匹配查找字符串数据。
可方便地定义复杂的规则。
对于复杂的规则,若采用代码来表示,会产生较多的代码行,并且逻辑复杂、容易出错。
另外,使用正则表达式远比自定义算法效率要高。
1.使用RegExp类用以定义和处理正则表达式。
语法有两种方式。
一种是使用“/“符定义正则表达式:var RegExp变量:RegExp=/正则表达式语句/;一种是使用字符串定义正则表达式:var RegExp变量:RegExp=new RegExp(“正则表达式”);2.使用RegExp类匹配数据一种是使用RegExp类的exec( )方法匹配数据。
用于匹配字符串,并返回匹配结果数组。
RegExp变量.Exec(字符串数据);如:var r : RegExp=/\d+/;var arr : Array=r.exec(“4256@322”);trace(arr); 结果为“4256“、”“322“两个子串。
一种是使用RegExp类的test()方法匹配数据。
用于匹配字符串,并返回布尔值。
如:var r : RegExp=/\d+/;var flag: boolean=r.exec(“4256@322”);trace(arr);一种是使用String类的match()方法匹配数据,用于匹配字符串并返回结果数组。
如:var r : RegExp=/\d+/;var s : String = “4256@322”;var arr : Array=s.match(r);trace(arr);数据传输与交互Flex4.0中的数据传输方式包括内部数据传输、文件流方式传输、xml方式传输、其他方式传输。
应用程序内部的数据传输大多通过变量传递来实现。
外部文件的数据可分为简单文本数据、xml数据和复杂数据。
对于简单的文本数据可以采用文件流方式传输。
对于xml数据可采用xml方式传输。
对于复杂的数据,如大型数据库中的数据,需要通过其他程序来辅助数据传输。

30.4使用Flex Network的外部输入/输出30.4.1简介通过将FLEX NETWORK模块连接到GP,您不仅可以使用人机界面来远程控制外部输入/输出,还可以控制输入和输出外的其他事项。
您还可以添加多个FLEXNETWORK模块来增加输入/输出点的数量。
该模块有两条连接线,而向这两条连接线输出的是相同的通讯数据。
只要使用其中任意一条线,则线1和线2都可用。
使用一条线时,可以连接的最大站数是31。
使用两条线时,可以连接的最大站数是63。
一条线支持31站,另一条线支持32站。
有关配置的详细信息,请参阅“FLEX NETWORK用户手册”1.1节系统配置。
•FLEX NETWORK和GP的连接需要专用电缆。
FLEX NETWORK模块:型号和站数下面将介绍FLEX NETWORK模块的型号、点数和站数。
例如,如果您使用的是具有32个离散输入和32个离散输出的总计64点的输入/输出模块,且将S编号定义为1,那么该输入/输出模块将使用S编号1至4。
类型类型点数占用站数I/O FN-X16TS16点输入1站FN-X32TS32点输入2站FN-Y08RL8点输出1站FN-Y16SK16点输出1站FN-Y16SC16点输出1站FN-XY08TS8点输入1站8点输出FN-XY16SK16点输入1站16点输出FN-XY16SC16点输入1站16点输出FN-XY32SK32点输入4站32点输出模拟FN-AD02AH2chA/D1站FN-AD04AH4chA/D4站FN-DA02AH2chD/A1站FN-DA04AH4chD/A4站特殊定位FN-PC10SK-4站高速计数器FN-HC10SK41-8站30.4.2设置步骤下面是如何在FLEX NETWORK 模块中使用数字输入/输出(DIO)的示例。
1选择型号为AGP-XXXXX-FN1M 的人机界面。
FLEX NETWORK 驱动程序将自动安装。
2在[系统设置]窗口中,选择[输入/输出驱动程序]来显示如下画面。

BlazeDS初始化时用于动态创建services, destinations, and adapters。
SpringRemotingDestinationBootstrapService扩展AbstractBootstrapService。
SpringRemotingDestinationBootstrapService 自动导出包含"@Service标注及以FlexService结尾"的Spring Bean为RemoteObject。
@SuppressWarnings("all")public class SpringRemotingDestinationBootstrapService extends AbstractBootstrapService {public static final String DEFAULT_INCLUDE_END_WITH_BEANS = "FlexService";private static Logger logger =LoggerFactory.getLogger(SpringRemotingDestinationBootstrapService.cla ss);private String destChannel;private String destSecurityConstraint;private String destScope;private String destAdapter;private String destFactory;private String serviceId;private String includeEndsWithBeans;@Override/***初始化入口*/public void initialize(String id, ConfigMap properties) { serviceId = properties.getPropertyAsString("service-id", "remoting-service");destFactory = properties.getPropertyAsString("dest-factory", "spring");destAdapter = properties.getProperty("dest-adapter");destScope = properties.getProperty("dest-scope");destSecurityConstraint =properties.getProperty("dest-security-constraint");destChannel = properties.getPropertyAsString("dest-channel", "my-amf");includeEndsWithBeans =properties.getPropertyAsString("includeEndsWithBeans",DEFAULT_INCLUDE_END_WITH_BEANS);Service remotingService = broker.getService(serviceId);if (remotingService == null)throw createServiceException("not found Service with serviceId:" + serviceId);createSpringDestinations(remotingService);}private ServiceException createServiceException(String message) {ServiceException ex = new ServiceException();ex.setMessage(message);return ex;}/***将Spring的Service Name自动定义为destination*/private void createSpringDestinations(Service remotingService) { WebApplicationContext wac = WebApplicationContextUtils.getWebApplicationContext(broker.getServletContext());List<String> addedBeanNames = new ArrayList();for (String beanName : wac.getBeanDefinitionNames()) {Class type = wac.getType(beanName);logger.debug("{}: {}", new Object[]{beanName,type.getName()});boolean isCreateSpringDestination = !type.isAnnotationPresent(com.grgbanking.platform.core.flex.NoneRemoti ngObject.class)|| beanName.endsWith(includeEndsWithBeans) || isCreateDestination(beanName, type);if (isCreateSpringDestination) {createSpringDestination(remotingService, beanName);addedBeanNames.add(beanName);}}("[Auto Export Spring toRemotingDestination],beanNames={}", addedBeanNames);}protected boolean isCreateDestination(String beanName, Class type) {return false;}/** <!-- 动态生成的配置内容 --> <destination id="sampleVerbose"><channels> <channel* ref="my-secure-amf" /> </channels> <adapter ref="java-object" /> * <security> <security-constraint ref="sample-users" /> </security> * <properties> <source>pany.SampleService</source>* <scope>session</scope> <factory>myJavaFactory</factory></properties>* </destination>*/protected void createSpringDestination(Service service, String destinationId) {flex.messaging.services.remoting.RemotingDestinationdestination = (flex.messaging.services.remoting.RemotingDestination) service.createDestination(destinationId);destination.setSource(destinationId);destination.setFactory(destFactory);if (destAdapter != null) {destination.createAdapter(destAdapter);}if (destScope != null) {destination.setScope(destScope);}if (destSecurityConstraint != null) {destination.setSecurityConstraint(destSecurityConstraint);}if (destChannel != null) {destination.addChannel(destChannel);}service.addDestination(destination);}2)修改SpringFactory并扩展FlexFactory根据destination的id,将Flex的destination映射为Spring的Beanpublic class SpringFactory implements FlexFactory {private static final String SOURCE = "source";/***This method can be used to initialize the factory itself.It is called*with configuration parameters from the factory tag which defines the id*of the factory.*/public void initialize(String id, ConfigMap configMap) {}/***This method is called when we initialize the definition of an instance*which will be looked up by this factory.It should validate that the*properties supplied are valid to define an instance.Any valid properties*used for this configuration must be accessed to avoid warnings about *unused configuration elements.If your factory is only used for *application scoped components,this method can simply return a factory*instance which delegates the creation of the component to the*FactoryInstance's lookup method.*/public FactoryInstance createFactoryInstance(String id, ConfigMap properties) {SpringFactoryInstance instance = new SpringFactoryInstance(this, id, properties);instance.setSource(properties.getPropertyAsString(SOURCE, instance.getId()));return instance;} // end method createFactoryInstance()/***Returns the instance specified by the source and properties arguments.*For the factory,this may mean constructing a new instance, optionally*registering it in some other name space such as the session or JNDI, and*then returning it or it may mean creating a new instance and returning *it.This method is called for each request to operate on the given item*by the system so it should be relatively efficient.*<p>*If your factory does not support the scope property,it report an error*if scope is supplied in the properties for this instance.*/public Object lookup(FactoryInstance inst) {SpringFactoryInstance factoryInstance = (SpringFactoryInstance) inst;return factoryInstance.lookup();}/***Spring工厂实例,执行实际的查找动作.**@author yrliang**/static class SpringFactoryInstance extends FactoryInstance { SpringFactoryInstance(SpringFactory factory, String id, ConfigMap properties) {super(factory, id, properties);}@Overridepublic String toString() {return"SpringFactory instance for id="+ getId() + " source=" + getSource() + " scope=" + getScope();}@Overridepublic Object lookup() {Logger logger =LoggerFactory.getLogger(SpringFactory.class);ApplicationContext appContext = WebApplicationContextUtils .getWebApplicationContext(flex.messaging.FlexContext.getServletCo nfig().getServletContext());String beanName = getSource();try {logger.debug("lookup(): bean id=" + beanName);//flex.messaging.FlexContext.getHttpRequest().getSession().getAttribute (arg0);return appContext.getBean(beanName);} catch (NoSuchBeanDefinitionException nexc) {ServiceException e = new ServiceException();String msg = "Spring service named '"+ beanName + "' does not exist.";e.setMessage(msg);e.setRootCause(nexc);e.setDetails(msg);e.setCode("Server.Processing");logger.error("",nexc);throw e;} catch (BeansException bexc) {ServiceException e = new ServiceException();String msg = "Unable to create Spring service named '" + beanName + "' ";e.setMessage(msg);e.setRootCause(bexc);e.setDetails(msg);e.setCode("Server.Processing");logger.error("",bexc);throw e;}}}}3)配置service-config.xml<?xml version="1.0" encoding="UTF-8"?><services-config><factories><factory id="spring"class="com.grgbanking.platform.core.flex.spring.SpringFactory"/> </factories><services><service-include file-path="remoting-config.xml" /><service-include file-path="proxy-config.xml" /><service-include file-path="messaging-config.xml" /><service id="spring-remoting-service"class="com.grgbanking.platform.core.flex.spring.SpringRemotingDestina tionBootstrapService"><!-- 其它生成的RemotingDestination默认属性<adapters><adapter-definition id="java-object"class="flex.messaging.services.remoting.adapters.JavaAdapter"default="true" /></adapters><default-channels><channel ref="my-amf" /></default-channels>--><properties><!--<service-id></service-id><dest-factory></dest-factory><dest-adapter></dest-adapter><dest-scope></dest-scope><dest-channel></dest-channel><dest-security-constraint></dest-security-constraint><includeEndsWithBeans></includeEndsWithBeans>--></properties></service></services>4)FLEX客户端调用this.blogFlexService = new RemoteObject("blogFlexService");//这里需要指定endpoint,因为是动态的RemotingDestination,而静态的RemotingDestination ,flex编译器会将endpoint编译进源代码.//这个也是flex编译器需要指定配置文件而导致使用flex经常会犯的错误之一.this.blogFlexService.endpoint = '../messagebroker/amf';3.公司应用案例这种整合最早是在2010年的FEEL View 5.0中使用,后台的统一平台,FEEL View5.1中都采用这种方法进行整合。


概述了柔性制造技术的基本概念、优缺点、发展的支撑条件等,探讨了柔性制造技术发展的现状与趋势,并指出“柔性”“敏捷”“智能”和“集成”乃是现今制造设备和系统的主要发展方向。
1 柔性制造技术(FMT)1.1 基本概念柔性制造技术(FMT)可以表述为两个方面:一是系统适应外部环境变化的能力,可用系统满足新产品要求的程度来衡量:二是系统适应内部变化的能力。
可用在有干扰情况下系统的生产率与无干扰情况下的生产率期望值之比来衡量。
“柔性”是相对于“刚性”而言的。
传统的“刚性”自动化生产线主要实现单一品种的大批量生产,优点是生产率高,设备利用率高,单件产品成本低。
但只能加工一种或几种相类似的零件,难以应付多品种中小批量的生产。
随着批量生产时代逐渐被适应市场动态变化的生产所替换,一个制造自动化系统的生存能力和竞争能力在很大程度上取决于它是否能在很短的开发周期内生产出较低成本、较高质量的不同品种产品的能力。
在现实社会中,人们通常将用以生产产品的制造系统根据其一次投产的数量而分为大量、批量和单件生产3种类型。
近20年来.世界市场从相对稳定型转向动态多变型。
市场的需求和企业产品特点表现为:市场的竞争日益激烈、市场需求的多变性和不可预测性、产品生命周期日益缩短、产品需求趋于顾客化。
在这种动态竞争全球化的市场环境中,企业生存和可持续发展已成为必须首先考虑的问题,这迫使企业努力寻找一种具有高柔性、高生产率、高质量和低成本的产品零件加工制造系统来替代传统制造系统,以期用最短的生产周期对市场需求变化作出响应,并使包括厂房、设备及人力在内的资源得到最有效地利用,达到企业生产经营能力整体优化的目的。
FMT所采用的一些原理和技术途径包含有非常先进的制造哲理和技术观念。
柔性制造系统(FMS)是能够覆盖上述3类制造系统基本原理和概念的一种制造系统。
柔性制造设备或系统正成为制造业领域中极为重要的主力制造设备。
1.2 柔性柔性制造系统(FMS)必须以柔性制造设备,如托盘化CNC加工中心机床为基础,而不能由没有固有柔性(Flexibility)的设备,如专用机床来构成。


and best practices Sunny SuenManaging Principal, AsiaESP Solutions ConsultingFlexConnector deep dive and best practicesAgendaFlexConnector deep dive•Customized event feeding options•Advanced topics in FlexConnector development FlexConnector best practices•Essential steps on FlexConnector configuration & development•Best Practice of FlexConnector submission to improve –Maintainability–Readability–Efficiency–Accuracy Target audienceGo through FlexConnector training and documentationHave created FlexConnector in practical environment ReferenceDocumentation•FlexConnector Development Guide•ArcSight Categorization Technical Note•Other SmartConnector Configuration GuideTraining•FlexConnector TrainingIntroductionSmartConnector architectureIDSFirewallUnix SyslogArcSight managerSmartConnector•An application that collects raw events from security devices, processes them into HP ArcSight security events, and transports them to destination devices. •SmartConnectors are generally one of the following types –File Connectors–Database Connectors–API Connectors–SNMP Connectors–Microsoft Windows Event Log Connectors–SyslogConnectors–ScannerConnectors–FlexConnectors–ModelConnectors FlexConnector•The FlexConnector framework is a software development kit (SDK) that lets you create a SmartConnector tailored to the devices on your network and their specific event data. •The available FlexConnectors are:–Logfile FlexConnector (fixed-format)–Regex FlexConnector (variable-format)–Database FlexConnectors–SNMP FlexConnector–Syslog FlexConnector–XML FlexConnector–Scanner FlexConnector–REST FlexConnector–Key-value FlexConnector (via Logfile/RegexFlexConnector)SmartConnector vs. FlexConnectorDo we need FlexConnector?First, capture the requirement•Capture all device log details–Vendor Name (e.g. ABCDE Technologies)–Product Name (e.g. ABCDE Web Server)–Software/Firmware version (e.g. version X.X)–Log Type (e.g. flat file)–Log format / transport (Free format text log)–Log rotation scheme (Daily; filename containing event log date: AccessLog_yyyyMMdd.log) –Event Type (e.g. access audit log)•Match supported device list of SmartConnector–If not in the list, seek for following options…Do we need FlexConnector?Options for customized event feeding•FlexConnector Development–For a complete development of parser/categorization on all required events –Identify FlexConnector format / transport•Reuse of SmartConnector parser/categorization–Partial development for unparsed/uncategorized events–Identify the similar type of parser/categorization•Map files/External Mapper–For further interpretation some event values–E.g. elaborating department name “HR” to “Human Resource Department” •Common Event Format (CEF)–Add/modify application log format as CEF outputFlexConnector developmentType of FlexConnectors•Logfile FlexConnector (fixed-format)•Regex FlexConnector (variable-format)•Database FlexConnectors•SNMP FlexConnector•Syslog FlexConnector•XML FlexConnector•Scanner FlexConnector•REST FlexConnector•Key-value FlexConnector (via Logfile/Regex FlexConnector)Reuse of SmartConnector parserWhen I need this?To reuse (convert) standard SmartConnector’s parser of the required log transport type, such as •Convert a file-based FlexConnector to folder-based FlexConnector• A file-based FlexConnector is wrapped by syslog transportHow to use it?•Identify the folder/file name of standard parser file (from aup)unzip -l {$Connector}/current/system/agent/arcsightagents.aup– e.g. apache/apache_access_file•Scenario 1: Converting standard file reader Connector to multi-folder Connector–Configure Multi-Folder FlexConnector to assign the configfile as the standard parser path agents[0].foldertable[0].configfile=apache/apache_access_file •Scenario 2: Converting standard file reader Connector to syslog transport–Create Syslog FlexConnector with following extraprocessor statementextraprocessor[0].type=regexextraprocessor[0].filename=apache/apache_access_fileReuse of SmartConnector categorizationWhen I need this?To reuse the standard categorization file of one supported device to the FlexConnector How to use it?•Check in the agent.log on the categorization file being used•Identify the folder/file name of standard categorization file (from aup)unzip -l {$Connector}/current/system/agent/arcsightagents_{date-version}.aup –e.g. apache/apache.csv•Create additional categorization file, e.g. newvendor/newproduct.csv•Include the folder/file name of standard categorization file into the link file, e.g.–Create a file newvendor/newproduct.link.csv in the acp/categorizer/current folder–Add following lines into newproduct.link.csv•/apache/apache.csv•/newvendor/newproduct.csvMap file revisitWhen I need this?To map additional values from event field(s) to assign new values How to use it?•create map.n.properties (where is 1,2,3,etc in sequence)•put getter and setter mapping on the first line of the map.n.properties file, such as –Line 1: Getters and setters•event.deviceHostName,set.event.deviceCustomString1–Line 2 onwards: value mapping•Host1,HR Dept•Host2,FIN DeptType of getters•Exact match: Header Row=event.deviceHostName, data=Host1•Range: Header Row=range.event.destinationPort, data=10000-19999 •Regex: Header Row=regex.event.deviceHostName, data=HR.*When I need this?Perform external database query on event field for additional mapping information How to use it?•Check the agent URI (with 2 ‘equal sign (==)’ suffices)•Create the folder: user/agent/extmap/{agent URI}•Create the external mapper file extmap.n.properties (where n=1,2,3… in sequence) into this folder(Continued)•Add following lines into the extmap.n.propertiestype=sqlfield.getter=deviceAddressfield.setter.count=1field.setter[0]=deviceCustomString1#field.addrs.as.numbers=truejdbc.class=org.gjt.mm.mysql.Driverjdbc.url=jdbc:mysql://localhost:3306/threatIntelername=inteljdbc.password=OBFUSCATE.4.8.1:LOX6GXaJ+5imr6M1wmwkNg==jdbc.query=select address, threatVector from watchList WHERE address in (?\u0000?) •The password has can be created by this command./arcsight agent runjava com.arcsight.agent.loadable._ExternalMapperComponent -p 'arcsight'Type of FlexConnectorsCEF formatWhen I need this?To adapt the application log to ArcSight CEF format. This can eliminate the FlexConnector parser maintenance afterwardsHow to use it?•Obtain the “Common Event Format” Documentation•Adapt the application log output to CEF format•Create event categorization file based for all possible event types HP ArcSight Common Event FormatAdvanced topics in FlexConnector development Scope•Advanced techniques commonly encountered in practical environment•Not currently discussed in documentation in detailsTopics•Fragmented event lines•Character encodingFragmented event linesWhen I need this?Some devices send single event in multiple log linesTo merge the information of all the related events into a single one Handling options•multiline.regex•Regex (?s)•Line.ignore.regex•Event mergingWhen I need this?In some instances the events sent by the device will not necessarily be close together, there could be events that will be sent in between other events, such asHow to use it?Use merge parameters:merge.count=1merge[0].pattern.count=2merge[0].pattern[0].token=NAME1merge[0].pattern[0].regex=(BIND|UNBIND|MOD|R ESULT)merge[0].pattern[1].token=NAME2merge[0].pattern[1].regex=(BIND|UNBIND|MOD|R ESULT)2merge[0].starts.count=1merge[0].starts[0].token=NAME3merge[0].starts[0].regex=(BIND|UNBIND|MOD) merge[0].ends.count=3merge[0].ends[0].token=NAME4 merge[0].ends[0].regex=RESULT merge[0].ends[1].token=NAME5 merge[0].ends[1].regex=RESULT2 merge[0].ends[2].token=NAME6 merge[0].ends[2].regex=RESULT3 merge[0].timeout=60000 merge[0].id.tokens=conn|msgId merge[0].id.tokens.delimiter=| merge[0].sendpartialevents=true merge[0].capacity=100(Continued)Character encodingWhen I need this?The raw log data contains non-ASCII charactersHow to use it?Configuration: agent.properties•The Multi Folder Follower FlexConnector–agents[0].foldertable[0].encoding=UTF-16LE•SNMP FlexConnector–snmp.charset={Your character set for the foreign language} (such as snmp.charset=big5) Configuration: JVM option•For other FlexConnector (such as Syslog FlexConnector)–In ${CONNECTOR}/current/bin/scripts/connectors.sh (or connectors.bat), append following options in the “ARCSIGHT_JVM_OPTIONS”:-Dfile.encoding=(character encoding) (such as -Dfile.encoding=gb2312)Character encoding(Continued)Development: regex–main / submessage regex statement•convert non-ascii/multi-byte characters into unicode notation, such as \u7528\u6236 (Chinese characters of ‘User’)••Folder structure FlexConnector Configuration ${ArcSight Connector Home}/current/user/agent User Development Folders •flexagent: parser•acp: event categorization•fcp: standard parser / parser override•map: map file•extmap: external mapper•lib: jdbc driverConfigurationagent.propertiesLocation under {$Connector_Home}/current•user/agentWhen I need it?To tune the advanced configuration parameters, such as:•File Rotation•Filename extractor•Subagent listRefer to agent.default.properties for more optionsHow to use it?•For Software Connector, modify the file directly in user/agent/agent.properties •For Connector Appliance, use “Diagnostic Wizard” and select agent.propertiesparser (*.properties)Location under {$Connector_Home}/current •user/agent/flexagentSections in properties file•Parser configuration•Token Declaration•ArcSight event field assignment•Severity mapping•Conditional mapping•ExtraprocessorPoint to Note•Proper comment should be required–Sample messages–Message group–Section headingFile extension and Locationflexagent/•Log-file: <product_name>.sdkfilereader.properties•Regex Log-file: <product_name>.sdkrfilereader.properties•Regex Folder Log-file: <product_name>.sdkrfilereader.properties•XML Folder Log-file: <product_name>.xqueryparser.properties•Time-based Database: <product_name>/<table_name>.sdktbdatabase.properties•ID-based Database: <product_name>/<table_name>.sdkibdatabase.properties •Multi-Database: <product_name>/table <n>/<table_name>.sdktbdatabase.properties •Syslog: s yslog/<product_name>.subagent.sdkrfilereader.properties •SNMP: <vendor>/sdksnmp.#.snmptrap.properties (where # = trap type) •Scanner (Normal Text): <vendor>.scanner.sdkrfilereader.properties•Scanner (XML): <vendor>.scanner. xqueryparser.properties•Scanner (Database): <vendor>. sdkdatabase.properties•REST: <product_name>.jsonparser.propertiesCategorization (*.csv)Location under {$Connector_Home}/current•user/agent/acp/categorizer/current/<device_vendor>/<device_product>.csvFile formatGetters and setters•Exact match, range, regex getters are all supportedSingle categorization file: vendor1/product1.csvMultiple categorization file: vendor1/product1.link.csv, vendor1/product.csv and vendor1/product.0.csv Point to NoteFile name capitalization•All folder and file names are in small letters•Space or non-alphanumeric letters are converted into underscore ‘-’, such as–AS/400 -> as_400–Microsoft Windows -> microsoft_windowsCategorization (*.csv) (Continued)Point to Note (continued)•Try using Regex getter and put some catch all to enhance the categorization result, such as–Logon.* (For all undefined event type with “Logon” prefix)–.* (For all other undefined event type)•Required categorization fieldsregex.event.deviceEventClassId,set.event.categoryObject,set.event.category Behavior,set.event.categoryTechnique,set.event.categoryDeviceGroup,set.eve nt.categoryDeviceType,set.event.categoryOutcome,set.event.categorySignific ance,set.event.agentSeverity•Obtain the ArcSight Categorization Technical NoteKey field assignmentTopicsTime fields:•deviceReceiptTime, startTime, endTimeDevice name for categorization link:•deviceVendor / deviceProductEvent type:•name/deviceSeverity/deviceAction/deviceEventClassIdCustom fields•Use deviceCustom* and avoid flex*•flex* fields are reserved for console mapping to additional dataSource-destination vs attacker-target•Only use source/destination pair (e.g. sourceUserName/destinationUserName) •attacker/target pair: result of correlation, not to be assigned in FlexConnector Assignable fields (list of assignable fields in FlexConnector Developer’s Guide)Local testing (CSV/CEF output)When I need this?To test and debug the parser/categorization in the development phase, it will be more efficient to verify locally rather than submitting to logger and ESMHow to use it?•For connector destination, choose CEF log file or CSV log file•Select header row to help readablility•For CSV log file, you can choose the required fields as outputPackagingFor submission of FlexConnector for production usage, we recommend: •Single Package file•Folder structure following Connector installation standard•Put device vendor/device product/FlexConnector version number in the package name ExamplePackage: $deviceProduct_flexconnector_vx.x_yyyy-mm-dd.zipContent folder structure:acp/fcp/flexagent/DocumentationHighly recommend to provide following documentation in the FlexConnector files for ongoing maintenance:•Parser comments•Configuration DocumentationPlease fill out a survey.Hand it to the door monitor on your way out. Thank you for providing your feedback, which helps us enhance content for future events.Session TB3033 Speaker Sunny Suen Please give me your feedback。

Flex System CN4054 and CN4054R 10Gb Virtual Fabric AdaptersProduct Guide (withdrawn product)The Flex System™ CN4054 and CN4054R 10Gb Virtual Fabric Adapters are 4-port 10Gb converged network adapters (CNAs) that support Ethernet, iSCSI, and FCoE. The adapters support up to 16 virtual NIC (vNIC) devices, where each physical 10 GbE port can be divided into four virtual ports with flexible bandwidth allocation. The CN4054 Virtual Fabric Adapter Upgrade adds FCoE and iSCSI hardware initiator functionality to either adapter. The CN4054R adds support for compute nodes with the Intel Xeon E5-2600 v2 and v3 processors.Figure 1 shows the adapters (they have the same physical appearance).Figure 1. Flex System CN4054 & CN4054R 10Gb Virtual Fabric AdaptersDid you know?This CN4054 is based on industry-standard PCIe architecture and offers the flexibility to operate as a Virtual NIC Fabric Adapter. Because this adapter supports up to 16 virtual NICs on a single quad-port Ethernet adapter, you see benefits in cost, power/cooling, and data center footprint by deploying less hardware. Compute nodes like the x240 support up to two of these adapters for a total of 32 virtual NICs per system.Click here to check for updatesSupported serversThe following table lists the Flex System compute nodes that support the adapters.Table 2. Supported serversDescription Part numberFlex System CN4054 10Gb Virtual Fabric Adapter90Y3554Y N Y N N N Y N N N Flex System CN4054R 10Gb Virtual Fabric Adapter00Y3306N N N Y Y Y N Y Y*Y**90Y3558Y N Y Y Y Y Y Y Y*Y Flex System CN4054 Virtual Fabric AdapterUpgrade* Only supported in slots 1 and 2 of the x280 X6, x480 X6, and x880 X6** The Flex System CN4054R 10Gb Virtual Fabric Adapter with two ASICs is not supported in slots 3 and 4 See ServerProven at the following web address for the latest information about the expansion cards that are supported by each blade server type: /us/en/serverproven/flexsystem.shtmlI/O adapter cards are installed in the slot in supported servers, such as the x240, as highlighted in the following figure.Figure 2. Location of the I/O adapter slots in the Flex System x240 Compute NodeEmbedded 10Gb Virtual Fabric AdapterSupported I/O modulesThese adapters can be installed in any I/O adapter slot of a supported Flex System compute node. One or two compatible 1 Gb or 10 Gb I/O modules must be installed in the corresponding I/O bays in the chassis. The following table lists the switches that are supported. When connected to the 1 Gb switch, the adapter will operate at 1 Gb speeds. When connected to the 40 Gb switch, the adapter will operate at 10 Gb speeds. To maximize the number of adapter ports usable, you may also need to order switch upgrades to enable additional ports as listed in the table. Alternatively, for CN4093, EN4093R, and SI4093 switches, you can use Flexible Port Mapping, a new feature of Networking OS 7.8, that allows you to minimize the number of upgrades needed. See the Product Guides for the switches for more details:https:///servers/blades/networkmoduleThe table also specifies how many ports of the adapter are supported once the indicated upgrades are applied. Switches should be installed in pairs to maximize the number of ports enabled and to provide redundant network connections.Table 4. I/O modules and upgrades for use with the CN4054 and CN4054R adaptersDescription Part number Port count(per pairof switches)Lenovo Flex System Fabric EN4093R 10Gb Scalable Switch + EN4093 10Gb Scalable Switch (Upgrade 1)00FM51449Y47984Lenovo Flex System Fabric CN4093 10Gb Converged Scalable Switch + CN4093 10Gb Converged Scalable Switch (Upgrade 1)00FM51049Y47984Lenovo Flex System SI4091 10Gb System Interconnect Module00FE3272Lenovo Flex System Fabric SI4093 System Interconnect Module + SI4093 System Interconnect Module (Upgrade 1)00FM51895Y33184Flex System EN6131 40Gb Ethernet Switch90Y93462Flex System Fabric CN4093 10Gb Converged Scalable Switch + CN4093 10Gb Converged Scalable Switch (Upgrade 1)00D582349Y47984Flex System Fabric EN4093R 10Gb Scalable Switch + EN4093 10Gb Scalable Switch (Upgrade 1)95Y330949Y47984Flex System Fabric EN4093 10Gb Scalable Switch + EN4093 10Gb Scalable Switch (Upgrade 1)49Y427049Y47984Flex System EN4091 10Gb Ethernet Pass-thru88Y60432Flex System Fabric SI4093 System Interconnect Module + SI4093 System Interconnect Module (Upgrade 1)95Y331395Y33184Flex System EN2092 1Gb Ethernet Scalable Switch + EN2092 1Gb Ethernet Scalable Switch (Upgrade 1)49Y429490Y35624Cisco Nexus B22 Fabric Extender for Flex System94Y53502Flex System EN4023 10Gb Scalable Switch(Base switch has 24 port licenses; Upgrades 1 & 2 may be needed)94Y52124* This column indicates the number of adapter ports that will be active if indicated upgrades are installed. The following table shows the connections between adapters installed in the compute nodes to the switch bays in the chassis.Table 5. Adapter to I/O bay correspondenceI/O adapter slot in the server Port on the adapter Corresponding I/O module bayin the chassisSlot 1Port 1Module bay 1Port 2Module bay 2Port 3*Module bay 1Port 4*Module bay 2 Slot 2Port 1Module bay 3Port 2Module bay 4Port 3*Module bay 3Port 4*Module bay 4Slot 3(full-wide compute nodes only)Port 1Module bay 1 Port 2Module bay 2 Port 3*Module bay 1 Port 4*Module bay 2Slot 4(full-wide compute nodes only)Port 1Module bay 3 Port 2Module bay 4 Port 3*Module bay 3 Port 4*Module bay 4* Ports 3 and 4 require Upgrade 1 of either the EN4093 10Gb or the EN2092 1Gb switch. The EN4091 Pass-thru and Cisco B22 only supports ports 1 and 2 (and only when two I/O modules are installed).The connections between the adapters installed in the compute nodes to the switch bays in the chassis are shown diagrammatically in the following figure. The figure shows both half-wide servers, such as the x240 with two adapters, and full-wide servers, such as the p460 with four adapters.Figure 3. Logical layout of the interconnects between I/O adapters and I/O modules Operating system supportPopular configurationsThe adapters can be used in various configurations. The following figure shows CN4054 10Gb Virtual Fabric Adapters installed in both slots of the x240 (a model without the Embedded 10Gb Virtual Fabric Adapter), which in turn is installed in the chassis. The chassis also has four Flex System Fabric EN4093 10Gb Scalable Switches, each with Upgrade 1 installed to enable 28 internal ports.Figure 4. Example configurationThe following table lists the parts that are used in the configuration.Table 6. Components used when connecting the adapter to the 10 GbE switchesPart number/machine type Description Quantity1 to 148737-x1x Flex System x240 Compute Node or othersupported server (without Embedded 10Gb VirtualFabric Adapter)90Y3554Flex System CN4054 10Gb Virtual Fabric Adapter 2 per server8721-A1x Flex System Enterprise Chassis1495Y3309Flex System Fabric EN4093R 10Gb ScalableSwitch49Y4798Flex System Fabric EN4093 10Gb Scalable Switch4(Upgrade 1)Related publicationsTrademarksLenovo and the Lenovo logo are trademarks or registered trademarks of Lenovo in the United States, other countries, or both. A current list of Lenovo trademarks is available on the Web athttps:///us/en/legal/copytrade/.The following terms are trademarks of Lenovo in the United States, other countries, or both:Lenovo®Flex SystemServerProven®System x®VMready®The following terms are trademarks of other companies:Intel® and Xeon® are trademarks of Intel Corporation or its subsidiaries.Linux® is the trademark of Linus Torvalds in the U.S. and other countries.Microsoft®, Windows Server®, and Windows® are trademarks of Microsoft Corporation in the United States, other countries, or both.Other company, product, or service names may be trademarks or service marks of others.。

选型指南 | VLT® FlexMotion™终极自由 – 一个同时用于集中式和分布式伺服运动解决方案VLT® Multiaxis Servo Drive MSD 510, VLT® Integrated Servo Drive ISD® 510 和 VLT® Decentral Servo Drive DSD 510灵活系统适用于模块化机器系统VLT®VLT® Decentral Servo Drive DSD 510Danfoss Drives · DKDD.PB.702.A3.412 您是否正在努力对机器结构进行模块化,以适应您的业务需求?那就了解一下 Danfoss VLT® FlexMotion™ 吧。
这是一个多用途、通用型、可兼容的伺服驱动器概念,满足未来的机器结构要求而设计。
对各种模块进行组合和扩展来满足您的具体需求。
因此,其各种集中式和分布式模块让您能够实现多种功能。
开放的系统体系结构为您带来全面的自由,可选择的任何电机和 PLC 集成。
各种巧妙设计可实现快速安装和调试,从而节省时间和成本。
全部这些因素可以实现严苛环境下可靠的运行。
总而言之,该系统为您的机器设计带来终极自由度。
开放快速可靠VLT® Integrated Servo Drive ISD® 510VLT® Multiaxis Servo Drive MSD 5103Danfoss Drives · DKDD.PB.702.A3.41每个模块都让机器制造商能够保持最大灵活性,无论您需要添加新产品线 – 还是要通过增加伺服器扩展现有产品线。
4Danfoss Drives · DKDD.PB.702.A3.41使用多用途系统构建模块化机器可扩展概念现代机器系统需要在适应性和扩展方面具有极致灵活性。


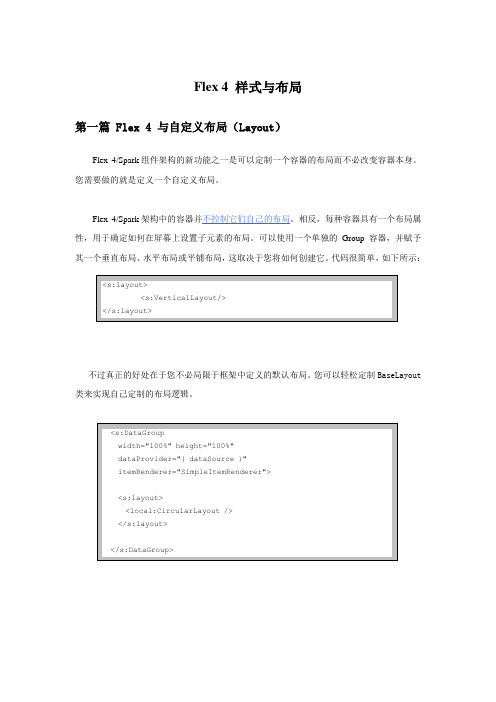
Flex 4 样式与布局第一篇 Flex 4 与自定义布局(Layout)Flex 4/Spark组件架构的新功能之一是可以定制一个容器的布局而不必改变容器本身。
您需要做的就是定义一个自定义布局。
Flex 4/Spark架构中的容器并不控制它们自己的布局。
相反,每种容器具有一个布局属性,用于确定如何在屏幕上设置子元素的布局。
可以使用一个单独的Group容器,并赋予其一个垂直布局、水平布局或平铺布局,这取决于您将如何创建它。
代码很简单,如下所示:(参考文章:Flex 4与自定义布局:译文:/lihe111/archive/2009/07/06/4325571.aspx原文:/2009/05/flex-4-custom-layouts.html)第二篇 Flex 4 SkinClass 改变组件外观在Flex 4中,SkinClass指向的文件通常用一个使用s:skin标签(或者sparkskin)的MXML 文件进行定义。
通过skinclass来改变外观的spark组件通常也是skinclass引用的Host component。
Flex 4 中新的改变外观架构可以在很大的程度上将组件和组件的外观设计分开,这样组件外观设计的代码通过改变小部分的代码就可以得到重用了。
一、SkinClass必须包含的三样东西:1、HostComponent metadataSkinClass文件需要引用HostComponent对象,而HostComponent是指需要改变外观的组件。
我们可以通过metadata标签来指定HostComponent。
如:我们需要设置Button 的外观,那么Button就是HostComponent。
Code:1.<fx:Metadata>2. <![CDATA[3. [HostComponent("ponents.Button")]4. ]]>5.</fx:Metadata>2、States如果HostComponent中有SkinState(一般用metadata标签来声明),例如:s: ButtonBase 中包含了 1. [SkinState("up")]那么在相应的skinclass mxml 文件中必须有如下相应的state : 1. <s:states>2. <s:State name="up"/>3、 Skin partsHostComponent 中的属性可以被定义为必须或者是可选的部分(skin parts ),可选的属性一般通过metadata 标签将其默认设置为false 。


Flex模块,Durability模块培训安排:1、为什么要在ADAMS中使用弹性体?〔单提拉弹射发射的例子〕在ADAMS中我们一般都把构件当成刚体来处理,这种构件在力的作用下不会产生变形,在现实中,把样机当成刚性系统来处理,在大多数情况下是可以满足要求的,但是在一些需要考虑构件变形的特殊情况下,完全把模型当成刚性系统来处理就不能到达精度要求,必须把模型中的局部构件做成可以产生变形的弹性体来处理,例如对汽车的转向机构进行研究时,需要考虑转向系统的转向臂的变形,导弹冷发射时需要考虑提拉杆弹性横向振动。
使用弹性体的最终目的就是更加真实的模拟我们设计的产品,建立精度更高的虚拟样机模型,使仿真分析更加精确,更能提高产品性能。
2、ADAMS/Flex模块介绍〔好处,界面介绍〕ADAMS/Flex是ADAMS软件包中的—个集成可选模块,提供了与ANSYS,MSC/NASTRAN,ABAQUS,Hypermesh等软件的接口,可以方便地考虑零部件的弹性特性,建立多体动力学模型,以提高系统仿真的精度。
ADAMS/Flex模块支持有限元软件中的MNF(模态中性文件)格式。
结合ADAMS/Linear模块,可以对零部件的模态进行适当的筛选,去除对仿真结果影响极小的模态,并可以人为控制各阶模态的阻尼,进而大大提高仿真的速度。
同时,利用ADAMS/Flex模块,还可以方便地向有限元软件输出系统仿真后的载荷谱和位移谱信息,利用有限元软件进行应力、应变以及疲劳寿命的评估分析和研究。
ADAMS/Flex中表述柔性体的方法是模态柔性方法,也就是分配一组模态振型集〔频率特征向量〕给柔性体,柔性体建模element分配一个状态变量给每个特性向量,在计算时间内,Flex计算每个特征向量的振幅,接着使用线型叠加原理来组合每个时刻各个模态形状产生总的柔性体的变形。
ADAMS/Flex中柔性体的变形是变形形状的线型组合,如果变形比较大的话〔非线型的〕我们就要采用简化的方法来处理:把非线型的柔性体飞行许多段后处理。

Flex 4 最佳集成实践苏春波, 高级软件工程师, HP简介: Flex 受到越来越多人的青睐,同时一些问题也涌现出来了,比如,代码结构,不同层间的信息交换不是很清晰等,使后期维护成本升高。
本文将通过具体实例来解决这些问题。
前言对于一个 web 软件项目而言,实现客户需要的基本功能往往是最基本的需求,随着软件的进一步发展和人们审美水平的逐步提高,客户已经不仅仅只是能满足功能性需求那么简单了,他们有了进一步的追求,呵呵,功能不但要强大,而且还要有漂亮、易于操作,甚至是能减少视觉疲劳的界面,这样一来一大群 UI 设计者如雨后春笋般应势而生,UI 也变得复杂起来了。
软件的生命周期因此而有小幅增长,“天空一声霹雳响,诞生 Flex 来帮忙”借用一下顺溜里面的一句话,Flex 的出现是软件开发者的福音,用它设计的界面不但绚丽多彩而且开发起来也相对简单,不但能缩短软件开发周期,还能给用户有一种好的视觉享受。
Flex 4 新特性总结了一下 Flex 4 的新特性,有助于用户更好的使用,理解它。
1) 代码模板虽然现在我们也可以通过插件来实现代码模板,但是总还是原生支持来的更舒服。
代码模板还支持“环境变量”,例如你可以向模板中添加“${project_name}”,则这部分内容会被转化成工程名称。
代码模板可以在偏好 (Preference) 中进行配置。
2) 悬停时的 ASDoc 提示也是从 Eclipse 中“继承”下来的功能,支持 ASDoc 中的链结3) Getter & Setter方便地在代码中添加 Getter 和 Setter。
(这里有个小插曲,Heidi 在演示前忘了把代码恢复成没有 Setter 的状态,所以她不得不现场把代码改回去,还很可爱的对观众们说“别看” ^_^ )。
4) 自动生成 Event Handler这个功能比用代码模板要方便得多。
5) 包重构重构功能一直是我对 Flex Builder 比较不满意的地方。
说实话,基于包的重构应该是比较基本的功能了。
6) Run to Line有的时候我们调试时会发现断点设置的并不合理,例如断点位置离我们关注的代1.下载开发 Flex 的 SDK :/cfusion/entitlement/index.cfm?e=flex4sdk (注意:是 flex4sdk);2.Flex SDK 下载完后点击安装文件开始安装,安装完后激活即可使用;3.安装 web 环境,将下载的 Apache-Tomcat-6.0.18 解压到指定目录,如c:\tomcat6;4.下载 Spring Framework:/download;5.下载 BlazeDS:/wiki/display/blazeds/BlazeDS初识 Flex 4新建一个 flex project,命名为 flexProjectForIBM, Flex SKD version 选择Flex 4.1( 一定是 4 以上的版本,版本 3 和 4 有很多差别的 ),其他选项默认即可,Main source folder 选择默认,Output folder 为 bin-debug, Output folder URL 为 http://localhost:8080/flexProjectForIBM, 规则为服务器地址加上工程名称,之所以是工程名称是因为我们以工程名称为包名部署到服务器中的,然后我们编辑 flexProjectForIBM.mxml 文件,增加一个 label,一个输入框,一个按钮,label 文本内容为“请输入员工姓名”,按钮命名为“查询”,然后我们在浏览器中输入http://localhost:8080/flexProjectForIBM/bin-debug/flexProjectForIBM.h tml, 我们就可以看到应用的主页了,主页内容显示如下:图 1.Flex UIFlex project 我们已经成功部署到服务器。
下面我们看下 Flex 是怎样与BlazeDS 集成的。
Flex 4 与 BlazeDS 集成首先我们修改 web.xml 文件,增加一个监听,内容见清单 1,一个 Servlet,内容如清单 2 所示:清单 1. 增加的监听<listener><listener-class>flex.messaging.HttpFlexSession</listener-class></listener>清单 2. 增加的 servlet<servlet><servlet-name>MessageBrokerServlet</servlet-name><servlet-class>flex.messaging.MessageBrokerServlet</servlet-class> <init-param><param-name>services.configuration.file</param-name><param-value>/WEB-INF/flex/services-config.xml</param-value></init-param><load-on-startup>1</load-on-startup></servlet><servlet-mapping><servlet-name>MessageBrokerServlet</servlet-name><url-pattern>/messagebroker/*</url-pattern></servlet-mapping>然后将 blazeds.war 解压到某个目录下,将 WEB-INF 下的 flex 和 lib 目录复制到 flexProjectForIBM 的 WEB-INF 下面,flex 目录下面包括 4 个文件,分别是messageing-config.xml,proxy-config.xml,remoting-config.xml,services-c onfig.xml,建议不要修改这 4 个文件的名称,他们的具体作用可以参考BlazeDS 的官方文档,这里不再描述了。
下面新建一个 java project 取名为serviceProjectForIBM, 然后新建一个接口 HelloWorld,并新建一个方法sayHelloToSomeone,新建一个 HelloWorld 的实现类 HelloWorldImpl,实现sayHelloToSomeone 方法,如清单 3 所示:清单 3.sayHelloToSomeone 实现方法package org.ibm.flex.service.impl;import org.ibm.flex.service.HelloWorld;public class HelloWorldImpl implements HelloWorld {@Overridepublic String sayHelloToSomeone(String name) {return "Hello "+name;}}后台的服务已经开发完毕,然后我们打成一个 service-for-flex.jar 包放到上面的 flexProjectForIBM 工程的 WAR 包里面。
然后我们在修改下flexProjectForIBM.mxml 文件,增加 4 个标签,一个输入框和一个命令按钮,详细命名与布局见清单 4 所示:清单 4. 与 BlazeDS 集成的 UI 变化<mx:Button x="324"y="103"label="Call remote method"click="remotingSayHello(event);"/> <mx:TextInput x="148"y="103"id="tiName"/><mx:Label x="98"y="105"text="name:"/><mx:Label text="{stResult}"x="52"y="162"width="448"height="71"id="lblView"color="#FCEE09"fontSize="20"fontWeight="bold"textDecoration="underline"fontStyle="normal"/><s:Label x="54" y="87" text="Remote service test:"/><s:Label x="54" y="142" text="Remote method result:"width="131"/>注意一下 lblView 的 text 值的设置。
我们这时候会发现清单 4 中的remotingSayHello 方法在上面也没有定义呀,你说对了,下面我们看下remotingSayHello 方法的定义,这是一个调用远程服务的方法,具体内容见清单 5 所示:清单 5. remotingSayHello 内容<fx:Script><![CDATA[function remotingSayHello(event:Event):void{var iname:String=tiName.text;say.sayHelloToSomeone(iname);}]]></fx:Script>注意上面的 say 是我们定义的一个远程对象,具体内容见清单 6 所示:清单 6. 定义远程对象<mx:RemoteObject id="say"destination="HelloWorld"endpoint="/flexProjectForIBM/messagebroker/amf"></mx:RemoteObject>注意上面的 endpoint 这个时候我们是一定要配置的,否则调用不到远程服务的,后面我们将会去掉这一冗余配置,destination 是我们在remoting-config.xml 定义的,详细内容见清单 7 所示:清单 7. remoting-config.xml 的配置<destination id="HelloWorld"><properties><source>org.ibm.flex.service.impl.HelloWorldImpl</source></properties></destination>以上步骤一定要仔细配置,有时候只是错了一小点,可是检查起来确是很困难的,那样的费时费力确实是使人很郁闷的。