kindeditor使用方法==
- 格式:docx
- 大小:20.44 KB
- 文档页数:16
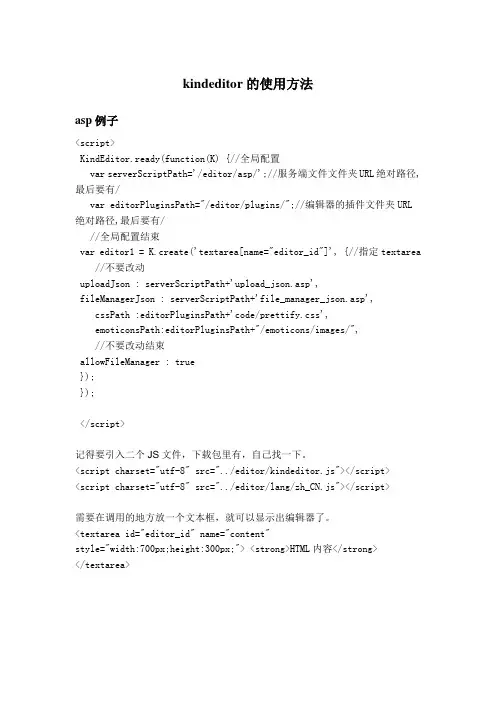
kindeditor的使用方法asp例子<script>KindEditor.ready(function(K) {//全局配置var serverScriptPath='/editor/asp/';//服务端文件文件夹URL绝对路径,最后要有/var editorPluginsPath="/editor/plugins/";//编辑器的插件文件夹URL绝对路径,最后要有///全局配置结束var editor1 = K.create('textarea[name="editor_id"]', {//指定textarea //不要改动uploadJson : serverScriptPath+'upload_json.asp',fileManagerJson : serverScriptPath+'file_manager_json.asp',cssPath :editorPluginsPath+'code/prettify.css',emoticonsPath:editorPluginsPath+"/emoticons/images/",//不要改动结束allowFileManager : true});});</script>记得要引入二个JS文件,下载包里有,自己找一下。
<script charset="utf-8" src="../editor/kindeditor.js"></script><script charset="utf-8" src="../editor/lang/zh_CN.js"></script>需要在调用的地方放一个文本框,就可以显示出编辑器了。
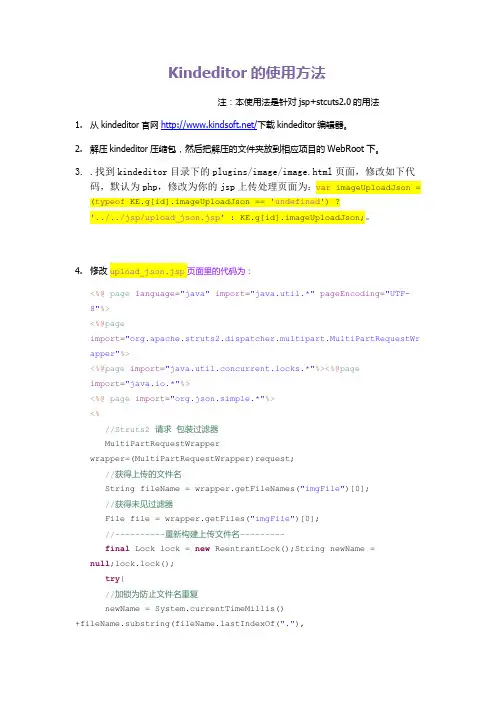
Kindeditor的使用方法注:本使用法是针对jsp+stcuts2.0的用法1.从kindeditor官网/下载kindeditor编辑器。
2.解压kindeditor压缩包,然后把解压的文件夹放到相应项目的WebRoot下。
3..找到kindeditor目录下的plugins/image/image.html页面,修改如下代码,默认为php,修改为你的jsp上传处理页面为:var imageUploadJson = (typeof KE.g[id].imageUploadJson == 'undefined') ?'../../jsp/upload_json.jsp' : KE.g[id].imageUploadJson;。
4.修改upload_json.jsp页面里的代码为:<%@ page language="java" import="java.util.*" pageEncoding="UTF-8"%><%@pageimport="org.apache.struts2.dispatcher.multipart.MultiPartRequestWr apper"%><%@page import="java.util.concurrent.locks.*"%><%@pageimport="java.io.*"%><%@ page import="org.json.simple.*"%><%//Struts2 请求包装过滤器MultiPartRequestWrapperwrapper=(MultiPartRequestWrapper)request;//获得上传的文件名String fileName = wrapper.getFileNames("imgFile")[0];//获得未见过滤器File file = wrapper.getFiles("imgFile")[0];//----------重新构建上传文件名---------final Lock lock = new ReentrantLock();String newName = null;lock.lock();try{//加锁为防止文件名重复newName = System.currentTimeMillis()+fileName.substring(stIndexOf("."),fileName.length());}finally{lock.unlock();}//------锁结束---------//获取文件输出流FileOutputStream fos = newFileOutputStream(request.getSession().getServletContext().getRealP ath("/")+"ke_upload/" + newName);//设置 KE 中的图片文件地址String newFileName = request.getScheme() + "://"+request.getServerName() + ":" + request.getServerPort()+request.getContextPath() + "/ke_upload/" + newName;byte[] buffer = new byte[1024];//获取内存中当前文件输入流InputStream in = new FileInputStream(file);try{int num =0;while((num = in.read(buffer)) >0){fos.write(buffer,0,num);}}catch(Exceptione){e.printStackTrace(System.err);}finally{in.close();fos.close();}//发送给 KEJSONObject obj = new JSONObject();obj.put("error", 0);obj.put("url", newFileName);out.println(obj.toJSONString());%>5.进入kindeditor\jsp\lib目录下,把commons-fileupload-1.2.1.jar、commons-io-1.3.2.jar、json_simple-1.1.jar这三个jar包放到相应项目的WEB-INF 文件夹下的lib文件夹里面:6.进入kindeditor\jsp的demo.jsp页面。
详细介绍如何使用kindEditor 编辑器今天群里的朋友问我能不能写个kindEditor 编辑器的使用教程,说是弄了半天没有搞定。
由于PHP 啦后台正好用了这个编辑器,我有写经验,正好教他的同时写出来分享给大家kindEditor 编辑器是一个由JS 写成的在线编辑器,很多网站或CMS 等都有用它,口碑不错,目前最新版本是4.1.10。
其实它的用法非常简单,我是在下载了它的安装包后看了一些demo 然后就把它放到PHP 啦的后台上去了。
好了教程正式开始一、下载下载最新版本的kindEditor (官方网站 ),下载后打开examples/index.html 就可以看到一排例子。
二、部署将解压后的文件包kindeditor-4.1.10里的asp jsp php 这几个带有服务端脚本的文件夹删除,然后上传到你网站的相应目录中,在这里我假设放到了plugin 目录。
三、嵌入在需要加入编辑器的页面的HTML 中倒入1 <link rel="stylesheet" href="/plugin/kindeditor-4.1.10/themes/default/default.css" /> 2 <script charset="utf-8" src="/plugin/kindeditor-4.1.10/kindeditor-min.js"></script>3 <script charset="utf-8" src="/plugin/kindeditor-4.1.10/lang/zh_CN.js"></script> 然后添加一个输入框1 <textarea id="editor_id" name="content"></textarea>最后在加入一段JS1 KindEditor.ready(function(K) {2 window.editor = K.create('#editor_id',{3 cssPath:'/public/plugin/editor/plugins/code/prettif y.css',4 uploadJson:'/upload/image.php',5 resizeType :1,6 allowPreviewEmoticons : true,7 allowImageUpload : true,8 });9 });好了。
kindeditor用法详解
kindeditor是一个基于JavaScript的富文本编辑器,它具有简单易用、功能强大、兼容性好等特点。
下面是对kindeditor用法的一些详细解释。
一、引入kindeditor
在使用kindeditor之前,需要先引入kindeditor的库文件。
可以通过下载kindeditor的压缩包,或者通过CDN引入kindeditor。
例如,通过CDN引入kindeditor的代码如下:
二、创建kindeditor编辑器
在HTML中创建一个textarea元素,并为其指定一个id或class,然后通过JavaScript代码将其转换为kindeditor编辑器。
例如,将id为"editor"的textarea元素转换为kindeditor编辑器的代码如下:
三、使用kindeditor编辑器
使用kindeditor编辑器非常简单,可以通过调用editor对象的方法来执行各种操作。
以下是一些常用的方法:
1.获取编辑器内容:
2.设置编辑器内容:
3.插入图片:
4.插入链接:
5.获取焦点:
6.执行其他操作:
kindeditor还提供了许多其他方法,例如删除选中内容、查找和替换文本、设置样式等。
可以参考kindeditor的官方文档或示例代码来了解更多用法。
配置KindEditor文本编辑器时间:2012-06-16 10:23来源:/ForEvErNoME 作者:ForEvErNoME 点击:1116次我要投稿高质量的 空间,完美支持1.0/2.0/3.5/4.0/MVC等之前一直使用CKEditor和CKFinder结合的文本编辑器,偶然机会看到KindEditor,感觉界面挺好看的,示例代码比较多,API文档内容清晰简单,于是下载尝试用下。
1.什么是KindEditorKindEditor 是一套开源的在线HTML编辑器,主要用于让用户在网站上获得所见即所得编辑效果,开发人员可以用KindEditor 把传统的多行文本输入框(textarea)替换为可视化的富文本输入框。
KindEditor 使用JavaScript 编写,可以无缝地与Java、.NET、PHP、ASP 等程序集成,比较适合在CMS、商城、论坛、博客、Wiki、电子邮件等互联网应用上使用。
2.前期准备到官网下载最新版的KindEditor 4.11,解压文件后可得文件结构:asp:与asp结合的示例代码:与结合的示例代码attached:上传文件的根目录,可在相关的代码中修改examples:功能演示的示例代码jsp:与jsp结合的示例代码lang:语言包php:与php结合的示例代码plugins:控件的功能代码的实现kindeditor.js:配置文件kindeditor-min.js:集成文件由于使用的是,所以将不需要的文件夹删掉。
其中在中demo.aspx是参考代码,也可以删掉。
3.配置KindEditor(1)新建网站,将精简后的kindeditor文件夹放到网站根目录下下,并且引用kindeditor//bin/LitJSON.dll文件。
(2)新建index.aspx文件,引入相关文件<link href="kindeditor/plugins/code/prettify.css" rel="stylesheet" type="text/css" /> <script src="kindeditor/lang/zh_CN.js" type="text/javascript"></script><script src="kindeditor/kindeditor.js" type="text/javascript"></script><script src="kindeditor/plugins/code/prettify.js" type="text/javascript"></script> <script type="text/javascript">KindEditor.ready(function (K) {var editor = K.create('#content', {//上传管理uploadJson: 'kindeditor//upload_json.ashx',//文件管理fileManagerJson: 'kindeditor//file_manager_json.ashx',allowFileManager: true,//设置编辑器创建后执行的回调函数afterCreate: function () {var self = this;K.ctrl(document, 13, function () {self.sync();K('form[name=example]')[0].submit();});K.ctrl(self.edit.doc, 13, function () {self.sync();K('form[name=example]')[0].submit();});},//上传文件后执行的回调函数,获取上传图片的路径afterUpload : function(url) {alert(url);},//编辑器高度width: '700px',//编辑器宽度height: '450px;',//配置编辑器的工具栏items: ['source', '|', 'undo', 'redo', '|', 'preview', 'print', 'template', 'code', 'cut', 'copy', 'paste','plainpaste', 'wordpaste', '|', 'justifyleft', 'justifycenter', 'justifyright','justifyfull', 'insertorderedlist', 'insertunorderedlist', 'indent', 'outdent', 'subscript','superscript', 'clearhtml', 'quickformat', 'selectall', '|', 'fullscreen', '/','formatblock', 'fontname', 'fontsize', '|', 'forecolor', 'hilitecolor', 'bold','italic', 'underline', 'strikethrough', 'lineheight', 'removeformat', '|', 'image', 'multiimage','flash', 'media', 'insertfile', 'table', 'hr', 'emoticons', 'baidumap', 'pagebreak','anchor', 'link', 'unlink', '|', 'about' ]});prettyPrint();});</script>(3)在页面中添加一个textbox控件,将id命名为content,把属性"TextMode"属性改为Multiline。
KindEditr在miniUI中的应用系统:Win7开发环境:Java框架:OSGI前台jsp先定义一个textarea,如下:<textarea id="editor_id"name="editor_id"vtype="rangeChar:1,200"style="width: 80%; height: 370px; visibility:hidden;" runat="server"required="true"></textarea>我把它的取值和赋值都放在了js中,如下:var editorId = "editor_id";//定义变量为富文本IDvar editor = null;//定义富文本//写一个调用方法showeditorfunction showeditor() {//KindEditor.ready();方法用了之后在FireFox中无法编辑,所以用了.create试试editor = KindEditor.create('#' + editorId/*这里是富文本ID*/, {resizeType: 1,//设置只能改变高度allowPreviewEmoticons: false,allowImageUpload: true,afterBlur:function(){this.sync();},//失去焦点(blur)时执行的回调函数。
在画面编辑富文本时,同步数据,如果不写,无法用时取到最新的值,那么保存到数据库的值就是旧的afterCreate:function(){this.sync();}//当我不点击富文本直接进行其他操作时,就靠这个方法同步数据,用a fterBlur是无法同步的items: []//,//控制工具栏显示哪些按钮,不写时默认成全部显示});}新建,要将富文本设置为空时,如下:KindEditor.html("#editor_id","");有试过miniUI提供的editor.html("");,editor.html(null) ;,但是都不行,赋值不成功,在网上看到有大拿用这种写法的,试了发现好用,特别开心。

KindEditor3.5.2最新ASP/PHP版分享及使用方法最近做web网站在找编辑器的时候在选择编辑器,分别测试了fckeditor和kindeditor这两款,下面做一个简单的说明:[1].fckeditor编辑器对于从word复制过来的格式会乱掉,另外考虑其自身的安全问题,就没用它了[2].kindeditor则是js+html的编辑器,当然另外如果你加入图片上传功能就要提供php或asp的脚本[3].比较遗憾的是kindeditor只能传图片,其他附件无法上传,不过如果加入这个功能也不难,可以参考image上传来编写因此本次的重点就是讲解kindeditor的使用,刚好这次同时使用了asp和php编写,因此两个都会分享。
<!--more-->1.ASP版KindEditor3.5.2使用方法及常见问题使用的时候可以参考原版里面的asp/demo.asp来操作,这里要重点说明是关于调用编辑器代码:[javascript]<script type="text/javascript" charset="utf-8" src="../keditor/kindeditor.js"></script> <script type="text/javascript">KE.show({id : 'content',// 这个是相对于/plugins/image目录而言,一般保持默认即可imageUploadJson : '../../asp/upload_json.asp',fileManagerJson : '../../asp/file_manager_json.asp',// 同上allowFileManager : true,afterCreate : function(id) {KE.event.ctrl(document, 13, function() {KE.util.setData(id);document.forms['editForm'].submit();});KE.event.ctrl(KE.g[id].iframeDoc, 13, function() {KE.util.setData(id);document.forms['editForm'].submit();});}});</script>[/javascript]在asp要调用编辑器比较常见问题是图片上传问题,我说下我这个编辑器的配置目录问题(1).编辑器在根目录,而我调用编辑器是后台文章编辑,如下方式:|--keditor # 放在根目录防止爆后台路径|--admin/newedit.asp|--upload #上传目录放在根目录防止暴露后台地址(2).在asp的2个上传文件keditor\asp\file_manager_json.asp # 图片浏览在该文件中,涉及到上传目录的设置问题,代码如下:[vb]rootPath = "/upload/"rootUrl = "../upload/"[/vb]keditor\asp\upload_json.asp # 图片上传在该文件中,涉及到上传目录的设置问题,代码如下:[vb]'文件保存目录路径savePath = "/upload/"'文件保存目录URLsaveUrl = "../upload/"[/vb](3)同时在编辑器中加入插入代码的功能,具体不详说,查看附件代码这样子设置完目录的结构就不会出现"服务器出现故障"的提示,出现这个提示一般可能有以下几种情况:(1).上传目录设置问题(2).从官方下载的版本默认是utf-8格式,如果用到gbk中可能会出现这个错误提示(3).程序本身出错(没有修改程序是不会这个问题!)<a href='/wp-content/uploads/2011/03/keditor.zip'>点我下载:keditor 3.5.2 for asp Modify by 冷锋</a>2.PHP版KindEditor3.5.2使用方法及常见问题PHP版的和ASP原理差不多就是在目录设置有点不一样,注意下就可以了,就不多说,只说下目录结构:|--keditor # 更目录|--keditor/attached # 上传目录|--system/newedit.php # 调用编辑器页面目录在后台目录设置常见keditor/php目录下两个php文件,建议不要调整目录结构。

∙ 1.下载KindEditor最新版本。
打开下载页面。
∙ 2.把kindeditor放在你的网站目录下,随意目录,只要路径设置对就可以!∙ 3.要显示编辑器的位置添加TEXTAREA输入框。
如果已经有TEXTAREA,属性里添加ID即可。
∙代码∙<textarea id="content_1"name="content"style="width:700px;h eight:300px;"></textarea>∙ 4.在相应页面上添加kindeditor的引用,添加如下代码:∙∙代码∙<script type="text/javascript" charset="utf-8" src="/editor/ kindeditor.js"></script><script type="text/javascript">KE.show({id : 'content_1' //TEXTAREA输入框的ID });</script>∙∙src=..... 这里根据你的kindeditor放置位置而变化。
∙怎么获取textarea的文本内容?1.在<textarea id="content_1" name="content" style="width:700px;height: 300px;"></textarea>后面添加隐藏input和button,代码如下:∙代码∙<input id="content_1_1" type="hidden" runat="server" value=""/> <asp:Button ID="Button1" runat="server" Text="保存"OnClientClick="save();" OnClick="Button1_Click" CssClass="i_1" />∙添加事件处理代码1.首先是客户端代码,在服务器代码之前执行,代码如下:∙∙代码∙function save(){var s = KE.util.getData("content_1");s = KE.util.escape(s);document.getElementById("content_1_1").value = s;}∙∙已经在服务器控件中取到了,保存的时候保持content_1_1的value就可以了。

KindEditor使用手册一简单使用方法1. 把所有文件上传到程序所在目录下,例如:http://你的域名/editor/。
2. 在此目录下创建attached文件夹,并把权限改成777。
3. 要添加编辑器的地方加入以下代码。
(原来的TEXTAREA或其它编辑器可以先注释。
)这里[]里的内容要根据你的实际情况修改。
-----------------------------------------------------------------------<input type="hidden" name="[原TEXTAREA名字]" value="[这里放你要编辑的内容]"><script type="text/javascript" charset="utf-8" src="[JS路径]/KindEditor.js"></script><script type="text/javascript">var editor = new KindEditor("editor"); //创建编辑器对象editor.hiddenName = "[原TEXTAREA名字]";editor.editorWidth = "[编辑器宽度,例如:700px]";editor.editorHeight = "[编辑器高度,例如:400px]";editor.show(); //显示//提交时获得最终HTML代码的函数function KindSubmit() {editor.data();}</script>-----------------------------------------------------------------------4. FORM的onsubmit属性里添加KindSubmit()函数。
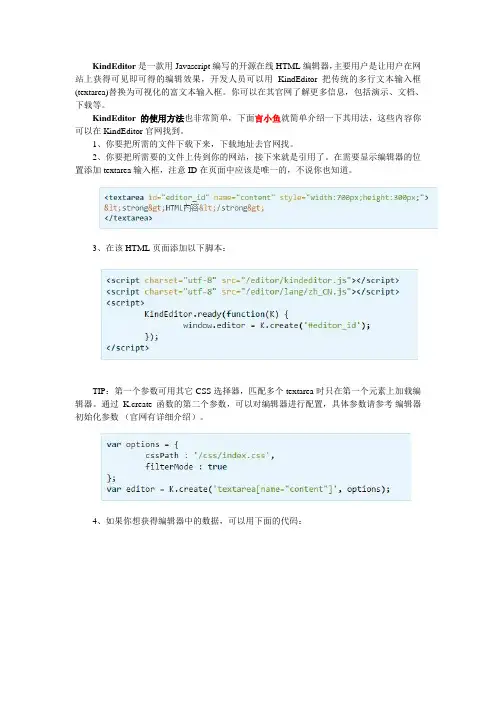
KindEditor是一款用Javascript编写的开源在线HTML编辑器,主要用户是让用户在网站上获得可见即可得的编辑效果,开发人员可以用KindEditor 把传统的多行文本输入框(textarea)替换为可视化的富文本输入框。
你可以在其官网了解更多信息,包括演示、文档、下载等。
KindEditor的使用方法也非常简单,下面言小鱼就简单介绍一下其用法,这些内容你可以在KindEditor官网找到。
1、你要把所需的文件下载下来,下载地址去官网找。
2、你要把所需要的文件上传到你的网站,接下来就是引用了。
在需要显示编辑器的位置添加textarea输入框,注意ID在页面中应该是唯一的,不说你也知道。
3、在该HTML页面添加以下脚本:
TIP:第一个参数可用其它CSS选择器,匹配多个textarea时只在第一个元素上加载编辑器。
通过K.create函数的第二个参数,可以对编辑器进行配置,具体参数请参考编辑器初始化参数(官网有详细介绍)。
4、如果你想获得编辑器中的数据,可以用下面的代码:
KindEditor的使用方法就介绍到这里了,如果您还有不明白的地方可以去官网查找详细资料,相信一定能找到您想要的答案!。
引用:/yanghbmail/blog/item/6fc7beec9531e33462d09f2a.htm lkindEditor完整认识 PHP上调用并上传图片说明。
2011年02月03日星期四 20:26最近又重新捣鼓了下kindeditor,之前写的一篇文章/yanghbmail/blog/item/c681be015755160b1d9583e7.htm l感觉有点不太全面细致,所以今天再重新写下。
此文所述KE版本为当前2011年2月3日 20:10:18最新版KindEditor 3.5.2 先看下目录结构我使用的是PHP 所以黄色区域的文件夹是可以删除的。
重命名为:kindeditor看下我的WWW目录:这里的关键文件就是图中的两个其它我划掉的是我自己的文件夹-----------------dome.php----------------------<?php$htmlData = '';if (!empty($_POST['content1'])) {if (get_magic_quotes_gpc()) {echo '上面的';$htmlData = stripslashes($_POST['content1']);} else {echo '下面的';$htmlData = $_POST['content1'];}}?><!doctype html><html><head><meta charset="utf-8" /><title>KindEditor PHP</title><link rel="stylesheet" href="./kindeditor/examples/index.css" /> //此处的引入文件位置路径为相对于该PHP文件的位置此为demo.php<script charset="utf-8" src="./kindeditor/kindeditor.js"></script> //此处的引入文件位置路径为相对于该PHP文件的位置此为demo.php<script>KE.show({id : 'content1',imageUploadJson : '../../php/upload_json.php', //<<相对于kindeditor3.5.5\plugins\image\image.htmlfileManagerJson : '../../php/file_manager_json.php', //<<相对于kindeditor3.5.5\plugins\file_manager\file_manager.htmlallowFileManager : true,afterCreate : function(id) {KE.event.ctrl(document, 13, function() {KE.util.setData(id);document.forms['example'].submit();});KE.event.ctrl(KE.g[id].iframeDoc, 13, function() {KE.util.setData(id);document.forms['example'].submit();});}});</script></head><body class="ke-content"><?php echo $htmlData; ?><form name="example" method="post" action="demo.php"><textarea id="content1" name="content1" cols="100" rows="8"style="width:700px;height:200px;visibility:hidden;"><?php echo htmlspecialchars($htmlData); ?></textarea><br /><input type="submit" name="button" value="提交内容" /> (提交快捷键: Ctrl + Enter)</form></body></html>注意上面的4处红色文件的位置。
KindEditor是一个流行的开源富文本编辑器,用于Web开发。
以下是KindEditor的基本用法:1. 引入KindEditor的JS文件:在HTML页面中引入KindEditor的JS文件,可以通过下载或在线引用。
确保在引入JS文件之前已经引入了jQuery库,因为KindEditor是基于jQuery的。
html复制代码<script src="path/to/kindeditor.js"></script>2. 创建KindEditor编辑器:在HTML页面中创建一个textarea元素,然后使用KindEditor的jQuery插件将其转换为富文本编辑器。
html复制代码<textarea id="editor"></textarea>javascript复制代码$(document).ready(function() {var editor = KindEditor.create('textarea[id=editor]', {width: '100%',height: '500px',// 其他配置项...});});3. 使用KindEditor的API:通过KindEditor提供的API,可以实现各种编辑器操作,如获取和设置内容、设置配置项、监听事件等。
可以使用KindEditor的官方文档或示例代码来了解更多API的使用方法。
4. 保存和提交内容:当用户完成编辑后,可以通过KindEditor提供的API获取编辑器中的内容,并将其提交到服务器进行处理。
例如,可以使用editor.html()方法获取编辑器中的HTML内容。
javascript复制代码var content = editor.html();// 将content提交到服务器...以上是KindEditor的基本用法。
kindeditor inserttext中括号内的内容是"[kindeditor inserttext]",那么我将以如何使用KindEditor富文本编辑器为主题,写一篇1500-2000字的文章,逐步介绍如何使用该工具。
文章标题:使用KindEditor富文本编辑器轻松创建精美的网页内容引言:在现代互联网时代,网页内容的创建和展示变得至关重要。
为了提高用户体验,一个简洁、美观的网页编辑工具是不可或缺的。
KindEditor富文本编辑器是一个功能强大、易于使用的工具,它为网页开发人员和内容创作者提供了许多特性和功能,帮助他们创建出高质量的网页内容。
本文将一步一步解释如何使用KindEditor富文本编辑器来实现这一目标。
第一步:下载和安装KindEditor富文本编辑器首先,从KindEditor官方网站下载最新版本的编辑器。
然后,将下载的文件解压缩到您的项目文件夹中。
随后,您需要引入必要的JavaScript和CSS文件到您的网页代码中,并根据您的需求进行定制配置。
第二步:初始化KindEditor编辑器为了在您的网页中使用KindEditor富文本编辑器,您需要初始化编辑器实例。
创建一个HTML元素(如textarea或div),并为其指定一个ID作为容器。
然后,在您的JavaScript代码中,使用KindEditor.create函数来初始化编辑器。
您可以通过传递一些配置选项来自定义编辑器的外观和行为,比如设置编辑器的高度、宽度、工具栏按钮等等。
第三步:编辑网页内容一旦您成功地初始化了KindEditor编辑器,您就可以开始编辑网页内容了。
编辑器提供了丰富的功能,比如字体样式、颜色、大小、加粗、斜体、添加链接、插入图片、表格等等。
您只需单击相应的按钮或使用快捷键即可完成操作。
编辑器还支持撤销和重做功能,以及对文本的搜索和替换。
您还可以通过代码视图查看和编辑HTML代码。
kindeditor的使用一、KindEditor介绍KindEditor是一款开源的web编辑器,由Javascript开发而成。
它支持网页编辑、图片上传和flash播放,也支持表情符号等特殊功能,使用起来非常方便,大大提高了文章的编辑效率。
二、KindEditor的功能1、支持多种文件上传格式:支持jpg、jpeg、png、gif、bmp等多种格式的图片上传,也支持doc、txt、xls等office文档的上传;2、支持Flash播放:支持swf格式的flash文件的播放,可以将flash文件插入到文章中;3、支持表情:支持表情符号的插入;4、支持滚动条:可以自定义滚动条的样式和速度;5、支持插入文件:可以插入html、css 、js等文件。
三、KindEditor的使用1、下载并解压KindEditor压缩包,在页面中引入kindeditor.js 文件;2、在需要使用KindEditor的地方插入一个<textarea>标签;3、实例化KindEditor://实例化编辑器var editor;KindEditor.ready(function(K) {editor = K.create('textarea[name='content']', {tresizeType : 1,tallowPreviewEmoticons : false,tallowImageUpload : false,titems : [tt'fontname', 'fontsize', '|', 'forecolor', 'hilitecolor', 'bold', 'italic', 'underline',tt'removeformat', '|', 'justifyleft', 'justifycenter','justifyright', 'insertorderedlist',tt'insertunorderedlist', '|', 'emoticons', 'image','link']});});4、提交表单:当提交表单时,调用 KindEditor.sync() 将编辑器中的内容同步到 textarea 中。
如何在vue中使⽤kindeditor富⽂本编辑器第⼀步,下载依赖yarn add kindeditor第⼆步,建⽴kindeditor.vue组件<template><div class="kindeditor"><textarea :id="id" name="content" v-model="outContent"></textarea></div></template><script>import '../../node_modules/kindeditor/kindeditor-all.js'import '../../node_modules/kindeditor/lang/zh-CN.js'import '../../node_modules/kindeditor/themes/default/default.css'export default {name: 'kindeditor',data () {return {editor: null,outContent: this.content}},props: {content: {type: String,default: ''},id: {type: String,required: true},width: {type: String},height: {type: String},minWidth: {type: Number,default: 650},minHeight: {type: Number,default: 100},items: {type: Array,default: function () {return ['source', '|', 'undo', 'redo', '|', 'preview', 'print', 'template', 'code', 'cut', 'copy', 'paste','plainpaste', 'wordpaste', '|', 'justifyleft', 'justifycenter', 'justifyright','justifyfull', 'insertorderedlist', 'insertunorderedlist', 'indent', 'outdent', 'subscript','superscript', 'clearhtml', 'quickformat', 'selectall', '|', 'fullscreen', '/','formatblock', 'fontname', 'fontsize', '|', 'forecolor', 'hilitecolor', 'bold','italic', 'underline', 'strikethrough', 'lineheight', 'removeformat', '|', 'image', 'multiimage','flash', 'media', 'insertfile', 'table', 'hr', 'emoticons', 'baidumap', 'pagebreak','anchor', 'link', 'unlink', '|', 'about']}},noDisableItems: {type: Array,default: function () {return ['source', 'fullscreen']}},htmlTags: {type: Object,default: function () {return {font: ['color', 'size', 'face', '.background-color'],span: ['style'],div: ['class', 'align', 'style'],table: ['class', 'border', 'cellspacing', 'cellpadding', 'width', 'height', 'align', 'style'], 'td,th': ['class', 'align', 'valign', 'width', 'height', 'colspan', 'rowspan', 'bgcolor', 'style'], a: ['class', 'href', 'target', 'name', 'style'],embed: ['src', 'width', 'height', 'type', 'loop', 'autostart', 'quality','style', 'align', 'allowscriptaccess', '/'],img: ['src', 'width', 'height', 'border', 'alt', 'title', 'align', 'style', '/'],hr: ['class', '/'],br: ['/'],'p,ol,ul,li,blockquote,h1,h2,h3,h4,h5,h6': ['align', 'style'],'tbody,tr,strong,b,sub,sup,em,i,u,strike': []}}},wellFormatMode: {type: Boolean,default: true},resizeType: {type: Number,default: 2},themeType: {type: String,default: 'default'},langType: {type: String,default: 'zh-CN'},designMode: {type: Boolean,default: true},fullscreenMode: {type: Boolean,default: false},basePath: {type: String},themesPath: {type: String},pluginsPath: {type: String,default: ''},langPath: {type: String},minChangeSize: {type: Number,default: 5},loadStyleMode: {type: Boolean,default: true},urlType: {type: String,default: ''},newlineTag: {type: String,default: 'p'default: 2},dialogAlignType: {type: String,default: 'page'},shadowMode: {type: Boolean,default: true},zIndex: {type: Number,default: 811213},useContextmenu: {type: Boolean,default: true},syncType: {type: String,default: 'form'},indentChar: {type: String,default: '\t'},cssPath: {type: [ String, Array ] },cssData: {type: String},bodyClass: {type: String,default: 'ke-content' },colorTable: {type: Array},afterCreate: {type: Function},afterChange: {type: Function},afterTab: {type: Function},afterFocus: {type: Function},afterBlur: {type: Function},afterUpload: {type: Function},uploadJson: {type: String},fileManagerJson: {type: Function},allowPreviewEmoticons: { type: Boolean,default: true},allowImageUpload: {type: Boolean,default: true},allowFlashUpload: {allowMediaUpload: {type: Boolean,default: true},allowFileUpload: {type: Boolean,default: true},allowFileManager: {type: Boolean,default: false},fontSizeTable: {type: Array,default: function () {return ['9px', '10px', '12px', '14px', '16px', '18px', '24px', '32px']}},imageTabIndex: {type: Number,default: 0},formatUploadUrl: {type: Boolean,default: true},fullscreenShortcut: {type: Boolean,default: false},extraFileUploadParams: {type: Array,default: function () {return []}},filePostName: {type: String,default: 'imgFile'},fillDescAfterUploadImage: {type: Boolean,default: false},afterSelectFile: {type: Function},pagebreakHtml: {type: String,default: '<hr style=”page-break-after: always;” class=”ke-pagebreak” />' },allowImageRemote: {type: Boolean,default: true},autoHeightMode: {type: Boolean,default: false},fixToolBar: {type: Boolean,default: false},tabIndex: {type: Number}},watch: {content (val) {this.editor && val !== this.outContent && this.editor.html(val)},outContent (val) {this.$emit('update:content', val)mounted () {var _this = this_this.editor = window.KindEditor.create('#' + this.id, {width: _this.width,height: _this.height,minWidth: _this.minWidth,minHeight: _this.minHeight,items: _this.items,noDisableItems: _this.noDisableItems,filterMode: _this.filterMode,htmlTags: _this.htmlTags,wellFormatMode: _this.wellFormatMode,resizeType: _this.resizeType,themeType: _this.themeType,langType: _ngType,designMode: _this.designMode,fullscreenMode: _this.fullscreenMode,basePath: _this.basePath,themesPath: _this.cssPath,pluginsPath: _this.pluginsPath,langPath: _ngPath,minChangeSize: _this.minChangeSize,loadStyleMode: _this.loadStyleMode,urlType: _this.urlType,newlineTag: _this.newlineTag,pasteType: _this.pasteType,dialogAlignType: _this.dialogAlignType,shadowMode: _this.shadowMode,zIndex: _this.zIndex,useContextmenu: _eContextmenu,syncType: _this.syncType,indentChar: _this.indentChar,cssPath: _this.cssPath,cssData: _this.cssData,bodyClass: _this.bodyClass,colorTable: _this.colorTable,afterCreate: _this.afterCreate,afterChange: function () {_this.afterChange_this.outContent = this.html()},afterTab: _this.afterTab,afterFocus: _this.afterFocus,afterBlur: _this.afterBlur,afterUpload: _this.afterUpload,uploadJson: _this.uploadJson,fileManagerJson: _this.fileManagerJson,allowPreviewEmoticons: _this.allowPreviewEmoticons,allowImageUpload: _this.allowImageUpload,allowFlashUpload: _this.allowFlashUpload,allowMediaUpload: _this.allowMediaUpload,allowFileUpload: _this.allowFileUpload,allowFileManager: _this.allowFileManager,fontSizeTable: _this.fontSizeTable,imageTabIndex: _this.imageTabIndex,formatUploadUrl: _this.formatUploadUrl,fullscreenShortcut: _this.fullscreenShortcut,extraFileUploadParams: _this.extraFileUploadParams,filePostName: _this.filePostName,fillDescAfterUploadImage: _this.fillDescAfterUploadImage, afterSelectFile: _this.afterSelectFile,pagebreakHtml: _this.pagebreakHtml,allowImageRemote: _this.allowImageRemote,autoHeightMode: _this.autoHeightMode,fixToolBar: _this.fixToolBar,tabIndex: _this.tabIndex})}}</script><style>第三步,引⼊使⽤<template><div id="app"><editor id="editor_id" height="500px" width="700px" :content.sync="editorText":afterChange="afterChange()":loadStyleMode="false"@on-content-change="onContentChange"></editor><div> editorTextCopy: {{ editorTextCopy }} </div></div></template><script>import editor from './components/kindeditor.vue'export default {name: 'app',components: {editor},data () {return {editorText: '直接初始化值', // 双向同步的变量editorTextCopy: '' // content-change 事件回掉改变的对象}},methods: {onContentChange (val) {this.editorTextCopy = val;window.console.log(this.editorTextCopy)},afterChange () {}}}</script>效果如下:以上就是vue中使⽤kindeditor富⽂本编辑器的详细内容,更多关于vue kindeditor富⽂本编辑器的资料请关注其它相关⽂章!。
kindeditor详细使用说明1.下载KindEditor 最新版本。
打开下载页面2. 解压zip文件,将所有文件上传到您的网站程序目录下。
例如:http://您的域名/editor/3.在需要显示编辑器的位置添加TEXTAREA输入框。
id在当前页面必须是唯一的值,还有,在有些浏览器上不设宽度和高度可能显示有问题,所以最好设一下宽度和高度。
宽度和高度可用inline样式设置,也可用编辑器初始化参数设置。
在TEXTAREA里设置HTML内容即可实现编辑,在这里需要注意的是,如果从服务器端程序(ASP、PHP、等)直接显示内容,则必须转换HTML特殊字符(>,<,&,")。
具体请参考各语言目录下面的demo.xxx程序,目前支持ASP、、PHP、JSP。
<textarea id="editor_id" name="content" style="width:700px;height:300px;"><strong>HTML内容</strong></textarea>4.在该HTML页面添加以下脚本。
<script charset="utf-8" src="/editor/kindeditor.js"></script><script> KE.show({ id : 'editor_id' });</script>注:KE.show的原理是先执行KE.init设置一些变量,等DOM 全部创建以后才开始执行KE.create创建编辑器。
如果浏览器不触发DOMContentLoaded事件(例如:jQuery的$.ready,点击某个按钮,通过innerHTML 插入HTML等),则不能使用KE.show,需要直接调用KE.init和KE.create。
KE.init({ id : 'editor_id'});$.ready(function() { KE.create('editor_id');});调用KE.show和KE.init时,除id之外还可以设置其它的参数,具体属性请参考编辑器初始化参数。
5.取得编辑器的HTML内容。
KindEditor的可视化操作在新创建的iframe上执行,代码模式下的textarea框也是新创建的,所以最后提交前需要将HTML数据同步到原来的textarea,KE.sync函数会完成这个动作。
KindEditor在默认情况下自动寻找textarea所属的form元素,找到form后onsubmit 事件里添加KE.sync函数,所以用form方式提交数据,不需要手动执行KE.sync函数。
//取得HTML内容html = KE.html('editor_id');//同步数据后可以直接取得textarea的valueKE.sync('editor_id');html = document.getElementById('editor_id').value;html = $('#editor_id').val(); //jQuery//设置HTML内容KE.html('editor_id', 'HTML内容');编辑器初始化参数1.调用KE.show或KE.init时可以设置以下参数。
1.idTEXTAREA输入框的ID,必须设置。
数据类型:String2.items配置编辑器的工具栏,其中"-"表示换行,"|"表示分隔符。
数据类型:Array默认值:['source', '|', 'fullscreen', 'undo', 'redo', 'print', 'cut', 'copy', 'paste','plainpaste', 'wordpaste', '|', 'justifyleft', 'justifycenter', 'justifyright','justifyfull', 'insertorderedlist', 'insertunorderedlist', 'indent', 'outdent', 'subscript','superscript', '|', 'selectall','-','title', 'fontname', 'fontsize', '|', 'textcolor', 'bgcolor', 'bold','italic', 'underline', 'strikethrough', 'removeformat', '|', 'image','flash', 'media', 'advtable', 'hr', 'emoticons', 'link', 'unlink', '|', 'about']3.width编辑器的宽度,可以设置px或%,比TEXTAREA输入框样式表宽度优先度高。
数据类型:String默认值:TEXTAREA输入框的宽度注: 3.2版本开始支持。
4.height编辑器的高度,只能设置px,比TEXTAREA输入框样式表高度优先度高。
数据类型:String默认值:TEXTAREA输入框的高度注: 3.2版本开始支持。
5.minWidth数据类型:Int指定编辑器最小宽度,单位为px。
默认值:2006.minHeight数据类型:Int指定编辑器最小高度,单位为px。
默认值:1007.filterMode数据类型:Booleantrue时过滤HTML代码,false时允许输入任何代码。
默认值:false注: 3.4以前版本的filterMode默认值为true。
8.htmlTags指定要保留的HTML标记和属性。
哈希数组的key为HTML标签名,value为HTML属性数组,"."开始的属性表示style属性。
数据类型:Object默认值:{ font : ['color', 'size', 'face', '.background-color'], span : ['style'], div : ['class', 'align', 'style'], table: ['class', 'border', 'cellspacing', 'cellpadding', 'width', 'height', 'align', 'style'], 'td,th': ['class', 'align', 'valign', 'width', 'height', 'colspan', 'rowspan', 'bgcolor', 'style'], a : ['class', 'href', 'target', 'name', 'style'], embed : ['src', 'width', 'height', 'type', 'loop', 'autostart', 'quality', 'style', 'align', 'allowscriptaccess', '/'], img : ['src', 'width', 'height', 'border', 'alt', 'title', 'align', 'style', '/'], hr : ['class', '/'], br : ['/'], 'p,ol,ul,li,blockquote,h1,h2,h3,h4,h5,h6' : ['align', 'style'], 'tbody,tr,strong,b,sub,sup,em,i,u,strike' : []}注:filterMode为true时有效。
3.4版本开始属性可设置style,保留所有inline样式。
9.resizeMode2或1或0,2时可以拖动改变宽度和高度,1时只能改变高度,0时不能拖动。
数据类型:Int默认值:210.skinType风格类型,default数据类型:String默认值:default11.wyswygMode可视化模式或代码模式数据类型:Boolean默认值:true12.cssPath指定编辑器iframe document的CSS,用于设置可视化区域的样式。
数据类型:String或Array默认值:空注:3.4.1版本开始可指定多个CSS文件。