使用Mybatis Generator自动生成Mybatis相关代码
- 格式:doc
- 大小:107.00 KB
- 文档页数:8
mybatis-generator selectbyprimarykey参数-回复MyBatis Generator是一个非常强大的工具,可以根据数据库表结构自动生成带有基本CRUD操作的实体类、Mapper接口和Mapper XML文件。
其中,selectByPrimaryKey(按主键查询)是MyBatis Generator生成的Mapper接口中的一个常用方法。
它使用主键作为参数,根据主键值来查询对应的记录。
在本文中,我们将以"[mybatisgenerator selectbyprimarykey参数]"为主题,一步一步回答有关该方法的实现和使用的问题。
首先,我们将介绍selectByPrimaryKey方法的作用和使用场景,然后详细阐述参数的含义与使用方法,并给出一些示例代码。
最后,我们将讨论selectByPrimaryKey 方法的实现原理和一些常见问题。
一、selectByPrimaryKey方法的作用和使用场景:selectByPrimaryKey方法用于根据主键值查找对应的记录。
它广泛应用于以主键作为唯一标识的表中,通过主键定位记录以实现精确查询。
它通常用于查询单条记录,并返回一个实体对象或者一个包含实体对象的集合。
二、selectByPrimaryKey的参数含义和使用方法:selectByPrimaryKey方法的参数是主键值,其类型必须和主键字段的类型一致。
对于MyBatis Generator生成的代码,主键字段会自动转换为对应的Java基本类型(如Integer、Long、String等),因此我们可以直接根据主键的类型来确定参数的类型。
例如,如果主键字段的类型是Integer,则selectByPrimaryKey方法的参数类型应为Integer。
具体的方法签名如下所示:T selectByPrimaryKey(PK id);其中,T表示返回的结果类型(通常是实体对象或者包含实体对象的集合),而PK表示主键字段的类型。
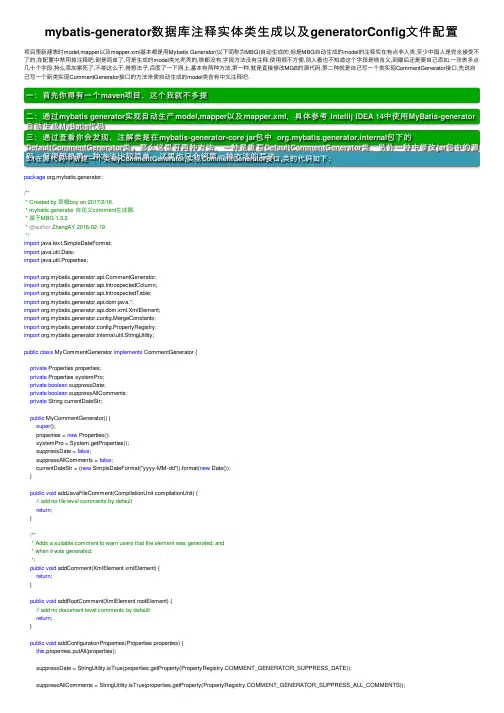
mybatis-generator数据库注释实体类⽣成以及generatorConfig⽂件配置项⽬⾥新建表时model,mapper以及mapper.xml基本都是⽤Mybatis Generator(以下简称为MBG)⾃动⽣成的,但是MBG⾃动⽣成的model的注释实在有点⾮⼈类,⾄少中国⼈是完全接受不了的,在配置中禁⽤掉注释吧,倒是简单了,可是⽣成的model类光秃秃的,啥都没有,字段⽅法没有注释,使⽤很不⽅便,别⼈看也不知道这个字段是啥含义,到最后还是要⾃⼰添加,⼀张表多点⼏⼗个字段,特么添加累死了,不能这么⼲,得想法⼦,百度了⼀下⽹上,基本有两种⽅法,第⼀种,就是直接修改MGB的源代码,第⼆种就是⾃⼰写⼀个类实现CommentGenerator接⼝,先说⾃⼰写⼀个新类实现CommentGenerator接⼝的⽅法来使⾃动⽣成的model类含有中⽂注释吧.⼀:⾸先你得有⼀个maven项⽬,这个我就不多提⼆:通过mybatis generator实现⾃动⽣产model,mapper以及mapper.xml,具体参考 Intellij IDEA 14中使⽤MyBatis-generator ⾃动⽣成MyBatis代码三:通过查看你会发现,注解类是在mybatis-generator-core jar包中 org.mybatis.generator.internal包下的DefaultCommentGenerator类。
那么这⾥有两种⽅法,⼀种是重写DefaultCommentGenerator类,另外⼀种中修改jar包中的源码,但很明显第⼀种⽅法⽐较简单,这⾥也只介绍第⼀种⽅法的写法。
3.1在源代码中新建⼀个类MyCommentGenerator,实现CommentGenerator接⼝,类的代码如下:package org.mybatis.generator;/*** Created by 草帽boy on 2017/2/16.* mybatis generator ⾃定义comment⽣成器.* 基于MBG 1.3.2.* @author ZhangAY 2016-02-19*/import java.text.SimpleDateFormat;import java.util.Date;import java.util.Properties;import mentGenerator;import org.mybatis.generator.api.IntrospectedColumn;import org.mybatis.generator.api.IntrospectedTable;import org.mybatis.generator.api.dom.java.*;import org.mybatis.generator.api.dom.xml.XmlElement;import org.mybatis.generator.config.MergeConstants;import org.mybatis.generator.config.PropertyRegistry;import org.mybatis.generator.internal.util.StringUtility;public class MyCommentGenerator implements CommentGenerator {private Properties properties;private Properties systemPro;private boolean suppressDate;private boolean suppressAllComments;private String currentDateStr;public MyCommentGenerator() {super();properties = new Properties();systemPro = System.getProperties();suppressDate = false;suppressAllComments = false;currentDateStr = (new SimpleDateFormat("yyyy-MM-dd")).format(new Date());}public void addJavaFileComment(CompilationUnit compilationUnit) {// add no file level comments by defaultreturn;}/*** Adds a suitable comment to warn users that the element was generated, and* when it was generated.*/public void addComment(XmlElement xmlElement) {return;}public void addRootComment(XmlElement rootElement) {// add no document level comments by defaultreturn;}public void addConfigurationProperties(Properties properties) {this.properties.putAll(properties);suppressDate = StringUtility.isTrue(properties.getProperty(MENT_GENERATOR_SUPPRESS_DATE));suppressAllComments = StringUtility.isTrue(properties.getProperty(MENT_GENERATOR_SUPPRESS_ALL_COMMENTS));}/*** This method adds the custom javadoc tag for. You may do nothing if you do* not wish to include the Javadoc tag - however, if you do not include the* Javadoc tag then the Java merge capability of the eclipse plugin will* break.** @param javaElement the java element*/protected void addJavadocTag(JavaElement javaElement, boolean markAsDoNotDelete) {javaElement.addJavaDocLine(" *");StringBuilder sb = new StringBuilder();sb.append(" * ");sb.append(MergeConstants.NEW_ELEMENT_TAG);if (markAsDoNotDelete) {sb.append(" do_not_delete_during_merge");}String s = getDateString();if (s != null) {sb.append(' ');sb.append(s);}javaElement.addJavaDocLine(sb.toString());}/*** This method returns a formated date string to include in the Javadoc tag* and XML comments. You may return null if you do not want the date in* these documentation elements.** @return a string representing the current timestamp, or null*/protected String getDateString() {String result = null;if (!suppressDate) {result = currentDateStr;}return result;}public void addClassComment(InnerClass innerClass, IntrospectedTable introspectedTable) { if (suppressAllComments) {return;}StringBuilder sb = new StringBuilder();innerClass.addJavaDocLine("/**");sb.append(" * ");sb.append(introspectedTable.getFullyQualifiedTable());sb.append(" ");sb.append(getDateString());innerClass.addJavaDocLine(sb.toString());innerClass.addJavaDocLine(" */");}public void addEnumComment(InnerEnum innerEnum, IntrospectedTable introspectedTable) { if (suppressAllComments) {return;}StringBuilder sb = new StringBuilder();innerEnum.addJavaDocLine("/**");// addJavadocTag(innerEnum, false);sb.append(" * ");sb.append(introspectedTable.getFullyQualifiedTable());innerEnum.addJavaDocLine(sb.toString());innerEnum.addJavaDocLine(" */");}public void addFieldComment(Field field, IntrospectedTable introspectedTable,IntrospectedColumn introspectedColumn) {if (suppressAllComments) {return;}StringBuilder sb = new StringBuilder();field.addJavaDocLine("/**");sb.append(" * ");sb.append(introspectedColumn.getRemarks());field.addJavaDocLine(sb.toString());// addJavadocTag(field, false);field.addJavaDocLine(" */");}public void addFieldComment(Field field, IntrospectedTable introspectedTable) {if (suppressAllComments) {return;}StringBuilder sb = new StringBuilder();field.addJavaDocLine("/**");sb.append(" * ");sb.append(introspectedTable.getFullyQualifiedTable());field.addJavaDocLine(sb.toString());field.addJavaDocLine(" */");}public void addModelClassComment(TopLevelClass topLevelClass, IntrospectedTable introspectedTable) { }public void addGeneralMethodComment(Method method, IntrospectedTable introspectedTable) {if (suppressAllComments) {return;}// method.addJavaDocLine("/**");// addJavadocTag(method, false);// method.addJavaDocLine(" */");}public void addGetterComment(Method method, IntrospectedTable introspectedTable,IntrospectedColumn introspectedColumn) {if (suppressAllComments) {return;}method.addJavaDocLine("/**");StringBuilder sb = new StringBuilder();sb.append(" * ");sb.append(introspectedColumn.getRemarks());method.addJavaDocLine(sb.toString());sb.setLength(0);sb.append(" * @return ");sb.append(introspectedColumn.getActualColumnName());sb.append(" ");sb.append(introspectedColumn.getRemarks());method.addJavaDocLine(sb.toString());// addJavadocTag(method, false);method.addJavaDocLine(" */");}public void addSetterComment(Method method, IntrospectedTable introspectedTable,IntrospectedColumn introspectedColumn) {if (suppressAllComments) {return;}method.addJavaDocLine("/**");StringBuilder sb = new StringBuilder();sb.append(" * ");sb.append(introspectedColumn.getRemarks());method.addJavaDocLine(sb.toString());Parameter parm = method.getParameters().get(0);sb.setLength(0);sb.append(" * @param ");sb.append(parm.getName());sb.append(" ");sb.append(introspectedColumn.getRemarks());method.addJavaDocLine(sb.toString());// addJavadocTag(method, false);method.addJavaDocLine(" */");}public void addClassComment(InnerClass innerClass, IntrospectedTable introspectedTable, boolean markAsDoNotDelete) {if (suppressAllComments) {return;}StringBuilder sb = new StringBuilder();innerClass.addJavaDocLine("/**");sb.append(" * ");sb.append(introspectedTable.getFullyQualifiedTable());innerClass.addJavaDocLine(sb.toString());sb.setLength(0);sb.append(" * @author ");sb.append(systemPro.getProperty(""));sb.append(" ");sb.append(currentDateStr);// addJavadocTag(innerClass, markAsDoNotDelete);innerClass.addJavaDocLine(" */");}}3.2.再新建⼀个类StartUp,⽤于运⾏项⽬,(若是集成Eclipse,可直接运⾏操作,查看mybatis与eclipse的集成,这⾥不介绍了)也就是运⾏StartUp类就会直接⽣成model,mapper以及mapper.xml,类的代码如下:package org.mybatis.generator;/*** Created by 草帽boy on 2017/2/16.* 启动⽂件,只需要点击运⾏就⾏*/import java.io.File;import java.io.IOException;import .URISyntaxException;import java.sql.SQLException;import java.util.ArrayList;import java.util.List;import org.mybatis.generator.api.MyBatisGenerator;import org.mybatis.generator.config.Configuration;import org.mybatis.generator.config.xml.ConfigurationParser;import org.mybatis.generator.exception.InvalidConfigurationException;import org.mybatis.generator.exception.XMLParserException;import org.mybatis.generator.internal.DefaultShellCallback;public class StartUp {public static void main(String[] args) throws URISyntaxException {try {List<String> warnings = new ArrayList<String>();boolean overwrite = true;//直接获取generatorConfig.xml的⽂件路径根据具体情况查看File configFile = new File("E:\\IDEAWorkPlace\\GraduationDesign\\CourseDesignManageSystem\\20170122\\CourseDesignManage\\src\\main\\resources\\generatorConfig.xml"); ConfigurationParser cp = new ConfigurationParser(warnings);Configuration config = cp.parseConfiguration(configFile);DefaultShellCallback callback = new DefaultShellCallback(overwrite);MyBatisGenerator myBatisGenerator = new MyBatisGenerator(config, callback, warnings);myBatisGenerator.generate(null);} catch (SQLException e) {e.printStackTrace();} catch (IOException e) {e.printStackTrace();} catch (InterruptedException e) {e.printStackTrace();} catch (InvalidConfigurationException e) {e.printStackTrace();} catch (XMLParserException e) {e.printStackTrace();}}}3.3 另外需要简单修改⼀下generatorConfig.xml中的注释配置<commentGenerator type="org.mybatis.generator.MyCommentGenerator"><!-- <property name="suppressDate" value="true"/><!– 是否去除⾃动⽣成的注释 true:是: false:否 –><property name="suppressAllComments" value="false"/>--></commentGenerator>commentGenerator 的type是你刚刚重构的MyCommentGenerator类的位置3.4其中我的⽂件结构如下:四:点击运⾏StartUp,你会发现model,mapper以及mapper.xml都已经产⽣,其中实体类的运⾏的结果如下注意:若是出现中⽂乱码,在generatorConfig.xml⽂件中增加以下配置<property name="javaFileEncoding" value="UTF-8"/>1.以下是generatorConfig.xml配置⽂件<?xml version="1.0" encoding="UTF-8" ?><!DOCTYPE generatorConfiguration PUBLIC "-////DTD MyBatis Generator Configuration 1.0//EN" "/dtd/mybatis-generator-config_1_0.dtd" > <generatorConfiguration ><!-- 数据库驱动包位置 --><classPathEntrylocation="D:\repository\mysql\mysql-connector-java\5.1.34\mysql-connector-java-5.1.34.jar"/><context id="context1"><property name="javaFileEncoding" value="UTF-8"/><commentGenerator type="com.wareic.utils.MyCommentGenerator"></commentGenerator><!-- <commentGenerator>是否去除⾃动⽣成的注释 true:是: false:否<property name="suppressAllComments" value="true"/></commentGenerator> --><!-- 数据库链接URL、⽤户名、密码 --><jdbcConnection driverClass="com.mysql.jdbc.Driver"connectionURL="jdbc:mysql://17.16.32.2:3306/db_wareic" userId="root" password="123456"/><!-- ⽣成模型的包名和位置 wareic为项⽬名称 --><javaModelGenerator targetPackage="com.wareic.model" targetProject="wareic/src/main/java"/><!-- ⽣成的映射⽂件报名和位置 --><sqlMapGenerator targetPackage="com.wareic.mapper" targetProject="wareic/src/main/java"/><!-- ⽣成DAO的包名和位置 --><javaClientGenerator targetPackage="com.wareic.mapper" targetProject="wareic/src/main/java" type="XMLMAPPER"/><!-- 要⽣成的那些表(更改tableName 和domainObjectName 就可以了) --><table schema="db_wareic" tableName="t_product" domainObjectName="Product" enableCountByExample="false" enableUpdateByExample="false" enableDeleteByExample="false" enableSelectByExample="false" selectByExampleQueryId="false"><!-- <columnOverride column="FILMID" property="FILMID" /> --></table></context></generatorConfiguration>2.执⾏startUp类型中的main函数3.MyBatis Generator官⽹:---------------------作者:王卫东来源:CSDN原⽂:https:///wwd0501/article/details/76618363版权声明:本⽂为博主原创⽂章,转载请附上博⽂链接!。
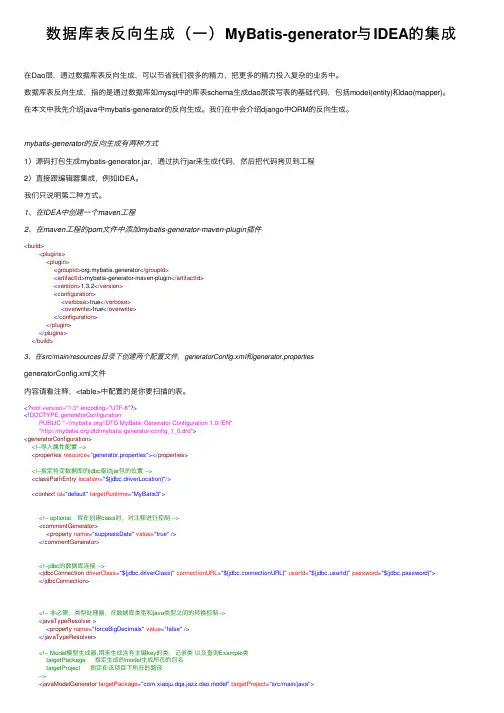
数据库表反向⽣成(⼀)MyBatis-generator与IDEA的集成在Dao层,通过数据库表反向⽣成,可以节省我们很多的精⼒,把更多的精⼒投⼊复杂的业务中。
数据库表反向⽣成,指的是通过数据库如mysql中的库表schema⽣成dao层读写表的基础代码,包括model(entity)和dao(mapper)。
在本⽂中我先介绍java中mybatis-generator的反向⽣成。
我们在中会介绍django中ORM的反向⽣成。
mybatis-generator的反向⽣成有两种⽅式1)源码打包⽣成mybatis-generator.jar,通过执⾏jar来⽣成代码,然后把代码拷贝到⼯程2)直接跟编辑器集成,例如IDEA。
我们只说明第⼆种⽅式。
1、在IDEA中创建⼀个maven⼯程2、在maven⼯程的pom⽂件中添加mybatis-generator-maven-plugin插件<build><plugins><plugin><groupId>org.mybatis.generator</groupId><artifactId>mybatis-generator-maven-plugin</artifactId><version>1.3.2</version><configuration><verbose>true</verbose><overwrite>true</overwrite></configuration></plugin></plugins></build>3、在src/main/resources⽬录下创建两个配置⽂件,generatorConfig.xml和generator.propertiesgeneratorConfig.xml⽂件内容请看注释,<table>中配置的是你要扫描的表。
mybatis sql提取MyBatis是一款开源的Java持久层框架,它通过XML文件或注解配置SQL语句,然后通过Java代码来调用和执行SQL语句,以实现数据持久化的功能。
在实际开发中,我们常常需要提取MyBatis中的SQL语句,以便我们对SQL进行优化、调试和查错。
下面是几种常见的MyBatis SQL提取方法:1. 使用日志MyBatis的日志功能可以记录执行SQL语句的过程和细节,因此我们可以通过查看日志来获取MyBatis执行的SQL语句。
在MyBatis的配置文件中,可以配置日志的级别和输出方式,一般建议将日志级别设置为DEBUG,这样可以输出更详细的日志信息。
同时,MyBatis还提供了多种日志输出方式,例如控制台输出、文件输出、数据库输出等,我们可以根据需要进行配置。
2. 使用插件MyBatis提供了插件机制,在SQL执行的不同阶段可以插入我们自定义的逻辑。
我们可以编写一个自定义插件,在SQL执行前或执行后获取SQL语句并输出,从而实现SQL提取的功能。
需要注意的是,在编写自定义插件时需要遵循MyBatis的插件规范,否则可能会导致不稳定或不可预期的结果。
3. 使用Mapper文件MyBatis的Mapper文件中存储了所有的SQL语句,因此我们可以直接在Mapper文件中查找需要提取的SQL语句。
在Mapper文件中,可以使用<select>、<insert>、<update>、<delete>等标签定义SQL语句,并通过#{param}等占位符表示参数。
需要特别注意的是,如果SQL语句比较复杂或包含动态SQL,则需要仔细分析Mapper文件中的代码逻辑,并结合实际执行的情况进行调试。
4. 使用MyBatis GeneratorMyBatis Generator是一款可以自动生成Mapper文件和Java实体类的工具,它可以根据数据库中的表结构自动生成相应的Mapper文件和Java实体类,并且在生成的Mapper文件中包含了所有的SQL语句。
mybatis generator 批量插入方法MyBatis Generator是一款优秀的Java代码生成工具,它可以帮助我们快速生成MyBatis的CRUD(创建、读取、更新、删除)代码。
在处理大量数据时,批量插入方法可以提高数据插入的效率,下面我们就来介绍如何使用MyBatis Generator生成批量插入方法。
**一、设置生成器配置**首先,你需要在MyBatis Generator的配置文件中,指定需要生成代码的表和对应的字段。
你需要提供表的结构信息,包括每个字段的数据类型、长度、是否主键等。
在生成的配置文件中,需要设置好数据库连接信息。
**二、编写Mapper接口**在Mapper接口中,你需要定义对应的批量插入方法。
这个方法会接收一个包含所有要插入数据的List对象,然后通过MyBatis Generator自动生成的CRUD方法将数据逐条插入数据库。
**三、生成代码**运行MyBatis Generator,根据你的配置文件生成对应的代码。
生成的代码中,应该包含Mapper接口中的批量插入方法以及对应的SQL语句。
你还可以在数据库表对应的实体类中看到自动生成的批量插入方法的调用方式。
**四、使用代码**在主程序中,你可以使用生成的代码进行批量插入操作。
注意,由于是批量插入,插入的数据量较大时,需要考虑到数据库的性能和内存使用情况,适当调整数据库连接数和JVM内存大小。
**示例代码**假设我们有一个User实体类,其中有id、name、age三个字段:1. 配置文件mybatis-generator-config.xml:```xml<configuration><environments default="development"><environment id="development"><database driver="com.mysql.jdbc.Driver"url="jdbc:mysql://localhost:3306/test" user="root"password="123456"><table name="user" schema="test"><propertyname="idColumn">id</property><propertyname="insertColumn">name,age</property><propertyname="mapperPrefix">UserMapper</property></table></database></environment></environments></configuration>```2. Mapper接口UserMapper:```javapublic interface UserMapper {void insertBatch(@Param("users") List<User> users);}```3. User实体类:```javapublic class User {private Integer id;private String name;private Integer age;// getter and setter methods...}```4. 使用生成的代码进行批量插入:在主程序中:```javaList<User> users = new ArrayList<>(); // 假设有多个User 对象需要插入数据库...UserMapper userMapper =MyBatisUtil.getMapper(UserMapper.class); // 获取Mapper接口实例...userMapper.insertBatch(users); // 调用批量插入方法...```以上就是使用MyBatis Generator生成批量插入方法的完整流程。

springboot+mybatis通过实体类⾃动⽣成数据库表的⽅法前⾔本章介绍使⽤mybatis结合mysql数据库⾃动根据实体类⽣成相关的数据库表。
⾸先引⼊相关的pom包我这⾥使⽤的是springboot2.1.8.RELEASE的版本<dependency><groupId>org.mybatis.spring.boot</groupId><artifactId>mybatis-spring-boot-starter</artifactId><version>2.1.0</version></dependency><dependency><groupId>com.gitee.sunchenbin.mybatis.actable</groupId><artifactId>mybatis-enhance-actable</artifactId><version>1.0.1</version></dependency><dependency><groupId>mysql</groupId><artifactId>mysql-connector-java</artifactId><scope>runtime</scope></dependency><dependency><groupId>com.alibaba</groupId><artifactId>druid-spring-boot-starter</artifactId><version>1.1.10</version></dependency><!--以下两个类需要加⼊,否则报错⽆法注⼊--><dependency><groupId>mons</groupId><artifactId>commons-lang3</artifactId><version>3.4</version></dependency><dependency><groupId>net.sf.json-lib</groupId><artifactId>json-lib</artifactId><version>2.4</version><classifier>jdk15</classifier><exclusions><exclusion><artifactId>commons-logging</artifactId><groupId>commons-logging</groupId></exclusion></exclusions></dependency>添加数据库配置⽂件application.propertiesapplication.properties这⾥是单独配置mybatis⾃动建表的相关信息。
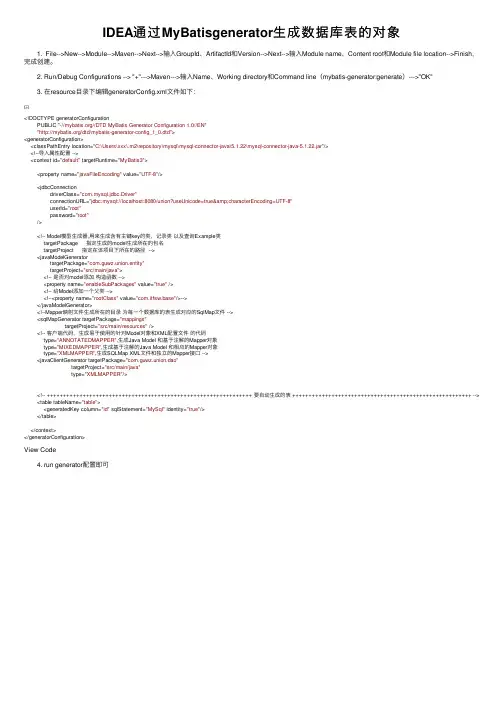
IDEA通过MyBatisgenerator⽣成数据库表的对象 1. File-->New-->Module-->Maven-->Next-->输⼊GroupId、ArtifactId和Version-->Next-->输⼊Module name、Content root和Module file location-->Finish,完成创建。
2. Run/Debug Configurations --> "+"--->Maven--->输⼊Name、Working directory和Command line(mybatis-generator:generate)--->"OK" 3. 在resource⽬录下编辑generatorConfig.xml⽂件如下:<!DOCTYPE generatorConfigurationPUBLIC "-////DTD MyBatis Generator Configuration 1.0//EN""/dtd/mybatis-generator-config_1_0.dtd"><generatorConfiguration><classPathEntry location="C:\Users\xxx\.m2\repository\mysql\mysql-connector-java\5.1.22\mysql-connector-java-5.1.22.jar"/><!--导⼊属性配置 --><context id="default" targetRuntime="MyBatis3"><property name="javaFileEncoding" value="UTF-8"/><jdbcConnectiondriverClass="com.mysql.jdbc.Driver"connectionURL="jdbc:mysql://localhost:8080/union?useUnicode=true&characterEncoding=UTF-8"userId="root"password="root"/><!-- Model模型⽣成器,⽤来⽣成含有主键key的类,记录类以及查询Example类targetPackage 指定⽣成的model⽣成所在的包名targetProject 指定在该项⽬下所在的路径 --><javaModelGeneratortargetPackage="com.guwz.union.entity"targetProject="src/main/java"><!-- 是否对model添加构造函数 --><property name="enableSubPackages" value="true" /><!-- 给Model添加⼀个⽗类 --><!--<property name="rootClass" value="com.itfsw.base"/>--></javaModelGenerator><!--Mapper映射⽂件⽣成所在的⽬录为每⼀个数据库的表⽣成对应的SqlMap⽂件 --><sqlMapGenerator targetPackage="mappings"targetProject="src/main/resources" /><!-- 客户端代码,⽣成易于使⽤的针对Model对象和XML配置⽂件的代码type="ANNOTATEDMAPPER",⽣成Java Model 和基于注解的Mapper对象type="MIXEDMAPPER",⽣成基于注解的Java Model 和相应的Mapper对象type="XMLMAPPER",⽣成SQLMap XML⽂件和独⽴的Mapper接⼝ --><javaClientGenerator targetPackage="com.guwz.union.dao"targetProject="src/main/java"type="XMLMAPPER"/><!-- +++++++++++++++++++++++++++++++++++++++++++++++++++++++++++++++ 要⾃动⽣成的表 +++++++++++++++++++++++++++++++++++++++++++++++++++++++ --> <table tableName="table"><generatedKey column="id" sqlStatement="MySql" identity="true"/></table></context></generatorConfiguration>View Code 4. run generator配置即可。
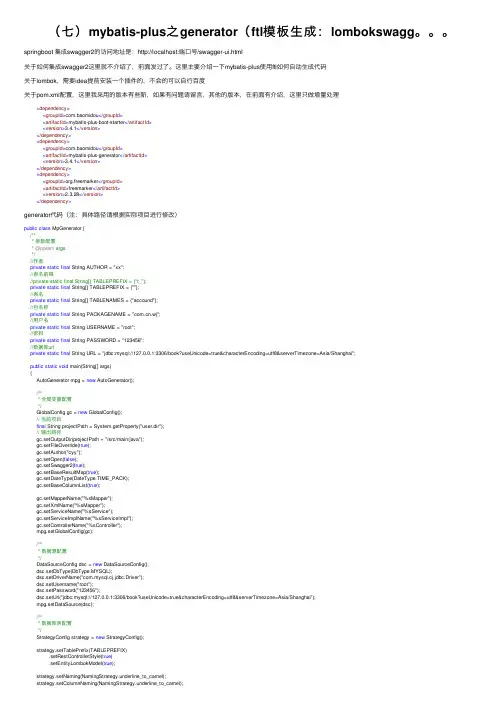
(七)mybatis-plus之generator(ftl模板⽣成:lombokswagg。
springboot 集成swagger2的访问地址是:http://localhost:端⼝号/swagger-ui.html关于如何集成swagger2这⾥就不介绍了,前⾯发过了。
这⾥主要介绍⼀下mybatis-plus使⽤ftl如何⾃动⽣成代码关于lombok,需要idea提前安装⼀个插件的,不会的可以⾃⾏百度关于pom.xml配置,这⾥我采⽤的版本有些新,如果有问题请留⾔,其他的版本,在前⾯有介绍,这⾥只做增量处理<dependency><groupId>com.baomidou</groupId><artifactId>mybatis-plus-boot-starter</artifactId><version>3.4.1</version></dependency><dependency><groupId>com.baomidou</groupId><artifactId>mybatis-plus-generator</artifactId><version>3.4.1</version></dependency><dependency><groupId>org.freemarker</groupId><artifactId>freemarker</artifactId><version>2.3.28</version></dependency>generator代码(注:具体路径请根据实际项⽬进⾏修改)public class MpGenerator {/*** 参数配置* @param args*///作者private static final String AUTHOR = "xx";//表名前缀//private static final String[] TABLEPREFIX = {"t_"};private static final String[] TABLEPREFIX = {""};//表名private static final String[] TABLENAMES = {"accound"};//包名称private static final String PACKAGENAME = ".wj";//⽤户名private static final String USERNAME = "root";//密码private static final String PASSWORD = "123456";//数据库urlprivate static final String URL = "jdbc:mysql://127.0.0.1:3306/book?useUnicode=true&characterEncoding=utf8&serverTimezone=Asia/Shanghai";public static void main(String[] args){AutoGenerator mpg = new AutoGenerator();/*** 全局变量配置*/GlobalConfig gc = new GlobalConfig();// 当前项⽬final String projectPath = System.getProperty("user.dir");// 输出路径gc.setOutputDir(projectPath + "/src/main/java");gc.setFileOverride(true);gc.setAuthor("cyy");gc.setOpen(false);gc.setSwagger2(true);gc.setBaseResultMap(true);gc.setDateType(DateType.TIME_PACK);gc.setBaseColumnList(true);gc.setMapperName("%sMapper");gc.setXmlName("%sMapper");gc.setServiceName("%sService");gc.setServiceImplName("%sServiceImpl");gc.setControllerName("%sController");mpg.setGlobalConfig(gc);/*** 数据源配置*/DataSourceConfig dsc = new DataSourceConfig();dsc.setDbType(DbType.MYSQL);dsc.setDriverName("com.mysql.cj.jdbc.Driver");dsc.setUsername("root");dsc.setPassword("123456");dsc.setUrl("jdbc:mysql://127.0.0.1:3306/book?useUnicode=true&characterEncoding=utf8&serverTimezone=Asia/Shanghai");mpg.setDataSource(dsc);/*** 数据库表配置*/StrategyConfig strategy = new StrategyConfig();strategy.setTablePrefix(TABLEPREFIX).setRestControllerStyle(true).setEntityLombokModel(true);strategy.setNaming(NamingStrategy.underline_to_camel);strategy.setColumnNaming(NamingStrategy.underline_to_camel);strategy.setCapitalMode(true);strategy.setInclude(TABLENAMES);mpg.setStrategy(strategy);/*** 包配置*/PackageConfig pc = new PackageConfig();pc.setParent(".wj");pc.setController("controller");pc.setService("service");pc.setServiceImpl("service.impl");pc.setMapper("mapper");pc.setEntity("entity");mpg.setPackageInfo(pc);/*** ⾃定义配置*/InjectionConfig cfg = new InjectionConfig(){@Overridepublic void initMap(){}};/*** 将xml⽣成到resource下⾯*/String templatePath = "/templates/mapper.xml.ftl";// ⾃定义输出配置List focList = new ArrayList();// ⾃定义配置会被优先输出focList.add(new FileOutConfig(templatePath){@Overridepublic String outputFile(TableInfo tableInfo){// ⾃定义输出⽂件名,如果你 Entity 设置了前后缀、此处注意 xml 的名称会跟着发⽣变化!!return projectPath + "/src/main/resources/mapper/" + "/" + tableInfo.getEntityName() + "Mapper" + StringPool.DOT_XML; }});cfg.setFileOutConfigList(focList);mpg.setCfg(cfg);/*** 配置模板*/TemplateConfig templateConfig = new TemplateConfig();templateConfig.setEntity("templates/entity");templateConfig.setService("templates/service.java");templateConfig.setServiceImpl("templates/serviceImpl.java");// /templates/entity.java 模板路径配置,默认再templatestemplateConfig.setController("templates/controller");templateConfig.setXml(null);mpg.setTemplate(templateConfig);/*** 模板引擎*/mpg.setTemplateEngine(new FreemarkerTemplateEngine());mpg.execute();}}ftl模板(这⾥只写了entity,controller)因为采⽤的是mybatis-plus的,service是不需要写代码的controller.ftlpackage ${package.Controller};import org.springframework.web.bind.annotation.*;<#if restControllerStyle>import org.springframework.web.bind.annotation.RestController;<#else>import org.springframework.stereotype.Controller;</#if>import org.springframework.beans.factory.annotation.Autowired;import io.swagger.annotations.Api;import io.swagger.annotations.*;import lombok.extern.slf4j.Slf4j;import org.slf4j.Logger;import org.slf4j.LoggerFactory;import java.util.*;import mon.util.ResponseDTO;import ${package.Service}.${table.serviceName};import ${package.Entity}.${table.entityName};<#if superControllerClassPackage??>import ${superControllerClassPackage};</#if>/*** <p>* ${ment!} 前端控制器* </p>** @author ${author}* @since ${date}*/<#if restControllerStyle>@RestController<#else>@Controller</#if>@Slf4j@Api(value = "${}CRUD接⼝")@RequestMapping("<#if package.ModuleName??>${package.ModuleName}</#if>/<#if controllerMappingHyphenStyle??>${controllerMappingHyphen}<#else>${table.entityPath}</#if>")<#if kotlin>class ${table.controllerName}<#if superControllerClass??> : ${superControllerClass}()</#if><#else><#if superControllerClass??>public class ${table.controllerName} extends ${superControllerClass} {<#else>public class ${table.controllerName} {</#if>private final Logger logger = LoggerFactory.getLogger(${table.controllerName}.class);@Autowiredprivate ${table.serviceName} ${}Service;@ApiOperation(value = "获取${}列表",notes="")@GetMapping("/")public List<${table.entityName}> ${}List() throws Exception {List<${table.entityName}> ${}List = ${}Service.list();return ${}List;}@ApiOperation(value = "修改${}",notes="根据id修改${}")@ApiImplicitParam(name = "${}", value = "${}实体", required = true, dataType = "Student")@PutMapping("/")public ResponseDTO<Boolean> ${}Update(@RequestBody ${table.entityName} ${}) throws Exception {Boolean flag = ${}Service.updateById(${});return ResponseDTO.ok(Boolean.valueOf(flag));}@ApiOperation(value = "删除${}",notes="根据id删除${}")@ApiImplicitParam(name = "id", value = "${}id", required = true, dataType = "<#list table.fields as field><#if field.keyFlag == true>${field.columnType?lower_case?cap_first}</#if></#list>") @DeleteMapping("/{id}")public ResponseDTO<Boolean> ${}Delete(@PathVariable <#list table.fields as field><#if field.keyFlag == true>${field.columnType?lower_case?cap_first}</#if></#list> id) throws Exception { Boolean flag = ${}Service.removeById(id);return ResponseDTO.ok(Boolean.valueOf(flag));}@ApiOperation(value = "添加${}",notes="新增⼀条${}")@ApiImplicitParam(name = "${}", value = "${}实体", required = true, dataType = "${}")@PostMapping("")public ResponseDTO<Boolean> ${}Insert(@RequestBody ${table.entityName} ${}) throws Exception {Boolean flag = ${}Service.save(${});return ResponseDTO.ok(Boolean.valueOf(flag));}}</#if>entity.ftlpackage ${package.Entity};<#list table.importPackages as pkg>import ${pkg};</#list><#if swagger2>import io.swagger.annotations.ApiModel;import io.swagger.annotations.ApiModelProperty;</#if><#if entityLombokModel>import lombok.Data;import lombok.EqualsAndHashCode;<#if chainModel>import lombok.experimental.Accessors;</#if></#if>/*** @author ${author}* @since ${date}*/<#if entityLombokModel>@Data<#if superEntityClass??>@EqualsAndHashCode(callSuper = true)<#else>@EqualsAndHashCode(callSuper = false)</#if><#if chainModel>@Accessors(chain = true)</#if></#if><#if table.convert>@TableName("${}")</#if><#if swagger2>@ApiModel(value="${entity}对象", description="${ment!}")</#if><#if superEntityClass??>public class ${entity} extends ${superEntityClass}<#if activeRecord><${entity}></#if> {<#elseif activeRecord>public class ${entity} extends Model<${entity}> {<#else>public class ${entity} implements Serializable {</#if><#if entitySerialVersionUID>private static final long serialVersionUID = 1L;</#if><#-- ---------- BEGIN 字段循环遍历 ----------><#list table.fields as field><#if field.keyFlag><#assign keyPropertyName="${field.propertyName}"/></#if><#if ment!?length gt 0><#if swagger2>@ApiModelProperty(value = "${ment}")<#else>/*** ${ment}*/</#if></#if><#if field.keyFlag><#-- 主键 --><#if field.keyIdentityFlag>@TableId(value = "${field.annotationColumnName}", type = IdType.AUTO)<#elseif idType??>@TableId(value = "${field.annotationColumnName}", type = IdType.${idType})<#elseif field.convert>@TableId("${field.annotationColumnName}")</#if><#-- 普通字段 --><#elseif field.fill??><#-- ----- 存在字段填充设置 -----><#if field.convert>@TableField(value = "${field.annotationColumnName}", fill = FieldFill.${field.fill})<#else>@TableField(fill = FieldFill.${field.fill})</#if><#elseif field.convert>@TableField("${field.annotationColumnName}")</#if><#-- 乐观锁注解 --><#if (versionFieldName!"") == >@Version</#if><#-- 逻辑删除注解 --><#if (logicDeleteFieldName!"") == >@TableLogic</#if>private ${field.propertyType} ${field.propertyName};</#list><#------------ END 字段循环遍历 ----------><#if !entityLombokModel><#list table.fields as field><#if field.propertyType == "boolean"><#assign getprefix="is"/><#else><#assign getprefix="get"/></#if>public ${field.propertyType} ${getprefix}${field.capitalName}() {return ${field.propertyName};}<#if chainModel>public ${entity} set${field.capitalName}(${field.propertyType} ${field.propertyName}) { <#else>public void set${field.capitalName}(${field.propertyType} ${field.propertyName}) {</#if>this.${field.propertyName} = ${field.propertyName};<#if chainModel>return this;</#if>}</#list></#if><#if entityColumnConstant><#list table.fields as field>public static final String ${?upper_case} = "${}";</#list></#if><#if activeRecord>@Overrideprotected Serializable pkVal() {<#if keyPropertyName??>return this.${keyPropertyName};<#else>return null;</#if>}</#if><#if !entityLombokModel>@Overridepublic String toString() {return "${entity}{" +<#list table.fields as field><#if field_index==0>"${field.propertyName}=" + ${field.propertyName} +<#else>", ${field.propertyName}=" + ${field.propertyName} +</#if></#list>"}";}</#if>}以上两个ftl的存放路径⽣成的⽂件entitypackage .wj.entity;import java.math.BigDecimal;import com.baomidou.mybatisplus.annotation.TableName;import java.time.LocalDateTime;import java.io.Serializable;import io.swagger.annotations.ApiModel;import io.swagger.annotations.ApiModelProperty;import lombok.Data;import lombok.EqualsAndHashCode;/*** @author cyy* @since 2020-12-11*/@Data@EqualsAndHashCode(callSuper = false)@TableName("accound")@ApiModel(value="Accound对象", description="")public class Accound implements Serializable {private static final long serialVersionUID = 1L;@ApiModelProperty(value = "UUID")private String id;@ApiModelProperty(value = "⽤户ID")private String userId;@ApiModelProperty(value = "记录时间")private LocalDateTime recordTime;@ApiModelProperty(value = "账⽬名称")private String name;@ApiModelProperty(value = "收⼊")private BigDecimal income;@ApiModelProperty(value = "⽀出")private BigDecimal expenditure;@ApiModelProperty(value = "修改时间")private String modificationTime;@ApiModelProperty(value = "是否删除(0:已删除 1:未删除)") private Boolean isDel;@ApiModelProperty(value = "备注")private String remarks;@ApiModelProperty(value = "⽀出类型(0-9)")private Integer expenditureType;}controllerimport org.springframework.web.bind.annotation.*;import org.springframework.web.bind.annotation.RestController; import org.springframework.beans.factory.annotation.Autowired; import io.swagger.annotations.Api;import io.swagger.annotations.*;import lombok.extern.slf4j.Slf4j;import org.slf4j.Logger;import org.slf4j.LoggerFactory;import java.util.*;import mon.util.ResponseDTO;import .wj.service.AccoundService;import .wj.entity.Accound;/*** <p>* 前端控制器* </p>** @author cyy* @since 2020-12-11*/@RestController@Slf4j@Api(value = "accoundCRUD接⼝")@RequestMapping("/accound")public class AccoundController {private final Logger logger = LoggerFactory.getLogger(AccoundController.class);@Autowiredprivate AccoundService accoundService;@ApiOperation(value = "获取accound列表",notes="")@GetMapping("/")public List<Accound> accoundList() throws Exception {List<Accound> accoundList = accoundService.list();return accoundList;}@ApiOperation(value = "修改accound",notes="根据id修改accound")@ApiImplicitParam(name = "accound", value = "accound实体", required = true, dataType = "Student") @PutMapping("/")public ResponseDTO<Boolean> accoundUpdate(@RequestBody Accound accound) throws Exception { Boolean flag = accoundService.updateById(accound);return ResponseDTO.ok(Boolean.valueOf(flag));}@ApiOperation(value = "删除accound",notes="根据id删除accound")@ApiImplicitParam(name = "id", value = "accoundid", required = true, dataType = "String")@DeleteMapping("/{id}")public ResponseDTO<Boolean> accoundDelete(@PathVariable String id) throws Exception {Boolean flag = accoundService.removeById(id);return ResponseDTO.ok(Boolean.valueOf(flag));}@ApiOperation(value = "添加accound",notes="新增⼀条accound")@ApiImplicitParam(name = "accound", value = "accound实体", required = true, dataType = "accound") @PostMapping("")public ResponseDTO<Boolean> accoundInsert(@RequestBody Accound accound) throws Exception { Boolean flag = accoundService.save(accound);return ResponseDTO.ok(Boolean.valueOf(flag));}}如果缺少什么或者有不懂的地⽅,欢迎留⾔沟通,需要原⽂件的可以留⾔。
mybatis generator or语句摘要:1.MyBatis简介2.MyBatis Generator介绍3.MyBatis Generator OR语句4.OR语句在MyBatis Generator中的应用5.总结正文:MyBatis是一个优秀的持久层框架,它支持定制化SQL、存储过程以及高级映射。
MyBatis Generator是MyBatis的代码生成工具,它可以自动生成MyBatis的映射文件、DAO接口和POJO实体类。
在MyBatis Generator 中,OR语句是一个非常重要的功能,它可以帮助我们简化查询条件,提高代码的可读性。
OR语句在MyBatis Generator中的应用非常广泛,尤其是在查询条件较为复杂的情况下。
例如,假设我们有一个用户表,包含用户名、年龄、性别等字段,我们可以通过OR语句来构造查询条件,例如:```xml<select id="selectByUsernameAndAge" parameterType="map" resultType="er">SELECT * FROM user WHERE username = #{username} AND age = #{age}<if test="gender != null">OR gender = #{gender}</if></select>```在这个例子中,我们通过OR语句将用户名、年龄和性别三个条件连接起来,如果用户名和年龄满足条件,那么就会返回对应的用户信息。
除了在查询条件中使用OR语句外,我们还可以在插入、更新和删除操作中使用OR语句。
例如,在插入操作中,我们可以通过OR语句来构造复合主键:```xml<insert id="insertUser" parameterType="er"> INSERT INTO user (username, age, gender)VALUES (#{username}, #{age}, #{gender})ON DUPLICATE KEY UPDATE username = #{username}, age = #{age}, gender = #{gender}</insert>```在这个例子中,我们通过OR语句将用户名、年龄和性别三个字段连接起来,如果存在相同的用户名或年龄,那么就会更新对应的性别信息。
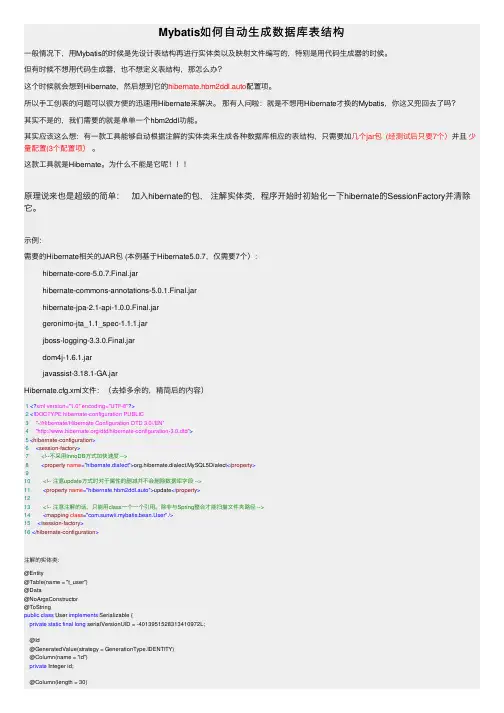
Mybatis如何⾃动⽣成数据库表结构⼀般情况下,⽤Mybatis的时候是先设计表结构再进⾏实体类以及映射⽂件编写的,特别是⽤代码⽣成器的时候。
但有时候不想⽤代码⽣成器,也不想定义表结构,那怎么办?这个时候就会想到Hibernate,然后想到它的hibernate.hbm2ddl.auto配置项。
所以⼿⼯创表的问题可以很⽅便的迅速⽤Hibernate来解决。
那有⼈问啦:就是不想⽤Hibernate才换的Mybatis,你这⼜兜回去了吗?其实不是的,我们需要的就是单单⼀个hbm2ddl功能。
其实应该这么想:有⼀款⼯具能够⾃动根据注解的实体类来⽣成各种数据库相应的表结构,只需要加⼏个jar包 (经测试后只要7个)并且少量配置(3个配置项)。
这款⼯具就是Hibernate。
为什么不能是它呢!!!原理说来也是超级的简单:加⼊hibernate的包,注解实体类,程序开始时初始化⼀下hibernate的SessionFactory并清除它。
⽰例:需要的Hibernate相关的JAR包 (本例基于Hibernate5.0.7,仅需要7个):hibernate-core-5.0.7.Final.jarhibernate-commons-annotations-5.0.1.Final.jarhibernate-jpa-2.1-api-1.0.0.Final.jargeronimo-jta_1.1_spec-1.1.1.jarjboss-logging-3.3.0.Final.jardom4j-1.6.1.jarjavassist-3.18.1-GA.jarHibernate.cfg.xml⽂件:(去掉多余的,精简后的内容)1<?xml version="1.0" encoding="UTF-8"?>2<!DOCTYPE hibernate-configuration PUBLIC3 "-//Hibernate/Hibernate Configuration DTD 3.0//EN"4 "/dtd/hibernate-configuration-3.0.dtd">5<hibernate-configuration>6<session-factory>7<!--不采⽤InnoDB⽅式加快速度 -->8<property name="hibernate.dialect">org.hibernate.dialect.MySQL5Dialect</property>910<!-- 注意update⽅式时对于属性的删减并不会删除数据库字段 -->11<property name="hibernate.hbm2ddl.auto">update</property>1213<!-- 注意注解的话,只能⽤class⼀个⼀个引⽤。
在idea中,mavne项⽬使⽤mybatis-generator-maven-plugi。
最近想学习mybatis的知识,⾃⼰搭了个简单的ssm框架,想通过插件⾃动⽣成实体类,发现想要的插件⼀直都没显⽰出来,着实很郁闷;pom.xm中的配置:
<!--mybatis-generator-maven-plugin⾃动⽣成实体类插件-start-->
<plugin>
<groupId>org.mybatis.generator</groupId>
<artifactId>mybatis-generator-maven-plugin</artifactId>
<version>1.3.2</version>
<configuration>
<verbose>true</verbose>
<overwrite>true</overwrite>
</configuration>
</plugin>
<!--mybatis-generator-maven-plugin⾃动⽣成实体类插件-end-->
截图:
maven插件⾥⾯显⽰的内容:
没有,是不是很郁闷了,后来发现了还是配置错了,mybatis-generator-maven-plugin插件需要放在和pluginManagement同级别,即:
这样配置后,重新导⼊依赖:
发现在maven插件⾥⾯有我们想要的插件了。
Mybatis-generator⽣成Service和Controller 好久记录笔记,这段时间做政府的项⽬,数据录⼊系统基本都是通过excel导⼊,且数据量⼤,许多也是单表的录⼊,这就有很多可以通⽤的代码,如controller,service层的那⼀套都是可以代码⽣成,添加了⼀个数据库批量添加接⼝(⽬前只⽀持oracle),代码是基于mybatis-generator-1.3.5源码修改后的,具体的源码解析,后⾯等项⽬上线后,再好好整理⼀下,这⾥就粗鲁的记录如何使⽤。
1:mybatis-generator.xml 配置⽂件<?xml version="1.0" encoding="UTF-8"?><!DOCTYPE generatorConfigurationPUBLIC "-////DTD MyBatis Generator Configuration 1.0//EN""/dtd/mybatis-generator-config_1_0.dtd"><generatorConfiguration><context id="DB2Tables" targetRuntime="MyBatis3"><!--<plugin type="net.coderbee.mybatis.batch.BatchStatementHandler"></plugin><plugin type="net.coderbee.mybatis.batch.BatchParameterHandler"></plugin>--><commentGenerator><property name="suppressDate" value="true"/><property name="suppressAllComments" value="true"/></commentGenerator><!--数据库链接地址账号密码--><jdbcConnection driverClass="oracle.jdbc.driver.OracleDriver"connectionURL="jdbc:oracle:thin:@127.0.0.1:1521:test"userId="xxxx" password="xxxx" ><!--开启读取数据库注释:为了把注释写到相对应的注解⾥⾯--><property name="remarksReporting" value="true"></property></jdbcConnection><javaTypeResolver><property name="forceBigDecimals" value="false"/></javaTypeResolver><!--⽣成Model类存放位置--><javaModelGenerator targetPackage="com.shsoft.platform.domain" targetProject="src/main/java"><property name="enableSubPackages" value="true"/><!--设置注解,%s占位符,读取数据库字段注释(多个注解⽤;分隔),⼀个占位符读取数据库字段注释,第⼆数据库字段排序--><property name="annotation" value="@Excel(name = "%s", fixedIndex = %s);@ApiParam(value = "%s")"/><!--设置注解需要的包路径,多个⽤,分隔--><property name="annotationTargetPackage" value="cn.afterturn.easypoi.excel.annotation.Excel,io.swagger.annotations.ApiParam"/></javaModelGenerator><!--⽣成映射⽂件存放位置--><sqlMapGenerator targetPackage="com.shsoft.platform.dao.mapper" targetProject="src/main/java"><property name="enableSubPackages" value="true"/></sqlMapGenerator><!--⽣成Dao类存放位置--><javaClientGenerator type="XMLMAPPER" targetPackage="com.shsoft.platform.dao" targetProject="src/main/java"><property name="enableSubPackages" value="true"/></javaClientGenerator><!--⽣成service,serviceImpl--><javaServiceGenerator targetPackage="com.shsoft.platform.service" targetProject="src/main/java"implementationPackage="com.shsoft.platform.service"></javaServiceGenerator><!--⽣成controller--><javaControllerGenerator targetPackage="com.shsoft.platform.ctrl" targetProject="src/main/java"><property name="superClass" value="com.shsoft.platform.ctrl.BaseController"></property></javaControllerGenerator><!--⽣成对应表及类名,添加:enableInsertBatch(是否⽣成批量添加语句,⽬前只⽀持oracle),enableInsertBatchIgnore:批量添加语句中忽略的字段--><table tableName="SYSTEM_NOTICE" domainObjectName="SystemNotice" enableCountByExample="true" enableUpdateByExample="true"enableDeleteByExample="true" enableSelectByExample="true" selectByExampleQueryId="false" enableInsertBatch="true"enableListParam="true"><property name="enableInsertBatchIgnore" value="createDt"></property></table></context></generatorConfiguration>2:执⾏⽣成代码2-1:最后⽣成 InsertBatch<insert id="insertBatch" parameterType="java.util.List">insert into FIXED_ASSETS_INDICATOR (ID, ORDER_MARK, COUNT_TIME,CITY, CITY_CODE, FIXED_INVESTMENT_TOTAL,FIXED_INVESTMENT_SPEED_UP, FOLK_INVESTMENT_TOTAL,FOLK_INVESTMENT_SPEED_UP, REALTY_INVESTMENT_TOTAL,REALTY_INVESTMENT_SPEED_UP, EMPLOYMENT_INVESTMENT_TOTAL,EMPLOYMENT_INVESTMENT_SPEED_UP, TECHNOLOGY_INVESTMENT_TOTAL,TECHNOLOGY_INVESTMENT_SPEED_UP, INFRASTRUCTURE_TOTAL,INFRASTRUCTURE_SPEED_UP, HIGH_TECH_TOTAL,HIGH_TECH_SPEED_UP, MANUFACTURING_TOTAL,MANUFACTURING_SPEED_UP)<foreach close=")" collection="list" item="item" open="(" separator="UNION">SELECT #{item.id,jdbcType=VARCHAR}, #{item.orderMark,jdbcType=DECIMAL}, #{item.countTime,jdbcType=TIMESTAMP},#{item.city,jdbcType=VARCHAR}, #{item.cityCode,jdbcType=VARCHAR}, #{item.fixedInvestmentTotal,jdbcType=DECIMAL}, #{item.fixedInvestmentSpeedUp,jdbcType=FLOAT}, #{item.folkInvestmentTotal,jdbcType=DECIMAL},#{item.folkInvestmentSpeedUp,jdbcType=FLOAT}, #{item.realtyInvestmentTotal,jdbcType=DECIMAL},#{item.realtyInvestmentSpeedUp,jdbcType=FLOAT}, #{item.employmentInvestmentTotal,jdbcType=DECIMAL},#{item.employmentInvestmentSpeedUp,jdbcType=FLOAT}, #{item.technologyInvestmentTotal,jdbcType=DECIMAL},#{item.technologyInvestmentSpeedUp,jdbcType=FLOAT}, #{item.infrastructureTotal,jdbcType=DECIMAL},#{item.infrastructureSpeedUp,jdbcType=FLOAT}, #{item.highTechTotal,jdbcType=DECIMAL},#{item.highTechSpeedUp,jdbcType=FLOAT}, #{item.manufacturingTotal,jdbcType=DECIMAL},#{item.manufacturingSpeedUp,jdbcType=FLOAT} FROM DUAL</foreach></insert>2-2:⽣成servicepublic class FixedAssetsIndicatorServiceImpl implements FixedAssetsIndicatorService {@Autowiredprivate FixedAssetsIndicatorMapper fixedAssetsIndicatorMapper;public int insertBatch(List<FixedAssetsIndicator> list) {if(list != null && list.size() > 0 ){FixedAssetsIndicatorExample fixedAssetsIndicatorExample = new FixedAssetsIndicatorExample();fixedAssetsIndicatorExample.createCriteria().andCountTimeEqualTo(list.get(0).getCountTime());fixedAssetsIndicatorMapper.deleteByExample(fixedAssetsIndicatorExample);return fixedAssetsIndicatorMapper.insertBatch(list);}return 0;}public PageInfo<FixedAssetsIndicator> list(ListFixedAssetsIndicatorParam param) {FixedAssetsIndicatorExample example = new FixedAssetsIndicatorExample();if(param.getCountTime() != null){example.createCriteria().andCountTimeEqualTo(param.getCountTime());}PageHelper.startPage(param.getPageNum(), param.getPageSize());example.setOrderByClause("ORDER_MARK");List<FixedAssetsIndicator> fromDB = fixedAssetsIndicatorMapper.selectByExample(example);PageInfo pageInfo = new PageInfo(fromDB);return pageInfo;}public FixedAssetsIndicator get(String id) {return fixedAssetsIndicatorMapper.selectByPrimaryKey(id);}public void save(FixedAssetsIndicator toDB) {fixedAssetsIndicatorMapper.insertSelective(toDB);}public void delete(String id) {fixedAssetsIndicatorMapper.deleteByPrimaryKey(id);}public void update(FixedAssetsIndicator toDB) {fixedAssetsIndicatorMapper.updateByPrimaryKeySelective(toDB);}}2-3:⽣成controller:添加excel导⼊导出接⼝(基于easypoi导⼊导出)@Slf4j@Controller@RequestMapping("/fixedAssetsIndicator")@Api(description = "能源投资统计科:分市固定资产投资主要指标")public class FixedAssetsIndicatorController extends BaseController {@Autowiredprivate FixedAssetsIndicatorService fixedAssetsIndicatorService;@ApiOperation(value = "列表查询", httpMethod = "POST")@RequestMapping("/list.do")@ResponseBodypublic JSONResult list(@Validated ListFixedAssetsIndicatorParam param) throws ShsoftException {JSONResult result = new JSONResult(fixedAssetsIndicatorService.list(param));return result;}@ApiOperation(value = "单条查询", httpMethod = "POST")@RequestMapping("/get.do")@ResponseBodypublic JSONResult get(String id) throws ShsoftException {JSONResult result = new JSONResult(fixedAssetsIndicatorService.get(id));return result;}@ApiOperation(value = "删除", httpMethod = "POST")@RequestMapping("/delete.do")@ResponseBodypublic JSONResult delete(String id) throws ShsoftException {fixedAssetsIndicatorService.delete(id);return new JSONResult();}@ApiOperation(value = "新增", httpMethod = "POST")@RequestMapping("/save.do")@ResponseBodypublic JSONResult save(@Validated FixedAssetsIndicator toDB) throws ShsoftException {toDB.setId(new UUIDFactory().generate().toString());fixedAssetsIndicatorService.save(toDB);return new JSONResult();}@ApiOperation(value = "修改", httpMethod = "POST")@RequestMapping("/update.do")@ResponseBodypublic JSONResult update(@Validated FixedAssetsIndicator toDB) throws ShsoftException {fixedAssetsIndicatorService.update(toDB);return new JSONResult();}@ApiOperation(value = "导出", httpMethod = "POST")@RequestMapping("/export.do")@ResponseBodypublic JSONResult exportExcel(@Validated ListFixedAssetsIndicatorParam param, HttpServletRequest request, HttpServletResponse response) throws ShsoftException { JSONResult result = new JSONResult();PageInfo<FixedAssetsIndicator> pageInfo = fixedAssetsIndicatorService.list(param);List<FixedAssetsIndicator> list = pageInfo.getList();List<Map<String, Object>> listMap = new ArrayList<Map<String, Object>>();if(list != null && list.size() > 0){for (int i = 0; i < list.size(); i++) {Map<String, Object> lm = new HashMap<String, Object>();if(list.get(i).getCity() != null ){lm.put("city", list.get(i).getCity());}if(list.get(i).getCityCode() != null ){lm.put("cityCode", list.get(i).getCityCode());}if(list.get(i).getFixedInvestmentTotal() != null ){lm.put("fixedInvestmentTotal", list.get(i).getFixedInvestmentTotal());}if(list.get(i).getFixedInvestmentSpeedUp() != null ){lm.put("fixedInvestmentSpeedUp", list.get(i).getFixedInvestmentSpeedUp());}if(list.get(i).getFolkInvestmentTotal() != null ){lm.put("folkInvestmentTotal", list.get(i).getFolkInvestmentTotal());}if(list.get(i).getFolkInvestmentSpeedUp() != null ){lm.put("folkInvestmentSpeedUp", list.get(i).getFolkInvestmentSpeedUp());}listMap.add(lm);}}Calendar calendar = Calendar.getInstance();calendar.setTime(param.getCountTime());Map<String, Object> map = new HashMap<String, Object>();map.put("maplist", listMap);map.put("year", calendar.get(Calendar.YEAR));map.put("month", calendar.get(Calendar.MONTH + 1));TemplateExportParams params = new TemplateExportParams("excel_temple/固定资产投资/分市固定资产投资主要指标.xls");Workbook workbook = ExcelExportUtil.exportExcel(params, map);OutputStream os = null;try {response.setHeader("content-Type", "application/vnd.ms-excel;charset=utf-8");response.setHeader("Content-disposition","attachment;filename=分市固定资产投资主要指标.xls");os = response.getOutputStream();workbook.write(os);os.flush();} catch (Exception e) {e.printStackTrace();}return result;}@ApiOperation(value = "导⼊", httpMethod = "POST")@RequestMapping("/import.do")@ResponseBodypublic JSONResult importExcel(HttpServletRequest request) throws ShsoftException {MultipartHttpServletRequest multipartHttpServletRequest = ((MultipartHttpServletRequest) request);MultipartFile file = multipartHttpServletRequest.getFile("file");JSONResult result = new JSONResult();ImportParams params = new ImportParams();params.setTitleRows(3);params.setHeadRows(1);params.setStartRows(1);try {if(file.getSize() > 0){List<FixedAssetsIndicator> dataList = new ShExcelImportUtils().importExcelByIs(file.getInputStream(), FixedAssetsIndicator.class,params, false).getList();fixedAssetsIndicatorService.insertBatch(dataList);}else{result = new JSONResult(new ErrorMessage(Error.DAMPE_FIELD_UNAUTH.getCode(),Error.DAMPE_FIELD_UNAUTH.getMessage()));}} catch (Exception e) {throw new ShsoftException(e.getMessage(),e);}return result;}}若⽂章在表述和代码⽅⾯如有不妥之处,欢迎批评指正。
mybatis-plus-generator datetime 类型如何使用Mybatis Plus生成器生成DateTime类型字段中括号中的Mybatis Plus生成器是一个非常实用的工具,可以帮助开发人员快速生成数据库表对应的实体类、Mapper接口以及Service接口和实现类,省去了开发人员手动编写大量重复的代码的时间和精力。
在实际开发过程中,经常会遇到需要处理日期时间类型的字段,而Mybatis Plus生成器默认生成的实体类中日期时间类型字段的映射方式可能不符合我们的需求。
因此,本文将以DateTime类型字段为例,一步一步介绍如何使用Mybatis Plus生成器生成符合需求的实体类。
首先,我们需要先确定数据库表中的DateTime类型字段,假设我们有一个名为user的表,其中包含一个名为create_time的DateTime类型字段。
接下来,我们将使用Mybatis Plus生成器生成对应的实体类。
第一步:配置Mybatis Plus Generator在项目的pom.xml文件中,添加Mybatis Plus Generator的依赖:<dependency><groupId>com.baomidou</groupId><artifactId>mybatis-plus-generator</artifactId><version>3.4.2</version></dependency>然后在项目的resources目录下创建一个名为generator.properties的配置文件,用于配置Mybatis Plus Generator的相关参数,例如数据库连接信息、生成路径等。
generator.properties配置示例:# 数据库连接信息spring.datasource.url=jdbc:mysql:localhost:3306/testspring.datasource.driverClassName=com.mysql.cj.jdbc.Driver ername=rootspring.datasource.password=root# 生成包名=com.example.entity# 生成路径output.dir=src/main/java第二步:编写代码生成器创建一个名为CodeGenerator的Java类,用于启动Mybatis Plus Generator 并生成实体类。
mybatis自动生成selectbyexample用法MyBatis是一个流行的Java持久层框架,提供了一种简洁而强大的数据库访问方式。
它的自动化映射功能可以根据数据库表结构自动生成对应的Java对象和SQL代码。
其中,selectByExample是MyBatis提供的一种根据条件查询的方法,可以根据传入的Example对象生成相应的查询语句。
本篇文章将一步一步地介绍selectByExample的用法。
首先,我们需要在项目中引入MyBatis的相关依赖。
可以通过Maven管理依赖,添加以下代码到pom.xml文件中:xml<dependencies><! MyBatis ><dependency><groupId>org.mybatis</groupId><artifactId>mybatis</artifactId><version>3.5.6</version></dependency><! JDBC ><dependency><groupId>mysql</groupId><artifactId>mysql-connector-java</artifactId><version>8.0.26</version></dependency></dependencies>接下来,我们需要定义一个Example类来描述查询条件。
Example类是MyBatis 提供的查询条件模板,通过设置Example对象的属性来指定查询条件。
可以根据需要在Example类中定义多个属性。
javapublic class UserExample {private String name; 姓名private Integer age; 年龄省略getter和setter方法}然后,我们需要在Mapper接口中定义一个selectByExample方法,用于执行查询操作并返回符合条件的结果。
SpringBoot整合mybatis-generator-maven-plugin的⽅法前⾔:SpringBoot版本 : 2.2.6mybatis-generator-maven-plugin版本: 1.4.0plugin 使⽤ mysql版本: 5.1.47本次主要记录⽇和使⽤该插件⾃动⽣成pojo mapper xml⽂件(单表)1 创建SpringBoot⼯程这⾥不做具体记录,创建⼯程往常教程很多,下⾯贴出重要⽂件和注意事项1.1 pom.xml<?xml version="1.0" encoding="UTF-8"?><project xmlns="/POM/4.0.0"xmlns:xsi="/2001/XMLSchema-instance"xsi:schemaLocation="/POM/4.0.0 /xsd/maven-4.0.0.xsd"><modelVersion>4.0.0</modelVersion><groupId>show.mrkay</groupId><artifactId>boot-mybatis-generator</artifactId><version>1.0-SNAPSHOT</version><packaging>jar</packaging><parent><groupId>org.springframework.boot</groupId><artifactId>spring-boot-starter-parent</artifactId><version>2.2.6.RELEASE</version></parent><properties><project.build.sourceEncoding>UTF-8</project.build.sourceEncoding><project.reporting.outputEncoding>UTF-8</project.reporting.outputEncoding><java.version>1.8</java.version></properties><dependencies><!--springboot--><dependency><groupId>org.springframework.boot</groupId><artifactId>spring-boot-starter</artifactId></dependency><dependency><groupId>org.springframework.boot</groupId><artifactId>spring-boot-starter-web</artifactId></dependency><dependency><groupId>org.springframework.boot</groupId><artifactId>spring-boot-starter-test</artifactId></dependency><!--mysql--><dependency><groupId>mysql</groupId><artifactId>mysql-connector-java</artifactId></dependency><dependency><groupId>com.alibaba</groupId><artifactId>druid-spring-boot-starter</artifactId><version>1.1.9</version></dependency><!--mybatis--><dependency><groupId>org.mybatis.spring.boot</groupId><artifactId>mybatis-spring-boot-starter</artifactId><version>2.1.0</version></dependency><!--⽇志--><!--因为是基于AOP实现的所以这⾥必须要调⼊aop--><dependency><groupId>org.springframework.boot</groupId><artifactId>spring-boot-starter-aop</artifactId></dependency><!--门⾯--><dependency><groupId>org.slf4j</groupId><artifactId>jcl-over-slf4j</artifactId></dependency><!--log4j12--><dependency><groupId>org.slf4j</groupId><artifactId>slf4j-log4j12</artifactId></dependency></dependencies><build><!--插件--><plugins><!--springboot的maven插件--><plugin><groupId>org.springframework.boot</groupId><artifactId>spring-boot-maven-plugin</artifactId></plugin><plugin><groupId>org.mybatis.generator</groupId><artifactId>mybatis-generator-maven-plugin</artifactId><version>1.4.0</version><!--插件设置--><configuration><!--允许移动⽣成的⽂件--><verbose>true</verbose><!--启⽤覆盖--><overwrite>true</overwrite><!--⾃动⽣成配置如果名字是generatorConfig.xml可以省略配置--><!--<configurationFile>src/main/resources/generatorConfig.xml</configurationFile>--></configuration><dependencies><dependency><groupId>mysql</groupId><artifactId>mysql-connector-java</artifactId><version>5.1.47</version></dependency></dependencies></plugin></plugins></build></project>1.2 application.ymlserver:port: 8080spring:datasource:driver-class-name: com.mysql.jdbc.Driverurl: jdbc:mysql://localhost:3306/generaltor?useUnicode=true&characterEncoding=utf-8&serverTimezone=GMTusername: rootpassword: lk0313druid:db-type: com.alibaba.druid.pool.DruidDataSource# 下⾯不配置就是采⽤默认配置# filters: stat# maxActive: 20# initialSize: 1# maxWait: 60000# minIdle: 1# timeBetweenEvictionRunsMillis: 60000# minEvictableIdleTimeMillis: 300000# validationQuery: select 'x'# testWhileIdle: true# testOnBorrow: false# testOnReturn: false# poolPreparedStatements: true# maxOpenPreparedStatements: 20mybatis:# 该配置项配置了MyBatis配置⽂件保存路径mapper-locations: classpath*:show/makey/dao/*.xml# 配置扫描对应实体所在包,将mapper的实现类注⼊容器我们在启动器类上加了@MapperScan注解这⾥就不需要了logging:file:path: /logs# type-aliases-package: show.mrkay.dao1.3 generatorConfig.xml<?xml version="1.0" encoding="UTF-8" ?><!DOCTYPE generatorConfiguration PUBLIC "-////DTD MyBatis Generator Configuration 1.0//EN""/dtd/mybatis-generator-config_1_0.dtd"><generatorConfiguration><context id="DB2Tables" targetRuntime="MyBatis3"><commentGenerator><!-- 是否⽣成注释代时间戳--><property name="suppressDate" value="true"/><!-- 是否去除⾃动⽣成的注释 true:是: false:否 --><property name="suppressAllComments" value="true"/></commentGenerator><!--数据库链接地址账号密码--><jdbcConnection driverClass="com.mysql.jdbc.Driver" connectionURL="jdbc:mysql://127.0.0.1:3306/generaltor?serverTimezone=Asia/Shanghai" userId="root" password="lk0313"></jdbcConnection><javaTypeResolver><!--该属性可以控制是否强制DECIMAL和NUMERIC类型的字段转换为Java类型的java.math.BigDecimal,默认值为false,⼀般不需要配置。
使用Mybatis Generator自动生成Mybatis相关代码本文将简要介绍怎样利用Mybatis Generator自动生成Mybatis的相关代码:一、构建一个环境:1. 首先创建一个表:Sql代码1.CREATE TABLE pet (name VARCHAR(20), owner VARCHAR(20), species VARCHAR(20), sex CHAR(1), birth DATE, death DATE);2. 然后注入数据Sql代码1.insert into pet values('Fluffy', 'Harold', 'cat', 'f', '1993-02-04', null);2.insert into pet values('Claws', 'Gwen', 'cat', 'm', '1994-03-17', null);3.insert into pet values('Buffy', 'Harold', 'dog', 'f', '1989-05-13', null);4.insert into pet values('Fang', 'Benny', 'dog', 'm', '1990-08-27', null);5.insert into pet values('Bowser', 'Diane', 'dog', 'm', '1979-08-31', '1995-07-29');6.insert into pet values('Chirpy', 'Gwen', 'bird', 'f', '1998-09-11', null);7.insert into pet values('Whistler', 'Gwen', 'bird', null, '1997-12-09', null);8.insert into pet values('Slim', 'Benny', 'snake', 'm', '1996-04-29', null);注:这里的sql例子来自/doc/refman/5.5/en/creating-tables.html3. 在Mybatis 主页/p/mybatis/ 上下载Mybatismybatis-generator-core [本文使用的是1.3.0 版本]。
当然运行mybatis-generator 生成的代码还需要下载mybatis 的jar 包[本例使用的是3.0.2 版本],和相关数据库的jdbc [本文中使用的是MySql的jdbc] 。
二、运行mybatis-generator1. 要运行generator ,需要给generator 提供一个配置文件,指定其生成的数据库的相关信息。
以下是一个示例:Xml代码1.<?xml version="1.0" encoding="UTF-8"?>2.<!DOCTYPE generatorConfiguration3. PUBLIC "-////DTD MyBatis Generator Configuration 1.0//EN"4. "/dtd/mybatis-generator-config_1_0.dtd">5.6.<generatorConfiguration>7. <classPathEntry location="mysql-connector-java-5.1.6-bin.jar" />8.9. <context id="DB2Tables" targetRuntime="MyBatis3">10.11. <commentGenerator>12. <property name="suppressDate" value="true" />13. </commentGenerator>14.15. <jdbcConnection driverClass="com.mysql.jdbc.Driver"16. connectionURL="jdbc:mysql://localhost/test" userId="qgd" password="123456">17. </jdbcConnection>18.19. <javaTypeResolver>20. <property name="forceBigDecimals" value="false" />21. </javaTypeResolver>22.23. <javaModelGenerator targetPackage="test.model"24. targetProject="../src/main/java">25. <property name="enableSubPackages" value="true" />26. <property name="trimStrings" value="true" />27. </javaModelGenerator>28.29. <sqlMapGenerator targetPackage="test.dao"30. targetProject="../src/main/java">31. <property name="enableSubPackages" value="true" />32. </sqlMapGenerator>33.34. <javaClientGenerator type="XMLMAPPER"35. targetPackage="test.dao" targetProject="../src/main/java">36. <property name="enableSubPackages" value="true" />37. </javaClientGenerator>38.39. <table tableName="pet" domainObjectName="Pet">40. </table>41.42. </context>43.</generatorConfiguration>这个配置文件提供了mybatis-generator所需要的参数信息:* 其中classPathEntry 是引用的jdbc的类路径,这里将jdbc jar和generator的jar包放在一起了;* commentGenerator 是用来除去时间信息的,这在配合类似subversion的代码管理工具时使用很有效,因为可以减少没有必要的注释迁入;* jdbcConnection是指定的jdbc的连接信息;* javaTypeResolver式类型转换的信息,这里并没有用到;* javaModelGenerator是模型的生成信息,这里将指定这些Java model类的生成路径;* sqlMapGenerator是mybatis 的sqlMapper XML文件的生成信息,包括生成路径等;* javaClientGenerator是应用接口的生成信息;* table是用户指定的被生成相关信息的表,它必须在指定的jdbc连接中已经被建立。
2. mybatis-generator 有多种运行方式,最简单的就是命令行的方式,只需要指定相应的配置文件的路径即可:Java代码1.java -jar mybatis-generator-core-1.3.0.jar -configfile ../src/main/resource/config.xml -overwrite运行后生成的代码包括模型类test.model.Pet 和test.model.PetExample ,test.dao.PetMapper 接口以及其相对应的xml 映射文件,在这里就不在赘述了。
三、使用mybatis-generator 生成的代码1. 现在我们要利用这些生成的代码,首先我们需要一个关于所有映射的配置文件。
需要我们手写如下:【不知道为什么generator没有选择自动生成这个文件,毕竟这些信息generator 都可以得到】Xml代码1.<?xml version="1.0" encoding="UTF-8" ?>2.<!DOCTYPE configuration3. PUBLIC "-////DTD Config 3.0//EN"4. "/dtd/mybatis-3-config.dtd">5.<configuration>6. <environments default="development">7. <environment id="development">8. <transactionManager type="JDBC" />9. <dataSource type="POOLED">10. <property name="driver" value="com.mysql.jdbc.Driver" />11. <property name="url" value="jdbc:mysql://localhost/test" />12. <property name="username" value="qgd" />13. <property name="password" value="123456" />14. </dataSource>15. </environment>16. </environments>17. <mappers>18. <mapper resource="test/dao/PetMapper.xml" />19. </mappers>20.</configuration>2. 另外还要使用然后我们还需要一个Main示例方法来调用这些已生成的代码:Java代码1.package test;2.3.import java.io.Reader;4.import java.util.List;5.6.import org.apache.ibatis.io.Resources;7.import org.apache.ibatis.session.SqlSession;8.import org.apache.ibatis.session.SqlSessionFactory;9.import org.apache.ibatis.session.SqlSessionFactoryBuilder;10.11.import test.dao.PetMapper;12.import test.model.Pet;13.import test.model.PetExample;14.15.public class Test {16.17. public static void main(String[] args) throws Exception {18. String resource = "MapperConfig.xml";19. Reader reader = Resources.getResourceAsReader(resource);20. SqlSessionFactory sqlMapper = new SqlSessionFactoryBuilder().build(reader);21. SqlSession sqlSession = sqlMapper.openSession();22.23. PetExample pet = new PetExample();24. pet.or().andDeathIsNotNull();25. try {26. PetMapper mapper = sqlSession.getMapper(PetMapper.class);27. List<Pet> allRecords = mapper.selectByExample(pet);28. for (Pet s : allRecords)29. System.out.println(s);30. } finally {31. sqlSession.close();32. }33. }34.}这样就可以打印出相应的查询结果信息了。