神州数码配置命令
- 格式:doc
- 大小:798.00 KB
- 文档页数:13
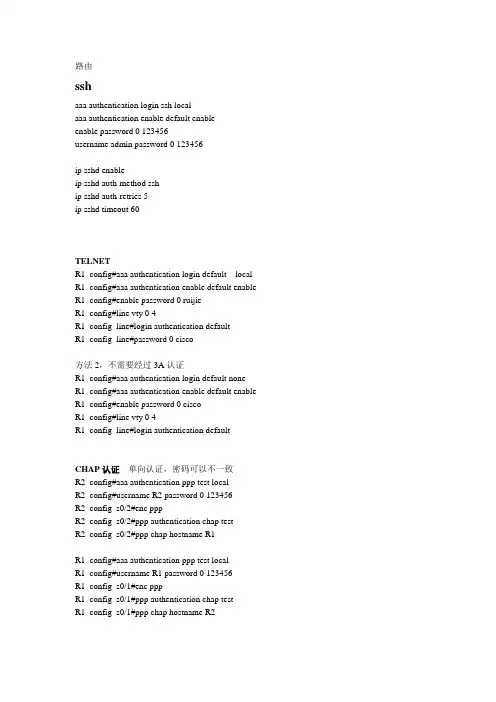
路由sshaaa authentication login ssh localaaa authentication enable default enableenable password 0 123456username admin password 0 123456ip sshd enableip sshd auth-method sship sshd auth-retries 5ip sshd timeout 60TELNETR1_config#aaa authentication login default local R1_config#aaa authentication enable default enable R1_config#enable password 0 ruijieR1_config#line vty 0 4R1_config_line#login authentication defaultR1_config_line#password 0 cisco方法2,不需要经过3A认证R1_config#aaa authentication login default noneR1_config#aaa authentication enable default enable R1_config#enable password 0 ciscoR1_config#line vty 0 4R1_config_line#login authentication defaultCHAP认证单向认证,密码可以不一致R2_config#aaa authentication ppp test localR2_config#username R2 password 0 123456R2_config_s0/2#enc pppR2_config_s0/2#ppp authentication chap testR2_config_s0/2#ppp chap hostname R1R1_config#aaa authentication ppp test localR1_config#username R1 password 0 123456R1_config_s0/1#enc pppR1_config_s0/1#ppp authentication chap testR1_config_s0/1#ppp chap hostname R2pap认证双向认证,密码要求一致R2_config#aaa authentication ppp test localR2_config#username R2 password 0 123456R2_config_s0/2#enc pppR2_config_s0/2#ppp authentication pap testR2_config_s0/2#ppp pap sent-username R1 password 123456R1_config#aaa authentication ppp test localR1_config#username R1 password 0 123456R1_config_s0/1#enc pppR1_config_s0/1#ppp authentication pap testR1_config_s0/1#ppp pap sent-username R2 password 123456FRRouter-A_config_s1/1#encapsulation frame-relay !封装帧中继协议Router-A_config_s1/1#frame-relay local-dlci 17 !设置本地DLCI 号Router-A_config_s1/1# frame-relay intf-type dce !配置FR的DCERouter-A_config_s1/1# frame-relay map 192.168.1.2 pvc 17 broadcast !配置DLCI 与对端IP的映射VrrpInt g0/4vrrp 1 associate 192.168.20.254 255.255.255.0vrrp 1 priority 120 设置优先级,为主vrrp 1 preempt 开启抢占vrrp 1 track interface Serial0/1 30 追踪上行接口,防止上行接口DOWN了,自动降低优先级Int g0/6vrrp 1 associate 192.168.20.254 255.255.255.0vrrp 1 priority 100 设置优先级,为备,默认为100vrrp 1 preempt 开启抢占vrrp 1 track interface Serial0/2 30 追踪上行接口,防止上行接口DOWN了,自动降低优先级RIP 验证,只有V2支持验证interface Serial0/2 接口起验证和配密码ip rip authentication simpleip rip password 123456RIP改单播router ripnei 192.168.1.1RIP定时器router riptimers update 10 更新时间timers exipire 30 失效时间timers hosddown 50 抑制时间ospfrouter os 1net 192.168.1.0 255.255.255.0 ar 0 不能写32位掩码OSPF 虚链路ROUTER OS 2 进程起用AR 1 VI 2.2.2.2 对方ROUTER-IDOSPF 汇总ROUTER OS 2 进程起用ar 0 range 192.168.0.0 255.255.252.0OSPF 验证ROUTER OS 2 明文AR 0 AUTHEN SP 进程给需要验证的区域启用验证INT S0/1IP OS passw 123456 接口配置密码密文router os 2ar 0 authen meint s0/1ip os me 1 md5 123456bgprouter bgp 100no synchronization bgp全互联必须要关闭同步检查nei 192.168.12.1 remot 200 与AS外部路由建立邻居nei 2.2.2.2 remot 100 与AS内部路由建立邻居nei 2.2.2.2 up lo0 改更新接口为环回接口nei 2.2.2.2 next-hop-self 改下一跳为自己net 2.2.2.0 通告路由表里面有的路由ACL路由上面的ACL要写子网掩码,不能写反掩码!!!!!基于时间的ACLtime-range acl 定义一个时间范围periodic weekdays 09:00 to 12:00periodic weekdays 14:00 to 17:00IP access-list extended time 写一个基于时间的acl,调用时间段deny ip 192.168.10.0 255.255.255.0 any time-range aclpermit ip any anyint g0/4 应用到接口ip access-group time inint g0/6ip access-group time in静态NATip route 0.0.0.0 0.0.0.0 192.168.12.2ip nat inside source static 192.168.10.10 192.168.12.1int g0/6ip nat inints0/1ip nat outNAPTip access-list standard NAT 定义要转换的IP网段permit 192.168.10.0 255.255.255.0ip nat pool NAT 192.168.23.10 192.168.23.20 255.255.255.0 创建转换的IP地址池ip nat inside source list NAT pool NAT overload 关联要转换的IP网段和地址池ip route default 192.168.23.3 写一条缺省路由,下一跳为出口网关的下一跳router rip 如果跑路由协议,要把缺省重分发到动态路由redistribute staticinterface Serial0/1 运用到内网接口ip nat insideinterface Serial0/2 运用到外网接口ip nat outsideroute-mapip acce sta acl 定义要匹配的流量per 192.168.20.0 255.255.255.0route-map SHENMA 10 permitma ip add acl 调用ACLset ip next-hop 192.168.12.1 改下一跳int g0/3ip po route-map SHENMA 定义到原接口DHCP给路由接口分配IP,不能是S口!!!R1ip dhcpd enableip dhcpd pool 1network 192.168.12.0 255.255.255.0range 192.168.12.10 192.168.12.20R2interface GigaEthernet0/6ip address dhcp给PC分配IP,底层网络要起路由互通!!!!实验全网起了RIP协议R1ip dhcpd enableip dhcpd pool 2network 192.168.1.0 255.255.255.0range 192.168.1.10 192.168.1.20default-router 192.168.1.1R2ip dhcpd enable 要开启DHCP服务!interface GigaEthernet0/4ip address 192.168.1.1 255.255.255.0ip helper-address 192.168.12.2 设置DHCP服务器IPVPN (GRE)int t0ip add 172.168.10.1 255.255.255.0 给T0配IPt so s0/2 源,路由的出接口t de 192.168.23.3 目的,对端的出接口IP,注意,要可达t key 123456 T0口密码,两端要一致exitip route 192.168.20.0 255.255.255.0 t0 用T0口写一条要到达网段的静态路由int t0ip add 172.168.10.3 255.255.255.0t so s0/1t de 192.168.12.1t key 123456exitip route 192.168.10.0 255.255.255.0 t0VPN (IPSEC)R1crypto ipsec transform-set SHENMA 设置转换集transform-type esp-des esp-md5-hmac 转换集的加密方式ip access-list extended 100 匹配感兴趣流permit ip 192.168.10.0 255.255.255.0 192.168.20.0 255.255.255.0crypto map HAN 10 ipsec-isakmpset peer 192.168.23.3 设置对等体set transform-set SHENMA 关联转换集match address 100 关联感兴趣流interface Serial0/2 进接口调用crypto map HANR3crypto ipsec transform-set SHENMA 设置转换集transform-type esp-des esp-md5-hmac 转换集的加密方式,两端要一致ip access-list extended 100 匹配感兴趣流permit ip 192.168.20.0 255.255.255.0 192.168.10.0 255.255.255.0crypto map HAN 10 ipsec-isakmpset peer 192.168.12.1 设置对等体set transform-set SHENMA 关联转换集match address 100 关联感兴趣流interface Serial0/1 进接口调用crypto map HANVPN (IKE)crypto isakmp key SHENMA 192.168.23.3 255.255.255.0 设置公共用密钥crypto isakmp policy 10 设置IKE策略hash md5au preenc desgroup 1lifetime 86400crypto ipsec transform-set SHENMA 设置转换集transform-type esp-Des esp-Md5-hmacip access-list extended 100 匹配感兴趣流permit ip 192.168.10.0 255.255.255.0 192.168.30.0 255.255.255.0crypto map SHENMA 10 ipsec-isakmp 设置IPSEC加密映射set peer 192.168.23.3set transform-set SHENMAmatch address 100int s0/2 调用到接口crypto map SHENMAQOSint g0/4ip add 192.168.10.1 255.255.255.0no shutip add 192.168.20.1 255.255.255.0no shutint s0/1ip add 192.168.12.1 255.255.255.0phy spe 64000no shutip route 0.0.0.0 0.0.0.0 192.168.12.2ip access-list ex 1 定义ACL抓取流量permit ip 192.168.10.0 255.255.255.0 2.2.2.0 255.255.255.0ip access-list ex 2permit ip 192.168.20.0 255.255.255.0 2.2.2.0 255.255.255.0priority 1 protocol ip high list 1 写一个IP协议的优先列表,调用ACL 1里面的地址,级别为HIGHpriority 1 protocol ip low list 2 写一个IP协议的优先列表,调用ACL 2里面的地址,级别为LOWint s0/1 进接口调用priority 1交换banner motd 系统登录标题telnettelnet-server enable 开启TELNETtelnet-server max-connection 16 最大连接数sshusername ssh password 0 123456ssh-server enable 开启SSHssh-server timeout 60 连接超时时间ssh-server max-connection 16 最大连接数ssh-server authentication-retries 5 重连次数ssh-server host-key create rsa 创建新的主机密钥1,首先要给所有的VLAN配上IPINT VLAN 10IP ADD 192.168.10.1 255.255.255.0NO SHUT2,创建一个VRRP组ROUTER VRRP 10VIRTUAL-IP 192.168.10.254 给虚拟IPINT VLAN 10 关联VLANPRIORITY 120 给优先级(默认100)ENABLE 激活STPSW1spanning-tree 开启STPspanning-tree mode mstp 改为MSTP模式spanning-tree mst configurtaion 配置域name shenma域名revision-level 3 修正级别instance 1 vlan10;20 在实例里面关联VLANinstance2 vlan30;40exitspanning-tree mst 1priority 4096 给实例配置优先级,越小的级别越高spanning-tree mst 2 priority 8192SW2spanning-tree 开启STPspanning-tree mode mstp 改为MSTP模式spanning-tree mst configurtaion 配置域name shenma域名revision-level 3 修正级别instance 1 vlan10;20 在实例里面关联VLANinstance2 vlan30;40exitspanning-tree mst 1priority 8192 给实例配置优先级,越小的级别越高spanning-tree mst 2 priority 4096SW21spanning-tree 开启STPspanning-tree mode mstp 改为MSTP模式spanning-tree mst configurtaion 配置域name shenma域名revision-level 3 修正级别instance 1 vlan10;20 在实例里面关联VLANinstance2 vlan30;40AM端口安全am enableint e1/0/1am portam mac-ip-pool 0000.1111.2222 192.168.10.1端口镜像monitor session 1 source int e1/0/1 bothmonitor session 1 destination int e1/0/15RIPRouter ripNet 192.168.1.0/24Router os 1Net 192.168.1.0 0.0.0.255 ar 0AclFirewall enableIp access-list ex 100Per ip 192.168.1.0 0.0.0.255 192.168.2.0 0.0.0.255单臂路由R1int g0/5no shutinterface GigaEthernet0/5.1encapsulation dot1Q 100ip address 192.168.10.1 255.255.255.0interface GigaEthernet0/5.2encapsulation dot1Q 200ip address 192.168.20.1 255.255.255.0interface GigaEthernet0/5.3encapsulation dot1Q 300ip address 192.168.30.1 255.255.255.0SW1vlan 100\sw int e1/0/1-2vlan 200sw int e1/0/3-4vlan 300sw int e1/0/5-6int e1/0/20sw mo trsw tr all vlan all端口聚合PORT-GROUP 1 创建一个组INT E1/0/17-18 聚合端口要设置为TRUNKSW MO TRSW TR ALL VLAN ALLPORT-GROUP 1 MO ON 设置聚合端口的模式为自动匹配EXITINT PORT-CHANNAL 1 进入聚合端口配置模式,也要设置为TRUNK SW MO TRSW TR ALL VLAN ALLEXITdhcpSERV DHCP 开启DHCP服务IP DHCP POOL VLAN10 创建地址池NETW 192.168.10.0 255.255.255.0def 192.168.10.1le 2dns 8.8.8.8ip dhcp ex 192.168.10.1 192.168.10.10 排除地址范围dhcp 中继serv dhcpip for udp bootint vlan 10ip he 192.168.12.2dhcp snoopingserv dhcp 开启DHCP服务ip dhcp snooping enable 开启DHCP SNOOPING 功能ip dhcp snooping binding enable 开启SNOOPING 绑定功能int e1/0/20ip dhcp snooping trust 设置接口为信任接口,一般是与服务器相连的接口int e1/0/1ip dhcp snooping binding user-control 设置端口自动绑定获取DHCP的地址设置端口手动绑定MAC,VLAN,IP,端口信息(全局模式)ip dhcp snooping binding user 00-11-22-33-44-55 address 192.168.22.22 vlan 1 int e1/0/5ipv66 to 4greipv6 unicast-routing 允许单播路由interface Tunnel0ipv6 enable 开启IPV6ipv6 address 2001:23::1/64tunnel source 192.168.12.1 本端接口地址tunnel destination 192.168.12.2 对端接口地址tunnel mode gre ip 隧道模式改为GREtunnel key 123456 隧道密码,两端一致ipv6 route 3::/64 Tunnel0 写一条下一跳为TUNNEL 0的IPV6静态,不能写默认静态natInternet(config)#ip route 0.0.0.0 0.0.0.0 fa0/1 ipv4网络要可达NA T-PT(config)#ip route 0.0.0.0 0.0.0.0 fa0/1NA T-PT(config)#ipv6 nat prefix 2001:db8:feed::/96 设置一个全局NAT前缀,掩码必须96位NA T-PT(config)#ipv6 nat v4v6 source 10.10.10.2 2001:db8:feed::2 写4 TO 6 地址转换,需要到达的地址都要写, 不需要与本地同一网段NA T-PT(config)#ipv6 nat v4v6 source 192.168.1.10 2001:db8:feed::3NA T-PT(config)#ipv6 nat v6v4 source 2001:db8:cafe:ffff::2 10.10.20.5 写6 to 4 地址转换,需要到达的地址都要写,不需要与本地同一网段int g0/4 调用到接口,进出都要调用ipv6 natint g0/4ipv6 natpatipv4 网络要可达NA T-PT(config)#ipv6 nat prefix 2001:db8:feed::/96 设置一个全局NAT 前缀,掩码必须96位NA T-PT(config)#ipv6 nat v4v6 source 10.10.10.2 2001:db8:feed::2 写4 TO 6 地址转换,需要到达的地址都要写NA T-PT(config)#ipv6 nat v4v6 source 192.168.1.10 2001:db8:feed::3 不需要与本地同一网段NA T-PT(config)#ipv6 access-list cafe 把IPV6要转换的网段匹配出来NA T-PT(config-ipv6-acl)#permit ipv6 2001:db8:cafe::/48 anyNA T-PT(config-ipv6-acl)#exitNA T-PT(config)#ipv6 nat v6v4 pool ipv4 10.10.20.5 10.10.20.6 prefix-length 24 写一个6 TO 4 的NAT地址池,不需要已知网段NA T-PT(config)#ipv6 nat v6v4 source list cafe pool ipv4 overload 把要转换的网段与地址池关联int g0/4ipv6 natint g0/4ipv6 natripingipv6 router rip 100 全局创建RIP实例,名字为100exitinterface GigaEthernet0/4ipv6 enable 开启IPV6ipv6 address 2001::1/64ipv6 rip 100 enable 启动为100的实例需要宣告的接口要设置ospfv3ipv6 router ospf 1 全局创建ospf,进程为1 int g0/6ipv6 enableipv6 address 2001::1/64ipv6 ospf 1 area 0 宣告本接口为area 0 需要宣告的接口要设置。
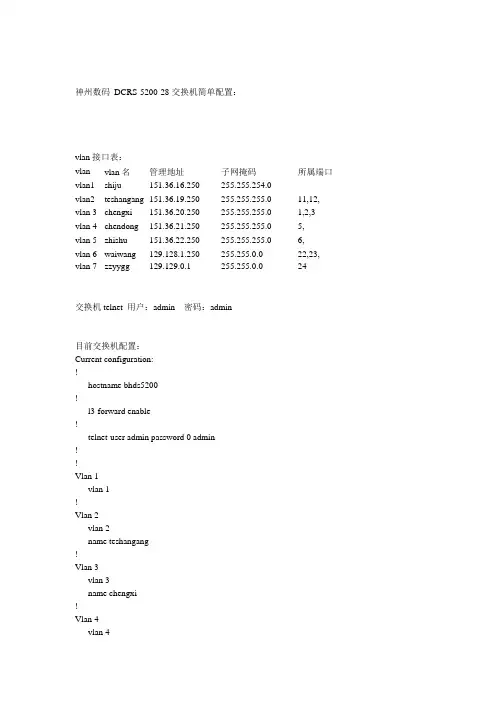
神州数码DCRS-5200-28 交换机简单配置:vlan 接口表:vlan vlan 名管理地址子网掩码所属端口vlan1 shiju 151.36.16.250 255.255.254.0vlan2 teshangang 151.36.19.250 255.255.255.0 11,12, vlan 3 chengxi 151.36.20.250 255.255.255.0 1,2,3 vlan 4 chendong 151.36.21.250 255.255.255.0 5,vlan 5 zhishu 151.36.22.250 255.255.255.0 6,vlan 6 waiwang 129.128.1.250 255.255.0.0 22,23, vlan 7 zzyygg 129.129.0.1 255.255.0.0 24交换机telnet 用户:admin 密码:admin目前交换机配置:Current configuration:!hostname bhds5200!l3-forward enable!telnet-user admin password 0 admin!!Vlan 1vlan 1!Vlan 2vlan 2name teshangang!Vlan 3vlan 3name chengxi!Vlan 4vlan 4name chengdong!Vlan 5vlan 5name zhishu!Vlan 6vlan 6name waiwang!Vlan 7vlan 7name zzyygg!!Interface Ethernet0/0/1switchport access vlan 3 !Interface Ethernet0/0/2switchport access vlan 3 !Interface Ethernet0/0/3switchport access vlan 3 !Interface Ethernet0/0/4!Interface Ethernet0/0/5switchport access vlan 4 !Interface Ethernet0/0/6switchport access vlan 5 !Interface Ethernet0/0/7!Interface Ethernet0/0/8!Interface Ethernet0/0/9!Interface Ethernet0/0/10!Interface Ethernet0/0/11switchport access vlan 2 !Interface Ethernet0/0/12switchport access vlan 2!Interface Ethernet0/0/13!Interface Ethernet0/0/14!Interface Ethernet0/0/15!Interface Ethernet0/0/16!Interface Ethernet0/0/17!Interface Ethernet0/0/18!Interface Ethernet0/0/19!Interface Ethernet0/0/20!Interface Ethernet0/0/21!Interface Ethernet0/0/22switchport access vlan 6!Interface Ethernet0/0/23switchport access vlan 6!Interface Ethernet0/0/24switchport access vlan 7!Interface Ethernet0/0/25!Interface Ethernet0/0/26!Interface Ethernet0/0/27!Interface Ethernet0/0/28!!interface Vlan1interface vlan 1imp address 151.36.16.250 255.255.254.0 !!interface Vlan2interface vlan 2ip address 151.36.19.250 255.255.255.0!!interface Vlan3interface vlan 3ip address 151.36.20.250 255.255.255.0!!interface Vlan4interface vlan 4ip address 151.36.21.250 255.255.255.0!!interface Vlan6interface vlan 6ip address 129.128.1.250 255.255.0.0!!interface Vlan7interface vlan 7ip address 129.129.0.1 255.255.0.0!ip route 151.36.47.0 255.255.255.0 151.36.16.253 ip route 151.16.16.0 255.255.248.0 151.36.16.253 ip route 23.136.98.0 255.255.255.0 151.36.16.99 ip route 0.0.0.0 0.0.0.0 129.128.1.254!!bhds5200#简单命令介绍:启动交换机进入CLI 界面后:switch#>enable *进入特权模式switch## *特权模式switch#config terminal *进入全局模式switch(config)#hostname bhds5200 *更改交换机名称bhds5200(config)#bhds5200(Config)#l3-forward enable *开启交换机三层转发功能L3 Function is alredy enabled!bhds5200(config)#vlan 1 *配置vlan1,vlan1 为默认vlan 不能更改或删除bhds5200(Config-Vlan1)#interface vlan 1 *进入vlan1 接口模式bhds5200(Config-If-Vlan1)#ip address 151.36.16.250 255.255.254.0 *设置vlan1 管理地址bhds5200(config)#vlan 2 *配置vlan2bhds5200(Config-Vlan2)# name teshangang *设置vlan2 名称bhds5200(Config-Vlan2)# switchport interface ethernet0/0/11-12 *将11 和12 口加入到vlan2 中Set the port Ethernet0/0/11 access vlan 2 successfully *提示11 口加入vlan2 成功Set the port Ethernet0/0/12 access vlan 2 successfully *提示12 口加入vlan2 成功bhds5200(config)#vlan 3 * 配置vlan3bhds5200(Config-Vlan3)# name chengxi *设置vlan3 名称bhds5200(Config-Vlan3)# switchport interface ethernet0/0/1-3 *将1,2,3 口加入到vlan3 中Set the port Ethernet0/0/1 access vlan 2 successfully *提示1 口加入vlan3 成功Set the port Ethernet0/0/2 access vlan 3successfully *提示2 口加入vlan3 成功Set the port Ethernet0/0/3 access vlan 3successfully *提示3 口加入vlan3 成功bhds5200(Config-Vlan3)#interface vlan 3bhds5200(Config-If-Vlan3)#ip address 151.36.20.250 255.255.254.0 *配置vlan3 接口地址*增加及配置vlan 照上例,删除vlan 将会删除vlan 的所有接口配置:bhds5200(config)# *vlan 更改必需在全局模式下bhds5200(config)#no vlan2 *删除vlan2配置静态路由:bhds5200(config)# ip route 0.0.0.0 0.0.0.0 129.128.1.254 *设置默认路由指向最终网关bhds5200(Config)# ip route 151.16.16.0 255.255.248.0 151.36.16.253bhds5200(Config)#ip route 23.136.98.0 255.255.255.0 151.36.16.99bhds5200(Config)#ip route 0.0.0.0 0.0.0.0 129.128.1.254删除静态路由:bhds5200(Config)#no ip route 0.0.0.0 0.0.0.0 129.128.1.254 *删除命令在启用命令前加no 即可bhds5200(config)#telnet-server enable *启用telnetTelnetd already enabled.bhds5200(Config)#telnet-user admin password 0 admin *用户名为admin,密码为admin关地址绑定问题,因进行全局端绑定需做前期大量工作,可参考神州数码DCRS5200 用户手册第16 章节节,AM 配置:am mac_ip_pool命令:am mac-ip-pool <mac_address> <ip_address>no am mac-ip-pool <mac_address> <ip_address>功能:创建一个MAC+IP 地址绑定,放到地址池中,或者删除一个在地址池中已经配置的MAC+IP 地址绑定,MAC 和IP 地址一一对应。
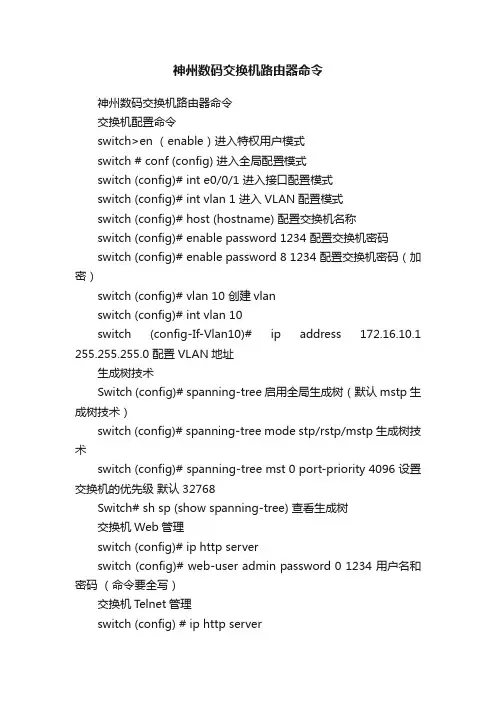
神州数码交换机路由器命令神州数码交换机路由器命令交换机配置命令switch>en (enable)进入特权用户模式switch # conf (config) 进入全局配置模式switch (config)# int e0/0/1 进入接口配置模式switch (config)# int vlan 1 进入VLAN配置模式switch (config)# host (hostname) 配置交换机名称switch (config)# enable password 1234 配置交换机密码switch (config)# enable password 8 1234 配置交换机密码(加密)switch (config)# vlan 10 创建vlanswitch (config)# int vlan 10switch (config-If-Vlan10)# ip address 172.16.10.1 255.255.255.0 配置VLAN地址生成树技术Switch (config)# spanning-tree 启用全局生成树(默认mstp生成树技术)switch (config)# spanning-tree mode stp/rstp/mstp 生成树技术switch (config)# spanning-tree mst 0 port-priority 4096 设置交换机的优先级默认32768Switch# sh sp (show spanning-tree) 查看生成树交换机Web管理switch (config)# ip http serverswitch (config)# web-user admin password 0 1234 用户名和密码(命令要全写)交换机T elnet管理switch (config) # ip http serverswitch (config)# telnet-user admin password 0 1234 用户名和密码(命令要全写)清空交换机配置switch# set def (default)恢复出厂配置switch# wr (write)保存配置switch# rel (reload)重启交换机链路聚合(不需启动生成树)switchA(config)# port-group 1switchA(config)# int e0/0/1-2switchA(config-port-range)# port-group 1 mode on/active 手动配置/自动配置switchA(config)# no port-group 1 删除组1switchB(config) # port-group 2switchB(config) # int e0/0/3-4switchB(config-port-range) # port-group 2 mode on/active switchA(config) # no port-group 2 删除组2交换机MAC与IP绑定switch (config)# am enable 启用全局am功能switch (config)# int e0/0/1switch (config_if_ethernet0/0/1)# am port 打开端口am功能switch (config_if_ethernet0/0/1)# am mac-ip-pool 00-A0-D1-D1-07-FF 192.168.1.101交换机DHCP服务器配置switch (config)# service dhcp 启用DHCPswitch (config)# ip dhcp pool poolA 定义地址池poolAswitch (dhcp-poolA- config)# network-address 192.168.1.0 24switch (dhcp-poolA- config)# lease 3 租期3天switch (dhcp-poolA- config)# default-router 192.168.1.1 网关switch (dhcp-poolA- config)# dns-server 60.191.244.5 DNS服务器ACL访问控制列表switchA(config)# ip access-list standard test 命名标准IP访问列表switchA(config-std-nacl-test)# deny 192.168.100.0 0.0.0.255 反子网掩码switchA(config-std-nacl-test)# deny 192.168.200.0 0.0.0.0switchA(config) # firewall enable 开启ACL功能switchA(config)# firewall default permit/deny 默认permit允许switchA(config)# int e0/0/1switchA(config-if-interface0/0/1) # ip access-group test in/outswitchA(config) # ip access-list standard 10 数字标准IP访问列表配置时间范围switchA(config)#time-range worktimeswitchA(config-time-range)#absolute-periodic weekdays 09:00:00 to 18:00:00路由器配置命令Router>ena 进入特权用户模式 Router# conf 进入全局配置模式Router_config# int f0/0Router_config_f0/0# ip address 10.1.1.1 255.255.255.0 配置路由器端口地址清空路由器配置Router# del (delete)删除启动配置文件Router# reb (reboot) 重启路由器静态路由Router_config# ip route 10.1.2.0 (目标网段) 255.255.255.0(子网掩码) 10.1.1.1 (转发地址)默认静态路由Router_config# ip route 0.0.0.0 (目标网段) 0.0.0.0(子网掩码)10.1.1.1 (转发地址)RIP动态路由Router_config# router rip 启用RIP路由Router_config_rip# version 2 RIP路由版本号 2Router_config_rip# network 10.1.1.0 255.255.255.0Router_config_rip# network 10.1.2.0 255.255.255.0 与路由器相连的网段OSPF动态路由Router_config# router ospf 1 启动ospf进程,进程号为1Router_config_ospf1# network 10.1.1.0 255.255.255.0 area 0 网段、子网掩码和区域号Router_config_ospf1# network 10.1.2.0 255.255.255.0 area 0 第一个区域(即主干区域)区域号为 0Router# show ip route 查看路由。
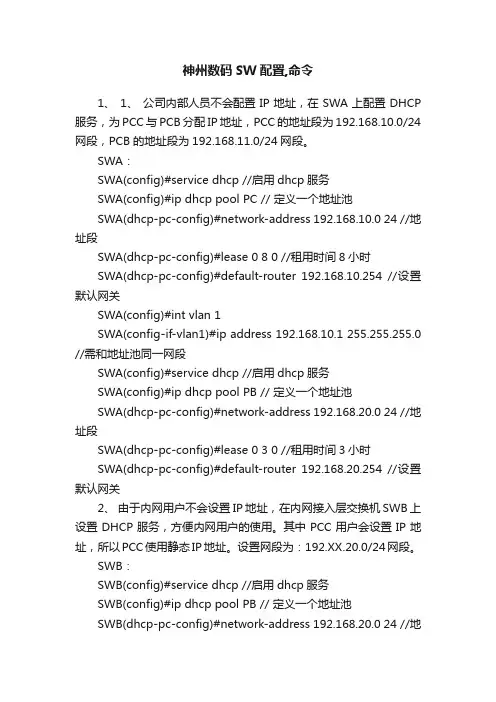
神州数码SW配置,命令1、1、公司内部人员不会配置IP地址,在SWA上配置DHCP 服务,为PCC与PCB分配IP地址,PCC的地址段为192.168.10.0/24网段,PCB的地址段为192.168.11.0/24网段。
SWA:SWA(config)#service dhcp //启用dhcp服务SWA(config)#ip dhcp pool PC // 定义一个地址池SWA(dhcp-pc-config)#network-address 192.168.10.0 24 //地址段SWA(dhcp-pc-config)#lease 0 8 0 //租用时间8小时SWA(dhcp-pc-config)#default-router 192.168.10.254 //设置默认网关SWA(config)#int vlan 1SWA(config-if-vlan1)#ip address 192.168.10.1 255.255.255.0 //需和地址池同一网段SWA(config)#service dhcp //启用dhcp服务SWA(config)#ip dhcp pool PB // 定义一个地址池SWA(dhcp-pc-config)#network-address 192.168.20.0 24 //地址段SWA(dhcp-pc-config)#lease 0 3 0 //租用时间3小时SWA(dhcp-pc-config)#default-router 192.168.20.254 //设置默认网关2、由于内网用户不会设置IP地址,在内网接入层交换机SWB上设置DHCP服务,方便内网用户的使用。
其中PCC用户会设置IP地址,所以PCC使用静态IP地址。
设置网段为:192.XX.20.0/24网段。
SWB:SWB(config)#service dhcp //启用dhcp服务SWB(config)#ip dhcp pool PB // 定义一个地址池SWB(dhcp-pc-config)#network-address 192.168.20.0 24 //地址段SWB(dhcp-pc-config)#lease 0 3 0 //租用时间3小时SWB(dhcp-pc-config)#default-router 192.168.20.254 //设置默认网关SWB(config)#int vlan 1SWB(config-if-vlan1)#ip address 192.168.20.254 255.255.255.03、为保证内网终端安全,要求内网所有用户的MAC地址与接入交换机SWB接口进行绑定,至少使用两种方法进行绑定。
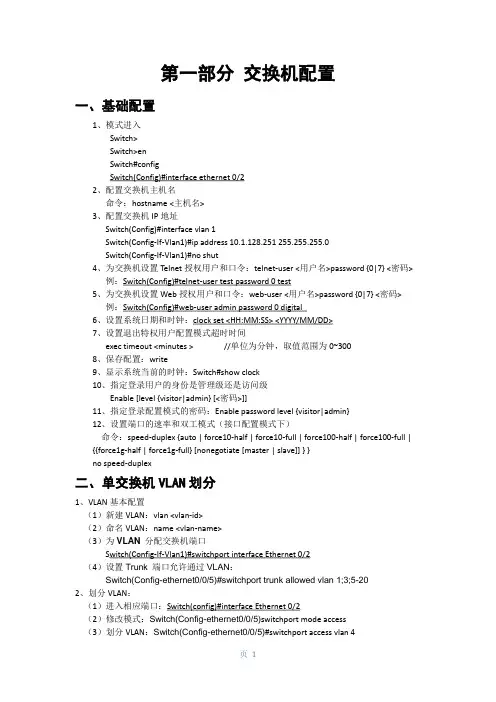
第一部分交换机配置一、基础配置1、模式进入Switch>Switch>enSwitch#configSwitch(Config)#interface ethernet 0/22、配置交换机主机名命令:hostname <主机名>3、配置交换机IP地址Switch(Config)#interface vlan 1Switch(Config-If-Vlan1)#ip address 10.1.128.251 255.255.255.0Switch(Config-If-Vlan1)#no shut4、为交换机设置Telnet授权用户和口令:telnet-user <用户名>password {0|7} <密码>例:Switch(Config)#telnet-user test password 0 test5、为交换机设置Web授权用户和口令:web-user <用户名>password {0|7} <密码>例:Switch(Config)#web-user admin password 0 digital6、设置系统日期和时钟:clock set <HH:MM:SS> <YYYY/MM/DD>7、设置退出特权用户配置模式超时时间exec timeout <minutes > //单位为分钟,取值范围为0~3008、保存配置:write9、显示系统当前的时钟:Switch#show clock10、指定登录用户的身份是管理级还是访问级Enable [level {visitor|admin} [<密码>]]11、指定登录配置模式的密码:Enable password level {visitor|admin}12、设置端口的速率和双工模式(接口配置模式下)命令:speed-duplex {auto | force10-half | force10-full | force100-half | force100-full | {{force1g-half | force1g-full} [nonegotiate [master | slave]] } }no speed-duplex二、单交换机VLAN划分1、VLAN基本配置(1)新建VLAN:vlan <vlan-id>(2)命名VLAN:name <vlan-name>(3)为VLAN 分配交换机端口Switch(Config-If-Vlan1)#switchport interface Ethernet 0/2(4)设置Trunk 端口允许通过VLAN:Switch(Config-ethernet0/0/5)#switchport trunk allowed vlan 1;3;5-202、划分VLAN:(1)进入相应端口:Switch(config)#interface Ethernet 0/2(2)修改模式:Switch(Config-ethernet0/0/5)switchport mode access(3)划分VLAN:Switch(Config-ethernet0/0/5)#switchport access vlan 4三、跨交换机VLAN划分(两台交换机作相同操作)1、新建VLAN2、划分VLAN3、修改链路模式(1)进入相应端口:Switch(config)#interface Ethernet 0/1(2)修改模式:Switch(config-if)#switchport mode trunk四、VLAN间主机的通信1、新建VLAN2、划分VLAN3、修改链路模式(1)进入相应端口:Switch(config)#interface Ethernet 0/1(2)修改模式:Switch(config-if)#switchport mode trunk注意:如果是三层交换机,在修改模式先封装802.1协议:Switch(config-if)#switchport trunk encapsulation dot1q4、建立VLAN子接口(1)、进入VLAN接口模式:Switch(config)#interface vlan 2(2)、设置VLAN子接口地址:Switch(config-if)#ip address 192.168.0.1 255.255.255.0(3)、打开端口:Switch(config-if)#no shutdown5、设置各主机IP地址、子网掩码、网关注意:(1)各主机IP地址应与其所在的VLAN在同一网段。
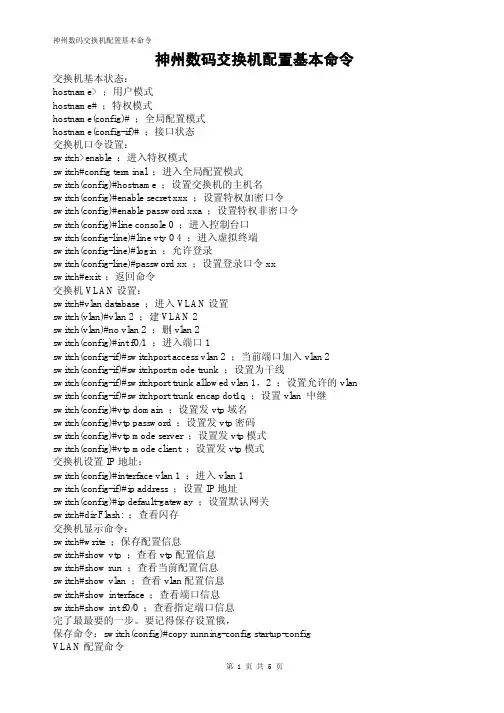
神州数码交换机配置基本命令交换机基本状态:hostname> ;用户模式hostname# ;特权模式hostname(config)# ;全局配置模式hostname(config-if)# ;接口状态交换机口令设置:switch>enable ;进入特权模式switch#config terminal ;进入全局配置模式switch(config)#hostname ;设置交换机的主机名switch(config)#enable secret xxx ;设置特权加密口令switch(config)#enable password xxa ;设置特权非密口令switch(config)#line console 0 ;进入控制台口switch(config-line)#line vty 0 4 ;进入虚拟终端switch(config-line)#login ;允许登录switch(config-line)#password xx ;设置登录口令xxswitch#exit ;返回命令交换机VLAN设置:switch#vlan database ;进入VLAN设置switch(vlan)#vlan 2 ;建VLAN 2switch(vlan)#no vlan 2 ;删vlan 2switch(config)#int f0/1 ;进入端口1switch(config-if)#switchport access vlan 2 ;当前端口加入vlan 2 switch(config-if)#switchport mode trunk ;设置为干线switch(config-if)#switchport trunk allowed vlan 1,2 ;设置允许的vlan switch(config-if)#switchport trunk encap dot1q ;设置vlan 中继switch(config)#vtp domain ;设置发vtp域名switch(config)#vtp password ;设置发vtp密码switch(config)#vtp mode server ;设置发vtp模式switch(config)#vtp mode client ;设置发vtp模式交换机设置IP地址:switch(config)#interface vlan 1 ;进入vlan 1switch(config-if)#ip address ;设置IP地址switch(config)#ip default-gateway ;设置默认网关switch#dir Flash: ;查看闪存交换机显示命令:switch#write ;保存配置信息switch#show vtp ;查看vtp配置信息switch#show run ;查看当前配置信息switch#show vlan ;查看vlan配置信息switch#show interface ;查看端口信息switch#show int f0/0 ;查看指定端口信息完了最最要的一步。
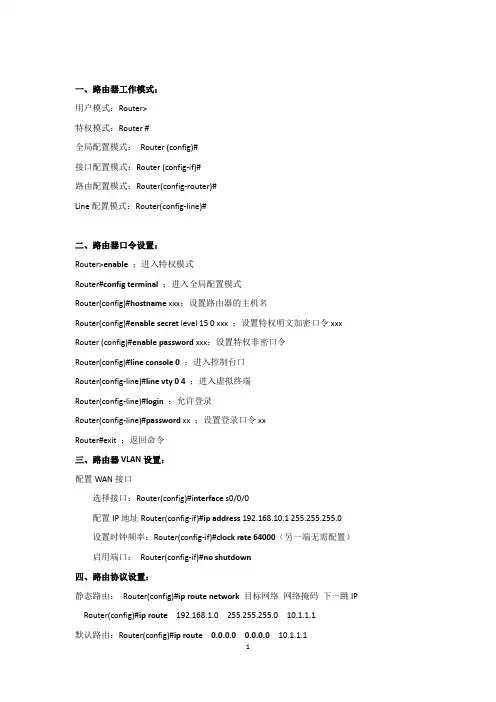
一、路由器工作模式:用户模式:Router>特权模式:Router #全局配置模式:Router (config)#接口配置模式:Router (config-if)#路由配置模式:Router(config-router)#Line配置模式:Router(config-line)#二、路由器口令设置:Router>enable;进入特权模式Router#configterminal;进入全局配置模式Router(config)#hostname xxx;设置路由器的主机名Router(config)#enable secret level 15 0 xxx ;设置特权明文加密口令xxx Router (config)#enable password xxx;设置特权非密口令Router(config)#line console 0;进入控制台口Router(config-line)#line vty 0 4;进入虚拟终端Router(config-line)#login;允许登录Router(config-line)#password xx ;设置登录口令xxRouter#exit;返回命令三、路由器VLAN设置:配置WAN接口选择接口:Router(config)#i nterface s0/0/0配置IP地址Router(config-if)#ip address 192.168.10.1 255.255.255.0设置时钟频率:Router(config-if)#clock rate 64000(另一端无需配置)启用端口:Router(config-if)#no shutdown四、路由协议设置:静态路由:Router(config)#ip route network 目标网络网络掩码下一跳IP Router(config)#ip route 192.168.1.0 255.255.255.0 10.1.1.1默认路由:Router(config)#ip route 0.0.0.0 0.0.0.0 10.1.1.1开启RIP协议:Router(config)#router rip指定版本协议:Router(config-router)#version 2声明直连网络号:Router(config-router)#network 直连网段Router(config-router)#network 192.168.1.0开启进程号为1的ospf协议:Router(config)#router ospf1声明直连网络号Router(config-router)#network直连网段反掩码area区域号Router(config-router)#network 192.168.1.0 0.0.0.255 area 0查看路由表:Router#showip route配置路由访问控制命令格式:Router(config)#access-list 列表号permit源IP地址反掩码配置允许:Router(config)#access-list 1 permit 192.168.10.1 0.0.0.255配置拒绝访问:Router(config)# access-list 1 deny 192.168.20.0 0.0.0.255配置允许其他:Router(config)#access-list 1 permit any端口绑定命令:进入相应端口:Router(config)#interface fa0/1配置列表防止位置:Router(config-if)#ip access-group 1 outRouter(config-if)#配置路由DHCP服务开启dhcp服务:Router(config)#service dhcp设置地址池:Router(config)#ipdhcp pool 172.16.12.0设置网段:Router(dhcp-config)#network 172.16.12.0 255.255.255.0设置默认网关:Router(dhcp-config)#default-router 172.16.12.200Router(dhcp-config)#exit设置排除地址:Router(config)#ipdhcp excluded-address 172.16.12.151 172.16.12.254 进入网关端口:Router(config)#interface g0/0设置网关IP:Router(config-if)#i p address 172.16.12.200 255.255.255.0配置路由NAT静态NATRouter1(config)#ipnat inside source static 192.168.11.2 200.200.200.3Router1(config)#interface fa0/0Router1(config-if)#ipnat insideRouter1(config)#interface Serial0/0/0Router1(config-if)#ipnat outside动态NATRouter1(config)#ipnat pool NAT 200.200.200.3 200.200.200.4 network 255.255.255.0//定义内部全局IP地址池NAT Router1(config)#access-list 1 permit 192.168.11.00.0.0.255 //定义可转换内部本地IP地址Router1(config)#ipnat inside source list 1 pool NAT //配置动态NAT映射Router1(config)#interface fa0/0 //定义内部接口Router1(config-if)#ipnat insideRouter1(config)#interface Serial0/0/0 //定义外部接口Router1(config-if)#ipnatoutsideRouter1(config-if)#no shutdown路由器显示命令:Router#dir Flash: ;查看闪存Router#write;保存配置信息Router#show run;查看当前配置信息Router#show ip access-list //查看ACL配置信息Router#clean ipnat translation //清除动态NA T转换列表信息Route#show ipnat statistics //查看NA T转换统计信息Route#clean ipnat statistics //清除NA T转换统计信息完了最最要的一步。
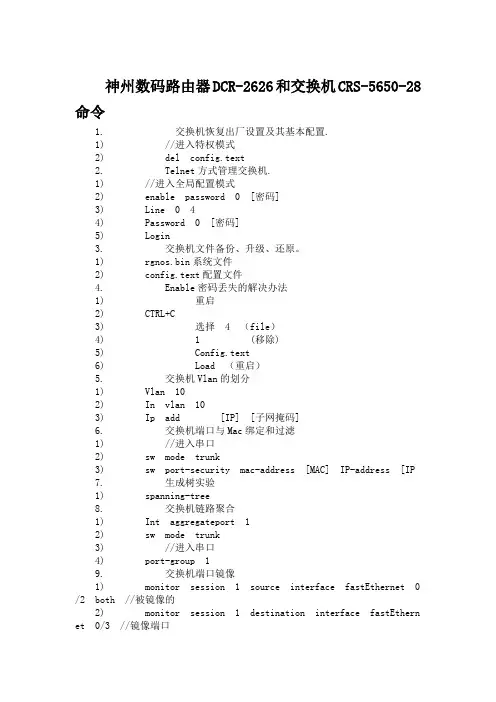
神州数码路由器DCR-2626和交换机CRS-5650-28命令1. 交换机恢复出厂设置及其基本配置.1) //进入特权模式2) del config.text2. Telnet方式管理交换机.1) //进入全局配置模式2) enable password 0 [密码]3) Line 0 44) Password 0 [密码]5) Login3. 交换机文件备份、升级、还原。
1) rgnos.bin系统文件2) config.text配置文件4. Enable密码丢失的解决办法1) 重启2) CTRL+C3) 选择 4 (file)4) 1 (移除)5) Config.text6) Load (重启)5. 交换机Vlan的划分1) Vlan 102) In vlan 103) Ip add [IP] [子网掩码]6. 交换机端口与Mac绑定和过滤1) //进入串口2) sw mode trunk3) sw port-security mac-address [MAC] IP-address [IP7. 生成树实验1) spanning-tree8. 交换机链路聚合1) Int aggregateport 12) sw mode trunk3) //进入串口4) port-group 19. 交换机端口镜像1) monitor session 1 source interface fastEthernet 0/2 both //被镜像的2) monitor session 1 destination interface fastEthernet 0/3 //镜像端口10. 多层交换机静态路由实验1) ip route [存在的IP段] [子网掩码] [下一跳IP]11. RIP动态路由1) router rip2) version 23) network [IP段]4) no auto-summary12. 端口安全1) //进入端口2) switchport port-security //开启端口安全3) switchport port-security maximum 5 //最大连接5.4) sw port-security violation shutdown //超出就shudown13. OSPF动态路由1) router ospf2) network [IP段] [反码] area 014. 标准ACL实验1) access-list 1 deny 192.168.1.0 0.0.0.255 //拒绝访问的IP段2) access-list 1 permit 192.168.1.0 0.0.0.255 //允许的IP段3) //进入端口4) ip access-group 1 in //把控制列表 1 配入端口,进入控制5) ip access-group 1 out //把控制列表 1 配入端口,输出控制15. 扩展ACL实验1) access-list 101 deny tcp A.B.C.D 255.255.255.0 A.B.C.D 255 .255.255.0 eq ftp(WWW)// 禁止前面个网段访问后面个网段的FTP或者WWW16. 交换机单向访问控制1) //使用标准ACL2) access-list 1 deny 192.168.1.0 0.0.0.2553) //进入端口4) ip access-group 1 in17. 交换机DHCP服务器配置1) service dhcp2) ip dhcp ping packets 13) ip dhcp excluded-address [ip1] [IP 2] //设置排斥的IP地址从1到2开始4) ip dhcp pool [名字]5) lease infinite //永久租用6) network [IP段] [子网掩码]7) default-router [网关IP]8) dns-server [NDS IP]18. 交换机DHCP中继功能1) service dhcp2) //进入VLAN3) ip helper-address [DHCP的网管]19. 交换机VRRP实验1) //进入VLAN2) vrrp 10 ip [IP] //设置vrrp虚拟网关3) vrrp 10 priority 150 //设置优先级为150(默认100)20. 交换机QOS实验 car1) //1.扩展控制列表,2策略,3方法 4配入端口2) access-list 101 permit ip host A.B.C.D any //定义要限速的IP3) class-map xiansu1 //创建class-map 名字为xiansu14) match access-group 101 //把控制列表套入策略xiansu15) policy-map pozz 创建policy-map名字为pozz6) class xiansu17) police 8000 512 exceed-action drop //限速值为8000 kbit ,512KB8) //进入端口9) service-policy input pozz路由器要求1. 路由器telneta) //进入全局配置模式b)c) enable password 0 [密码]d) Line vty 0 4e) Password 0 [密码]2. Login路由器weba) //先建立用户密码b) Ip http port 80 //开启web端口为803. 路由器广域网HDLC封装配置a) encapsulation hdlc4. 路由器广域网PPP封装配置a) encapsulation ppp5. 路由器广域网PPP封装PAP配置a) encapsulation pppb) ppp authentication papc) ppp pap sent-username [用户] password 0 [密码] //验证方d) username [用户名] password 0 [密码] //被验证方6. 路由器广域网PPP封装CHAP配置a) encapsulation pppb) ppp authentication CHAP7. ppp chap hostname [对方电脑]8. ppp chap password 0 12345687a) Ip nat Inside 设置为内网接口b) ip nat outside 设置为外网接口c) access-list 10 permit A.B.C.D 0.0.0.255//配置允许访问的ACLd) ip nat inside source list 10 interface serial 1/0 overl oad //允许访问外网的ACL9. NAT内网映射a) ip nat inside source static tcp 192.168.1.1 80 interfac e s4/0 //把IP的80端口射到s4/0端口10. 策略路由(PBR)配置Access-list 101 permit ip host A.B.C.D any //定义ACLRoute-map test permit 10 ..\\定义策略Match ip add0020101 .//匹配ACLSet int null 0//如果匹配就丢弃Set ip next-hop A.B.C.D //如果匹配就放到下一条Route-map test permit 20 //如果不匹配执行默认路由Int f 0/1 //进入端口Ip policy route-map test //关联策略11. 路由在发布a) 当出现多动态路由的时候,一个网段只声明一次,要和下一条的协议一样b) Reredistribute rip subnets 重分布RIP路由redistribute static subnets 重分布静态路由5650S-1(config)#router rip5650S-1(config-router)#version 25650S-1(config-router)#redistribute ospf5650S-1(config-router)#redistribute stati12. 配置QOSa) //1.扩展控制列表,2策略,3方法 4配入端口b) access-list 101 permit ip host A.B.C.D any //定义要限速的IPc) class-map xiansu1 //创建class-map 名字为xiansu1d) match access-group 101 //把控制列表套入策略xiansu1e) policy-map pozz 创建policy-map名字为pozzf) class xiansu1g) police 8000 512 exceed-action drop //限速值为8000 kbit ,512KBh) //进入端口i) service-policy input pozz13. VPN,pptpa) ip local pool text 192.168.2.2 192.168.2.20 //定义获取VPN的地址池,b) interface Virtual-Template 1 //进入虚接口1c) ppp authentication pap //配置认证方式d) ip unnumbered FastEthernet 1/0 //继承接口IPe) peer default ip address pool pptp //关联地址池f) //进入全局模式g) vpdn enable //开启VPNh) vpdn-group PPTP //定义组名称i) accept-dialin //允许拨入访问j) protocol pptp //允许拨入访问得协议k) virtual-template 1 //关联虚接口,拨入时候分配给用户得虚接口。
1. 计算机命令:PCA login: root ;使用root用户password: linux ;口令是linux# shutdown -h now ;同init 0 关机# logout# login# ifconfig ;显示IP地址# ifconfig eth0 <ip address> netmask <netmask> ;设置IP地址# ifconfig eht0 <ip address> netmask <netmask> down ;删除IP地址# route add 0.0.0.0 gw <ip># route del 0.0.0.0 gw <ip># route add default gw <ip> ;设置网关# route del default gw <ip> ;删除网关# route ;显示网关# ping <ip># telnet <ip>2. 交换机支持的命令:交换机基本状态:switch: ;交换机的ROM状态rommon> ;路由器的ROM状态hostname> ;用户模式hostname# ;特权模式hostname(config)# ;全局配置模式hostname(config-if)# ;界面状态交换机口令设置:switch>enable ;进入特权模式switch#config terminal ;进入全局配置模式switch(config)#hostname <hostname> ;设置交换机的主机名switch(config)#enable secret xxx ;设置特权加密口令switch(config)#enable password xxa ;设置特权非密口令switch(config)#line console 0 ;进入控制台口switch(config-line)#line vty 0 4 ;进入虚拟终端switch(config-line)#login ;允许登录switch(config-line)#password xx ;设置登录口令xx switch#exit ;返回命令交换机VLAN设置:switch#vlan database ;进入VLAN设置switch(vlan)#vlan 2 ;建VLAN 2switch(vlan)#no vlan 2 ;删vlan 2switch(config)#int f0/1 ;进入埠1switch(config-if)#switchport access vlan 2 ;当前埠加入vlan 2switch(config-if)#switchport mode trunk;设置为干线switch(config-if)#switchport trunk allowed vlan 1,2 ;设置允许的vlan switch(config-if)#switchport trunk encap dot1q ;设置vlan 中继switch(config)#vtp domain <name> ;设置发vtp域名switch(config)#vtp password <word> ;设置发vtp密码switch(config)#vtp mode server ;设置发vtp模式switch(config)#vtp mode client ;设置发vtp模式交换机设置IP地址:switch(config)#interface vlan 1 ;进入vlan 1switch(config-if)#ip address <IP> <mask> ;设置IP地址switch(config)#ip default-gateway <IP> ;设置默认网关switch#dir flash: ;查看闪存交换机显示命令:switch#write ;保存配置信息switch#show vtp ;查看vtp配置信息switch#show run ;查看当前配置信息switch#show vlan ;查看vlan配置信息switch#show interface ;查看端口信息switch#show int f0/0 ;查看指定端口信息3. 路由器支持的命令:路由器显示命令:router#show run ;显示配置信息router#show interface ;显示接口信息router#show ip route ;显示路由信息router#show cdp nei ;显示邻居信息router#reload ;重新起动路由器口令设置:router>enable ;进入特权模式router#config terminal ;进入全局配置模式router(config)#hostname <hostname> ;设置交换机的主机名router(config)#enable secret xxx ;设置特权加密口令router(config)#enable password xxb ;设置特权非密口令router(config)#line console 0 ;进入控制台口router(config-line)#line vty 0 4 ;进入虚拟终端router(config-line)#login ;要求口令验证router(config-line)#password xx ;设置登录口令xx router(config)#(Ctrl+z) ;返回特权模式router#exit ;返回命令路由器配置:router(config)#int s0/0 ;进入Serail界面router(config-if)#no shutdown ;启动当前接口router(config-if)#clock rate 64000 ;设置同步时钟router(config-if)#ip address <ip> <netmask> ;设置IP地址router(config-if)#ip address <ip> <netmask> second ;设置第二个IP router(config-if)#int f0/0.1 ;进入子界面router(config-subif.1)#ip address <ip> <netmask> ;设置子界面IP router(config-subif.1)#encapsulation dot1q <n> ;绑定vlan中继协议router(config)#config-register 0x2142 ;跳过配置文件router(config)#config-register 0x2102 ;正常使用配置文件router#reload ;重新引导路由器檔操作:router#copy running-config startup-config ;保存配置router#copy running-config tftp ;保存配置到tftp router#copy startup-config tftp ;开机配置存到tftp router#copy tftp flash: ;下传文件到flash router#copy tftp startup-config ;下载配置文件ROM状态:Ctrl+Break ;进入ROM监控状态rommon>confreg 0x2142 ;跳过配置文件rommon>confreg 0x2102 ;恢复配置文件rommon>reset ;重新引导rommon>copy xmodem:<sname> flash:<dname> ;从console传输文件rommon>IP_ADDRESS=10.65.1.2 ;设置路由器IP rommon>IP_SUBNET_MASK=255.255.0.0 ;设置路由器屏蔽rommon>TFTP_SERVER=10.65.1.1 ;指定TFTP服务器IP rommon>TFTP_FILE=c2600.bin ;指定下载的檔rommon>tftpdnld ;从tftp下载rommon>dir flash: ;查看闪存内容rommon>boot ;引导IOS静态路由:ip route <ip-address> <subnet-mask> <gateway> ;命令格式router(config)#ip route 2.0.0.0 255.0.0.0 1.1.1.2 ;静态路由举例router(config)#ip route 0.0.0.0 0.0.0.0 1.1.1.2 ;默认路由举例动态路由:router(config)#ip routing ;启动路由转发router(config)#router rip ;启动RIP路由协定。
神州数码交换机路由器配置命令神州数码交换机路由器配置命令章节一:引言⑴文档目的本文档旨在提供神州数码交换机路由器的详细配置命令,以指导管理员进行设备的初始化和配置。
⑵背景神州数码交换机路由器是一种用于数据传输的网络设备,拥有多种功能和特性。
本文档将介绍如何使用各种命令来配置交换机路由器的不同功能。
⑶受众本文档适用于所有需要配置神州数码交换机路由器的管理员和网络工程师。
章节二:初始化设备⑴登录设备使用如下命令登录设备:`login`⑵修改设备密码使用如下命令修改设备密码:`configure terminalenable secret [password]`章节三:基本配置⑴设置主机名使用如下命令设置设备的主机名:`configure terminalhostname [hostname]`⑵配置IP地质使用如下命令配置设备的IP地质:`configure terminalinterface [interface]ip address [ip-address] [subnet-mask]`⑶设置默认网关使用如下命令设置设备的默认网关:`configure terminalip default-gateway [gateway-address]`章节四:VLAN配置⑴创建VLAN使用如下命令创建一个新的VLAN:`configure terminalvlan [vlan-id]name [vlan-name]`⑵将接口加入VLAN使用如下命令将接口加入指定的VLAN:`configure terminalinterface [interface]switchport mode accessswitchport access vlan [vlan-id]`章节五:路由配置⑴静态路由使用如下命令配置静态路由:`configure terminalip route [destination-network] [subnet-mask] [next-hop]`⑵动态路由使用如下命令配置动态路由协议:`configure terminalrouter [routing-protocol]network [network-address] [subnet-mask]`章节六:安全配置⑴访问控制列表(ACL)使用如下命令配置ACL:`configure terminalaccess-list [acl-number] [permit----deny] [source] [destination] [protocol]`⑵端口安全使用如下命令配置端口安全:`configure terminalinterface [interface]switchport mode accessswitchport port-securityswitchport port-security maximum [max] switchport port-security violation [mode]`章节七:QoS配置⑴优先级队列使用如下命令配置优先级队列:`configure terminalinterface [interface]priority-queue out`⑵带宽限制使用如下命令配置带宽限制:`configure terminalinterface [interface]bandwidth [rate]`章节八:设备管理⑴ NTP服务使用如下命令启用NTP服务:`configure terminalntp server [server-address]`⑵ Telnet和SSH访问使用如下命令配置Telnet和SSH访问:`configure terminalline vty 0 15transport input telnet ssh`⑶登录Banner使用如下命令配置登录Banner:`configure terminalbanner login [banner-text]`附录:本文档涉及附件附件1:设备配置备份说明附录:法律名词及注释⒈ACL:访问控制列表,用于控制网络流量的访问权限。

神州数码交换机路由器配置命令神州数码交换机路由器配置命令文档范本1.系统配置1.1 登录路由器进入路由器登录界面,输入用户名和密码进行身份验证。
1.2 修改密码修改默认密码以确保安全性,并避免未经授权访问。
1.3 系统时间设置设置路由器系统时间,以确保日志记录和其他时间相关功能的正确运行。
2.接口配置2.1 查看接口信息查看路由器上各个接口的状态信息,包括接口编号、MAC地质、速率等。
2.2 配置接口IP地质为路由器上的接口分配一个唯一的IP地质,以便在网络中进行通信。
3.静态路由配置3.1 添加静态路由添加路由器的静态路由表,将目的网络与下一跳的出接口进行绑定。
3.2 删除静态路由删除不再需要的静态路由表项,以避免冗余和失效路由的影响。
4.动态路由配置4.1 配置动态路由协议配置常见的路由协议,如OSPF、BGP等,使路由器能够通过动态协议学习和更新路由表。
4.2 配置路由器之间的邻居关系配置路由器之间的邻居关系,并通过协议交换路由信息。
5.QoS配置5.1 配置带宽限制对指定的流量进行带宽限制,以确保网络资源的公平分配。
5.2 配置流量分类根据不同的流量类型,进行分类和标记,以便在网络中进行优先处理。
6.安全配置6.1 ACL配置配置访问控制列表(ACL),限制网络中某些主机或网络的访问权限。
6.2 配置防火墙配置防火墙规则,控制网络流量的进出。
7.网络管理配置7.1 配置SNMP配置简单网络管理协议(SNMP),以便对路由器进行监控和管理。
7.2 配置日志记录配置路由器的日志记录功能,记录重要的系统事件和错误信息。
8.附件本文档附带了相关的配置示例和常见问题解答。
9.法律名词及注释在本文档中所涉及的法律名词和相关注释的完整列表。
第一部分交换机配置一、基础配置1、模式进入Switch>Switch>enSwitch#configSwitch(Config)#interface ethernet 0/22、配置交换机主机名命令:hostname <主机名>3、配置交换机IP地址Switch(Config)#interface vlan 1Switch(Config-If-Vlan1)#ip address 10.1.128.251 255.255.255.0Switch(Config-If-Vlan1)#no shut4、为交换机设置Telnet授权用户和口令:登录到Telnet的配置界面,需要输入正确的用户名和口令,否则交换机将拒绝该Telnet用户的访问。
该项措施是为了保护交换机免受非授权用户的非法操作。
若交换机没有设置授权Telnet用户,则任何用户都无法进入交换机的Telnet配置界面。
因此在允许Telnet方式配置管理交换机时,必须在Console的全局配置模式下使用命令username <username>privilege <privilege> [password (0 | 7) <password>]为交换机设置Telnet授权用户和口令并使用命令authentication line vty login local打开本地验证方式,其中privilege选项必须存在且为15。
例:Switch>enableSwitch#configSwitch(config)#username test privilege 15 password 0 testSwitch(config)#authentication line vty login localSwitch(Config)#telnet-user test password 0 testSwitch (Config)#telnet-server enable://启动远程服务功能5、配置允许Telnet管理交换机的地址限制(单独IP或IP地址段)(1)限制单个IP允许Telnet登录交换机switch(config)#authentication security ip 192.168.1.2(2)限制允许IP地址段Telnet登录交换机switch(config)#access-list 1 permit 192.168.1.0 0.0.0.255switch(config)#authentication ip access-class 1 in5、为交换机设置Web授权用户和口令:web-user <用户名>password {0|7} <密码>例:Switch(Config)#web-user admin password 0 digital6、设置系统日期和时钟:clock set <HH:MM:SS> <YYYY/MM/DD>7、设置退出特权用户配置模式超时时间exec timeout <minutes > //单位为分钟,取值范围为0~3008、保存配置:write9、显示系统当前的时钟:Switch#show clock10、指定登录用户的身份是管理级还是访问级Enable [level {visitor|admin} [<密码>]]11、指定登录配置模式的密码:Enable password level {visitor|admin}12、配置交换机的用户名密码:username admin privilege 15 password 0 admin00013、配置enable密码为ddd:enable password 0 ddd level 1514、配置登录时认证:authentication line vty login local15、设置端口的速率和双工模式(接口配置模式下)命令:speed-duplex {auto | force10-half | force10-full | force100-half | force100-full | {{force1g-half | force1g-full} [nonegotiate [master | slave]] } }no speed-duplex二、单交换机VLAN划分1、VLAN基本配置(1)新建VLAN:vlan <vlan-id>(2)命名VLAN:name <vlan-name>(3)为VLAN 分配交换机端口Switch(Config-If-Vlan1)#switchport interface Ethernet 0/2(4)设置Trunk 端口允许通过VLAN:Switch(Config-ethernet0/0/5)#switchport trunk allowed vlan 1;3;5-202、划分VLAN:(1)进入相应端口:Switch(config)#interface Ethernet 0/2(2)修改模式:Switch(Config-ethernet0/0/5)switchport mode access(3)划分VLAN:Switch(Config-ethernet0/0/5)#switchport access vlan 4三、跨交换机VLAN划分(两台交换机作相同操作)1、新建VLAN2、划分VLAN3、修改链路模式(1)进入相应端口:Switch(config)#interface Ethernet 0/1(2)修改模式:Switch(config-if)#switchport mode trunk四、VLAN间主机的通信1、新建VLAN2、划分VLAN3、修改链路模式(1)进入相应端口:Switch(config)#interface Ethernet 0/1(2)修改模式:Switch(config-if)#switchport mode trunk注意:如果是三层交换机,在修改模式先封装802.1协议:Switch(config-if)#switchport trunk encapsulation dot1q4、建立VLAN子接口(1)、进入VLAN接口模式:Switch(config)#interface vlan 2(2)、设置VLAN子接口地址:Switch(config-if)#ip address 192.168.0.1 255.255.255.0 (3)、打开端口:Switch(config-if)#no shutdown5、设置各主机IP地址、子网掩码、网关注意:(1)各主机IP地址应与其所在的VLAN在同一网段。
神州数码dcfw1800系列安全网关命令手册40r4c一、系统基本命令1. 登录与退出(1)登录网关admindcfw1800> enablePassword:admindcfw1800configure terminal输入管理员密码后,即可进入配置模式。
(2)退出网关admindcfw1800exit退出配置模式后,系统将返回用户模式。
2. 查看系统信息(1)查看系统版本admindcfw1800show version执行此命令,可以查看当前网关的软件版本、硬件版本等信息。
(2)查看系统状态admindcfw1800show system status执行此命令,可以查看网关的运行状态、CPU使用率、内存使用率等信息。
3. 配置系统时间(1)设置系统时间admindcfw1800clock set HH:MM:SS YYYYMMDD将HH:MM:SS替换为具体的小时、分钟和秒,将YYYYMMDD替换为具体的年、月、日。
(2)查看系统时间admindcfw1800show clock执行此命令,可以查看当前网关的系统时间。
二、接口配置命令1. 查看接口状态admindcfw1800show interface执行此命令,可以查看所有接口的状态、速率、双工模式等信息。
2. 配置接口(1)进入接口配置模式admindcfw1800interface <interfacetype> <interfacenumber>将<interfacetype>替换为接口类型(如GigabitEthernet),将<interfacenumber>替换为接口编号(如0/0)。
(2)设置接口描述admindcfw1800description <descriptiontext>将<descriptiontext>替换为接口描述信息。
(3)设置接口速率和双工模式admindcfw1800speed <speed> duplex <duplexmode>将<speed>替换为接口速率(如1000),将<duplexmode>替换为双工模式(如full或half)。
神州数码交换机路由器命令汇总(部分)2016年3月23日星期三修改_________________________________________________________________________注:本文档命令为最简命令,如不懂请在机器上实验注:交换机版本信息:DCRS-5650-28(R4) Device, Compiled on Aug 12 10:58:26 2013sysLocation ChinaCPU Mac 00:03:0f:24:a2:a7Vlan MAC 00:03:0f:24:a2:a6SoftWare Version 7.0.3.1(B0043.0003)BootRom Version 7.1.103HardWare Version 2.0.1CPLD Version N/ASerial No.:1Copyright (C) 2001-2013 by Digital China Networks Limited.All rights reservedLast reboot is warm reset.Uptime is 0 weeks, 0 days, 1 hours, 42 minutes路由器版本信息:Digital China Networks Limited Internetwork Operating System SoftwareDCR-2659 Series Software, Version 1.3.3H (MIDDLE), RELEASE SOFTWARECopyright 2012 by Digital China Networks(BeiJing) LimitedCompiled: 2012-06-07 11:58:07 by system, Image text-base: 0x6004ROM: System Bootstrap, Version 0.4.2Serial num:8IRTJ610CA15000001, ID num:201404System image file is "DCR-2659_1.3.3H.bin"Digital China-DCR-2659 (PowerPC) Processor65536K bytes of memory,16384K bytes of flashRouter uptime is 0:00:44:44, The current time: 2002-01-01 00:44:44Slot 0: SCC SlotPort 0: 10/100Mbps full-duplex EthernetPort 1: 2M full-duplex SerialPort 2: 2M full-duplex SerialPort 3: 1000Mbps full-duplex EthernetPort 4: 1000Mbps full-duplex EthernetPort 5: 1000Mbps full-duplex EthernetPort 6: 1000Mbps full-duplex Ethernet一、交换机配置命令1.基本配置switch > en (enable )进入特权用户模式 switch # con (config) 进入全局配置模式switch (config)# ho switch (hostname) 配置交换机名称 switch (config)# in e1/0/1 进入接口配置模式 switch (config -if -ethernet1/0/1)# exswitch (config)# in vl 1 进入VLAN 配置模式switch (config -if -vlan1)# ip ad 192.168.1.252 255.255.255.0 switch (config -if -vlan1)# exswitch (config)# ena p 1234 配置交换机密码(不加密) switch (config)# ena p 7 1234 配置交换机密码(加密) switch (config)# vl 10 创建vlan switch (config -vlan10)#ex switch (config)# in vl 10switch (config -if -vlan10)# ip ad 172.16.10.1 255.255.255.0 配置VLAN 地址2.生成树技术switch (config)# sp (spanning -tree) 启用全局生成树(默认mstp 生成树技术) switch (config)# sp mo stp/rstp /mstp (生成树/快速生成树/多生成树技术) switch (config)# sp ms 0 p 4096 设置交换机的优先级 默认32768 switch (config)# sh sp (show spanning -tree) 查看生成树3.交换机Web 管理switch (config)# ip ht serswitch (config)# usern admin pa 1234 用户名和密码4.交换机Telnet 管理switch (config)# telnet -s e (telnet enable) 开启telnet 服务 switch (config)# usern admin pa 1234 用户名和密码5.链路聚合(不需启动生成树)switchA (config)# port -g 1 (prot -group) switchA (config)# in e1/0/1-2switchA (config -port -range)# po 1 m on/active switchA (config -port -range)# ex switchA (config)# no port -g 1 删除组1switchB (config)# port -g 2 switchB (config)# in e1/0/3-4switchB (config -port -range)# po 2 m on/active switchB (config -port -range)# ex switchB (config)# no port -g 2 删除组26.交换机MAC 与IP 绑定switch (config)# am e (am enable) 启用全局am 功能 switch (config)# in e1/0/1switch (config_if_ethernet1/0/1)# am p (am port) 打开端口am 功能switch (config_if_ethernet1/0/1)# am m (mac -ip -pool) 00-A0-D1-D1-07-FF 192.168.1.101 switch (config_if_ethernet1/0/1)# ex switch (config)# in e1/0/2输入这条命令会出现: Invalid ENCRYPTED password! Please input the ENCRYPTED password with length 32 密码位数不够32位switch (config_if_ethernet1/0/2)# no am p 解锁端口7.交换机MAC与IP绑定静态绑定switch (config)# in e1/0/1switch (config_if_ethernet1/0/1)# sw p (port-security) 开启绑定功能switch (config_if_ethernet1/0/1)# sw p mac 00-a0-d1- d1-07-ff 添加静态MAC地址switch (config_if_ethernet1/0/1)# sw p max 4 绑定MAC地址的个数(默认为1)动态绑定(实验中交换机没有动态绑定命令)switch (config)# in e1/0/1switch (config_if_ethernet1/0/1)# sw p (port-security) 开启绑定功能switch (config_if_ethernet1/0/1)# sw port-security lockswitch (config_if_ethernet1/0/1)# sw port-security convert 将动态学习到绑定MAC的进行绑定switch # sh port-s add 查看绑定的地址8.交换机DHCP服务器配置switch (config)# service dhcp 启用DHCPswitch (config)# ip dh po poolA定义地址池poolAswitch (dhcp-poolA- config)# netw (network-address) 192.168.1.0 24switch (dhcp-poolA- config)# de (default-router) 192.168.1.254网关switch (dhcp-poolA- config)# dn 60.191.244.5DNS服务器switch (dhcp-poolA- config)# le 3租期3天switch (dhcp-poolA- config)# exswitch (config)# ip dh ex (excluded-add) 192.168.1.252 192.168.1.254 排除地址范围9.保留地址(一个地址池中只能配一个IP-MAC的绑定)switch (config)# ip dh po poolCswitch (dhcp-poolC- config)# ho 192.168.1.100 绑定的IP地址switch (dhcp-poolC- config)# ha (hardware-add) 00-a0-d1- d1-07-ff 绑定的MAC地址switch (dhcp-poolC- config)# de 192.168.1.254 网关10.ACL访问控制列表switchA (config)# ip ac s (standard) test命名标准IP访问列表switchA (config-std-nacl-test)# d (deny) 192.168.100.0 0.0.0.255反子网掩码(路由器上为子网掩码)switchA (config-std-nacl-test)# d 192.168.200.0 0.0.0.255switchA (config-std-nacl-test)# p (permit) a (permit any) 允许所有switchA (config-std-nacl-test)# exswitchA (config)# fir e (firewall enable) 开启ACL功能switchA (config)# in e1/0/1switchA (config-if-interface1/0/1)# ip ac (access-group) test in/out 进in出out (二层交换机上不支持out)11.配置时间范围switchA (config)# time-r worktimeswitchA (config-time-range)# p (periodic) weekd 9:0:0 to 18:0:012.VRRP虚拟路由器冗余协议Master BackupswitchA (config)# router v 1 switchB (config_router)# router v 1switchA (config_router)# v (virtual-ip) 192.168.1.254 switchB (config_router)# v 192.168.1.254 switchA (config_router)# i v 1 (interface vlan 1) switchB (config_router)# i v 1switchA (config_router)# pri 110 switchB (config_router)# enaswitchA (config_router)# c (circuit-failover) v 10 20switchA (config_router)# ena13.DHCP中继DHCP_relay (config)# service dhcp 全局开启DHCP服务DHCP_relay (config)# ip fo u b (ip forward-protocol udp bootps) 全局开启转发DHCP_relay (config)# in vl 10DHCP_relay (config-if-vlan10)# ip h 172.16.1.1 转发到DHCP服务器地址14.DHCP侦听DHCP (config)# service dhcpDHCP (config)# ip dh sn e 开启DHCP侦听功能DHCP (config)# in e1/0/1DHCP (config-if-ethernet1/0/1)# ip d s t (ip dhcp snooping trust)设置上联口为信任口15.端口隔离Switch (config)# is g test s i e1/0/1-2 (isolate-port group test switchport interface e1/0/1-2)e1/0/1-2口不能互相通信,可以和其它端口通信。
神州数码交换机配置命令交换机基本状态:hostname> ;用户模式hostname# ;特权模式hostname(config)# ;全局配置模式hostname(config-if)# ;接口状态交换机口令设置:switch>enable ;进入特权模式switch#config terminal ;进入全局配置模式switch(config)#hostname ;设置交换机的主机名switch(config)#enable secret xxx ;设置特权加密口令switch(config)#enable password xxa ;设置特权非密口令switch(config)#line console 0 ;进入控制台口switch(config-line)#line vty 0 4 ;进入虚拟终端switch(config-line)#login ;允许登录switch(config-line)#password xx ;设置登录口令xxswitch#exit ;返回命令交换机VLAN设置:switch#vlan database ;进入VLAN设置switch(vlan)#vlan 2 ;建VLAN 2switch(vlan)#no vlan 2 ;删vlan 2switch(config)#int f0/1 ;进入端口1switch(config-if)#switchport access vlan 2 ;当前端口加入vlan 2switch(config-if)#switchport mode trunk ;设置为干线switch(config-if)#switchport trunk allowed vlan 1,2 ;设置允许的vlan switch(config-if)#switchport trunk encap dot1q ;设置vlan 中继switch(config)#vtp domain ;设置发vtp域名switch(config)#vtp password ;设置发vtp密码switch(config)#vtp mode server ;设置发vtp模式switch(config)#vtp mode client ;设置发vtp模式交换机设置IP地址:switch(config)#interface vlan 1 ;进入vlan 1switch(config-if)#ip address ;设置IP地址switch(config)#ip default-gateway ;设置默认网关switch#dir Flash: ;查看闪存交换机显示命令:switch#write ;保存配置信息switch#show vtp ;查看vtp配置信息switch#show run ;查看当前配置信息switch#show vlan ;查看vlan配置信息switch#show interface ;查看端口信息switch#show int f0/0 ;查看指定端口信息完了最最要的一步。
神州数码路由器配置命令端口基本配置•interface serial 1/0–encapsulation hdlc–ip address 192.168.10.1 255.255.255.252–physical-layer speed 2048000–!PAP认证配置(双向认证)•DCR-1配置:•interface s0/1–encapsulate ppp–ip add 192.168.10.1 255.255.0.0–ppp authentication pap–ppp pap user routerA aaa–physical-layer speed 2048000•username routerB password bbb•DCR-2配置:•username routerA password aaa•interface s0/1–encapsulate ppp–ip add 192.168.10.2 255.255.0.0–ppp authentication pap–ppp pap user routerB bbbCHAP协议配置•DCR-1配置:•username digitalchina2 password legend•interface Serial1/0–encapsulation ppp–ppp authentication chap–ppp chap hostname digitalchina1–PPP chap password legend–ip address 192.168.10.1 255.255.255.252–physical-layer speed 2048000•DCR-2配置:•username digitalchina1 password legend•interface Serial1/0 encapsulation ppp–ppp authentication chap–ppp chap hostname digitalchina2–PPP chap password legend–ip address 192.168.10.2 255.255.255.252RIP协议配置•DCR-1(config)#router rip–DCR-1(router-rip)#network 192.200.10.4 255.255.255.252–DCR-1(router-rip)#version 2–DCR-1(router-rip)#redistribute connectOSPF协议配置•router ospf 1–network 192.200.10.4 255.255.255.252 area 0–redistribute connectNAT配置如上图所示,公司申请了一个合法的IP地址,公司局域网用户使用一个IP地址连接入internet•interface fastethernet 0/0–ip address 192.168.1.1 255.255.255.0–ip nat inside•interface serial 1/0–encapsulation ppp–ip address 61.1.1.1 255.255.255.252–ppp pap sent-username 169 169–ip nat outside•ip access-list standard test1–permit any•ip nat inside source list test1 interface serial 1/0•ip route default serial 1/0IPSEC的配置crypto ipsec transform-set test1 -------------------------------------------设置变换集合transform-type ah-md5-hmac esp-desip access-list extended ipsec -------------------------------------------设置要保护的数据permit ip 3.3.3.0 255.255.255.0 2.2.2.0 255.255.255.0set transform-set test1 ----------------- ----------------- -------- ---------------运用变换集合test1 match address ipsec -------------------------指定所要保护的IP数据●配置SSH Server,允许可以通过SSH远程管理设备,并使用AAA本地验证。
Telnet远程Shell管理•设置交换机IP地址–Switch(config)#interface vlan 1–Switch(config-If-Vlan1)#ip address 10.1.1.1 255.255.255.0–Switch(config-If-Vlan1)#no shutdown•交换机设置Telnet授权用户和口令;若交换机没有设置授权Telnet用户,则任何用户都无法进入交换机的CLI配置界面。
–Switch(config)#telnet-user test password 0 testHTTP远程图形管理•设置交换机IP地址–Switch(config)#interface vlan 1–Switch(config-If-Vlan1)#ip address 10.1.1.1 255.255.255.0–Switch(config-If-Vlan1)#no shutdown•交换机启动HTTP Server功能–Switch(config)#ip http server•交换机设置Web授权用户和口令;若交换机没有设置授权Web用户,则任何用户都无法进入交换机的Web配置界面。
–Switch(config)#web-user test password 0 testSSH配置•Switch(Config)#ssh-user test password 0 test•Switch(Config)#ssh-server enableVLAN的基本配置•划分VLAN 100和VLAN 200,并加入端口;–Switch(Config)#vlan 100–Switch(Config-Vlan100)#switchport interface e0/0/1-5–Switch(Config)#vlan 200–Switch(Config-Vlan200)#switchport interface e0/0/6-10•配置0/0/24端口为级联端口–Switch(Config)#interface ethernet 0/0/24–Switch(Config-ethernet0/0/24)#switchport mode trunk–switchport trunk allowed vlan 100;200–/#Trunk端口缺省允许通过所有VLAN;用户可以通过上述命令设置哪些VLAN 的流量可以通过Trunk口,没有包含的VLAN流量则被禁止。
•察看配置:show vlan利用三层交换机实现VLAN间路由•为VLAN接口设置IP地址;–Switch(Config)#interface vlan 100–Switch(Config-If-Vlan100)#ip address 192.168.1.1 255.255.255.0–Switch(Config)#interface vlan 200–Switch(Config-If-Vlan200)#ip address 192.168.2.1 255.255.255.0Switch-1的配置•hostname Switch-1•interface ethernet 0/0/1-2–port-group 1 mode on•vlan 100–switchport interface ethernet 0/0/16-20 •vlan 200–switchport interface ethernet 0/0/6-10 •vlan 300–switchport interface ethernet 0/0/11-15 •interface port-channel 1–switchport mode trunk–switchport trunk allowed vlan 100;200;300 Switch-2的配置•hostname Switch-2•interface ethernet 0/0/1-2–port-group 2 mode on•vlan 100–switchport interface ethernet 0/0/16-20 •vlan 200–switchport interface ethernet 0/0/6-10 •vlan 400–switchport interface ethernet 0/0/11-15 •interface port-channel 2–switchport mode trunk–switchport trunk allowed vlan 100;200;400 Switch的二层配置•interface ethernet 0/0/1-2–port-group 1 mode on•interface ethernet 0/0/3-4–port-group 2 mode on•vlan 100•vlan 200•vlan 300•vlan 400•vlan 500–switchport interface ethernet 0/0/11-15•interface port-channel 1–switchport mode trunk–switchport trunk allowed vlan 100;200;300•interface port-channel 2–switchport mode trunk–switchport trunk allowed vlan 100;200;400Switch 三层配置•interface vlan 100–ip address 192.168.10.1 255.255.255.0•interface vlan 200–ip address 192.168.20.1 255.255.255.0•interface vlan 300–ip address 192.168.30.1 255.255.255.0•interface vlan 400–ip address 192.168.40.1 255.255.255.0•interface vlan 500–ip address 192.168.50.1 255.255.255.0三层交换机中三层接口的创建要将某一个端口设定为三层端口,需要将它加入到某一个VLAN中,然后为该VLAN设置IP 地址Vlan 100Int f0/4Switchport access vlan 100Int vlan 100Ip address 11.1.1.1 255.255.255.0No shutdownDHCP的配置Switch(Config)#Service dhcp 启动/关闭DHCP服务Switch(Config)#ip dhcp pool ASwitch(dhcp-A-config)#network 10.16.1.0 24Switch(dhcp-A-config)#lease 3 10 32Switch(dhcp-A-config)#default-route 10.16.1.200 10.16.1.201Switch(dhcp-A-config)#dns-server 10.16.1.202Switch(dhcp-A-config)#exitSwitch(Config)#ip dhcp excluded-address 10.16.1.200 10.16.1.201 二层交换机端口安全配置设置静态一一映射:Mac-adderess-table static address 22-22-22-22-22-22-22 vlan 10 int f0/3 设置安全端口地址:Int f0/3Switchport port-securitySwitchport port-security mac-address 22-22-22-22-22-22神州数码路由器配置命令端口基本配置•interface serial 1/0–encapsulation hdlc–ip address 192.168.10.1 255.255.255.252–physical-layer speed 2048000–!PAP认证配置(双向认证)•DCR-1配置:•interface s0/1–encapsulate ppp–ip add 192.168.10.1 255.255.0.0–ppp authentication pap–ppp pap user routerA aaa–physical-layer speed 2048000•username routerB password bbb•DCR-2配置:•username routerA password aaa•interface s0/1–encapsulate ppp–ip add 192.168.10.2 255.255.0.0–ppp authentication pap–ppp pap user routerB bbbCHAP协议配置•DCR-1配置:•username digitalchina2 password legend•interface Serial1/0–encapsulation ppp–ppp authentication chap–ppp chap hostname digitalchina1–PPP chap password legend–ip address 192.168.10.1 255.255.255.252–physical-layer speed 2048000•DCR-2配置:•username digitalchina1 password legend•interface Serial1/0 encapsulation ppp–ppp authentication chap–ppp chap hostname digitalchina2–PPP chap password legend–ip address 192.168.10.2 255.255.255.252RIP协议配置•DCR-1(config)#router rip–DCR-1(router-rip)#network 192.200.10.4 255.255.255.252–DCR-1(router-rip)#version 2–DCR-1(router-rip)#redistribute connectOSPF协议配置•router ospf 1–network 192.200.10.4 255.255.255.252 area 0–redistribute connectNAT配置如上图所示,公司申请了一个合法的IP地址,公司局域网用户使用一个IP地址连接入internet•interface fastethernet 0/0–ip address 192.168.1.1 255.255.255.0–ip nat inside•interface serial 1/0–encapsulation ppp–ip address 61.1.1.1 255.255.255.252–ppp pap sent-username 169 169–ip nat outside•ip access-list standard test1–permit any•ip nat inside source list test1 interface serial 1/0•ip route default serial 1/0IPSEC的配置crypto ipsec transform-set test1 -------------------------------------------设置变换集合transform-type ah-md5-hmac esp-desip access-list extended ipsec -------------------------------------------设置要保护的数据permit ip 3.3.3.0 255.255.255.0 2.2.2.0 255.255.255.0set transform-set test1 ----------------- ----------------- -------- ---------------运用变换集合test1match address ipsec -------------------------指定所要保护的IP数据配置SSH Server,允许可以通过SSH远程管理设备,并使用AAA本地验证。