
netCDF
- 格式:pdf
- 大小:230.60 KB
- 文档页数:6
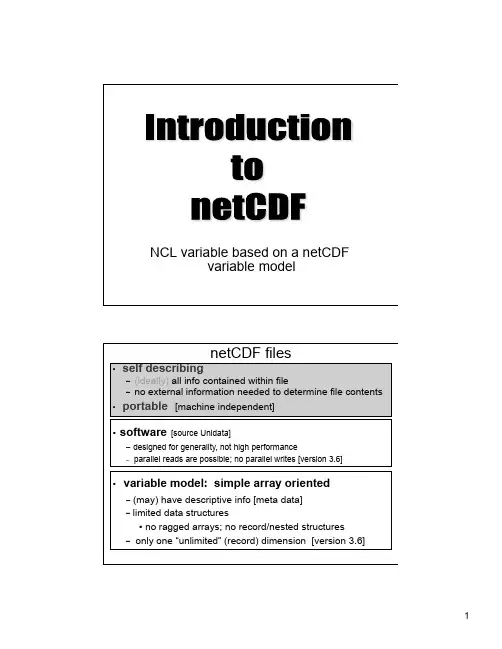

2.2 NETCDF DATA作者:Catherine Nunkai 上次修改时间: 2014-11-13 12:52The Network Common Data Format (NetCDF) is an interface to a library of data access routines for storing and retrieving scientific data. NetCDFallows the creation of data sets which are self-describing and platform-independent. netCDFwas created under contract with the Division of Atmospheric Sciences of the National Scientific Foundation and is available from the Unidata Program Center in Boulder, Colorado.Ferret expects netCDF files to adhere to the COARDS conventions. Also Ferret treatment of netCDF files is consistent with the CF standard for netCDFfiles, .Ferret does not implement all of that standard.See the chapter "Converting Data to NetCDF", for a complete description of how to create netCDFdata sets or how to convert existing data sets into NetCDF.To output a variable in NetCDF, simply use:This will create a file named example.cdf.The current region and data sets determine the variable names in the saved file and the range over which they are saved. Saved data can then be accessed as follows:(USE is an alias for SET DATA/FORMAT=CDF, see )To read a netCDF dataset that is on a DODS (also known as OPeNDAP) server, simply specify the DODS address in quotes:To check whether a dataset exists or a URL is available, the TEST_OPENDAP function returns the flag that the netCDF library sends back on an attempt to open the data.If a filename is not specified for writing, Ferret will generate one. (See the command SET LIST/FILE in the Commands Reference section). An example of converting TMAP-formatted data to netCDF goes as follows:These commands will save sst, airt, uwnd, and vwnd at the first time step over their entire regions to a netCDF file named by Ferret.One advantage to using netCDF is that users on a different system (i.e., VMS instead of Unix) with different software (i.e., with an analysis tool other than Ferret) can share data easily without substantial conversion work. NetCDF files are self-describing; with a simple command the size, shape and description of all variables, grids and axes can be seen.2.1.1 NetCDF data and stridesBeginning with Ferret version 5.1 , the internal functioning of netCD Freads has been changed when "strides" are involved. Suppose that CDFVAR represent a variable from a netCDFfile. In version 5.0 and earlier the command PLOT CDFVAR[L=1:1000:10] would have read the entire array of 1000 points from the file; Ferret's internal logic would have subsampled every 10th point from the resulting array in a manner that was consistent for netCDF variables, ASCII variables, user defined variables, etc. In V5.1 strides applied to netCDF variables are given special treatment -- subsampling is done by the netCDF library. The primary benefit of this is to make network access to remote data sets via DODS more efficient. Beginning with Ferret v5.4, strides can be applied across the "branch point" of a modulo variable without loss of efficiency for the netCDF data set, as long as the stride is an integer fraction of the modulo length times the number of points on the axis. A remote satellite image of size, say,1000x1000 points x 8 bit depth (8 megabytes) can efficiently be previewed usingmy_X = X[g=sst[D=coads_climatology]]) that variable definition will be invalidated when the data set is canceled (CANCEL DATA coads_climtology, in the preceding example). There is a single exception to this behavior: netCDF files such as climtological_axes.cdf, which define grids or axes that are not actually used by any variables. These grids and axes will remain defined even after the data set, itself, has been canceled. They may be deleted with explicit use of CANCEL GRID or CANCEL AXIS.In Ferret version 6.02 we introduce a method whereby a grid may be redefined with strided axes. This "native stride" syntax means that the stride information needs to be specified only once, and variable names do not need to be changed.Old syntax:New syntax:AXIS/STRIDE=/OFFSET=. The offset value must be less than the stride value, and it refers to the first index to use:Old syntaxNew syntax:This syntax associates a new strided axis with the original axis. Everywhere that original axis is used, the new strided behavior will be applied. This means that all variables from all datasets that share the same exact axis will appear on the new strided axis. The original axis definition still exists and we can cancel the stride behavior with2.2.2 NetCDF data attributesBeginning with Ferret V6.0, Ferret has access to attributes of netCDF variables, including coordinate variables. In fact, attributes can be defined and used for user variables and variables from any kind of dataset. See the section in the next chapter about dataset and variable attributes2.2.3 NetCDF Data with the bounds attributeThe CF standard for netCDF files defines a bounds attribute for coordinate axes, where the upper and lower bounds of the grid cells along an axis are specified by a bounds variable which is of size n*2 for an axis of length N. See Section 7.1 of the CF document/The coordinates on the axis may be anywhere within the cells defined by the upper and lower cell bounds. Ferret uses these as the upper and lower bounds of of axis cells (also known as boxes). They may be listed or otherwise accessed using the pseudo-variables XBOXLO, XBHOXH, YBOXLO, etc.For example, a simple netCDF file with bounds would have the following ncdump output:The CF standard allows for axes in a file that may have discontiguous bounds (the upper bound of one cell is not the same as the lower bound of the next cell). Ferret does not allow such an axis. When discontiguous bounds are encountered in a file, we arbitrarily choose to use the lower bounds throughout, with the upper bound of the topmost cell to close the definition. This way all axes have contiguous upper and lower bounds. A warning message is issued.DEFINE AXIS/BOUNDS may be used to create an axis with cell bounds. All irregular axes are saved with a bounds attribute (beginning with Ferret v5.70) and the user may request that all axes be written with the bounds attribute with the SAVE/BOUNDS commandNote that if you have a dataset that has an irregular time axis and a bounds attribute on that axis and you force Ferret to apply a regular time axis withyes? USE/REGULART my_data.ncthen the bounds are ignored: the regular time axis is formed from the first and last coordinate and the number of points.2.2.4 Multi-file NetCDF data setsFerret supports collections of netCDF files that are regarded as a single netCDF data set. Such data sets are referred to as "MC" (multi CDF) data sets. They are particularly useful to manage the outputs of numerical models. MC data sets use a descriptor file, in the style ofTMAP-formatted data sets. The data set is referred to inside Ferret by the name of this descriptor file.A collection of netCDF files is suitable to form a multi-file data set if1) The files are connected through their time axis—each file represents one or more time snapshots of the variables it contains.2) All non-time-dependent variables in the data set must be contained in the first file of the data set (or those variables will not appear in the merged, MC, data set).Note that previous to version 5.2, each file is self-documenting with respect to the time axis of the variables—even if the time axis represents only a single point. (All of the time axes must be identically encoded with respect to units and date of the time origin.) In version 5.3 and higher these checks are not performed. This means that the MC descriptor mechanism can be used to associate into time series groups of files that are not internallyself-documenting with respect to time. See Creating a Multi-File netCDF Data SetBeginning with version 5.8 of Ferret the stepfiles may contain different scale and offset values for the variables they contain. See the section on Standardized NetCDF attributes. Ferret reads and applies the scale and offset values as data from each stepfile is read. Note that the commandsreturn the latest scale and offset value that were applied.A typical MC descriptor file may be found in the chapter "Converting to netCDF", in the section "Creating a multi-NetCDF data set"2.2.5 Non-standard NetCDF data setsAs discussed in the Chapter, "Converting Data to NetCDF", Ferret expects netCDF files to adhere to the COARDS conventions(/noaa_coop/coop_cdf_profile.html). If the files do not adhere to the COARDS conventions, Ferret will still attempt to access them. Often, the user can use Ferret controls for regridding, reshaping, and otherwise transforming data to recover the intended file contents.Here are a few common ways in which netCDF files may deviate from the COARDS standard and how one may cope with those situations in Ferret.▪Files with disordered coordinatesIn the COARDS conventions an axis (a.k.a. "coordinate variable") must havemonotonically-increasing coordinate values. If the coordinates are disordered orrepeating in a netCDF file, then Ferret will present the coordinates to the user (in SHOW DATA) as a dependent variable, whose name is the axis name, and it will substitute an axis of the index values 1, 2, 3, ... Note that Ferret will apply this same behavior when files have long irregular axis definitions that exceed Ferret's axis memory capacity.▪Files with reverse-ordered axesIf the coordinates of an axis are monotonically decreasing, instead of increasing, Ferret will transparently reverse both the axis coordinates and the dependent variables that are defined upon that axis. Note that if Ferret writes a reverse-ordered variable to a new netCDF file (with the SAVE command), the coordinates and data in the output file will be in monotonically increasing coordinate order—reversed from the input file. In Ferret v6.83 and higher, Ferret will issue a NOTE when it does this:axis then use attach a minus sign to the corresponding axis orientation in theUSE/ORDER= qualifier to designate that the variable(s) should be reversed along the corresponding axis.For more on this topic see the FAQ, "Are there any disadvantages to using reversed coordinates?"▪Files with "invalid" variable namesThe COARDS standard specifies that variable names should begin with a letter and be composed of letters, digits, and underscores. In files where the variable names contain other letters, references to those variable names in Ferret must be enclosed in single quotes.▪Files with permuted axis orderingThe COARDS standard specifies that if any or all of the dimensions of a variable have the interpretations of "date or time" (a.k.a. "T"), "height or depth" (a.k.a. "Z"), "latitude"(a.k.a. "Y"), or "longitude" (a.k.a. "X") then those dimensions should appear in therelative order T, then Z, then Y, then X in the CDL definition corresponding to the file. In files where the axis ordering has been permuted the commandqualifiers USE/ORDER= allow the user to inform Ferret of the correct permutation of coordinates. Note that if Ferret writes a permuted variable to a new netCDF file (with the SAVE command), the coordinates and data in the output file will be in standard X-Y-Z-T ordering (as indicated in the user’s /ORDER specification)—permuted from the originalfile ordering. See the Command Reference for a complete description of the ORDER qualifier.▪Files with more than four dimensionsThe COARDS standard specifies that a netCDF file may be created with more than four dimensions. However the Ferret framework allows just four dimensions at this time.2.2.6 NetCDF and non-standard calendarsThe netCDF conventions document discusses and defines usage for different calendar axes. These conventions for calendars are implemented in Ferret version 5.3 See the discussion of calendars in Section 4 of the CF Conventions document at/The calendars allowed are:GREGORIAN or STANDARD (default) Ferret uses the proleptic Gregorian calendar, which is the Gregorian calendar extended to dates before 1582-10-15.NOLEAP or 365_DAY All years are 365 days long.NOLEAP or 365_DAY All years are 365 days long.ALL_LEAP or 366_DAY All years are 366 days long.360_DAY All years are 360 days divided into 30 day months.JULIAN Julian calendar; leap years with no adjustment at the turn of the century.These calendars are compatible with the Udunits standard which has slightly different naming conventions, except that the gregorian or standard calendar is a proleptic Gregorian calendar in Ferret. If the mixed Julian/Gregorian calendar is desired, use a time origin of1-jan-0001:00:00 and Ferret will apply the 2-day shift that was made historically when the Gregorian calendar was introduced. The Udunits standard can be found at:/software/udunits/udunits-1/udunits.txtudunits.dat (A local copy of the above link).The netCDF conventions recommend that the calendar be specified by the attributetime:calendar which is assigned to the time coordinate variable when there is anon-Gregorian calendar associated with a data set, i.e.time:calendar=noleapFerret reads this attribute when it is present in a netCDF file and assigns the appropriate calendar identifer to the variable. When a variable has a non-Gregorian calendar, the attribute is written to a netCDF file when the variable is output to a netCDF file.2.2.7 NetCDF "packed data"The netCDF conventions documents describe the use of scale_factor and add_offset attributes for packing data. When Ferret encounters a variable in a netCDF file that has these attributes, it automatically applies them as the data is read, returning the scaled data. For details, please see the description of the scale_factor and add_offset attributes in the COARDS standards documentat /noaa_coop/coop_cdf_profile.html2.2.8 NetCDF version 4Unidata has released NetCDF-4 which includes classic NetCDF dataset access and also netcdf 4 files with HDF5 capabilities for compression and chunking. With the release of netCDF-4.1, this also includes remote data access with build-in OPeNDAP client. Starting with Ferret v6.6, Ferret is linked with netCDF-4.1 libraries instead of the libraries from . Please see the full netCDF documentation and descriptions of the use of HDF5 with netCDF-4 at the Unidata NetCDF pages,/software/netcdf/In Ferret v6.6, the Ferret syntax is expanded to take advantage of netCDF-4. All previously existing syntax works with no changes needed. Data that Ferret writes is compatible with netcdf-3 and netcdf-4 libraries by default; special netcdf-4 capabilities such as compression are employed only if settings are made to request those features.A Ferret symbol is set at startup: NETCDF_VERSIONThis queries the version number of the netCDF library, and reports back a string containing that version - the start of the string lists the version number.SHOW SYMBOL NETCDF_VERSIONNetcdf-4 - formatted files are read by Ferret with no intervention from the user, except possibly to adjust the chunk cache for better performance.SHOW NCCACHE Lists the current settings for the CACHEChunk cache size is listed in mbytes. The current default set by the netCDF-4.1 library is 4.1943 Mbytes.SET NCCACHEto change the chunk cache settings from the defaults. The options are:SET NCCACHE/SIZE/NELEMS/PREEMPT/SIZE= new size in mb/NELEMS see the netCDF-4 documentation/PREEPMT see the netCDF-4 documentationCANCEL NCCACHE restores the default settings for the chunk cacheFor example,SAVE/NCFORMAT/DEFLATE/SHUFFLE/ENDIAN/XCHUNK/YCHUNK/ZCHUNK/TCH UNKQualifiers on LIST/FORMAT=CDF (e.g. SAVE). For more details see documentation onthe LIST command in the Commands Reference section. These can be set differently for variables in a dataset./NCFORMAT = netcdf4, classic, 4, 3, 64BIT_OFFSET. (4=netcdf4, 3=classic). By default Ferret writes classic files./ENDIAN = big, little, native/DEFLATE = deflate level, 0 through 9; if specified with no argument, the deflate level is setto 1. (1 is recommended for compression)/SHUFFLE = 0 or 1; if /shuffle with no argument, it is set to 1/XCHUNK/YCHUNK/ZCHUNK/TCHUNK = chunk sizes in each index direction, integer values. If these are not specified, the compression will use the default chunk-size scheme of the NetCDF-4 library. If you specify a chunk size for any dimension, you must specify it for all of the dimensions present in the grid. Chunking is done only if the file has been set to be written in NetCDF-4 format.For example,commands. More details may be found in the documentation for the command SET LIST in the Commands Reference section).SET LIST/NCFORMAT/ENDIAN/DEFLATE/SHUFFLE/NCFORMAT = netcdf4, classic, 4, 3, 64BIT_OFFSET. (4=netcdf4, 3=classic)/ENDIAN = big, little, native/DEFLATE = deflate level, 0 through 9 (1 is recommended for compression)/SHUFFLE = 0 or 1For example,CANCEL LIST/all Restores default settingsNetcdf-4 - formatted files are read by Ferret with no intervention from the user, except possibly to adjust the chunk cache for better performance.SHOW NCCACHE Lists the current settings for the CACHEChunk cache size is listed in mbytes. The current default set by the netCDF-4.1 library is4.1943 Mbytes.SET NCCACHE changes the chunk cache settings from the defaultsSET NCCACHE/SIZE/NELEMS/PREEMPT Sets the chunk cache:/SIZE= new size in mb/NELEMS see the netCDF-4 documentation/PREEPMT see the netCDF-4 documentationCANCEL NCCACHE restores the default settings for the chunk cacheFor example,There are qualifiers on SET LIST, to make settings for subsequent SAVE commands: SET LIST/NCFORMAT/ENDIAN/DEFLATE/SHUFFLE/NCFORMAT = netcdf4, classic, 4, 3, 64BIT_OFFSET. (4=netcdf4, 3=classic)/ENDIAN = big, little, native/DEFLATE = deflate level, 0 through 9 (1 is recommended for compression)/SHUFFLE = 0 or 1CANCEL LIST/all Restores default settings(来源网站:/Ferret/documentation/users-guide/data-set-basics/NETCDF-D ATA)。

NCSA格式,全称是"NetCDF Climate and Forecast (netCDF-CF) Metadata Convention",是一种用于气象学和环境科学领域的数据格式。
它是一种面向对象的格式,用于存储和共享气象、海洋、地球科学等领域的数据。
NetCDF-CF格式具有以下特点:
1. 它是一种标准的数据格式,被广泛应用于气象学、海洋学、地球科学等领域。
2. 它支持多种数据类型,包括数值数据、字符串、时间和日期等。
3. 它支持多维数据,可以表示多变量、多时间步、多空间位置的数据。
4. 它具有强大的元数据支持,可以存储数据的来源、创建时间、数据质量等信息。
5. 它具有可扩展性,可以根据需要扩展数据类型和属性。

NetCDF TutorialTable of ContentsAbout the netCDF Tutorial . . . . . . . . . . . . . . . . . . . . . . . . . . . . . . . 3 Exercise 1: Displaying a raster layer from a netCDF file . . . . . . . . . . . . . . . . . . . 4 Exercise 2: Creating a temperature table at a specific location . . . . . . . . . . . . . . . . . 8 Exercise 3: Finding temperature difference between two time steps . . . . . . . . . . . . . . . 11About the netCDF TutorialNetwork Common Data Form (netCDF) is a file format for storing multidimensional scientific data (variables) such as temperature, humidity, pressure, wind speed, and direction. You can use tools from the Multidimension Tools toolbox to create a raster layer, a feature layer, and a table view from a netCDF file. You can change the display by selecting a specific dimension value from the properties dialog box or by running the Select by Dimension geoprocessing tool. You can also perform analysis using a layer or table view created from a netCDF file.Tutorial scenarioThe tutorial data, a netCDF file, contains derived data from an atmospheric model simulation. The three-dimensional variable tmin represents the annual minimum temperature for winter seasons. In addition to lon and lat dimensions, the variable tmin also has year, a third dimension to represent time steps.This tutorial is divided into three exercises and is designed to allow you to explore the multidimension tools and the netCDF-related functionality in ArcGIS at your own pace.•In exercise 1, you'll copy the tutorial data locally and create a raster layer from a netCDF file. You'll then change the display by selecting a different time step.•In exercise 2, you'll create a temperature time series table for a specific location.•In exercise 3, you'll create a model to find the temperature difference between two time steps.You will need approximately 45 minutes of focused time to complete the tutorial. Alternatively, you can perform the exercises in sequence one at a time, saving your results along the way when recommended.You'll locate the Make NetCDF Raster Layer tool and create a raster layer using a variable from a netCDF file. You'll then change the display by selecting a different time step. This exercise will take approximately 15minutes to complete.Copying tutorial data Before working with multidimension tools, you'll organize your tutorial data.Steps:1.Open Windows Explorer. You can use the shortcut key combination Windows logo key+E toopen it.2.Navigate to the location where you installed the tutorial data; for example, if you installed ArcGISon your C drive, navigate to C:\arcgis\ArcTutor.3.Right-click the NetCDF folder and click Copy .4.Right-click the C drive (or an alternative location) in Windows Explorer and click Paste .Making a netCDF raster layerYou'll run the Make NetCDF Raster Layer tool to create a raster layer using the tmin variable from the temperature.nc netCDF file.Steps:1.Start ArcMap by either double-clicking a shortcut installed on your desktop or using the AllPrograms list on the Start menu.2.Click OK on the ArcMap startup dialog box.3.Open the Make NetCDF Raster Layer tool.Note:Use the Search window to locate the Make NetCDF Raster Layertool.Click Searchb.Choose Tools .c.Type Make NetCDF Raster Layer .d.Click the magnifying glass icon.e.Click the Make NetCDF Raster Layer tool in the list.Complexity:BeginnerData Requirement:ArcGIS Tutorial Data Setup Data Path:C:\arcgis\ArcTutor\NetCDFGoal:Create a raster layer from a netCDF file.4.For the Input netCDF File value, type or browse to C:\NetCDF\temperature.nc.5.Accept default values for Variable(tmin),X Dimension(lon), and Y Dimension(lat)parameters.6.Type Minimum_Temperature in the Output Raster Layer text box.7.Click OK to run the tool.The Minimum_Temperature raster layer is added to ArcMap. It displays the winter minimum temperature of the year 1875, which is the default (first) time step. Note that the maximum and minimum and temperature values in the table of contents are 27.6854 and -59.0669, respectively.Displaying a specific time stepThe raster layer is displayed using the default time step, which is 1/1/1875. You'll change the display to show the minimum winter temperature of the year 1940 by changing the time step on the Layer Properties dialog box.Steps:1.Right-click the Minimum_Temperature layer in the table of contents and click Properties.2.Click the NetCDF tab.3.Click the cell next to Year under the Value column. An arrow appears.4.Click the arrow and choose1/1/1940.5.Click OK on the Layer Properties dialog box.The Minimum_Temperature layer now displays the winter minimum temperature of 1940. Note that the maximum and minimum temperatures have changed to 28.153 and -60.2398, respectively.Returning to the default time stepYou can return to the default (the first) time step by changing the time dimension value on the Layer Properties dialog box, or you can run the Select by Dimension tool.Steps:1.Open the Select by Dimension tool.2.For the Input Layer or Table value, choose Minimum_Temperature from the drop-down list.3.Accept default values for all other parameters.4.Click OK to run the tool.The display of the Minimum_Temperature layer is back to the default time step (in other words, the winter minimum temperature of 1875). Note that the maximum and minimum temperatures are now back to27.6854 and -59.0669, respectively.Exercise 2: Creating a temperature table at a specific locationYou'll locate the Make NetCDF Table View tool and create a table view using a variable from a netCDF file. You'll then create a temperature profile from the table. This exercise will take approximately 10 minutes to complete.Making a netCDF table view Run the Make NetCDF Table View tool to create a temperature timeseries table at a specific location using the tmin variable from thetemperature.nc netCDF file.Steps:1.Open the Make NetCDF Table Viewtool.2.For the Input netCDF File value, type or browse to C:\NetCDF\temperature.nc .3.Click the Variables arrow and choose the tmin variable.4.Type Temperature for Output Table View .5.Click the Row Dimensions arrow and choose the year dimension.6.Click the Dimension Values arrow and choose the lon dimension.7.Click the cell next to lon in the Value column and type -111.75.8.Click the Dimension Values arrow again and choose the lat dimension.9.Click the cell next to lat in the Value column and type 45.75.10.Click OK to run the tool.Complexity:BeginnerData Requirement:ArcGIS Tutorial Data SetupData Path:C:\arcgis\ArcTutor\NetCDFGoal:Create a table from a netCDF file.11.Click the List By Source button in the table of contents to see the Temperature table.12.Right-click Temperature table in the table of contents and click Open.13.Examine fields and values in the Temperature table and close it.14.Click the List By Drawing Order button in the table of contents.You can create a temperature profile from this table. See A quick tour of creating graphs and The steps to create a graph for more information.Exercise 3: Finding temperature difference between two time stepsIn this exercise, you'll create a model to find the temperature differencebetween two time steps. This exercise will take approximately 20 minutes tocomplete.Creating a new toolboxYou'll first create a new toolbox to store the model you will create in thisexercise.Steps:1.Click the Catalog Windowbutton on the Standard toolbar to open the Catalog window.2.Click the Default Geodatabase button on the Catalog.3.Right-click Default.gdb and click New >Toolbox.4.Change the name of the toolbox you just created from Toolbox to NetCDF.Complexity:Beginner Data Requirement:ArcGIS Tutorial Data SetupData Path:C:\arcgis\ArcTutor\NetCDFGoal:Perform analysis using a netCDF file.Creating a new modelYou'll create a new model and name it TemperatureDifference.Steps:1.Right-click the NetCDF toolbox and click New>Model.2.On the model's Main menu, click Model>Model Properties.3.Click the General tab.4.Type TemperatureDifference in the Name text box.5.Type Temperature Difference in the Label text box.6.Click OK to close the dialog box.Building the Temperature Difference modelYou'll add the netCDF file and Make NetCDF Raster Layer tool in your model to create two raster layers for the years 1935 and 1940.Steps:1.From your NetCDF folder in Windows Explorer, drag the temperature.nc file onto your model.2.Locate the Make NetCDF Raster Layer tool and drag it onto your model.3.Connect the temperature.nc variable to the Make NetCDF Raster Layer tool.4.Double-click the Make NetCDF Raster Layer tool.5.Type tmin_1935in the Output Raster Layer text box.6.Click the Dimension Values arrow and choose the year dimension.7.Click the cell next to year in the Value column, click the arrow, then choose1/1/1935.8.Click OK on the Make NetCDF Raster Layer dialog box.9.Locate the Make NetCDF Raster Layer tool again and drag it onto your model.10.Connect the temperature.nc variable to the Make NetCDF Raster Layer (2)tool.11.Double-click the Make NetCDF Raster Layer (2)tool.12.Type tmin_1940in the Output Raster Layer text box.13.Click the Dimension Values arrow and choose the year dimension.14.Click the cell next to year in the Value column, click the arrow, then choose1/1/1940.15.Click OK on the Make NetCDF Raster Layer (2)dialog box.Finding temperature differenceNow you'll finish up your model to find the minimum temperature difference between years 1935 and 1940 by subtracting two raster layers.Steps:1.Locate the Minus tool in Spatial Analyst or the 3D Analyst Tools toolbox and drag it onto yourmodel.2.Connect tmin_1935 then tmin_1940 to the Minus tool.3.Right-click the output of the Minus tool and click Rename.4.Type Temperature_Difference in the text box and click OK.5.Right-click Temperature_Difference and click Add To Display.6.Click the Auto Layout button to arrange the model elements.7.Click the Save button to save your model.8.Click the Run button to run your model. The output raster layer is added to the table ofcontents.9.Click the legend of the Temperature_Difference layer and choose a color ramp for betterdisplay.Saving the map documentYou are done with the exercise. However, you may want to save the map document to explore other functionalities.Steps:1.On the main menu, click File>Save.。

洋流nc文件结构全文共四篇示例,供读者参考第一篇示例:洋流nc文件结构是用于存储海洋洋流数据的一种标准文件格式。
这种格式可以存储海洋洋流数据的不同变量,如海洋表面速度、海洋表面温度等,并且可以方便地对这些数据进行处理和分析。
在洋流nc 文件结构中,通常包括了数据的维度、变量、属性等信息,以便在读取和处理数据时能够准确地理解数据的含义。
洋流nc文件结构的核心是NetCDF(Network Common Data Form)格式。
NetCDF是一种用于存储科学数据的文件格式,它提供了一种灵活的方式来组织和描述数据,从而使科学家们能够更轻松地共享和处理数据。
在洋流nc文件结构中,数据通常被组织为一个或多个多维数组,这些数组包含了不同的数据变量和坐标信息。
洋流nc文件结构通常由以下几部分组成:1. 文件头部信息:文件头部信息包括了文件的版本信息、创建时间、作者信息等。
这些信息通常被用来描述文件的基本属性,以便用户可以快速了解文件的内容。
2. 数据维度信息:数据维度信息包括了数据的维度大小、名称等。
通过这些信息,用户可以了解数据的空间和时间分辨率,以及数据的组织结构。
4. 数据属性信息:数据属性信息包括了数据集的属性信息,例如数据的来源、质量等。
这些信息可以帮助用户评估数据的可靠性和适用性。
第二篇示例:洋流NC文件结构指的是用于描述洋流数据的一种文件格式。
随着海洋科学和气象学的发展,洋流数据在海洋研究和气象预测中起着重要作用。
洋流NC文件结构的设计和优化对于数据的存储、管理和分析具有重要意义。
一般来说,洋流NC文件结构包括以下几个部分:1. 文件头(Header):文件头包含了关于洋流文件的基本信息,比如文件的创建时间、作者信息、数据的时间范围等。
文件头还可以包含一些关于数据质量和准确性的描述,以便用户在使用数据时了解数据的可靠性。
2. 数据变量(Variables):数据变量是洋流NC文件中最重要的部分,它包含了实际的洋流数据。