
[ArcGIS]-Excel中XY点数据生成点Shape文件方法
- 格式:pdf
- 大小:1.37 MB
- 文档页数:7
![[ArcGIS]-Excel中XY点数据生成点Shape文件方法](https://imgs-1438308264.cos.ap-hongkong.myqcloud.com/ef43b679f5335a8102d2208e.webp)
ArcGIS问题:如何将坐标点或者点文件转换成线、面文件
工作过程中,如果获得了一批点坐标信息(如通过GPS获得的点位坐标),如何将这些坐标信息直接转换成Arcmap下面的点呢?或者说就是把这些点坐标直接转换成线或面呢?需要用到Add XY Data…工具,
下面是具体的方法:
首先,将数据导入到Excel里面,总共有两列X,Y(列名可以随便取,但必须有列名),下面对应x,
y坐标数据即可;
接着:将文件保存成.xls或者dbf文件。
(1)ArcMAP下面,菜单tools-Add XY Data
(2)这时会形成一个新图层,所有的点都添加进来了,但现在添加进来的点由于没有objectID 或者FID,现在图层不具备.shp图层的大部分功能,如点的选择,编辑,关联,属性等操作
(3)在刚才生成的图层上点右键,选data-expot data…,导出成.shp文件。
下面,我们利用arcgis中toolbox工具中的脚本,将shp点文件转成线或面
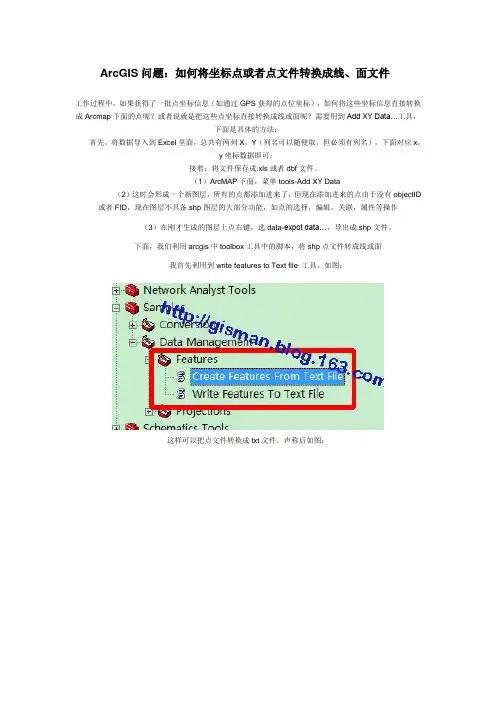
我首先利用到write features to Text file 工具,如图:
这样可以把点文件转换成txt文件,声称后如图:
之后我们相应的把txt文件中的Point 改成Polyline或Polygon,保存。
然后利用Create Features From Text File就可以生成相应的线和面文件了。
注意:讲INput decimal separator 改成12345678.12345或者11111111.11111也可以是其他,,坐标系
根据需要自己选择,如图,然后确定即可生成。

ArcMap应用:如何将点的经纬度坐标添加到shp文件中在点shp文件中,点的坐标信息保存于shp文件的shape字段中,而不能直接看到坐标。
我们可以通过提取点的经纬度并保存于点shp文件的属性表X(或经度)、Y(或纬度)字段中。
方法如下:1) 在ArcMap中打开点shp文件的属性表。
2) 单击【Options】-> Add Field…,添加新字段X_coord,格式如图:然后单击OK,则X_coord字段添加到属性表中。
3) 右击X_coord字段,选择Field Calculator,在弹出的对话框上选Yes后,出现编辑窗口Field Calculator。
4) 在Field Calculator窗口中,勾选Advanced 选择框,然后在Pre-Logic VBA Script Code代码窗口下:输入如下代码:Dim dblX as doubleDim pPoint as IPointSet pPoint = [Shape]dblX = pPoint.X在下面的X_coord窗口中输入dblX,具体如图所示:5)完成以上操作后,单击OK按钮,则点的经度信息添加到X_coord字段中。
6)重复以上操作,添加Y_coord字段,并更改代码如下:Dim dblY as doubleDim pPoint as IPointSet pPoint = [Shape]dblY = pPoint.Y并修改上图框中3所标示的为dblY,单击OK,则完成Y_coord信息的提取与添加。
如图为提取的信息与原来有经纬度点的比较,可见完全一致。
[参考资料]1.Tony Soeller. ArcMap Procedure: How to Add X- and Y-coordinates to a Point shapefile's attribute table, RCOMPUTING SUPPORT. NACS/UC IRVINE, MAY 2004.(End)By blsm_IRSA_CAS分享是一种快乐!。

Arcgis10.0之后版本坐标值转换成shp图层教程通过坐标数值⽣成点线⾯的shp图层Arcgis10.0之后版本虽然交9.3增加了很多功能,但是却不知何故少了⼀些常⽤的功能。
本问主要就⽐较常⽤通过坐标数值⽣成点线⾯的shp图层做简单介绍。
⼀、前期准备1.将附件CreateFeaturesFromTextFile⽂件复制到任何⼀个固定的位置。
2.打开Arcgis,新建toolbox3.按图新建脚本⼯具C:\Program Files\ArcGIS\Desktop10.1\ArcToolbox\Stylesheets\geoprocessing_help.xsl 4.点击下⼀步,Script File选择刚才那个脚本⽂件“CreateFeaturesFromTextFile”5.设置参数其中,“坐标值规定“中的Default的值为12345678.12345 “输出shp⽂件”中的Direction改为output “坐标系统“的type改为optional6.点击finished⼆、制作带有坐标的⽂本⽂件。
1.这个⽂件第⼀⾏以d,x,m开头,分别表⽰点线⾯。
2.接下⼏⾏是坐标值,以“编号(编号从0开始)X坐标Y坐标”例如:0 40545654.256 532145697.3253.另起⾏以end结束。
保存成txt格式的⽂件。
三、⽣产shp图层1.打开刚才那个制作好的脚本⼯具CreateFeaturesFromTextFile2.按照提⽰操作,坐标系统可以不填3.点击Ok。
完成注意事项:编写的txt⽂件的坐标必须按照顺序编写,否则图形会出现紊乱(点⽂件除外)。
将⼀下⽂本粘贴到txt中,并保存成.py的⽂件。
'''---------------------------------------------------------------------------------- Tool Name: CreateFeaturesFromTextFileSource Name: CreateFeaturesFromTextFile.pyVersion: ArcGIS 9.1Author: Environmental Systems Research Institute Inc. Required Argumuments: An Input Text File containing feature coordinatesAn Input Character designating the decimal separator used in the text file.An output feature classOptional Arguments: A spatial reference can be specified. This will be thespatial reference of the output fc. Description: Reads a text file with feature coordinates and creates a feature classfrom the coordinates.----------------------------------------------------------------------------------'''import string, os, sys, locale, arcgisscriptinggp = arcgisscripting.create()gp.overwriteoutput = 1msgErrorTooFewParams = "Not enough parameters provided." msgUnknownDataType = " is not a valid datatype. Datatype must be point, multipoint, polyline or polygon."msgErrorCreatingPoint = "Error creating point %s on feature %s"# sets all the point propertiesdefcreatePoint(point, geometry):try:point.id = geometry[0]point.x = geometry[1]point.y = geometry[2]# When empty values are written out from pyWriteGeomToTextFile, they come as 1.#QNAN# Additionally, the user need not supply these values, so if they aren't in the list don't add themif len(geometry) > 3:if geometry[3].lower().find("nan") == -1: point.z = geometry[3]if len(geometry) > 4:if geometry[4].lower().find("nan") == -1: point.m = geometry[4]return pointexcept:raise Exception, msgErrorCreatingPointtry:# get the provided parametersinputTxtFile = open(gp.getparameterastext(0))fileSepChar = gp.getparameterastext(1)outputFC = gp.getparameterastext(2)# spatial reference is optionaloutputSR = gp.getparameterastext(3)# make sure the text type specified in the text file is valid. inDataT = inputTxtFile.readline().strip().lower()d = {'d':'point','ml':'multipoint','x':'polyline','m':'polygon'} inDataType = d[inDataT]dataTypes = ["point", "multipoint", "polyline", "polygon"] if inDataType.lower() not in dataTypes: msgUnknownDataType = "%s%s" % (inDataType, msgUnknownDataType)raise Exception, msgUnknownDataType# create the new featureclassgp.toolbox = "management"gp.CreateFeatureclass(os.path.split(outputFC)[0],os.path.split(outputFC)[1], inDataType, "#", "ENABLED", "ENABLED", outputSR)# create a new field to assure the id of each feature is preserved. idfield = "File_ID"gp.addfield(outputFC, idfield, "LONG")# get some information about the new featureclass for later use. outDesc = gp.describe(outputFC)shapefield = outDesc.ShapeFieldName# create the cursor and objects necessary for the geometry creation rows = gp.insertcursor(outputFC)pnt = gp.createobject("point")pntarray = gp.createobject("Array")partarray = gp.createobject("Array")locale.setlocale(locale.LC_ALL, '')sepchar = locale.localeconv()['decimal_point']# loop through the text file.featid = 0lineno = 1for line in inputTxtFile.readlines():lineno += 1# create an array from each line in the input text filevalues = line.replace("\n", "").replace("\r","").replace(fileSepChar, sepchar).split(" ")# for a point feature class simply populate a point object and insert it.if inDataType == "point" and values[0].lower() != "end":row = rows.newrow()pnt = createPoint(pnt, values)row.SetValue(shapefield, pnt)row.SetValue(idfield, int(values[0]))rows.insertrow(row)# for a multipoint the text file is organized a bit differently. Groups of points must be inserted at the same time. elifinDataType == "multipoint":if len(values) > 2:pnt = createPoint(pnt, values)pntarray.add(pnt)elif (len(values) == 2 and lineno != 2) or values[0].lower() == "end":row = rows.newrow()row.SetValue(shapefield, pntarray)# store the feature id just in case there is an error. helps track down the offending line in the input text file.if values[0].lower() != "end":row.SetValue(idfield, featid)featid = int(values[0])else:row.SetValue(idfield, featid)rows.insertrow(row)pntarray.removeall()elif (len(values) == 2 and lineno == 2):featid = int(values[0])# for polygons and lines. polygons have a bit of logic for interior rings (donuts).# lines use the same logic as polygons (except for the interior rings)elifinDataType == "polygon" or inDataType == "polyline":#takes care of#adds the point array to the part array and then part array to the featureif (len(values) == 2 and float(values[1]) == 0 and lineno != 2) or values[0].lower() == "end":partarray.add(pntarray)row = rows.newrow()row.SetValue(shapefield, partarray)# store the feature id just in case there is an error. helps track down the offending line in the input text file. if values[0].lower() != "end":row.SetValue(idfield, featid)featid = int(values[0])else:row.SetValue(idfield, featid)rows.insertrow(row)partarray.removeall()pntarray.removeall()#adds parts and/or interior rings to the part arrayelif (len(values) == 2 and float(values[1]) > 0) or values[0].lower() == "interiorring":partarray.add(pntarray)pntarray.removeall()#add points to the point arrayeliflen(values) > 2:pnt = createPoint(pnt, values)pntarray.add(pnt)elif (len(values) == 2 and lineno == 2):featid = int(values[0])inputTxtFile.close()del rowsdel rowexcept Exception, ErrorDesc:# handle the errors here. if the point creation fails, want to keep track of which point failed (easier to fix the # text file if we do)if ErrorDesc[0] == msgErrorCreatingPoint:if inDataType.lower() == "point": msgErrorCreatingPoint = msgErrorCreatingPoint % (values[0],values[0])else:msgErrorCreatingPoint = msgErrorCreatingPoint % (values[0], featid) gp.AddError(msgErrorCreatingPoint) elifErrorDesc[0] != "":gp.AddError(str(ErrorDesc))gp.AddError(gp.getmessages(2))# make sure to close up the fileinput no matter what. if inputTxtFile: inputTxtFile.close()。

ArcGISshape⽂件要素类包括点,⾯,折线,多点,多⾯数据表字段以及数据的查看,添加。
⾸先shape⽂件是怎么建⽴的呢?======================打开ArcGIS Desktop中的Catalog,在⽬录树列表中,选择⼀个⽂件夹(如果有ArcSDE GeoDatabase则省去这步),在⽂件夹点击右键,新建ShapeFile⽂件,或者在空间数据库中New -》要素类FeatureClass(两者其实⼀样⼀样的),输⼊名称,和选择要素类型(有五种点线⾯多点多⾯||),坐标系也选择⼀个,⼀般要和其他要素⼀样,⽐如都是China的那个某年的坐标系,点击确定就创建了shape⽂件(在地理空间数据库中就是建⽴了⼀个表,⼀个要素类⽽已,下⾯全部按照shape单独的⽂件来说,地理空间数据库其实⼀样。
)。
Shape⽂件添加删除字段,暂时⽆法修改字段============================在shape⽂件上点击右键,打开【属性】,选择字段,默认有FID、Shape和id三个字段,FID就是⾃动增长的⼀个id,Shape是类型,这俩必须有,还必须有第三个字段,ArcGIS10好像不能修改id字段,但是可以先添加⼀个字段,然后再id这⼀⾏最左边,点击选择整⾏进⾏删除。
这样就可以查看,添加或删除字段了,⾄于修改,和更改顺序(其实更改顺序只是给⼈看的,没啥⽤),我暂时不知道如何操作。
Shape⽂件中对表进⾏数据的添加删除修改操作============================在有了字段后,表还是空的,这⾥的表其实和数据库⾥的表table的概念是⼀模⼀样的。
有了表结构,下⾯就是对表内容进⾏进⾏添加删除修改了。
这个操作需要使⽤ArcGIS Desktop⾥的 ArcMap软件。
打开ArcMap之后,⾸先把编辑器和绘图⼯具条调⽤出来。
在【⾃定义】【⾃定义模式】中可以操作,简单的也可以在⼯具栏空⽩处点击右键直接打开这些⼯具条。