
桃源网络硬盘的安装与配置
- 格式:pdf
- 大小:1.53 MB
- 文档页数:5

Guide to SATA Hard Disks Installation and RAID Configuration1.Guide to SATA Hard Disks Installation (2)1.1Serial ATA (SATA) Hard Disks Installation (2)1.2Making An SATA Driver Diskette (3)2.Guide to RAID Configurations (4)2.1Introduction of RAID (4)2.2RAID Configuration Precautions (6)2.3BIOS Configuration Utility (7)2.3.1Enter BIOS Configuration Utility (7)2.3.2Create Disk Array (8)2.3.3Delete Disk Array (13)2.3.4Select Boot Array (14)3.Installation of Windows 2000 / Windows XP (15)1.Guide to SATA Hard Disks Installation1.1Serial ATA (SATA) Hard Disks InstallationThis motherboard adopts VIA VT8237 southbridge chipset thatsupports Serial ATA (SATA) hard disks. You may install SATA harddisks on this motherboard for internal storage devices. Thissection will guide you to install the SATA hard disks.STEP 1:Install the SATA hard disks into the drive bays of yourchassis.STEP 2:Connect the SATA power cable to the SATA hard disk.STEP 3:Connect one end of the SATA data cable to themotherboard’s SATA connector.STEP 4:Connect the other end of the SATA data cable to theSATA hard disk.1.2Making An SATA Driver DisketteIf you want to install Windows 2000 or Windows XP on yourSATA HDDs, you will need to make an SATA driver diskette before you start the OS installation.STEP 1:Insert the ASRock Support CD into your optical drive to boot your system. (Do NOT insert any floppy disketteinto the floppy drive at this moment!)STEP 2:During POST at the beginning of system boot-up, press <F11> key, and then a window for boot devicesselection appears. Please select CD-ROM as the bootdevice.STEP 3:When you see the message on the screen, “Do youwant to generate Serial ATA driver diskette [YN]?”,press <Y>.STEP 4:Then you will see these messages,Please insert a diskette into the floppy drive.WARNING! Formatting the floppy diskette willlose ALL data in it!Start to format and copy files [YN]?Please insert a floppy diskette into the floppy drive, andpress <Y>.STEP 5:The system will start to format the floppy diskette andcopy SATA drivers into the floppy diskette.Once you have the SATA driver diskette ready, you may start toinstall Windows 2000 / Windows XP on your system directlywithout setting the RAID configuration on your system, or youmay start to use “VT8237 SATA RAID BIOS” to set RAID 0 / RAID 1 / JBOD configuration before you install the OS. You may also setthe RAID configuration by using “VIA RAID Tool” in Windowsenvironment. Please refer to the document in the Support CD,“Guide to VIA RAID Tool”, which is located in the folder at thefollowing path:.. \ VIA RAID ToolRAID 1 (Data Mirroring)RAID 1 is called data mirroring that copies and maintains an identical image of data from one drive to a second drive. It provides data protection and increases fault tolerance to the entire system since the disk array management software will direct all applications to the surviving drive as it contains a complete copy of the data in the other drive if one drive fails.JBOD (Spanning)A spanning disk array is equal to the sum of all drives. Spanning stores data onto a drive until it is full then proceeds to store files onto the next drive in the array. When any member disk fails, it will affect the entire array. JBOD is not really a RAID, and it does not support fault tolerance.2.3BIOS Configuration Utility2.3.1Enter BIOS Configuration UtilityAfter the system powers on, the following information will appear on the screen. Press ‘Tab’ key to enter BIOS configuration utility.The main interface of BIOS configuration utility is as below:2.3.2Create Disk Array1.Within the main interface, use the up and down arrowkey to highlight the Create Array command and press<Enter> to call out the list of creation steps.2.Highlight the Array Mode and press <Enter>, then a listof array modes will appear. Just highlight the targetarray mode that you want to create, and press <Enter>to confirm the selection.3.There are two methods to create a disk array. Onemethod is “Auto Setup”, and another is “Select DiskDrives”. Select “Auto Setup” to allow BIOS to selectthe disk drives and create array automatically. Select“Select Disk Drives” to let user select the array drivesmanually. When using Select Disk Drives method, thechannel column will be activated. Just highlight the targetdrives that you want to use and press <Enter> to selectthem respectively. When all drives have been selected,press <Esc> to go back to the creation steps menu.Use the arrow key to highlight the Start Create Process and press <Enter>, then a warning message will appear. Press Y to finish the creation, or press N to cancel the creation.Important note:The content of the hard drive will be destroyed after array creation.Create RAID 1The data on disk drives will be destroyed if user uses “Auto Setup” to create RAID 1. But you can reserve the data on source drive if you use “Select Disk Drives” to select the source and the mirror drive.Press “y” to copy data of source to mirror drive. There is a limitation when using this feature. The capacity of mirror drive must be greater or equal to the source drive; otherwise the RAID 1 can’t be created and a error message will appear: “Error: mirror’s size is smaller than source Press ESC return”. If user does not want to duplicate data, the data on the source and the mirror drive will be destroyed.Create JBODThe data on disk drives will be destroyed if user uses “Auto Setup” to create a JBOD. However, you can reserve the data on the first disk drive of a JBOD array if you use “Select Disk Drives” to select disk drivesThe data on the first disk drive will be reserved and the other disk drives in JBOD will be expanded behind the first disk drive and become free space.Expand Span (JBOD) Array function is not available if VT8237 only supports 2 SATA ports.2.3.3Delete Disk ArrayUser can delete a specific RAID that has been created. Following are the steps to delete a created disk array.e arrow key to highlight Delete Array item in main menuinterface, and press <Enter>. The channel column will beactivated.e arrow key to highlight the target disk drive and press<Enter>. A warning message will appear. Press Y to delete a specific array or press N to cancel.Delete a disk array will destroy all the data on the disk array except RAID 1. When a RAID 1 is deleted, the data on these two hard disk drives will be reserved and become two normal disks.2.3.4Select Boot ArrayUser can select a disk array as boot device if user wants to boot operating system from an array. Boot disk array may not be selected if user does not boot the Operating System from the disk array. Use the arrow key to highlight the “Select Boot Disk” item then press <Enter>. The channel column will be activated. Just use arrow key to highlight the target disk array then press<Enter>. If user select a disk array that has a boot mark and press <Enter>, then its boot setting will be canceled.3.Installation of Windows 2000 / Windows XPFor the installation of Windows 2000 or Windows XP, please insertWindows 2000 or Windows XP CD into the optical drive. Then removethe floppy diskette, and reboot the system. At the very beginning, youwill see the message at the bottom of the screen, “Press F6 if you need to install a third party SCSI or RAID driver....”At this moment, please press <F6> key and the following information will appear.Please press <S> key to install the SATA driver diskette that you previously made. You will see the instruction as followed.After inserting the SATA HDD driver diskette and pressing <Enter> key, you will see the different versions of the SATA HDD drivers for you to install. Please use arrow keys to move the highlight bar to make your selection according to the OS you use.When the installation of the SATA HDD drivers is complete, please continue to follow the instructions of Windows 2000 or Windows XP for the proper installation.。

服务器安装与配置手册一、概述服务器是一种提供计算资源和存储空间的计算机设备,广泛应用于网络环境中。
本手册旨在提供服务器安装与配置的详细指南,帮助用户顺利完成服务器的安装和配置流程。
二、硬件准备在开始服务器安装和配置之前,需要进行以下硬件准备工作:1. 选择适合的服务器硬件:根据实际需求选择合适的服务器硬件,包括处理器、内存、硬盘容量等。
2. 连接必要的设备:将显示器、键盘、鼠标等设备连接至服务器主机。
3. 连接网络设备:将服务器主机与网络交换机或路由器进行连接,确保服务器可以接入网络。
三、操作系统安装1. 下载操作系统镜像:从官方网站下载最新的服务器操作系统镜像,并验证镜像的完整性。
2. 制作安装介质:使用合适的软件将操作系统镜像烧录到光盘或USB闪存驱动器上。
3. 启动服务器:将制作好的安装介质插入服务器主机,启动服务器使其从安装介质引导。
4. 安装操作系统:按照安装界面的提示,选择合适的语言和地区设置,进行操作系统的安装。
5. 添加所需软件与驱动:根据需求,在安装完成后添加所需的软件和硬件驱动程序。
四、网络配置完成操作系统的安装后,需要进行网络配置以使服务器正确连接到网络。
1. IP地址设置:根据网络环境,选择手动分配还是自动获取IP 地址。
若需要手动分配,将IP地址、子网掩码、网关等信息配置正确。
2. 域名解析:如果服务器需要提供互联网服务,需要进行域名解析配置,将域名与服务器IP地址进行绑定。
3. 防火墙设置:根据实际需求,配置服务器的防火墙策略,确保服务器的网络安全性。
五、服务配置根据服务器的用途和需求,需要进行相应的服务配置,如 Web 服务器、数据库服务器等。
1. Web 服务器配置:安装并配置适合的 Web 服务器,如Apache、Nginx等,设置网站根目录、虚拟主机等参数。
2. 数据库服务器配置:根据需求安装和配置相应的数据库服务器,如 MySQL、PostgreSQL等,设置数据存储路径和权限等。

光驱硬盘安装系统安装教程光驱硬盘安装系统是一种常见的安装操作系统的方式,它使用光驱或者硬盘来进行系统的安装。
下面将为大家介绍光驱硬盘安装系统的详细步骤。
第一步:准备工作首先,我们需要准备一个可启动的光盘或者U盘以及要安装的操作系统的安装镜像文件。
可以通过官方网站或者第三方下载站点获取安装镜像文件,确保下载的镜像文件与电脑的硬件兼容。
第二步:设置BIOS接下来,需要进入电脑的BIOS设置界面,通常在开机时按下Del键或者F2键即可进入BIOS设置。
在BIOS设置中,需要将光驱或者硬盘设置为第一启动项,并保存设置后重新启动电脑。
第三步:插入安装介质将之前准备好的光盘或者U盘插入电脑的光驱或者USB接口,并重新启动电脑。
此时,电脑将从光盘或者U盘启动,并加载安装程序。
第四步:选择安装方式在安装程序启动后,会出现一系列的选项供用户选择。
通常,我们需要选择“安装新系统”或者类似选项,并根据提示进行下一步操作。
第五步:分区和格式化在安装程序中,可以选择对硬盘进行分区和格式化操作。
分区是将硬盘分成不同的逻辑区域,而格式化是对硬盘进行初始化,以便操作系统能够正常使用。
第六步:选择安装位置和安装方式在分区和格式化完成后,需要选择安装的位置和安装方式。
通常,我们可以选择安装到指定的分区或者选择默认的安装位置。
此外,还可以选择完全自动安装或者人工干预安装。
第七步:等待安装完成安装程序会自动将系统文件拷贝到硬盘上,并进行必要的配置和设置。
这个过程需要一定的时间,取决于硬盘的容量和电脑的性能。
在安装过程中,可以选择设置个人信息和系统选项。
第八步:重新启动电脑安装完成后,安装程序会要求重新启动电脑。
按照提示操作,重新启动电脑。
第九步:设置系统在重新启动后,进入新安装的操作系统。
根据引导向导的提示,可以设置个人账户、网络连接以及其他个性化选项。
第十步:更新和安装驱动程序安装完成后,需要进行系统更新,并安装电脑硬件所需的驱动程序,以确保系统的正常工作和充分发挥性能。
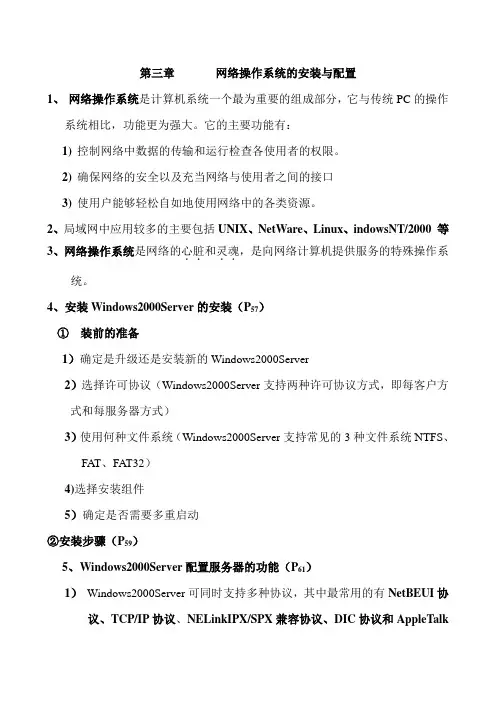
第三章网络操作系统的安装与配置1、网络操作系统是计算机系统一个最为重要的组成部分,它与传统PC的操作系统相比,功能更为强大。
它的主要功能有:1)控制网络中数据的传输和运行检查各使用者的权限。
2)确保网络的安全以及充当网络与使用者之间的接口3)使用户能够轻松自如地使用网络中的各类资源。
2、局域网中应用较多的主要包括UNIX、NetWare、Linux、indowsNT/2000 等3、网络操作系统是网络的心脏..,是向网络计算机提供服务的特殊操作系..和灵魂统。
4、安装Windows2000Server的安装(P57)①装前的准备1)确定是升级还是安装新的Windows2000Server2)选择许可协议(Windows2000Server支持两种许可协议方式,即每客户方式和每服务器方式)3)使用何种文件系统(Windows2000Server支持常见的3种文件系统NTFS、FAT、FAT32)4)选择安装组件5)确定是否需要多重启动②安装步骤(P59)5、Windows2000Server配置服务器的功能(P61)1)Windows2000Server可同时支持多种协议,其中最常用的有NetBEUI协议、TCP/IP协议、NELinkIPX/SPX兼容协议、DIC协议和AppleTalk通信协议等。
6、Windows2000Server的系统管理1)用户或计算机只有在域中拥有相应的账户才能登录到网络中并访问域中的资源。
账户是实现网络安全性的基础........,有了账户就可以在用户登录时进行身份认证、在用户访问资源时进行权限确认并在用户执行系统操作时进行权利约束等。
2)Windows2000Server提供了两个预定义的用户账户:Adminitistrator和Guest。
3)组是一种包含用户、计算机或者其他组织的..。
...................ActiveDirectory...............对象4)管理用户账户(P66)5)管理计算机账户(P68)6)网路打印机的设置(P70)7、Windows2000Server的磁盘管理1)Windows2000Server支持3种硬盘文件格式:FAT、FAT32和NTFS。