斯丹德闪光灯DF-800用户手册
- 格式:pdf
- 大小:17.74 MB
- 文档页数:18
单反配件闪光灯DF800易懂说明前话:很想吐槽一下很多摄友只看到别人用闪光拍出来的照片有多好多牛X,然后自己入手一台,发现很难用,怎么难用?不会用所以难用!关键不会看说明书,说明书垃圾?其实说明书只是太正规化了而已呵呵,本人也是看说明书,然后自己一项项试验,才会的,鉴于你们这群懒得去一一验证试验的摄友,我写这篇说解让你们看完就基本知道闪灯怎么设置,设置有啥效果会出现什么问题。
当然也会写的通俗易懂一点。
然后摄友们可以慢慢练习,剩下就是涨经验和熟练升级自己的问题了!1)这个灯没有先后步骤,我就按我自己用的800开机后的状态一一说过去。
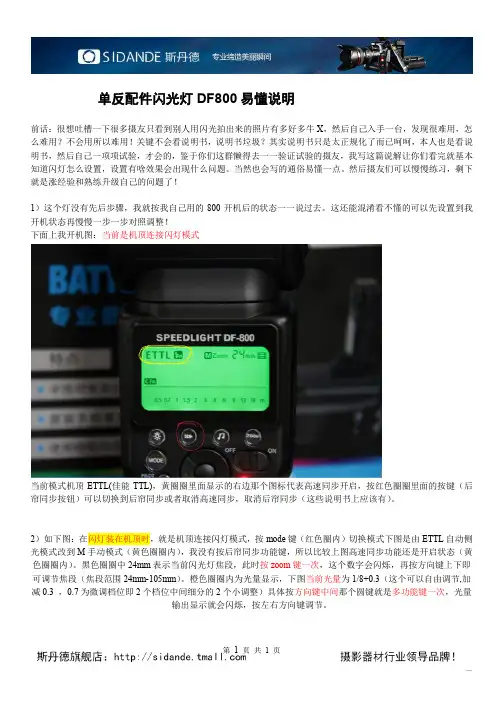
这还能混淆看不懂的可以先设置到我开机状态再慢慢一步一步对照调整!下面上我开机图:当前是机顶连接闪灯模式当前模式机顶ETTL(佳能TTL),黄圈圈里面显示的右边那个图标代表高速同步开启,按红色圈圈里面的按键(后帘同步按钮)可以切换到后帘同步或者取消高速同步,取消后帘同步(这些说明书上应该有)。
2)如下图:在闪灯装在机顶时,就是机顶连接闪灯模式,按mode键(红色圈内)切换模式下图是由ETTL自动侧光模式改到M手动模式(黄色圈圈内),我没有按后帘同步功能键,所以比较上图高速同步功能还是开启状态(黄色圈圈内)。
黑色圈圈中24mm表示当前闪光灯焦段,此时按zoom键一次,这个数字会闪烁,再按方向键上下即可调节焦段(焦段范围24mm-105mm)。
橙色圈圈内为光量显示,下图当前光量为1/8+0.3(这个可以自由调节,加减0.3 ,0.7为微调档位即2个档位中间细分的2个小调整)具体按方向键中间那个圆键就是多功能键一次,光量输出显示就会闪烁,按左右方向键调节。
3)如下图按下第一次后帘同步键(红圈内)即可由高速同步切换到后帘同步(黄圈圈内显示即为后帘同步功能开启)再次按下后帘同步键即可关闭后帘同步功能(即高速同步关闭,后帘同步也关闭),第三次按下后帘同步键又回到高速同步功能,如此循环。
国产闪光灯哪个牌子好?近年来,国产闪光灯有了很大的进步,也得到好评和肯定。
可以支持TTL闪光等精确闪光模式,永诺、美科、沃龙、品色、斯丹德……这些国产闪光灯哪个品牌好?我们是否能够放心地选择国产摄影器材呢?2015年最值得期待的国产闪光灯又是哪个呢?永诺永诺在其成名作产品YN460之后,陆续的推出了其他的型号的闪光灯,但当永诺试图以YN565EX等进入到更高利润的自动闪光灯领域时,擅长塑料模具制造的永诺似乎遇到了一些电子技术上的问题,居高不下的闪光灯返修率让消费者和经销商都非常的失望。
随后永诺提供了良好而有信誉的售后维修,试图挽回市场信心。
但这仅仅是权宜之计,从根本上解决质量问题是永诺正视的一个大问题。
美科另外一家老牌厂家美科,在闪光灯领域重视度并不大,仅有的MK950/MK951两款产品知名度非常低。
在2012年年初,美科对MK950进行了工艺改进,使得这款本来质量并不靠谱的产品稍微靠谱了一些,但仍然远远不够,但价格上的一定的优势。
MK900 高仿尼康SB900,没有高速同步,也缺乏一些细节上的设计。
MK900的操作面板可谓原汁原味地保留了SB900的几大优秀设计,遗憾的是,美科把尼康最大的缺点也照搬了进去:MK900的外置电源接口支持SD-6/SD-7/SD-8/SD-9,但是那个容易弄丢的盖子实在是让人头大。
沃龙国产闪光灯的后起之秀沃龙,挟多年ODM/OEM经验,一进入市场就涉足了高技术含量的TTL闪光灯,推出了SP660和SP690两款产品,,闪光灯内部的电路质量让人惊艳,以极低的返修率迅速获得了市场的认同。
SP-690不支持无线TTL指令模式,也就是说无法作为一只TTL副灯来使用。
同样的,SP-690也不支持无线TTL主灯模式,它无法控制其他的TTL副灯。
SP-690的定位是一只机顶TTL主灯。
模具精度一般,电池仓部分的缝隙尤其让人担心,转轴没有类似佳能原厂一样的金属弹簧,在需要单手打开电池仓,快速更换电池的时候,生涩的手感会带来不小麻烦。
82.A0D00000-00 VA说明手册Instruction ManualD200/200/D300/300/D400/400/D500/500/D600/600/D800/800/D1000/1000D /数码先锋系列专业影室闪光灯Professional Studio Flash中英文双语Chinese English Bilingual DTo prevent damage to your product or injury to you or to others, read the following safety precautions in their entirety before using this equipment. Keep these safety instructions where all those who use this equipment will read them.Body1.Light Sensor2.Charging Indicator Lamp3.Power Fuse4.Test Button5.Sync Cord Jack6.Buzz Switch7.Modeling Lamp Auto Selecting Switch Upwards: Auto On; Downwards: Auto Off 8.AC Power Socket 9.Modeling Lamp Switch 10.Power Switch 11.Power Indicator Lamp 12.Flash Output Controller 13.Mounting BracketThe flash can be used at full power for 5 minutes continuous, and then it should be cooled down for 2 to 3 minutes. Overheating will occur if it is used continuously without cooling down.Do not disassemble or modifyIt has got high voltage storage capacitor inside. Failure to observe this precaution could result in electric shock or product malfunction. Should theproduct break open as the result of a fall or other accident, remove the batteriesand take the product to authorized maintenance center for inspection.03Keep dryDo not handle with wet hands. Also, the product should not be immersed in or exposed to water or rain. Failure to observe this precaution could result in fire or electric shock.Keep out of the reach of childrenThis device contains small parts that may pose a choking hazard. Consult a physician immediately if a child swallows any part of this device.Do not expose to high temperatureDo not leave the device in a closed vehicle under the sun or in other areas subject to extremely high temperature. Failure to observe this precautioncould result in fire or damage to the casing or internal parts.Do not exceed 150 Watts for modeling lamp. The excess heat can damage the unit.Do not keep long time in using the modeling light, otherwise the modeling lamp will be deformed, and the flammable accessories such as soft box willget burnt.Do not touch the lamp bulb or tube with your bare hands. Oil residue fromyour fingers can cause the surface of the lamp to heat unevenly and explode.Do not flash directly towards naked eyes (especially those of babies), otherwise it may lead to visual impairment.When not in use, disconnect from the power supply.Avoid sudden impacts as this can damage the flash tube and/or modeling lamp.0414352678910111213When using a snoot, do not keep long time the modeling lamp on, or over frequent flashlight (not over six times for one minute). Overheating will resultin damages for strobe casing and studio light.Do not touch the lampcap when the flash or lamp is working, as it will give out heat, leading to high surface temperature.1.Sync Cord(optional accessory) 2.Power Cord 3.Fuse Tube4.Modeling Lamp5.Reflecting Lamp Shademp Cover7.Instruction ManualAccessoriesFlash Preparation1.Take down the lamp cover. Install the reflecting lamp shade and modeling lamp.2. Mount the flash unit on an appropriate light stand and adjust the mounting bracket (13). Make sure it's tightened and fixed.Flash Output ControlFlash output controller (12) controls the power radio to satisfy requirements of light under different environment. (Note: When adjusting the power from full power to a lower setting, press the test button to release the power in the capacitor, so when recharged, the flash output will be in the corresponding setting.)0506563241 Power ConnectionUse the power cord to connect the flash to an AC power source and turn on the power switch (10), power indicator lamp (11) lit. The charging indicator lamp (2) is off when it is charging, no flash at this moment. The unit is ready to fire until the charging indicator lamp (2) is on, meaning it is fully charged. Set the power switch to OFF position when it is not in use.Modeling Lamp1. Modeling lamp switch (9) decides whether the modeling lamp is on or off:Downwards (OFF position), it's off; upwards (MODE position), it's on.2. Modeling lamp auto selecting switch (7) decides whether it's auto or not: Downwards (DIM position), auto on; upwards (AUTO position), auto off. The modeling lamp will turn off automatically when flash works.Do not keep long time in using the modeling lamp. It's better to be cooled down for 2 minutes after 5 minutes continuous use.Test ButtonTo fire the flash without taking a picture, push the test button (4). It can also adjust the brightness when combined with the flash output controller (12).Sync TriggeringA sync cord (5) isprovided with your flash unit, and the input is a Φ6.35m m mini plug. synchronously.Slave Trigger ModelThe flash will be fired synchronously with one external flash. This model can act as an auxiliary lamp, offering various effects of light and shadow. * The slave trigger model is shut down when the sync cord is in use.Buzz FunctionThe device is equipped with buzz function. It is turned on when the buzz switch (6) is set downwards, and then a “BI” sound will be heard when it is fully charged.Shut down the device immediately when it works abnormally and find out thereason.Maintenance0708Avoid sudden impacts and the lamp should be dedusted usually.It's normal for lamp being warm when in use. Avoid continuous flashes when it is not necessary.Maintenance of all the flashes is up to our authorized maintenance department which can provide original accessories.One year warranty period will be canceled when any unauthorized maintenance is found.Disconnect the power when doing maintenance work or cleaning.It has one year free warranty (flash tube excluded).If the product had failures or is wetted, it can be continuously used only after it is repaired by professionals.感谢您使用D/数码先锋系列专业影室闪光灯,闪光灯在款式设计、使用强度、操作性能以及价格上均达到您的要求。

DF-660闪光灯用户手册一、DF-660特点DF-660是具有TTL功能的大指数闪光灯(58 ISO100 105mm)•自动兼容E-TTLⅡ、E-TTL和TTL自动闪光,对应CANON闪光灯机型。
•自动兼容i-TTL、和TTL自动闪光,对应NIKON闪光灯机型。
•支持曝光补偿、曝光包围、前后帘同步、曝光锁定、光圈预览造影闪。
•支持AF辅助对焦功能。
•全面支持CANON和NIKON无线TTL闪光,同时支持S1和S2无线触发闪光。
•电动变焦功能可以自动和手动调节变焦灯头的位置,以配合镜头的焦距(24mm至105mm)。
•智能的声音提醒系统,让您更易操作。
•镜片过热保护功能,防止快速闪光导致的高温烫伤人,延长闪光灯使用寿命。
•高灵敏的无线感应器,可以让相机在很远的距离触发闪光灯闪光。
•佳能∕尼康标准的外置电源接口,满足你快速闪光的需求。
•标准的PC同步插孔。
•快速的回电时间,全闪情况下仅需2.8秒就可以让闪光灯充满电。
•C.Fn自定义功能,您可以按照自己的拍摄喜好自定义闪光灯的功能。
•休眠自动关机功能,让闪光灯更省电。
•自动保存功能,能自动保存闪光灯的当前设置。
•LCD屏显示。
•金属热靴。
二、闪光灯部件1.反光片2.广角扩散片3.镜片4.无线感应器5.热脚锁环6.电池盖7.闪光灯头8.外接电池接口9.PC同步端子10.接口盖1.液晶显示器2.快门帘幕同步/Canon、Nikon无线TTL切换按钮3.声音提示按钮4.液晶显示器照明/自定义功能设置按钮5.<ZOOM>变焦按钮/无线选择按钮/无线设置按钮6.<MODE>模式切换按钮7.测试闪光按钮<PILOT>8.电源开关9.充电指示灯10.多功能组合按钮11.热脚三、产品安装1、按装电池•按箭头所示的方向滑动<电池舱盖>将其打开•按图示中的<+>和<->标志插入电池,确保电池的正负极接点朝向正确•如箭头所示方向滑动<电池舱盖>将其关闭。
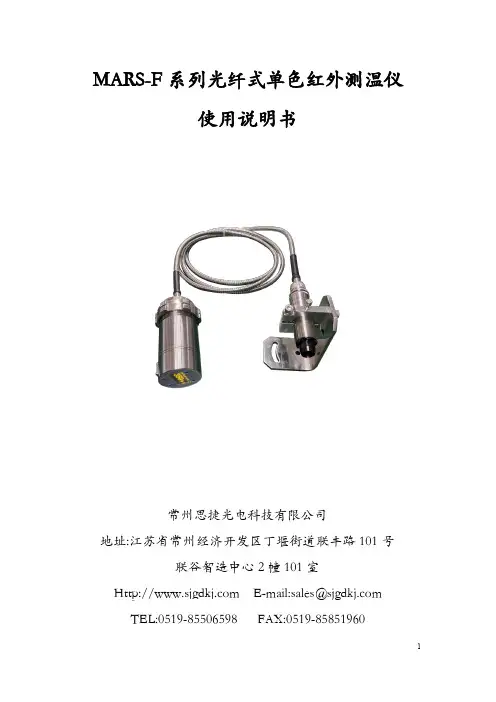
MARS-F系列光纤式单色红外测温仪使用说明书常州思捷光电科技有限公司地址:江苏省常州经济开发区丁堰街道联丰路101号联谷智造中心2幢101室 E-mail:****************TEL**************FAX**************目录1.1概述 (4)1.2产品特点 (4)1.3光纤式单色红外测温仪原理 (5)1.4适用场合 (6)1.5技术参数 (6)1.5.1MARS-FS技术参数 (6)1.5.2MARS-FG技术参数 (7)1.6接线表...................................................................................................................................................................82.1安装调试...............................................................................................................................................................82.1.1安装...........................................................................................................................................................82.1.2调试.......................................................................................................................................................102.1.2.1发射率系数调整............................................................................................................102.1.2.2选择测量模式................................................................................................................142.1.2.3设置报警值(上限报警,下限报警),模拟量输出起始值,终点值等。
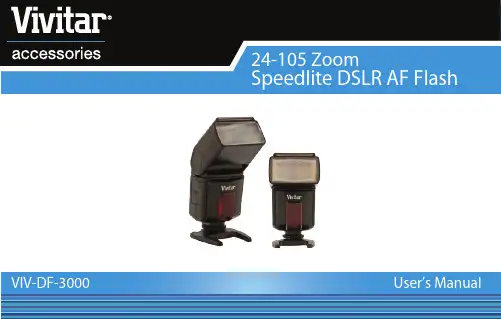
User’s ManualVIV-DF-3000Vivitar One year WarrantyThis warranty covers the original consumer purchaser only and is not transferable.This warranty covers products that fail to function properly UNDER NORMAL USAGE, due to defects in material or workmanship. Your product will be repaired or replaced at no charge for parts or labor for a period of one year.What Is Not Covered by WarrantyDamages or malfunctions not resulting from defects in material or workmanship and damages or malfunctions from other than normal use, including but limited to, repair by unauthorized parties, tampering, modification or accident.To obtain Warranty Service and Troubleshooting information:Call 1-800-592-9541 in the U.S. or 0-800-917-4831 in the UK or Visit our website at .To receive Warranty service along with the name and address of an authorized product service center, the original consumer purchaser must contact us for problem determination and service procedures. Proof of purchase in the form of a bill of sale or receipted invoice, evidencing that the Product is within the applicable Warranty period(s), MUST be presented in order to obtain the requested service. It is your responsibility to properly package and send any defective products along with a dated copy of proof of purchase, a written explanation of the problem, and a valid return address to the authorized service center at your expense. Do not include any other items or accessories with the defective product. Any products received by the authorized service center that are not covered by warranty will be returned unrepaired.-1-Vivitar One year Warranty (continued)NO WARRANTIES, WHETHER EXPRESS OR IMPLIED, INCLUDING, BUT NOT LIMITED TO, ANY IMPLIED WARRANTIES OF MERCHANTABILITY OR FITNESS FOR A PARTICULAR PURPOSE, OTHER THAN THOSE EXPRESSLY DESCRIBED ABOVE SHALL APPLY. DISTRIBUTOR FURTHER DISCLAIMS ALL WARRANTIES AFTER THE EXPRESS WARRANTY PERIOD STATED ABOVE. NO OTHER EXPRESS WARRANTY OR GUARANTY GIVEN BY ANY PERSON, FIRM OR ENTITY WITH RESPECT TO THE PRODUCT SHALL BE BINDING ON DISTRIBUTOR. REPAIR, REPLACEMENT, OR REFUND OF THE ORIGINAL PURCHASE PRICE - AT DISTRIBUTOR’S SOLE DISCRETION -ARE THE EXCLUSIVE REMEDIES OF THE CONSUMER. IN NO EVENT WILL DISTRIBUTOR, ITS MANUFACTURERS, OR SAKAR INT. BE LIABLE FOR ANY INCIDENTAL, DIRECT, INDIRECT, SPECIAL, PUNITIVE OR CONSEQUENTIAL DAMAGES (SUCH AS, BUT NOT LIMITED TO, DAMAGES FOR LOSS OF PROFITS, BUSINESS, SAVINGS, DATA OR RECORDS) CAUSED BY THE USE, MISUSE OR INABILITY TO USE THE PRODUCT. EXCEPT AS STATED HEREIN, NO OTHER WARRANTIES SHALL APPLY. NOTWITHSTANDING THE FOREGOING, CONSUMER’S RECOVERY AGAINST DISTRIBUTOR SHALL NOT EXCEED THE PURCHASE PRICE OF THE PRODUCT SOLD BY DISTRIBUTOR. THIS WARRANTY SHALL NOT EXTEND TO ANYONE OTHER THAN THE ORIGINAL CONSUMER WHO PURCHASED THE PRODUCT AND IS NOT TRANSFERABLE.Some countries, states or provinces do not allow the exclusion or limitation of incidental or consequen-tial damages or allow limitations on warranties, so limitation or exclusions may not apply to you. This warranty gives you specific legal rights, and you may have other rights that vary from state to state or province to province. Contact your authorized retailer to determine if another warranty applies. This product is manufactured, distributed and sold by SAKAR International, Inc. All other trademarks are the property of the respective owner, who has not sponsored, endorsed or approved this product.-2--3- IntroductionCompatibilityCongratulations on your purchase of the Vivitar VIV-DF-3000 flash unit. This electronic flash is innovatively designed for digital cameras, with advanced technology used to control the correct amount of light output. Please kindly take a few minutes to read this instruction manual before using.The VIV-DF-3000 flash comes in different varieties, each compatible with differentcameras. Check to make sure the flash that you have is compatible with your camera.VIV-DF-3000-CAN - Compatible with Canon Digital E-TTL camerasVIV-DF-3000-NIK - Compatible with Nikon Digital I-TTL camerasImportant Notes for Flash Photography and Maintenance1. After taking a picture, wait for at least 4-5 seconds for the flash to be fully chargedbefore taking the next shot even though the ready light is on. This will help prolong the lifespan of the flash tube and also to attain the full charging capacity of the flash capacitorfor precise flash photography.2. For precise flash output, it is best to wait until an intermittent humming sound is heard before pushing the shutter button.3. Maintain at least 2m between your flash and the subject you are photographing.4. Always set the flash zoom head position so that it corresponds to the zoom position of your camera’s lens.5. In the event that the flash exposure is incorrect (over or under exposed or if the green auto check light does not light up), you may take either one or more of the corrective actions: (1) move closer to the object (2) re-adjust your bounce angle (3) adjust flash zoom head (4) increase ISO* setting.*Note: In digital photography, the ISO number notes how sensitive the image sensor is to the amount of light present. The higher the ISO number, the more sensitive the image sensor is to light and therefore the possibility to take pictures in low light situations increases.-4-Important Notes for Flash Photography and Maintenance (cont.) 6. Bounce should only be used on lighter color ceilings or white walls with the zoom head set at the 35mm position. Note that when using this feature, 2-3 f/stops of light will be lost due to reflection.7. Always use a fresh set of 4 batteries of the same brand and type when old batteries are depleted and need to be replaced. Mixing and matching batteries of different types and brands will greatly deteriorate the flash’s performance.8. When the flash is not being used for extended periods of time (>2 weeks), remove the batteries to prevent battery leakage. After the batteries are removed, do not expose the flash unit and batteries to excessive heat such as fire or excessive sun light.9. Charge up and test fire the flash unit at least once per month to maintain the optimal performance of the flash tube and charging capacitor.-5--6-Installing BatteriesIn order to power on your flash, you will first need to install batteries. To do so, first ensure that the ON/OFF switch is in the OFF position. Next, open the battery compartment, and insert 4 new AA batteries with the correct polarity (+,-) as indicated inside the batterycompartment.Battery Compartment DoorSlide open the batterycompartment door toaccess the batterycompartment.over your flash in order to soften the light emitted.Mounting the Flash Onto Your CameraOnce batteries are inserted into your flash, you can proceed to mount it onto your camera. To do so, first ensure that the ON/OFF swtch is in the OFF position. Next, slide the flash’s hotshoe base onto the camera’s hot shoe then rotate the lock ring until it is fastened securely. Slide the ON/OFF Switch to the ON position. When the Ready Light illuminates, the flash is ready to fire. Pressing the Test Button will test fire the unit.hot shoe base-7-Auto Check LightThe Green Auto Check Light (OK) located on the back of the flash is used to confirm that your subject is within the effective TTL range of the flash unit. If your subject is within the effective TTL flash range after shooting, the green Auto Check Light will illuminate for approximately 2 seconds.Power Saving FunctionIn order to save battery life, your flash will automatically turn off if left idle for more than one minute.-8-PROGRAM TTL (P) / AUTO MODEThis flash unit provides automatic Through-The-Lens (TTL) control of the flash exposure when used with dedicated digital cameras. When using this mode, the flash unit will automatically emit the flash output for a balanced illumination of the subject and background. The inbuilt AF infra-red assistance beam will turn on automatically to assist the camera to focus in low lighting conditions.-9-TTL AV, TV AND M MODESWhen this flash unit is used with your camera set to AV, TV or M modes, the flash exposure will be automatically controlled by the camera based on the combination of shutter speed and aperture value.*For TV mode, do not exceed the camera’s maximum flash synchronization speed. In AV mode, setting at a slow speed will usually result in blurry pictures caused by the shaking of one’s hand. In such situations, the use of tripod is recommended.-10-SECOND/REAR CURTAIN SYNCHRONIZATIONThis mode permits you to fire the flash just before your camera’s shutter closes during slow shutter speed shooting. This will create a trail of lighting that will be appear behind the main subject when a slow shutter speed is being used.*For more information on rear curtain synchronization settings, refer to your camera’s instruction manual.-11-RED EYE REDUCTIONWhen red eye reduction is activated on the DSLR body, the flash unit will activate a series of preflashes before the main flash to reduce the possibility of red eye occurrence during shooting.-12-USING THE BOUNCE HEADVarious combinations of bounce angles can be used to cut off unwanted shadows or for special soft effect purposes.Direct Flash Indirect FlashUSING THE ZOOM HEADFor proper angle coverage, set the flash zoom head position so that it corresponds with the zoom position of the camera’s lens.-13-SPECIFICATIONS AND FEATURES • Guide Number 59m at 85 zoom position• Auto Focus / TTL Metering• Focus Beam to Assist in• Automatic Shutter Speed SettingLow Light Conditions• 6 Way Flash• Bounce Up/Down• Zoom In/Out• Swivel 270°; left 180°/ right 90°• Built-In Slave Function• Red Eye reduction• Power Saving Functions• Flash Readiness Indication in Viewfinder• Recycle Time: 0.3-10 Sec.• Uses 4x AA Batteries (Not Included)• Package Contents: Speedlite DSLR AF Flash,Flash Diffuser, One Year Warranty Card-14-。
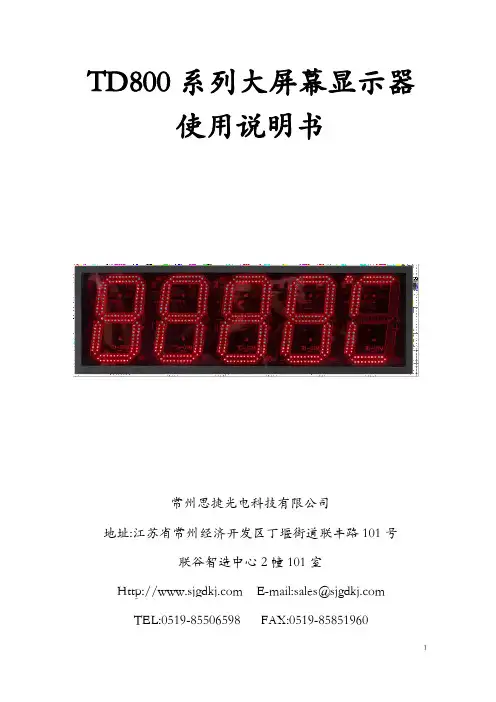
TD800系列大屏幕显示器使用说明书常州思捷光电科技有限公司地址:江苏省常州经济开发区丁堰街道联丰路101号联谷智造中心2幢101室 E-mail:****************TEL**************FAX**************目录1.1概述........................................................................................................................................................................32.1技术参数...............................................................................................................................................................33.1安装调试...............................................................................................................................................................43.1.1安装...........................................................................................................................................................43.1.2调试...........................................................................................................................................................44.1键盘功能释义.....................................................................................................................................................44.1.1按键功能描述..........................................................................................................................................44.1.2按键流程图..............................................................................................................................................55.1按键操作说明.....................................................................................................................................................55.1.1仪表量程下限值对应显示温度(AL)............................................................................................55.1.2仪表量程上限值对应显示温度(AH)...........................................................................................65.1.3检测模式(SO)...................................................................................................................................65.1.4检测模式时间设定(SE)...................................................................................................................65.1.5各种检测模式说明.................................................................................................................................65.1.6触发功能开关(ANF)........................................................................................................................85.1.7触发上限温度(ACH).......................................................................................................................85.1.8触发下限温度(ACL)........................................................................................................................85.1.9满度修正系数(A DJ)..........................................................................................................................95.1.10LED测试(CHEC)..........................................................................................................................95.1.11上限报警阈值(AUP,TD800-2有此功能)...............................................................................95.1.12下限报警阈值(ALO,TD800-2有此功能)..............................................................................96.1模拟量输入与温度显示的对应关系.......................................................................................................107.1接线说明..........................................................................................................................................................107.1.1信号输入、输出接线表...................................................................................................................107.1.2电源输入接线表..............................................................................................................................108.1大屏幕显示器外形图...................................................................................................................................10TD800系列大屏幕显示器使用说明书1.1概述TD800系列大屏幕温度显示器是一种智能型温度显示器,是红外测温仪或其它检测器仪器的显示配套仪表。

Speedlights & SpeedlitesT raveling at LightspeedW e mulled over the cover of this book for quite a while and rejected a lot ofideas. By accident I struck upon featuring the Speedlight in the photograph.I also wanted to incorporate a number of the techniques that we talk abouton the pages of this book. But like everything, it all comes down to money.There was a budget. We searched a lot of models ’ portfolios to fi nd the perfectsubject. In the end I pressed my studio manager into service.I wanted to imply movement. We handled this in a couple of ways: thephotograph was shot on a slant so the woman’s hair hung at an angle. Weused a fan to add to the illusion. A tungsten light was placed behind themodel to create some blur.F our Speedlights, in three groups, doing separate jobs: lighting her face and hairwith daylight; adding the comet-like background light; emphasizing the bluecolor but keeping it off her face. The trick was timing when to have Leah initiatethe stroboscopic Speedlight in her hand each time we made an exposure.W e used lots of gobos to keep each light from “ c ontaminating ” the others.So there was a great deal of fi ne tuning. But the whole shot was done inabout twenty exposures which is a testament to the methods we have at ourfi ngertips today.s oftboxGroup C s etting s :ϩ2,s et tos h at 4 Hz,triggered by LeahS peedlights &Speedlites C reative Flash Photography at LightspeedL ou J onesB ob K eenanS teve O strowskiAM S TERDAM • BO S TON • HEIDELBERG • LONDON • NEW YORK • OXFORD P ARI S • S AN DIEGO • S AN FRANCI S CO • S INGAPORE • S YDNEY • TOKYO Foc a l Press is an imprint of ElsevierF ocal Press is an imprint of Elsevier30 Corporate Drive, Suite 400, Burlington, MA 01803, USAL inacre House, Jordan Hill, Oxford OX2 8DP, UKC opyright © 2009, Elsevier Inc. All rights reserved.N o part of this publication may be reproduced, stored in a retrieval system, or transmitted in any form or by any means, electronic, mechanical, photocopying, recording, or otherwise, without the prior written permission of the publisher.P ermissions may be sought directly from Elsevier’s Science &Technology RightsD epartment in Oxford, UK: phone: ( ϩ44) 1865 843830, fax: ( ϩ44) 1865 853333,E-mail: p***********************. You may also complete your request on-linevia the Elsevier homepage ( h ttp:// ), by selecting “S upport &Contact ”then“C opyright and Permission”and then“O btaining Permissions.”L ibrary of Congress Cataloging-in-Publication DataA pplication submittedB ritish Library Cataloguing-in-Publication DataA catalogue record for this book is available from the British Library.I SBN:978-0-240-81207-6F or information on all Focal Press publicationsvisit our website at w 09 10 11 12 5 4 3 2 1P rinted in CanadavC ontentsS peed of Light .................................................................................................viii C olor Coding Key ..............................................................................................ix T en Tenets of TTL Speedlights ..........................................................................x I ntroduction ......................................................................................................xi The Authors.. (xiv)C hapter 1: One Light ......................................................................................... 1 T TL Flash . (2)E lectronic Flash: D efi nition ....................................................................... 2 S peedlight / S peedlite :Defi nition (3)F undamentals of Electronic Flash (9)C omprehending Flash Exposure (11)T TL Electronic Flash:Defi nition (14)T TL Exposure System (16)T TL Flash and Exposure: A Primer (16)T TL Flash and Aperture (17)T TL Flash and Distance (17)I nverse Square Law (18)T TL Flash and Subject Size (20)T TL Flash and Shutter Speed: Synchronization (20)T TL Flash: Flash Anatomy and Features (20)S peedlight Components (20)T he LCD (30)M easuring Light (31)U nderstanding the Light Meter (32)S tops, F/Stops, Exposure Value (35)H istogram (40)R GB Histogram (43)E xposure Bias for Digital (44)M iddle Tonal Value (44)E xposure Compensation (44)E xcessive Contrast (45)M astering Distance:Near and Far (46)M ain Light and Fill Light: Defi nitions (48)P hilosophy .........................................................................................................50viLight (50)C haracteristics of Light: Analysis and Decisions (54)Q uantity,Intensity,or Brightness (54)Q uality (56)C ontrast (61)C olor (62)C olor Spaces and the Color Triangle (65)D irection (67)M ixing TTL Flash with Available Light: Quantitiesof Light (68)A vailable Light as Main (68)T TL Flash as Fill (68)T TL Flash as Main (70)A vailable Light as Fill (71)G eneral Guidelines (73)B alancing TTL Flash and Available Light: Colorsof Light (73)B ounce Flash: Direction and Quality of Light (75)M oving Light (77)C omprehending Directions of Bounce Flash (77)C hapter 2: Two Lights (87)L ight (89)L ighting (91)D esign (91)E xecute (92)R eview (92)P ostproduction (92)W ireless (96)W ireless TTL:R emote/S lave Flash (96)W ireless TTL:Additional Trigger Devices NeedNot Apply! (96)N ikon SU-4Mode (97)W ireless TTL Transmitters:Master (99)W ireless TTL Receivers:R emote/S lave (99)W ireless TTL Communication: Line of Sight (102)W ireless TTL:R emote/S lave ID Groups (105)W ireless TTL:Channels (106)W ireless TTL: Privacy (108)T ravel (108)W ireless TTL: Basic Settings for Master and Slave (110)W ireless TTL: Controlling Exposure and Contrast (112)M anual Flash (121)H ow It Works (121)F lash LCD (126)W ireless Manual Flash (128)vii M ixing Speedlights with Studio Flashes .........................................129M odifying Flash:Quality of Light (132)S oftboxes:Notes.....................................................................................132E quipment, Accessories, Products . (136)E quipment (137)B atteries:Powering the Flash (144)B attery Types:Power Decisions (145)A ccessories (147)S ummary ..................................................................................................... 153L ighting Diagrams ...................................................................................... 155I ndex .. (201)viiis oot soaked shadowsp rojecting moving picturesu pon a cavedwelling walla s toxic bonfi res choke life from the artist p rehistoric transfers to permanentp ale paraffi n candles melt dimension into painted canvaseso ily pigments made more unctuous b aked by their heatz oetropesm agic lanternsk lieg lightsa nd their wrath of fl amei lluminate all thingss een and unseena nd take their turn substituting for day fl ashfl ashblindingfl ashw hen we fi nish herel ike godsw e will learn to move the sun L ou JonesD ecember 2006S peed ofLightixB rand-specifi c information is indicated by the following colors: G reen: Canon Speedlite 550EX/580EX/550 EXMKII/580 EXMkII fl ashes, used with compatible Canon EOS cameras.P urple: Nikon Speedlight SB-900/SB-800, Nikon Speedlight Commander SU-800, used with compatible Nikon cameras.S ome of the information in the book has been categorized in an eff ort to increase accessibility. Six aspects are diff erentiated with the following background colors:S olutions:Olive greenW arning:RedE xample: OrangeA necdote: TanT extbook: GrayV ocabulary:YellowC olor CodingKeyx 1. S eparate. Get those Speedlights off camera.2. B ounce. If you can’t separate, bounce It. Bounce it anyway.3.R esist using Speedlights strictly on manual.The computer can outthink you.4. I n any camera exposure mode, when correctly exposing for existing light, the camera computer will automatically reduce TTL fl ash to a fi ll light.5. L CD ϭa esthetic; histogram ϭe xposure. Use them both.6. E xposure Compensation is used to change the TTL ambient exposure and Flash Exposure Compensation is used to correct the fl ash exposure on the subject.7. E xpose to the right (on the histogram). Underexposure provides no benefi t.8.T ake your camera seriously,don’t abuse postproduction.9. N o Fear. Just do it.10. T he elegant solution is often the simplest solution. T en Tenets of TTLSpeedlightsxiO nce upon a time I pushed a thumb-sized red button and exposed a roll of black and white fi lm. Several months later I retrieved an envelope fi lled with postcard sized pictures of my friends marching in a Boy Scout parade. Memories forged a lifetime ago. In fact not only do I still have most of those photographs but I still cherish the original camera, a marvel of modern technology,the Kodak 1Brownie Starfl ex. Not only was it a symbol of a decades-long race to permanently capture an image on paper, but it was small, light, and foolproof. Somewhere in my attic I have also saved the silver dish into which I inserted golf ball sized fl ashbulbs that miraculously “ f ocused ” the sun for the briefest fraction of a second. In a relatively short time those innovations morphed into today’s digital miracles. P hotography i s c ameras . But a better axiom dictates that g ood photography is lighting . Distinguished craftspeople, artists are masters of light. Whether photographers are striving to imitate Renaissance painters and their classic “ R embrandt lighting ” or experimenting with cutting edge, unorthodox sources, such as ring lights or HMIs, the camera is secondary — the light paramount. Learning to “s ee ”or “r e-create ”light can take a lifetime. Designing stylized illumination, or mimicking the sun, may be opposite ends of the visual spectrum but they are equally diffi cult to accomplish. Cameras have historically been the major focus of photographic innovations. Wooden frames, accordion bellows, twin lens refl ex, rangefi nder apparitions, pentaprisms, and instant gratifi cation fi lms have dotted the imaging landscape. Millions and possibly billions have been invested in making the proclivity for taking pictures as foolproof as those original mass produced box cameras.A vast majority of photographers are the “ s hutterbug ” equivalent of the motor “ g earheads ” who enjoy lifting their car hood, changing their own oil, fi xing the transmission, and dropping a new engine into vintage automobiles cadged away in cramped garages. Hardware “ e quipment junkies ” thrive in equally cramped darkrooms, buy the latest equipment, and argue incessantly about the merits of each lens and gadget. This dialogue is what keeps camera manufacturers awake at night.M otordrives, zoom lenses, autofocus, and autoexposure are all improvements that have made the process of taking a usable photograph easier and less obscured by a mastery of craft. The main reason these devices were invented was to enable the consumer to more easily produce acceptable results. But more important, the byproduct of these advances allows skilled practitioners I ntroduction 1 “ Y ou press the button, we do the rest. ” George Eastman, Kodak.xii to do things they never dreamed of doing before: react instantaneously to a new environment, compose a complicated landscape, measure a diffi cult light condition, chase a fast-changing combat situation, document a slowly evolving wildlife metamorphosis, adjust for bad eyesight caused by the natural burden of aging, and produce better, more provocative images.I t stands to reason that if cameras are keeping up with the photographer’s rigorous demands, the lighting equipment needs to keep pace also. Evenafter cameras became small and compact, lights remained ponderous and complicated. Techniques were artistic, but also idiosyncratic and sacrosanct, requiring a l ot of practice to be considered competent.L ighting has always taken a long time to learn. Lights have gotten a little smaller but their mysteries have remained large. Just monitoring their application has always been slow and tedious. Measuring lumens, color temperature, and ratios was formulaic and imperfect.After fl ashbulbs, D octor Harold Eggerton of M assachusetts Institute ofTechnology has been credited with giving us the fi rst practical electronic strobes. For the fi rst time since the invention of photography we were able to easily and safely transport our own reusable light to the photograph instead of always bringing our subjects into the light.T hen came a major breakthrough when the“t hyristor”2strobes made tremendous advances in artifi cial lighting and variable output. The infamous V ivitar 283revolutionized the industry for years. Up to that point in history a slide rule and several complicated calculations extrapolated u sable lighting. And a degree in mathematics or physics did not hurt either.S ince that innovation there has been masterful progress in portable fl ash. Many companies make their own versions catering to every size, preference, and price range. Whereas amateurs employ portable fl ashes to quickly produce convenient but clumsy illumination, professionals have long been adept at both wresting beautiful results out of the same equipment and exceeding the design specifi cations.P ower has always been a major issue. Capacitors and power packs grew large and cumbersome. To assemble enough light for interesting scenarios required multiple light heads and energy sources. This was heavy to carry. Anticipating the outcome was also complicated. Shooting Polaroids was slow. And every step called for experience.C ompact fl ashes, strobes, and fl ash guns have partially addressed the portability issue. They are built smaller than their studio counterparts, however, size limits power. And any more than one proves hard to coordinate because you have to reposition or recalibrate each separate light and hardwire them together or set up some kind of electronic triggering system.2A thyristor is a semiconductor switch capable of automatically switching the fl ash on and off at very high speeds. It is used to control the duration and output of the fl ash tube.xiii E nter the S peedlight /S peedlite . 3Every photographer taking pictures today is familiar with this revolution in photography, as it changed from fi lm to digital. There is an equally dramatic evolution in lighting — from flash to S peedlight / S peedlite . They look, feel, and work, albeit more versatile, like traditional portable fl ashes. In fact, they so closely resemble their “ c ousins, ” most photographers continue to use them like old fashioned fl ashes. But S peedlights/ S peedlites are the most signifi cant technological advance in the history of lighting. A quantum leap forward. Flash powder with computers attached. Digital sunlight.S mall and portable,S peedlights /S peedlites are easy … and nearly infallible. The ambitious photographer who needs more “ j uice ” can pack more than one without breaking the bank. They use proprietary technology, currently utilized by two camera manufacturers. 4 Only their products are compatible with all the features: dozens of fl ashes ignited simultaneously, wirelessly, each fl ash programmable to insert diff erent predetermined power outputs, every fl ash able to be controlled from a single central source, and the fi nal result immediately reviewable on the camera LCD screen. Additionally they can be programmed for stroboscopic eff ects, rear curtain synchronization, fi ll fl ash, higher shutter speed usage, and much more. It is a 35 m m revolution.“ T ake a picture, take a look. ” The modern digital photographer can quickly set up a battery of S peedlights /S peedlites in inaccessible locations, designate outputs for each one, snap a picture, observe the histogram, readjust each light to taste, and start all over without changing position. It is a “ c losed system. ” S peedlights / S peedlites are fully integrated with their specifi c camera for automatic through-the-lens exposure and the camera, in turn, gives instant feedback, monitors the aesthetics of the photograph, measures the contribution, interacts directly with the S peedlights /S peedlites, and stores the results. No more wires or clumsy accessories. The fl exibility in continuously orchestrating “ p ieces ” of light to accompany the tempo of your imagination is unprecedented.T he potential of the ubiquitous desktop or laptop computer today is barely realized. Because they are so overwhelming the average person only uses a small portion of the computer’s capability. The computers in S peedlights / S peedlites are equally sophisticated. Most photographers barely test them. This book proposes to uncloak the complexities of S peedlights /S peedlites in plain, systematically organized segments. There are no ratios to calculate. No formulas to memorize. Using your eyes, imagination, intuition, and the LCD/histogram, you can design, meter, and modify one or many S peedlights /S peedlites to create drama, color, mood, eff ects, depth of fi eld, or just more natural looking images. This text will showcase examples and their respective lighting diagrams for your perusal. It is set up so you can read from cover to cover or just those parts you need for your next assignment. Combined with the camera andS peedlight /S peedlites manuals, you can quickly perfect a whole new set of skills. L ight a la carte. We decipher the basics. The art is up to you.3S ee book defi nition of S peedlight /Speedlite on page 3.4 C anon and N ikon.xiv T he Authors L ou Jones is one of Boston’s most diverse commercial and art photographers. This prolifi c, award-winning photographer specializes in photo illustration and location photography for corporate, advertising, and collateral projects. His client list is as impressive as are his photographs — IBM, FedEx, American Express, Oldsmobile, AETNA, Museum of Fine Arts, Fortune Magazine, U .S. News & World Report , and N ational Geographic . Jones ’ assignments have taken him to Europe, Central and South America, Africa, Japan, and 46 of the 50 states. Assignments have placed Jones on location at NASA, Boeing, Universal Studios, British Telecom (England), and Saab (Sweden). B ob Keenan is a Boston-area photographer. A retired Electrical Engineer, Bob spent his career designing and developing Radio Frequency communications equipment, so working with the wireless speedlights and the concept of light pulses is a natural fi t. Bob is a graduate of the Boston University’s Center for Digital Imaging’s Photography Program S teve Ostrowski is an award winning photographer with over 30 years experience in Commercial, Editorial, Annual Report, Fashion, Portrait, and Event photography. He has worked with small fl ash as a studio and location lighting tool since 1977. He is currently an instructor at The New England School of Photography in Boston, MA; teaching Editorial Photography as a major course of study, digital camera techniques, and specializing in teaching lighting with Wireless TTL Flash.。

DC T800数码相机用户手册欢迎版权版权所有 2007 by BenQ Corporation。
保留所有权利。
未经本公司事先书面许可,不得以任何形式和电子、机械、磁学、光学、化学、手册以及其它任何方式复制、传播、转录本出版物的任何部分,也不得将任何部分存储到检索系统中或翻译成任何语言或计算机语言。
免责声明BenQ Corporation对于本文档的内容不提供任何明示或隐含的陈述或担保,特别是对于针对特殊目的的适销性和适用性不提供任何担保。
另外,BenQ Corporation保留修订本出版物和随时修改本文档内容而不需要通知任何人的权利。
保管相机• 本相机的工作温度范围是0到40摄氏度。
温度过低时使用时间会缩短,这是正常现象。
• 不要在下列环境条件下使用或存放相机:• 直接阳光照射• 高且多尘的地方• 靠近空调、电热器或其它热源的地方• 在阳光直接照射的封闭汽车内• 不稳定的位置• 如果相机潮湿,应尽快用干布擦拭。
• 盐或海水可能导致相机严重损坏。
• 不要使用酒精等溶剂清洁相机。
• 如果镜头脏了,应使用镜头刷或软布清洁镜头。
不要用手指触摸镜头。
• 为防止触电,不要尝试自行拆卸或修理相机。
• 水可能导致火灾或触电。
因此,将相机存放在干燥的地方。
• 当正在下雨或下雪时,不要在户外使用相机。
• 不要在水中或靠近水的地方使用相机。
• 如果异物或水进入相机,应立即关闭电源,并取出电池和断开电源适配器。
取出异物或擦干水,然后将相机送到维修中心进行检修。
• 将数据尽快转移到计算机以避免丢失图像和/或视频剪辑。
1.有毒有害物质或元素表依据中国政府针对"电子信息产品污染控制管理办法"为控制和减少电子信息产品废弃后对环境造成的污染,促进生产和销售低污染电子信息产品,保护环境和人体健康,仅提供有关本产品可能含有有毒及有害物质如后:表1有关中国"电子信息产品污染控制管理办法"之相关规定请参考信息产业部所公布之信息表中标示有"X"的所有部件都符合欧盟RoHS 法规 (欧盟关于电子电器设备中限制使用某些有害物质的2002/95/EC 号指令)2.产品环保使用期限的使用条件:在按照本产品的使用条件使用的情况下(说明书中对温湿度等使用条件有详细说明),从生产日期开始,在标志的年限内使用,本产品中含有的有毒有害物质或元素不会对环境造成严重污染或对人身、财产造成严重损害。
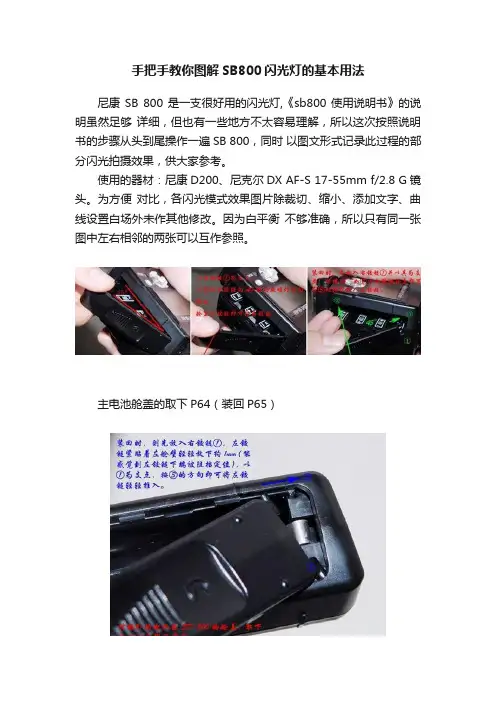
手把手教你图解SB800闪光灯的基本用法尼康SB 800是一支很好用的闪光灯,《sb800使用说明书》的说明虽然足够详细,但也有一些地方不太容易理解,所以这次按照说明书的步骤从头到尾操作一遍SB 800,同时以图文形式记录此过程的部分闪光拍摄效果,供大家参考。
使用的器材:尼康D200、尼克尔DX AF-S 17-55mm f/2.8 G镜头。
为方便对比,各闪光模式效果图片除裁切、缩小、添加文字、曲线设置白场外未作其他修改。
因为白平衡不够准确,所以只有同一张图中左右相邻的两张可以互作参照。
主电池舱盖的取下P64(装回P65)额外电池匣SD-800舱盖的取下(装回)注意:取下和装回,保持45°角、以①为支点以②为方向从③处出入是技巧所在。
LCD屏色彩的色彩不一样1、TTL BL(自动均衡补充)闪光P37这是均衡TTL傻瓜模式,闪光灯设定为TTL BL模式,在监察预闪标志出现的情况下拍摄。
注:TTL=through the lens=通过镜头被摄体距背景约0.3m。
a.在浅色背景下b.在深色背景下2、标准TTL闪光P37这是标准TTL傻瓜模式,闪光灯设定为TTL模式,在监察预闪标志出现的情况下拍摄。
3、 AA(预设光圈)闪光P38该模式通过闪光灯测光窗(非TTL)感受被摄主体反射的光线来控制闪光输出量,测光窗的&ldq uo;瞳孔大小”只能通过相机(D200)设定。
“瞳孔”由机身设定成F5.6的效果4、A(预设光圈)闪光P40此模式类同AA,只不过测光窗的“瞳孔大小”必须通过set和+、-钮设定,镜头的光圈值应按测光窗的“瞳孔大小”来设置。
“瞳孔”由set和+、-钮设定为F5.6的效果5、手动闪光a. GN(距离先决)方式P44b. M方式P46变更拍摄距离为1.5m后的拍摄情况。
c. RPT(多次闪光)方式P48利用闪光灯多次闪光,在一帧图片内记录被摄体的运动轨迹。
看看拍摄情况,“实拍”快门速度(1.6s)<“计算”快门速度(0.4s)。
斯丹德闪光灯DF-800用户手册
斯丹德DF-800
1.支持高速同步功能,1/8000秒高速同步突破快门速度,可以瞬间凝结,更可以起到压光补光;
2.支持主控从属模式,还支持TTL、M、MULT
3.支持S1、S2功能,可以简单快速进行引闪
4.支持TTL自动测光,自带的全自动测光系统让你时刻保持良好状态
5.支持后帘同步功能,可以实现魔幻的创意
6.频闪模式,可以把拍摄的事务一一记录下来
7.灯的前面有背光功能,夜晚拍摄下可以轻松调节使用功能
8.支持手动变焦
9.支持精细调控,可以更自由的创作
10.2.5秒快速回电,不怕错过好看的场景。
800 WATT LED LIGHT SOURCEWith an efficient 800 watt light source, the ERA 800 Profile delivers more output than similar-sized fixtures. Fully electronic dimming ensures extremely fast strobing, instant intensity control, and a flat, consistent field that can be maintained down to zero percent.GREAT COLOR PALETTEPrecise color temperature control with variable color temperature correction (CTO). Vibrant CMY color mixing from light and smooth pastels to rich, saturated primaries. The color wheel produces nice color splits, fast color bumps and extends overall color gamut and brightness.1:8 ZOOM RANGEWith 7 to 56 degrees of zoom, the ERA 800 Profile works great even on larger trim heights. Zooming is fast and accurate and maintains a high output throughout the range.COMPACT AND DESIGNED FOR THE ROADThe ERA 800 Profile is a very compact and low weight for its class making it easy to handle and rig. The modular design makes accessing and replacing of effects safe, quick, and easy – modules can be swapped in less than a minute.KEY MESSAGES Designed to fulfill the demand for an ultra-bright, compact, tour-worthy moving head, the Martin ERA 800 Profile combines a feature-loaded and rugged, yet cost-efficient profile for entertainment and rental applications.It features a highly efficient, super-bright 800W white LED engine that produces a bright, sharp 6,500K gobo projection with a flat field. Additional key benefits include 1:8 zoom, electronic dimming and strobe, full CMY color mixing and separate color wheel, variable color temperature control, animation wheel, iris for beam adjustment and fixed and rotating gobo wheels, loaded withuser-favorite gobos from the renowned Martin MAC range that includes a wide variety of effects, especially when combined with the two included rotating prisms and soft and heavy frost filters. Perfect for big, stadium-sized stage and live productions, the Martin ERA 800 Profile is idealfor a long list of scenarios, requiring an extremely bright, yet truly versatile LED profile that offers near limitless design and usage potential.MODELS• ERA 800 Profile in cardboard box .............................P/N 9025123581• ERA 800 Profile White in cardboard box ..................P/N 9025123582• Flightcase, two unit, for 2 x ERA 800Performance / Profile ...................................................P/N 91512255 INCLUDED ITEMS• Two omega brackets with 1/4 turn fastenersfor rigging clamp attachment .................................2 x P/N 91602001 RELATED ITEMS• Martin Companion software suite(incl. firmware uploader) .......Free download from • Martin Companion Cable USB/DMXhardware interface .......................................................P/N 91616091• Martin RDM 5.5 Splitter ................................................P/N 90758150CONVERSION KITS• Framing Module(converts ERA 800 Profile to Performance) ..............P/N 5125961-00• Gobo Wheel 3 Effects Module(converts ERA 800 Performance to Profile) ..............P/N 5131799-00OPTICAL ACCESSORIES• CRI Boost Filter(CRI >80, installs on gobo wheel) ..............................MAR-91614059POWER INPUT CABLES• Power Input Cable, H07RN-F, 2.5 mm 2, 14 AWG, bare ends to TRUE1 NAC3FX-W(female), 1.5 m (4.9 ft.) ..................................................P/N 91611797• Power Input Cable, H07RN-F, 2.5 mm 2, 14 AWG, bare ends to TRUE1 NAC3FX-W(female), 5 m (16.4 ft.) ...................................................P/N 91611786• Power Input Cable, SJOOW, 12 AWG, bare ends to TRUE1 NAC3FX-W(female), 1.5 m (4.9 ft.) ..................................................P/N 91610173• Power Input Cable, SJOOW, 12 AWG, bare ends to TRUE1 NAC3FX-W(female), 5 m (16.4 ft.) ...................................................P/N 91610174POWER RELAY CABLES, 16 A, FOR RELAYING POWER TO A SECOND FIXTURE AT 200 - 230 V MAINS POWER• Power Relay Cable, H07RN-F, 2.5 mm 2,TRUE1 to TRUE1, 0.45 m (1.5 ft.) ..................................P/N 91611784• Power Relay Cable, H07RN-F, 2.5 mm 2,TRUE1 to TRUE1, 1.2 m (3.9 ft.) ....................................P/N 91611785• Power Relay Cable, H07RN-F, 2.5 mm 2,TRUE1 to TRUE1, 2.5 m (8.2 ft.) ....................................P/N 91611796• Power Relay Cable, SJOOW, 12 AWG,TRUE1 to TRUE1, 0.45 m (1.5 ft.) ..................................P/N 91610170• Power Relay Cable, H07RN-F, 2.5 mm 2,TRUE1 to TRUE1, 1.2 m (3.9 ft.) ....................................P/N 91610171• Power Relay Cable, H07RN-F, 2.5 mm 2,TRUE1 to TRUE1, 2.5 m (8.2 ft.) ....................................P/N 91610172POWER CONNECTORS• Cable Connector, Neutrik powerCON TRUE1NAC3FX-W TOP (female) .........................................P/N 91611789HU • Cable Connector, Neutrik powerCON TRUE1NAC3FX-W TOP (male) ............................................P/N 91611788HUINSTALLATION HARDWARE• Hand-coupler Clamp ....................................................P/N 91602005• Safety Cable, SWL 60 kg,BGV C1 / DGUV 17, black ..............................................P/N 91604006• Safety Cable, SWL 60 kg,BGV C1 / DGUV 17, silver ..............................................P/N 91604007DYNAMIC EFFECTSElectronic 'shutter' effect......................S trobe effect, pulse effects, instantopen and blackoutElectronic dimming ...............................0 - 100%, four dimming curve options Color mixing ..........................................CMY, independently variable 0-100% Color temperature control ....................Variable 6500 - 2700 KColor wheel............................................6 color filters plus openRotating gobo whee l ..............................6 gobos plus open, wheel rotation, goborotation, indexing and shakeSecond rotating gobo whee l ..................6 gobos plus open, wheel rotation, goborotation, indexing and shakeStatic gobo wheel ..................................7 gobos plus open, wheel indexing,rotation and shakeGobo animation......................................A nimation wheel, indexing, continuousrotation with variable speed anddirection Iris..........................................................0-100%Zoom ......................................................Motorized Focus......................................................Motorized Prism......................................................2 rotating/indexing prisms(4-facet circular and 6-facet linear) Frost.......................................................Soft frost effect and heavy frost effect Pan .........................................................540°, coarse & fine control and speed Tilt ..........................................................260°, coarse & fine control and speedCONTROL AND PROGRAMMINGControl options ......................................DMX16-bit control .........................................Dimming, CMY, CTO, pan and tilt Setting and addressing .........................Control panel with backlit LCD display DMX channels, ERA 800 Performance..42DMX channels, ERA 800 Profile (36)DMX compliance ITT DMX512/1990RDM compliance....................................ANSI/ESTA E1.20Transceiver ............................................Opto-isolated RS-485OPTICSFront lens diameter...............................160 mm (6.3 in.)Zoom range............................................7° - 56° (1:8)Light source...........................................800 W LED engineMinimum LED lifetime...........................20 000 hours (to >70% luminousoutput)**Figure obtained under manufacturer's test conditionsSpecifications 35PHOTOMETRIC DATALight engine luminous output...............70000lumensFixture luminous output........................34000 lumensCCT (Calibrated Color Temperature) ....6500 K (+/-250K)CRI (Color Rendering Index) .................>70CQS (Color Quality Scale) ......................>67TM-30 Rf(IES TM-30-15 Fidelity Index)................>65TM-30 Rg(IES TM-30-15 Gamut Index).................>93TLCI (Television LightingConsistency Index) ................................>44LED refresh rate ...................................3600 Hz CONSTRUCTIONHousing..................................................H igh-impact flame-retardantthermoplasticColor.......................................................BlackProtection rating....................................IP20GOBOSExternal diameter .................................30.0 mm +0 / -0.2 mm (1.181 in.+0 / -0.008 in.)Maximum image diameter ....................25 mm (0.98 in.)Maximum gobo thickness .....................1.1 mm (0.04 in.)Material..................................................Borofloat 33Coating...................................................Heavy matted aluminum INSTALLATIONMounting points.....................................2 pairs of 1/4-turn points for 106 mm(4.17 in.) center-to-center omegabracketsLocation .................................................D ry location only, must be fastened tosurface or structureOrientation.............................................AnyMinimum distance tocombustible materials .........................0.2 m (8 in.)Minimum distance toilluminated surfaces .............................2.0 m (6.6 ft.)CONNECTIONSAC mains power input ...........................N eutrik TRUE1 socket, accepts TRUE1NAC3FX-W (TOP) connectorAC mains power throughput .................N eutrik TRUE1 socket, accepts TRUE1NAC3MX-W (TOP) connectorDMX and RDM data in/out .....................5-pin locking XLRELECTRICALAC power................................................100-240 VAC (nominal), 50/60 Hz Power supply unit..................................Auto-ranging electronic switch mode Maximum total power consumption .....1397 WPower consumption, all effects static,zero light output ....................................64 WHalf-cycle RMS inrush current at230 V, 50 Hz............................................10.3 ARecommended MCB (MiniatureCircuit Breaker) per IEC60898/UL489/CSA C22.2 No. 5..............Type DTYPICAL POWER AND CURRENT120V, 60Hz .............................................10.8 A, 1270 W, PF 0.99230V, 50Hz .............................................5.5 A, 1240 W, PF 0.97Figures are typical, not maximum. Measurements made at nominal voltage with all LEDs at full intensity. Allow for a deviation of +/- 10%. PF = power factorTHERMALCooling...................................................F orced air (temperature regulated,low noise)Maximum surface temperature,steady state, at Ta 40° C .......................70° C (158° F)Maximum ambient temperature(Ta max.) ................................................40° C (104° F)Minimum ambient temperature(Ta min.) .................................................5° C (41° F)Maximum total heat dissipation(calculated, +/- 10%) .............................4770 BTU/hr.APPROVALSGlobal CB Certification/IECEE ..............IEC 60598-2-17 (IEC 60598-1)EU safety................................................E N 60598-2-17 (EN 60598-1), EN 62471,EN62493EU EMC ..................................................E N 55015; EN 55032; EN 55035;EN 61000-3-2, EN 61000-3-3, EN 61547 US safety................................................UL 1573US EMC ..................................................FCC Part 15 Class BCanadian safety .....................................CSA C22.2 No. 166Canadian EMC........................................I CES-3 (B) / NMB-3 (B); ICES-5 (B) /NMB-5 (B)Australia/NZ ..........................................RCM36 ERA 800 Performance / Profile Safety and Installation ManualPHYSICALLength (head) .........................................608 mm (24.0 in.)Width (base) ...........................................290 mm (11.4 in.)Length (base) .........................................416 mm (16.4 in.)Width (across yoke) ...............................431 mm (17.0 in.)Height (head straight up) ......................802 mm (31.6 in.)Height (maximum) .................................821 mm (33.5 in.)Minimum center-to-center distancein side-by-side installation ...................730 mm (28.8 in.)Weight ....................................................40.0 kg (88.2 lbs.)。
闪光灯的专业使用方法一般而言,使用闪光灯拍摄照片是一种无奈的选择,不是在不得已的情况下,大多数人都不愿意使用闪光灯拍摄(特别是机身自带的弹起式闪光灯)。
但是,如果你拥有一款专用闪光灯设备(如尼康SB-800或佳能580EXⅡ),并能很好地运用它,你就可以获得同样专业品质的摄影效果。
下面我们就来探讨一下闪光灯的专业使用方法。
第一,让闪光灯脱离相机,改变光线的方向。
固定在相机上的闪光灯直打在被摄体上的光是没有立体感的,这也是人们讨厌使用闪光灯的原因之一。
但是,如果你能把闪光灯从相机上移开,创建一个你认为满意的方向性光源,就可以获得更惹人喜爱、更专业的效果,从而提升你的图片的立体感和深度。
分离相机和闪光灯的方法之一就是使用闪光灯同步线,用同步线把相机和闪光灯连起来,你就可以用左手手持闪光灯高高举起,向下朝向被摄体,这样就有了像太阳光一样打在被摄物体上的定向侧光,进而获得专业品质的理想效果。
如果你使用的是尼康或佳能的单反相机,那么它们具有的无线闪光功能,会为你创造方向性光源提供更加方便的条件,你只需在相机上作一些设定,就可以在无线状态下,随意使用闪光灯。
至于怎样设定无线闪光功能,我会在以后的文章中介绍(你也可查阅或下载相关说明书进行了解)。
第二,使用慢速快门,提升背景清晰度。
室内使用闪光灯,往往是主体看起来很刺眼,而背景却非常黑暗,因而照片看起来很丑陋。
如果能使闪光灯与室内可用光线混合,被摄体后面的背景就会变得非常自然。
这种技巧就叫做“慢速快门”。
首先,相机设置为程序模式(P),然后对准被摄体半按快门,查看取景器,读取光圈和快门速度数值并记住它。
之后,再将相机切换到手动模式(M),并拨到刚才记住的那两个数值,如果相机显示快门速度是1∕60秒,那么,使用慢速快门就把它降到1∕15秒后拍摄。
你不必担心被摄体会模糊,因为闪光灯启动时会锁定被摄体,而被摄体的背景会因为长时间曝光而得到与主体相一致的混合效果。
第三,为闪光灯增加柔光罩,使光线变得柔和。
®The All-Round Flashlight ExpertEC4S User ManualFeatures·Solid lightweight aero grade aluminum alloy construction ·Utilizes a CREE XHP50 LED·Maximum output up to 2150 lumens·Dual switch design offers unprecedented ease of use ·Thumbscrew lock on tailcap doubles as a tripod receiver ·5 brightness levels and 3 special modes available·High efficiency constant current circuit enables maximum runtime up to 325 hours ·Features advanced temperature regulation (ATR) technology·A power indicator built into the on/off switch indicates remaining battery power (Chiese Patent :ZL201220057767.4))·Direct access to ultralow and turbo outputs·A micro-textured reflector offers wide angle lighting·Reverse polarity protection prevents damage arise from incorrectly inserted batteries ·Stainless steel retaining ring protects core components from damage ·Toughened ultra-clear mineral glass with anti-reflective coating ·Waterproof in accordance with IPX-8 (2 meters submersible)·Impact resistant to 1.5 meters ·Tail stand capabilityDimensionsLength: 5.90” (150mm)Head diameter: 1.57” (40mm)Tube: 1.54” × 1.10” (39mm×28mm)Weight: 6.03oz (171gram) (without battery)Brightness LevelsWith the light turned on, press the mode switch repeatedly to cycle through brightness levels of ultralow, low, medium, high and turbo. This mode has memory effect that ensures direct access to the brightness level last used.Direct Access to Ultralow/TurboWith the light turned off, press and hold the on/off switch for over one second to enter ultralow level (2 lumens).With the light turned off, press and hold the mode switch for over one second to enter turbo level (2150 lumens).Special Modes (Strobe/Location Beacon/SOS)With the light turned on, press and hold the mode switch for over one second to enter strobe mode. To cycle through location beacon/SOS/strobe modes, press and hold the mode switch for over one second again. To exit, press the on/off switch to turn the light off.Strobe ReadyWith the light turned off, press the mode switch twice in quick succession to enter strobe mode directly. To exit, simply press any switch to turn the light off.Lockout/UnlockWith the light turned on, press and hold both switches for over one second to switch the light off and enter lockout mode. In this mode, the two switches will not have their respective functions, thus preventing accidental activation. To unlock, press and hold both switches for over one second again. NOTE:1.When in lockout mode, the EC4S will remain operational using 2x18650 batteries for over 12months.2.When the EC4S is kept in a backpack or left unused for extended periods, Nitecorerecommends batteries are removed to cut off power entirely and thus prevent battery leakage or accidental activation.Power TipsAfter battery installation or with the mode switch being pressed when the light is off, the blue power indicator built into the switch will blink to indicate remaining battery power. The power indicator will blink three times when power levels are above 50%; twice when power levels are below 50%; and once when battery is close to depletion.ATR TechnologyAdvanced temperature regulation (ATR) technology allows the EC4S to dynamically adjust output performance according to its internal temperature. This prevents damage from overheating and prolongs its working life.Changing / Charging BatteryBatteries should be replaced or recharged when output appears to be dim or the flashlight becomes unresponsive.MaintenanceEvery 6 months, threads should be wiped with a clean cloth followed by a thin coating of silicon-based lubricant.Warranty ServiceAll NITECORE® products are warranted for quality. Any defective / malfunctioning NITECORE® product can be repaired free of charge for a period of 60 months (5 years) from the date ofpurchase. Beyond 60 months (5 years), a limited warranty applies, covering the cost of labor and maintenance, but not the cost of accessories or replacement parts.The warranty is nullified in all of the following situations:1. The product(s) is/are broken down, reconstructed and/or modified by unauthorized parties.2. The product(s) is/are damaged through improper use.3. The product(s) is/are damaged by leakage of batteries.For the latest information on NITECORE® products and services, please contact a local NITECORE®**********************************************※All images, text and statements specified herein this user manual are for reference purpose only. Should any discrepancy occurs between this manual and information specified on, information on our official website shall prevail. Sysmax Industry Co., Ltd. reserves the rights to interpret and amend the content of this document at any time without prior notice.Output & RuntimeNOTICE:The stated data has been measured in accordance with the internationalflashlight testing standards ANSI/NEMA FL1, using 2 x Nitecore 18650 Li-ion batteries (3.7V, 2600mAh) or 4 x Nitecore CR123 batteries (3V, 1700mAh) under laboratoryconditions. The data may vary in real-world use due to different battery usage or environmental conditions.Operating InstructionsBattery installationAs illustrated, rotate the thumbscrew lock counterclockwise and screw the tail cap off. Insertbatteries with the negative (-) ends contacting the springs, and then tighten the thumbscrew lock clockwise.AccessoriesQuality holster, lanyardThanks for purchasing NITECORE!SYSMAX Industry Co., Ltd.TEL: +86-20-83862000FAX: +86-20-83882723E-mail: *****************Web: Address : Rm1401-03, Glorious Tower, 850 East Dongfeng Road,Guangzhou, China 510600NOTE: After battery insertion, the power indicator light will blink to indicate remaining battery power. Please refer to the “Power Tips” section of this manual for details.WARNING:1. Do not mix rechargeable and non-rechargeable batteries.2. Do not mix batteries of different types/brands.20150921TURBOHIGHMIDLOWLUMENS1100LUMENS2150LUMENS400LUMENS802h 15min 45min 30h 45min6h 15min 2h30min23h 15min5h 45min ULTRALOWLUMENS2325h 210h280m (Beam Distance)19600cd (Peak Beam Intensity)IPX-8, 2m (Waterproof AND Submersible)1.5m (Impact Resistant)4×CR1232 ×18650On/Off OperationTo switch on: Press the on/off switch to turn the light onTo switch off: Press the on/off switch again to turn the light off and enter standby modeStandby ModeWith the light turned on, press and hold the on/off switch for over one second to turn the light off and activate the power indicator to blink once every three seconds, thus helping users locate the EC4S in dark environments. When powered by 2x18650 batteries, the EC4S can operate for over 6 months with the power indicator on, or remain on standby for over 12 months with the power indicator off.Please find us on facebook: NITECORE Flashlights。