日清 i40闪光灯使用说明书
- 格式:pdf
- 大小:1.03 MB
- 文档页数:23
Changes or modifications not expressly approved by the party responsible for compliance could void the user's authority to operate the equipment.This device complies with Part 15 of the FCC Rules. Operation is subject to the following two conditions: (1) this device may not cause harmful interference, and (2) this device must accept any interference received, including interference that may cause undesired operation.Thank you for purchasing a Nissin productBefore using this flash unit, please read this instruction manual and refer to the manual of camera owner carefully to get a better understanding of the proper operation to enjoy flash photography.Nissin Air System (NAS) is a Nissin wirelessly remote control flash light system, designed by Nissin. It consists of a Nissin radio commander (NAS commander) and the Nissin wireless flash (NAS flash) and Nissin radio receiver (NAS receiver) as remote slave units.Insert Air 10s on the camera hot shoe as a NAS commander.The signal of Air 10s is transmitted by using 2.4 GHz transmission.Transmission distance is approx. 100m (330 ft.)(Metal/ Wire/ Wall/ another 2.4 GHz radio frequency may cause areduction in the NAS transmission distance)These safety instructions refer to important information on how to use this product safely and properly. Please read the following instructions before using the product.Do not touch the inside parts from the opening when the unit was dropped or broken.Place the batteries correctly in position. Placing the batteries in wrong polarity may cause leakage, exothermic heat or explosion.Do not leave or store the commander unit in the temperature over 40ºC/ 104ºF, such as in the automobile.The flash unit is not water resistance. Keep the unit away from rain, snow and humidity.Do not use benzene, thinner or other alcoholic agents to clean the unit.Do not use this flash unit with cameras which are not recommended in the compatibility list at official website, otherwise it may damage the camera’s circuitry.Remove the batteries when not in use for a longer period of time.This sign refers to conditions which may cause damage or defect.WARNINGThe flash unit contains high voltage electric parts. Do not try to open or repair the flash unit. Return it back to the repair service station or the store where you bought it from.Do not touch the inside parts from the opening when the unit was dropped or broken.Do not shoot the flash directly to the eyes at short distance. It may damage the eyes.When taking a flash picture, especially toward a baby, it is recommended to keep the flash unit at least 1 meter (3.3feet) away from the subject. Or use diffuser or bounce the light to the ceiling or wall to soften its intensity.Do not place the flash unit near any flammable gas, chemicals or such liquids. It may cause fire or electric shock.Do not touch the flash unit with wet hands or use in the water. The flash unit carries high voltage inside and it may cause an electric shock.Do not shoot the flash unit directly at the driver of automobiles or such vehicles.Do not set the flash window close to the human body and shoot, which may get scalded.Place the batteries correctly in position. Placing the batteries in wrong polarity may cause leakage, exothermic heat or explosion.This symbol refers to the possibility of personal injury, death or propertydamage if not followed as described.X-terminal 1Bounce lock 4Wireless remote shutter 3Channel Dial 10Pilot button (Test flash button)11Power On/Off button 12Open Mode button 13Power Pack socket 14Group Dial 15Battery compartment door 16NAS connection light 9Rail 7Modelling Light 8Tripod Screw 5Shutter cable socket (2.5mm)6Micro SD card slot (for firmware update)2Accessories:DiffuserInserting batteriesBefore starting wireless flash shooting.2. Insert 8 x size AA batteries in battery caseas shown in the picture.3. Insert the battery case and lock the batterydoor. Make sure white dot at same side asshown in the picture.1. It is recommended to use batteries of the same brand and replace all at the same time.2. It is recommended to use a qualified rechargeable battery due to environmental protection and power supply reaction while using. Re-charge the battery before use3. Wrong insertion of the battery direction or wrong versions of batteries may lead to malfunction on electrical contacts or damage on MG10.4. Remove all batteries from MG10 is highly recommended while not in use for long time.Applicable Battery Type - Alkaline batteries, Lithium batteries or NiMH batteries.1. Open the battery compartment door.CAUTIONSDo not use the Air 10s as a holder to pick up the whole camera system.Loosen the mounting screw at bottom side.2.Using light diffuser / filter holder with zoom headPairing SettingTo perform wireless shooting, set the Nissin Air 10s commander andNAS slave unit with the following procedure. After pairing is completed, both of them will memorize the data and there will be no need to pair again after the units are switched on and off.Step 1: Set all NAS flashes and NAS receivers to pairing mode.Nissin flash MG101. Make sure the Nissin MG10 is off.2. Rotate the "Ch" channel dial to "Auto" auto channel mode.3. Hold the "Open" button and the power button for 3 seconds.Step 2: Binding on Flash CommanderNissin Air 10s1. Make sure the Nissin Air 10s is off.2. Hold both Panel Lock button and Power on/off buton for 3 secondsuntil the pilot light is blinking in orange colour.3. “Beep” sound persists until the Pairing signal is received.When the "beep" sound stops, the pairing is complete.MG10, provides individual control of 4 groups (strobes), you can set these 4 groups in different settings. Before shooting, you have to set each strobes to be one of these 4 groups.Nissin Air 10sThere are basic groups and advance groups for controlling the Nissin Air10s. They allow the user to pair an unlimited amount of slave units. They mainly divided into two kinds of groups:Basic groups and advance groups can beuse at the same time for different strobes.Example:Use the i60A in basic group A on manual,use two MG10 in advance group A & D inTTL and manual mode.Press 1 second to switch basic group and advanced groupM modeM/TTL modeTTL modeThe NAS system is using an independent identity (ID) function to access strobes, the NAS strobes will not be affected by other commanders when-ever they are using the same channel in the same location. A slave unit of Nissin flash or Nissin receiver can only be controlled by one and only one NAS commander with pairing in default setting.MG10 offers “Open Mode” ,a new function (only works with Air 10s), on the pairing setting. Open Mode can let two or more camera using same set MG10 in one place.1. Press the OPEN button on MG10 to switch on Open mode. Pilot light onwhich means Open mode is on.2. Hold the button of Nissin Air 10s for 1 seconds,the word “OPEN" lights up on the top of in the LCD display which means Open Mode is on. Now hold the for 1 seconds again to turn off.MG10 with Air 10s provide wireless remote shutter. User allow to use remote shutter to control camera on MG10.Slide the mounting foot of Air 10s into the hotshoe of the camera.1.Connect the shutter cable betweenAir 10s & the camera.2.3.The Nissin MG10 can only be used in wireless mode with a NAScommander like the Nissin Air 10s. All exposure setting functions will becontrolled by this NAS commander. (X-sync please refer to P.16)In Basic groups mode: Press the button.In Advanced groups mode:To set different exposure mode in each group:1. Press the Group Selection button. When the letter “A” blinks,press M / TTL mode button to change the exposure mode(the same procedure works with groups B, C, and D).2. After completing the exposure setting,press the Group Selection button again to stop the blinking.TTL auto flash exposure mode of Nissin Air 10s supports cameras which walked through the compatibility test.All the following setting have to be carried out on the control of the commander order on the commander Air 10s.1. Press the Group Selection button, the group letters blink.2. Rotate the Operation Dial to increase or decrease the TTL flash exposure compensation.The settings of TTL auto exposure compensation on Nissin Air 10s startsfrom -2EV to + 2EV and controlled by 1 / 3EV step interval.3. When the exposure compensation setting is completed,press the group selection button again.Switching Air 10s from TTL mode to M mode, the last flash power settingwill be saved in TTL control. Flash power value will also remain unchanged in M mode.If you do not press any group selection button which means all group letters in the display do not blink, rotate the Operation Dial to increase/ decrease the power of all groups. For example, A: 0EV, B: + 0.6EV, C: + 1EV, D: -1EV, do not select anygroup then turn the Operation Dial clockwise in 2 click intervals, will cause to A:+ 0.6EV, B: + 1.3EV, C: 1.6EV, D: -0.3EV.All the following setting have to be carried out on the control of the commander order on the commander Air 10s.1. Press the Group Selection button, the group letter blinks.2. Rotate the Operation Dial to increase or decrease the flash power of the group selected.The setting of M mode on Air 10s starts from 1/256 (minimum) to 1/1 (Full), andcontrolled by 1/3 step intervals. The value digi displayed next to the grouponly shows the integer step value (*).If you do not press any group selection button which means all group letters in the display do not blink, rotate the Operation Dial to increase/ decrease the power of all groups. For example, A: 1/256, B: 1/8 + 0.6EV, C: 1/4, D: 1/2, do not select anygroup then rotate the Operation Dial clockwise with 2 intervals, it becomesA: 1/256 + 0.6EV , B: 1/4 + 0.3EV, C: 1/4 + 0.6EV, D: 1/2 + 0.6EV.Turn off MG10 and camera.1.Plug the cable into X-terminal oncamera & MG10.e Channel Dial to control the flash power:2.Nissin MG10 offers "A" auto zoom mode and manual zoom mode.1. Hold the on Air 10s for 2 seconds.2. Press the group selection button until the the desired letter(s) blink.Rotate the Operation Dial to change the Zoom head position setting.The focal length is representing the flash angle. Rotate the Operation Dialin anti-clockwise direction to decrease the value of the focal length of zoom head.Keep rotating anti-clockwise to change the "A" automatic zoom mode at the end.Rotate the Operation Dial in a clockwise direction to leave.The “A” auto zoom mode will increase the value of the focal length value of zoom head. Coverage range supports 24mm, 28mm, 35mm, 50mm, 70mm, 85mm,105mm, 135mm and 200mm focal length lenses.3. Press the group selection button again after completion of the zoom setting.Hold for 2 seconds again when all groups zoom settings are completed.If you do not press any group selection button, which means all group letters in the display do not blink, rotating the Operation Dial to increase or decrease the flashzoom head focal length will affect all groups; A, B, C and D.Since the different focal length of the lens are suitable for different anglesof the shooting range, the focal length is getting shorter at the same sensors size. Which means that the smaller focal length lens with larger angle in the view,the flash area coverage will be larger.Nissin MG10 Guide No. at manual exposure mode (ISO 100 in meters)For the camera system we support, there are 4 main image sensor sizes:35mm Full Frame format, APS-C format, 4/3 system format and 1” sensor format.Normal flashguns have a very short flash duration. In order to estimate and control the flash more efficiently, the modeling light on slave unit can be used. It is a constant light for the user to estimate and preview the lightbefore shooting(flash emitting).1. Press the Group Selection button(s), the group letter(s) blink.2. Press to switch the group’s modeling on/off.3. Press the Group Selection button again when setup completed.1. Press on Air 10s for 1 second to switch to theadvanced groups.2. Press to change to M mode.2. Press to turn on modeling light.If you do not press any group selection button, which means all group letter in the display do not blink, pressing the modeling light button will invert the modeling on/off setting of all groups. For example, A & C: On and B & D: off, press the modelinglight button without selecting any group, will cause to A & C: Off, and B & D: On.Flashgun supports shutter speed limitation on X-Sync (maximum speed synchronizeto flash) on SLR / DSLR /Mirrorless Cameras in general. If it does not supportHSS function of the camera, faster shutter speed settings than the maximum synchronize speed will block the flash gun. With faster shutter speeds than the maximum sync speed some part(s) of the image area would be shaded by the moving shutter leaves withinthe flash duration. As a result the image is only partially exposed by the flash light.”. HSS allows flashgun works under high speed shutter (max 1/8000s).Method A (for Canon & Sony)Hold button for 2 seconds to turn on or off.Method B1. Insert Air 10s to camera shoe.2. Switch on both Air 10s and Camera,For Canon: Menu setting External Flash setting HSS mode in the sync settingFor Nikon: Custom setting menu Flash Flash sync speed Auto FPThe flash emitting operation in HSS mode is different from the normal flash mode.With the HSS function, users can get a faster shutter speed which will result ina lower guide number. This is equivalent to a lower flash output. The flash of HSScannot be measured by an external light meter. When HSS is on,the exposure compensation setting of TTL mode offers the same -2EV to +2EV ofbasic mode. Using the power control of "M" Manual mode under HSS,the Air 10s offers 1/32 to 1/1 power range only. If power is set from 1/256 to 1/64+0.3EV, “M” manual power setting will automatically change to 1/32 in HSS mode.All settings of strobes are controlled by the commander wirelessly after the pairing is completed. If the strobes buzzer is on, a “Beep” sound will be heard when the Strobe is charging and not ready to flash. The “Beep” sound will be heard everytime when there is any change made through the commander.Hold button to switch the buzzer (on strobes) on or off.When “no buzzer” logo is displayed in LCD, it means that the beep sound is off.When the “no buzzer” logo disappears, then the buzzer function is turned on.Connecting the Power PackDisconnecting Power Supply CableMake sure to switch o�f f both the Power Pack and theflash unit before e the compatible flash power supply cable for MG10.Hold the connector of the flash power supply cablein front of the socket with both guide marks on theconnector and on the socket coinciding and insertit into the socket straightly. You can plug theconnector into either socket 1 or socket 2.1.Make sure the Power Pack has been switched OFF .1.Connect the plug at the other end of the powersupply cable to the MG10.2.Hold the connector of the flash powter supplycable as shown and pull it off.2.To start the firmware update procedure, you need to have:The computer (Windows or Mac) connected to the InternetA Micro SD/SDHC card (recommend 4GB-32GB) and Micro SD card reader.MG10 with 8pcs of full re-charged AA batteries or 2pcs of full recharged26650 Lithium ion battery.1. Download the Firmware file(s). Click here to download firmware files:http: ///firmware.html2. Insert Micro SD/SDHC card to the card reader and connect to the computer.3. Format Micro SD/SDHC card under FAT32 format (Please backup before format).4. Copy all Firmware file(s) to Micro SD/SDHC card.5. Eject the Micro SD/SDHC and remove from the card reader.6. Insert batteries into MG10 and switch on it.7. Then switch off the MG10.8. Remove the Micro SD/SDHC cover of MG10, insert the Micro SD/SDHC which contains the latest firmware update files into the MG10.9. Switch on the MG10. A LED light inside the Micro SD card slot of MG10 will blink, it will blink and the light will change orange to red and stop blinking oncethe update is finished.10. The green light will emit when the firmware update procedure is completed.Remove the batteries and remove the Micro SD/SDHC.11. Insert the batteries again and switch on the MG10.(1) This is a testing result record , it may be affected by equipment and environmental factors.(2) This is a new feature which supports a coming new NAS flash.Guide no. (at ISO 100)Continuous flashesZoom coveragePower sourceRecycling time Number of flashes (Approx.)Flash Duration Color temperature Exposure control Control Setting Wireless mode EV compensation on flash Bounce position Manual mode power ratio Mode LED Modeling External power pack socket Shutter Release Tripod mounting hole Bracket Mount Flash Tube life Dimensions WeightGN80@200mm/GN47@35mm/165Ws / Dual Quartz flash tubes 200 flashes@ 3sec interval 24mm~200mm motorize zoom, 18mm with diffuser 2x 26650 Li-ion Batteries (4000mAh or higher) or 8xAA rechargeable Batteries 2.8sec with 2x Li-ion Batteries/3.0sec with 8xAA Rechargeable Batteries/1.5sec with PS8+2x Li-ion batteries500times with 2x Li-ion 5000mAh batteries /250 times with 8x AA 2200mAhrechargeable batteries1/10000~1/167sec5600KPrecision Light sensor with IGBT flash controlBy Nissin Air10sChannel setting, Group setting,Open mode on/off, Power switch2.4GHz with Nissin NAS systemNone (1/256 - 1/1 with 1/3 steps set by Nissin commander)-7 ~ 90 degree Vertical, +/- 180 degree Horizontal.1/256 ~1/1 with 1/3 stepsTTL, M, HSS, OPEN MODE8W LED, Control by Air10s,25steps, appox 4 hoursoperation with 5000mAh batteries, Overheat protectedYesshutter cable to camera or by NAS¼'' , 20UNCLeft or right hand mountable100,000 full flashes210x145x80mm HxDxW975g w/o batteriesWarrantyIn case of the following reason of the defect, it may void the warranty.1. The product is not used in accordance with the instruction of the owner’s manual.2. The product is repaired or modified by the one who is not an authorized repair service.3. When the product is used with the cameras not applicable, lens, adaptors or such accessories produced by the third party.4. Fault or defect caused by fire, earthquake, flood, public pollution and such natural accident.5. In case that the product is stored in dust, moisture, extremely high temperature or such poor condition.6. Scratch, blemish, crush or worn out by a violent use or treatment.7. Guarantee card without name of place purchased or date of purchase stamped, or no guarantee card.Please refer the respective warranty condition for details which depends on the country of purchase and contact our official distributors who distributed this product for the warranty arrangement details.Nissin Japan Ltd., Tokyo Nissin Marketing Ltd., Hong Kong 。
摄影棚闪光灯使用技巧摄影棚闪光灯是摄影过程中常用的一种灯光设备。
掌握好闪光灯的使用技巧可以帮助我们拍摄出更好的作品。
以下是一些常用的摄影棚闪光灯使用技巧。
首先,了解闪光灯的功能。
闪光灯有多种模式,如手动模式、TTL自动模式等。
手动模式下,可以自定义闪光灯的输出功率,控制光线的明亮度。
TTL模式下,闪光灯会自动计算出合适的闪光量。
根据拍摄对象和场景的需要,选择合适的模式。
其次,掌握合适的闪光灯位置。
闪光灯的位置对照片的效果有很大的影响。
一般来说,我们可以把闪光灯安装在摄影棚的顶部、侧面或背后。
从顶部照射可以产生柔和的光线,从侧面照射可以突出物体的纹理和表面细节,从背后照射可以产生背景逆光效果。
根据拍摄需要选择合适的位置。
然后,使用闪光灯配件。
闪光灯配件可以帮助改变光线的角度和方向,从而创造出不同的照片效果。
比如,反射板可以将光线反射到被摄物体上,增加被摄物体的明亮度;软盒可以使光线更加柔和,减轻阴影;灰卡可以用来测量闪光灯的输出功率等。
灵活运用这些配件可以提升照片的质量。
此外,注意闪光灯的色温。
闪光灯的光线有一定的色温,与自然光有所不同。
为了避免照片中出现色差,可以使用色温片或调节白平衡来校正色彩。
尤其是在与室外光线混合使用闪光灯时,调整好色温非常重要。
最后,掌握好闪光灯的曝光控制。
合适的闪光灯曝光可以使被摄物体更突出,而过曝或欠曝则会影响照片的质量。
在摄影过程中,可以通过改变闪光灯的输出功率、快门速度和光圈值等参数来控制曝光。
适当地调整这些参数可以获得理想的曝光效果。
综上所述,摄影棚闪光灯的使用技巧包括了了解闪光灯的功能、掌握合适的闪光灯位置、使用闪光灯配件、注意闪光灯的色温以及掌握好闪光灯的曝光控制。
运用这些技巧,可以帮助我们拍摄出更好的作品。
摄影新手必学闪光灯使用方法,1分钟搞定单反闪光灯的基础知识闪光灯对新手摄影爱好者来讲,真的是一个器材学习上的难题,很多新手一般都是这样理解,闪光灯的作用不过是「在光线不足的时候有多一点光来拍照来提升照片的亮度,保持照片的正常曝光」。
但其实闪光灯的作用远远不在于补光,还可以提供一个可控制光源,让你透过光线形造相片的效果和气氛。
在了解怎样具体使用闪光灯之前,我们会先教你一些有关闪光灯的基本操作:闪光灯一般都有的模式(M、A、TTL)这类所介绍的闪光灯模式指在外置闪光灯身上常见的不同闪光灯用法。
M:Manual Mode: 让用家全手动地控制闪光灯的输出光量。
如果拍摄对像不会移动,这种恒定的输出光量则变相提供了一个很稳定的光源,因此适合影楼之类的固定环境。
A:Auto Mode: 闪光灯根据闪灯机身上的感光器对现场环境光暗的测定,加上机身数据(焦距、光圈、ISO)去计算出需要输出的光量。
因此镜头加上滤镜的效果,不能加入闪光灯运算输出光量的过程中,此外闪灯感光器须对着主体,所以只适合「直打」,不适用于加上配件。
TTL:Through The Lens Mode: 故名思义,闪光灯对输出光量的计算是根据相机机身的测光而定,所以镜头加入滤镜后的光量变化效果亦能较算在内。
TTL 的好处是在变化的环境中,比较灵活,但在固定环境底下,轻微偏差也会导致输出不一致,因此不适合影楼之类。
但这个模式比较适合一些不懂闪光灯的小白使用。
如果对环境要求不是很苛刻的话。
下面是一些使用闪光灯的方法与技巧:飞灯/离闪外置闪光灯可以透过传送和接收器,对外置光灯进行遥距的控制,令闪光灯的光源位置可以有更灵活的变化。
硬光和柔光(Hard/Soft light)Hard/Soft light指光的质地。
光得质地可以由做造成的影子去判断:Hard light造成的影子边沿明确,相片对比度较高。
所以被Hard light所照射的主题的轮廓会变得十分明显,亦容易有明显的反光,因此适合拍摄气氛强烈的影像;Soft light由于经过漫射或反射,造成的影子边沿模糊,对比度较低,但能表现细节。
使用闪光灯的基本技巧闪光灯是摄影中一种重要的工具,它能够提供额外的光源,帮助解决拍摄环境光线不足的问题。
然而,要想在使用闪光灯时取得最佳效果,需要掌握一些基本的技巧。
本文将介绍使用闪光灯的一些基本技巧,以帮助您在拍摄中提升照片的品质。
1. 了解闪光灯的原理在学习如何使用闪光灯之前,了解闪光灯的工作原理是很重要的。
闪光灯通过电流通过气体产生强烈的光,以补充或替代环境中的光线。
掌握闪光灯的原理对于理解和调整其设置至关重要。
2. 使用合适的闪光灯模式大多数相机都提供多种闪光灯模式,如自动模式、手动模式和红眼降低模式等。
根据拍摄需求,选择合适的模式能够获得更好的效果。
自动模式可以根据环境光线自动调整闪光灯的强度,手动模式允许您完全控制闪光灯的强度,红眼降低模式则可减少拍摄人物出现红眼的可能。
3. 调整闪光灯的参数除了选择合适的模式外,还需要调整闪光灯的参数以适应不同的拍摄环境。
闪光灯的强度、角度和白平衡等参数都可以影响拍摄效果。
在使用闪光灯时,可以尝试不同的设置,找出最适合当前拍摄场景的参数组合。
4. 考虑闪光灯与环境光线的平衡使用闪光灯时,要注意闪光灯与环境光线的平衡。
如果闪光灯过强,可能会导致照片过曝;如果闪光灯过弱,则可能无法补光。
通过调整闪光灯的强度和环境光线的相对比例,可以获得自然且平衡的照片效果。
5. 利用闪光灯的反射板一些闪光灯配备了反射板,可以帮助扩散和柔化光线。
使用反射板可以减少直射的硬光线,产生柔和的光线效果。
在人像摄影中,利用反射板能够给人物的肤色带来柔和的光线,使肤色更加自然。
6. 调整闪光灯的角度和方向闪光灯的角度和方向在拍摄中起着重要的作用。
直射闪光灯可能会导致强烈的阴影或镜头背景的过曝。
调整闪光灯的角度和方向,使其光线更加均匀地分布在被拍摄物体上,可以避免这些问题,并获得更好的照片效果。
7. 使用闪光灯的快速同步功能在高速运动的拍摄中,快速同步功能可以帮助冻结运动并获得清晰的照片。
闪光灯的使用技巧汇总一篇闪光灯的使用技巧 1闪光灯的使用技巧导语:闪光灯既可以成就也可以毁掉一张照片!正确的使用闪光灯就能让你拍出精彩的照片。
这篇短文会给你介绍一些使用闪光灯的基本方式。
爱摄影,追求完美的帅哥美女要好好看了。
1. 使用柔光罩柔光罩可以削弱光线的“硬度”。
它可以柔化光线,拍摄出更好看的照片。
所有的外接闪光灯都可以使用柔光罩,大部分数码单反相机的机顶闪光灯也可以用。
柔光罩很便宜,但是很实用。
我自己的柔光罩是用白色的牛奶盒做的,用皮筋固定在闪光灯上。
2.填充闪光在户外拍摄时,若被摄体或人物脸部有阴影,最简单的处理方式是使用填充闪光。
这种方法正如其字面意思所示,是给阴影区加入少量的`人造光。
户外拍摄时你只需打开闪光灯,剩下的工作就可以交给相机去做了。
第一次使用时,你就会为它带来的效果而惊喜,从此阴影再也不会出现在你的照片中。
如果你不确定闪光灯如何使用,请查看相机说明书。
你可以调整闪光灯的输出等多项设置。
3.离机闪光在不使用柔光罩的情况下,离机闪光是唯一能拍出精彩照片的方法。
离机引闪线非常便宜,却很有用。
把闪光灯装在引闪线的热靴座上,放在相机左侧或右侧位置,这样可以避免直射的光线造成生硬的效果。
你可以把离机闪光灯装在三脚架或专用灯架上。
用闪光灯拍摄,你需要不停地练习,直到掌握所有技巧。
理解相机闪光灯的工作方式,以及如何改变各项设置。
只要熟悉了闪光灯的使用,你就可以自由发挥创造了。
4.跳闪如果你用过外接闪光灯,应该能注意到直射的硬光会破坏照片美感。
斯丹德闪光灯解决这个问题的方法很简单。
大多数外接闪光灯的灯头都可以旋转一定角度。
将灯头指向天花板,经过天花板反射的光线同样也被柔化了。
只有一种情况会有点问题——天花板有颜色。
如果天花板不是白色的,那么光线也会带上同样的颜色。
所以在拍摄前先试拍一下,看看效果能否接受。
木质的天花板会形成暖色的光线,往往效果更好。
超详细机顶闪光灯使⽤教程,教你彻底了解机顶闪光灯 在拍摄⼈像时,机顶闪光灯是⾮常有⽤的伙伴。
它不仅能提供照明,还能有针对性地创造或消除阴影,或者改变⽪肤的⾊彩和质感。
不过,如果你想真正发挥出机顶闪光灯的全部效⽤和功能,你必须切实、彻底地了解它的使⽤技巧和注意事项。
今天为您带来的是,外国摄影师 Ed Verosky 分享的超详细机顶闪光灯使⽤教程,⼀起来看看吧~ 兵马未动,粮草先⾏。
我们先从拍摄前的⼀些相关配套准备措施说起吧。
预备篇 ⾸先,最好把相机调到 M 档,以便灵活调整三⼤曝光参数。
你不需要“正确”的曝光,只需要合适的、照⽚好看的曝光。
在这⼀模式下,你可以不断地通过尝试微调三⼤参数,来观察画⾯变化,获取不同的拍摄效果。
第⼆个需要留⼼的参数是⾼速快门同步。
⼤部分的相机都有最⼤的闪光灯同步快门速度,⼀般是 1/200 秒到 1/250 秒。
如果你使⽤的快门速度⾼于这个最⼤同步快门速度,很可能就会出现“快门已经闭合,闪光灯却还没来得及把整个画⾯照亮”的现象:快门速度过⾼,闪光灯来不及照亮整个画⾯ 室内拍摄,你可能⽤不了那么⾼的快门速度;但如果要拍体育竞技类题材或者在室外强光中拍摄,你可能需要开启⾼速快门同步。
有同学问“强光下拍摄为什么还要开闪光灯”,要知道,闪光灯的功能可不光是照明⽽已。
有兴趣的请⾃⾏搜索“闪光灯压光”。
我们接着说。
在相机的闪光灯功能设置⾥开启⾼速同步功能,就可以在使⽤⾼速快门的同时正常使⽤闪光灯了。
⾼速同步设置界⾯ 需要注意的是,使⽤⾼速快门同步功能可能会造成闪光灯的最⼤输出功率下降。
第三个需要在闪光灯功能界⾯开启的设置就是 TTL。
这⼀功能的实质是在正式闪光前进⾏⼀次预闪光,通过计算反射回来的光线调整正式闪光的实际输出功率,达到“恰好使主体正确曝光”的效果。
这⼀功能可以保证你的闪光灯输出不会过强,导致过曝;但如果你的闪光灯最⼤输出功率不够,它也是⽆能为⼒的。
【关键字】模式、地方、亮点、系统、整体、平衡、合理、快速、合作、了解、覆盖面、基础、需要、竞争力、重点、负担、规模、设置、联动、凝聚、调节、形成、拓展、丰富、满足、保证、支持、调整、方向、实现、协调、中心、重要性小体积高指数TTL 日清i40闪光灯评测首发热靴闪光灯在拍摄时的重要性已经被越来越多的摄影爱好者们所了解,选购一款闪光灯也成为闪光灯初学者的一个必备课程。
目前佳能和尼康等原厂推出的顶级TTL闪光灯的价格比较昂贵,即便是尼康SB700和佳能430EX II这样的闪光指数在GN40左右的原厂中端闪光灯价格也在两千元左右。
于是闪光灯副厂厂商看到了这一市场,重点发力推出了一些兼容原厂TTL闪光系统的闪光灯,这类产品的价格不仅要比原厂低不少,同时在闪光指数上也是直逼原厂。
在2014年CP+大展上,日本日清公司就发布了一款TTL自动闪光灯i40。
日清i40闪光灯的包装内标配了一个软包,可以用来收纳闪光灯。
此外,包装内还附带了一个挂环,可以将软包悬挂在摄影包处,便于迅速取出拍摄。
这款闪光指数为GN.40(ISO 100/m时,覆盖视角105mm)或者GN27(ISO 100/m时,覆盖视角35mm)。
日清i40闪光灯标配软包和挂环日清i40闪光灯体积比较小巧日清i40闪光灯灯头的焦段则覆盖了24-105mm焦距(使用广角散射板后焦距变为14mm)。
这款闪光灯体积相当小巧,但却具备比较丰富的功能。
除了兼容原厂的TTL自动闪光之外,这款产品还拥有诸如光敏从属引闪、手动闪光、外侧光以及无线从属功能。
此外,这款闪光灯还具备LED补光功能,这在同级别产品中比较少见。
拓展阅读:P&E2014:专访日清运营总监洪壮炜先生最轻出色外闪日清i40闪灯日本地区发售平价新锐附件日清i 40新型闪灯香港上市CP+2014:专访日清运营总监洪状伟CP+2014:日清展台报道规模不大亮点多CP+2014:日清发布全球最小闪光灯i40 ·产品外观:体积小巧做工精致日清i40闪光灯的外形设计基本延续了日清家族闪光灯的设计风格,但并不存在模仿的痕迹。
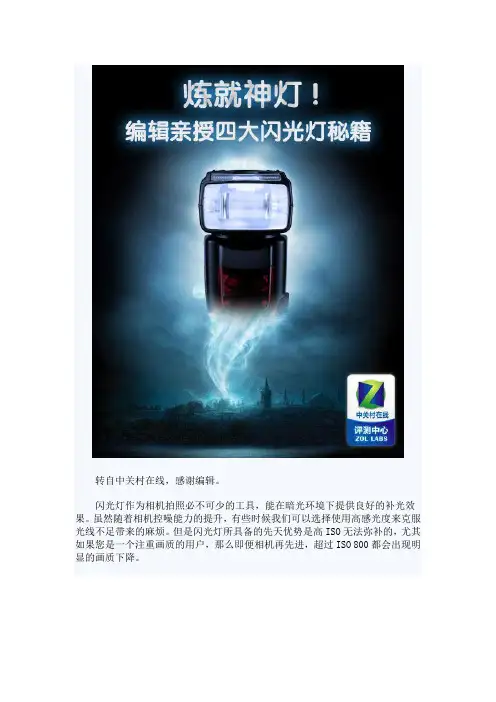
转自中关村在线,感谢编辑。
闪光灯作为相机拍照必不可少的工具,能在暗光环境下提供良好的补光效果。
虽然随着相机控噪能力的提升,有些时候我们可以选择使用高感光度来克服光线不足带来的麻烦。
但是闪光灯所具备的先天优势是高ISO无法弥补的,尤其如果您是一个注重画质的用户,那么即便相机再先进,超过ISO 800都会出现明显的画质下降。
多种闪光技法倾囊而授虽然闪光灯在很多时候都能很好的完成补光工作(尤其是功率强大的外置闪光灯),但是大多数初级玩家还是对于闪灯敬而远之。
究其原因,主要是过强的光照容易带来巨大的光比和画面失真。
不过,这种闪光失真是可以通过特定的拍摄技巧来减轻的,首先,笔者就为大家介绍三种常见的闪光灯方法。
产品:50D佳能数码相机各取所需:详解三种闪光灯位·各取所需:详解三种闪光灯位首先是大家最常见的直射式闪光灯方式。
在新闻里,我们经常看到记者在拍照的时候使用弯曲的闪光灯拍照。
显而易见,将闪光灯灯泡正对着拍摄者的头,白光一闪,整个会场都亮了一下。
这种直射式闪光灯拍摄方式能最大范围利用到闪光灯所发出的光芒,当然也能产生最大的光比,造成最明显的阴影,以及拥有让被摄者“瞬间致盲”的功效……最常见的直射式灯位相对于直射式来说,比较“温和”的闪光方式为垂直式,简单的说就是把闪光灯立起来拍!这种方法利用天花板反射光来实现照明,可以让光线变得比较柔,同时相对不怎么晃眼。
不过如果天花板距离地面太高,又或者您的闪光灯“劲儿”不够大,这种方法并不适合!实用的垂直式灯位最后我们来说反射式闪光灯。
这种闪光方式是比较特殊,首先将闪光灯灯头指向镜头后方,利用相机后面的物体(比如墙壁)将闪光灯发出的光线进行二次反射获得柔和自然的光源。
可以想象,这样所获得的光线比垂直式闪光方法所获得的光更加柔和自然,而对于诸位闪光灯功率的要求和环境的要求也更苛刻。
画质优先的反射式灯位三种闪光灯方式,看起来很容易理解,听起来也比较抽象,下面我们就通过实际拍摄来对比它们的效果。

As photographers we're always looking for perfect light.And yet, the quality of available light isn't always ideal.It is rarely perfect. But I feel that in using flash wisely, I'm able to enhance or over-ride the available light.作为摄影者总是追求完美的光线,但是现场可用光的质量却并非总是尽如人意。
可以说光线完美的情况是少之又少。
但是合理的利用闪光灯你就能够加强甚至覆盖现场的可用光。
With careful use of flash, I am more in control of light, and hence the way my photos will look - than if I had just accepted the existing ambient light.合理的使用闪光灯你就会对光线的控制更加自如,使你的照片比不用闪光灯时更加耐看。
Instead of waiting for perfect light, I use what I have ...and add flash to make the best of the situation.因此,与其等待好光线出现不如利用你现有的东西---用闪光灯创造出最后的拍摄条件。
A few things we need to get out of the way first :事先要交待几点:- These pages were originally written to help other photographers who struggle with on-camera flash. But it was also written as a reaction against the snobbery of the purists who insist on using available light only - even when it looks terrible.这篇文章是写给那些使用外闪的人看的,当然也是写给即使现场光很差也不肯用闪灯的顽固派看的。
内置闪光灯使用技巧内置闪光灯使用技巧一、合理设置并注意检查数码相机的闪光模式各种类型的数码相机,一般都内置了闪光灯,而且不少机型还可以外接闪光灯,因此,数码相机上一定会有个闪光模式的设置,通常至少包括3种基本方式:“自动、强制闪光、无闪光”,且多数相机会另加1-2种特殊模式:“防红眼、慢速”之一或全部,在操作方式上一般是有一个按键就可以控制,少数机型要配合菜单选择某些模式,使用前要仔细查看一下。
另外,数码相机都有休眠模式,当从休眠唤醒时或者关机后又开机时,闪光模式可能会改变,不同的机型有不同的缺省模式,不一定都能记忆上次调好的状态,部分机型甚至在切换“浏览/拍摄”状态之后也会发生闪光状态的改变,最常犯的毛病之一就是按下快门后忽然发现闪光方式不对只好重来,所以,拍摄前一定要留意检查一下。
二、需要考虑用闪光灯的场合以下场合一般是要用闪光灯的,除非有后面“禁用”那条中所述的情景,否则不要犹豫。
1.没有灯光,或者灯光昏暗,拍摄对象亮度不足的时候,比如晚上拍夜景人物照。
2.逆光、侧逆光拍摄,拍摄对象与背景的亮度反差较大的时候。
比如阳光从人的后面照过来的时候,不打闪光灯则人物会很黑。
3.画面中同时有发光物体和不发光物体的时候,比如电视机屏幕,如果不用闪光灯则只能看到屏幕画面而电视外壳却是漆黑的。
4.拍摄对象不同部位亮度严重不均匀的时候,使用闪光灯可以让物体亮度均匀。
三、不要用闪光灯的场合以下场合一般应考虑关闭闪光灯。
1.超出闪光灯作用范围,且无法通过调整距离进入这个有效范围的场合。
白天一般不超过2米,晚上不要超过3米,才有好的效果,否则用不用都一样不会有理想效果,某些相机闪光灯比较强的例外,参考其说明书吧。
2.在昏暗的场合,如果拍摄对象的背景是大面积发光的场合,比如大家去海底世界,穿过海底隧道拍水下世界的时候,又比如彩色的音乐喷泉,用了闪光灯反而漆黑一团,此时用通过曝光补偿来解决。
这么大范围的喷泉,用闪光灯是没有用的,什么都看不见了不用闪光灯,提高曝光时间才能获得理想效果3.物体过近时,比如在15厘米以内近拍的时候一般不用闪光灯,否则物体表面亮度会不太均匀,某些部位可能曝光过度。
闪光灯的专业使用方法一般而言,使用闪光灯拍摄照片是一种无奈的选择,不是在不得已的情况下,大多数人都不愿意使用闪光灯拍摄(特别是机身自带的弹起式闪光灯)。
但是,如果你拥有一款专用闪光灯设备(如尼康SB-800或佳能580EXⅡ),并能很好地运用它,你就可以获得同样专业品质的摄影效果。
下面我们就来探讨一下闪光灯的专业使用方法。
第一,让闪光灯脱离相机,改变光线的方向。
固定在相机上的闪光灯直打在被摄体上的光是没有立体感的,这也是人们讨厌使用闪光灯的原因之一。
但是,如果你能把闪光灯从相机上移开,创建一个你认为满意的方向性光源,就可以获得更惹人喜爱、更专业的效果,从而提升你的图片的立体感和深度。
分离相机和闪光灯的方法之一就是使用闪光灯同步线,用同步线把相机和闪光灯连起来,你就可以用左手手持闪光灯高高举起,向下朝向被摄体,这样就有了像太阳光一样打在被摄物体上的定向侧光,进而获得专业品质的理想效果。
如果你使用的是尼康或佳能的单反相机,那么它们具有的无线闪光功能,会为你创造方向性光源提供更加方便的条件,你只需在相机上作一些设定,就可以在无线状态下,随意使用闪光灯。
至于怎样设定无线闪光功能,我会在以后的文章中介绍(你也可查阅或下载相关说明书进行了解)。
第二,使用慢速快门,提升背景清晰度。
室内使用闪光灯,往往是主体看起来很刺眼,而背景却非常黑暗,因而照片看起来很丑陋。
如果能使闪光灯与室内可用光线混合,被摄体后面的背景就会变得非常自然。
这种技巧就叫做“慢速快门”。
首先,相机设置为程序模式(P),然后对准被摄体半按快门,查看取景器,读取光圈和快门速度数值并记住它。
之后,再将相机切换到手动模式(M),并拨到刚才记住的那两个数值,如果相机显示快门速度是1∕60秒,那么,使用慢速快门就把它降到1∕15秒后拍摄。
你不必担心被摄体会模糊,因为闪光灯启动时会锁定被摄体,而被摄体的背景会因为长时间曝光而得到与主体相一致的混合效果。
第三,为闪光灯增加柔光罩,使光线变得柔和。
数码相机闪光灯有什么使用技巧摄影的艺术是光影的艺术,光与影组成了摄影最基本的元素,但是自然光并不是完美的,它井不能出现在每一个需要照射的地方,我们可以通过使用闪光灯便更自如控制拍摄现场的光线,通过组合闪光灯和自然光,创作更靓丽优秀的人像作品。
下面是小编为大家精心推荐闪光灯的一些使用技巧,希望能够对您有所帮助。
闪光灯使用技巧自动闪光通常,傻瓜相机(使用胶卷)与数码相机在不做任何设定变动的时候,闪光灯模式都预设在“自动闪光”模式下。
此时,相机会自动判断拍摄场景的光线是否充足。
如果不足,就会自动在拍摄时打开闪光灯进行闪光,以弥补光线。
我们大部分的拍摄,“自动闪光”模式都足以应付。
消除红眼“红眼”现象在拍摄人像照片(尤其是比较近的距离、环境较阴暗)时常会发生。
这是由于眼睛视网膜反射闪光而引起的。
如果你不想让拍摄出来的人或动物的眼睛出现“红眼”,可以利用数码相机的“消除红眼”模式先让闪光灯快速闪烁一次或数次,使人的瞳孔适应之后,再进行主要的闪光与拍摄。
关闭闪光(强制不闪光)顾名思义,就是强迫数码相机关闭闪光灯。
不管拍摄环境的光线条件如何,都不准闪光。
此功能最适宜于静止使用闪光灯的地方进行拍摄。
如笔者就曾经利用此功能在峨眉山万年寺拍摄金佛、在故宫拍摄“龙珠”。
此外,借助此功能在黄昏或弱光环境更能营造出自然的拍摄气氛。
强制闪光也就是“关闭闪光”的相反,即不管在明亮或弱光的环境中,都开启闪光灯进行闪光。
通常用在对背对光源的人物进行拍摄。
因为拍摄人物时,如果主体处于背光位置(如拍摄一间光线黑暗的房屋中的人物,主体背对着明亮的窗户),主体的正面就会处于阴影中看不清楚。
此时可借助此功能,在闪光灯的有效覆盖范围内拍摄到主体受光均匀的照片。
慢速同步闪光在光线昏暗的环境下拍照时,如果使用闪光灯加较高的快门速度进行拍摄,很容易造成前景主体太亮,甚至是白晃晃的一片,而背景却依旧灰暗,无法辨别细节。
而“慢速闪光同步”会延迟数码相机的快门释放速度,以闪光灯照明前景,配合慢速快门(如1/5秒)为弱光背景曝光。
内置闪光灯使用技巧随着智能手机的普及,内置闪光灯的使用也变得越来越常见,能够在光线较暗的环境下提供足够的光源。
但是,很多人在使用闪光灯时并不得心应手,导致拍摄效果不尽如人意。
下面是一些内置闪光灯使用的技巧,希望能给你带来帮助。
1. 正确的角度:许多人在使用闪光灯时都把它直接对准被拍摄物体,这样会导致照片过度曝光,且光线不均匀。
正确的做法是将闪光灯抬高到相机镜头的一边,或者使用一个反射板将闪光灯的光线引导到被拍摄物体上,以减少直接照射的光线。
2. 防止红眼:红眼是指在使用闪光灯时,被拍摄人物的瞳孔反射红光的现象。
要避免红眼,可以在拍摄前让被拍摄人物进行适当的休息,或者使用手机相机设置中的红眼降低功能来减少红眼的发生。
3. 近距离拍摄:内置闪光灯的功率有限,只适用于近距离拍摄。
如果你需要拍摄远距离的物体,最好使用外置闪光灯,或者调节相机的ISO值和快门速度来增加光线。
4. 光线均匀:内置闪光灯的光线往往不均匀,会导致照片中明暗两极分化。
要解决这个问题,可以使用一个软光罩或者反射板来扩散闪光灯的光线,使得光线更加柔和均匀。
5. 调节闪光灯强度:很多手机相机都有闪光灯强度调节的功能,可以根据拍摄环境的光线情况来调节闪光灯的强度。
如果环境光线比较暗,可以增加闪光灯的强度;如果环境光线比较亮,可以减小闪光灯的强度。
6. 室内拍摄:在室内拍摄时,如果只使用闪光灯会让照片看起来非常刻板和不自然。
可以尝试在室内利用环境光和闪光灯相结合的方式,调整白平衡,并保持相机的稳定,这样才能拍摄出清晰自然的照片。
7. 不必仅依赖闪光灯:在光线比较暗的环境下,闪光灯并不是唯一的选择。
可以尝试在闪光灯的帮助下使用架设支承设备或调整相机的快门速度、ISO值等来增加光线,或者寻找有足够光源的位置进行拍摄。
在使用内置闪光灯时,要注意不要长时间连续使用,以免过热或损坏。
另外,在夜间或者低光条件下,使用闪光灯也容易吸引注意,打扰到他人。
因此,在使用内置闪光灯时应当注意场合和礼仪。