G-BOOK新服务操作指南(网络地图接收服务)
- 格式:pdf
- 大小:916.38 KB
- 文档页数:4
车载GPS导航仪使用说明书尊敬的用户,欢迎您购买并使用我们的车载GPS导航仪。
本使用说明书将为您提供详细的操作指南,以帮助您正确使用导航仪并获得最佳的导航体验。
一、产品概述车载GPS导航仪是一种基于全球定位系统(GPS)技术的导航设备。
它结合了卫星定位、地图数据库和导航软件,能够为您提供准确的车辆位置信息、路线规划以及导航指引等功能。
我们的产品具有以下特点:1.高精度定位:通过接收卫星信号,导航仪能够实时准确地定位您的车辆,提供精准的导航服务。
2.多功能导航:除了常规的驾车导航功能外,导航仪还提供步行、骑行等多种导航模式,并支持POI(兴趣点)搜索、线路规划等功能。
3.智能语音提示:导航仪内置语音合成技术,能够实时播报导航指引,让您无需分心看屏幕,更加安全便捷地进行导航。
二、使用方法1.前期准备在第一次使用前,请确保您已经将导航仪的电源充满,并正确插入车载支架。
您还需要安装地图数据,可通过我们提供的软件或者在线下载的方式进行。
2.开机与关机长按开关键一秒钟,导航仪即可开机启动。
在正常使用过程中,您可以通过点击界面上的关机按钮进行关闭。
3.地图操作使用触摸屏幕或者外部键盘进行地图操作。
您可以通过手势缩放、平移等方式调整地图显示区域。
另外,点击地图上的兴趣点或者目的地图标,即可进行相关操作,如导航规划、查看详细信息等。
4.导航设置导航仪提供了丰富的导航设置选项,您可以根据个人需求进行调整。
例如,您可以选择偏好路线、避开拥堵、设置声音提示等。
5.语音指引导航仪通过内置扬声器进行语音指引。
在导航过程中,您会听到详细的导航提示,包括转向指示、距离提示等。
您还可以根据需要调整音量大小或者关闭语音指引。
6.兴趣点搜索导航仪允许您搜索周边的兴趣点,如餐馆、加油站、酒店等。
您可以直接在搜索框中输入关键词,系统会为您提供相关的搜索结果,并进行导航到达。
三、常见问题与解答1.为什么导航仪无法定位?请确保导航仪在开放的区域使用,避免遮挡。
NXNX200/NX300/NX300h锐与智,成就不套路我走的路,可能和别人想象的不是同一条路。
外观04内室 10性能 16安全 26服务300102如果路上的景致都千篇一律,那就太单调了。
幸好总会有一些特立独行的美,来打破俗套的沉闷。
03外观| 04钻石切割外观设计,锐不可当突破式纺锤形进气格栅,尽情释放凌厉气势*锐利耀目的L 型矩阵式LED 前大灯,L 型日间行车灯与立体尾灯锋芒毕露时尚硬朗轮毂,更添个性风范*部分车型配备,敬请参阅标准装备与技术参数表详情。
对NX 而言,锋芒是一种珍贵的品质,一种与生俱来、且融入血脉的品格。
这种品格在对于美的理解上有独到而犀利的观点,当你凝视它那动人心魄、与众不同的外观时,一切不言而明。
0506车身尾部设计,宽绰大气*非接触式电动行李箱背门,人性化智能的体现*超大全景天窗,尽情仰望天空*部分车型配备,敬请参阅标准装备与技术参数表详情。
当千人一面的城市中闪过一个与众不同的背影,那无疑便是NX 。
宽厚的车身尾部配以锋锐设计自显不凡气势,在从容进退之间,时刻动人心魄。
图片仅展示此功能,具体车型配置以实车为准。
0708身体与思想都在路上,在旅程中丰富内心的宽度与温度。
09内室| 10开阔的内部空间和储物空间,用尺度决定了气度*体贴的后排座椅加热,让舒适也可以分享高品质座椅,将舒适提升新层级*部分车型配备,敬请参阅标准装备与技术参数表详情。
格局与享受之间必须要做取舍么?NX 或许可以给你一个不一样的答案。
跨入座舱那一刻,便可尽情在舒适宽阔的空间中放纵天性,随心驾控。
此内饰为NX300h F SPORT 专属内饰,具体车型配置请以实车为准。
1112中控台设计,流畅线条动感十足全新多媒体系统,打造灵敏而有质感的操作体验触控式Remote Touch 信息操作系统,指尖轻动掌控全局*Mark Levinson ®高级音响系统,美妙音质如身临其境*车载无线充电,方便快捷触摸式车内照明,开启照明触手可及多功能方向盘及仪表盘,释放纯粹驾趣*部分车型配备,敬请参阅标准装备与技术参数表详情。

Gdrive使用教程contents •Gdrive简介与注册•Gdrive界面与基本操作•在线协作与共享功能介绍•存储空间管理与优化建议•安全性保障措施及隐私保护策略•常见问题解答与客服支持途径目录01Gdrive简介与注册Gdrive是什么Gdrive,全称为Google Drive ,是Google提供的一项云存储服务。
它允许用户将文件存储在Google的服务器上,并可以通过互联网访问这些文件。
Gdrive还提供了同步功能,可以将文件同步到多个设备上,方便用户随时随地访问和共享文件。
提供多种存储方案,满足不同用户的存储需求。
大容量存储支持Windows 、Mac 、iOS 、Android 等多个平台,实现文件跨平台同步。
跨平台同步支持多人在线同时编辑文档、表格等,提高团队协作效率。
在线协作支持全文搜索和图片识别搜索,快速定位所需文件。
强大的搜索功能Gdrive 功能特点注册流程及注意事项注册流程访问Google官网,点击“GoogleDrive”进入注册页面,填写相关信息并创建账户。
注意事项确保提供的注册信息真实有效,并妥善保管账户密码;遵守Google的服务条款和政策规定,不得上传违法、涉黄、涉暴等不良内容。
02Gdrive界面与基本操作主界面布局包括菜单栏、左侧导航栏、文件列表和右侧详情栏。
菜单栏功能提供文件操作、共享、搜索和帮助等功能选项。
左侧导航栏显示我的云端硬盘、共享云端硬盘、最近使用和星标等快捷方式。
文件列表与排序展示云端硬盘中的文件和文件夹,支持按名称、日期等排序。
登录后界面概览文件上传、下载和分享方法上传文件通过拖拽或点击上传按钮,将本地文件上传至云端硬盘。
下载文件选中需要下载的文件,点击下载按钮即可将文件保存到本地。
分享文件右键点击文件,选择“共享”选项,设置共享权限并发送共享链接。
文件夹创建与管理技巧创建文件夹在文件列表中右键点击,选择“新建文件夹”并命名。
文件夹重命名与移动选中文件夹,点击右键进行重命名或移动到其他文件夹。
北京超星数字文献服务V3。
0用户手册北京世纪超星2007年12月目录目录 (2)1、系统简介 (4)2、使用流程 (4)3、超星阅览器4.0版本下载与安装 (4)3。
1、超星阅览器4.0版本下载 (4)3。
2、超星阅览器4。
0版本安装 (4)4、数字文献服务V3。
0功能 (7)4。
1图书检索 (7)4.1.1分类检索 (7)4.1.2快速检索 (8)4。
1.3高级检索 (9)4。
1.4进入读秀检索 (12)4.2图书阅读 (13)4.3图书排行 (13)4。
3。
1首页图书排行 (13)4.3。
2图书排行菜单 (14)4。
4图书推荐 (15)4。
4.1专业推荐图书 (16)4。
4。
2教师推荐图书 (17)4.5反馈需求 (17)4.6书签 (18)4。
6。
1设置书签 (18)4。
6.2书签管理 (19)4.7公告及FAQ (20)4。
7。
1公告 (21)4。
7.2 FAQ (22)5、超星4。
0版本阅览器使用说明 (23)5.1下载与安装 (23)5.2启动和设置 (23)5.2.1如何启动超星阅览器 (23)5。
2。
2个性化设置 (24)5。
3用户注册 (26)5。
3.1新用户注册 (26)5.3。
2用户登陆 (28)5。
3.3离线登陆 (29)5。
4资源列表 (31)5.4。
1我的图书馆 (31)5。
4.2图书馆模版 (32)5。
4.3卡片显示方式 (33)5.5图书阅读 (34)5.5。
1翻页工具 (34)5.5.2缩放工具 (34)5。
5.3其他工具 (34)5.6图书下载 (35)5.7图书打印 (36)5。
8其他功能 (37)5。
8.1采集 (37)5。
8。
2多窗口 (40)5.8.3历史 (40)5。
8.4标注 (42)6、常见问题 (44)6.1如何阅读电子图书 (44)6.2超星阅览器3。
91为什么不能阅读图书 (44)6。
3下载图书时一直提示进度为0% (45)6.4下载的图书如何拷贝到其他机器上阅读 (45)6.5访问时提示需要输入用户名、密码 (45)6。

用户指南摘要本指南提供有关组件、网络连接、电源管理、安全性和备份等相关信息。
法律信息©Copyright 2022 HP Development Company, L.P.Bluetooth 是其所有人所拥有的商标,HP Inc. 已取得授权使用。
Intel、Celeron、Pentium 和 Thunderbolt 是 Intel Corporation 或其子公司在美国和/或其他国家/地区的商标。
Windows 是 Microsoft Corporation 在美国和/或其他国家/地区的注册商标或商标。
USB Type-C® 和 USB-C® 是 USB Implementers Forum 的注册商标。
DisplayPort™ 和 DisplayPort™ 徽标是 Video Electronics Standards Association (VESA) 在美国和其他国家/地区所有的商标。
Miracast® 和 Wi-Fi 是 Wi-Fi Alliance 的注册商标。
本文所含信息如有更改,恕不另行通知。
HP 产品和服务附带的明示保修声明中阐明了此类产品和服务的全部保修服务。
本文档中的任何内容均不构成任何额外保修。
HP 对本文档中出现的技术错误、编辑错误或遗漏之处不承担任何责任。
第一版:2022 年 4 月文档部件号:N05204-AA1产品通知本指南介绍大多数产品共有的功能。
您的计算机上可能未提供某些功能。
并非所有功能在所有 Windows 版本中都可用。
系统可能需要升级和/或单独购买硬件、驱动程序、软件或 BIOS 更新,才能充分利用Windows 功能。
Windows 会自动更新,此功能始终处于启用状态。
需要高速互联网和Microsoft 帐户。
可能会收取 ISP 费用,在更新过程中可能还会有其他要求。
请参阅。
如果您的产品出厂随附 S 模式的 Windows:S 模式的Windows 仅适用于来自 Windows 的 MicrosoftStore 中的应用。
ESES200/ES260/ES300h当优雅与动感,在此水乳相融,光华不落俗世。
浑然间,见美学新境!以上所示图片仅供参考,中国区销售的具体车型配置,请以实车为准。
03外观| 04凝结在每一个细节之处的温婉典雅,是一种可被沉淀的美。
从前脸造型直至流线身形,全新ES别出心裁的灵感,始终创造着令人屏息凝神的美学观。
*矩阵式LED远近光照明大灯,熠熠生辉夺人眼目。
流线型侧身腰线,写意间尽展气宇轩昂。
*18英寸降噪轮毂设计,尽情尽兴间尽享优雅从容。
*部分车型配备,敬请参阅标准装备与技术参数表详情。
以上所示图片仅供参考,中国区销售的具体车型配置,请以实车为准。
0506美是安静的,亦是流动的,在不拘泥、不故步自封之间,完成潮流的突破而自成一格。
行锋芒之势的设计理念,让全新ES在行走之中彰显非凡魄力,令人怦然心动。
外后视镜撞色设计,满足个性审美。
*前LED流水式转向灯与全LED尾灯交相辉映,整体灵感协调统一。
车尾隐藏式排气设计,隐小节,重大局,推动时代潮流。
*部分车型配备,敬请参阅标准装备与技术参数表详情。
以上所示图片仅供参考,中国区销售的具体车型配置,请以实车为准。
0708当悦然心动,融合平和静谧,驾乘皆随心所欲。
自在其间,享从容新境。
以匠心造诣,雕琢豪华宁静之境,每一程都是养心之旅。
置身于匠心之作里,感受时光的奢华与静默。
全新ES 用时间潜心雕琢空间细节,令驾驭者无论行走何方,亦可自取一片宁静格局。
*ANC 主动降噪科技、*Hybrid Acoustics TM 混合动力降噪系统、*双层降噪玻璃,提供多方位静谧体验。
**半苯胺高级真皮座椅,甄选上等牛皮,细心缝制,彰显以心至诚的待客之道。
*Shimamoku 至臻木纹饰板或*竹饰板,尽显东方儒雅尊贵。
*部分车型配备,敬请参阅标准装备与技术参数表详情。
**仅指座椅与乘客人体接触的主要部分的材料。
部分车型配备,敬请参阅标准装备与技术参数表详情。
以上所示图片仅供参考,中国区销售的具体车型配置,请以实车为准。
用户指南Lenovo ThinkBook13s Gen2和Lenovo ThinkBook14s Gen2用前必读使用本文档及其支持的产品之前,请务必先阅读和了解以下信息:•第29页附录A“重要安全信息”•《安全与保修指南》•《设置指南》第一版(2020年9月)©Copyright Lenovo2020.有限权利声明:如果数据或软件依照美国总务署(GSA)合同提供,其使用、复制或公开受编号为GS-35F-05925的合同的条款的约束。
目录关于本指南 (iii)第1章了解计算机 (1)前视图 (1)底座视图 (2)左视图 (3)右视图 (4)底视图 (5)功能部件和规格 (6)USB传输速率声明 (7)运行环境 (8)第2章开始使用您的计算机 (9)Windows10入门 (9)Windows帐户 (9)Windows桌面 (10)Lenovo Vantage和联想电脑管家 (11)连接到Wi-Fi网络 (11)忽略Wi-Fi网络 (12)打开或关闭飞行模式 (12)Novo按钮菜单 (12)打开Novo按钮菜单 (12)与计算机交互 (12)键盘热键 (12)使用多点触控式屏幕 (13)第3章了解您的计算机 (17)管理电源 (17)检查电池状态 (17)为电池充电 (17)检查电池温度 (17)设置电源按钮行为 (17)更改或创建电源计划 (17)设置性能模式 (18)更改UEFI/BIOS Setup Utility中的设置..18 UEFI/BIOS Setup Utility是什么 (18)打开UEFI/BIOS Setup Utility (18)更改启动顺序 (18)更改Hotkey Mode (18)启用或禁用Always-on (19)启用或禁用Flip to Boot (19)在UEFI/BIOS Setup Utility中设置密码..19密码类型 (19)设置管理员密码 (19)更改或删除管理员密码 (20)设置用户密码 (20)启用开机密码 (20)设置硬盘密码 (21)更改或删除硬盘密码 (21)重置或还原Windows (21)Windows10恢复选项 (21)Windows系统还原 (22)重置Windows (22)创建恢复驱动器 (23)使用恢复驱动器还原或重置Windows (23)第4章帮助和支持 (25)常见问题 (25)自助资源 (25)CRU是什么? (26)您的产品型号适用的CRU (26)致电Lenovo (27)联系Lenovo之前 (27)Lenovo客户支持中心 (27)购买附加服务 (28)附录A重要安全信息 (29)附录B辅助功能和人体工程学信息 (39)附录C合规性信息 (43)附录D声明和商标 (57)©Copyright Lenovo2020iii用户指南关于本指南•本指南适用于下面列出的Lenovo产品型号。
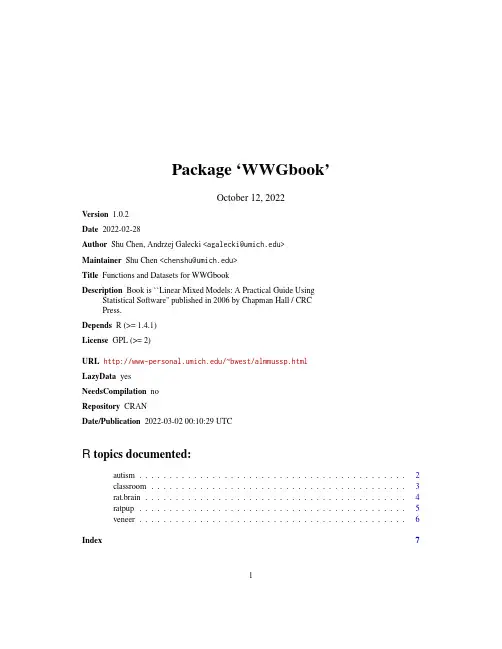
Package‘WWGbook’October12,2022Version1.0.2Date2022-02-28Author Shu Chen,Andrzej Galecki<******************>Maintainer Shu Chen<*****************>Title Functions and Datasets for WWGbookDescription Book is``Linear Mixed Models:A Practical Guide UsingStatistical Software''published in2006by Chapman Hall/CRCPress.Depends R(>=1.4.1)License GPL(>=2)URL /~bwest/almmussp.htmlLazyData yesNeedsCompilation noRepository CRANDate/Publication2022-03-0200:10:29UTCR topics documented:autism (2)classroom (3)rat.brain (4)ratpup (5)veneer (6)Index712autism autism autism data in Chapter6DescriptionThe data comes from researchers at the University of Michigan as part of a prospective longitudinal study of214children.Usagedata(autism)FormatA data frame with612observations on the following4variables.age:Age in years(2,3,5,9,13);the time variablevsae:Vineland Socialization Age Equivalent:parent-reported socialization,the dependent vari-able measured at each agesicdegp:Sequenced Inventory of Communication Development Expressive Group:categorized expressive language score at age2years(1=Low,2=Medium,3=High) childid:Unique child identifierReferencesOti,R.,Anderson,D.,Risi,S.,Pickles,A.&Lord,C.,Social Trajectories Among Individuals with Autism Spectrum Disorders,Developmental Psychopathology(under review),2006.West,B.,Welch,K.&Galecki,A,Linear Mixed Models:A Practical Guide Using Statistical Software,Chapman Hall/CRC Press,first edition,2006.Examplesattach(autism)sicdegp.f<-factor(sicdegp)age.f<-factor(age)detach(autism)#Add the new variables to a new data frame object.autism.updated<-data.frame(autism,sicdegp.f,age.f)dim(autism.updated)names(autism.updated)classroom3 classroom classroom data in Chapter4DescriptionThe Study of Instructional Improvement(SII;Hill,Rowan,and Ball,2004)was carried out by researchers at the University of Michigan to study the math achievement scores offirst-and third-grade students in randomly selected classrooms from a national U.S.sample of elementary schools. Usagedata(classroom)FormatA data frame with1190observations on the following12variables.sex:Indicator variable(0=boys,1=girls)minority:Indicator variable(0=non-minority students,1=minority students)mathkind:Student math score in the spring of their kindergarten yearmathgain:Student gain in math achievement score from the spring of kindergarten to the spring offirst grade(the dependent variable)ses:Student socioeconomic statusyearstea:First grade teacher years of teaching experiencemathknow:First grade teacher mathematics content knowledge:based on a scale based composed of30items(higher values indicate higher content knowledge)housepov:Percentage of households in the neighborhood of the school below the poverty level mathprep:First grade teacher mathematics preparation:number of mathematics content and methods coursesclassid:Classroom ID numberschoolid:School ID numberchildid:Student ID numberReferencesHill,H.C.,Rowan,B.,and Ball,D.L.(In Press).Effect of Teacher’s Mathematical Knowledge for Teaching on Student Achievement,American Educational Research Journal,Learning Mathematics for Teaching(LMT)Project.West,B.,Welch,K.&Galecki,A,Linear Mixed Models:A Practical Guide Using Statistical Software,Chapman Hall/CRC Press,first edition,2006.4rat.brain Examplesattach(classroom)####Boxplots for Figure4.2classroom.first8<-classroom[classroom$schoolid<=8,]par(mfrow=c(4,2))for(i in1:8){boxplot(classroom.first8$mathgain[classroom.first8$schoolid==i]~classroom.first8$classid[classroom.first8$schoolid==i],ylab="Mathgain",xlab="classid")} rat.brain rat.brain data in Chapter5DescriptionThe data used in this example were originally reported by Douglas,et al.(2004).The aim of their experiment was to examine nucleotide activation(guanine nucleotide bonding)in seven different brain nuclei(i.e.,brain regions)amongfive adult male rats.Usagedata(rat.brain)FormatA data frame with30observations on the following4variables.animal:Unique identifier for each rattreatment:Level of drug treatment(1=Basal,2=Carbachol)region:Brain nucleus(1=BST,2=LS,3=VDB)activate:Nucleotide activation(the dependent variable)ReferencesDouglas,C.L.,Demarco,G.J.,Baghdoyan,H.A.,and Lydic,R,Pontine and basal forebrain cholin-ergic interaction:implications for sleep and breathing,Respiratory Physiology and Neurobiology, 143,251,2004.West,B.,Welch,K.&Galecki,A,Linear Mixed Models:A Practical Guide Using Statistical Software,Chapman Hall/CRC Press,first edition,2006.ratpup5Examplesattach(rat.brain)region.f<-regionregion.f[region==1]<-1region.f[region==2]<-2region.f[region==3]<-0region.f<-factor(region.f)treat<-treatmenttreat[treatment==1]<-0treat[treatment==2]<-1treat<-factor(treat)detach(rat.brain)rat.brain<-data.frame(rat.brain,region.f,treat)str(rat.brain)ratpup ratpup data in Chapter3DescriptionThe data come from a study in which30female rats were randomly assigned to receive one of three doses(High,Low,or Control)of an experimental compound.Usagedata(ratpup)FormatA data frame with322observations on the following6variables.pup.id:Unique identifier for each rat pupweight:Birth weight of the rat pup(the dependent variable)sex:Sex of the rat pup(Male,Female)litter:Litter ID numberlitsize:Litter size(i.e.,number of pups per litter)treatment:Dose level of the experimental compound assigned to the litter(High,Low,Control) ReferencesPinheiro,J.C.and Bates,D.M.,Mixed-effects models in S and S-PLUS,Springer-Verlag Inc., Berlin,New York,2000.West,B.,Welch,K.&Galecki,A,Linear Mixed Models:A Practical Guide Using Statistical Software,Chapman Hall/CRC Press,first edition,2006.Examplesstr(ratpup)6veneer veneer veneer data in Chapter7DescriptionThe Dental Veneer data were collected by researchers at the University of Michigan Dental School, in a study investigating the impact of veneer placement on subsequent gingival(gum)health among adult patients(Ocampo,2005).Usagedata(veneer)FormatA data frame with110observations on the following7variables.patient:Patient ID variable(Level3ID)tooth:Tooth number(Level2ID)age:Age of patient when veneer was placed,constant for all observations on the same patient base.gcf:Baseline measure of Gingival Crevicular Fluid for the tooth,constant for all observations on the same toothcda:Average contour difference in the tooth after veneer placement,constant for all observations on the same toothtime:Time points of longitudinal measures(3=Three Months,6=Six Months)gcf:Gingival Crevicular Fluid adjacent to the tooth,collected at each time point(Dependent Variable)ReferencesOcampo,J.,Data taken from M.S.Thesis,Effect of Porcelain Laminate Contour on Gingival In-flammation,University of Michigan School of Dentistry,2005West,B.,Welch,K.&Galecki,A,Linear Mixed Models:A Practical Guide Using Statistical Software,Chapman Hall/CRC Press,first edition,2006.Examplesstr(veneer)Index∗datasetsautism,2classroom,3rat.brain,4ratpup,5veneer,6autism,2classroom,3rat.brain,4ratpup,5veneer,67。
G-BOOK图形交通信息服务操作指南一、服务简介:以往的交通信息服务是通过地图上的不同颜色的线条来表示道路拥堵状况。
当前我们即将推出的新服务是通过下面描述的两种图形来更直观的表示实时交通信息。
(a) 表示城市主要道路拥堵情况的城市全域图;(通过手动操作导航仪界面来使用服务)(b)车辆行驶中时表示行进方向周围拥堵情况的交通信息图;(车辆行驶到既定地点图形自动弹出)二、特点:和以往的通过导航地图上不同颜色的线条来表示道路拥堵状况的方法相比,新服务有以下特点:◇用图形的形式更直观形象的描述道路实时拥堵状况;◇部分路段可以预测到下一个路口的所需时间等,信息量更加丰富;三、详细:◇该服务目前先在北京,上海推出,在下半年将会扩大到广州,深圳;◇该交通信息为实时数据,每5分钟更新一次;◇对于在本服务正式提供前已经开通G-BOOK服务的用户,需要进行“初期设定”。
◇本服务使用前,需要进行“设定默认城市”的操作。
(a) 城市全域图(图例)北京全域图例上海全域图例(b)车辆行驶中自动弹出图(图例)四、操作流程说明:①点击“主菜单”②点击“ ”④点击“下载必要的⑦回到“信息”页面,确认是否出现新图标“交通信息”③点击“G-BOOK 智能副驾合同信息”⑤等待数据更新⑥面出现新图标“交通信息”之后,通过操作图标欢迎进入下一步的“默认城市”设定操作。
5.1、初期设定:①点击“交通信息”如图示将北京设置为“默认城市”,您可随即在行车途中得到北京市内“自动弹出图”及通过手动操作得到北京市内“道路全域图”信息,欢迎您的使用。
⑥服务初始化设定完成5.2、设定默认城市:②点击“设定”③点”④点击“北京”(以北京为例)⑤系统正在初始化①点击“交通信息”您可通过点击操作得到默认城市内不同区域的“道路全域图”信息。
如果您同时希望临时了解其它城市的道路全域信息,通过点击“选择城市”即刻可以得到您所需的信息,欢迎您的使用。
5.3、服务使用操作:点击“城市内快速路”④显示北京的“城市内快速路”画面②点击“道路全域图”③点击“选择城市”④点击“上海”⑤选择“城市内快速路”⑥显示上海的“城市内快速路”画面①点击“交通信息”如果您希望长期使用默认城市之外的其它城市的图形交通信息时,您可通过点击操作进行服务城市的变更。
用户指南Lenovo ThinkBook15p Gen2i用前必读使用本文档及其支持的产品之前,请务必先阅读和了解以下信息:•《常规安全与合规性声明》•《安全与保修指南》•《设置指南》第一版(2021年9月)©Copyright Lenovo2021.有限权利声明:如果数据或软件依照美国总务署(GSA)合同提供,其使用、复制或公开受编号为GS-35F-05925的合同的条款的约束。
目录关于本指南 (iii)第1章了解计算机 (1)前视图 (1)底座视图 (2)左视图 (3)右视图 (4)底视图 (5)功能部件和规格 (6)USB传输速率声明 (7)运行环境 (7)避免身体持续接触特定的发热部分 (8)第2章开始使用您的计算机 (9)使用Windows (9)Windows帮助信息 (9)Lenovo Vantage和联想电脑管家 (10)Novo按钮菜单 (10)打开Novo按钮菜单 (10)与计算机交互 (11)键盘热键 (11)数字小键盘 (12)第3章了解您的计算机 (13)管理电源 (13)检查电池状态 (13)为电池充电 (13)通过USB-C接口提供功率输入 (13)设置电源按钮行为 (14)电源计划 (14)设置性能模式 (15)更改UEFI/BIOS Setup Utility中的设置..15 UEFI/BIOS Setup Utility是什么 (15)打开UEFI/BIOS Setup Utility (15)更改启动顺序 (15)在UEFI/BIOS Setup Utility中设置密码..15密码类型 (15)设置管理员密码 (16)更改或删除管理员密码 (16)设置用户密码 (17)启用开机密码 (17)设置硬盘密码 (17)更改或删除硬盘密码 (17)第4章帮助和支持 (19)常见问题 (19)自助资源 (19)CRU是什么? (20)您的产品型号适用的CRU (20)致电Lenovo (21)联系Lenovo之前 (21)Lenovo客户支持中心 (21)购买附加服务 (22)附录A声明和商标 (23)©Copyright Lenovo2021iii用户指南关于本指南•本指南适用于下面列出的Lenovo产品型号。