显示仪表
- 格式:doc
- 大小:358.81 KB
- 文档页数:19

车辆组合仪表显示原理一、什么是车辆组合仪表?你开车的时候,看到那个挡风玻璃下方的仪表盘没有?对,就是那个时刻告诉你车况的小“闹钟”——车速、油量、发动机温度,甚至是行驶里程,全都一目了然。
这个叫做“车辆组合仪表”,名字有点长,不知道你是不是觉得有点复杂,其实它就像车子里的“健康监测仪”一样,帮助你实时了解车子的状况。
如果没有它,你还真不知道什么时候油快没了,发动机是不是在冒火,或者轮胎是不是没气。
车辆组合仪表的工作原理并不神秘,了解了它,你会发现它不仅是车上的“眼睛”,还是车主的“好伙伴”呢。
二、车辆组合仪表是怎么显示信息的?话不多说,我们来深入聊聊车辆组合仪表是怎么“出奇不意”地给我们展示一堆信息的。
组合仪表的显示原理简单得很,但它背后的技术可一点也不简单。
咱们可以把仪表盘分成两个部分,一部分是机械的,另一部分是电子的。
机械的嘛,主要是靠指针在表盘上转,像我们常见的车速表、油量表,都是这个类型。
你看,车速表上的指针,动起来的时候,给你一种非常直观的感觉,好像它在“为你奔跑”一样。
油量表也是,指针指向哪,油就差不多多少了,开车时你不看油量的话,突然油量告急,那可就麻烦了!但是,随着科技的发展,电子显示仪表逐渐流行开来。
像现在许多高端车,仪表盘基本上就是一块电子屏,显示内容直接通过电子信号来控制,能显示出各种各样的信息:车速、发动机转速、行驶模式、甚至还有导航信息,一切都在这块屏幕上瞬间切换。
三、组合仪表背后到底有啥黑科技?说到这里,你可能会好奇,车辆组合仪表到底是怎么知道这些信息的?别急,接下来就给你揭个“小秘密”。
组合仪表通过一堆传感器,实时收集车身的各类数据。
比如说车速,是通过车轮的转速来判断的;油量,得靠油箱里的油位传感器来测量;发动机温度,当然是通过发动机的温度传感器来反馈啦。
这些传感器每时每刻都在默默工作,把收集到的数据传送给车载电脑。
然后,这些数据就会被计算、处理,最后通过机械指针或者电子屏幕,反馈到你的仪表盘上。
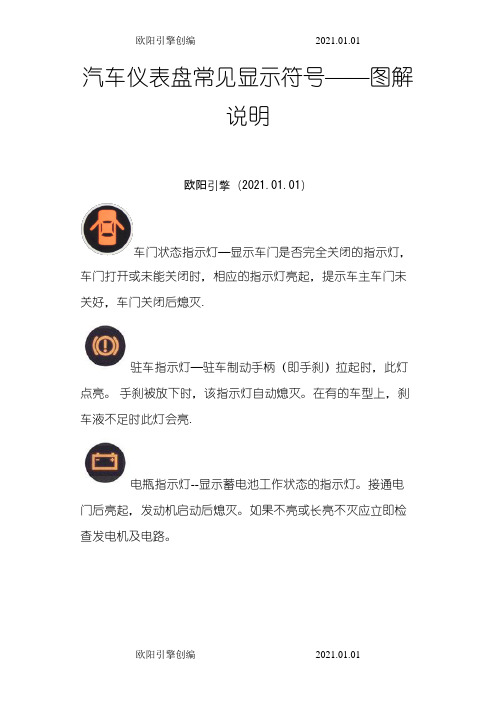
汽车仪表盘常见显示符号——图解说明欧阳引擎(2021.01.01)车门状态指示灯—显示车门是否完全关闭的指示灯,车门打开或未能关闭时,相应的指示灯亮起,提示车主车门未关好,车门关闭后熄灭.驻车指示灯—驻车制动手柄(即手刹)拉起时,此灯点亮。
手刹被放下时,该指示灯自动熄灭。
在有的车型上,刹车液不足时此灯会亮.电瓶指示灯--显示蓄电池工作状态的指示灯。
接通电门后亮起,发动机启动后熄灭。
如果不亮或长亮不灭应立即检查发电机及电路。
刹车盘指示灯--显示刹车盘片磨损情况的指示灯。
正常情况下此灯熄灭,点亮时提示车主应及时更换故障或磨损过渡刹车片,修复后熄灭。
机油指示灯--显示发动机机油压力的指示灯,本灯亮起时表示润滑系统失去压力,可能有渗漏,此时需立即停车关闭发动机进行检查.水温指示灯--显示发动机冷却液温度过高的指示灯,此灯点亮报警时,应即时停车并关闭发动机,待冷却至正常温度后再继续行驶.安全气囊指示灯--显示安全气囊工作状态的指示灯,接通电门后点亮,约3-4秒后熄灭,表示系统正常,不亮或常量表示系统存在故障.ABS指示灯--接通电门后点亮,约3-4秒后熄灭,表示系统正常。
不亮或长亮则表示系统故障,此时可以继续低速行驶,但应避免急刹车.发动机自检灯--发动机工作状态的指示灯,接通电门后点亮,约3-4秒后熄灭,发动机正常。
不亮或长亮表示发动机故障,需及时进行检修.燃油指示灯--提示燃油不足的指示灯,该灯亮起时,表示燃油即将耗尽,一般从该灯亮起到燃油耗尽之前,车辆还能行驶约50公里左右。
清洗液指示灯--显示风挡清洗液存量的指示灯,如果清洗液即将耗尽,该灯点亮,提示车主及时添加清洗液。
添加清洁液后,指示灯熄灭.电子油门指示灯--本灯多见于大众公司的车型中,车辆开始自检时,EPC灯会点亮数秒,随后熄灭,出现故障,本灯亮起,应及时进行检修.前后雾灯指示灯--该指示灯是用来显示前后雾灯的工作状况,前后雾灯接通时,两灯点亮,图中左侧的是前雾灯显示,右侧为后雾灯显示.转向指示灯--转向灯亮时,相应的转向灯按一定频率闪烁。

汽车仪表盘指示灯及开关符号说明一、汽车仪表盘图解1综合显示屏1.1车外温度表:显示车外温度,在综合显示屏上用数字显示这一信息。
1.2瞬时油耗表:显示车辆某一瞬间油耗情况,单位是升/百公里L/100Km。
不少车型已经采用综合显示屏显示油耗,并能换算出余油尚能行驶的里程数。
1.3自动挡挡位显示:用于指示自动档档位。
不同车型的显示方法不同,有的使用指示灯配合图形,有的则通过显示屏直接显示。
2转速表:反映发动机转速的仪表,通常设置在仪表板内,与车速里程表对称地放置在一起。
驾驶员可以通过该表了解发动机的运转情况。
3车速里程表3.1速度表:显示的是汽车的时速,公制单位是公里/小时Km/h。
传统的车速表是机械式的,现在很多轿车仪表已经装备了使用传感器的电子车速表3.2里程表:它是记录车辆行驶里程的仪表,多整合在速度表内。
3.3小计里程表:记录车辆某一段行驶里程的仪表,多与里程表整合在一起,能够随时清零。
它能帮助车主掌握某段路程的长短以及计算油耗等。
二、仪表板显示符号及说明车门状态指示灯—显示车门是否完全关闭的指示灯,车门打开或未能关闭时,相应的指示灯亮起,提示车主车门未关好,车门关闭后熄灭.驻车指示灯—驻车制动手柄(即手刹)拉起时,此灯点亮。
手刹被放下时,该指示灯自动熄灭。
在有的车型上,刹车液不足时此灯会亮电瓶指示灯--显示蓄电池工作状态的指示灯。
接通电门后亮起,发动机启动后熄灭。
如果不亮或长亮不灭应立即检查发电机及电路。
刹车盘指示灯--显示刹车盘片磨损情况的指示灯。
正常情况下此灯熄灭,点亮时提示车主应及时更换故障或磨损过渡刹车片,修复后熄灭。
机油指示灯--显示发动机机油压力的指示灯,本灯亮起时表示润滑系统失去压力,可能有渗漏,此时需立即停车关闭发动机进行检查.水温指示灯--显示发动机冷却液温度过高的指示灯,此灯点亮报警时,应即时停车并关闭发动机,待冷却至正常温度后再继续行驶. 安全气囊指示灯--显示安全气囊工作状态的指示灯,接通电门后点亮,约3-4 秒后熄灭,表示系统正常,不亮或常量表示系统存在故障.ABS 指示灯--接通电门后点亮,约3-4 秒后熄灭,表示系统正常。

汽车仪表盘指⽰灯⼤全(图解)现在的汽车越造越好,车上仪表盘的指⽰灯也是越来越复杂,这个是什么指⽰灯,灯亮了该怎么办?指⽰灯虽然复杂,但是指⽰灯准确认知仪表盘上的图标可以带给⼴⼤车主很多实惠。
在这⾥,⼩编为⼤家介绍⼀下⽐较常见的指⽰灯及其含义,希望对⼴⼤车主会有帮助 汽车仪表盘指⽰灯⼤全(图解) 汽车仪表盘指⽰灯详解1、车辆基本情况提⽰标识平常常见的并最常使⽤的图标有:车门提⽰、⼿刹提⽰、安全带提⽰、发动机⾃检、润滑油情况检查、ABS系统检查、安全⽓囊检查、蓄电池提⽰以及燃油量提⽰这么⼏种。
另外,还有⼀些标识是因为相关车型仪表盘设计的原因⽽产⽣的,⽐如说⽔温显⽰标识,在北京现代⽼款悦动、东风⽇产骊威等没有⽔温表的车型上,这些标识就充当显⽰车辆⽔温是否正常的功能,⼀般情况下,蓝⾊和绿⾊表⽰⽔温低,红⾊表⽰⽔温⾼,不显⽰任何颜⾊表⽰⽔温合适。
刚才在说常⽤标识的时候提到了安全带未系提⽰标识,⽽有些对安全要求⽐较⾼的车型,⽐如东风标致408会分开提醒主、副驾驶位置的⼈安全带是否系好安全带。
车辆基本信息提⽰标识异常点亮可能代表的故障标识可能的故障情况⼿刹提⽰⼿刹没有放下;刹车⽚/盘磨损到极限发动机⾃检燃油系统故障;点⽕系统故障;排放系统故障润滑油检查润滑系统故障ABS系统检测ABS传感器故障安全⽓囊检测安全⽓囊传感器故障蓄电池检测蓄电池没电;电池系统故障⽔温表显⽰成红⾊标识⽔温过⾼;蓝⾊、绿⾊⽔温过低助⼒系统转向助⼒系统故障2、灯光信息提⽰标识在仪表盘中除了刚才提⽰的⼀些关于车辆安全⽅⾯的标识外,还有⼀部分也是⾮常重要的,它的存在甚⾄关系我们驾车的安全,那就是灯光提⽰标识。
不过这⾥也需要提醒您⼀下,如果看到仪表盘上灯光表⽰亮起的时候可能实际上相应的灯光没有亮,因此就需要我们在使⽤的过程中勤检查灯光是否正常,因为特别是在夜间开车,没有灯光、甚⾄不正确使⽤灯光都会有交通事故的隐患存在。
说到这⾥也请各位车主朋友能够在合适的时间恰当的使⽤车辆灯光,⽐如夜间就要开车灯;远光灯尽量不要长时间开启等,错误的使⽤车辆灯光可能会给⾃⼰以及车辆造成不必要的⿇烦。

仪表指示灯大全驻车指示灯 电瓶指示灯 刹车盘指示灯 机油指示灯 水温指示灯 安全气囊指示灯 ABS 指示灯 发动机自检灯驻车制动手柄(即手刹)拉起时,此灯点亮。
手刹被放下时,该指示灯自动熄灭。
在有的车型上,刹车液不足时此灯会亮。
显示蓄电池工作状态的指示灯。
接通电门后亮起,发动机启动后熄灭。
如果不亮或长亮不灭应立即检查发电机及电路。
显示刹车盘片磨损情况的指示灯。
正常情况下此灯熄灭,点亮时提示车主应及时更换故障或磨损过渡刹车片,修复后熄灭。
显示发动机机油压力的指示灯,本灯亮起时表示润滑系统失去压力,可能有渗漏,此时需立即停车关闭发动机进行检查。
显示发动机冷却液温度过高的指示灯,此灯点亮报警时,应即时停车并关闭发动机,待冷却至正常温度后再继续行驶。
显示安全气囊工作状态的指示灯,接通电门后点亮,约3-4秒后熄灭,表示系统正常,不亮或常量表示系统存在故障。
接通电门后点亮,约3-4秒后熄灭,表示系统正常。
不亮或长亮则表示系统故障,此时可以继续低速行驶,但应避免急刹车。
发动机工作状态的指示灯,接通电门后点亮,约3-4秒后熄灭,发动机正常。
不亮或长亮表示发动机故障,需及时进行检修。
燃油指示灯 车门状态指示灯 清洗液指示灯 电子油门指示灯 前后雾灯指示灯 转向指示灯 远光指示灯 安全带指示灯提示燃油不足的指示灯,该灯亮起时,表示燃油即将耗尽,一般从该灯亮起到燃油耗尽之前,车辆还能行驶约50公里左右。
显示车门是否完全关闭的指示灯,车门打开或未能关闭时,相应的指示灯亮起,提示车主车门未关好,车门关闭后熄灭。
显示风挡清洗液存量的指示灯,如果清洗液即将耗尽,该灯点亮,提示车主及时添加清洗液。
添加清洁液后,指示灯熄灭。
本灯多见于大众公司的车型中,车辆开始自检时,EPC 灯会点亮数秒,随后熄灭,出现故障,本灯亮起,应及时进行检修。
该指示灯是用来显示前后雾灯的工作状况,前后雾灯接通时,两灯点亮,图中左侧的是前雾灯显示,右侧为后雾灯显示。
1.短接热电偶信号输入端,室温显示过高或过低
造成这类故障主要有以下两种原因:
(1)仪表内部冷端补偿参数的设置过大或过小,导致仪表接信号输入时出现故障。
(2)当参数设置正常时,则可能是重点补偿电路三极管9014损坏。
2.仪表工作时,测量值无规律跳变
(1)温度传感器接线处虚连或测量端开焊(测量桥路正常)。
(2)仪表受到震动、噪声、磁场等干扰产生此故障。
解决办法:使信号输入端远离动力线或感性负载,不要与动力线平行架设,应适当接地、屏蔽等。
(3)确认无干扰源,则A/D转换器ICL7135CN损坏。
(4)以上3项均正常,则单片机AT89C55内部程序混乱。
艾驰商城是国内最专业的MRO工业品网购平台,正品现货、优势价格、迅捷配送,是一站式采购的工业品商城!具有 10年工业用品电子商务领域研究,以强大的信息通道建设的优势,以及依托线下贸易交易市场在工业用品行业上游供应链的整合能力,为广大的用户提供了传感器、图尔克传感器、变频器、断路器、继电器、PLC、工控机、仪器仪表、气缸、五金工具、伺服电机、劳保用品等一系列自动化的工控产品。
如需进一步了解相关仪器仪表产品的选型,报价,采购,参数,图片,批发等信息,请关注艾驰商城。
ABS指示灯O/D挡指示灯 该指示灯用来显示自动档的O/D挡(Over-Drive)超速挡的工作状态,当O/D挡指示灯闪亮,说明O/D挡已锁止。
此时加速能力获得提升,但会增加油耗。
内循环指示灯该指示灯是用来显示车辆空调系统的工作状态,平时为熄灭状态。
当点亮内循环按钮,车辆关闭外循环,空调系统进入内循环状态时,该指示灯自动点亮。
内循环关闭时熄灭。
该指示灯是用来显示车辆示宽灯的工作状态,平时为熄灭状态,当示宽灯打开时,该指示灯随即点亮。
当示宽灯关闭或者关闭示宽灯打开大灯时,该指示灯自动熄灭。
该指示灯是用来显示车辆VSC(电子车身稳定系统)的工作状态,多出现在日系车上。
当该指示灯点亮时,说明VSC系统已被关闭。
该指示灯是用来显示车辆转向灯所在的位置。
通常为熄灭状态。
当车主点亮转向灯时,该指示灯会同时点亮相应方向的转向指示灯,转向灯熄灭后,该指示灯自动熄灭。
远光指示灯 该指示灯是用来显示车辆远光灯的状态。
通常的情况下该指示灯为熄灭状态。
当车主点亮远光灯时,该指示灯会同时点亮,以提示车主,车辆的远光灯处于开启状态。
安全带指示灯该指示灯用来显示安全带是否处于锁止状态,当该灯点亮时,说明安全带没有及时的扣紧。
有些车型会有相应的提示音。
当安全带被及时扣紧后,该指示灯自动熄灭。
雾灯指示灯 该指示灯是用来显示前后雾灯的工作状况,当前后雾灯点亮时,该指示灯相应的标志就会点亮。
关闭雾灯后,相应的指示灯熄灭。
转向指示灯该指示灯用来显示车辆各车门状况,任意车门未关上,或者未关好,该指示灯都有点亮相应的车门指示灯,提示车主车门未关好,当车门关闭或关好时,相应车门指示灯熄灭。
清洗液指示灯 该指示灯是用来显示车辆所装玻璃清洁液的多少,平时为熄灭状态,该指示灯点亮时,说明车辆所装载玻璃清洁液已不足,需添加玻璃清洁液。
添加玻璃清洁液后,指示灯熄灭电子油门灯常见于大众品牌车型中。
打开钥匙门,车辆开始自检时,EPC灯会点亮数秒,随后熄灭。
%0: *URXS $IWHUVDOHV7UDLQLQJ( 'LVSOD\V DQG &RQWUROV 3DUWLFLSDQW 0DQXDONOTEThe information contained in this participant's manual is intended for participants of the Aftersales Training.Refer to the relevant "BMW Service" information for any changes/ supplements to the Technical Data.© 2003 BMW AGMünchen, Germany. Reprints of this manual or its partsrequire the written approval of BMW AG, MünchenVS-12/VS-42 MFP-HGK-BRK-E63_1100ContentsPage CHAP 1Displays and Controls1 Condition Based Service (CBS)8- Block diagram8US instrument cluster9Central Information Display (CID)10Components11Head-up display32System overview33- Input/Output35- System circuit diagram37Components39- Head-up display42- Display area of head-up display50- Control elements52- Adjusting HUD brightness53Service information54ConnectedService58Condition Based Service (CBS)59TeleService167Displays and ControlsThis participant's manual describes the display and control design for the new BMW 6 Series. It is divided into the following sections:-Instrument cluster (changes compared to E60)-Central Information Display (changes compared to E60)-Head-up display-ConnectedService (changes compared to E60).Instrument clusterAll driving-related displays in the instrument cluster have been further optimized.In the E63, the road speed is now displayed in the form of a detailed scale.Furthermore, the economy control is replaced by the oil temperature gauge.Central Information DisplayThe Central Information Display is the graphic display unit for the user interface of all convenience functions and some vehicle functions.By contrast with the E65,the CID in the E63has just four menu items in the global main menu, namely Communication, Navigation, Enter-tainment and Climate.There are two versions of the controller for the E63,a basic variant and a High variant.The basic variant is only installed in conjunction with the mid-size 6.5" colour display.Head-up displayFor the first time at BMW, a head-up display is used in the E60/E63.This display shows important information in the driver's direct field of vision. A projection unit integrated in the instrument cluster generates the virtual image and projects it onto the windscreen.Corresponding to the vehicle equipment configuration, information on the navigation system, cruise control, active cruise control, the current road speed as well as check control warning messages is displayed. ConnectedServiceConnectedService is made up of several modules; some of these are already in use while others have been further developed or introduced for the first time with the launch of the E60 and E63.For instance,ease of servicing has been improved thanks to expanded or modified service options in the Condition Based Service (CBS) system.The logical continuation of the innovative service concept is demon-strated by the new display functions, the service reception module, SAM 2, and the introduction of T eleService 1.A detailed description of all T eleService functions and associated appli-cation examples can be found in a training and information program (SIP).Instrument clusterOn the E63, the road speed is now displayed in the form of a detailed scale and the economy control is replaced by the oil temperaturegauge.The scales on the instrument cluster are specific to each country,vehicle and engine.KT-12082Fig. 1:E60 and E63 Instrument clusterDisplay areasThe instrument cluster is divided into the following display areas: -Instrument dials-Indicator and warning lamps-LC display-Program and gear displays for automatic gearbox and SMG Sequential Manual GearboxKT-12082Fig. 2:Display areas in the instrument cluster E60 and E63Instrument dialsThe instrument cluster includes the following dials:-Speedometer-Rev counter-Fuel gauge-Fuel consumption (economy) indicator-Oil temperature gauge (E63 only)KT-10883Fig. 3:Instrument dials E60Index Explanation1Set speed for cruise control system2Speedometer E603Rev counter4Rev counter speed warning zone5Economy control (oil temperature gauge on E63)6Fuel gaugeEngine speed warning zoneThe maximum engine speed warning display is indicated by the rev counter as a function of engine temperature.The following table lists the main engine speed warning zones:Engine variant Petrol engine Diesel engineStart of variable warning zone4200 rpm3500 rpmEnd of variable warning zone6300 rpm4800 rpmStart of fixed warning zone6500 rpm5000 rpmEnd of fixed warning zone7000 rpm5500 rpmKT-11231Fig. 4:Rev counter warning zones for petrol engines E63Index Explanation1Start of variable warning zone2End of variable warning zone3Start of fixed warning zone4End of fixed warning zoneOil temperature gaugeOn the E63, the economy control is replaced by the oil temperaturegauge.The DME control unit makes available the value indicated in the instrument cluster via the PT-CAN and K-CAN.KT-12048Fig. 5:Oil temperature gauge E63Condition Based Service (CBS)- Block diagramAll information that the CBS system requires is sent on the K-CAN bus.The instrument cluster is a subscriber on the K-CAN and acts as theCBS master control unit.The CBS requests from all the control units are therefore sent via theK-CAN to the instrument cluster and to the Central Information Display.KT-11135Fig. 6:Block diagram of the Condition Based Service (CBS)US instrument clusterThe main difference between the US version and the one for EU LHD vehicles is the speed scale, which on the US version is shown in both mph (miles per hour) and in km/h (kilometres per hour).There are also differences in the program and gear display in theinstrument cluster, depending on which transmission is installed.The program and gear display is only used on vehicles with automatic gearboxes or SMG sequential manual gearboxes.KT-11197Fig. 7:Instrument cluster E63, USA versionThere are also differences in the indicator and warning lamps:-The general brake warning light symbol is replaced by the word BRAKE-The indicator lamp for the rear fog lights is not activated-The check engine symbol is replaced by SERVICE ENGINE SOONCentral Information Display (CID)The CID is the graphic display unit for the user interface of the navigation, audio, climate control and communications systems. Unlike the E65, the CID has just four items in the main menu. It has therefore been adapted to the level of optional equipment for the E60 and E63.As on the E65, it is operated from the central control element, the controller.ComponentsThe Central Information Display (CID) comprises the following compo-nents:-LC display-Controller-Displays in the CIDLC displayIn order to cope with the various equipment specifications, the following variants are used for the E60/E63:-CID Mid with 6.5" colour LCD (400 x 240 pixels)-CID High with 8.8" colour LCD (640 x 240 pixels)The LCD also features a help windowThe casing is designed to be able to accommodate all screen variants offered.The entire Central Information Display assembly is fixed to the dashboard by two screws.KT-12191Fig. 8:Central Information Display E60 and E63Index Explanation1 6.5" Mid colour LCD CID28.8" High colour LCD CIDDisplays in the Central Information DisplayThe 6.5" colour LC display, with a resolution of 400 x 240 pixels (width x height), is divided into a display zone and a status bar.The main menu display comprises the following four menu items:-Communication-Navigation-Entertainment-ClimateThe four menu items are displayed in a cross pattern on the Central Information Display corresponding to the four main directions in which the controller can be moved.In addition to these four main menu items, there is a fifth menu item used exclusively for individual user settings. The screen can also be switched on and off from this menu.The menu can be called up by pressing the controller.The following diagram is a schematic representation showing how the controller and the display of the individual menus on the Central Infor-mation Display interact.All screen shots shown are derived from a simulation of a version with featuring a 6.5" Mid colour LC display and correspond to the status at the time of going to press.Further changes are possible to the contents and the layout.KT-11531Fig. 9:User interface of the Central Information Display for the E60 and E63Status barThe status bar displays the main information on the various functions, such as the telephone signal strength or the time; this information is permanently displayed after Ignition ON.KT-11511Fig. 10:CID status barIndex Explanation1Automatic air conditioning system activated2Audio source activated3TMC (T raffic Message Channel) activated4Unread text message (SMS)5T elephone signal strength6TimeCOMMUNICATION menuIn this menu, entries in the telephone directory can be displayed and sorted according to various criteria. Here too, the user can query his SMS (Short Message Service) for incoming text messages or display any calls that were not answered.This menu also contains the BMW services such as BMW Assist and BMW Online. Certain services are only available to customers after appropriate authorization.In another menu bar, information about BMW Service and general traffic information can be called up and an emergency call made.The main menu is activated as soon as terminal 15 is on.Slide the controller forwards, the Communication menu will appear. The following functions are available to the user:-First menu bar:The Phone,SMS,BMW ASSIST,BMW Online and Notepad functions can be selected from the first menu bar.Each menu item is linked with further entries or information. If, for example, BMW Assist is activated, further entries can be made or additional information can be called up.-Second menu bar:Once, for example, the menu item BMW ASSIST has been selected and activated, the second menu bar, BMW Info opens.Messages and information, e.g. about dates for your BMW Service, are listed in this bar and can then be selected.Each message is linked with further entries or information.KT-12331Fig. 11:COMMUNICATION menuIndex Explanation1First menu bar- Phone, SMS (Short Message Service)- BMW ASSIST, BMW Online, Notebook 2Second menu bar, e.g. of BMW ASSIST- BMW Info, T raffic information, Information Plus- BMW Services- Emergency callNAVIGATION menuThis menu provides access to all functions necessary to operate the navigation system. The on-board computer can also be selected from this menu item.Certain services are relevant to specific equipment and are only available to customers after appropriate authorization. For example, on the 6.5" monochrome display, route guidance is shown in the form of an arrow display.The main menu is activated as soon as terminal 15 is on.Slide the controller to the right, the Navigation menu will appear.If the navigation function is activated in the main menu, the user will have the following functions available:-First menu bar:The Navigation,On-board info,Address book and Traffic information functions can be selected from the first menu bar.Each menu item is linked with further entries or information.If, for example, Navigation is activated, the usual entries such as Address input, Guidance, Route selection and Map display can be made.-Second menu bar:Once, for example, the On-board info menu item has been selected and activated, the second menu bar, Computer opens.The Computer,Journey computer,Limit and Stopwatch functions can be selected from this bar.Each menu item is linked with further entries or information.KT-11522Fig. 12:Navigation menuIndex Explanation1First menu bar- Navigation- On-board info- Address book- T raffic information2Second menu bar, e.g. On-board info- Computer, Journey computer- Limit- StopwatchENTERTAINMENT menuThe Entertainment menu is a frequently used function.Certain services are relevant to specific equipment and are only available to customers after appropriate authorization.The main menu is activated as soon as terminal 15 is on.Slide the controller back, the Entertainment menu will appear.-First menu bar:The functions FM/AM, Satellite radio, CD, MD, TV, Videotext, DVD and AUX can be selected from the first menu bar.Each menu item is linked with further entries or information.-Second menu bar:Once, for example, the FM menu item has been selected andactivated, the cursor skips to Set.Sliding the controller forwards will open the second menu bar and Manual frequency selection will be highlighted.The functions All stations,Autostore and Memorised stations can also be selected from this bar.Each menu item is linked with further entries or information.KT-11523Fig. 13:Entertainment menuIndex Explanation1First menu bar- FM/AM waveband, Satellite radio, CD, MD- TV, Videotext, DVD, AUX2Second menu bar- Manual frequency selection, All stations, Autostore, Memorised stationsAdjusting the toneThe following tone settings can be selected for tone and sound repro-duction:-Treble: amplifying or weakening the higher sounds-Bass: amplifying or weakening the lower sounds-Left/right volume distribution (balance)-Back/front volume distribution (fader)-Speed-sensitive volume control (speed volume)-LOGIC7 spatial sound effect-Frequency range (equalizer)-Central settings (reset)Once a waveband has been highlighted and activated in the first menu bar, the second menu bar opens and Set is highlighted.Pressing the controller will open another window from which the T one function has to be selected and activated.It is also possible to set the tone via the Entertainment settings menu.KT-12067Fig. 14:T one settings menuIndex Explanation1First menu bar- Audio/video2Second menu bar- T reble/bass, Balance/fader, Speed-sensitive volume, Equalizer- LOGIC7 room acoustics- ResetTV settingsThe picture quality can also be set from the tone and sound repro-duction menu.In the first menu bar,highlight and activate Video.Highlight a TV station, e.g.ARD, and confirm.Another menu window will open. With the controller, highlight Settings and confirm. A second menu with the functions Brightness, Colour, Contrast, TV standard and Reset will appear.Each menu item is linked with further entries or information.It is also possible to set the picture quality via the Entertainment settings menu.KT-11526Fig. 15:TV settingsIndex Explanation1First menu bar- Audio/video2Second menu bar- Brightness, Colour, Contrast, TV standard, ResetCLIMATE menuLike on the E65 the expanded air conditioning functions such as mixture control and independent heating can be selected and activated from the Central Information Display.The main menu is activated as soon as terminal 15 is on.Slide the controller to the left, the Climate menu will appear.-First menu bar:The Air distribution, Seat-heating distribution and Automatic heater/ ventilation functions can be selected.-Second menu bar:Once the automatic heater/ventilation menu item has been selected, the second menu bar Switch-on Times will open.The Direct operation and Switch-on times functions can be selected from this bar.Each menu item is linked with further entries or information.KT-11527Fig. 16:Climate menuIndex Explanation1First menu bar- Air distribution, Seat-heating distribution, Automatic heater/ventilation 2Second menu bar- Direct operation, Switch-on timesSETTINGS menuThe individual user settings can be performed from this menu.The main menu is activated as soon as terminal 15 is on.Press the controller, the Settings menu will appear.The following menu items can be selected:-Screen on/off-Entertainment settings-Traffic information-Display settings-Vehicle settings-Service-Communications interface-Central address bookEach menu item is linked with further entries or information. From the Vehicle settings menu, for example, further information on the vehicle systems such as Park Distance Control (PDC) can be called up.KT-12332Fig. 17:The Settings menuIndex Explanation1Vehicle settings2Second menu bar- MFL button- Progr. cruise contr.- PDC- Light and door locks settings- A/C settings- Enable- Delete dataService modeThe controller can be used to activate the Service mode functions. Service mode is a special facility which provides information about the status of the display and user control system.The function is designed for use by service technicians and is not intended to be accessible to vehicle owners.Service mode provides access to details of the hardware/software versions for the Central Information Display and the control units in the M-ASK network, for example.As an addition to the comprehensive facilities of the diagnosis system, Service mode acts as a a simple means of quickly accessing diagnostic data without the need for a diagnosis tester.Activating Service modeIn the main menu, press and hold the controller. T actile feedback will then be generated.-Turn controller 3 increments clockwise-Turn controller 3 increments anti-clockwise-Turn controller 1 increment clockwise-Turn controller 1 increment anti-clockwise-Turn controller 1 increment clockwise-Press the controller to confirm, Service mode will then appear in the CID.KT-11720Fig. 18:Service mode example: version checkIn Service mode,information on the following functions can be queried from the upper menu bar:-TV-Radio-Version check-Navigation-GPS-Sensor testT o return to the Main menu, slide the controller in any direction.Head-up displayThe HUD projects a virtual image into the driver's field of vision. Depending on the equipment installed in the vehicle, this virtual image contains information that is of relevance to the driver, such as e.g.:-Cruise control FGR-Active Cruise Control ACC-Navigation-Check Control messages-Road speedThe size of the virtual image is approx. 200mm x 100mm.Advantages of the head-up displayThe virtual image in the driver's field of vision allows the driver to concentrate more on the road ahead than previously. Driving is thus rendered less fatiguing.The driver switches his vision between e.g.the instrument cluster and road traffic less frequently.System overviewKT-11898Fig. 19:System overview of head-up displayIndex Explanation Index Explanation10Controller1Current distributor, rear,terminal30g relay2Operating unit with light switch11Instrument cluster3Light Module12Central Information Display(CID)4Active Cruise Control13Multi-audio system controllerM-ASK/car communicationcomputer CCC5Safety and Gateway14Head-up display HUD Module SGM6Digital Stability Control15HUD projection7Digital Motor Electronics byteflight byteflight8Steering column switchK-CAN Body CANcluster SZL9Rain/light sensor MOST MOST bus- Input/OutputKT-11938Fig. 20:Head-up display inputs/outputsIndex Explanation Index Explanation1Current distributor, rear8Instrument cluster9Central Information Display CID 2Head-up display switch/lightswitch3Active Cruise Control10Light Module4Digital Motor Electronics11Multi-audio system controller,car communication computer 5Steering column switch cluster12Head-up displaySZL6Rain/light sensor RLS13HUD projection7Controller CON- System circuit diagramKT-11906Fig. 21:Head-up display system schematicIndex Explanation Index Explanation1Central Information Display CID10Light Module LM2Rain/light sensor RLS11Head-up display HUD3Safety and GatewayModule SGM 12Multi-audio system controllerM-ASK/car communicationcomputer CCC4Steering column switchcluster SZL13Further components in MOST5Digital Motor Electronics DMEDigital Diesel Electronics DDEbyteflight byteflight6Active Cruise Control ACC K-CAN Body CAN7Controller CON Kl. 30T erminal 308Instrument cluster Kl.30g T erminal 30g9Head-up display switch/lightswitch MOST MOST-bus media-orientedsignal transportComponentsThe HUD is made up of the following components: -Cover glass-Mirror-LED power supply-LED array-Light well-TFT projection display-Shutter-Master board-Slave board-HousingAdditionally required components-Windscreen-Light Module-Rain/light sensor-Safety and information moduleControl elements-HUDs control buttons and light switch-Instrument-lighting dimmer-ControllerImage sourcesThe following control units supply the necessary signals for the displays:-Active cruise control ACC-Multi-audio system controller M-ASK/car communication computer CCC-Instrument cluster KOMBI-Steering column switch cluster SZL-Digital motor electronics DME/Digital diesel electronics DDELocationThe HUD is mounted above the steering column on the cross-member of the cowl panel and on the front bulkhead.The influence of vibrations when driving over cobblestones for instance is not noticeable.Brief functional descriptionThe HUD can be compared to a projection device. An LED field is required as the light source for the purpose of projecting the HUD infor-mation.The image content is created by the TFT projection display.The TFT projection display can be compared to a filter which admits or blocks light.An optical imaging element determines the shape and size of the HUD images.The image is projected onto the windscreen and appears freely suspended over the road surface.KT-11947Fig. 22:HUD operating principleIndex Explanation Index Explanation1LED array6Curved mirror2TFT projection display7Windscreen3Curved mirror8Observer's point of vision 4Curved mirror9Projected image5Plane mirror- Head-up displayExploded viewKT-11924Fig. 23:Exploded view of HUDIndex Explanation Index Explanation1HUD finisher12Light well2Cover glass13Fixture, TFT projection display 3Housing frame14TFT projection display4Curved mirror15Shutter5Plane mirror16Master board Activation of LEDs6Mounting points, front bulkhead17Housing frame7Adjusting device18Curved mirror8Curved mirror19Slave board Activation of shutter9LED power supply20Housing section10Heat sink21Housing11LED arrayMirrorThe HUD incorporates four mirrors. These mirrors reflect the displaycontent onto the windscreen. Three of the mirrors are curved. Thesemirrors adapt the display content to the screen.This mirror determines the size and distance of the HUD projection.The curved mirrors are made of plastic while the plane mirror is made of glass.The course of projection is shown in the following illustration.KT-11885Fig. 24:Course of projectionIndex Explanation Index Explanation1HUD housing5Plane mirror2Projection display6Curved mirror3Curved mirror7Plastic wedge4Curved mirror8WindscreenThe projected HUD image content appears at a distance of approx.2.2m from the eye.KT-11904Fig. 25:Projection distanceIndex Explanation Index Explanation1Head-up display3Projected image2Windscreen4Projection distanceEyeboxThe eyebox is the movement space in which the driver can movewithout his view of the image in the HUD being impaired. The freedom of movement within the eyebox is roughly:-130mm horizontally-90mm verticallyOutside the eyebox limits the image in the HUD is no longer clearlyvisible.KT-11891Fig. 26:Eyebox, shift left/rightIndex Point of vision HUD image1Point of vision inside the eyebox HUD image OK2Point of vision displaced to the left HUD image distorted to the left3Point of vision displaced to the right HUD image distorted to the right。
课程设计数字显示仪表课程设计数字压力显示仪表的制作2013年8月2日东北石油大学课程设计任务书数字显示仪表课程设计数字压力显示仪表的制作专业名称和学号主要内容:在面包板上安装一个由单个A/D转换器7107或7106组成的0-2V通用接头。
与压力传感器(应变计、扩散硅或其他类型的压力传感器)连接,制成数字压力显示仪表。
基本要求:(1)根据实验室提供的元件和材料,设计并描述电路接线图。
最后,插上面包板上显示仪表的电路。
(2)由于元件和材料的重复使用,在连接和插接过程中要小心,不要故意损坏元件。
(3)在整个课程设计中,要学会使用基本的实验仪器和工具。
(4)小心使用各组提供的万用表和工具。
如有故意损坏或丢失,照价赔偿。
参考资料:[1]张,杨惠敏.数字显示仪器课程设计指南。
大庆石油学院编写的教材,2008。
[2]李政军。
计算机控制系统[M]。
北京:机械工业出版社,2006。
[3]沙藏。
数字测量技术与应用[M]。
机械工业出版社,2004。
[4]井口招聘。
传感工程[M]。
科学出版社,2005。
竣工时间为2013年7月22日至2013年8月2日。
教师专业领导者2013年8月2日目录第1章数字显示仪表工作原理11.1数字显示仪表的基本构成11.2数字显示仪表的特点21.3信号的标准化及标度变换2第2章数显仪表设计方案4 2.1ICL7107双积分A/D转换器42.2 ICL7107的逻辑电路42.3 LED显示器62.4主要集成块、三极管7第3章数显仪表的安装8 3.1安装操作须知83.2具体安装操作8第4章结论与体会10参考文献11第一章数字显示仪表的工作原理1.1数字显示仪表的基本组成用数字显示测量值的仪器。
将测量值转换成数字量并以数字形式显示的仪器。
在工业测量中,位移、电流、电压、气压等模拟量。
由模数转换器(简称模数转换)转换成数字量。
仪表以数字形式显示测量数据,读数直观。
一般包括三部分:用刻度盘和指针指示电量、基于电磁力的测量电路、模数转换和数字显示。
显示仪表论文
课程名称: 化工仪表及自动化
专 业: **工程 组 别: 第*小组 指导老师: **
设计时间:20**年**月**日--**月**日 目录 第一节 模拟式显示仪表.............................................................................................. 4 一、自动电子电位差计......................................................................................... 4 二、自动电子平衡电桥......................................................................................... 6 三、自动电子平衡电桥与自动电子电位差计的比较......................................... 7 第二节 数字化显示仪表.............................................................................................. 8 一、数字化测量技术的发展概况:..................................................................... 8 二、数字式显示仪表的特点:............................................................................. 8 三、数字式显示仪表的类型:............................................................................. 9 四、数字式显示仪表的主要技术指标:............................................................. 9 五、数字式显示仪表的结构组成:................................................................... 10 第三节 新型显示仪表................................................................................................ 17 一、新型显示仪表概述:................................................................................... 17 二、无纸记录仪特点:....................................................................................... 17 三、虚拟显示仪表............................................................................................... 18 四、无纸记录仪和虚拟显示仪的比较:........................................................... 18 第四节 组长总结...........................................................................错误!未定义书签。 五、参考文献.............................................................................................................. 19 附录:小组成员与分工.................................................................错误!未定义书签。 摘要 本文主要根据显示仪表的三种显示类型——模拟式、数字式和屏幕显示来进行阐述。通过对三种显示仪表的组成、特点、原理、种类以及优缺点等的介绍,来让同学们更好的了解、掌握显示仪表的相关知识。 关键词:显示仪表;模拟式;数字式;屏幕显示
Abstract This article mainly according to the three kinds of display instrument display types: analog, digital and screen display, through the three kinds of display instrument, the composition, characteristics, principles, types and advantages and disadvantages of the introduction, to let the students better understand, to master the relevant knowledge. Key words: display instrument; analog; digital; screen display 第一节 模拟式显示仪表 模拟式显示仪表是自动平衡式指示记录仪表,有电子电位差计和电子自动平衡电桥两类。这两类仪表都是根据自动平衡的原理工作,具有测量精度较高、工作比较可靠的优点。
一、自动电子电位差计 电子电位差计是用来测量直流电压信号,凡是能转化成毫伏级直流电压信号的工艺变量都能用它测量。在电动单元组合仪表中,如温度、压力、流量、液位等变送器可以和电子电位计相配套,用来指示相应的变量。电子电位差计属于自动平衡显示仪表,它是利用补偿原理进行测量的。它又是一种能够连续显示和记录被测量参数变化情况的自动化仪表,如将它配用不同的变送器,就可以测量不同的参量,因而在工业上得到了广泛应用。 1.手动电位差计 手动电位差计是根据平衡法(补偿法、零值法)将被测电势与已知的标准电势相比较,当两者的差值为0时,被测电势即等于已知的标准电势。但是,手动电位差计的测量过程十分缓慢,自始自终需要人工参与,经常要调滑线电阻的滑动触点以找出新的平衡位置。操作较为麻烦,添加相应组件,采取相应措施,结合电子应用技术和不断发展,产生自动电子电位差计。 2.自动电子电位差计的工作原理 电子电位差计的原理框图如图1所示。热电偶输人的直流电势与测量桥路中的电势相比较,比较后的差值电压经电子放大器放大后输出,该值的大小足以驱动可逆电机,使可逆电机带动和滑线电阻相接触的滑臂进行移动,从而改变滑线电阻的阻值,使测量桥路的电势与热电偶产生的热电势平衡。当被测温度变化使热电偶产生新的热电势时,桥路又有新的不平衡电压输出,再经放大器放大后,又驱动可逆电机转动,再次改变滑臂的位置,直到达到新的平衡为止。在滑臂移动的同时,与它相连的指针和记录笔沿着有温度分度的标尺和记录纸运动。滑臂的每一平衡位置相对应于有温度分度的标尺和记录纸上的一定坐标数值,因此能自动指示和记录出相应的温度。当温度到达给定值后,还可以通过附加的调节机构来实现对温度的自动控制。
图1 电子电位差计原理框图 3.自动电子电位差计的测量桥路 在自动电子电位差计测量的实际应用中,存在两个问题。 (1)冷端温度补偿问题 在实际应用中,热电偶冷端温度常常不是0℃,而是室温,此时,热电偶输出的热电势就会减少,相应的温度指示也要减小,会造成测量误差,因此需要在电子电位差计原理图增加一条支路以达到温度补偿的目的。 (2)量程匹配问题 当滑动触点处于滑线电阻的起点时,电压应相应于温度为标尺下限的热电势,而仪表的标尺下限有很多规格,为了满足这一要求,在上支路上接入一个电阻,该电阻越大,在下限时的电压越大,即测量下限越高。反之亦然。 XW系列电位差计测量桥路(如图2)包括R2铜电阻(装在仪表后接板上以使其和热电偶冷端处于同一温度);下支路限流电阻R3(它与R2配合,保证了下支路回路的工作电流为2mv);上支路限流电阻R4(把上支路的工作电流限定在4mA);滑线电阻RP(仪表的示值误差、记录误差、变差、灵敏度以及仪表运行的平滑性等都和滑线电阻的优劣有关);量程电阻RM(决定仪表量程大小的电阻);始端(下限)电阻RG(大小取决于测量下限的高低)。自动电子电位差计由测量桥路、放大器、可逆电机、指示机构、记录机构组成。 图2 XW系列电位差计测量桥路原理图 4.自动电子电位差计的结构 电子电位差计尽管型号品种不同,但其测量原理和基本结构基本相似,如图1所示。它由热电偶、测量桥路、放大器、可逆电机、指示记录机构和调节机构、电源等部分组成。 (1)测量桥路 电子电位差计中的测量桥路是用来产生直流电压,使之与热电偶产生的热电势相平衡,所以它在仪表中起主要作用。它由桥臂各电阻和稳压电源组成。 (2)放大器 电子电位差计中的放大器实际上相当于一个指零仪器,它的作用是将热电偶产生的热电势与测量桥路输出的电势比较后的差值信号进行放大,按一定的比例驱动执行机构(可逆电机)动作。
二、自动电子平衡电桥 自动平衡式显示仪表, 此类仪表包括自动电位差计和自动平衡电桥。 该仪表是用于指示和记录温度、压力、真空、流量、物位等参数的。当检出元件、传感器以及变送器把上述参数转换成仪表可以接受的电量(如电压和电阻量)后,仪表即可通过对电量的测量来间接反应各种参数的变化。同样,仪表也可直接测量直流电流和电压等参数。仪表是一个由测量电路、检零放大器、伺服电机、指示记录机构和滑线电阻组成的闭环控制系统。 其原理如图3所示。被测参数经过转换后得到的被测量(电压、电阻或电流信号)输入仪表后,通过测量电路将被测信号与反映平衡量的反馈信号叠加后产