【VIP专享】JPG数据结构及与bmp的转换代码
- 格式:pdf
- 大小:269.29 KB
- 文档页数:14

8位、24位、32位图像数据转换最近调⽤⼀个⼈体检测算法,算法要求输⼊的是图⽚的BGR数据,但是拿到的数据是32位Argb数据,算法⽆法正确进⾏⼈体检测,从⽹上百度⽂库中搜到⼀个C#代码,可以进⾏转换。
⽹上的代码有点乱,整理了⼀下,记录留存。
整理后的代码如下:1class BitmapConvertHelp2 {3struct BitmapFileHeader4 {5//位图⽂件头6public UInt16 bfType;7public UInt32 bfSize;8public UInt16 bfReserved1;9public UInt16 bfReserved2;10public UInt32 bfOffBits;11 }1213struct BitmapInfoHeader14 {15//位图信息头16public UInt32 biSize;17public UInt32 biWidth;18public UInt32 biHeight;19public UInt16 biPlanes;20public UInt16 biBitCount;21public UInt32 biCompression;22public UInt32 biSizeImage;23public UInt32 biXPelsPerMeter;24public UInt32 biYPelsPerMeter;25public UInt32 biClrUsed;26public UInt32 biClrImportant;27 }2829struct RGBQUAD30 {31//位图调⾊板项32public byte rgbBlue;33public byte rgbGreen;34public byte rgbRed;35public byte rgbReserved;36 }3738private string filepath = null;//需打开的位图的路径39private string savepath = null;//转换后位图的保存路径40private BitmapFileHeader bfh;41private BitmapInfoHeader bih;4243private void Save8Bits(Bitmap bmp)44 {45//为位图⽂件头赋值46 bfh.bfOffBits = 1078;47 bfh.bfReserved1 = 0;48 bfh.bfReserved2 = 0;49 bfh.bfSize = 14;50 bfh.bfType = 19778;51//为位图信息头赋值52 bih.biBitCount = 8;53 bih.biClrImportant = 0;54 bih.biClrUsed = 0;55 bih.biCompression = 0;56 bih.biHeight = (uint)bmp.Height;57 bih.biPlanes = 1;58 bih.biSize = 40;59 bih.biSizeImage = (uint)(bmp.Height * ((bmp.Width * 8 + 31) / 32 * 4));60 bih.biWidth = (uint)bmp.Width;61 bih.biXPelsPerMeter = 0;62 bih.biYPelsPerMeter = 0;63//构造256⾊的调⾊板,⾮索引图64 RGBQUAD[] pal = new RGBQUAD[256];65for (int i = 0; i < 256; i++)66 {67 pal[i].rgbBlue = (byte)i;68 pal[i].rgbGreen = (byte)i;69 pal[i].rgbRed = (byte)i;70 pal[i].rgbReserved = 0;71 }72 FileInfo f = new FileInfo(savepath);73using (BinaryWriter bw = new BinaryWriter(f.OpenWrite()))74 {75//写⼊⽂件头76 bw.Write(bfh.bfType);77 bw.Write(bfh.bfSize);78 bw.Write(bfh.bfReserved1);79 bw.Write(bfh.bfReserved2);80 bw.Write(bfh.bfOffBits);81//写⼊信息头82 bw.Write(bih.biSize);83 bw.Write(bih.biWidth);84 bw.Write(bih.biHeight);85 bw.Write(bih.biPlanes);86 bw.Write(bih.biBitCount);87 bw.Write(bih.biCompression);88 bw.Write(bih.biSizeImage);89 bw.Write(bih.biXPelsPerMeter);90 bw.Write(bih.biYPelsPerMeter);91 bw.Write(bih.biClrUsed);92 bw.Write(bih.biClrImportant);93//写⼊调⾊板94for (int i = 0; i < 256; i++)95 {96 bw.Write(pal[i].rgbBlue);97 bw.Write(pal[i].rgbGreen);98 bw.Write(pal[i].rgbRed);99 bw.Write(pal[i].rgbReserved);100 }101//位图上下翻转102 bmp.RotateFlip(RotateFlipType.Rotate180FlipX);103 BitmapData data = bmp.LockBits(new Rectangle(0, 0, bmp.Width, bmp.Height), ImageLockMode.ReadOnly, PixelFormat.Format8bppIndexed); 104unsafe105 {106byte* ptr = (byte*)data.Scan0.ToPointer();107//位图的指针108109byte[] line = new byte[data.Stride];110//保存位图的⼀⾏111for (int i = 0; i < data.Stride; i++)112 line[i] = 0;113for (int i = 0; i < bmp.Height; i++)114 {115for (int j = 0; j < bmp.Width; j++)116 {117 line[j] = *ptr++;118 }119 ptr += data.Stride - bmp.Width;//指针跳过对齐的字节120 bw.Write(line, 0, line.Length);//写⼊位图的⼀⾏121 }122 }123 bw.Close();124 bmp.UnlockBits(data);125 }126 }127128public void Bit8To24()129 {130 Bitmap bmp8 = new Bitmap(filepath);131 BitmapData data8 = bmp8.LockBits(new Rectangle(0, 0, bmp8.Width, bmp8.Height), ImageLockMode.ReadOnly, PixelFormat.Format8bppIndexed); 132 Bitmap bmp24 = new Bitmap(bmp8.Width, bmp8.Height, PixelFormat.Format24bppRgb);133 BitmapData data24 = bmp24.LockBits(new Rectangle(0, 0, bmp24.Width, bmp24.Height), ImageLockMode.WriteOnly, PixelFormat.Format24bppRgb); 134unsafe135 {136byte* ptr8 = (byte*)data8.Scan0.ToPointer();137byte* ptr24 = (byte*)data24.Scan0.ToPointer();138for (int i = 0; i < bmp8.Height; i++)139 {140for (int j = 0; j < bmp8.Width; j++)141 {142//⽤8位位图的灰度值填充24位位图的R、G、B值143 *ptr24++ = *ptr8;144 *ptr24++ = *ptr8;145 *ptr24++ = *ptr8++;146 }147 ptr8 += data8.Stride - bmp8.Width; //跳过对齐字节148 ptr24 += data24.Stride - bmp8.Width * 3; //跳过对齐字节149 }150 }151 bmp8.UnlockBits(data8);152 bmp24.UnlockBits(data24);153 bmp24.Save(savepath);154 }155156public void Bit8To32()157 {158 Bitmap bmp8 = new Bitmap(filepath);159 BitmapData data8 = bmp8.LockBits(new Rectangle(0, 0, bmp8.Width, bmp8.Height), ImageLockMode.ReadOnly, PixelFormat.Format8bppIndexed); 160 Bitmap bmp32 = new Bitmap(bmp8.Width, bmp8.Height, PixelFormat.Format32bppArgb);161 BitmapData data32 = bmp32.LockBits(new Rectangle(0, 0, bmp32.Width, bmp32.Height), ImageLockMode.WriteOnly, PixelFormat.Format32bppArgb); 162163unsafe164 {165byte* ptr8 = (byte*)data8.Scan0.ToPointer();166byte* ptr32 = (byte*)data32.Scan0.ToPointer();167for (int i = 0; i < bmp8.Height; i++)168 {169for (int j = 0; j < bmp8.Width; j++)170 {171//⽤8位位图的灰度值,填充32位位图的RGB值,透明度为100%172 *ptr32++ = *ptr8;173 *ptr32++ = *ptr8;174 *ptr32++ = *ptr8++;175 *ptr32++ = 255;176 }177 ptr8 += data8.Stride - bmp8.Width;178 ptr32 += data32.Stride - bmp8.Width * 4;179 }180 }181 bmp8.UnlockBits(data8);182 bmp32.UnlockBits(data32);183 bmp32.Save(savepath);184 }185186public void Bit24To8()187 {188 Bitmap bmp24 = new Bitmap(filepath);189 BitmapData data24 = bmp24.LockBits(new Rectangle(0, 0, bmp24.Width, bmp24.Height), ImageLockMode.ReadOnly, PixelFormat.Format24bppRgb); 190 Bitmap bmp8 = new Bitmap(bmp24.Width, bmp24.Height, PixelFormat.Format8bppIndexed);191 BitmapData data8 = bmp8.LockBits(new Rectangle(0, 0, bmp8.Width, bmp8.Height), ImageLockMode.WriteOnly, PixelFormat.Format8bppIndexed); 192193unsafe194 {195byte* ptr24 = (byte*)data24.Scan0.ToPointer();196byte* ptr8 = (byte*)data8.Scan0.ToPointer();197for (int i = 0; i < bmp8.Height; i++)198 {199for (int j = 0; j < bmp8.Width; j++)200 {201//⽤RGB值的均值作为8位位图的灰度值202 *ptr8++=(byte)(((int)(*ptr24++)+(int)(*ptr24++)+(int)(*ptr24++))/3);203 }204 ptr24 += data24.Stride - bmp8.Width * 3;205 ptr8 += data8.Stride - bmp8.Width;206 }207 }208 bmp8.UnlockBits(data8);209 bmp24.UnlockBits(data24);210 Save8Bits(bmp8);211 }212213public void Bit32To8()214 {215 Bitmap bmp32 = new Bitmap(filepath);216 BitmapData data32 = bmp32.LockBits(new Rectangle(0, 0, bmp32.Width, bmp32.Height), ImageLockMode.ReadOnly, PixelFormat.Format32bppArgb); 217 Bitmap bmp8 = new Bitmap(bmp32.Width, bmp32.Height, PixelFormat.Format8bppIndexed);218 BitmapData data8 = bmp8.LockBits(new Rectangle(0, 0, bmp8.Width, bmp8.Height), ImageLockMode.WriteOnly, PixelFormat.Format8bppIndexed); 219unsafe220 {221byte* ptr32 = (byte*)data32.Scan0.ToPointer();222223byte* ptr8 = (byte*)data8.Scan0.ToPointer();224for (int i = 0; i < bmp8.Height; i++)225 {226for (int j = 0; j < bmp8.Width; j++)227 {228//⽤32位位图的RGB值的均值作为8位位图的灰度值229 *ptr8++ = (byte)(((int)(*ptr32++) + (int)(*ptr32++) + (int)(*ptr32++)) / 3);230 ptr32++;//跳过透明度字节231 }232 ptr32 += data32.Stride - bmp32.Width * 4;233 ptr8 += data8.Stride - bmp8.Width;234 }235 }236 bmp8.UnlockBits(data8);237 bmp32.UnlockBits(data32);238 Save8Bits(bmp8);239 }240241public void Bit32To24()242 {243 Bitmap bmp32 = new Bitmap(filepath);244 BitmapData data32 = bmp32.LockBits(new Rectangle(0, 0, bmp32.Width, bmp32.Height), ImageLockMode.ReadOnly, PixelFormat.Format32bppArgb); 245 Bitmap bmp24 = new Bitmap(bmp32.Width, bmp32.Height, PixelFormat.Format24bppRgb);246 BitmapData data24 = bmp24.LockBits(new Rectangle(0, 0, bmp24.Width, bmp24.Height), ImageLockMode.WriteOnly, PixelFormat.Format24bppRgb); 247unsafe248 {249byte* ptr32 = (byte*)data32.Scan0.ToPointer();250byte* ptr24 = (byte*)data24.Scan0.ToPointer();251for (int i = 0; i < bmp24.Height; i++)252 {253for (int j = 0; j < bmp24.Width; j++)254 {255//将32位位图的RGB值赋值给24位位图的RGB值256 *ptr24++ = *ptr32++;257 *ptr24++ = *ptr32++;258 *ptr24++ = *ptr32++;259 ptr32++;//跳过透明度字节260 }261 ptr24 += data24.Stride - bmp24.Width * 3;262 ptr32 += data32.Stride - bmp32.Width * 4;263 }264 }265 bmp32.UnlockBits(data32);266 bmp24.UnlockBits(data24);267 bmp24.Save(savepath);268 }269270public void Bit24To32()271 {272 Bitmap bmp24 = new Bitmap(filepath);273 BitmapData data24 = bmp24.LockBits(new Rectangle(0, 0, bmp24.Width, bmp24.Height), ImageLockMode.ReadOnly, PixelFormat.Format24bppRgb); 274 Bitmap bmp32 = new Bitmap(bmp24.Width, bmp24.Height, PixelFormat.Format32bppArgb);275 BitmapData data32 = bmp32.LockBits(new Rectangle(0, 0, bmp32.Width, bmp32.Height), ImageLockMode.WriteOnly, PixelFormat.Format32bppArgb); 276unsafe277 {278byte* ptr24 = (byte*)data24.Scan0.ToPointer();279byte* ptr32 = (byte*)data32.Scan0.ToPointer();280for (int i = 0; i < bmp32.Height; i++)281 {282for (int j = 0; j < bmp32.Width; j++)283 {284//将24位位图的RGB值赋值给32位位图的RGB分量285 *ptr32++ = *ptr24++;286 *ptr32++ = *ptr24++;287 *ptr32++ = *ptr24++;288 *ptr32++ = 255;//设透明度为100%289 }290 ptr24 += data24.Stride - bmp24.Width * 3;291 ptr32 += data32.Stride - bmp32.Width * 4;292 }293 }294 bmp32.UnlockBits(data32);295 bmp24.UnlockBits(data24);296 bmp32.Save(savepath);297 }298 }。

Java实现图⽚转base64字符串和图⽚互相转换⽬录Java实现图⽚转base64字符串和图⽚互相转换参考:base64编码字符串转换为图⽚,并写⼊⽂件/*** base64编码字符串转换为图⽚,并写⼊⽂件** @param imgStr base64编码字符串* @param path 图⽚路径* @return*/public static boolean base64StrToImage(String imgStr, String path) {if (imgStr == null)return false;BASE64Decoder decoder = new BASE64Decoder();try {// 解密byte[] b = decoder.decodeBuffer(imgStr);// 处理数据for (int i = 0; i < b.length; ++i) {if (b[i] < 0) {b[i] += 256;}}//⽂件夹不存在则⾃动创建File tempFile = new File(path);if (!tempFile.getParentFile().exists()) {tempFile.getParentFile().mkdirs();}OutputStream out = new FileOutputStream(tempFile);out.write(b);out.flush();out.close();return true;} catch (Exception e) {return false;}}图⽚转base64字符串/*** 图⽚转base64字符串** @param imgFile 图⽚路径* @return*/public static String imageToBase64Str(String imgFile) {InputStream inputStream = null;byte[] data = null;try {inputStream = new FileInputStream(imgFile);data = new byte[inputStream.available()];inputStream.read(data);inputStream.close();} catch (IOException e) {e.printStackTrace();}// 加密BASE64Encoder encoder = new BASE64Encoder();return encoder.encode(data);}测试:public static void main(String[] args) {String base64Str = imageToBase64Str("D:/pic/001.jpg");System.out.println(base64Str);boolean b = base64StrToImage(base64Str, "D:/pic/temp/002.jpg"); System.out.println(b);}。

Delphi常见图象格式转换技术1.Chinese : ICO图标转换BMP格式English :(Conversion from ICO to BMP)--------------------------------------------------------varIcon : TIcon;Bitmap : TBitmap;beginIcon := TIcon.Create;Bitmap := TBitmap.Create;Icon.LoadFromFile('c:\picture.ico');Bitmap.Width := Icon.Width;Bitmap.Height := Icon.Height;Bitmap.Canvas.Draw(0, 0, Icon );Bitmap.SaveToFile('c:\picture.bmp');Icon.Free;Bitmap.Free;===================================2.Chinese: 32x32 BMP格式图象转换为ICO格式English :32x32 bit Bitmaps to ICO's-----------------------------------unit main;interfaceusesWindows, Messages, SysUtils, Classes, Graphics, Controls, Forms,Dialogs,ExtCtrls, StdCtrls;typeTForm1 = class(TForm)Button1: TButton;Image1: TImage;Image2: TImage;procedure Button1Click(Sender: TObject);procedure FormCreate(Sender: TObject);private{ Private declarations }public{ Public declarations }end;Form1: TForm1;implementation{$R *.DFM}procedure TForm1.Button1Click(Sender: TObject);var winDC, srcdc, destdc : HDC;oldBitmap : HBitmap;iinfo : TICONINFO;beginGetIconInfo(Image1.Picture.Icon.Handle, iinfo);WinDC := getDC(handle);srcDC := CreateCompatibleDC(WinDC);destDC := CreateCompatibleDC(WinDC);oldBitmap := SelectObject(destDC, iinfo.hbmColor);oldBitmap := SelectObject(srcDC, iinfo.hbmMask);BitBlt(destdc, 0, 0, Image1.picture.icon.width,Image1.picture.icon.height,srcdc, 0, 0, SRCPAINT);Image2.picture.bitmap.handle := SelectObject(destDC, oldBitmap);DeleteDC(destDC);DeleteDC(srcDC);DeleteDC(WinDC);image2.Picture.Bitmap.savetofile(ExtractFilePath(Application.ExeName)+ 'myfile.bmp');end;procedure TForm1.FormCreate(Sender: TObject);beginimage1.picture.icon.loadfromfile('c:\myicon.ico');end;end.================================================================== 3. Chinese:转换BMP->JPEG文件格式Englsh:convert the bitmap into a JPEG file format------------------------------------------------------------------varMyJpeg: TJpegImage;Image1: TImage;Image1:= TImage.Create;MyJpeg:= TJpegImage.Create;Image1.LoadFromFile('TestImage.BMP'); // 读取Bitmap文件MyJpeg.Assign(Image1.Picture.Bitmap);objectMyJpeg.SaveToFile('MyJPEGImage.JPG'); //保存JPEG end;--------------------------------------------------------------------4.JPEG 转换为BMP函数procedure Jpg2Bmp(const source,dest:string);varMyJpeg: TJpegImage;bmp: Tbitmap;beginbmp:=tbitmap.Create;MyJpeg:= TJpegImage.Create;trymyjpeg.LoadFromFile(source);bmp.Assign(myjpeg);bmp.SaveToFile(dest);finallybmp.free;myjpeg.Free;end;end;----------------------------------------------------------5.Bmp转换为JPEG文件格式函数----------------------------------------------------------procedure Bmp2Jpg(const source,dest:string;const scale:byte);varMyJpeg: TJpegImage;Image1: TImage;beginImage1:= TImage.Create(application);MyJpeg:= TJpegImage.Create;tryImage1.Picture.Bitmap.LoadFromFile(source);MyJpeg.Assign(Image1.Picture.Bitmap);pressionQuality:=scale;press;MyJpeg.SaveToFile(dest);image1.free;myjpeg.Free;end;end;TxT 转换为GIF------------------------------------------------procedure TxtToGif (txt, FileName: String);vartemp: TBitmap;GIF : TGIFImage;begintemp:=TBitmap.Create;trytemp.Height :=400;temp.Width :=60;temp.Transparent:=True;temp.Canvas.Brush.Color:=colFondo.ColorValue;:=Fuente.FontName;temp.Canvas.Font.Color:=colFuente.ColorValue;temp.Canvas.TextOut (10,10,txt);Imagen.Picture.Assign(nil);GIF := TGIFImage.Create;tryGIF.Assign(Temp);//保存GIFGIF.SaveToFile(FileName);Imagen.Picture.Assign (GIF);finallyGIF.Free;end;Finallytemp.Destroy;End;end;--------------------------------------------------------------------- 2.WMF格式转换为BMP格式-------------------------------------------------------------------- procedure WmfToBmp(FicheroWmf,FicheroBmp:string); varMetafile:TMetafile;Bmp:TBitmap;beginMetafile:=TMetaFile.create;{Create a Temporal Bitmap}Bmp:=TBitmap.create;{Load the Metafile}MetaFile.LoadFromFile(FicheroWmf);{Draw the metafile in Bitmap's canvas}with Bmp dobeginHeight:=Metafile.Height;Width:=Metafile.Width;Canvas.Draw(0,0,MetaFile);{Save the BMP}SaveToFile(FicheroBmp);{Free BMP}Free;end;{Free Metafile}MetaFile.Free;end;--------------------------------------------------------------------- 3.BMP格式转换为WMF格式--------------------------------------------------------------------- procedure BmpToWmf (BmpFile,Wmffile:string);varMetaFile : TMetaFile;MFCanvas : TMetaFileCanvas;BMP : TBitmap;begin{Create temps}MetaFile := TMetaFile.Create;BMP := TBitmap.create;BMP.LoadFromFile(BmpFile);{Igualemos tama駉s}{Equalizing sizes}MetaFile.Height := BMP.Height;MetaFile.Width := BMP.Width;{Create a canvas for the Metafile}MFCanvas:=TMetafileCanvas.Create(MetaFile, 0);with MFCanvas dobegin{Draw the BMP into canvas}Draw(0, 0, BMP);{Free the Canvas}Free;end;{Free the BMP}BMP.Free;with MetaFile dobegin{Save the Metafile}SaveToFile(WmfFile);{Free it...}Free;end;end;---------------------------------------------------------------------4.TBitmaps to Windows Regions---------------------------------------------------------------------function BitmapToRegion(bmp: TBitmap; TransparentColor: TColor=clBlack; RedTol: Byte=1; GreenTol: Byte=1; BlueTol: Byte=1): HRGN;constAlloc Unit = 100;typePRectArray = ^TRectArray;TRectArray = Array[0..(MaxInt div SizeOf(TRect))-1] of TRect;varpr: PRectArray;h: HRGN;RgnData: PRgnData;lr, lg, lb, hr, hg, hb: Byte;x,y, x0: Integer;b: PByteArray;ScanLinePtr: Pointer;ScanLineInc: Integer;maxRects: Cardinal;beginResult := 0;{ Keep on hand lowest and highest values for the "transparent" pixels }lr := GetRValue(TransparentColor);lg := GetGValue(TransparentColor);lb := GetBValue(TransparentColor);hr := Min($ff, lr + RedTol);hg := Min($ff, lg + GreenTol);hb := Min($ff, lb + BlueTol);bmp.PixelFormat := pf32bit;maxRects := Alloc Unit;GetMem(RgnData,SizeOf(RGNDATAHEADER) + (SizeOf(TRect) * maxRects)); trywith RgnData^.rdh dobegindwSize := SizeOf(RGNDATAHEADER);iType := RDH_RECTANGLES;nCount := 0;nRgnSize := 0;SetRect(rcBound, MAXLONG, MAXLONG, 0, 0);end;ScanLinePtr := bmp.ScanLine[0];ScanLineInc := Integer(bmp.ScanLine[1]) - Integer(ScanLinePtr);for y := 0 to bmp.Height - 1 dobeginx := 0;while x < bmp.Width dobeginx0 := x;while x < bmp.Width dobeginb := @PByteArray(ScanLinePtr)[x*SizeOf(TRGBQuad)];// BGR-RGB: Windows 32bpp BMPs are made of BGRa quads (not RGBa) if (b[2] >= lr) and (b[2] <= hr) and(b[1] >= lg) and (b[1] <= hg) and(b[0] >= lb) and (b[0] <= hb) thenBreak; // pixel is transparentInc(x);end;{ test to see if we have a non-transparent area in the image }if x > x0 thenbegin{ increase RgnData by AllocUnit rects if we exceeds maxRects }if RgnData^.rdh.nCount >= maxRects thenbeginInc(maxRects,AllocUnit);ReallocMem(RgnData,SizeOf(RGNDATAHEADER) + (SizeOf(TRect) * MaxRects));end;{ Add the rect (x0, y)-(x, y+1) as a new visible area in the region }pr := @RgnData^.Buffer; // Buffer is an array of rectswith RgnData^.rdh dobeginSetRect(pr[nCount], x0, y, x, y+1);{ adjust the bound rectangle of the region if we are "out-of-bounds" }if x0 < rcBound.Left then rcBound.Left := x0;if y < rcBound.Top then rcBound.Top := y;if x > rcBound.Right then rcBound.Right := x;if y+1 > rcBound.Bottom then rcBound.Bottom := y+1;Inc(nCount);end;end; // if x > x0if RgnData^.rdh.nCount = 2000 thenbeginh := ExtCreateRegion(nil, SizeOf(RGNDATAHEADER) + (SizeOf(TRect) * maxRects), RgnData^);if Result > 0 thenbegin // Expand the current regionCombineRgn(Result, Result, h, RGN_OR);DeleteObject(h);endelse // First region, assign it to ResultResult := h;RgnData^.rdh.nCount := 0;SetRect(RgnData^.rdh.rcBound, MAXLONG, MAXLONG, 0, 0);end;Inc(x);end; // scan every sample byte of the imageInc(Integer(ScanLinePtr), ScanLineInc);end;{ need to call ExCreateRegion one more time because we could have left }{ a RgnData with less than 2000 rects, so it wasn't yet created/combined }h := ExtCreateRegion(nil, SizeOf(RGNDATAHEADER) + (SizeOf(TRect) * MaxRects), RgnData^);if Result > 0 thenbeginCombineRgn(Result, Result, h, RGN_OR);DeleteObject(h);endelseResult := h;finallyFreeMem(RgnData,SizeOf(RGNDATAHEADER) + (SizeOf(TRect) * MaxRects)); end;。

VC实现打开BMP JPG或GIF图片|VC/MFC/打开图片1、新建一个单文档的应用程序,项目名称为ShowBitmap2、为CShowBitmapView类添加下述成员变量和成员函数://参数定义public:int state; //位图显示状态CString BmpName; //保存图像文件文件名CString extname; //保存图像文件扩展名CBitmap m_bitmap; //创建位图对象void ShowBitmap(CString BmpName); //用来显示指定位图的函数BOOL ShowJpgGif(CDC* pDC,CString strPath, int x, int y);3、在CShowBitmap类的构造函数中,初始化成员变量state// CShowBitmapView 构造/析构CShowBitmapView::CShowBitmapView(){state=0;}4、为ID_FILE_OPEN消息添加响应函数(具体怎么加就不细说了),编写该函数// CShowBitmapView 消息处理程序void CShowBitmapView::OnFileOpen(){//CFileDialog dlg(TRUE,_T("BMP"),_T("*.BMP"),OFN_HIDEREADONLY |OFN_OVERWRITEPROMPT,_T("位图文件(*.BMP;*.jpg)|*.BMP;*.jpg|")); / /这行代码可以打开BMP格式的图片CFileDialog dlg(TRUE,NULL,NULL,OFN_HIDEREADONLY|OFN_OVERWRIT EPROMPT,_T("位图文件(*.BMP)|*.BMP|jpg文件(*.jpg)|*.jpg||")); //这行代码可以打开BMP和JPG格式的图片//gif格式图片的打开在这就不列出来了,留给各位自己尝试吧,对于gif格式图片的显示图片函数和jpg格式图片是同一个函数。

常见图⽚格式详解做了⼏年有关图形、图像的⼯作,对图⽚格式算是⼩有经验,在此写成⼀⽂章总结下。
虽然⼀开始并不想讲很理论的东西,但写完后发现⼏乎全是理论,细想⼀下关于图⽚格式的知识本⾝就是理论的东西,囧~~ 那就⼒求⽤最简单的⽅式将这些“理论”讲清楚吧。
常见的图⽚格式有bmp, jpg(jpeg), png, gif, webp等。
图像基本数据结构要讲图⽚格式还先得从图像的基本数据结构说起。
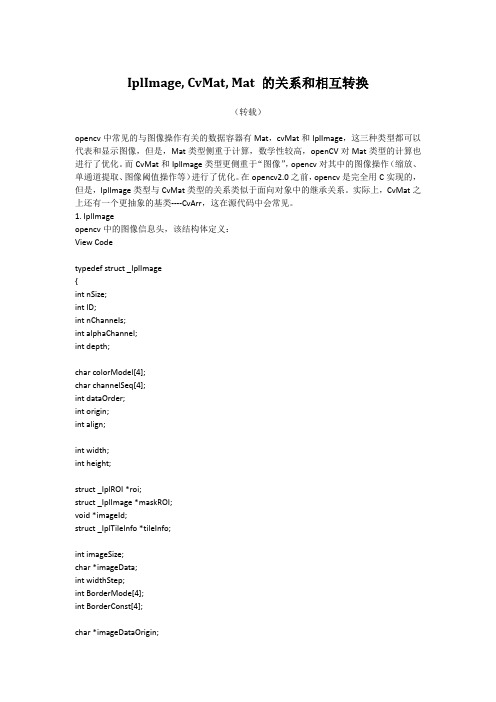
在计算机中, 图像是由⼀个个像素点组成,像素点就是颜⾊点,⽽颜⾊最简单的⽅式就是⽤RGB或RGBA表⽰, 如图所⽰(图1)(图2)如果有A通道就表明这个图像可以有透明效果。
R,G,B每个分量⼀般是⽤⼀个字节(8位)来表⽰,所以图(1)中每个像素⼤⼩就是3*8=24位图, ⽽图(2)中每个像素⼤⼩是4*8=32位。
这⾥有三点需要说明:⼀、图像y⽅向正⽴或倒⽴图像是⼆维数据,数据在内存中只能⼀维存储,⼆维转⼀维有不同的对应⽅式。
⽐较常见的只有两种⽅式: 按像素“⾏排列”从上往下或者从下往上。
如图所⽰的图像有9个像素点,如果从上往下排列成⼀维数据是(123456789),如果是从下往上排列则为(789456123)。
只所以会有这种区别是因为,前⼀种是以计算机图形学的屏幕坐标系为参考(右上为原点,y轴向下 ),⽽另后⼀种是以标准的数学坐标系为参考(右下为原点,y轴向上)。
这两个坐标系只是y值不⼀样,互相转换的公式为:y2 = height-1-y1y1,y2分别为像素在两个坐标系中的y坐标,height为图像的⾼度。
不过好像只有bmp图⽚格式以及windows下的GDI,GDI+是从下往上排列,其它⽐如DirectX,OpenGL,Cocoa(NSImage, UIImage),OpenCV 等都是从上往下排列。
⼆、RGB排列顺序不同图形库中每个像素点中RGBA的排序顺序可能不⼀样。
上⾯说过像素⼀般会有RGB,或RGBA四个分量,那么在内存中RGB的排列就有6种情况,如下:RGBRBGGRBGBRBGRBRGRGBA的排列有24种情况,这⾥就不全部列出来了。
ffmpeg(7):将h264编码的视频流保存为BMP或者JPEG图片ffmpeg(7):将h264编码的视频流保存为BMP或者JPEG图片2015-07-03 16:094603人阅读评论(8)收藏举报分类:音视频(20)ffmpeg(12)版权声明:本文为博主原创文章,未经博主允许不得转载。
目录(?)[+]一般我们知道播放视频流的时候是有截图功能的。
所以我想是否可以将视频流保存为BMP或者JPEG参考:1.最简单的基于FFMPEG的图像编码器(YUV编码为JPEG)/leixiaohua1020/article/details/253461 472. 视频帧保存为BMP[cpp] view plain copy print?#define__STDC_CONSTANT_MACROS #ifdef _WIN32//Windows extern "C" { #include"libavcodec/avcodec.h" #include "libavformat/avformat.h" #include "libswscale/swscale.h" #include "SDL.h" };#else //Linux... #ifdef __cplusplus extern "C"{ #endif #include <libavcodec/avcodec.h>#include <libavformat/avformat.h> #include<libswscale/swscale.h> #include <SDL2/SDL.h> #ifdef __cplusplus }; #endif #endif [cpp] view plain copy print? [cpp] view plain copy print?//保存BMP文件的函数void SaveAsBMP(AVFrame *pFrameRGB, int width, int height, int index, int bpp) { char buf[5] = {0}; BITMAPFILEHEADER bmpheader; BITMAPINFOHEADER bmpinfo; FILE *fp;char *filename = new char[255]; //文件存放路径,根据自己的修改sprintf_s(filename, 255,"%s%d.bmp", "E:/temp/", index); if( (fp =fopen(filename,"wb+")) == NULL ) { printf ("open file failed!\n"); return; }bmpheader.bfType = 0x4d42;bmpheader.bfReserved1 = 0;bmpheader.bfReserved2 = 0; bmpheader.bfOffBits = sizeof(BITMAPFILEHEADER) +sizeof(BITMAPINFOHEADER); bmpheader.bfSize = bmpheader.bfOffBits + width*height*bpp/8;bmpinfo.biSize = sizeof(BITMAPINFOHEADER);bmpinfo.biWidth = width; bmpinfo.biHeight = height; bmpinfo.biPlanes = 1; bmpinfo.biBitCount = bpp; bmpinfo.biCompression = BI_RGB;bmpinfo.biSizeImage = (width*bpp+31)/32*4*height; bmpinfo.biXPelsPerMeter = 100;bmpinfo.biYPelsPerMeter = 100; bmpinfo.biClrUsed = 0; bmpinfo.biClrImportant = 0;fwrite(&bmpheader, sizeof(bmpheader), 1, fp);fwrite(&bmpinfo, sizeof(bmpinfo), 1, fp);fwrite(pFrameRGB->data[0], width*height*bpp/8, 1, fp); fclose(fp); } [cpp] view plain copy print?DWORDWork_Save2BMP() { int videoStream = -1; AVCodecContext *pCodecCtx; AVFormatContext *pFormatCtx; AVCodec *pCodec; AVFrame *pFrame, *pFrameRGB; struct SwsContext*pSwsCtx; const char *filename = "bigbuckbunny_480x272.h264"; AVPacket packet; int frameFinished; int PictureSize; uint8_t*outBuff; //注册编解码器av_register_all(); // 初始化网络模块avformat_network_init(); // 分配AVFormatContext pFormatCtx =avformat_alloc_context(); //打开视频文件if( avformat_open_input(&pFormatCtx, filename, NULL, NULL) != 0 ) { printf ("av open input file failed!\n"); exit (1); } //获取流信息if( avformat_find_stream_info(pFormatCtx, NULL) < 0 ) { printf ("av find stream info failed!\n");exit (1); } //获取视频流for( int i = 0; i < pFormatCtx->nb_streams; i++ ) { if( pFormatCtx->streams[i]->codec->codec_type == AVMEDIA_TYPE_VIDEO ) { videoStream = i; break; } }if( videoStream == -1 ) { printf ("find video stream failed!\n"); exit (1); } // 寻找解码器pCodecCtx =pFormatCtx->streams[videoStream]->codec; pCodec =avcodec_find_decoder(pCodecCtx->codec_id);if( pCodec == NULL ) { printf ("avcode find decoder failed!\n"); exit (1); } //打开解码器if( avcodec_open2(pCodecCtx, pCodec, NULL) < 0 ) { printf ("avcode open failed!\n"); exit (1); } //为每帧图像分配内存pFrame = avcodec_alloc_frame(); pFrameRGB =avcodec_alloc_frame(); if( (pFrame == NULL) || (pFrameRGB == NULL) ) { printf("avcodec alloc frame failed!\n"); exit (1); } // 确定图片尺寸PictureSize =avpicture_get_size(PIX_FMT_BGR24,pCodecCtx->width, pCodecCtx->height);outBuff = (uint8_t*)av_malloc(PictureSize); if( outBuff == NULL ) { printf("av malloc failed!\n");exit(1); } avpicture_fill((AVPicture*)pFrameRGB, outBuff, PIX_FMT_BGR24,pCodecCtx->width, pCodecCtx->height); //设置图像转换上下文pSwsCtx =sws_getContext(pCodecCtx->width,pCodecCtx->height, pCodecCtx->pix_fmt, pCodecCtx->width, pCodecCtx->height,PIX_FMT_BGR24, SWS_BICUBIC, NULL, NULL, NULL); int i = 0;while( av_read_frame(pFormatCtx, &packet) >= 0 ) { if( packet.stream_index == videoStream ){ avcodec_decode_video2(pCodecCtx, pFrame, &frameFinished, &packet);if( frameFinished ) { //反转图像,否则生成的图像是上下调到的pFrame->data[0] += pFrame->linesize[0] * (pCodecCtx->height - 1);pFrame->linesize[0] *= -1;pFrame->data[1] += pFrame->linesize[1] * (pCodecCtx->height / 2 - 1);pFrame->linesize[1] *= -1;pFrame->data[2] += pFrame->linesize[2] * (pCodecCtx->height / 2 - 1);pFrame->linesize[2] *= -1; //转换图像格式,将解压出来的YUV420P的图像转换为BRG24的图像sws_scale(pSwsCtx,pFrame->data,pFrame->linesize, 0, pCodecCtx->height, pFrameRGB->data, pFrameRGB->linesize); SaveAsBMP(pFrameRGB, pCodecCtx->width, pCodecCtx->height, i ++,24); } } else { int a=2; int b=a; }av_free_packet(&packet); }sws_freeContext (pSwsCtx); av_free (pFrame);av_free (pFrameRGB); avcodec_close (pCodecCtx);avformat_close_input(&pFormatCtx); return 0; } 其实总结起来就几点,打开视频文件,将里面的每一帧取出来,并将其转换为RGB 格式。
余信息。
JPEG算法框图如图:1、使用正向离散余弦变换(Forward Discrete Cosine Transform,FDCT)把空间域表示的图变换成频率域表示的图。
2、使用加权函数对DCT系数进行量化,这个加权函数对于人的视觉系统是最佳的。
3、使用霍夫曼可变字长编码器对量化系数进行编码。
译码或者叫做解压缩的过程与压缩编码过程正好相反。
JPEG算法与彩色空间无关,因此“RGB到YUV变换”和“YUV 到RGB变换”不包含在JPEG算法中。
JPEG算法处理的彩色图像是单独的彩色分量图像,因此它可以压缩来自不同彩色空间的数据,如RGB, YCbCr和CMYK。
二、JPEG算法的主要计算步骤JPEG压缩编码算法的主要计算步骤如下:(1)正向离散余弦变换(FDCT)。
(2)量化(Quantization)。
(3)Z字形编码(Zigzag Scan)。
(4)使用差分脉冲编码调制(Differential Pulse Code Modulation,DPCM)对直流系数(DC)进行编码。
(5)使用行程长度编码(Run-Length Encoding,RLE)对交流系数(AC)进行编码。
(6)熵编码(Entropy Eoding)。
1、正向离散余弦变换下面对正向离散余弦变换(FDCT)变换作几点说明。
(1)对每个单独的彩色图像分量,把整个分量图像分成若干个8×8的图像块,如图所示,并作为两维离散余弦变换DCT的输入。
通过DCT变换,把能量集中在少数几个系数上。
(2)DCT变换使用下式计算:它的逆变换使用下式计算:上面两式中,C(u),C(v) = (2)-1/2,当u, v = 0;C(u),C(v) = 1,其他。
f(i, j)经DCT变换之后,F(0,0)是直流系数,其他为交流系数。
(3)在计算两维的DCT变换时,可使用下面的计算式把两维的DCT变换变成一维的DCT变换:2、量化量化是对经过FDCT变换后的频率系数进行量化。
psd.jpg.tiff.bmp.ai.cda.dwg之间的区别跟用途一、PSD文件格式JPEG格式是目前网络上最流行的图像格式,是可以把文件压缩到最小的格式,在 Photoshop软件中以JPEG格式储存时,提供11级压缩级别,以0—10级表示。
其中0级压缩比最高,图像品质最差。
即使采用细节几乎无损的10 级质量保存时,压缩比也可达 5:1。
以BMP格式保存时得到4.28MB图像文件,在采用JPG格式保存时,其文件仅为178KB,压缩比达到24:1。
经过多次比较,采用第8级压缩为存储空间与图像质量兼得的最佳比例。
二、JPG文件格式JPG即JEPGJPEG格式的应用非常广泛,特别是在网络和光盘读物上,都能找到它的身影。
目前各类浏览器均支持JPEG这种图像格式,因为JPEG格式的文件尺寸较小,下载速度快。
这是Photoshop图像处理软件的专用文件格式,文件扩展名是.psd,可以支持图层、通道、蒙板和不同色彩模式的各种图像特征,是一种非压缩的原始文件保存格式。
扫描仪不能直接生成该种格式的文件。
PSD文件有时容量会很大,但由于可以保留所有原始信息,在图像处理中对于尚未制作完成的图像,选用 PSD格式保存是最佳的选择。
JPEG格式是目前网络上最流行的图像格式,是可以把文件压缩到最小的格式,在 Photoshop 软件中以JPEG格式储存时,提供11级压缩级别,以0—10级表示。
其中0级压缩比最高,图像品质最差。
即使采用细节几乎无损的10 级质量保存时,压缩比也可达 5:1。
以BMP格式保存时得到4.28MB图像文件,在采用JPG格式保存时,其文件仅为178KB,压缩比达到24:1。
经过多次比较,采用第8级压缩为存储空间与图像质量兼得的最佳比例。
JPEG格式的应用非常广泛,特别是在网络和光盘读物上,都能找到它的身影。
目前各类浏览器均支持JPEG这种图像格式,因为JPEG格式的文件尺寸较小,下载速度快。
三、TIFF文件格式TIFF (TaglmageFileFormat)图像文件是由Aldus和Microsoft公司为桌上出版系统研制开发的一种较为通用的图像文件格式。
JPEG 文件数据结构以及将位图保存为 JPG 的代码一、简述JPEG 是一个压缩标准,又可分为标准 JPEG、渐进式 JPEG 及 JPEG2000 三种:①标准 JPEG:以 24 位颜色存储单个光栅图像,是与平台无关的格式,支持 最高级别的压缩,不过,这种压缩是有损耗的。此类型图片在网页下载时只能 由上而下依序显示图片,直到图片资料全部下载完毕,才能看到全貌。②渐进式 JPEG:渐进式 JPG 为标准 JPG 的改良格式,支持交错,可以在网 页下载时,先呈现出图片的粗略外观后,再慢慢地呈现出完整的内容,渐进式 JPG 的文件比标准 JPG 的文件要来得小。③JPEG2000:新一代的影像压缩法,压缩品质更好,其压缩率比标准 JPEG 高约 30%左右,同时支持有损和无损压缩。一个极其重要的特征在于它能实现 渐进传输,即先传输图像的轮廓,然后逐步传输数据,让图像由朦胧到清晰显 示。以一幅 24 位彩色图像为例,JPEG 的压缩分为四个步骤:①颜色转换:在将彩色图像进行压缩之前,必须先对颜色模式进行数据转 换。转换完成之后还需要进行数据采样。②DCT 变换:是将图像信号在频率域上进行变换,分离出高频和低频信息 的处理过程,然后再对图像的高频部分(即图像细节)进行压缩。首先以象素 为单位将图像划分为多个 8×8 的矩阵,然后对每一个矩阵作 DCT 变换。把 8×8 的象素矩阵变成 8×8 的频率系数矩阵(所谓频率就是颜色改变的速度),频 率系数都是浮点数。③量化:由于下面第四步编码过程中使用的码本都是整数,因此要对频率 系数进行量化,将之转换为整数。数据量化后,矩阵中的数据都是近似值,和 原始图像数据之间有了差异,这一差异是造成图像压缩后失真的主要原因。这 一过程中,质量因子的选取至为重要。值选得大,可以大幅度提高压缩比,但 是图像质量就比较差,质量因子越小图像重建质量越好,但是压缩比越低。④编码:编码是基于统计特性的方法。四个步骤都完成后的 JPEG 文件,其基本数据结构为两大类型:“段”和经 过压缩编码的图像数据。
二、数据结构1.段的一般结构如下表所示: 表 1:段的一般结构-----------------------------------------------------------------名称字节数 数据说明
-----------------------------------------------------------------段标识1FF每个新段的开始标识段类型1类型编码(称作“标记码”)段长度2包括段内容和段长度本身,不包括段标识和段类型 段内容≤65533 字节-----------------------------------------------------------------说明:①JPG 文件中所有关于宽度高度长度间隔这一类数据,凡是>1字节的,均采 用 Motorola 格式,即:高位在前,低位在后。②有些段没有长度描述也没有内容,只有段标识和段类型。文件头和文件尾均 属于这种段。③段与段之间无论有多少 FF 都是合法的,这些 FF 称为“填充字节”,必须被 忽略掉。2.段类型有 30 种,但只有 10 种是必须被所有程序识别的,其它的类型都可以忽略。所以下面只列出这 10 种类型。
表 2:段类型---------------------------------------名称标记码说明---------------------------------------SOID8文件头EOID9文件尾SOF0C0帧开始(标准 JPEG)SOF1C1同上DHTC4定义 Huffman 表(霍夫曼表)SOSDA扫描行开始DQTDB定义量化表DRIDD定义重新开始间隔APP0E0定义交换格式和图像识别信息COMFE注释-----------------------------------------------------------说明:有的文章也将 DNL 段(标记码=DC,定义扫描行数)列为必须段。 3.以下按一般 JPEG 文件的段排列顺序详细介绍各种段的结构:
表 3:SOI(文件头)-----------------名称字节数值-----------------段标识1FF
段类型1D8-----------------说明:这两个字节构成了 JPEG 文件头。
表 4:APP0(图像识别信息)--------------------------------------------------------------------------名称字节数 值说明
--------------------------------------------------------------------------段标识1FF
段类型1E0段长度20010如果有 RGB 缩略图就=16+3n(以下为段内容)交换格式54A46494600“JFIF”的 ASCII 码主版本号1次版本号1密度单位10=无单位;1=点数/英寸;2=点数/厘米X 像素密度2水平方向的密度Y 像素密度2垂直方向的密度缩略图 X 像素1缩略图水平像素数目缩略图 Y 像素1缩略图垂直像素数目(如果“缩略图 X 像素”和“缩略图 Y 像素”的值均>0,那么才有下面的数据) RGB 缩略图3×nn=缩略图像素总数=缩略图 X 像素×缩略图 Y 像素--------------------------------------------------------------------------说明:①JFIF 是 JPEG File Interchange Format 的缩写,即 JPEG 文件交换格式,另 外还有 TIFF 等格式,很少用②“如果有 RGB 缩略图就=16+3n”是什么意思呢?比如说“缩略图 X 像素” 和“缩略图 Y 像素”的值均为 48,就表示有一个 48×48 像素的缩略图(n=48×48),缩略图是 24 位真彩位图,用3个字节来表示一个像素,所以共占用 3n 个字节。但大多数 JPG 文件都没有这个“鸡肋”缩略图。
表 5:COM(注释)--------------------------------------------------------------------------名称字节数值说明--------------------------------------------------------------------------段标识1FF段类型1FE段长度2其值=注释字符的字节数+2段内容注释字符--------------------------------------------------------------------------说明:有的 JPEG 文件没有这个段。
表 6:DQT(定义量化表)--------------------------------------------------------------------------名称字节数值说明--------------------------------------------------------------------------段标识1FF
段类型1DB段长度243其值=3+n(当只有一个 QT 时)(以下为段内容)QT 信息10-3 位:QT 号4-7 位:QT 精度(0=8bit,1 字节;否则=16bit,2 字节)QTnn=64×QT 精度的字节数--------------------------------------------------------------------------说明:①JPEG 文件一般有2个 DQT 段,为 Y 值(亮度)定义1个, 为 C 值(色度)定 义1个。②一个 DQT 段可以包含多个 QT, 每个都有自己的信息字节
表 7:SOF0(图像基本信息)--------------------------------------------------------------------------名称字节数值说明--------------------------------------------------------------------------段标识1FF段类型1C0段长度2其值=8+组件数量×3(以下为段内容)样本精度18每个样本位数(大多数软件不支持 12 和 16)图片高度2图片宽度2组件数量131=灰度图,3=YCbCr/YIQ 彩色图,4=CMYK 彩色图(以下每个组件占用3字节)组件 ID11=Y, 2=Cb, 3=Cr, 4=I, 5=Q采样系数10-3 位:垂直采样系数4-7 位:水平采样系数量化表号1---------------------------------------------------------------------------说明:①JPEG 大都采用 yCrCb 色彩模型(y 表示亮度,Cr 红色分量,Cb 表示蓝色分量), 所以组件数量一般=3②样本就是单个像素的颜色分量,也可理解为一个样本就是一个组件③采样系数是实际采样方式与最高采样系数之比,而最高采样系数一般=0.5(分数表示为 1/2)。比如说,垂直采样系数=2,那么 2×0.5=1,表示实际 采样方式是每个点采一个样,也就是逐点采样;如果垂直采样系数=1,那么: 1×0.5=0.5(分数表示为 1/2),表示每2个点采一个样
表 8:DHT(定义 Huffman 表)--------------------------------------------------------------------------名称 字节数 值 说明
--------------------------------------------------------------------------段标识 1 FF段类型 1 C4段长度 2其值=19+n(当只有一个 HT 表时)(以下为段内容)HT 信息 10-3 位:HT 号4 位:HT 类型, 0=DC 表,1=AC 表5-7 位:必须=0HT 位表 16这 16 个数的和应该≤256HT 值表 nn=表头 16 个数的和--------------------------------------------------------------------------