WES7概览
- 格式:ppt
- 大小:4.47 MB
- 文档页数:21
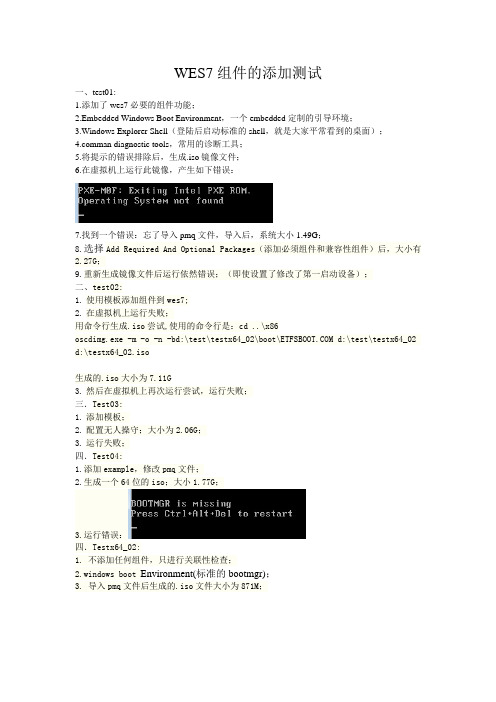
WES7组件的添加测试一、test01:1.添加了wes7必要的组件功能;2.Embedded Windows Boot Environment,一个embedded定制的引导环境;3.Windows Explorer Shell(登陆后启动标准的shell,就是大家平常看到的桌面);man diagnostic tools,常用的诊断工具;5.将提示的错误排除后,生成.iso镜像文件;6.在虚拟机上运行此镜像,产生如下错误:7.找到一个错误:忘了导入pmq文件,导入后,系统大小1.49G;8.选择Add Required And Optional Packages(添加必须组件和兼容性组件)后,大小有2.27G;9.重新生成镜像文件后运行依然错误;(即使设置了修改了第一启动设备);二、test02:1.使用模板添加组件到wes7;2.在虚拟机上运行失败;用命令行生成.iso尝试,使用的命令行是:cd ..\x86oscdimg.exe -m -o -n -bd:\test\testx64_02\boot\ d:\test\testx64_02 d:\testx64_02.iso生成的.iso大小为7.11G3.然后在虚拟机上再次运行尝试,运行失败;三.Test03:1.添加模板;2.配置无人操守;大小为2.06G;3.运行失败;四.Test04:1.添加example,修改pmq文件;2.生成一个64位的iso;大小1.77G;3.运行错误:四.Testx64_02:1. 不添加任何组件,只进行关联性检查;2.windows boot Environment(标准的bootmgr);3. 导入pmq文件后生成的.iso文件大小为871M;4.猜测之前的错误可能是pmq文件的问题;五.Testx64_03:1. 在base基础上增加一个net组件;oscdimg.exe -m -o -n -bd:\test\testx64_03\boot\ d:\test\testx64_03 d:\test\testx64_03\testx64_03.iso2.生成.iso文件,大小为977M;3.在虚拟机上测试.无变化;4.在base基础上增加IE组件和USER组件;oscdimg.exe -m -o -n -bd:\test\testx64_04\boot\ d:\test\testx64_04 d:\test\testx64_04\testx64_04.iso5.生成了大小为995M的.iso;6.运行后发现,多了IE浏览器,能上网,并且c盘下多了个“用户”文件夹。

一、制作启动盘。
1、准备好U盘,Wes7镜像,UltraISO程序。
2、插入U盘后,用UltraISO打开Wes7镜像,如下图:选择“启动→写入硬盘映像“,弹出新的对话框界面,如下图:注意:硬盘驱动器一定要选择到你的U盘,否则数据丢失我可不负责任。
格式化你选中的U盘,快速或者全部,随便你。
完成之后返回上边的界面,点击写入,等待写入过程结束,关闭UltraISO。
二、安装过程。
1、用制作好的U盘进行启动电脑。
2、进入第一个界面。
如下图:3个条目,第一个是制作自己的Wes7镜像,第二个使用应答文件(也就是定制系统的设置文件),运行WinPE命令行。
选择第一个条目,进入系统安装过程。
在授权说明这里,接受许可条例,然后进入模版选择,如下图:由于我们只需要一个精简的系统,所以这里选择最后一项Thin Client,并下一步进入语言和区域配置等界面,如下图:Language to install,语言,选择Chinese(Simplified),也就是简体中文。
Time and currency format,时区之类的,自动选择Chinese(Simplified,PRC)。
Keyboard or input method,选择语言的时候,自动选择了,所以,我们不要去更改它了。
下一步之后,进入了一个关于驱动和模块包(这个名字是我取的,将就一下吧!)的分析界面,这里比较重要了,它列出了你系统里边的设备是否能驱动上,就算没有驱动,它也提醒你是哪些设备。
如下图:在驱动这里,有一项设备的驱动是系统驱动库没有的,所以有个感叹号!下边有2个选项,第一个Modify Drivers,修改驱动;第二个Modify Features,修改模块包。
如果勾选了这些选项,那么下一个界面的时候,会询问你的驱动放在什么地方,它会自动分析驱动安装包,并集成到你的镜像文件里边。
或者,会让你选择当前的模块包设置,有一些系统软件或许不是你所需要的。
WES7 技术概述目录一、技术规范 (1)1.1操作系统开发工具 (1)1.2应用程序工具 (2)1.3中间件 (2)1.4开发工具规范 (2)1.5提供每个SKU系统元件(针对不同应用的三种License) (3)二、嵌入式设备定义 (3)三、Windows Embedded产品家族 (3)四、WES 7 技术概览 (6)五、WES7 新的嵌入式特性 (10)5.1EWF\FBWF (写过滤器): (10)5.2Register Filter (注册表过滤器): (12)5.3HORM (Hibernate Once Resume Many) (13)5.4USB\CD 引导启动 (13)5.5自定义的Shell和启动界面 (14)5.6消息框\对话框自动回复 (14)5.7DISM (Deployment Image Servicing and Management) (15)5.8系统引导 (15)5.9Meida Center (15)5.10Direct Computer (16)六、相关参考资料 (17)WES7(Windows Embedded Standard 7)是微软在2010年5月13日发布的基于X86平台,Windows 7组件化的嵌入式操作系统,是一个基于 Windows 7 的非常可靠、高度安全且稳定的操作系统。
使用 Windows Embedded Standard 7,设备开发人员可以基于硬件、软件和应用程序集中精力开发与众不同的产品,而不是将精力放在平台开发上。
WES7除了具有Windows 7最新的功能外,还具有适用于嵌入式设备的嵌入式功能,例如EWF,FBWF,Dialog Filter,DISM,Register Filter等等。
本文将揭开WES7最新的技术特性和神秘面纱,让我们了解基于Windows 7的更加简单,更加强大的新一代微软嵌入式操作系统。
一、技术规范1.1操作系统开发工具Windows Embedded Standard 7 包含以下实用程序,可简化整个开发流程,使其更加顺畅:∙基于映像的向导 (IBW)一个基于向导的工具,允许快速制作映像原型,并提供在设备上安装自定义映像的最快捷方法。


wes7蓝⽛问题解决⽅案wes7 也就是windows embedded standard 7可以理解为微软为了嵌⼊式系统准备的模块化windows7⼤家就理解成⼀个模块化,可精简的win7得了,这个系统⽐较适合的⼈群主要是POS机,嵌⼊式应⽤环境等等但是由于其和win7⼆进制兼容所以普通⽤户也可以拿来⽤。
对于win7我还是推荐32位的多⼀些主要还是64位软件体积⽐较⼤⽽且软件兼容⾏不如32的另外装了64的系统安装vc的运⾏库和其他运⾏库的时候也要同时安装32和64的两套版本以保证兼容性,我个⼈觉得有些⿇烦还是推荐装32的,⾄于wes7 也和win7⼀样个⼈偏好32位的wes7和win7相⽐好处就是占⽤空间很少,⽐xp⼤⼀点点,可定制灵活性⾼,我⾃⼰安装的组件系统最后⼤约是2个多G,安装⽅法我也不多说了⼤家喜欢的⾃⼰百度wes7 就有了。
其实这个系统的运⾏效率和win7基本上差不多,优点就是体积⼩⽽且有⼀些win7没有的嵌⼊式特性⽐如可以⽤ewf把C盘写保护,就不怕中毒了,原理类似还原卡。
另外有horm功能⼀次休眠多次唤醒,其实就是锁定休眠⽂件,每次都⽤那个⽂件进⾏唤醒。
另外因为系统体积⽐较⼩适合装在SSD固态硬盘上(⼤容量的固态盘很贵,买个⼩容量的固态盘装个wes7还是速度提升⽐较明显的)但是wes7安装相对⽐较⿇烦,⽤ICE来安装⾃然是最好的,不过如果是⾃⼰⽤不需要成百上千台机器部署,直接⽤IBW刻盘安装还是最⽅便的,安装的时候选择兼容性模板或者瘦客户模板然后把⾃⼰需要的其他组件勾上点击修复依赖关系就可以安装了,但是有⼀个问题很多论坛的朋友都遇到过也没有解决,就是IBW的兼容性模板和瘦客户模板本⾝好像是没有蓝⽛以来的包,所以装完系统蓝⽛驱动装不上去。
这个问题困扰我已久,查了很多论坛,甚⾄微软的MSDN society⾥也发现有⼈问过但都没有⼈回帖解决,今⽇脑⽠⼦突然发光找到了解决的办法,公布如下以资有需要之⼈wes7仅⽀持蓝⽛发送⽂件,不⽀持其他⼀些蓝⽛设备驱动的安装问题主要是缺少⽀持驱动⽤的包造成的到ibw安装盘下找到下⾯这些包⽤dism加到系统⾥即可:Bluetooth MTP Device Enumerator的包WinEmb-INF-bthmtpenum.cabBluetooth Device Personal Area Network的包WinEmb-INF-bthpan.cab蓝⽛打印机的包WinEmb-INF-bthprint.cabBluetooth Serial Communications Driver的包WinEmb-INF-bthspp.cab蓝⽛⽹络的包winemb-networking-bluetooth.cabBluetooth Radio USB Driver的包winemb-inf-bth.cab(蓝⽛⽹络和usb蓝⽛这两个个包IBW⾥那两个常⽤模板⾥是有的,不添加也⾏,如果⽤的ICE⾃制模板可能没有)Microsoft Bluetooth HID Miniport的包WinEmb-INF-hidbth.cabBluetooth Device RFCOMM Protocol的包WinEmb-INF-tdibth.cab最后这两个包⽐较难找主要是不是⽤bth开头的。
Copyright ©2015 Dell WyseNovember 2015SummaryWES7 and WES7P are based on Windows 7, WE8S is based on Windows 8 while WIE10 is based on Windows 10 IoT LTSB. Thin clients provide a limited amount of “drive” space on the “C:” drive to install customer apps, and care should be taken when installing or adding applications/drivers to the thin client.There are two ways of installing third party applications that we will discuss in this document; Local, where you have the installation file(s), and Web-based, where the installation file can only be installed through a web browser.CAUTION: Before installing an application on a thin client, consider if you will not be better served if the app resides on your server. We do not recommend the installation of applications on thin clients.AudienceCustomers, 1st Level Support, and Systems Engineering GroupAffected ProductsWindows Embedded Standard 7 (WES7)Windows Embedded Standard 7P (WES7P)Windows Embedded 8 Standard (WE8S)Windows 10 IoT-based thin clientsRequirementsIn addition to a thin client with any of the above mentioned operating systems, a USB drive or USB flash drive is required.Table of ContentsSummary (1)Audience (1)Affected Products (1)Requirements (1)Table of Contents (2)Issues and Procedures (2)LOCAL INSTALLATION (3)PROCEDURE (4)WEB-BASED INSTALLATION (6)Summary of Installation: (6)Step-by-Step Installation (6)Example - Installing Yahoo Messenger (9)Yahoo Messenger Installation Settings: (10)Example - Installing Google Chrome (11)How to stop the Google Update service: (11)Issues and ProceduresAll Windows Embedded thin clients provide you with a compact, very powerful, fast, manageable, cost-effective and secure environment with many peripheral connectivity options available that allow you to run Windows based applications. The purpose of these devices is to help organizations maintain a manageable and secure environment without all the unnecessary burdens of a Personal Computer. These Windows-based clients have no moving parts (i.e. Hard Disk Drive) but have a 4Gb, 8Gb, 16Gb or 32Gb flash memory module (used for the boot agent, OS and backup OS) and 2Gb or 4Gb of DDR RAM for application/data use. The internal flash drive size requirements and availability will depend on the device model and the installed OS.Now that you have this information, you need to consider the memory requirements of the driver (how much disk space is required) and determine if it will fit within the available flash memory on the thin client, before you proceed with the installation.IMPORTANT: Although installing drivers and applications is available for these models, you may want to consider the management impact this will have when you have to re-image these devices.Figure 1 - "Computer" WES7 with a 4GB Flash DriveOpen Windows Explorer/File explorer on the task bar, select “Computer” when usingWES7, WES7p or WE8S and click on the “C:” drive. (See Figure 1). If Using Windows 10 IoT, select “This PC” and select the “C: drive, (See Error! Reference source not found.).Figure 2 - "This PC” Windows 10 IoT with 32GB Flash DriveLOCAL INSTALLATIONLocal installation means that you will perform the installation using an available installation file. The steps below will guide through the process.Note: Before you start the installation,Make the program you want to add or drivers for the device you are installing available either through a local external USB flash/hard disk drive, CD/DVD or amapped network shared drive. DO NOT COPY TO THE C: DRIVE or ANY LOCALDRIVE∙Additional DLL’s, not included WES, may be required to support the spe cific device you wish to install. Make sure you have access to the Microsoft Windows OS CD(Windows 7 or Windows 8) to get the necessary DLL’s, or have the files available via one of the options listed above∙An external USB flash drive is recommended for temporary storage PROCEDURE1.Plug in the external USB drive and logoff from the thin client as “User”2.Login as “Administrator” (Refer to Admin Guide for more information)3.Verify that the FBWF Disable is active (see figure 3). If not, click on the “FBWFDisable” icon (This will restart your thin client) and login again as Administrator.Figure 3 - FBWF Disable displays a "RED" dot on the status row4.Go the “Start > Settings > Control Panel” and double-click on the “R AMd isk” or “DellWyse RAMdisk) icon.5.Verify the value is set to at least 100MB.6.Reboot the thin client if you changed the RAMdisk value. If not, go to step 87.Login as Administrator (See step 2)8.Go the “Start > Settings > Control Panel” and double-click on the “System” icon9.You will need to select from the left pane “Advanced system settings” first, select the“Advanced” tab and click on the “Environmental Variables…” button.Figure 4 - System Properties WES 7 - Advanced Tab10.Select the “TEMP” variable and click on the “Edit” button11.Change the “Variable value” from “Z:\” to “E:\” (where “E” is the drive letter of yourexternal USB drive) and press “OK” (See Figure 5 and Figure 6 below)12.Select the “TMP” variable and click on the Edit button13.Change the “Variable Value” from “Z:\” to “E:\” and press “OK”Figure 5 - Environmental Variables Figure 6 - Environmental Variables Modified14.If you are downloading the application from the web, make sure that you save it tothe “External USB drive”. DO NOT RUN IT FROM THE CLIENT FLASH15.Since the installation for different software and devices varies, “Read the softwareinstallation instructions and requirements before continuing”16.When the installation of your program is complete, change the Temp and TMPvariables as well as the RAM disk back to the original values17.Double-click on the FBWF Enable icon. This will reboot the thin client.18.Verify your new program.WEB-BASED INSTALLATIONSummary of Installation:If you are familiar with Windows Embedded environments, all you have to do isDisable the Write filter, change the Temp directories to the external flash drive and goto the website for the files to install.Step-by-Step InstallationIf you are not familiar with the process, here is the step-by-step:1.Plug in the external USB drive and logoff from the thin client as “User”2.Login as “Administrator” (Refer to Admin Guide for more information)3.Verify that the FBWF Disable is active (see figure 3). If not, click on the “FBWFDisable” icon (This will restart your WES Client) and login again as Administrator.Figure 7 - FBWF Disable displays a "RED" dot on the status row4.Go the “Start > Settings > Control Panel” and double-click on the “System” icon5.You will need to select from the left pane “Advanced system settings” first, select the“Advanced” tab and click on the “Environmental Variables…” button.Figure 8 - System Properties WES 7 - Advanced Tab6.Select the “TEMP” variable and click on the “Edit” button7.Change the “Variable value” from “Z:\” to “E:\” (where “E” is the drive letter of yourexternal USB drive) and press “OK” (See Figures 11 and 12 below)8.Select the “TMP” variable and click on the Edit button9.Change the “Variable Value” from “Z:\” to “E:\” and press “OK”Figure 9 - Environmental Variables Figure 10 - Environmental Variables Modified10.Go to the website to start the installation. If the installation requires that you“Download the file” to install, download the file to the external flash drive (in this case, drive E:) if the installer will launch from the web browser, just continue.11.Since the installation for different software and devices varies, “Read the softwareinstallation instructions and requirements before continuing”12.When the installation of your program is complete, change the Temp and TMPvariables as well as the RAM disk back to the original values13.Double-click on the FBWF Enable icon. This will reboot the thin client.14.Verify your new program.Example - Installing Yahoo MessengerIf you have a web-based installer, meaning that you have an installation program that goes out to the web to download the program to be install, and when the installation process is complete you get a message “Installation Unsuccessful” or your program failed to install, you may want to check the settings on your browser.Some web installer applications use Internet Explorer “Temporary Internet Files” settings to store the files, and with the change of the location of these file (Figure 10) the installation program may not be able to find some of the files until the TMP, TMP and “Temporary Internet Files” are all on the same drive. To do this, you will need to change the location of these files for a successful installation.Set the variables as described previously. In addition:1.Open the Control Panel2.Select “Internet options”3.On the General tab, under “Browsing history”, click on the “S ettings” button(Figure 11)Figure 11 - Changing Settings Figure 12 - Temporary Internet Files Setting4.On the Website Data Settings page, in the “Temporary Internet Files” tab, clickon the button labeled “Move folder …” (Figure 12)5.Navigate to the drive assigned to the TMP and TEMP variable (same as Figure10), select that drive and press “Ok”. In this case it would be Drive E: (Figure 13).Figure 13 - Browse for Drive Figure 14 - New Location for the Temporary Internet Files6.Once the change is made, verify that the new location is displayed under “Newlocation” as in Figure 14.7.Press “OK” twice to complete the procedure. The thin client will log off and logback in.Try your installation again and if successful, restore the device configuration to the original settings.Y AHOO M ESSENGER I NSTALLATION S ETTINGS:Screen 1:∙Uncheck both option for default home page and default search engine.∙Press “Custom Install” on topScreen 2:∙Check Create a Desktop shortcut and Create a Quick Launch shortcut∙Uncheck all others (unless you want them)∙Click nextScreen 3:∙Check the Yes, I agree … box to accept the Terms of Service∙Click nextScreen 4:∙Click Install and wait for completion.Screen 5:∙Click Finish once installation is complete.Example - Installing Google ChromeWhen Google Chrome is installed, Google Update is also installed by default and this program runs in the background automatically (regardless of an instance of Chrome running or not) and consumes FBWF RAM cache and considerable CPU usage. This will cause the thin client to crash.After installing Google Chrome on any Wyse WES7, WES7p or WE8S thin client, the error “The system is running out of free memory and needs to restart” will appear.This is caused by the design of Google Chrome requiring constant updates and can only be addressed by Google. To alleviate this issue, we recommend that you stop the Google Update Service. Since the thin client is designed to run with the Write Filter enabled, any updates that are applied to the Chrome browser will just be wiped out by the reboot, so you are just wasting memory and CPU resources.H OW TO STOP THE G OOGLE U PDATE SERVICE:1.Login as Administrator2.Disable the Write Filter (this will reboot the thin client)3.Login as Administrator4.Open the Control Panel5.Select "Administrative Tools"6.Select Component Services7.Expand "Services (Local)"8.In the middle pane, find "Google Update Service"9.Right-click and select "Properties"10.Under "Startup type", select Disabled11.Press OK to close12.If you have multiple "Google Update Service" entries, make sure you also disable all ofthem.13.Close Component Services14.Enable the Write Filter (this will reboot the thin client)15.Process completeCAUTION: Increasing the size of the FBWF cache, instead of stopping the service, will just cut into the available RAM the system needs for normal application operation and delay the inevitable crash. This is not recommended.。
微科普│Windows Embedded Standard 7(WES 7)WES7(Windows Embedded Standard 7)是微软在2010年5月13日发布的基于X86平台的组件化的Windows 7嵌入式操作系统。
在工控行业工控机系统除了常用的Windows7以外,还有一种定制系统Windows Embedded Standard 7(以下简称WES7)也比较常用。
WES7除了具有Windows 7最新的功能外,还具有适用于嵌入式设备功能,例如EWF,FBWF,Dialog Filter,DISM,Register Filter等等;兼容微软所有的服务器技术、数据库技术及开发技术;使设备更加高效稳定,减少维护工作量。
WES7优点1. 通过裁剪不必要的组件,系统大大瘦身。
2. 对硬件要求降低。
3. 支持32位系统和64位系统。
4. 与企业级的服务器和工具相集成,与微软的数据库、云计算体系及各类应用技术无缝连接。
除了以上基本功能以外,WES7相对Windows7标准系统具有更多优点:1. EWF/FBWF技术(写过滤器)•构建可靠的操作系统•保护目标磁盘避免误写入操作•降低存储介质损耗•在异常掉电的状态下保护磁盘和系统文件•快速启动2. HORM 技术•与EWF/FBWF技术相结合,支持断电、关机、重启下的休眠启动。
3. Register Filter (注册表过滤器)•防止注册表被恶意修改,安全保护系统稳定运行。
4. USB/CD 引导启动•支持Windows从可移动磁盘启动。
•自定义界面•可定制启动界面和登录界面。
•消息框/对话框自动回复•屏蔽自动弹出的消息框和对话框,用户体验更好。
5. DISM功能•在系统完成安装以后,如果某些软件或者硬件缺少组件无法正常运行,通过光盘或者网络安装的方式可以再将相关组件安装到系统中,以确保这些软件和硬件可以正常运行。
有优点就有缺点。
WES7也有自身的缺点,比如要求系统定制者对系统组件非常了解,具有一定的底层开发知识;比如在使用过程中,没有WIN7专业的技术支持等等。
同方瘦客户机卖点指导手册同方(深圳)云计算技术股份有限公司2012-12目录一、瘦客户机和Mini PC概念浅谈 (3)1、瘦客户机概念 (3)2、Mini PC概念 (3)二、同方瘦客户机优势 (3)1、同方瘦客户机与PC及Mini PC比较 (3)2、同方瘦客户机与国内厂商瘦客户机比较 (5)一、瘦客户机和Mini PC概念浅谈1、瘦客户机概念瘦客户机是使用专业嵌入式处理器,小型本地闪存,精简版操作系统的基于工业标准设计的行业专用产品。
其追求的目标是设备具有总拥有成本低、安全性高、可靠性强、易于管理维护等优点。
2、Mini PC概念所谓Mini PC,其实就是体积小巧的PC。
与普通PC相比,Mini PC的最大特征就是电脑主机在体积上进行“缩水“,例如将光驱盒硬盘安装位都竖立起来,主机内部电源的安装位也出现了相应的改变等。
二、同方瘦客户机优势同方凭借其在瘦客户机市场的多年积累和挖掘,提炼出品质上佳的同方瘦客户机产品。
下面,将与PC,Mini PC和其他瘦客户机厂商的品质进行比较:1、同方瘦客户机与PC及Mini PC比较1)无风扇,静音PC内部安装有CPU风扇,电源风扇等,运行时,CPU风扇,电源风扇等声音明显,且后期使用时由于灰尘,润滑等问题,噪声日益提高;由于Mini PC体积较PC小,相应的内部空间也变得很狭小,空气在如此狭小的空间内不易流通,因此散热性能成为Mini PC的一个瓶颈;而为了加强散热,Mini PC的主机内部会采用多个散热风扇,而随着风扇的增多,电脑运行时的噪音问题也随之而来,运行时的噪音根本得不到很好的控制,降低了客户的环境舒适度;而同方瘦客户机采用硬件嵌入式方案,整机无风扇设计,设备运行时可以完美的控制噪声问题,保证静音,提高客户的环境舒适度;2)稳定性高PC和Mini PC采用高功耗CPU,CPU采用PGA封装方式,易松动,主板稳定性低;同方瘦客户机采用硬件一体化设计,高速低功耗CPU,CPU采用BGA封装方式,尺寸小,直接封装到主板上,主板稳定性高;3)接口设计丰富,且为主板支持PC和Mini PC内采用机械插拔式接口,随着使用时间的加长,易出现松脱等现象;连接线多,布线复杂;且主板直接支持外设接口少,后期扩展需要使用各类扩展卡,由于扩展卡为小器件,本身质量低,且供应厂商各异,外设兼容性降低,稳定性也随之降低;同方瘦客户机为满足外设需求丰富的环境使用,有加强设计。