1.3 抗光幕清洁说明书
- 格式:pdf
- 大小:127.12 KB
- 文档页数:1

OF INFECTION PREVENTION.ES HAS A POWERFUL P ARTNER IN INFECTION PREVENTION.Sani-Cloth ® products are specifically designed to supportEnvironmental Service Professionals in their vital role to help stopthe spread of preventable infections, whatever the challenge.Features• Pre-moistened, ready to use • No measuring, no mixing, or waiting• Color-coded for ease of implementation, replacement and compliance • Compliant with CDC Guideline Disinfection and Sterilization inHealthcare Facilities and AHE Practice Guidance for Environmental Cleaning1• Designed for Environmental Services convenience & efficiency with bilingual materialsINTERVENTIONAL CARE PATIENT CAREENVIRONMENT OF CARESani-Cloth® BleachGermicidal Disposable WipeIdeal for disinfecting high risk areas endemicwith Clostridium difficle spores and Norovirus.Super Sani-Cloth®Germicidal Disposable WipeIdeal for daily use in fast-paced environmentsthat require short contact times and broadcoverage of microorganisms.Sani-Cloth® AF3Germicidal Disposable WipeAlcohol and fragrance free formula is idealfor use around patients, residents and staff,especially those with respiratory sensitivities.Sani-Cloth® Point-of-Care Accessories and Staff Education Developed to assist you in facility protocol compliance, meet regulatory as well as accreditation requirements, and provide a comprehensive training program to ensure proper use. Visit for more education.Instructions for Use Signage(bilingual)Quick Reference Guide(bilingual)Daily Cleaning Wall Chart(bilingual)Terminal Cleaning Wall Chart(bilingual)High-Touch Surface Guide(bilingual)PDI 3-in-1 Universal Sani-BracketLarge CanisterX-Large CanisterLarge Individual PacketX-Large Individual PacketLarge CanisterX-Large CanisterLarge Individual PacketINTERVENTIONAL CARE PATIENT CARE ENVIRONMENT OF CARE3-in-1 Universal3-in-1 UniversalSani-Bracket3-in-1 Sani-BracketSani-Canister CaddyCountertop placeholder for canisters. Displays important product and compliance information.PDI Safety StandPPE StationINTERVENTIONAL CARE PATIENT CARE ENVIRONMENT OF CARE1。


Understanding the Cleaning Process for Automatic Stencil PrintersEd NaussSr. Sales / Applications EngineerThe automatic stencil wiper –first line of defense •The Printing process and why we need to focus on the wiping function•Frequency of wiping•Wiping options•Wiper profiles•Event driven wiping•Advanced options•Materials –Paper•Materials –Solvent•Preventive maintenance•Random stuffPrimary goal of the printing machineTo print or place an exact amount of material in a precise location.Simply -Align the board to the stencil•Solder Paste•Adhesives•Flux•Solder Spheres•Thick FilmHowever the printing processhas become much more thanthat…….To address defects and yield –the printing process has the largest impactSMT Defects:•Printing process is the major cause for yield loss (50-75%)Auto stencil wiping is the critical tool for addressing these defects.Printing Process is critical to success:•Confirmed by 86% of SMT industry(Value in Use Survey 2016)Yield & Throughput influence up to 91% of the margin made on a particular assemblyMaterials 12%Other Solder Print53%Placement33%0%20%40%60%80%100%Product MarginImpacted by Yield &ThroughputWhy Wipe the SMT Stencil?overcome the forces holding the deposit to the stencil walls.The paste near the wall stretches and snaps.StencilPCBPCB PadPaste up and sticks to both the stencil walls and thepads.Depending on the pad wall area ratio, a portion of the paste will release to the PCB, while some will stay in theapertureSome paste may also stick to bottom of stencil due tostringing, bad gasketing or pump outWhy do we wipe?•Gasketing•How often we wipe is a direct result of how well the board and stencil are positioned and sealed •Contributors of gasketing issues:•Incorrect or varied board thickness•Variation of mask thickness•Encroachment of mask on pads•Pads recessed below mask•Nomenclature /silk screens•HASL•Board warpage•Bar code labels•Damaged or worn stencils•Loss of stencil tension•Insufficient tooling / support•Board holding interference•Vacuum•Squeegee over pressure•Mismatch of aperture to ball size•Machine contaminationIDEAL STENCILCONDITIONNo unwantedpaste insideapertures or onbottom surface Paper/fabric typeWiper typeWipe parameters:Sequence, speed, frequency SolventeffectivenessOriginalCleanlinessBaseline releasecharacteristics ExposuretimeSolventcompatibilityWorkingtimeBoard SupportPCB-StencilAlignmentPCBFlatnessPrintParameters:speed, pressure,separationPaste Delivery:Squeegee type, angle,stiffness, coating, etcORPump propertiesAperture size& positionTemperatureAperture wallgeometry andtopographyAlloyRelease coatings inaperture or on surfaceFoilThickness(Area Ratio)Powder SizeDrynessTaking the guess work out of Frequency•Most customers “Guesstimate” the wiper frequency•Apply same frequency number to each individual printer program•Issue: wiping frequency is not linear•Under-wiping•Allow paste to build up on bottom of stencil•Solder balls, bridging poor gasketing•Allows paste to build up in apertures resulting in clogging and decreased material transfer •Over-wiping•Elimination of flux that acts like lubricant during material transfer•Excess paper and solvent consumption•Cycle time hit•Simple DOE can determine a starting point for wiping•Use of onboard Inspection or down stream SPI is another tool to determine or adjust frequencyDetermining Wiper Frequency Manually•Inspect the stencil and ensure the stencil is clean•Print 1 board•Jog vision system to inspect stencil bottom surface for paste residue (Squeeze Out)•If there is no evidence of Squeeze Out, print another 1-2 boards•Repeat this until you see Squeeze OutSolder paste residuebridging the gaps betweenthe aperturesClean StencilSubtract 1 -2 prints from the determined number of prints for your “wipe frequency”Stencil after a wiper cycleWipe Types•Dry Wipe –most common used –addresses the solder balls on the bottom of the stencil caused by bleed-out from the aperture •Vacuum Wipe –address the aperture to remove paste and address clogging of the aperture•Solvent wipe –used to address the flux on the bottom of the stencilWipe frequency•>15 –excellent gasketing –aperture sizes are not challenging•10-15 –good gasketing with the occasional anomaly•5-10 –Average wipe frequency –some challenging apertures –some gasketing issues•2-5 –Poor gasketing –mismatch of materials –stencil design issues –very challenging components•1-each print –something is wrong -requiring a wipe after every print –micro components –pushing envelopeWiper profile –wipe 1Wiper profile –wipe 2Wiper profile –wipe 3Additional Parameters•Recent studies have shown a Vac/Vac/Dry or a Solvent/Vac/Vac/Dry wipe is most effective•The first vacuum wipe pulls solder from the aperture and forms stalactite's hanging from the apertureContinuous vs index mode•Continuous mode –advances the paper during wiper motion ensuring fresh paper is applied during the wipe –maximum paper consumption•Index mode –paper is advanced a pre-determined amount then is stationary during wiper motion –minimum paper consumption •Continuous has shown to clean better and prevent “snowplowing” of the paste particularly when vacuumingHop over•Used to address snowplow effect –retracts plenum and moves over end pointOvertravel•Wipe stroke pre-determined by squeegee stroke –allows extension of stroke –eliminates contamination of gold fingers if present Wiper speed•Recommended speed of wipe or solvent stroke –2 Inch/second•Recommended speed of Vacuum stroke –1 inch/secondEvent driven wiping•Key events that can trigger defects:•Pause in printing•First 1-4 prints•Additional paste added•Custom Wipes to target specific events in the printer •Pause in printing•Based on thixotropic index of paste•Recommend a medium plus wipe•Kneed function•Squeeze out is the issue•Heavy on the dry wipe / no solvent•During paste dispense•Utilize printer window to do additional wipeWiper Paper•“Printers are only as good as the material that you put into it” –the same can be applied to the wiper•Using low-cost paper directly influences the wiper ability to clean the stencil•In general, there are two types of papers used in stencil wiping: papers made with synthetic fibers held together with glues (called binders), and papers made from a mix of natural and synthetic fibers that do not use glue.•The papers ability to absorb both the solder and solvents reflects on the cleanliness of the stencilGlue Binders•Synthetic fibers found in paper usually are polyester or rayon.•In general, about 30% of the paper’s weight is found in binders.•These papers have a harder surface, lower tensile strength, absorb less contamination and are less expensive than glue-less versions.•Cross-section microphotograph of polyester paper madewith binders, enlarged 200 times.•The fibers are coated with glue, making surfaces hard and unable toabsorb contamination.•Most empty space in the wipe has been filled with binders, reducing theability to pick up solder paste.Hydro-Entangling•Some paper is made using a process called “hydro-entangling”•This process involves laying raw fibers of polyester and cellulose onto a conveyor belt and intertwining the fibers with high-pressure jets of water•Heat and pressure then are used to dry the slurry into the proper configuration•Lacking glue, hydro-entangled papers have a softer feel•They are more absorbent, thicker and stronger than ordinary paper•The flat, rough cellulose fibers (thin, top layer) are highly absorbent, butweak and prone to lifting•The rounder polyester fibers (middle and bottom) provide structuralstrength and open space to pick up solder pasteHydro-Entangled, Single-Fiber Polymer• A new material consisting of a hydro-entangled, single-fiber polymer based on regenerated cellulose was developed.•This fabric, which is completely synthetic, contains no natural fibers or binders.•Under a microscope, the long, thin, hard fibers are identical and homogenous, giving the fabric an open structure.•The material is a pale, off-white color and highly absorbent.•The fabric scores well on the solder paste pick-up tests for non-liquidcontamination.•The fibers are smooth, consistent and hard.•The paper includes extensive voids and cavities to pick up solder paste.•There is no cellulose to rip or shred, or binders to dissolve and contaminate thestencil.Paper Compared (Dry Wipe Data Only)High End Paper Typical Paper Paper Using Glue Base Weight (oz/per yd²) 1.87 1.56 1.11 Tensile Strength (LB’s)293116 Thickness (Mils)151211 Absorption (ML H²O/M²)391290231Fiber Shedding (particles >0.51271,13020mm/m². x103)Extractable IPA %0.08%0.07%0.98% Solder Paste Pick-up Test77%61%33%Solvents•Usage on solvents split down the middle with yes or no•A NO to solvent is often based on a negative experience that can be traced to:•Negative effect on the print process following solvent application•Poor solvent performance•Application method used•Mismatch of solvent to printing material•Misunderstanding of what solvents do•Most common solvent used is Isopropyl Alcohol –which now has its issues•Chemistry companies, prior to 7 years ago, did not understand the printing process and its requirements •Often what was being recommended to be applied to the printer is also used to clean boards or stencils in a tank•Requirements of the print process and new chemistries have improved performance in the printer and have a targeted this applicationIsopropyl AlcoholAlcohol Types•Ethanol –Fermented / yeast –consumable•“the root cause and solution to all of life's problems” –Homer Simpson•Methanol –Fermented / wood –toxic•Ethanol + Methanol = denatured alcohol•Propanol –Fermented / bacterium (Clostridium Acetobutylicum) -feeds on cellulose –common name –Rubbing Alcohol •Isopropyl-mixture of Propanol and ethyl methyl ether -secondary alcohol that uses a binderIssues with Isopropyl•Flash Point = 53 F (open cup) 55 F l (closed cup)•Defined as a Class 1B flammable liquid ( same as Gasoline)•Definition of a flammable liquid –flash point below 100 F•National Fire association•US Environmental Protection Agency (EPA)•US Occupational Safety and Health Administration (OSHA)•Previously Isopropyl was a match as it was the solvent of choice used in paste•Newer paste designs use a solvent to increase stencil life –can react badly to Isopropyl•Results in “clumping” of paste when combined with flux•Less than 90% purity will leave residue on stencil that will result in poor transfer efficiencySolvent Checklist•Chemical compatibility with the solder paste•Dissolve the flux & free up the powder spheres•No bad reaction with paste that affects paste viscosity •Process compatibility•Dry evenly and at a controlled rate•No adverse paste reactions•Leave no residue•Equipment compatibility•Does not attack valves, seals, pumps, reservoirs •Safety & health•Non-toxic, non-flammable, low-(or no-) odorApproved SolventsSolvent conclusions•Evaporation rate of chemistry critical to printer application •Good indicator is the flash point of the material –the lower theflashpoint –the better the evaporation rate•Test for residues –mirror test•Avoid water-based solvents for the printer•Petroleum based solvents should be also be avoided •Check with your paste manufacturer for compatibility of solvents •Work with chemistry vendors for best application•Always start wipe cycle with the solvent wipe•Match the solvent to the material and application –one size does not fit allPreventive Maintenance•Check the owner's manual for preventive maintenance for your individual machine •Replace Vacuum filters based on requirements•Check main drive belts/chains for proper tension•Clean all bushings and remove any foreign material from wiper assembly•Check and replace vacuum hosing as needed especially if using solvent•Remove plenum and remove any material build up in trough –check plenum bow if present •Inspect plenum for damage –verify match of plenum to stencil/foil sizeRandom Stuff•Motion additions to wiping process has shown no improvement in wiping •Ultrasonic•X-Motion•Nano-coating of stencils•Confusion on Aculon Nano-Clear –reduces wipes/ buildup of paste –not focused on release•Nano-coating will wear from the bottom of stencil•New coating methods –Plasma coating / baking improve coating life•Paper wash•No input•Paperless wiper development•Effectiveness of wipe•How to indicate alternative wiping material is contaminated•TBDSummary•Under stencil wiper is the first defense against defects•Matching the wiper profile and frequency to the individual boards –where one size does not fit all •The wiper like the printer in general –process as good as the material applied•Base wiper paper used on performance not cost•Solvents when used correctly can contribute a positive influence to the stencil cleaning process •Keep up with wiper PM for optimum performance。

4000 PSI Surface CleanersOwner’s Manual#49429 #49430 WARNING: Read carefully and understand all ASSEMBLY AND OPERATION INSTRUCTIONS before operating. Failure to follow the safety rules and other basic safety precautions may result in serious personal injury.Items #49429& #49430Thank you very much for choosing a NorthStar™ product!For future reference, please complete the owner’s record below:Serial Number/Lot Date Code: ________________________________ Purchase Date: ____________________________________________ Save the receipt, warranty, and this manual. It is important that you read the entire manual to become familiar with this product before you begin using it.These 4000 PSI Surface Cleaners are designed for certain applications only. Northern Tool and Equipment cannot be responsible for issues arising from modification or use of these products in an application for which they were not designed. We strongly recommend that these products not be modified and/or used for any application other than that for which they were designed. If you have questions about a particular modification or application, DO NOT use these products until you have first contacted the distributor to determine if the product can or should be modified or used in such an application.For technical questions, please call 1-800-222-5381.Intended Use (4)Technical Specifications (4)Important Safety Information (5)Specific Operation Warnings (6)Assembly (7)Before Each Use (7)Operating Instructions (7)After Each Use (8)Maintenance (9)#49429 Parts Diagram (11)#49429 Parts List (12)#49429 Swivel Parts Diagram (13)#49429 Swivel Parts List (14)#49430 Parts Diagram (15)#49430 Parts List (16)#49430 Swivel Parts Diagram (17)#49430 Swivel Parts List (18)Troubleshooting (19)Replacement Parts (19)Limited Warranty (20)The NorthStar 4000 PSI Surface Cleaners are used for the high-pressure cleaning needs of driveways, concrete floors, parking lots, roofs, warehouses, boat ramps, garage floors, boat decks, and other flat surfaces. The benefits of using these products are clear: effective, shorter working times, enormous energy savings and a long useful life due to the high industrial quality.#49429 - 20” Cleaner#49430 - 22” Cleaner1. Bolt the two halves of the handle together with the two M6 x 60mm bolts, nylon nuts, and fourwashers.2. Connect the handle to the brackets on the deck with the two 55mm pins and rings.3. Apply thread sealant to the hose’s male threads and connect the hose to the swivel on thedeck.4. Again, using thread sealant, attach the in-line filter to the inlet of the gun.∙Check for damaged parts before each use. Carefully check that the surface cleaner will operate properly and perform its intended function. Replace damaged or worn parts immediately. Never operate the surface cleaner with a damaged part.1. Connect the inlet filter (D40014 on cleaner #49429; D40015 on #49430) to the FSC gun inlet.2. Connect the cleaner to a non-operating pressure washer.3. Turn the water on and open the valve. Open the trigger gun for flow of water through thenozzles. The nozzles must have flowing spray. If not, remove the tips, clean them, andreassemble the nozzles making sure that the groove of the nozzle is parallel to the spray bar.Use thread sealant when reinstalling the nozzles.4. Start the pressure washer. The surface cleaner is ready for operation.5. Walk slowly behind the machine, cleaning as you go. If striping occurs, slow down your pace.6. Periodically check the weep hole on the bottom of the swivel. Water will seep slowly; if watershoots out, stop and replace the seals. The swivel assembly can then be rebuilt.7. For maximum effectiveness, keep the spray tips clean. If the machine vibrates, stop and cleanthe spray tips.Inspect the cleaner after each use. Clean it and prepare it for the next use.∙Clean out any dirt or foreign material from under the housing and casters. Use a cloth or sponge to wash the surface cleaner and rinse with tap water.∙Check for loose parts and any damages.When storing the cleaner for an extended time, it’s best to drain as much water from the unit as possible. Disconnect the cleaner from the pump and stand the handle upright. Clamp the gun trigger open and let the water run out. Shop air can also be used in the gun inlet to force out the water.Store the unit in a dry, secure place out of the reach of children. Inspect the cleaner for good working condition prior to storage and before re-use.The surface cleaner does not require maintenance.Replacing the nozzles: Disconnect the FSC from the pump. Turn the FSC deck upside down andu se a 9/16” combination wrench to unscrew the nozzles. Do not let any debris fall into the open nozzle ports. Apply thread sealant to the new nozzle threads and thread into the nozzle ports. Tighten securely making sure the nozzle slot is parallel to the rotating arm.Replacing the hose: Disconnect the FSC from the pump. Unscrew the hose from the swivel using a suitable wrench. Thread the hose out of the hose guides on the handle.Loosen the two socket head cap screws on the gun using a 4mm allen wrench and slide the gun toward the end of the handle until the gun outlet with the hose is exposed. Disconnect the hose from the gun.The new hose can now be attached to the FSC. Use thread sealant on both hose threads and assemble the hose in the reverse order that it was disassembled.Replacing the swivel: Disconnect the FSC from the pump then disconnect the hose from the swivel. Use a 6mm allen wrench to loosen the socket head cap screw on the collar holding the swivel.The swivel can drop out of the bottom of the FSC deck. Remove the rotating arm using two wrenches. If a vice is handy, hold the rotating arm while turning the hex on the swivel outlet.Installing the new swivel in the FSC is the reverse process of removing the old one. Use only identical replacement parts with the cleaner. Parts that may be suitable for one tool may create a risk of injury when used with another tool. Never use a part that has a lower operating pressure than the tool itself.If the surface cleaner’s rotating arm is not spinning, ensure that the cleaner is not pressurized then tilt it upward so you can see the underside of the deck. If a nozzle is not spraying, it’s plugged and needs to be cleaned. The best way to unclog a plug is to remove the nozzle (9/16" wrench) and tap it on a hard surface (being careful not to damage the threads). It may be necessary to unclog the nozzle by running a thin wire through the tip.Seal the threads before replacing the nozzle. Teflon tape can often clog a nozzle so be sure tape does not get into the nozzle flow path. A light duty liquid or paste thread sealant is the best way to seal the threads (photo).∙For replacement parts and technical questions, please call Customer Service at 1-800-222-5381.∙Not all product components are available for replacement. The illustrations provided are a convenient reference to the location and position of parts in the assembly sequence.∙When ordering parts, the following will be required: model number, serial number/lot date code, description, and reference number.∙The distributor reserves the rights to make design changes and or improvements to product lines and manuals without notice.Northern Tool and Equipment Company, Inc. ("We'' or '"Us'') warrants to the original purchaser only ("You'' or “Your”) that the NorthStar product purchased will be free from material defects in both materials and workmanship, normal wear and tear excepted, for a period of 2 years from date of purchase. The foregoing warranty is valid only if the installation and use of the product is strictly in accordance with product instructions. There are no other warranties, express or implied, including the warranty of merchantability or fitness for a particular purpose. If the product does not comply with this limited warranty, Your sole and exclusive remedy is that We will, at our sole option and within a commercially reasonable time, replace product components without charge to you. No returns will be accepted. This limited warranty is not transferable.Limitations on the WarrantyThis limited warranty does not cover: (a) normal wear and tear; (b) damage through abuse, neglect, misuse, or as a result of any accident or in any other manner; (c) damage from misapplication, overloading, or improper installation; (d) improper maintenance and repair; and (e) product alteration in any manner by anyone other than Us, with the sole exception of alterations made pursuant to product instructions and in a workmanlike manner.Obligations of PurchaserYou must retain Your product purchase receipt to verify date of purchase and that You are the original purchaser. To make a warranty claim, contact Us at 1-800-222-5381, identify the product by make and model number, and follow the claim instructions that will be provided. The product and the purchase receipt must be provided to Us in order to process Your warranty claim. Any returned product that is replaced or refunded by Us becomes our property. You will be responsible for return shipping costs or costs related to Your return visit to a retail store.Remedy LimitsProduct replacement or a refund of the purchase price is Your sole remedy under this limited warranty or any other warranty related to the product. We shall not be liable for: service or labor charges or damage to Your property incurred in removing or replacing the product; any damages, including, without limitation, damages to tangible personal property or personal injury, related to Your improper use, installation, or maintenance of the product or product component; or any indirect, incidental or consequential damages of any kind for any reason.Assumption of RiskYou acknowledge and agree that any use of the product for any purpose other than the specifieduse(s) stated in the product instructions is at Your own risk.Governing LawThis limited warranty gives You specific legal rights, and You also may have other rights which vary from state to state. Some states do not allow limitations or exclusions on implied warranties or incidental or consequential damages, so the above limitations may not apply to You. This limited warranty is governed by the laws of the State of Minnesota, without regard to rules pertaining to conflicts of law. The state courts located in Dakota County, Minnesota shall have exclusive jurisdiction for any disputes relating to this warranty.Distributed by:Northern Tool & Equipment Company, Inc.Burnsville, Minnesota 55306Made in ChinaPage 21 of 21。

SF系列安全光幕使用说明书◆ 安全光幕的使用关系人身安全,使用前请仔细阅读使用说明书◆ 说明书是指导用户正确安装、使用安全光幕的重要文件,请代理商、经销商、机床厂务必将使用说明书随安全光幕交付用户山东莱恩光电科技股份有限公司SHANDONG LAIEN OPTIC-ELECTRONIC TECHNOLOGY CO.,LTD.感谢您选用“LNTECH(莱恩)”牌安全光幕!本安全光幕主要用于汽车电子产业、包装业等自动化领域,防止工作人员误入危险区域造成的人身伤害,保护人身安全。
本安全光幕仅保护发光器与受光器(SF系列)之间的矩形光幕区域。
如果其安装位置不正确,或不按说明书与相关安全作业条例操作,或被保护设备执行机构故障,都可能使其无法起到保护作用。
因此,安装本光幕之前,请仔细阅读说明书,充分理解有关事项,尤其是说明书中标出的“警告”、“注意”等内容;在使用过程中,请正确理解安全光幕的工作性能,严格按照本说明书所提出的要求,制定相应的安全作业条例。
本说明书内容解释权归山东莱恩光电科技股份有限公司,阅读或使用本说明书时,如有不明之处,请与本公司联系。
禁止事项:禁止擅自复印、转载本使用说明书的部分或全部内容。
关于本使用说明书的内容,将来可能因装置改良等原因而进行修改,恕不另行预告。
本使用说明书虽经精心制作以期万全,但如果您发现有不明之处或异常、错页或缺页等时,烦请您通知最近的本公司办事处。
1)2)3)1 重要资料1.1 概述 (1)1.2 使用说明书的组成 (1)1.3 适用范围 (1)1.4 欧洲指令验证 (1)1.5 欧洲标准验证 (2)1.6 中国标准验证 (2)1.7 术语 (3)1.8 安全须知 (4)2 基本介绍2.1 外形尺寸图 (5)2.2 规格型号 (6)2.3 检测精度与光轴间距的关系 (7)2.4 技术标牌 (8)3 产品描述3.1 技术参数 (9)3.2 特点 (10)3.3 工作示意图 (10)3.4 应用案例 (11)3.5 应用条件 (13)4 功能配置4.1 外部装置监视功能(EDM) (14)4.2 辅助输出功能 (15)4.3 辅助对光功能 (15)4.4 对光强弱指示功能 (16)5 SF系列安全光幕的安装5.1 安全距离的计算 (17)5.2 相邻安装时的注意事项 (19)5.3 有反射物时的正确安装位置 (20)5.4 安装说明 (21)5.5 安装工具 (25)6 SF系列安全光幕部件说明6.1 主体部件说明 (26)6.2 发光器指示灯说明 (27)6.3 受光器指示灯说明 (28)7 接线7.1 SF系列安全光幕I/O接线 (29)7.2SF系列安全光幕与SR4P2A1B24N/P接线 (32)7.3 SF系列安全光幕与SR4P3A1B24接线 (34)7.4 SF系列安全光幕与SR4P2A1B24N/P-M接线 (35)7.5 信号电缆 (37)7.6 接线注意事项 (38)8 SF系列安全光幕的调试8.1 安全光幕的调试 (39)8.2 试运行 (39)9 使用、检查、保养9.1 使用注意事项 (40)9.2 检查与保养 (40)10 简单故障检修10.1 安全光幕故障判别 (41)11 配货信息11.1 配货 (42)1.重要资料1.1 概述本说明书包含了关于SF系列产品的说明、操作、安装、电气连接、维护和故障判断等资料。

劳易测光幕使用说明书
劳易测光幕使用说明书
感谢您购买劳易测光幕。
本说明书将为您提供有关产品的详细信息和正确使用方法。
1. 产品概述
劳易测光幕是一种用于测量光线强度的设备。
它由一个光敏元件和一个显示屏组成,可以准确地测量光线的强度,并将结果显示在屏幕上。
2. 产品特点
- 高精度测量:劳易测光幕采用先进的测量技术,可以提供高精度的测量结果。
- 易于使用:只需将测光幕放置在所需测量的位置,即可获得测量结果。
- 显示屏幕:具备显示屏幕,可直观地显示测量结果。
3. 使用步骤
以下是劳易测光幕的正确使用步骤:
步骤1:准备
- 打开包装,取出劳易测光幕及配件。
- 确保设备已经充电或插入电源。
步骤2:放置劳易测光幕
- 将测光幕放置在需要测量的位置上,确保其朝向待测光源。
步骤3:测量
- 按下电源按钮,屏幕将显示测量结果。
- 建议将测光幕静置片刻,以确保结果的稳定性。
步骤4:保存和复位
- 在完成测量后,您可以选择保存结果,或按下复位按钮以重新开始。
4. 注意事项
- 避免将光敏元件暴露在强烈光线下,以免损坏设备。
- 定期清洁测光幕以保持测量的准确性。
- 请勿将测光幕浸入水中或暴露在湿气环境中。
5. 产品维护
- 储存时,请将劳易测光幕放在干燥、通风的地方。
- 如果测光幕出现故障,请不要自行拆卸或修理,而应联系售后服务中心。
希望本说明书能够帮助您正确使用劳易测光幕。
如有其他问题或需要进一步的帮助,请随时联系我们的客服人员。
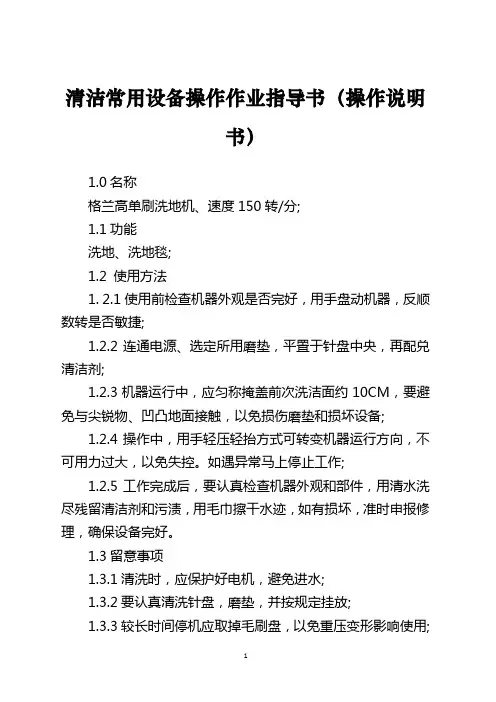
清洁常用设备操作作业指导书(操作说明书)1.0名称格兰高单刷洗地机、速度150转/分;1.1功能洗地、洗地毯;1.2 使用方法1. 2.1使用前检查机器外观是否完好,用手盘动机器,反顺数转是否敏捷;1.2.2连通电源、选定所用磨垫,平置于针盘中央,再配兑清洁剂;1.2.3机器运行中,应匀称掩盖前次洗洁面约10CM,要避免与尖锐物、凹凸地面接触,以免损伤磨垫和损坏设备;1.2.4操作中,用手轻压轻抬方式可转变机器运行方向,不可用力过大,以免失控。
如遇异常马上停止工作;1.2.5工作完成后,要认真检查机器外观和部件,用清水洗尽残留清洁剂和污渍,用毛巾擦干水迹,如有损坏,准时申报修理,确保设备完好。
1.3留意事项1.3.1清洗时,应保护好电机,避免进水;1.3.2要认真清洗针盘,磨垫,并按规定挂放;1.3.3较长时间停机应取掉毛刷盘,以免重压变形影响使用;1.3.4应选用最近距电源工作,工作间不可离人;1.3.5未经培训,禁止操作机器。
2.0名称格兰高抛光机、速度1500转/分;2.1 功能地面高速抛光2.2使用方法2.2.1使用前检查机器外观是否完好,用手盘动机器反顺是否敏捷;2.2.2选定抛光垫,平置于针盘中央,旋紧保险盖,防止垫子脱落;2.2.3该机器是高速运转,要集中精力操作,不牢靠近其它物体,应避免与尖锐物和不平地面碰撞,以免损坏磨垫和设备;2.2.4开动机器后要不停移动机器,才能避免高速磨擦损伤地面;2.2.5完成工作后,要认真检查机器外观和部件,用干毛巾擦去灰尘,用轻度配制液浸泡磨垫数小时后洗尽晾干备用;2.2.6如有损坏,准时申报修理、确保设备完好。
2.3留意事项:2.3.1应选用最近距离电源工作,工作间不可离人;2.3.2未经培训,禁止操作机器。
3.0名称:格兰高吸尘吸水机3.1 功能:吸尘、吸水3.2使用方法:3.2.1使用前,检查机器外观是否完好,所需配件是否完好,齐全;3.2.2吸尘时,应放置灰尘过滤网罩,吸水时应取掉灰尘过滤网罩,不可混用;3.2.3操作中,吸嘴应避免与尖锐物接触,防止损坏,不可强行吸吮异物,防止堵塞和损伤设备;3.2.4完成工作后,要准时清洁设备,擦净晾干备用,检查所属配件是否齐全、完好,如有损坏准时申报修理,确保设备完好。
厨房设备清洁说明书一、使用说明1. 本说明书适用于家庭和商用厨房的各类设备,如炉灶、烤箱、微波炉、抽油烟机等。
2. 在使用前,请务必阅读设备的相关操作手册,并按照要求正确操作。
3. 本说明书主要介绍设备的清洁方法和注意事项,请按照说明进行操作。
二、清洁方法1. 清洗前的准备工作在清洗设备之前,确保设备已断电或断气,并等待其完全冷却。
同时,关闭相关阀门,避免水或清洁剂进入不需要清洗的部分。
2. 厨房设备清洁剂的选择根据设备的材质和功能,选择适合的清洁剂。
常见的选择包括洗涤剂、消毒剂、去污剂等。
确保所选清洁剂符合食品卫生标准,避免对人体和设备造成伤害。
3. 清洁步骤(1)表面清洁:首先,用湿布或海绵蘸取适量清洁剂,轻轻擦拭设备表面。
注意不要使用过量的清洁剂,以免残留。
对于油污较重的表面,可以先使用去污剂进行预处理。
(2)内部清洁:打开设备的各个部件,如炉灶的焦点、烤箱的烤盘等,将其放入温水中浸泡。
使用刷子或海绵清洁内部部件,注意不要用过硬的物品刮擦,以免刮伤设备表面。
待清洁完成后,清洗剂和污垢彻底清洗干净。
(3)管道清洁:对于使用水或气体的设备,如抽油烟机、水槽等,定期清洗管道,避免积累油渍或污垢引发细菌滋生。
可使用管道清洁剂进行清洁,按照说明进行操作,确保通畅无阻。
三、注意事项1. 注意个人安全清洗设备时,请佩戴适当的防护手套、工作服和眼镜,以免清洁剂溅入眼睛或对皮肤造成伤害。
2. 防止电器进水在清洗电器时,确保设备断电,并避免水或清洁剂进入电器内部,以免损坏设备电路。
清洗后,请待设备彻底干燥后再通电使用。
3. 不可过度清洁虽然保持设备干净是重要的,但过度清洁可能会对设备造成损害。
请遵循设备手册中的建议,并避免使用过量的清洁剂或过硬的物品对设备进行清洁。
4. 定期保养除了日常清洁,定期保养设备也是必要的。
请按照设备手册中的保养指南进行操作,包括更换滤网、清理通风口等,以保持设备的正常运行和延长使用寿命。
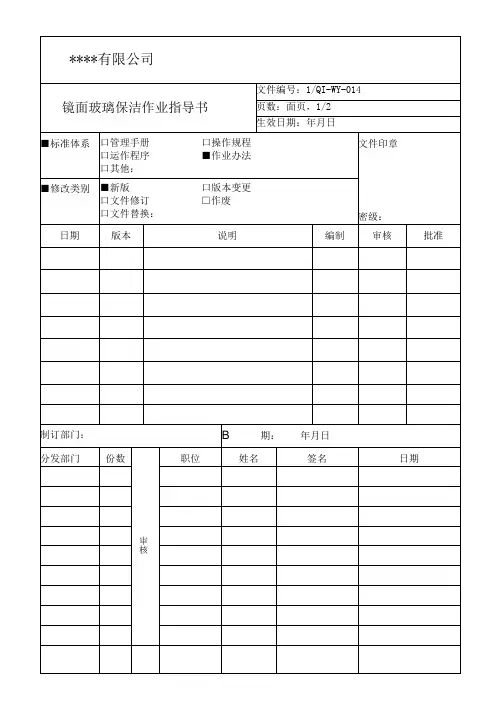
1.目的
指导保洁人员对镜面玻璃(如镜面、窗户玻璃、宣传窗等)进行保洁和日常保养。
2.范围
适用于三亚海昌梦幻海洋不夜城乐园对镜面玻璃的保洁保养工作。
3.术语
抹水器:将清洁溶液抹到玻璃上去的专用工具;
刮水器(玻璃刮):由刮板和橡胶皮条组成,是清洁玻璃表面的工具。
4.职责
环境维护课负责对镜面玻璃的保洁和保养。
5.程序
重点程序描述:I工具准备I—情洁流程
5.1工具准备
保洁前准备好工具:抹水器、刮水器、水桶、抹布、玻璃清洁剂、伸缩杆。
5.2清洁流程
1)将清洁剂按使用说明比例配置好;
2)将抹水器放入兑好的玻璃清洁剂中浸泡,抹水器离开容器前应将其沾水压干到不滴水时再离开,以免二次污染;
3)用抹水器将玻璃清洁剂抹在镜面玻璃表面上,应注意四边和角落,不得漏抹;
4)在使用抹水器时,清洁剂或抹下的脏水不应产生飞溅,以免造成二次污染;
5)用刮水器从上至下刮擦镜面玻璃表面;
6)刮水器在刮擦玻璃和其它硬表面时可采用一刀连续刮擦或一刀一刀刮擦的方式;
7)每刮一刀完毕后应用抹布擦去刮刀上的水;
8)刮水器在刮擦时,应一刀重叠一刀,不得在镜面玻璃表面留下印迹;
9)尽量避免在玻璃中央停刀而造成接缝印痕;
10)刮水器的刮擦平面不能受到外力的冲击,应妥善保管。
6.相关记录
无。

ESN3220光幕说明书一、引言感谢您选择购买ESN3220光幕产品,请在使用前仔细阅读本说明书,并按照说明书的指示正确使用该产品。
本说明书将为您提供ESN3220光幕的安装、使用和维护等全面的指导。
二、产品概述1.高亮度显示:ESN3220光幕配备了高亮度LED灯珠,可以在户外光照充足的情况下保持清晰明亮的显示效果。
2.超大显示面积:ESN3220光幕的显示面积达到了XX寸,能够满足户外大型广告宣传的需求。
3.高分辨率:ESN3220光幕具备高分辨率显示,能够呈现更加细腻的图像和文字。
4.高防护等级:ESN3220光幕采用了防水、防尘和防腐蚀的设计,能够适应各种恶劣的户外环境。
三、安装步骤1.安装位置选择:选择一个适合的位置来安装ESN3220光幕,确保光幕不会受到突然大风、暴雨等自然因素的影响。
2.固定安装支架:使用配套的固定支架将ESN3220光幕牢固地固定在安装位置上,确保其稳定性和安全性。
3.连接电源:将光幕与电源连接,确保提供足够的电力支持光幕的正常运行。
四、使用说明1.开机与关机:按下电源按钮开机,按住电源按钮数秒后松开可关闭光幕。
2.画面调整:通过遥控器或面板按键进行亮度、对比度、色彩等画面参数的调整。
3.播放多媒体文件:ESN3220光幕支持通过USB接口连接外部存储设备进行多媒体文件的播放,通过遥控器或面板按钮控制播放。
4.定时开关机:设置光幕的定时开关机时间,能够自动开关机,方便管理和节约能源。
五、注意事项1.使用环境温度:ESN3220光幕适用的环境温度范围为-20℃至+50℃,请勿在超出该范围的环境中使用。
2.防护措施:光幕使用过程中,请避免各种机械碰撞和化学腐蚀,以保护其外观和功能。
3.遥控器操作:使用遥控器时,请确保操作距离合理,避免遥控器的信号受到干扰。
六、保养与维护1.清洁光幕:定期使用柔软无纤维的布擦拭光幕,防止灰尘堆积影响显示效果。
注意:在购买ESN3220光幕之前,请仔细阅读本说明书,并根据说明操作光幕。
EDV-136型全功能光纤端面电动清洁器操作说明书感谢您使用EDV-136型光纤端面电动清洁器,该清洁器彻底解决了长期困扰光纤维护人员对端面进行有效清洁的难题。
它清洁质量高,功能齐全,操作简单,携带方便,是光网络维护人员随身必备的最佳维护工具。
一、包装下面的操作说明可以帮助您正确有效地清洁光纤端面。
二、EDV-136型光纤端面电动清洁器结构介绍D C B B1A1A1、A部分为电池盒,内置AA电池二节。
A1为清洁器开关键。
2、B部分为高速高稳定电机。
B1区域为OFF—ON总开关部分。
3、C部分内为传动轴及连接保护套,内为传动轴,外是连接保护套。
4、D部分为导入转接头,它导入清洁杆可自动对准光纤端面进行清洁。
5、清洁器的组合步骤:第一步:电池安装:两手掰开A、B两部分,按照“+、-”位置将5号电池装入电池盒中。
合拢时必须将A部分装有开关的一面对准B1部分(OFF-ON)区域方能卡接到位。
第二步:将连接套卡入B部分前端(使用加长型LC/MU导入定位转接头时不需要连接套)。
第三步:将2.5mm或1.25mm清洁杆插入清洁器旋转轴上,同时取掉前端的防尘帽。
第四步:再装入相应的导入转接头。
第五步:将电池盒部分旋转至ON位置,按下switch开始清洁。
各部分组装后示意图如下:三、EDV-136新适配头EDV-136电动清洁器采用三款综合性适配头,涵盖了以往所有的清洁模式的同时,将配件集于一体(一个适配头既能清洁公头,又能清洁母头),便于操作和携带,使清洁作业更加方便快捷。
四、EDV-136型清洁器专用清洁材料(一)性能简介清洁材料共分两个型号:EDV-F25型和EDV-F15型EDV-F25清洁杆EDV-F15清洁杆该清洁材料前端为厚度0.5~0.8mm的软性进口无毛纤维,它以恒定的压力顶着光纤端面高速旋转时(80转/秒),连续3~5秒钟,不会破损、不会掉渣,将端面上的任何污染物紧收在高密度的纤维中,然后带离端面。
自动化设备使用说明书引言概述:自动化设备是现代工业生产中不可或缺的重要工具,它能够提高生产效率、降低劳动强度,为企业带来巨大的经济效益。
然而,对于初次接触自动化设备的用户来说,了解如何正确使用和操作设备是至关重要的。
本文将详细介绍自动化设备的使用说明,以帮助用户更好地掌握设备的操作技巧和注意事项。
一、设备安装与调试1.1 确定设备安装位置- 根据设备的尺寸和功能要求,选择合适的安装位置,确保设备能够正常运行并方便维护。
- 避免将设备安装在潮湿、高温或有振动的环境中,以免影响设备的性能和寿命。
- 确保设备周围有足够的通风空间,以保持设备的散热效果。
1.2 连接电源和信号线- 根据设备的电源要求,正确接入电源线,并确保电源接地良好,以防止电击和设备损坏。
- 根据设备的信号输入输出要求,正确连接信号线,并检查连接是否牢固,以确保数据传输的稳定性。
1.3 调试设备- 在启动设备之前,仔细阅读设备的说明书,了解设备的启动流程和操作步骤。
- 按照说明书的要求,逐步进行设备的调试,确保设备的各项功能正常运行。
- 在调试过程中,注意观察设备的运行状态和指示灯的显示,及时排除故障和异常情况。
二、设备操作与维护2.1 设备操作- 在设备操作之前,确保已经熟悉设备的操作界面和功能按钮的用途,避免误操作和操作失误。
- 按照设备的操作流程,正确操作设备,避免超负荷运行和误操作导致的设备故障。
- 注意设备的运行状态和指示灯的显示,及时处理设备运行中出现的异常情况。
2.2 设备维护- 定期清洁设备的外壳和内部部件,保持设备的清洁和整洁。
- 按照设备的维护周期,定期检查设备的关键部件,如电源、传感器、电机等,及时更换磨损的部件。
- 在设备维护过程中,注意安全操作,避免触碰高温部件和高压电源,确保人身安全。
2.3 设备故障排除- 当设备出现故障时,首先查阅设备的故障排除指南,根据故障现象和指南提供的解决方案,进行故障排查。
- 如无法解决故障,及时联系设备厂家或维修人员,寻求专业的技术支持和维修服务。
玻璃制品清洗器使用说明书使用说明书一、产品介绍玻璃制品清洗器是一款专为清洁玻璃制品而设计的电动设备。
它采用先进的清洗技术,能够轻松有效地清洁各种玻璃制品,如窗户、镜子、餐具等。
本说明书将详细介绍玻璃制品清洗器的使用方法及注意事项,请用户仔细阅读并按照说明进行操作。
二、使用准备1. 确保玻璃制品清洗器处于良好的工作状态,无明显损坏或异物。
2. 确认电源电压与玻璃制品清洗器标识的电源要求一致,以免电气故障或其他安全问题。
3. 准备清洗用水,建议使用纯净水或饮用水,以避免水垢对清洗效果的影响。
三、使用步骤1. 将玻璃制品清洗器放置于平稳的工作台面上,确保设备稳固可靠。
2. 打开玻璃制品清洗器的盖板,将需要清洗的玻璃制品放置在清洗器盖板上。
3. 根据清洗器上的操作面板,选择适当的清洗模式和时间。
4. 按下启动按钮,开始清洗过程。
在清洗过程中,玻璃制品清洗器将自动运行,无需用户干预。
5. 清洗完成后,玻璃制品清洗器会发出提示音,表示操作完成。
此时,用户可以打开清洗器盖板,将清洗好的玻璃制品取出。
四、注意事项1. 请勿将手指或其他物体伸入玻璃制品清洗器内部,以免发生意外伤害。
2. 在清洗器运行过程中,不要随意拔掉电源插头或移动设备位置,以免影响清洗效果或引发设备故障。
3. 在使用过程中,切勿将玻璃制品清洗器置于水中或受潮处,以防电气遭受损坏。
4. 清洗器清洗过程中会产生一定的噪音,请将其放置在适当的工作环境,以免影响他人。
5. 长时间不使用玻璃制品清洗器时,请将设备断电并存放在干燥通风的地方。
6. 如遇到其他问题或需要维修,请联系售后服务中心,并遵循专业人员的指导进行操作。
五、保养与维护1. 清洗器每次使用后,请将其清洁干净,并使用干布进行擦拭,以保持设备外观干净。
2. 定期检查清洗器的电源线和插头是否损坏,如有损坏应及时更换以免发生安全事故。
3. 如发现清洗器运行异常或存在故障,请及时停止使用并联系售后服务中心进行维修。
各位老师:
我校使用的鸿合投影仪过滤网需要定期维
护(至少一月一次),如果不定期除尘和复
位,投影仪使用寿命将会变短和不正常工作,下面我给大家讲一下怎样除尘和复位。
一、除尘
1、认识过滤网(平常所说的网格)
这就是过滤网
2、一手托住投影仪,一手按住过滤网的横
线处并向下拉,过滤网就拆下来了。
这是拆下来的过
滤网
3、把过滤网上的灰尘拍打干净,然后把过
滤网安装上去即可(注意位置不能装反)。
二、过滤网复位
当我们把过滤网除尘后,有时投影仪还是不能正常工作,会出现如下图片所示:
这是过滤网设置的时间为500小时,超过500小时要重新复位过滤器时间(前提是要彻底清洁过滤网灰尘后)
过滤网复位操作
1、
2、
按这里七下(上方向键)按这颗键一下(菜单键)
(按中间)
按这里两下(左方向键)
3、
4、成功复位后,等三分钟,菜单信息会自动退
出。
超短焦抗光银幕日常清洁说明
1.一般的灰尘请使用细软毛刷清洁银幕表面。
2.请使用不留棉絮的软布沾温和肥皂水或中性洗碗精加水稀释。
3.粗糙的毛巾或布料可能会伤害银幕表面。
4.银幕表面有横向结构,所以清洁银幕时请左右方向擦拭;不可上下方向擦拭,也不可绕圆擦拭。
5.清洁完成后,请确认银幕干燥。
警告!
-避免尖锐物品直接接触银幕表面,以免刺破或刮伤银幕表面。
-请勿使用丙酮、苯、酒精..等有机溶剂清洁银幕,会导致银幕永久性损坏。
-请勿持久性或大力的清洁银幕,以免银幕表面刮伤。