
HarmanKardon-1274
- 格式:pdf
- 大小:3.20 MB
- 文档页数:50
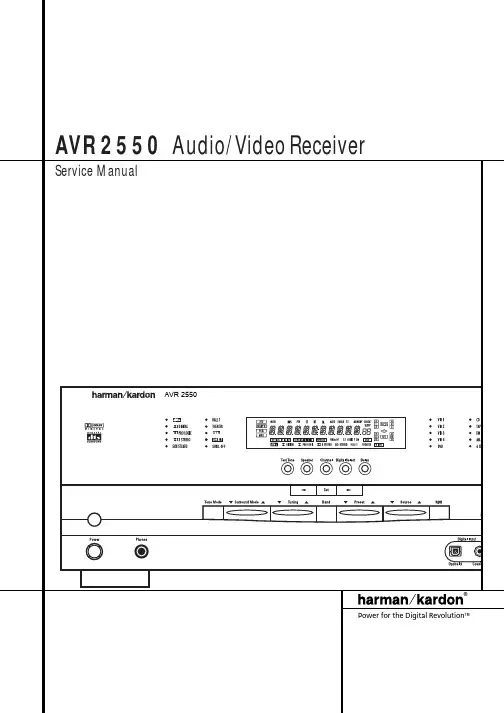

2715281530163212221724143310S T A N D A R D M O D E L SH M O D E L S 15’16’12’ 6”10’REFER WARDMICROOHCELECTRIC BEDS & MAX CLEARANCE DINETTESRAMP DOOR W/CABLE KIT17’70”REFERMICROSHELFWARDOHCOHCELECTRIC BEDS & MAX CLEARANCE DINETTESRAMP DOOR W/CABLE KIT14’70”CLEARANCE DINETTESDOOR QUEEN BEDCLEARANCE DOOR QUEEN BEDQUEEN BEDCLEARANCE DOOR 15’70”CLEARANCE DOOR QUEEN BEDCLEARANCE DOOR QUEEN BEDOHCMICRO2421 Century Drive / Goshen, IN 46528Phone: 574-642-0438E-mail:**************************SPECS 2217241427152815301632123310Hitch Weight 955 lb 1,050 lb 940 lb 1,230 lb TBD 1,485 lb TBD UVW 5,993 lb 6,398 lb 6,963 lb 7,718 lb TBD 8,593 lb TBD CCC3,762 lb 3,452 lb 2,777 lb 3,712 lb TBD 3,092 lb TBD Exterior Length 26' 3"28'31' 2"32' 2"TBD 36' 1"TBD Exterior Height TBD TBD TBD TBD TBD TBD TBD Exterior Width 96"96"96"102"102"102"102"Fresh Water 50 gal 50 gal 50 gal 102 gal 102 gal 102 gal 102 gal Gray Water 64 gal 64 gal 64 gal 64 gal 64 gal 64 gal 64 gal Black Water 32 gal 32 gal 32 gal 32 gal 32 gal 32 gal32 galAwning Size14'18'18'20'20'20'20'STANDARD MODELS HD MODELSEXTERIOR PACKAGEFriction Hinge Entry Door(s) w/ Window, Dual 20# LP Tanks w/ Cover, 30AMP Service w/ Transfer Switch, Black Tank Flush, UV Resistant Gel-Coated Fiberglass Exterior, Radius Fully-Walk-able Roof, Singular Roof Membrane w/ 12 Year Warranty, Insulated Storage Compartment Doors, Vacuum-Bonded Aluminum-Framed Sidewalls, Laminated & Insulated Slide Room Walls, Fully Enclosed “Body-Armor” Underbelly w/ Radiant Foil Layer, Electric Awning w/ LED Lights, Full-LED Rear Taillights, Alumi-Tread Main Entry StepsCHASSIS & SUSPENSIONPACKAGEMORRyde CRE3000 Suspension Enhancement, Aluminum Wheels, Dexter EZLube® Axles, Full-Sized Spare Tire, Nev-R-Adjust® Brakes, Radial Tires w/ Nitrofill™SAFETY PACKAGEPower Tongue Jack, 12V Battery Disconnect Switch, 80% Tint Radius Safety Glass Windows, LP/CO Detector, Fire Extinguisher, No Excuses Lionshead® Tire WarrantyINTERIOR PACKAGE17” Oven w/ Cast Iron Three Burner Cooktop, Bathroom Skylight, Lumber Core Cabinet Stiles, Adjustable Hidden Hinge Cabinet Hardware, Full Extension Four-Sided Craftsman Drawers, Radiant Foil Insulation Technology - Ceiling, Floors, Front, Stainless Steel Single Basin Sink, 15,000 BTU Ducted Air Conditioning Distribution System, Grate Style Sink Cover/Drying Rack, Hardwood Cabinet Doors, Gas/Electric Refrigerator, LED Accent Lighting, Metroplitan Grey Countertops, Master Suite w/ Queen Bed, 72” Solid Passage Doors, Master Bedroom Accent Wall, Black CabinetHardware, Underbed Storage Shelf, Black Faucets, Congoleum™ Stain-Resistant Vinyl Flooring, Roller Shades in Bedroom & Living RoomHD PACKAGE(N/A 2217, 2414, 2715)Fiberglass Front Cap w/ Automotive Window, Residential Microwave, Solid Surface Kitchen Countertop, 100 Gallons Fresh Water Tank, 16” Radial Tires, “Quick Clean” Central Vac, Electric Fireplace (N/A 2815), Rubber Garage Flooring (3212 & 3310 only)GARAGE PACKAGEGenerator Prep, 20 Gallon Fuel Station, Single Electric Queen Bed w/ Max Clearance Sofa/Dinette, 5,000# Cargo Tie Downs, Insulated Floor, Black Rear Privacy Screen,Insulated Ramp Door, Black Night Shades, Ramp Patio Cable Kit, Alumi-Tread Rear Entry StepsTECHNOLOGY PACKAGEWinegard Air 360 Antenna w/ WiFi & 4G L TE Prep, Backup Camera Prep, Dual Zone Soundbar w/ Built-in Subwoofer, TV and Cable Connections in Bedroom & Garage, Exterior Speakers, Convenient USB Charging Stations, 39” Living Room TVOPTIONAL EQUIPMENTSTANDARD EQUIPMENTMANDATORYOPTIONSActual towing capacity is dependent on your particular loading and towing circumstances, which includes GVWR, GAWR and GCWR, as well as adequate trailer brakes. Please refer to the Owners Manual of your vehicle for further information. All information contained in this brochure is believed to be accurate at the time of publication. However, during the model year, it may be necessary to make revisions and Forest River, Inc., reserves the right to make all such changes without notice, including prices, colors, materials, equipment and specifications as well as the addition of new models and the discontinuance of models shown in this brochure. Therefore, please consult with your Forest River dealer and confirm the existence of any materials, design or specifications that are material to your purchase decision. ©2019 XLR, a Division of Forest River, Inc., a Berkshire Hathaway company. All Rights Reserved. 9/19• 4.0 Onan Generator • VIP Party Deck (Railing Only) • U-shaped Booth Dinette (3212 & 3310 only)• Quick Cool Package• Solar Package • 12V Heated Holding Tanks。

BDS 275/BDS 277/BDS 575/BDS 577 Blu-ray Disc ReceiverQuick-Start GuideBDS 2Introduction and ConnectionsThank you for choosing a Harman Kardon® product! This quick-start guide contains all the information you need to connect and set up your new BDS Blu-ray Disc™ receiver.To conserve our natural resources, your BDS receiver does not include a printed owner’s manual. An owner’s manual containing complete information about operating all of your new Blu-ray Disc receiver’s features is available at our Web site. Go to www. and download the BDS Blu-ray Disc Receiver Owner’s Manual.ConnectionsConnect the SpeakersCAUTION: Before making any connections to the BDS receiver, ensure that the receiver’s AC cord is unplugged from the receiver and the AC outlet. Making speaker connections with the receiver plugged in and turned on could damage your speakers.Your BDS receiver has color-coded speaker terminals:BDS 275/BDS 277white left channel (+)red right channel (+)black(–) on both channelsBDS 575/BDS 577white front left (+)red front right (+)blue surround left (+)gray surround right (+)green center (+)black(–) on all channelsMost speakers use red to denote the (+) terminal and black for the (–) terminal. Be sure to connect each speaker identically: (+) on the speaker to (+) on the receiver and (–) on the speaker to (–) on the receiver. Miswiring one or more speakers results in thin sound,weak bass and a poor stereo image.Front Right Front Left* Used only with BDS 575/BDS 577 receiverIMPORTANT: Make sure the (+) and (–) bare wires do not touch each other or any metal object on the BDS receiver’s rear panel. Touching wires can cause a short circuit that can damage the BDS receiver.3E n g l i s Connect the SubwooferIMPORTANT: Do not plug the subwoofer’s AC power cord into an AC outlet at this time.Connect the Radio AntennaConnect a TV or Video DisplayNOTE: If your TV supports the HDMI Audio Return Channel and you access digital TV channels from your TV’s built-in tuner or you have other sources already connected directly to your TV, you can feed their sound to the BDS receiver via the HDMI Monitor Out connector’s Audio Return Channel, and they will not require additional connections to the receiver.Connect to Your Wired Home NetworkConnecting Your HDMI ®Source DevicesHDMI-Equipped Source Device4Connecting Your Component Video Source DeviceComponent Video-EquippedConnecting Your Optical Digital Audio Source DevicesOptical Digital-EquippedSource DeviceConnecting Your Coaxial Digital Audio Source DeviceCoaxial Digital-EquippedSource DeviceConnecting Your Analog Audio Source DevicesAnalog Source Device5BDSConnections and Receiver Setup100V – 240V 50Hz/60HzSet Up the ReceiverInstall the Batteries in the Remote Control1.2.3.SwitchTo set up your BDS receiver you will use the remote to navigate through the on-screen menus and to make selections from them.Home Button OK ButtonCursor ControlsBack Button • Use the Cursor Up/Down buttons to navigate through the menu list. When an item is highlighted, a border will appear around it.• To select a highlighted item, press the OK button. The screen will change depending on your selection. • To return to the previous screen, press the Back button.BDS6Initial Setup and Configuring the ReceiverInitial SetupWhen you turn your BDS receiver on for the first time, the on-screen menu will display the Initial Setup screens. The first screen lets you set the language you want the BDS receiver to use.Press the OK button, and the Initial Setup introduction screen will appear.Press the OK button, and the Initial Setup TV resolution screen will appear.After selecting your TV’s resolution, press the OK button, and the Initial Setup aspect-ratioscreen will appear.After selecting the aspect ratio that best fits your TV, press the OK button and the InitialSetup speaker package screen will appear.This setting enables processing in the BDS receiver that will maximize your system’s audio performance. If you are using a Harman Kardon speaker package with your BDS receiver, select it’s model number from the list. If you’re not using a Harman Kardon speaker package, select “Other.”Press the OK button to save your settings and then press it again to exit the Initial Setup screens.Configure the Receiver for Your SpeakersBefore you use your BDS receiver you need to configure it to work with your particular speaker system. The BDS receiver’s EZSet/EQ ™ system uses the supplied EzSet/EQ microphone to perform this important step automatically. Before beginning, be sure you have correctly connected your speakers to the BDS receiver. IMPORTANT: Press the remote’s “Disc” input button before performing the EZ Set/EQ procedure. The EZ Set/EQ procedure is only available when the Disc input is selected.1. P lug the supplied EzSet/EQ microphone into the BDS receiver’s Headphone connector.Headphone Connector2. P lace the microphone at ear height in your main listening position.3. P ress the remote control’s Home button. The receiver’s Home Menu screen will appear on the TV.7BDSE n g l i s Configuring the Receiver and Using the Receiver4. U se the Cursor and OK buttons to highlight and select Settings. The General Settings menu will appear.5. U se the right Cursor button to select Audio Settings, then use the down Cursor button to select Speaker Settings. The Speaker Settings screen will appear.6. P ress the right Cursor button to select EzSet/EQ, then use the cursor buttons to select the configuration of your speaker system.7. P ress the OK button, then press it again to select Continue in the EzSet/EQ (Automatic Setup) box that appears.8. R emain silent while the test noise plays through the speakers. As the test noise circulates among the speakers the screen will show which speaker is being tested.Audio SettingsLeft (0.0dB, 0.0m/0 ft)Right (0.0dB, 0.0m/0 ft)Tone Controls Audio OutputSpeaker SettingsLLSRSRC9. W hen the testing process is completed, the “Testing...” message on the screen will change to “All test done!”10. P ress the Back button to exit the EzSet/EQ test procedure.NOTE: If the test fails, the “Testing...” message on the screen will change to “EzSet/EQ failed. Make sure all speakers are connected and the room is quiet then try again.” Press the Back button, make sure all speakers are correctly connected and perform the test again from Step 6. Make sure that the room remains silent during the test.Using the BDS ReceiverPress the remote’s Home button to display the Home Menu screen:The available sources are listed on the left. If a disc has been inserted into the receiver’s built-in disc slot, it will appear on the list as “Blu-ray Disc,” “DVD Video”, “CDDA” or “Data Disc” (audio or data CD-R disc). If you have inserted a USB device into the receiver’s USB port, it will appear on the list as “USB.”NOTE: Digital and analog audio sources connected to the receiver’s rear-panel optical digital, coaxial digital and analog inputs will not appear on the list but can be selected using the remote’s “Aux” Source Selector button (see below).To select a source from the list, use the Cursor Up/Down buttons to highlight the desired source, then press the OK button to select it.You can also select some sources directly by pressing their Source Selector buttons on the remote.Source Selector ButtonsFor complete information about using all of your BDS system’s features, you can download the BDS 275/BDS 277/BDS 575/BDS 577 Blu-ray Disc ™ Receiver Owner ’s Manual from .HARMAN International Industries, Incorporated8500 Balboa Boulevard, Northridge, CA 91329 USA516.255.4545 (USA only)Made in P.R.C.© 2012 HARMAN International Industries, Incorporated. All rights reserved.Harman Kardon is a trademark of HARMAN International Industries, Incorporated, registered in the United States and/or other countries. EzSet/EQ is atrademark of HARMAN International Industries, Incorporated. Blu-ray Disc and BD-Live are trademarks of the Blu-ray Disc Association. The Bluetoothword mark and logo are registered trademarks and are owned by the Bluetooth SIG, Inc., and any use of such marks by HARMAN International Industries,Incorporated, is under license. DIVX: ABOUT DIVX VIDEO: DivX® is a digital video format created by DivX, LLC, a subsidiary of Rovi Corporation. Thisis an official DivX Certified® device that plays DivX video. Visit for more information and software tools to convert your files into DivX video.ABOUT DIVX® VIDEO-ON-DEMAND: This DivX Certified® device must be registered in order to play purchased DivX Video-on-Demand (VOD) movies.To obtain your registration code, locate the DivX VOD section in your device setup menu. Go to for more information on how to completeyour registration. DivX®, DivX Certified® and associated logos are trademarks of Rovi Corporation or its subsidiaries and are used under license.DivX Certified® to play DivX® video up to HD 1080p, including premium content. DLNA®, the DLNA Logo and DLNA CERTIF IED® are trademarks,service marks, or certification marks of the Digital Living Network Alliance. DOLBY DIGITAL PLUS TRUE-HD. Manufactured under license from DolbyLaboratories. Dolby and the double-D symbol are registered trademarks of Dolby Laboratories. DTS DIGITAL SURROUND. Manufactured under licenseunder U.S. Patent # s: 5,956,674; 5,974,380; 6,487,535 & other U.S. and worldwide patents issued & pending. DTS, the Symbol and DTS and theSymbol together are registered trademarks, and DTS Digital Surround and the DTS logos are trademarks, of DTS, Inc. Product includes software.© DTS, Inc. All Rights Reserved. HDMI, the HDMI logo, and High-Definition Multimedia Interface are registered trademarks of HDMI Licensing LLC inthe United States and other countries. iPhone, iPod and iPad are trademarks of Apple Inc., registered in the U.S. and other countries. iPod, iPhone andiPad not included. “Made for iPod,” “Made for iPhone,” and “Made for iPad” mean that an electronic accessory has been designed to connect specifically to iPod, iPhone, or iPad, respectively, and has been certifi ed by the developer to meet Apple performance standards. Apple is not responsiblefor the operation of this device or its compliance with safety and regulatory standards. Please note that the use of this accessory with iPod, iPhone, oriPad may affect wireless performance. Java, Java Powered and the Java Steaming Coffee Cup logo are trademarks or registered trademarks of SunMicrosystems, Inc., or its subsidiaries in the United States and other countries. Microsoft, Windows and Windows Media are registered trademarks ofMicrosoft Corporation in the United States and/or other countries.Pandora is a registered trademark of Pandora Media, Inc.Picasa is a trademark of Google, Inc.The Wi-Fi CERTIFIED Logo is a certification mark of the Wi-Fi Alliance.WMA (Windows Media Audio) is a proprietary file format developed by Microsoft. This item incorporates copy-protection technology that is protected byU.S. patents and other intellectual-property rights of Rovi Corporation. Reverse engineering and disassembly are prohibited.YouTube is a trademark of Google, Inc.Features, specifications and appearance are subject to change without notice.Part # 950-0466-001, Rev. A 。

AVR 1700, AVR 170, AVR 170/230C Audio/video receiverQuick-Start GuideIntroduction, Speaker Placement and ConnectionAVR2IntroductionThank you for choosing a Harman Kardon product!This quick-start guide contains all the information you need to connect and set up your new Harman Kardon audio/video receiver (AVR).To conserve our natural resources, your AVR does not include a printed owner’s manual. An owner’s manual containing complete information about operating all of your new AVR’s features is available at our Web site. Go to and download the AVR 1700, AVR 170, AVR 170/230C Owner’s Manual.Place the Receiver• P lace the AVR on a firm and level surface. Be certain that the surface and any mounting hardware can support the AVR’s weight.• P rovide proper space above and below the AVR for ventilation. Recommended clearance distances are 30cm above the unit, 30cm behind the unit and 30cm on each side of the unit.• I f you install the AVR in a cabinet or other enclosed area, provide cooling air within the cabinet. Under some circumstances, a fan may be required.• D o not obstruct the ventilation slots on the top of the AVR or place objects directly over them.• Do not place the AVR directly on a carpeted surface.• D o not place the AVR in moist or humid locations, in extremely hot or cold locations, in areas near heaters or heat registers, or in direct sunlight.ConnectionsPlace Your SpeakersDetermine the locations for your system’s speakers according to their manufacturer’s directions and the layout of your listening room. Use the illustrations below as a guidefor 5.1-channel systems.Speaker Positioning for 5.1-Channel SystemsFor more detailed speaker placement information, download the complete AVR 1700, AVR 170, AVR 170/230C Owner’s Manualfrom .ConnectorConnectorsConnectorConnect Your SpeakersHow to use the AVR speaker terminals:1. Unscrew Cap2. Insert Bare Wire3. Tighten CapAlways connect the colored (+) terminal on the AVR to the (+) terminal on the speaker(usually red), and the black (–) terminal on the AVR to the (–) terminal on the speaker(usually black).IMPORTANT: Make sure the ( + ) and ( – ) bare wires do not touch each other or the otherterminal. Touching wires can cause a short circuit that can damage your AVR.Connect the speakers as shown in the illustration.Connect Your SubwooferUse a single RCA audio cable to connect the AVR’s Subwoofer Pre-Out connector to yoursubwoofer. Consult your subwoofer’s user manual for specific information about makingconnections to it.PoweredReceiverConnect Your TVHDMI Out ConnectorIf your TV has an HDMI connector and you have HDMI source devices, use an HDMI cable(not supplied) to connect your TV to the AVR’s HDMI Out connector. It will provide thebest possible video quality.IMPORTANT: The AVR’s on-screen display (OSD) only appears through the HDMI Outconnector. If you want to use the AVR’s OSD menus you need to connect its HDMI Outconnector to your TV even if you are not connecting any HDMI video source devices tothe AVR.AVR HDMIOut Connector(not supplied)Composite Video Monitor Out ConnectorIf your TV does not have an HDMI connector, or if your TV does have an HDMI connectorbut you are connecting some source devices with only composite video connectors, usea composite video cable (not supplied) to connect the AVR’s Composite Monitor Outconnector to your TV’s composite video connector.AVRCompositeMonitor Out(not supplied)34se of setup, you should connect each source device to the connector where the ponding default source button is assigned (e.g., connect your Cable/Satellite tuner HDMI 1).all of the connections. (You will make any changes to the connector assignments later in the setup process.)HDMI DevicesIf any of your source devices have HDMI connectors, using them will provide the best possible video and audio performance quality. Since the HDMI cable carries both digital video and digital audio signals, you do not have to make any additional audio connections for source devices you connect via HDMI connectors.Note: If you have a TV or other source device equipped with the HDMI Audio Return Channel Function, its sound will be fed to the AVR via the HDMI Monitor Out connection’s Audio Return Channel, and it will not require additional audio connections to the AVR. Refer to the complete AVR 1700, AVR 170, AVR 170/230C Owner’s Manual , downloadableat .AVR HDMI ConnectorsHDMI-Equipped Source DeviceComposite Video DevicesUse composite video connectors for video source devices that don’t have HDMI connectors. You will also need to make an audio connection from the source device tothe AVR.Composite Video-Equipped Source DeviceAVR Composite Video ConnectorsOptical digital audio devicesIf your non-HDMI source devices have optical digital outputs, connect them to the AVR’s optical digital audio connectors. NOTE: Make only one type of digital connection (HDMI,optical or coaxial) from each source device.AVR Digital Coaxial digital audio devicesIf your non-HDMI source devices have coaxial digital outputs, connect them to the AVR’s coaxial digital audio connectors. NOTE: Make only one type of digital connection (HDMI,optical or coaxial) from each source device.AVR Digital Coaxial-Equipped Source Device5Analog Audio DevicesUse the AVR’s analog audio connectors for source devices that don’t have HDMI or digitalaudio connectors.AVR Analog Audio RecordersConnect an analog audio recorder’s inputs to the AVR’s analog audio Rec Out connectors.You can record any analog audio input signal.AVR Analog Audio Video RecordersConnect an analog video recorder’s video input connector to the AVR’s Composite Monitor Out connector. You can record any composite video signal. To record the audio and video from the source device, connect the AVR’s Analog Rec Out connectors to the analog video recorder’s audio inputs. NOTE: If you have connected the AVR’s Composite Monitor Outvideo connector to your TV you cannot connect a VCR to the AVR for recording.AVR Analog Audio Connect Your Home NetworkUse a Cat. 5 or Cat. 5E cable (not supplied) to connect the AVR’s Network connector to your home network to enjoy Internet radio and content from DLNA ®-compatible devices that areconnected to the network.AVR Network Connect the Radio Antennas• C onnect the supplied FM antenna to the AVR’s FM 75Ω antenna connector. For the best reception, extend the FM antenna as far as possible.• B end and fold the base of the supplied AM antenna as shown and connect the antenna wires to the AVR’s AM and Gnd connectors. Rotate the antenna as necessary to maximizereception quality.NOTE: To connect RS-232, remote IR and trigger equipment, please download the AVR 1700, AVR 170, AVR 170/230C Owner’s Manual from .6Connect to AC PowerConnect the AC power cord to the AVR’s AC Input connector and then to a working, non-switched AC power outlet. IMPORTANT: Before connecting the AC power cord, make surethat the AC voltage listed on the AVR’s back panel matches the AC voltage used in your country.AVR AC Set Up the AVRInstall the Batteries in the Remote ControlRemove the remote control’s battery cover, insert the three supplied AAA batteries as shownin the illustration, and replace the battery cover.NOTE: Remove the protective plastic from the AVR’s front panel so it doesn’t reduce the remote control’s effectiveness.Turn On the AVRConfigure the AVR for Your SpeakersOne of the most important steps in setting up a home theater system is to calibrate the AVR to match your loudspeakers, optimizing sound reproduction. Your AVR features the Harman Kardon EzSet/EQ ™ system, which performs this calibration automatically using the supplied EzSet microphone.You will be using the following remote cotnrol buttons to configure your AVR:1. P lug the supplied EzSet/EQ ™ microphone into the AVR’s Headphone connector.AVRHeadphone 2. P lace the microphone at ear height in your listening position.3. T urn on your TV and select the TV input where you connected the AVR in Connect Your TV , on page 3.4. P ress the remote control’s AVR button, then press the OSD button. The AVR’s on-screen display (OSD) Master Menu will appear on the TV. (Note: If you have only used a composite video connection to your TV, the OSD menus will not appear on your TV. Follow the steps below using the receiver’s front-panel display.)75. U se the remote’s arrow and OK buttons to select “EzSet/EQ.”6. Select “Yes.” The Speaker Configuration menu wlll appear.7. Select “5.1.”8. R emain silent while the test noise plays through your system’s speakers. When the calibration has completed, press the OSD button to exit.Assign the AVR Input Connections1. R eview the input connections you listed on the connection table, on page 4. Note what changes (if any) you have made from the default AVR Input Connector assignments that appear on the list. If you connected your source devices according to the entries in the “Default AVR Input Connector” column of the table on page 4, you can skip this section.2. T urn on your TV and select the TV input where you connected the AVR in Connect Your TV, on page3.3. P ress the remote control’s OSD button. The AVR’s on-screen display (OSD) setup menu will appear on the TV. (Note: If you have used a composite video connection to your TV, the OSD menus will not appear on your TV. Follow the steps below using the AVR’s front-panel display.)4. Use the remote’s arrow and OK buttons to select “Source Setup.” If there is a Source Selector for which you want to assign different video or audio connections. use the left/right arrow buttons to select it, and press the OK button.S o u r c e S e t u pS o u r ce <C a b l e/S a t e l l i t e>T i t l eV i d e o I n H D M I1A u d i o I n H D M I1T o n e O u tB a s s 0T r e b l e 0N i g h t M o d e O f fR e co r d O u t A n a l o g5. S elect “Video In” and use the left/right arrow buttons to select the video input connector you want to assign to the Source Selector button. Press the OK button. (Note: If you select an HDMI connector for the Video connection the Audio connection will automatically change to the same HDMI connector.)S o u r c e S e t u pS o u r ce <C a b l e/S a t e l l i t e>T i t l eV i d e o I n H D M I2A u d i o I n H D M I2T o n e O u tB a s s 0T r e b l e 0N i g h t M o d e O f fR e co r d O u t A n a l o g6. S elect “Audio In” and use the left/right arrow buttons to select the audio input connector you want to assign to the Source button. (Note: If you have assigned an HDMI Video connector for the Source button you cannot assign a different Audio connector.)S o u r c e S e t u pS o u r ce <C a b l e/S a t e l l i t e>T i t l eV i d e o I n C o m p o s i t e1A u d i o I n O p t i ca l1T o n e O u tB a s s 0T r e b l e 0N i g h t M o d e O f fR e co r d O u t A n a l o g7. R epeat steps 4 – 6 for the remaining audio/video connections that you want to re-assign. You are now ready to enjoy your AVR!IMPORTANT: For complete set up information, and for complete information about using all of your audio/video receiver’s features and capabilities, download the AVR 1700, AVR 170, AVR 170/230C Owner’s Manual from .8General SpecificationsPower consumption (AVR 1700):260W(AVR 170):240W(AVR 170/230C): 240WDimensions (W x H x D): 17-5/16" x 6-1/2" x 14-13/16"(440mm x 165mm x 377mm)Weight (unit):12.8 lb (5.8kg)Weight (shipping):18 lb (8.2kg)9HARMAN International Industries, Incorporated8500 Balboa Boulevard, Northridge, CA 91329 USA516.255.4545 (USA only)Made in P.R.C.© 2012 HARMAN International Industries, Incorporated. All rights reserved.Harman Kardon is a trademark of HARMAN International Industries, Incorporated, registered in the United States and/or othercountries. EzSet/EQ is a trademark of HARMAN International Industries, incorporated. DLNA®, the DLNA Logo and DLNA CERTIFIED®are trademarks, service marks, or certification marks of the Digital Living Network Alliance. Dolby, Pro Logic, and the double-Dsymbol are registered trademarks of Dolby Laboratories. DTS, DTS-HD, the Symbol, & DTS or DTS-HD and the Symbol together areregistered trademarks of DTS, Inc. © DTS, Inc. All Rights Reserved. The terms HDMI, the HDMI logo, and High-Definition MultimediaInterface are trademarks or registered trademarks of HDMI Licensing LLC in the United States and other countries. SIRIUS, SIRIUSConnect and all related marks and logos are trademarks of SIRIUS XM Radio inc., and its subsidiaries.Features, specifications and appearance are subject to change without notice.Part no. 950-0459-001, Rev. A 。

HKTS 210 SUB/HKTS 200 SUBSubwooferOwner’s Manual2HKTS 210 SUB/HKTS 200 SUBIntroduction, Included Items and Subwoofer Rear-Panel ControlsIntroductionThank you for choosing this Harman Kardon product!Your new Harman Kardon 200-watt powered subwoofer incorporates an 8" (200mm) down-firing cone transducer and a built-in, high-performance, 200-watt amplifier that delivers the powerful, dynamic and accurate low-frequency performance that makes your film soundtracks and music come alive. And with line-level and LFE inputs, phase control and automatic turn-on/turn-off, the HKTS 210 SUB/HKTS 200 SUB is also simple to connect and set up.We’re confident that this Harman Kardon subwoofer will provide every note of enjoyment that you expect – and that when you think about purchasing additional audio equipment, you will once again choose Harman Kardon products.This owner’s manual contains all the information you need to set up, connect and adjust your new subwoofer. For more in-depth information, go to our Web site: .NOTE: This owner’s manual covers both the HKTS 210 SUB and HKTS 200 SUB models. All contents cover both models except where noted.Included ItemsOne powered subwooferOne combination LFE and trigger cableSubwoofer Rear-Panel ControlsPhase Switch Phase Switch Bass Boost SwitchBass Boost SwitchPower On Mode Switch Power On Mode Switch Input Mode Switch External Trigger Input ConnectorExternal Trigger Input ConnectorLine-Level LFE In Connector Line-Level LFE In Connector Line-Level L/R In ConnectorLine-Level L/R In ConnectorPower Switch Power Switch Power CordPower CordSubwoofer Level ControlSubwoofer Level Control Top: HKTS 210 SUB Rear-Panel; Bottom: HKTS 200 SUB Rear-PanelHKTS 210 SUB/HKTS 200 SUB Subwoofer Rear-Panel Controlsand Placing the SubwooferPhase switch: This switch determines whether the subwoofer transducer’s piston-like action moves in and out in phase with the satellite speakers. If the subwoofer were to play out of phase with the satellite speakers, the sound waves from the satellites could cancel out some of the subwoofer’s sound waves, reducing bass performance and sonic impact. This phenomenon depends in part on the placement of all the speakers in the room. In most cases, the Phase switch should be left in the “Normal” position. However, it does no harm to experiment, and you can leave the Phase switch in the position that maximizes bass response and impact.Bass Boost switch: Set this switch to “On” to enhance the subwoofer’s low-frequency performance. Set this switch to “Off” for normal low-frequency performance.Power On Mode switch: When this switch is set in the “Auto” position and when the Power switch is set to “On,” the subwoofer will automatically turn itself on when it receives an audio signal and will enter the standby mode after it has received no audio signal for about 15 minutes. When this switch is set in the “On” position, the subwoofer will remain on whether or not it is receiving an audio signal. An LED on the subwoofer’s top panel indicates whether the subwoofer is in the on or standby state:• W hen the LED glows white, the subwoofer is turned on.• W hen the LED is not illuminated, the subwoofer is in the standby mode. When the Power switch is set to “Off,” the LED will not be illuminated, no matter what setting the Power On Mode switch is in.Subwoofer Level control:Use this control to adjust the subwoofer’s volume. Turn clockwise to increase the volume; turn counterclockwise to decrease the volume. Input Mode switch (HKTS 210 SUB only): When this switch is in the “Normal” setting, the input signal from the Line-Level L/R In connectors is active. When this switch is in the “LFE” setting, the input signal from the Line-Level LFE In connector is active. External Trigger Input connector: Use the mini plug of the supplied combination LFE and trigger cable to connect the External Trigger Input connector to the trigger output of another compatible component. Whenever the subwoofer detects a trigger signal between 3V and 30V (AC or DC), its amplifier will turn on. The amplifier will turn off after the trigger signal ceases, even when the Power On Mode switch is in the “Auto” position. Line-Level LFE In connector: The signal from this connector bypasses the subwoofer’s internal low-pass crossover. When you’re connecting the subwoofer to the dedicated subwoofer output of a receiver/processor that has its own low-pass crossover network, use the Line-Level LFE In connector. HKTS 210 SUB only: You must also set the subwoofer’s Input Mode switch in the “LFE” position.Line-Level L/R In connectors: The signals from these connectors pass through the subwoofer’s internal low-pass crossover. When you’re connecting the subwoofer to the preamp or subwoofer outputs of a receiver/processor that does not have its own low-pass crossover network, use both Line-Level L/R In connectors. HKTS 210 SUB only: You must also set the Input Mode switch in the “Normal” position. If your receiver/ processor has only one subwoofer output, you can use either the L or R connector. Power switch:Set this switch in the “On” position to turn the subwoofer on. The subwoofer will then be either on or in the standby mode, depending on the setting of the Power On Mode switch.Power Cord (non-detachable): After you have made and verified all the connections described in this manual, plug this cord into an active, unswitched electrical outlet for proper operation of the subwoofer. DO NOT plug this cord into the accessory outlets found in some audio components.Placing the SubwooferThe performance of a subwoofer is directly related to its placement in the listening room and its physical position relative to the other speakers in the system.While it is true that in general our ears do not hear directional sounds at the low frequencies where subwoofers operate, when installing a subwoofer within the limited confines of a room, the reflections, standing waves and absorptions generated within the room will strongly influence the performance of any subwoofer system. As a result, the specific location of the subwoofer in the room does become important to the amount and quality of bass that is produced.For example, placing the subwoofer next to a wall generally will increase the amount of bass in the room; placing it in a corner (1) generally will maximize amount of bass in the room. However, corner placement can also increase the destructive effect of standing waves on bass performance. This effect can vary depending on the listening position – some listening positions may yield very good results while others may have far too much (or too little) bass at certain frequencies.In many rooms, placing the subwoofer along the same plane as the left and right speakers (2) can produce the best integration between the sound of the subwoofer and that of the left and right speakers. In some rooms, the best performance could even result from placing the subwoofer behind the listening position (3).We strongly recommend that you experiment with placement before choosing a final location for your subwoofer. One way you can determine the best location for the subwoofer is by temporarily placing it in the listening position and playing music with strong bass content. Move around to various locations in the room while the system is playing (putting your ears where the subwoofer would be placed), and listen until you find the location where the bass performance is best. Place the subwoofer in thatlocation.3HKTS 210 SUB/HKTS 200 SUB Connecting the SubwooferConnecting the SubwooferConnecting the Subwoofer to a Receiver or Preamp/ProcessorWith a Dedicated Subwoofer OutputLFE/Trigger Cable(supplied)Use this installation method for receivers and preamps/processors that have a dedicated subwoofer output with low-pass filtering (also called bass management). If the dedicated subwoofer output does not have low-pass filtering, follow the instructions in Connecting the Subwoofer to a Receiver or Preamp/Processor With Line Outputs on this page. Use the LFE (purple) connector of the supplied combination LFE and trigger cable to connect the subwoofer’s Line-Level LFE In connector to the dedicated subwoofer output (or LFE output) of your audio/video receiver or preamp/processor. HKTS 210 SUB only: Set the Input Mode switch in the “LFE” position.Configure your receiver or preamp/processor’s setup menu for “Subwoofer On.” After you have made and verified all connections, plug the subwoofer’s AC Power Cord into an active AC outlet.Connecting the Subwoofer to a Receiver or Preamp/Processor With Line OutputsStereo RCA Cable(not supplied)Use this installation method for receivers and preamp/processors that do not have a dedicated subwoofer output but do have preamp-level (volume-controlled) line outputs. If the receiver or preamp/processor has a dedicated subwoofer output with low-pass filtering, see Connecting the Subwoofer to a Receiver or Preamp/Processor With a Dedicated Subwoofer Output on this page.Connect one end of a stereo RCA cable (not supplied) to the receiver’s or preamp’s line outputs and the other end to the subwoofer’s Line-Level L/R In connectors. HKTS 210 SUB only: Set the Input Mode switch in the “Normal” position.After you have made and verified all connections, plug the subwoofer’s AC Power Cord into an active AC outlet.4HKTS 210 SUB/HKTS 200 SUB Connecting the Subwoofer, OperatingYour Subwoofer and SpecificationsConnecting the Subwoofer to a Trigger Voltage SourceThe subwoofer will automatically turn on if it receives a trigger voltage at its External Trigger Input connector and will enter the Standby mode when the voltage ceases.If your preamp/processor or another audio/video component has a trigger-voltage connection that supplies between 3V and 30V (AC or DC), connect it to the subwoofer’s External Trigger Input connector. If the component’s trigger-voltage connection has a 3.5mm mini jack, you can use the supplied combination LFE/trigger cable to make the connection.NOTE:Do not connect the subwoofer’s External Trigger input connector to a remote control output (IR Out) of your home cinema system or surround receiver. Doing so could lead to malfunction.Operating Your SubwooferTurning the Subwoofer On and OffSet the subwoofer’s Power switch to the “On” position.If you set the Power On Mode switch to “Auto,” the subwoofer will automatically turn itself on when it receives an audio signal, and it will go into the standby mode after it has received no audio signal for 15 minutes. The subwoofer’s LED will glow white when the subwoofer is on and will not be illuminated when the subwoofer is in the standby mode. If you set the Power On Mode switch to “On,” the subwoofer will remain on at all times. The subwoofer’s LED will glow white.If you connect the subwoofer’s External Trigger Input connector to a trigger-voltage source, the subwoofer will turn on whenever a trigger voltage is present and will enter the standby mode after the trigger voltage ceases, regardless of the position of the Power On Mode switch.If you will be away from home for an extended period of time, or if you will not be using the subwoofer for an extended period, switch the Power switch to the “Off” position.Subwoofer Adjustments: VolumeUse the Subwoofer Level Control to set the subwoofer’s volume. Turn the knob clockwise to increase the subwoofer’s volume; turn the knob counterclockwise to decrease the subwoofer’s volume.Notes on Setting Subwoofer Volume:Sometimes the ideal subwoofer volume setting for music is too loud for films, while the ideal setting for films is too quiet for music. When setting the subwoofer volume, listen to both music and films with strong bass content and find a “middle ground” volume level that works for both.If your subwoofer always seems too loud or too quiet, you may want to place it in a different location. See Placing the Subwoofer, on page 3, for more information. Subwoofer Adjustments: PhaseThe Phase switch determines whether the subwoofer’s piston-like action moves in and out in phase with the satellite speakers. If the subwoofer were to play out of phase with the satellite speakers, the sound waves from the satellites could cancel out sound waves from the subwoofer, reducing bass performance and sonic impact. This phenomenon depends in part on the placement of all the speakers in the room.Although in most cases the Phase switch should be left in the “Normal” position, there is no absolutely correct setting for the Phase switch. When the subwoofer is properly in phase with the satellite speakers, the audio will be clearer, have maximum impact and make percussive sounds like drums, piano and plucked strings sound more lifelike. The best way to set the Phase switch is to listen to music that you know well and set the switch in the position that gives drums and other percussive sounds maximum impact. Subwoofer Adjustments: Bass BoostWhen set to the “On” position, the Bass Boost switch enhances low-frequency performance, resulting in bass with more impact, which you may prefer while watching movies or listening to music. There is no harm in experimenting with this control. Setting the switch to the “Off” position will return normal low-frequency performance to your system.SpecificationsLow-frequency transducer:8" (200mm) down-firing cone Amplifier power:200 wattsFrequency response:45Hz – 200Hz (–6dB)Controls:Volume, phase, bass boost Connections:LFE (RCA-type); left and right line-level(RCA-type)Enclosure type:SealedExternal trigger input voltage: 3 – 30 volts, AC or DCPower requirement:120V, 60Hz (USA); 220V – 240V,50/60Hz (EU)Power consumption:<1W (standby); 200W (maximum) Dimensions (H x W x D):13-29/32" x 10-1/2" x 10-1/2"(353mm x 267mm x 267mm) Weight:19.8 lb (9kg)5HARMAN Consumer, Inc.8500 Balboa Boulevard, Northridge, CA 91329 USA© 2011 HARMAN International Industries, Incorporated. All rights reserved.Harman Kardon is a trademark of HARMAN International Industries, Incorporated,registered in the United States and/or other countries.Features, specifications and appearance are subject to change without 。