LTE无线路由器B310快速入门-Huawei
- 格式:pdf
- 大小:1.26 MB
- 文档页数:20
华为路由器使用说明书一、前言华为路由器是一种用于实现网络连接与数据传输的设备,它能够将外部网络与局域网连接起来,为用户提供快速、稳定的网络连接。
本文将详细介绍华为路由器的使用方法,帮助用户正确使用该设备。
二、路由器的连接与设置1. 连接路由器将华为路由器的电源线插入电源插座,并将路由器的WAN口与宽带接入设备连接,如光猫或ADSL调制解调器。
接着,将路由器的LAN口与电脑或交换机连接,确保网络连接正常。
2. 设置路由器在电脑上打开浏览器,输入路由器默认IP地址(一般为192.168.1.1),按下回车键进入路由器管理界面。
首次登录时,需要输入默认用户名和密码,常见的用户名为admin,密码为空或admin。
登录成功后,按照界面提示进行基本设置,如设置WAN 口连接方式、无线网络设置、安全设置等。
三、无线网络设置1. 设置无线网络名称(SSID)在路由器管理界面的无线设置中,找到无线网络名称(SSID)的选项,输入您希望设置的无线网络名称,该名称将在搜索无线网络时显示。
2. 设置无线网络密码在无线设置中,找到无线密码的选项,输入您希望设置的无线密码。
为了保证网络安全,密码应包含数字、字母和特殊字符,并且长度不少于8位。
3. 设置无线加密方式在无线设置中,找到无线加密方式的选项,选择适合您的网络环境的加密方式,如WPA2-PSK。
加密方式可以有效防止他人未经授权的访问。
四、网络管理与优化1. DHCP设置在路由器管理界面的网络设置中,找到DHCP的选项,开启该功能。
DHCP功能能够自动为连接到路由器的设备分配IP地址,方便管理和使用。
2. 端口转发与触发在路由器管理界面的安全设置中,找到端口转发与触发的选项,根据需要设置端口转发规则,以实现特定服务的访问。
3. 无线信号优化在路由器管理界面的无线设置中,找到无线高级设置的选项,调整无线信号的传输功率、信道等参数,以优化无线信号的覆盖范围和传输速率。
五、故障排除与常见问题解决1. 无法访问路由器管理界面检查电脑与路由器的连接是否正常,确保电脑IP地址设置为自动获取。
4G 無線路由器(LTEFDD :700/900/1800/2100/2600; TDD:2570-2620/WCDMA 2100/WLAN )使用者手冊目錄限用物質含有情況標示聲明書 (1)安全性和使用 (2)1. 概觀 (6)1.1 系統要求 (6)1.2 裝置描述 (6)2. 開始使用您的裝置 (8)2.1 插入Micro SIM 卡 (8)2.2 連接電源變壓器 (9)2.3 選擇性:安裝外部天線 (10)2.4 如何在 Wi-Fi 模式下連接 (10)3. 組態 Cat7 路由器 (12)3.1 透過應用程式組態 Cat7 路由器 (12)3.2 透過網頁組態 Cat7 路由器 (12)3.3 狀態 (13)3.4 首頁 (14)4. 服務 (14)4.1 簡訊 (14)4.2 通話日誌 (16)4.3 來電轉接 (16)5. 設定 (16)5.1 連線優先性 (16)5.2 行動數據 (17)5.3 WAN (18)5.4 DHCP (18)5.5 Wi-Fi (19)5.6 安全性 (20)5.7 伺服器品質 (22)6. 系統 (22)6.1 裝置資訊 (22)6.2 重新啟動並重設 (22)6.3 更新 (22)6.4 裝置管理 (23)7. 保固 (24)8. 問與答 (25)限用物質含有情況標示聲明書Declaration of the Presence Condition of the Restricted Substances Marking設備名稱:Equipment name 4G 無線路由器(LTEFDD: 700/900/1800/2100/ 2600;TDD: 2570-2620/WCDMA 2100/WLAN)型號(型式):Typedesignation(Type)HH71V單元Unit限用物質及其化學符號Restricted substances and its chemical symbols鉛Lead(Pb)汞Mercury(Hg)鎘Cadmium(Cd)六價鉻Hexavalentchromium(Cr+6)多溴聯苯Polybrominatedbiphenyls(PBB)多溴二苯醚Polybrominateddiphenyl ethers(PBDE)主机-O O O O O電源供應器-O O O O O充電線O O O O O O電池組O O O O O O包装材料O O O O O O備考1.〝超出0.1 wt %〞及〝超出0.01 wt %〞係指限用物質之百分比含量超出百分比含量基準值。
4G LTE WIFI Router User manual1.Brief IntroductionThis device is designed for WIFI users to get access to internet via UMTS/HSPA/LTE. In order to connect to high speed network easily and fast, it uses the battery powered.2 LED indicator lightsLED indicator lights can show the device working status visually.3.Turn on, off, Sleep, Reset, restart the deviceOn: Long press the power button for 3 seconds, until the red light on;Sleep: No external power, no wifi users, in 10min, the device will sleep, all lights offWake up: When the device sleeps, click power button to wake it up;Off: Long press the power button for 5 seconds, until all lights off;Reset: Use a pin to long stick the pin hole on the back of the device for 3 seconds, the device will restart and reset;Restart: Use a pin to click the restart button, the device will restart.4. WIFI connectionSearching network to find SSID: 4G_MIFI-****, Click connect, input password: 1234567890, and confirm.(see detailed information on the label on the device)5 WEB UI descriptionLog on WEB UI1. Find the SSID and input the password.2. Connect to WIFI, open you browser, input”http://192.168.0.1”or Connect it to PC with USB cable to run RNDIS, open you browser, input”http://192.168.0.1”to open WEB UI.(IE Browserrecommended).Detailed information (operator, connection status, flow usage, WIFI, SSID) of the device can be seen on the home page.3.Input password: admin to enter management page(English/Chinese language optional)4.Enter the basic information interface.User can find the current detailed information, namely: SIM card No., IMEI, IMSI, SSID, Max user No., Wi-Fi Performance, LAN name, IP/MAC/WAN IP address, Software/Firmware/Hardware version information, data statistics and data limitation settings.5.SD card settingsUSB and HTTP sharing modes are optional, Under HTTP sharing mode, the device only supports FAT document system.6.Driver download7.SMS: Create, delete SMS, User can set the validity time of thesending out SMS.8.Phone book: Create, send, delete, delete all, when too muchcontact, there is also page-turn function.work settings: Dial setting, Search setting, APN10.WiFi settings, Modify wireless network parameters(SSID,SSIDbroadcast, WIFI password, WPS setting etc.)11.Device settingsUser can Log on user name and password, restore factory setting, restart the device.12. FAQ1. What OS does this device support?Windows XP, Windows Vista, Windows 7,Windows 8,windows 10 2. Can not install the software?Reasons as below:1. if the auto-installation has not completed, please check if theanti-virus and security software are running, if yes, please close them and do the installation again; for the software that can not be forbidden, please close the monitoring software, open it after installation.2. For some PC, the installing time maybe long because of the different configuration. Thus, when installing, be patient, do not cancel it, nor plug out the device. If still not succeed, please uninstall the driver and install it again.3. SIM card not resigsteredReasons as below:1. local signal is not stable2. software is old version3. hardware problemYou can:1. Try to log on at another place.2. update the software3. check the hardware or change another device to connectagain4.Why prompt ”can not connect to configuration files ”?Please add a configuration file manually.5.Can not connect to internet?Please make sure the configuration files and setting correct.6.Connecting and data exchange too slow?Please check local network signal strength.7.Fail to send messages?Please make sure message center number is correct.。

设置上网手机连接华为4G路由2 Pro的无线网络,默认的无线网络名称请查看华为4G路由2 Pro背部铭牌,默认无密码。
输入您宽带运营商的帐号及密码。
台式电脑通过网线连接到华为4G路由2 Pro的LAN网口。
连接有线宽带3接通电源,自动开机、联网。
4连接上网设备5打开浏览器,页面自动跳转至上网向导。
(若未跳转,请输入192.168.8.1)6配置宽带7设置WLAN密码和设备登录密码8设置双宽带Turbo9若无需输入宽带帐号密码,将自动跳过此步骤。
用手机App管理华为4G路由2 Pro扫描二维码或在应用市场搜索“华为智慧生活”App,下载安装App。
使用App 助您便捷管理华为4G路由2 Pro,如:设置双宽带Turbo、修改密码、设置儿童上网保护、查看流量及短信等。
购买华为终端产品请访问 华为商城:更多信息请访问:/cn/消费者服务热线:800 830 8300(仅固话),400 830 8300产品型号:B316-855 31500CBS_01使用前,您需要先在App上登录华为帐号,并添加华为4G路由2 Pro。
若手机已安装华为智慧生活App ,请确保App版本为最新。
123456认识华为4G路由2 Pro更多功能常见问题华为4G路由2 Pro本身有内置天线,可满足您的日常使用。
在室内信号弱时,建议您购买外置天线,使用外置天线可以改善上网速率。
将华为4G路由2 Pro接通电源,稍等片刻(待华为4G路由2 Pro的指示灯稳定后),使用针状物按下华为4G路由2 Pro的Reset按键,并保持2秒以上,直到电源灯开始闪烁后松开。
恢复出厂设置后华为4G路由2 Pro的配置参数将被清除,需要重新对华为4G路由2 Pro进行配置。
网络状态灯信号强度灯WLAN灯青色/蓝色/绿色已连接到4G/3G网络/运营商宽带。
网口灯常亮网口已连接有线上网设备或运营商宽带。
闪烁正在进行数据传输。
已连接双宽带同时上网。
未完成上网向导设置/SIM卡未识别/无网络。
华为路由器怎么设置上网华为路由器上网设置图文详细步骤教程现在很多用户在选择路由器的时候,都比较喜欢华为品牌的路由器,因为大品牌质量上有保证,很多用户在购买华为路由器之后,因为是初次使用所以不太清楚怎么设置上网,其实设置方法和其他品牌的路由器差不多,下面小编为大家带来华为路由器上网设置的图文详细步骤教程,不懂得设置的朋友可以进来学习下设置方法。
华为路由器怎么设置上网1.打开IE浏览器,在地址栏中输入网关的维护地址(默认为192.168.3.1或192.168.1.1),登录用户名和密码(默认用户名密码均为admin)进行登录。
如果192.168.1.1打不开可参考文档: 192.168.1.1 无线路由器设置方法2.进入“配置向导”3.如下图,选择所需的配置方式1).宽带用户名密码PPPoE拨号方式:输入帐号、密码,点击“下一步”。
2).设置动态IP的上网方式:连接类型选择DHCP,点击“下一步”。
打开本地连接状态,点击“属性”,双击“Internet协议(TCP/IP)”,勾选“自动获得IP地址”,点击“确定”,然后网关会自动分配IP地址给电脑。
3).DHCP连接类型下也可以设置设置静态IP的上网方式,开始步骤同上,然后输入静态IP地址192.168.3.x(2≤x≤254)。
华为路由器怎么设置防止别人蹭网1、第一招:使用最安全的WPA/WPA2-PSK安全模式,密码使用字母和数字的组合,且8位以上。
荣耀路由默认使用最全的WPA/WPA2-PSK安全模式,并做了防暴力破解强化,您可以在电脑浏览器地址输入192.168.3.1登入路由器“我的Wi-Fi” 设置界面进行确认,如下图:这是保证Wi-Fi安全的最基本措施,WPA/WPA2-PSK安全模式下Wi-Fi通信报文被加密,很难通过报文分析获取Wi-Fi密码。
其它的安全模式如“Open(不加密)”、“WEP”都不安全,建议不要使用。
但虽然使用了“WPA/WPA2-PSK”安全模式,但不能防止黑客穷举法猜测密码,所谓穷举法就是通过数字、字母组合不断尝试密码进行连接。
华为路由器设置无线方法华为路由器设置无线方法虽然看起来比较麻烦,但是实际上跟其他无线路由器的设置方式是相同的。
要是想要极路由那么简单还是算了,不过在这里有方法帮你链接路由器,快来看看吧。
第一步:获得超级管理员账号密码,知道的话直接跳过第一步。
初始管理员账号(telecomadmin)密码(nE7jA%5m),首先电脑连猫就不用我说了吧。
1.查看网关,打开命令提示符,XP用户开始-运行-输入cmd-回车win7用户同上,要是找不到运行,请开始-所有程序-附件-命令提示符2.在命令提示符里输入telnet 192.168.1.1(看猫背面对应值)回车root 回车admin 回车shelll 回车vi /mnt/jffs2/hw_ctree.xml 回车这时候出来很多英文,账号密码已经在里面了,我们可以查找一下。
键入/telecomadmin 回车(我这账号已经改成admin了,所以输入的是/admin)OKUserName="XXX"。
XXX即为用户名Password="XXX"。
此处为密码附上修改密码技巧:找到要修改的地方,用方向键把光标移动到要修改地方,按一下键盘上面小写的s,就可以使用删除键或者是输入要输入的内容,修改好后,特别要注意:一定要按一下键盘上面的ESC键,退出s键修改命令,以后其它的修改也要如此。
输入冒号加x (:x)保存当前文件并退出。
通过telnet连接光猫telnet 192.168.1.1用户名root密码admin第二步:首先你要在本地连接中指定IP,IP地址:192.168.1.2(从192.168.1.2-192.168.1.254都可以),子网掩码自动会生成:255.255.255.0,默认网关:192.168.1.1(这个是华为HG8245的默认地址)。
下面的DNS服务器地址都不需要填写,空着好了。
第三步:登录HG8245,即在地址栏输入http://192.168.1.1,回车!用户名和密码为第一步获得,如(telecomadmin,nE7jA%5m),注意不是不是华为路由猫后面给的用户名和密码,那个只能看状态信息。
华为无线路由器怎么在线升级
华为无线路由器怎么在线升级
华为4G无线路由器B310在线升级操作指导(手动检测)
1、打开浏览器,地址栏输入:192.168.8.1 (定制版本网关地址会有不同,可通过连接CPE的本地连接中查看具体的网关地址),打开CPE配置界面。
1)默认用户名是admin,密码是admin;
2)如果用户曾经手动修改过,需要输入修改过的用户名和密码;
3)如果用户忘记修改后的用户名和密码,需要恢复出厂设置。
恢复出厂设置的`方法是,长按(3秒以上)设备电源接口旁边凹进去的复位按键,设备重启。
重启后,用户名是admin,密码是admin
2、此时可进入web UI页面,进入更新页面,选择在线更新,点击“ 检测新版本”按钮
3、检测到升级包后,页面右上角会有升级包的图标提示,更新页面也会有升级包的相关信息显示(升级包的版本号,升级包的大小,以及此次升级包更新的特性)
4、点击“ 立即更新”,即可进入升级模式。
1)升级预计耗时5~8分钟,与当前网络状态有关;
2)升级过程中不可断电。
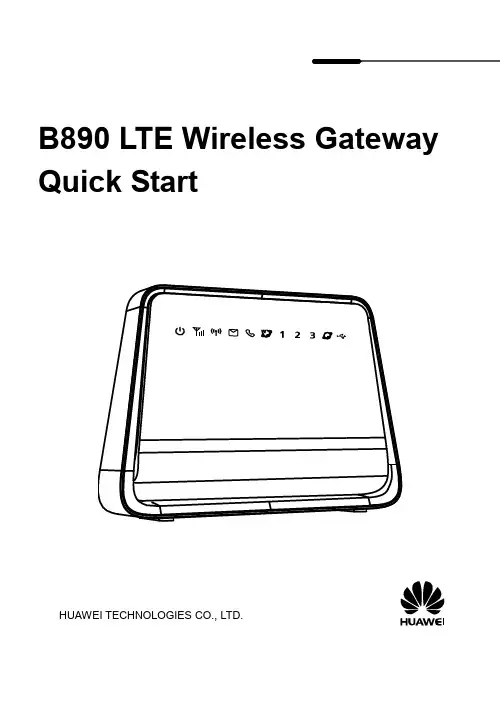
B890 LTE Wireless Gateway Quick StartHUAWEI TECHNOLOGIES CO., LTD.Note:●Figures in this guide are only for your reference. For details about a particularmodel, contact your service provider.●Before purchasing this product, verify that its specifications meet yourrequirements. If necessary, contact your local vendor to purchase the relevantaccessories.●This guide briefly describes the functions of the B890 LTE Wireless Gateway.For details about how to set the management parameters, see the helpinformation on the web management page.1 Getting to Know Your DeviceScenario 1:Use an Ethernet cable to connect your B890 to an Ethernet port on the wall to use Ethernet data services. You can also connect your computer to the B890 to access the Internet.Scenario 2:Insert a Universal Subscriber Identity Module (USIM) card into your B890 to use 3G/4G data and voice services. You can also connect your computer to the B890 to access the Internet or connect a phone to it to make calls.Scenario 3:Use an Ethernet cable to connect your B890 to an Ethernet port on the wall to use Ethernet data services. Then insert a USIM card into the B890 to use 3G/4G voice services. You can also connect your computer to the B890 to access the Internet or connect a phone to it to make calls.1. Power indicator2. Network status indicator3. Wi-Fi/WPS indicator4. SMS indicator5. Call status indicator6. Wireless dialing indicator7. LAN indicators8. Ethernet dialing indicator9. USB indicator10. Power button11. Register button (Reserved)12. Power port13. Telephone port14. USB port15. LAN ports16. WAN port17. USIM card slot18. Dial-up button19. Wi-Fi/WPS button2 InstallationAttention:●After the B890 is installed, keep it upright, so the indicators are easy to see.Furthermore, when placed flat, the B890 may be damaged due to poor heatdissipation.●Only use a B890-compatible power adapter. Using an incompatible poweradapter may cause damage to the B890.Note:●When connecting the B890 to a telephone, use an RJ11 telephone cable. Do notconnect the B890 to the telephone wall outlet (or any Public Switched Telephone Network), because doing so could damage the B890 due to excessive heat.Radio signals can interfere with telephone call connection and quality. Toeliminate interference, place the telephone at least 1 meter (3.28 feet) away from the B890.●When connecting the B890 to a computer, use an RJ45 Ethernet cable no longerthan 100 meters (328 feet).Connect the cables in the sequence indicated in the following figure. Connect cable to the B890's WAN port and the Ethernet port on the wall.Once connected to a power supply, the B890 automatically powers on.1. Pull out the card slot cover and rotate it to reveal the USIM card slot.2. Insert the USIM card into the card slot. Ensure that the beveled edgeof the USIM card aligns with that of the card slot. Gently push thecard until it clicks into place.3. Replace the card slot cover.Step 2 Connect the cables in the sequence indicated in the following figure.Once connected to a power supply, the B890 automatically powers onand searches for networks.1. Pull out the card slot cover and rotate it to reveal the USIM card slot.2. Insert the USIM card into the card slot. Ensure that the beveled edgeof the USIM card aligns with that of the card slot. Gently push thecard until it clicks into place.3. Replace the card slot cover.Step 2 Connect the cables in the sequence indicated in the following figure.Connect cable to the B890's WAN port and the Ethernet port onthe wall.Once connected to a power supply, the B890 automatically powers on.1. Installing an External AntennaSkip this section if you do not need to connect an external antenna to the B890. In areas with poor network coverage, connect an external antenna to the B890's external antenna port for better signal reception.Step 1 Remove the cover from the antenna port. (Keep it in a safe place.) Step 2 Screw external antenna fully into the antenna port, as shown in theNote:●Before using an external antenna, log in to the web management page(http://192.168.1.1) and set antenna mode to outer. For details, see thehelp information on the web management page.●Only use the external antenna indoors, and do not use it duringthunderstorm.2. Connecting to a USB deviceSkip this section if you do not need to connect a USB device to the B890. Connect a USB device to the B890, as shown in the following figure. For details, see the help information on the web management page.Note:●Do not connect a computer to the B890's USB port.●B890's USB port can supply a maximum current of 500 mA. If the currentrequired by a peripheral device, such as a portable hard disk drive, connected to the B890 is higher than 500 mA, the B890 may fail to recognize the device. Inthis case, use an auxiliary power supply for the peripheral device. For moreinformation, contact your service provider.3 Setting Up a Wireless ConnectionNote:Before setting up a Wi-Fi connection, ensure that a wireless network adapter has been installed on your computer. If the wireless network adapter is functioning correctly, you will be able to find a wireless network connection in your computer's connection manager application.The B890's Wi-Fi automatically turns on whenthe B890 is powered on.●To manually turn Wi-Fi off, press and holdbutton for 2 seconds. Theindicator turns off.●To manually turn Wi-Fi on, press and holdbutton until the indicatorturns steady on.A computer running Windows 7 is used as an example to describe how to manually set up a wireless connection:Step 1 Ensure that the indicator is steady on, and the wireless configuration service of the computer that you want to connect isenabled.Step 2 Find and make note of the wireless network (SSID) and password (Wi-Fi Key) printed on the label on the rear panel of the B890.Step 3 Configure the wireless network connection on the computer as follows:1. Choose Start > Control Panel > Network and Sharing Center >Change Adapter settings.2. In the Network Connections window, right-click the WirelessNetwork Connection to display a shortcut menu, and selectConnect/Disconnect.3. In the Wireless Network Connection dialog box, select the wirelessnetwork whose name is the same as the one you recorded in Step 2,and click Connect.4. In the Connect to Network dialog box, enter the wireless networkpassword you recorded in Step 2, and click OK.After the system verifies the password, Connected appears onthe wireless network icon in the wireless network list, indicating thatyour computer has established a wireless connection to the B890.Note:●If the wireless network name (SSID) and password (Wi-Fi Key) are changed, theinformation will have to be reconfigured on your computer.●To protect your wireless network from unauthorized access, change the SSIDand Wi-Fi key a regular intervals. For details, see the help information onthe web management page.If the client to which the B890 connects supports WPS, a Wi-Fi key is generated automatically.To set up a WPS connection:Step 1 Ensure that the indicator is steady on, and the wireless configuration service of the computer that you want to connect isenabled.Step 2 until the indicator blinks to activate the WPS connection on your device.Step 3 Activate the WPS connection on the client.Note:For details about operations on the client side, see the client user guide.4 Logging In to the Web Management PageYou can configure and manage the B890 settings using the web management page.1. L aunch a web browser, and enter http://192.168.1.1 in the address bar.2. E nter the password, and log in to the web management page. The defaultpassword is admin.If you are logging in to the web management page for the first time, follow the Quick Setup Wizard to quickly configure your B890.Note:●To protect your device, only one user can log in to the web management page ata time.●To protect your account, change the password after the first login. For details,see the help information on the web management page.5 Accessing the InternetThe B890 can access the Internet through wireless networks (3G/4G networks) and wireline networks (Ethernet networks), but it cannot access both networks simultaneously.If the USIM card is correctly installed, the B890 automatically searches for networks after startup.indicator turns steady on.Note:If the B890 fails to connect to the network, log in to the web management page to verify the wireless network parameters. For details, see the help information onthe web management page.indicator turns steady on. YouNote:If the B890 fails to connect to the network, log in to the web management page to verify the wireline network parameters. For details, see the help information onthe web management page.Note:For details about the access modes, see the help information on the web6 Restoring Factory DefaultsIf you are uncertain of which settings you have configured or changed, you can restore the B890’s factory defaults, and then reconfigure the B890.T o restore the factory defaults, Use a sharp-pointed object, such as a ballpoint pen, toNote:After the factory defaults are restored, the B890 automatically restarts.7 Troubleshooting TipsIf the B890 does not work properly:●See the help information on the web management page.●Restart the B890.●Restore the B890 to its factory defaults.●Contact your service provider.Copyright © Huawei Technologies Co., Ltd. 2012. All rights reserved.THIS DOCUMENT IS FOR INFORMATION PURPOSES ONLY, AND DOES NOT CONSTITUTE ANY KIND OF WARRANTIES.Please visit /worldwide/support/hotline for recently updated hotline and email address in your country or region.96721484_01。

TD-LTE无线数据终端UG908快速入门手册深圳合众思壮科技有限公司1.外观说明正视图2返回键菜单键耳机后视图2、电池充电·用旅行充电器充电将数据线的小端插头插入主机TYPE—C接口,将USB数据线的大端插头插入旅行充电插头。
然后将旅行充电插头插入电源插座进行充电。
·用USB数据线充电将USB数据线的小端插头插入主机TYPE—C接口,将大端插头插入计算机的USB接口进行充电。
注:充电正常时,开机状态下,主屏幕状态栏显示充电图标。
充电完成时,开机状态下,主屏幕状态栏显示充电满格图标。
3、安装SIM卡、存储卡.电池安装或取出SIM卡、存储卡或电池之前,先将主机电源关闭。
将主机翻至背面,按图1指示方向推动后盖卡扣至开启位置,取下电池仓盖,按照电池仓标签指示安裝SIM卡和TF卡,如图2所示。
图 1图 2图 3将SIM卡金属触点朝下完全推入插槽,注意切角方向。
将Micro SD存储卡金属触点朝下推入插槽,注意切角方向。
将电池铜质部位对准电池仓的铜质接触端,轻轻放入电池。
电池安装完成后将电池仓盖装好,推动后盖卡扣至锁定位置锁住电池仓盖4、开关机若要开机,稳固按住底部右侧【电源键】直至出现开机界面。
若要关机,稳固按住【电源键】,弹出选项菜单,包括关机、飞行模式、重启、静音、会议和户外等选项,选择关机选项,则关机。
开机状态下,点击【电源键】关闭屏幕,进入睡眠模式,再次点击【电源键】唤醒屏幕.在屏幕上向上滑动屏幕,则解锁屏幕,主机闲置一段时间后会自动关闭屏幕进入睡眠模式。
5、主屏幕操作通过主屏幕可查看设备状态和访问应用程序。
主屏幕有多个面板.在屏幕上向左或向右滑动可查看各面板。
主屏幕顶部为状态栏,包含通知区域、状态区域和显示区域;底部为快捷面板;中间为“应用程序图标 ”。
如图3 所示。
使用通知面板当新通知图标显示在状态栏的通知区域中,按住状态栏,然后将其向下拖动,则打开通知面板。
如欲隐藏面板,向上拖动面板的下边框。
目錄I.產品資訊 (1)I-1. 包裝內容物 (1)I-2. LED狀態 (2)I-3. 背面面板 (3)I-4. 安全資訊 (4)II.安裝 (5)II-1. 無線分享器模式 (8)II-2. 無線基地台模式 (13)II-3. 無線訊號延伸器模式 (18)II-4. 無線橋接器模式 (25)II-5. 無線公共熱點模式 (31)II-6. WPS設定 (39)II-7. 恢復出廠預設值 (39)III.網頁式設定介面 (40)III-1. 登入 (40)III-2. 儲存設定值 (42)III-3. 主功能表 (43)III-3-1. 狀態 (44)III-3-2. 安裝精靈 (45)III-3-3. 網際網路/WISP (47)III-3-3-1. WAN 設定 (48)III-3-3-1-1. 動態IP (48)III-3-3-1-2. 靜態IP (49)III-3-3-1-3. PPPoE (50)III-3-3-1-4. PPTP (52)III-3-3-1-5. L2TP (54)III-3-3-2. DDNS (56)III-3-4. 區域網路 (57)III-3-5. 2.4GHz 無線及5GHz 無線 (60)III-3-5-1. 基本 (60)III-3-5-1-2. WEP (64)III-3-5-1-3. WPA / WPA2 加密技術 (65)III-3-5-1-4. WPA RADIUS (66)III-3-5-2. 訪客/多重無線網路 (67)III-3-5-3. WPS (70)III-3-5-4. 存取控制 (71)III-3-5-5. 無線排程 (73)III-3-6. 防火牆 (74)III-3-6-1. URL Blocking (74)III-3-6-2. 存取控制 (75)III-3-6-3. DMZ (79)III-3-6-4. DoS (80)III-3-7. QoS (82)III-3-7-1. QoS (82)III-3-7-2. iQoS (85)III-3-8. 進階 (87)III-3-8-1. 靜態路由 (87)III-3-8-2. Port Forwarding (88)III-3-8-3. Virtual Server (89)III-3-8-4. 2.4GHz 無線 (91)III-3-8-5. 5GHz 無線 (92)III-3-8-6. IGMP (92)III-3-8-7. UPnP (93)III-3-9. 管理平台 (94)III-3-9-1. 時區 (94)III-3-9-2. 密碼 (95)III-3-9-3. 遠端存取 (95)III-3-9-4. 備份/還原 (96)III-3-9-5. 升級 (96)III-3-9-6. 重新開機 (97)III-3-9-8. 已啟用的DHCP 終端 (98)III-3-9-9. 統計 (98)IV.附錄 (99)IV-1. 設定您的IP 位址 (99)IV-1-1. 如何檢查您的電腦是否使用動態IP 位址 (100)IV-1-1-1. Windows XP (100)IV-1-1-2. Windows 7 (101)IV-1-1-3. Windows 8 (104)IV-1-1-4. Mac OS (108)IV-1-2. 如何修改您電腦的IP 位址 (110)IV-1-2-1. Windows XP (110)IV-1-2-2. Windows 7 (111)IV-1-2-3. Windows 8 (114)IV-1-2-4. Mac (118)IV-1-3. 如何尋找您的網路安全性金鑰 (121)IV-1-3-1. Windows 7 (121)IV-1-3-2. Mac (123)IV-1-4. 如何尋找您分享器的IP 位址 (126)IV-1-4-1. Windows XP / 7 (126)IV-1-4-2. Windows 8 (128)IV-1-4-3. Mac (130)IV-2. 連接至Wi-Fi 網路 (132)IV-3. 疑難排解 (134)I.產品資訊I-1. 包裝內容物在您開始使用本產品之前,請檢查包裝中是否有任何物品短缺,並請洽原購買經銷商或店家協助:網路線快速安裝指南電源變壓器CD-ROMBR-6208ACI-2. LED狀態I-3. 背面面板天線 重設/WPS 按鈕天線I-4. 安全資訊為確保本產品及其使用者的安全,請閱讀並依下列安全性指示說明操作。
怎么设置华为路由器
2019.04.10
先将网线、路由器和电脑连接好,在浏览器里输入192.168.3.1并回车,输入账号密码后点击下一步,点击球形图标后,勾选自动识别上网方式,如果上网方式为自动获取IP则勾选下方的静态DNS,点击保存后进行wifi名称和密码设置,设置完点击保存,智能宽带你选择一种喜欢的模式即可,这样就设定好了。
这里以win7系统和华为路由器操作演示一下。
开启分步阅读模式
华为路由器设置方法
01
将网线接口连接到路由器WAN接口,在用网线将路由器与电脑连接,如图所示。
02
打开浏览器,在地址栏中输入:192.168.3.1 并按下键盘中的回车。
03
输入完宽带的帐号密码,完成基本设置后会进入到WS832的主页。
04
点击我要上网,里面可以设置基本的网络连接方式,选择你想设置的上网方式,打开“自动识别上网方式”,如果检测到“上网方式”是:自动获取IP(DHCP),勾选静态DNS,再点击保存。
05
点击“我的Wi-Fi”选项后,可以分别设置2.4GWiFi名称、WiFi 密码,5GWiFi名称、WiFi密码,如下图所示:
06
然后是“智能带宽”设置,在这里,可以选择一种上网模式,来合理分配网速,也可以自己定义下行总带宽。
07
华为路由器设置完毕,手机,电脑等设备可以连接无线网了。
本页搜狗指南内容仅供参考,请您根据自身实际情况谨慎操作。
尤其涉及您或第三方利益等事项,请咨询专业人士处理。
华为4G路由B315快速入门1 认识产品Wi-Fi/WPS 指示灯 LAN/WAN 指示灯 信号强度指示灯SIM 卡槽 外置天线接口 WPS 按钮电源开关 Reset 按键电源接口LAN/WAN 接口按照图示方向安装好SIM卡后接通电源,B315将自动开机并搜索可用的移动网络。
待指示灯呈现以下状态时,即表示联网成功。
动网络。
强。
能丢失存储在SIM卡中的数据。
3连接Wi-FiWi-Fi 名称:.................... Wi-Fi 密码:............abcdefgXXXXXXXXWi-Fi 密码:YYYYYYYYXXXXXXXXWi-Fi 名称:YYYYYYYYB315 联网成功后,笔记本电脑或手机即可通过Wi-Fi连接到B315上网。
B315默认的无线名称(Wi-Fi 名称)和密码(Wi-Fi 密码)请查看壳体底部的标签。
●当指示灯常亮,代表B315 的Wi-Fi 功能已开启。
若您需要手动开启或关闭Wi-Fi 功能,请参见web 管理网页中的帮助信息。
●为避免您的Wi-Fi 网络被未经授权的用户访问,请及时登录web管理网页修改无线名称和密码。
修改完成后,您需要重新建立与B315的Wi-Fi连接。
4设置B315IP:XXX.XXX.X.X用户名:yyy 密码:zzz用户名:yyy密码:zzzXXX.XXX.X.XXXX.XXX.X.X用户名:yyy密码:zzz登录web管理网页,您可以对B315进行管理和设置。
默认的IP地址、用户名和密码请查看壳体底部的标签。
更多详情,请参见web管理网页中的帮助信息。
为防止未经授权的用户随意修改相关参数,请您及时登录web管理网页修改默认登录密码。
5 可选操作1. 连接电脑将电脑连接到 B315 上,可以实现上网功能。
本节所述功能仅供参考,具体支持情况请以实际产品为准。
2. 安装外置天线安装外置天线后可增强移动信号的接收能力,如果需要,请另行购买。
B310 LTE CPE Quick Start31507294_011Getting to know your B310Power indicator ●On: the B310 is powered on.●Off: the B310 is powered off.Network mode indicator ●Steady cyan: connected to an LTE network.●Steady green: connected to an Ethernet network.●Steady red:–The SIM card is not recognized, the PIN has not been entered, or the PIN verification failed.–Failed to connect to a mobile network or anEthernet network.Wi-Fi/WPS indicator ●Steady on: Wi-Fi turned on.●Blinking: a WPS connection is being set up.●Off: Wi-Fi turned off.LAN/WAN indicator● Steady on: LAN/WAN port is connected to a LANdevice or an Ethernet port.● Blinking: data is being transmitted through the LAN/WAN port.● Off: LAN/WAN port is not connected to a LAN device or an Ethernet port.Signal strength indicator ● On: signal reception available (more bars meanbetter reception).● Off: no reception.SIM card slot Install a standard SIM card to access the Internet via an LTE data connection.External antenna port Connect to external antenna after remove the cover.WPS buttonPress and hold for 2 or more seconds until is blinking to active WPS connection when Wi-Fi is turned on.Power buttonPress and hold for about 3 seconds to power the B310 on or off.Reset buttonRestoring the default settings of the B310 will eraseall previous settings.When the B310 is powered on, use a sharplypointed object to press and hold for about 3 seconds until indicator is blinking to restore the B310 to its factory settings. After the factory defaults are restored, the B310 will restart automatically.Power port Connect to compatible power adapter.LAN/WAN port● Working as a LAN port when connected to acomputer, switch, or other LAN device.● Working as a WAN port when connected to an Ethernet port on the wall. Telephone portConnect to a telephone.2InstallationScenario 1: Accessing the Internet using an LTE networkStep 1: Installing the SIM card1.Slide off the card slot cover.2.Insert the SIM card into the card slot. Ensure that the beveled edge of the SIM cardaligns with that of the card slot.3.Close the card slot cover.Do not remove the SIM card when it is in use. Doing so will affect the performance of your B310 and data stored on the SIM card may be lost.Step 2: Connecting cablesOnce connected to a power outlet, the B310 automatically powers on.Power adapterComputerTelephoneLaptop, tablet, or smart phone● To prevent interference caused by radio signals, place the B310 at least 1 meter (3.28 feet) away from telephone and other electrical devices. ● The B310's power adapter model is HW-120100XYW. X and Y represent letters or numbers that vary by region. For details about the specific adapter model, contact an authorized dealer.Do not connect the B310 to the telephone wall outlet (or any Public SwitchedTelephone Network), because doing so could damage the B310 due to excessive heat.Optional: Installing the external antennaIn areas with poor reception, connect external antenna to the B310's external antenna port to improve signal reception.1. Power off the B310 and disconnect it from the power outlet.2. Remove the cover from the antenna port. (Keep it in a safe place.)3. Install one or two external antennas as you need. Make sure the external antennas are securely connected to the antenna ports.If you are using only one external antenna, connect it to port 1.The external antenna is an optional accessory, and may not included in the packagingbox. If required, please contact your local dealer to purchase it.● Before installing the external antenna, ensure that the B310 is powered off and disconnected from the power outlet. ● Only use the external antenna indoors, and do not use it during thunderstorm. ● Do not change another unexpected antenna unless manufacturer provide.Scenario 2: Accessing the Internet using EthernetConnect the B310 to a wall-mounted Ethernet port or an ADSL modem for Internetaccess.Once connected to a power outlet, the B310 automatically powers on.Power adapterEthernet port on the wall TelephoneLaptop, tablet, or smart phone● To prevent interference caused by radio signals, place the B310 at least 1 meter (3.28 feet) away from telephone and other electrical devices. ● The B310's power adapter model is HW-120100XYW. X and Y represent letters or numbers that vary by region. For details about the specific adapter model, contact an authorized dealer.Do not connect the B310 to the telephone wall outlet (or any Public SwitchedTelephone Network), because doing so could damage the B310 due to excessive heat.3 Setting up a Wi-Fi connectionStep 1: Enabling Wi-Fi on the B310When theindicator is steady on, the Wi-Fi function of the B310 is turned on.Step 2: Recording the SSID and Wi-Fi keyThe default SSID and Wi-Fi key are printed on the B310's bottom label.Step 3: Setting up a Wi-Fi connection on your clientMethod 1: Setting up a Wi-Fi connection manually1. From your Wi-Fi enabled client, scan for wireless networks in your area.2. Connect to the network name that matches the SSID found on the device label.3. When prompted for password, enter the Wi-Fi Key found on the device label. (TheWi-Fi key is case sensitive.) Your client will notify you when it is connected.Make sure your client (computer, tablet, or smart phone) also supports Wi-Fi.For details about how to manually enable or disable the Wi-Fi function, refer to theWLAN settings section of the help information on the web management page.To prevent unauthorized parties from accessing your Wi-Fi network, it isrecommended that you change the SSID and Wi-Fi key from time to time. For details, see the help information on the web management page.Method 2: Setting up a Wi-Fi connection through WPSIf the client supports WPS, you can set up a WPS connection as follows:1.Ensure that Wi-Fi is enabled on the client.2.Press and hold the WPS button for 2 or more seconds. The indicator thenstarts blinking.3.Activate the WPS connection on the client in 2 minutes.user guide.4 Configuring your B3101. After a client is connected to the B310 through Wi-Fi or LAN port, launch a browser on the client and visit http://192.168.8.1.2. Enter the user name and password to log in to the web management page. Thedefault user name and password are printed on the B310's bottom label.3. Follow the quick setup wizard to check or set network connection parameters step by step. For details, see the help information on the web management page.Once you are done, try opening a web page on the client to verify whether you haveInternet access.● To protect your account, change the password after your first login. For details, see the help information on the web management page.● If you modify the SSID and Wi-Fi key, you must set up the Wi-Fi connection on the client again.5For more helpIf you are experiencing any issues with the B310:●Restart the B310.●See the help information on the web management page.●Restore the B310 to its factory settings.●Contact your service provider.Please visit /en/support/hotline for recently updated hotline and email address in your country or region.Figures in this guide are for your reference only. Specific models may vary slightly, contact your service provider for more detailed information.6Safety informationThis section contains important information about the operation of your device. It also contains information about how to use the device safely. Read this information carefully before using your device.Electronic deviceDo not use your device if using the device is prohibited. Do not use the device if doing so causes danger or interference with other electronic devices.Interference with medical equipment●Follow rules and regulations set forth by hospitals and health care facilities. Do notuse your device where prohibited.●Some wireless devices may affect the performance of hearing aids or pacemakers.Consult your service provider for more information.●Pacemaker manufacturers recommend that a minimum distance of 15 cm bemaintained between a device and a pacemaker to prevent potential interference with the pacemaker. If using a pacemaker, hold the device on the side opposite the pacemaker and do not carry the device in your front pocket.Areas with flammables and explosives●Do not use the device where flammables or explosives are stored (in a gas station,oil depot, or chemical plant, for example). Using your device in these environments increases the risk of explosion or fire. In addition, follow the instructions indicated in text or symbols.●Do not store or transport the device in containers with flammable liquids, gases, orexplosives.Operating environment●Avoid dusty, damp, or dirty environments. Avoid magnetic fields. Using the devicein these environments may result in circuit malfunctions.●Before connecting and disconnecting cables, stop using the device and disconnectit from the power supply. Ensure that your hands are dry during operation.●Place the device on a stable surface.●Keep the device away from electronic appliances that generate strong magnetic orelectric fields, such as a microwave oven or refrigerator.●During thunderstorms, power off your device and remove all cables connected to itto protect against lightning strikes.●Do not use your device during thunderstorms to protect your device against anydanger caused by lightning.●Ideal operating temperatures are 0°C to +40°C. Ideal storage temperatures are-20°C to +70°C. Extreme heat or cold may damage your device or accessories.●Keep the device and accessories in a well-ventilated and cool area away fromdirect sunlight. Do not enclose or cover your device with towels or other objects.Do not place the device in a container with poor heat dissipation, such as a box or bag.●To protect your device or accessories from fire or electrical shock hazards, avoidrain and moisture.●Keep the device away from sources of heat and fire, such as a heater, microwaveoven, stove, water heater, radiator, or candle.●Do not place any object, such as a candle or a water container, on the device. Ifany foreign object or liquid enters the device, immediately stop using it, power it off, and remove all cables connected to it. Then, contact an authorized service center.●Do not block device openings. Reserve a minimum of 10 cm around the device todissipate heat.●Stop using your device or applications for a while if the device is overheated. If skinis exposed to an overheated device for an extended period, low temperature burn symptoms, such as red spots and darker pigmentation, may occur.●Do not touch the device's antenna. Otherwise, communication quality may bereduced.●Do not allow children or pets to bite or suck the device or accessories. Doing somay result in damage or explosion.●Observe local laws and regulations, and respect the privacy and legal rights ofothers.●The device should be installed and operated with a minimum distance of 20 cmbetween the radiator and your body.●Keep the device in a place with good reception. The distance between the deviceand other metal materials (such as metal brackets or metal doors and windows) should be greater than 25 cm and the distance between the device should be greater than 30 cm.Child's safety●Comply with all precautions with regard to child's safety. Letting children play withthe device or its accessories may be dangerous. The device includes detachable parts that may present a choking hazard. Keep away from children.●The device and its accessories are not intended for use by children. Children shouldonly use the device with adult supervision.Accessories●Using an unapproved or incompatible power adapter, charger or battery may causefire, explosion or other hazards.●Choose only accessories approved for use with this model by the devicemanufacturer. The use of any other types of accessories may void the warranty, may violate local regulations and laws, and may be dangerous. Please contact your retailer for information about the availability of approved accessories in your area. Power adapter safety●The power plug is intended to serve as a disconnect device.●For pluggable devices, the socket-outlet shall be installed near the devices and shallbe easily accessible.●Unplug the power adapter from electrical outlets and the device when not in use.●Do not drop or cause an impact to the power adapter. If it is damaged, take it toan authorized service center for inspection.●If the power cable is damaged (for example, the cord is exposed or broken), or theplug loosens, stop using it at once. Continued use may lead to electric shocks, short circuits, or fire.●Do not touch the power cord with wet hands or pull the power cord to disconnectthe power adapter.●Do not touch the device or the power adapter with wet hands. Doing so may leadto short circuits, malfunctions, or electric shocks.●If your power adapter has been exposed to water, other liquids, or excessivemoisture, take it to an authorized service center for inspection.●Ensure that the power adapter meets the requirements of Clause 2.5 in IEC60950-1/EN60950-1/UL60950-1 and has been tested and approved according to national or local standards.Cleaning and maintenance●During storage, transportation, and operation of the device, keep it dry andprotect it from collision.●Keep the device and accessories dry. Do not attempt to dry it with an external heatsource, such as a microwave oven or hair dryer.●Do not expose your device or accessories to extreme heat or cold. Theseenvironments may interfere with proper function and may lead to fire or explosion.●Avoid collision, which may lead to device malfunctions, overheating, fire, orexplosion.●If the device is not going to be used for an extended period of time, power it off,and remove all cables connected to it.●If anything unusual occurs (for example, if the device emits smoke or any unusualsound or smell), immediately stop using it, power it off, remove all cablesconnected to it, and contact an authorized service center.●Do not trample, pull, or excessively bend any cable. Doing so may damage thecable, causing the device to malfunction.●Before you clean or maintain the device, stop using it, stop all applications, anddisconnect all cables connected to it.●Do not use any chemical detergent, powder, or other chemical agents (such asalcohol and benzene) to clean the device or accessories. These substances may cause damage to parts or present a fire hazard. Use a clean, soft, and dry cloth to clean the device and accessories.●Do not place magnetic stripe cards, such as credit cards and phone cards, near thedevice for extended periods of time. Otherwise the magnetic stripe cards may be damaged.●Do not dismantle or remanufacture the device and its accessories. This voids thewarranty and releases the manufacturer from liability for damage. In case ofdamage, contact an authorized service center for assistance or repair. Environmental protection●The device and its accessories (if included), such as the power adapter, headset,and battery should not be disposed of with household garbage.●Disposal of the device and its accessories is subject to local regulations. Supportproper collection and recycling.Disposal and recycling informationThis symbol (with or without a solid bar) on the device, batteries (if included), and/or the packaging, indicates that the device and its electrical accessories (for example, a headset, adapter, or cable) and batteries should not be disposed of as household garbage. These items should not be disposed of as unsorted municipal waste and should be taken to a certified collection point for recycling or proper disposal.For more detailed information about device or battery recycling, contact your local city office, household waste disposal service, or retail store.Disposal of the device and batteries (if included) is subject to WEEE Directive Recast (Directive 2012/19/EU) and Battery Directive (Directive 2006/66/EC). The purpose of separating WEEE and batteries from other waste is to minimize the potential environmental impacts and human health risk of any hazardous substances that may be present.Reduction of hazardous substancesThis device is compliant with the REACH Regulation [Regulation (EC) No 1907/2006] and RoHS Directive Recast (Directive 2011/65/EU). Batteries (if included) are compliant with the Battery Directive (Directive 2006/66/EC). For up-to-date information aboutREACH and RoHS compliance, please visit the web site/certification.EU regulatory conformanceStatementHereby, Huawei Technologies Co., Ltd. declares that this device is in compliance with the essential requirements and other relevant provisions of Directive 1999/5/EC.For the declaration of conformity, visit the web site/certification.The following marking is included in the product:This device may be operated in all member states of the EU.Observe national and local regulations where the device is used.This device may be restricted for use, depending on the local network. Restrictions in the 2.4 GHz band:Norway: This subsection does not apply for the geographical area within a radius of 20 km from the centre of Ny-Ålesund.7Legal NoticeCopyright © Huawei Technologies Co., Ltd. 2015. All rights reserved. No part of this manual may be reproduced or transmitted in any form or by any means without prior written consent of Huawei Technologies Co., Ltd. and its affiliates ("Huawei").The product described in this manual may include copyrighted software of Huawei and possible licensors. Customers shall not in any manner reproduce, distribute, modify, decompile, disassemble, decrypt, extract, reverse engineer, lease, assign, or sublicense the said software, unless such restrictions are prohibited by applicable laws or such actions are approved by respective copyright holders.Trademarks and Permissions, , and are trademarks or registered trademarks of HuaweiTechnologies Co., Ltd.LTE is a trade mark of ETSI.Other trademarks, product, service and company names mentioned may be the property of their respective owners.NoticeSome features of the product and its accessories described herein rely on the software installed, capacities and settings of local network, and therefore may not be activated or may be limited by local network operators or network service providers.Thus, the descriptions herein may not exactly match the product or its accessories which you purchase.Huawei reserves the right to change or modify any information or specifications contained in this manual without prior notice and without any liability. DISCLAIMERALL CONTENTS OF THIS MANUAL ARE PROVIDED "AS IS". EXCEPT AS REQUIRED BY APPLICABLE LAWS, NO WARRANTIES OF ANY KIND, EITHER EXPRESS OR IMPLIED, INCLUDING BUT NOT LIMITED TO, THE IMPLIED WARRANTIES OF MERCHANTABILITY AND FITNESS FOR A PARTICULAR PURPOSE, ARE MADE IN RELATION TO THE ACCURACY, RELIABILITY OR CONTENTS OF THIS MANUAL.TO THE MAXIMUM EXTENT PERMITTED BY APPLICABLE LAW, IN NO EVENT SHALL HUAWEI BE LIABLE FOR ANY SPECIAL, INCIDENTAL, INDIRECT, OR CONSEQUENTIAL DAMAGES, OR LOSS OF PROFITS, BUSINESS, REVENUE, DATA, GOODWILL SAVINGSOR ANTICIPATED SAVINGS REGARDLESS OF WHETHER SUCH LOSSES ARE FORSEEABLE OR NOT.THE MAXIMUM LIABILITY (THIS LIMITATION SHALL NOT APPLY TO LIABILITY FOR PERSONAL INJURY TO THE EXTENT APPLICABLE LAW PROHIBITS SUCH A LIMITATION) OF HUAWEI ARISING FROM THE USE OF THE PRODUCT DESCRIBED IN THIS MANUAL SHALL BE LIMITED TO THE AMOUNT PAID BY CUSTOMERS FOR THE PURCHASE OF THIS PRODUCT.Import and Export RegulationsCustomers shall comply with all applicable export or import laws and regulations and be responsible to obtain all necessary governmental permits and licenses in order to export, re-export or import the product mentioned in this manual including the software and technical data therein.Privacy PolicyTo better understand how we protect your personal information, please see the privacy policy at /privacy-policy.。
千万不要以为这是MP3之类的产品噢!它可是必联新推出的4G无线路由器,可以直插sim卡使用!
BL-MiFi301颜色苹果白,简约时尚,影随心动,让你看着就觉得舒服美丽。
轻巧精致,超薄设计。
14mm厚度,超薄体验,小巧精致。
这样一个无线路由器真的是简单方便,一点也不担心占多大的空间。
它采用高通9X15顶级芯片,速度更快,功耗更低;高强度钢化承载面,更安全、更有保障,且坚固耐用。
还支持8H小时续航,350H待机。
可卸载式电池,与三星电池通用,确保8H小时续航,350H待机内置TF卡槽,最大支持32G扩充容量。
你以为BL-MiFi301仅仅是4G无线路由器?那你就错了,它还可以当U盘使用。
已接入路由器设备之间通过电脑存储,轻松存储电影、音乐、照片等。
它还能智能收发短信,1.4寸智能彩屏,实时显示工作状态,随时查看流量使用情况,监控别人是否蹭网。
这样一款赏心悦目的4G无线路由器,它的安装方法是很简单的。
1、打开带有WiFi接收功能的电脑,找到并连接相应的WiFi;
2、打开浏览器,在地址栏输入192.168.0.1。
在显示的界面中输入管理员名称及密码,管理员名称为:admin,密码为admin或111111。
3、点击“连接设置”进入设置页面-选择WLAN-WLAN 基本设置,然后输入新的SSID 以及WPA 预共享密匙:再点击应用即可修改WiFi 名称和密码。
4、点击“短信”可进行短信管理编辑。
5、点击“流量统计”可查看当月当日流量使用状况,以便于管理。
6、在“更多”里可以将此WiFi分享给更多人。
产品图片:。
Check the following LEDs’ status. If the internet LED is on, your router is connected to the internet successfully.Quick Installation GuideWireless 4G LTE Router3. Enjoy the Internet2. Verify the Hardware ConnectionImages may differ from actual products.Note: If the Internet LED does not turn on, please refer to Q2 of Need Help? in this guide.Power OnOnInternet OnWi-Fi For better internet connection, make sure 2 or 3 bars of the Signal Strength LED are lit. Otherwise, try relocating the router to a spot that may receive a stronger mobile network signal, such as near a window.WiredWirelessConnect your computers to the router's LAN ports via Ethernet cables.7106507816 REV3.0.0Find the SSID (network name) and wireless password printed on the label at the bottom of the router.a.Click the network icon of your computer or go to Wi-Fi settings of your smart device, and then select the SSID to join the network.b.Customize the 4G LTE RouterTether AppNote: The router can also be used (or configured) in Wireless Router Mode for ADSL/Cable connections. For more advanced configurations, please refer to the user guide on TP-Link official website at .Note: If the login page does not appear, please refer to Q1 of Need Help? in this guide.2. Launch a web browser and type in or http://192.168.1.1. Create a new password for future logins.3. Follow the step-by-step i nstructions of the Quick Setup to complete the initial configuration.1. Make sure your computer is connected to the router (wired or wireless).How to begin?1. Download the TP-Link T ether app from the Apple App Store or Google Play Store.2. Ensure your smart device is wirelessly connected to the home network.3. Launch the T ether app and start managing your home network.Scan to downloadThe TP-Link T ether app provides a simple, intuitive way to access and manage your router.View information about clients connected to your routerBlock unwelcome users from connecting to your networkSet up Parental Controls with access timeChange the basic wireless network settingsT ether。