大金空调使用手册
- 格式:docx
- 大小:34.03 KB
- 文档页数:3
大金空调使用指南引言概述:大金空调是一款高质量、高性能的家用空调产品。
本文将为用户提供大金空调的使用指南,包括控制面板的使用、温度调节、模式选择、节能提示及维护保养等方面的详细说明。
正文内容:一、控制面板的使用1.1熟悉面板布局:了解面板上的按键、显示屏和指示灯的功能和位置。
1.2开关机操作:如何正确使用电源开关和遥控器的电源按钮。
1.3温度调节:通过面板上的温度按钮或遥控器上的温度增减键调节空调的运行温度。
二、温度调节2.1制冷模式温度设定:根据室内温度和个人需求,合理设定制冷模式下的目标温度。
2.2制热模式温度设定:根据室内温度和个人需求,合理设定制热模式下的目标温度。
2.3自动模式温度设定:说明自动模式下空调的温度设定范围和优势。
2.4温度快速调节:介绍如何利用大金空调的快速调温功能来快速改变室内温度。
三、模式选择3.1制冷模式:详细介绍制冷模式下的运行原理和适用场景。
3.2制热模式:详细介绍制热模式下的运行原理和适用场景。
3.3抽湿模式:说明抽湿模式下的特点和适用条件。
3.4自动模式:解释自动模式的工作原理和优势。
四、节能提示4.1温度设定:合理设置温度可以节约能源消耗。
4.2定时开关机:通过定时开关机功能,合理安排空调的运行时间,避免不必要的能源浪费。
4.3能量管理模式:介绍能量管理模式可以帮助用户实现更节能的空调使用。
4.4温度偏差调整:说明如何利用温度偏差调整功能来实现更精确的温度控制。
五、维护保养5.1清洁滤网:定期清洁滤网可以保证空调的正常运行和空气质量。
5.2清洗室内机和外机:详细介绍如何正确清洗室内机和外机,以保持空调的高效工作。
5.3检查制冷剂:解释制冷剂的作用和如何检查制冷剂的充足性。
5.4故障排除:常见故障及解决方法,帮助用户在遇到问题时能够快速处理。
总结:通过本文提供的大金空调使用指南,用户可以掌握空调的操作技巧和使用要点。
正确的操作和维护保养将有助于大金空调的长期稳定运行,提供舒适的室内环境,并实现节能效果。
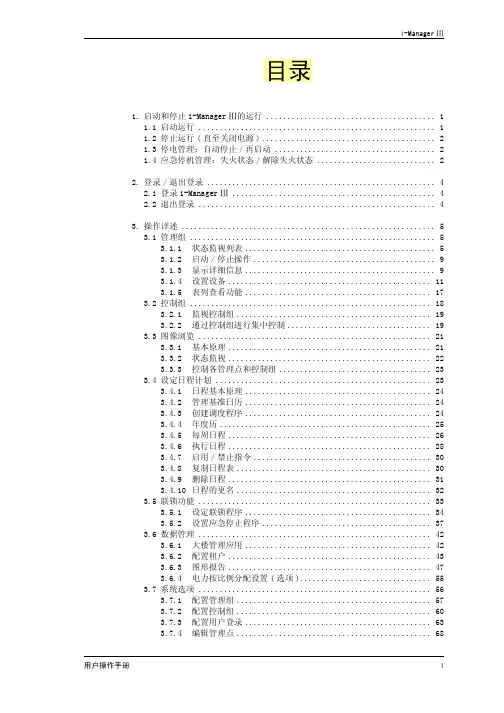
目录1.启动和停止i-ManagerⅢ的运行 (1)1.1启动运行 (1)1.2停止运行(直至关闭电源) (2)1.3停电管理:自动停止/再启动 (2)1.4应急停机管理:失火状态/解除失火状态 (2)2.登录/退出登录 (4)2.1登录i-ManagerⅢ (4)2.2退出登录 (4)3.操作详述 (5)3.1管理组 (5)3.1.1状态监视列表 (5)3.1.2启动/停止操作 (9)3.1.3显示详细信息 (9)3.1.4设置设备 (11)3.1.5表列查看功能 (17)3.2控制组 (18)3.2.1监视控制组 (19)3.2.2通过控制组进行集中控制 (19)3.3图像浏览 (21)3.3.1基本原理 (21)3.3.2状态监视 (22)3.3.3控制各管理点和控制组 (23)3.4设定日程计划 (23)3.4.1日程基本原理 (24)3.4.2管理基准日历 (24)3.4.3创建调度程序 (24)3.4.4年度历 (25)3.4.5每周日程 (26)3.4.6执行日程 (28)3.4.7启用/禁止指令 (30)3.4.8复制日程表 (30)3.4.9删除日程 (31)3.4.10日程的更名 (32)3.5联锁功能 (33)3.5.1设定联锁程序 (34)3.5.2设置应急停止程序 (37)3.6数据管理 (42)3.6.1大楼管理应用 (42)3.6.2配置租户 (43)3.6.3图形报告 (47)3.6.4电力按比例分配设置(选项) (55)3.7系统选项 (56)3.7.1配置管理组 (57)3.7.2配置控制组 (60)3.7.3配置用户登录 (63)3.7.4编辑管理点 (68)3.7.5设置集中控制 (69)3.7.6配置蜂鸣器 (70)3.7.7配置日志选项 (71)3.7.8调节时间 (71)3.7.9启用确认对话框 (72)3.7.10设置夏日制时间 (73)3.7.11自动转换 (73)3.7.12可调节温度 (75)3.7.13温度极限 (76)3.7.14制热模式最佳化 (77)3.8窗口之间的移动 (77)3.8.1简单移动 (78)3.8.2通过保留按钮进行的移动 (78)3.8.3自动循环顺序 (79)3.9帮助 (81)3.10异常显示和日志管理 (81)3.10.1显示故障消息 (82)3.10.2操作人员日志显示功能 (82)3.10.3详细日志窗口 (83)1.启动和停止i-ManagerⅢ的运行1.1启动运行如下所示,计算机电源接通时,i-ManagerⅢ就开始工作。

大金控制手册最新(总47页) -CAL-FENGHAI.-(YICAI)-Company One1-CAL-本页仅作为文档封面,使用请直接删除大金(中国)投资有限公司技术部前言目前,空调市场对控制系统的要求越来越多,为了方便公司员工能够更好地对应用户所提出的控制需求,了解掌握大金控制产品知识,故整理总结了相关控制产品及知识,并制作成册。
本手册中总结了公司现有自控产品的规格、功能及设计要点等,方便大家查阅。
本手册在内容上还有不尽完善之处,虽经多次校对,但难免还有遗漏甚至出错之处,今后将不断更新充实内容。
3空调单独控制、集中控制i-M a n a g e rⅢ2 i-C o n t r o l l e r4 i-e a s y6集中遥控器79统一O N/O F F开关空调状态显示及故障报警i-M a n a g e rⅢ2 i-C o n t r o l l e r4 i-e a s y6集中遥控器7统一O N/O F F开9关温度控制i-M a n a g e rⅢ2 i-C o n t r o l l e r4 i-e a s y6集中遥控器7遥控器权限设定[空调开关|运转模式|温度控制]i-M a n a g e rⅢ2 i-C o n t r o l l e r4 i-e a s y6集中遥控器7模式转换[制冷|制热|通风]i-M a n a g e rⅢ2 i-C o n t r o l l e r4 i-e a s y6集中遥控器7日程定时设定i-M a n a g e rⅢ2 i-C o n t r o l l e r4 i-e a s y6集中遥控器7电量划分i-M a n a g e rⅢ2室温上下限设定i-M a n a g e rⅢ2 i-C o n t r o l l e r4 i-e a s y6联锁控制[火警联动|故障联动]等i-M a n a g e rⅢ2 i-C o n t r o l l e r4开关运转、监视B AC n e t12L o n W o r k s14 K R P4A8016D R C H-R417温度控制、监视B AC n e t12L o n W o r k s14 K R P4A8016D R C H-R417运转模式设定、监视[制冷|制热|通风]B AC n e t12L o n W o r k s14D R C H-R417故障监视B AC n e t12L o n W o r k s14 K R P4A8016D R C H-R418联锁控制[火警联动|故障联动]等B AC n e t12L o n W o r k s14 K R P4A8016D R C H-R418对遥控器权限设定及监视[空调开关|运转模式|温度控制]B AC n e t12L o n W o r k s14风量控制与监视B AC n e t12L o n W o r k s14D R C H-R418压缩机运转状态监视B AC n e t12名词解释18疑问与解答21附录一:控制产品功能一览表27附录二:控制产品兼容表30附录三:控制产品适用机型一览表32附录四:控制用选配件及转接P板功能一览表35附录五:控制信号线要求一览表36附录六:i-M a n a g e rⅢ控制系统设备配件表376本章节中的控制设备不能与非大金的控制设备及软件兼容i-M a n a g e rⅢ系统1.规格2.外形尺寸图3.系统框架4.系统概述1)注意点:✓i-M a n a g e rⅢ系统控制单元i P U有4个DⅢ-N e t端口,每个端口最多可连64组内机,10套外机。
大金空调ry125lmy手册
一、空调的供电应有专用线,在专用线路中应设有断路器或空气开关。
供电导线、保险丝都应符合有关规定,不能随意更改。
二、为防止绝缘破损造成漏电危险,如有条件,可设置漏电保护器,其动作电流为15-30毫安,切断时间应不大于0。
1秒。
三、空调器的开机、停机都要使用开关,不要用直接插拔电源插头来开、停空调器。
这样一来造成空调控制系统会损坏,二来在插拔时会在插头和插座之间拉电弧,造成人身安全事故。
而且长期在待机中,不仅消耗了- -定的电量,还会在雷雨天容易遭雷击。
四、所有电器插头都要插紧,不能松动。
否则会造成接触不良,损坏空调器。
五、住处电表容量不够,一定要先行增容,切莫抱着侥幸心理,以免因线路不堪负荷而发生火灾
六、应认真阅读使用说明书,按规定操作,切莫胡乱按揿遥控器。
七、老式空调器停机后不可在3分钟内重新开机,否则容易烧坏压缩机。
新式空调安有防止3 分钟内重新开机的电路,即使在3分钟内重开机,压缩机也不工作。
八、一旦出现异常声响,应立刻关机、切断电源,并请厂家特约维修
点或办事处技术人员到场检修。
九、大金空调器在运转时,切勿对着它喷杀虫剂或挥发性液体,以免漏电酿成火灾。
十、电源电压超过了工作额定电压240以上时,最好停用空调器,以保安全。
使用空调器时,若发现电源电压过低,应马上断电停止使用。
容易损坏压缩机。
大金空调使用手册第一章:产品概述1.1 产品简介大金空调是一款高品质的空调产品,采用先进的技术和创新的设计,提供舒适的室内空气环境。
本手册将详细介绍大金空调的使用方法和注意事项,以确保用户能够正确地操作和享受空调的优质性能。
1.2 主要特点- 高效制冷和制热功能:大金空调能够快速降低室内温度或升高室内温度,以满足用户不同的需求。
- 节能环保:大金空调采用先进的能效技术,以最大限度地减少能源消耗,降低对环境的影响。
- 智能控制:大金空调配备了先进的智能控制系统,支持远程控制和定时预约等功能,提供更加便捷的使用体验。
- 静音运行:大金空调采用低噪音设计,确保室内的安静环境,给用户带来更加舒适的体验。
第二章:安装与设置2.1 安装位置选择在安装大金空调之前,请选择一个合适的位置。
确保空调室内机的空气流通和热交换正常,并且避免直接阳光照射和其他遮挡物干扰。
2.2 安装步骤- 确保安装位置的墙壁或支架足够坚固,能够承受空调的重量。
- 将室内机安装在合适的高度处,通常建议离地面2米以上。
- 室内机与室外机之间应保持一定的距离,以确保空气流通良好。
- 将室外机安装在平稳的地面上,并确保它与室内机之间的管道连接紧密可靠。
- 按照安装指南连接电源线和排水管道,确保安全可靠。
2.3 设置步骤- 首次使用大金空调前,需要设置时间、日期和语言等基本信息。
- 使用遥控器上的设置选项,可以根据用户的需求进行各种操作,如温度调节、模式选择、风速控制等。
- 大金空调还提供一些高级设置选项,比如睡眠模式、定时操作和风向控制等。
用户可以根据具体需求进行设置。
第三章:使用方法3.1 遥控器介绍大金空调配备了易于操作的遥控器,它包含了各种功能按钮和显示屏,方便用户对空调进行控制。
3.2 基本操作- 打开/关闭空调:通过按下遥控器上的电源按钮,可以打开或关闭空调。
- 温度调节:通过遥控器上的温度加/减按钮,可以调节室内温度。
- 模式选择:通过遥控器上的模式按钮,可以选择不同的工作模式,如制冷模式、制热模式、送风模式等。
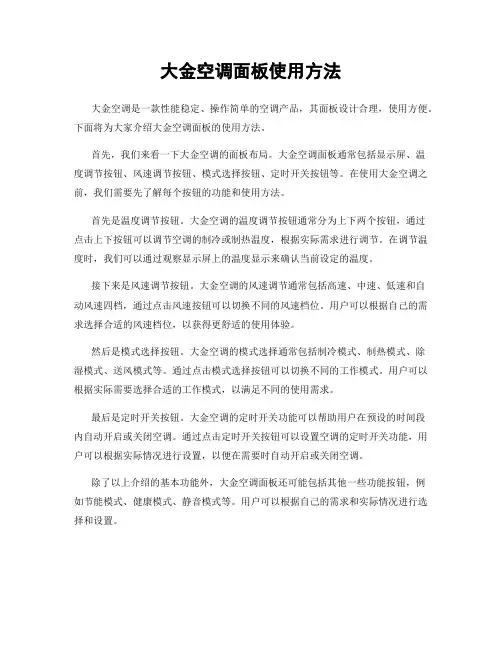
大金空调面板使用方法大金空调是一款性能稳定、操作简单的空调产品,其面板设计合理,使用方便。
下面将为大家介绍大金空调面板的使用方法。
首先,我们来看一下大金空调的面板布局。
大金空调面板通常包括显示屏、温度调节按钮、风速调节按钮、模式选择按钮、定时开关按钮等。
在使用大金空调之前,我们需要先了解每个按钮的功能和使用方法。
首先是温度调节按钮。
大金空调的温度调节按钮通常分为上下两个按钮,通过点击上下按钮可以调节空调的制冷或制热温度,根据实际需求进行调节。
在调节温度时,我们可以通过观察显示屏上的温度显示来确认当前设定的温度。
接下来是风速调节按钮。
大金空调的风速调节通常包括高速、中速、低速和自动风速四档,通过点击风速按钮可以切换不同的风速档位。
用户可以根据自己的需求选择合适的风速档位,以获得更舒适的使用体验。
然后是模式选择按钮。
大金空调的模式选择通常包括制冷模式、制热模式、除湿模式、送风模式等。
通过点击模式选择按钮可以切换不同的工作模式。
用户可以根据实际需要选择合适的工作模式,以满足不同的使用需求。
最后是定时开关按钮。
大金空调的定时开关功能可以帮助用户在预设的时间段内自动开启或关闭空调。
通过点击定时开关按钮可以设置空调的定时开关功能,用户可以根据实际情况进行设置,以便在需要时自动开启或关闭空调。
除了以上介绍的基本功能外,大金空调面板还可能包括其他一些功能按钮,例如节能模式、健康模式、静音模式等。
用户可以根据自己的需求和实际情况进行选择和设置。
在使用大金空调面板时,用户需要注意以下几点,首先,要仔细阅读产品说明书,了解每个按钮的功能和使用方法;其次,要根据实际需求合理设置温度、风速、工作模式等参数;最后,要定期清洁空调面板,保持按钮灵敏和显示清晰。
总的来说,大金空调面板使用方法并不复杂,只要我们了解每个按钮的功能和使用方法,合理设置参数,定期保养清洁,就可以轻松使用大金空调,享受舒适的室内环境。
希望以上介绍能够帮助大家更好地使用大金空调,如果在使用过程中遇到问题,可以随时咨询售后服务人员,他们会为您提供及时的帮助和解决方案。
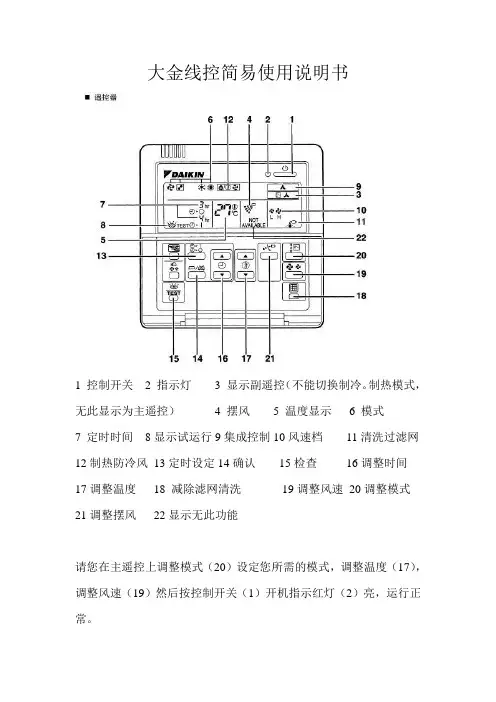
大金线控简易使用说明书
1 控制开关
2 指示灯
3 显示副遥控(不能切换制冷。
制热模式,无此显示为主遥控)
4 摆风
5 温度显示
6 模式
7 定时时间8显示试运行9集成控制10风速档11清洗过滤网12制热防冷风13定时设定14确认15检查16调整时间
17调整温度18 减除滤网清洗19调整风速20调整模式21调整摆风22显示无此功能
请您在主遥控上调整模式(20)设定您所需的模式,调整温度(17),调整风速(19)然后按控制开关(1)开机指示红灯(2)亮,运行正常。
如指示灯(2)红灯闪烁,说明空调系统运转不正常,请看(7)(8)闪烁处故障代码,请断开内外机电源后重启,重启时间为12分钟左右,内外机正常工作请耐心等待。
如指示红灯仍在闪烁,请拨打保修电话4或2报修,请告知线控器上显示的故障代码,及时判断显示故障的原因并处理。
简易故障处理:
U1 相序错误或缺相处理:三根火线任意两根调换或其中火线断开的请通知电工处理。
U2 电源异常处理:测量三根火线电压是否为380左右如正常请重启。
U4 通讯故障处理:外机电源是否断开,合上电源断路器。
U9 室内外之间传送故障处理:检查该系统内所有内机的线控器是否有显示,请通知电工检查内机是否有电。
如上述故障未能处理,请拨打保修电话。
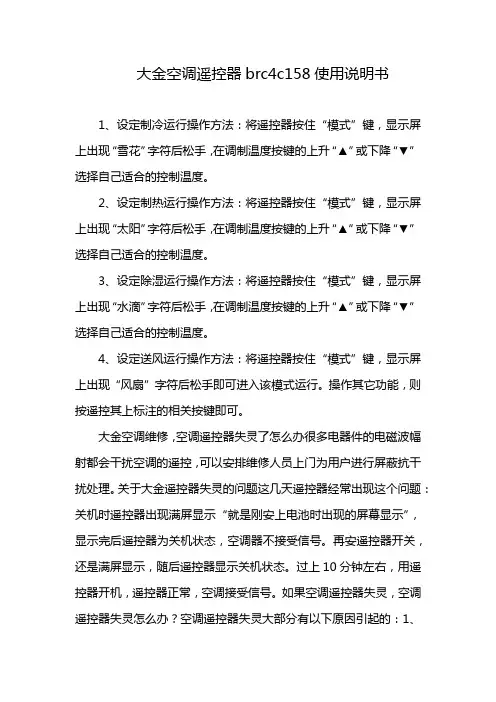
大金空调遥控器brc4c158使用说明书1、设定制冷运行操作方法:将遥控器按住“模式”键,显示屏上出现“雪花”字符后松手,在调制温度按键的上升“▲”或下降“▼”选择自己适合的控制温度。
2、设定制热运行操作方法:将遥控器按住“模式”键,显示屏上出现“太阳”字符后松手,在调制温度按键的上升“▲”或下降“▼”选择自己适合的控制温度。
3、设定除湿运行操作方法:将遥控器按住“模式”键,显示屏上出现“水滴”字符后松手,在调制温度按键的上升“▲”或下降“▼”选择自己适合的控制温度。
4、设定送风运行操作方法:将遥控器按住“模式”键,显示屏上出现“风扇”字符后松手即可进入该模式运行。
操作其它功能,则按遥控其上标注的相关按键即可。
大金空调维修,空调遥控器失灵了怎么办很多电器件的电磁波幅射都会干扰空调的遥控,可以安排维修人员上门为用户进行屏蔽抗干扰处理。
关于大金遥控器失灵的问题这几天遥控器经常出现这个问题:关机时遥控器出现满屏显示“就是刚安上电池时出现的屏幕显示”,显示完后遥控器为关机状态,空调器不接受信号。
再安遥控器开关,还是满屏显示,随后遥控器显示关机状态。
过上10分钟左右,用遥控器开机,遥控器正常,空调接受信号。
如果空调遥控器失灵,空调遥控器失灵怎么办?空调遥控器失灵大部分有以下原因引起的:1、最大的可能就是电池没有电了,电池接触不良啊,电池触片腐蚀了等,没电的换电池,接触不良的重新安装好,腐蚀的想办法把腐蚀的部分去除,摩光了,重新安装好电池就好。
2、遥控器发光二级管坏。
3、空调内机接收头坏。
4、空调内机电路板坏。
遥控不接收是空调里最简单的故障之一,你不必担忧。
根据实际情况,可能性“2”出现的机率最高大于80%。
遥控器问题,如果不是那就是电脑板上的遥控接收问题了哈,你可以打开机壳,你看看那个接收头是什么的,如果表面有金属罩着,那你就把金属罩给拔掉,就可以咯,因为前两年大金空调采用的接收头是用带了金属罩的,那个生锈后就容易漏电,自然就不可以用咯。
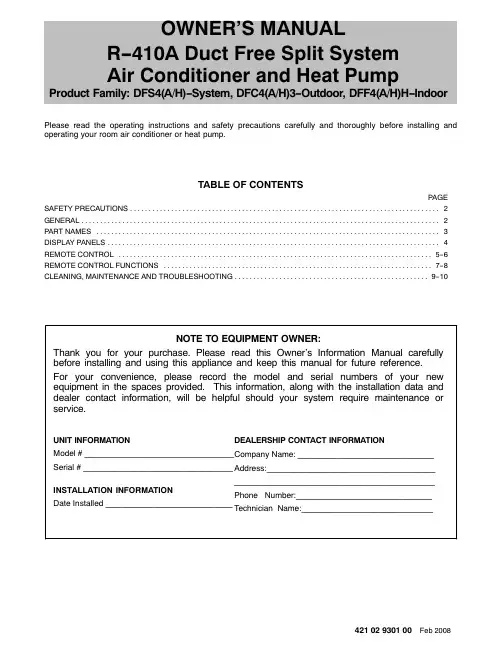
OWNER'S MANUALR-410A Duct Free Split SystemAir Conditioner and Heat PumpProduct Family: DFS4(A/H)-System, DFC4(A/H)3-Outdoor, DFF4(A/H)H-Indoor Please read the operating instructions and safety precautions carefully and thoroughly before installing and operating your room air conditioner or heat pump.TABLE OF CONTENTSPAGE SAFETY PRECAUTIONS2 . . . . . . . . . . . . . . . . . . . . . . . . . . . . . . . . . . . . . . . . . . . . . . . . . . . . . . . . . . . . . . . . . . . . . . . . . . . . . . . . . . . GENERAL2 . . . . . . . . . . . . . . . . . . . . . . . . . . . . . . . . . . . . . . . . . . . . . . . . . . . . . . . . . . . . . . . . . . . . . . . . . . . . . . . . . . . . . . . . . . . . . . . .PART NAMES3 . . . . . . . . . . . . . . . . . . . . . . . . . . . . . . . . . . . . . . . . . . . . . . . . . . . . . . . . . . . . . . . . . . . . . . . . . . . . . . . . . . . . . . . . . . . . DISPLAY PANELS4 . . . . . . . . . . . . . . . . . . . . . . . . . . . . . . . . . . . . . . . . . . . . . . . . . . . . . . . . . . . . . . . . . . . . . . . . . . . . . . . . . . . . . . . . . REMOTE CONTROL5-6 . . . . . . . . . . . . . . . . . . . . . . . . . . . . . . . . . . . . . . . . . . . . . . . . . . . . . . . . . . . . . . . . . . . . . . . . . . . . . . . . . . . . REMOTE CONTROL FUNCTIONS7-8. . . . . . . . . . . . . . . . . . . . . . . . . . . . . . . . . . . . . . . . . . . . . . . . . . . . . . . . . . . . . . . . . . . . . . . . CLEANING, MAINTENANCE AND TROUBLESHOOTING9-10. . . . . . . . . . . . . . . . . . . . . . . . . . . . . . . . . . . . . . . . . . . . . . . . . . . .NOTE TO EQUIPMENT OWNER:Thank you for your purchase. Please read this Owner's Information Manual carefully before installing and using this appliance and keep this manual for future reference.For your convenience, please record the model and serial numbers of your new equipment in the spaces provided. This information, along with the installation data and dealer contact information, will be helpful should your system require maintenance or service.UNIT INFORMATIONModel # _________________________________ Serial # _________________________________INSTALLATION INFORMATIONDate Installed ____________________________DEALERSHIP CONTACT INFORMATIONCompany Name: ______________________________ Address:_________________________________________________________________________________ Phone Number:______________________________ Technician Name:_____________________________421 02 9301 00 Feb 2008SAFETY PRECAUTIONSAny time you see this symbol in manuals, instructions and on the unit, be aware of the potential for personal injury. There are three levels of precaution:DANGER identifies the most serious hazards which will result in severe personal injury or death.WARNING signifies hazards that could result in personal injury or death.CAUTION is used to identify unsafe practices which would result in minor personal injury or product and property damage.NOTE is used to highlight suggestions which will result in enhanced installation, reliability, or operation.GENERALThe high wall fan coil unit provides quiet, maximum comfort. In addition to cooling and/or heating, the high wall fan coil unit matched with an outdoor condensing unit will filter and dehumidify the air in the room to provide maximum comfort. IMPORTANT: The high wall fan coil unit should be installed by authorized personnel only; using approved tubing and accessories. If technical assistance, service or repair is needed, contact the installer or local dealer.The high wall fan coil unit can be set up and operated from the remote control (provided). If the remote is misplaced, the system can be operated from the “Auto” setting on the unit.Operating Modes:The high wall fan coil unit has five operating modes.S Fan onlyS Auto (heat pump models only)S Heating (heat pump models only)S CoolingS Dehumidification (DRY)Fan OnlyIn Fan Only mode, the system filters and circulates room air without changing room air temperature.AutoIn Auto mode, the system will automatically cool or heat the room according to the user-selected set point.HeatingIn Heating mode, the system heats and filters room air. CoolingIn Cooling mode, the system cools, dries and filters room air. Dehumidification (DRY)In Dehumidification mode, the system dries, filters and slightly cools room air temperature. This mode does not take the place of a dehumidifier.Remote ControlThe remote control transmits commands to set up and operate the system. The controller has a window display panel that shows the current system status. The controller can be secured to a surface when used with the mounting rack provided.2 421 02 9301 00421 02 9301 00 3PART NAMESFront panel frame Front panel Air filterHorizontal air flow grille Vertical air flow louver Room temperature sensor Display panelInfrared signal receiver Remote controllerInterconnecting tubing Connective cable Service valveINDOOR Remote controller holder Indoor/Outdoor Unit1245638791011121314MODE Button ON/OFF Button FAN SPEED Button AIR DIRECTION Button SWING Button LED Button RESET Button F/C Button TEMP Button SLEEP Button CLOCK Button TIMER Button CANCEL Button TURBO ButtonRemote Control4 421 02 9301 00UNIT DISPLAY PANELSNOTE: The display panel on the indoor unit will look like one of the following. Some of the functions will appear on either the display panel, remote control, or both.On the Unit:Infrared signal receptorOPE RA T I ON T I ME RP R E -D E FA UTO E C ON 9KT I ME R OPE RA T I ONP R E -D E FInfrared signal receptor12K A UTOA UTOT I ME RT I ME RP R E.-D E F .OPE RA T I ON OPE RA T I ON C ooling O nlyFA N ONLYC ooling/ Hea ting 18K - 24KOPERATION :This indicator flashes once per second after power is on and illuminates when the unit is in operation.TIMER :This indicator illuminates when TIMER is set ON or OFF.PRE.-DEF indicator (heat pump units only):Pre-Def indicator illuminates when the coil is warming up to prevent cold blow or when unit goes into defrost mode.AUTO indicator :When air conditioner is set to AUTO mode, the indicatorilluminates.FAN ONLY indicator:When air conditioner is set to FAN ONL Y mode, this indicator illuminates.NOTE: All the pictures in this manual are fordemonstration purposes only. The actual shape of yourair conditioner may be slightly different, but theoperation instructions are the same.1 TRANSMISSION Indicator Lights when remote control transmits signals to the indoor unit.2 MODE Display Indicates the current operation mode - “AUTO”, “COOL”, “DRY”, “HEAT” (Heat Pump Only), or “FAN”.3 ON/OFF Indicator Symbol appears when unit is turned on by the remote control, and disappears when unit is turned off.4 TEMPERATURE Setting From 62°F(17°C) to 88°F(30°C) will be displayed. If Fan Mode is selected there will be no display.5 CLOCK Display Indicates the current time (0 to 24 hours).6 TIMER Display Indicates the set times for the Timer operation (0 to 24 hours).7 LOCK Display Appears when settings are Locked.8 SLEEP Display Indicates unit is running in Sleep mode.9 FAN SPEED Display Indicates the set fan speed. “Auto” is displayed when unit is running in Auto or Dry mode.NOTE: Symbols shown in this manual are for the purpose of demonstration. During actual operation, only therelevant symbols are displayed.421 02 9301 00 5REMOTE CONTROLIMPORTANT : The remote control can operate the unit from a distance of up to 25 ft. (7.6 m) as long as there are no obstructions. This is one-way communication only (from remote control to fan coil).When the Timer function is used, the remote control should be kept within 25 ft. of the indoor unit.The remote control can perform the following basic functions:S Turn the system ON and OFF S Select operating mode S Adjust room air temperature set point and fan speed SAdjust airflow directionRefer to the Remote Control Function section for detailed description of all the capabilities of the remote control.Battery InstallationTwo AAA 1.5 v alkaline batteries (included) are required for operation of the remote control.To install or replace batteries:1.Slide the back cover off the control to open the battery compartment.2.Insert batteries. Follow the polarity markings inside the battery compartment.3.Replace battery compartment cover.NOTE:1.When replacing batteries, do not use old batteries or a different type battery. This may cause the remote control to malfunction.2.If the remote is not going to be used for several weeks,remove the batteries. Otherwise battery leakage may damage the remotecontroller.3.The average battery life under normal use is about 6months.4.Replace the batteries when there is no audible beep from the indoor unit or if the Transmission Indicator fails to light.Set the Clockremote control as outlined below. The clock panel on the remote control will display the time whether the unit is in use or not.Initial Setting of the ClockAfter batteries are installed in the remote control, the clock panel will display “12:00” and begin to flash.1. TEMP buttonS Press these buttons to set time Y Forward B BackwardS Each time you press the button, the time moves forward or backward by one minute. If you press and hold theTemperature button, the time adjusts in increments of 10minutes.2. CLOCK buttonS When the correct time is selected, press the CLOCK button or release Y B buttons and wait for 3 seconds,the clock time will then stop flashing and the clock starts operating normally.3. Readjusting the CLOCKS Press and hold the CLOCK button for approximately 3seconds, the time on the clock display will start to flash. To set the new time, repeat steps 1 and 2 above.NOTE: The time on the clock must be set before the Auto-Timer function will operate.Clock accuracy is within 15 seconds per day.6 421 02 9301 00REMOTE CONTROL FUNCTIONS Pressing the On/Off ButtonWhen the air conditioner is not in operation, the remote control will display the last set point, mode, and time.S Press the On/Off button to start the unit.- The unit will start in the last operating mode andset point. The ON/OFF indicator will appear.S Press button On/Off to stop the unit.- All indicator lights on the unit will go out, and the remote control will display the set point, mode, and time. NOTE: If the On/Off button is pressed too soon after a stop, the compressor will not start for 3 minutes due to the inherent protection against frequent compressor cycling. The unit will only emit an audible beep when the signals are received correctly.Selecting an Operating ModeUse the Operating Mode button to select one of the available modes.A07548 Setting the Room Temperature Set Point Pressing the increase temperature set point Y and decrease B buttons will raise or lower the temperature. The unit will confirm signal receipt with a beep and the value of the set temperature on the display will change accordingly. The temperature can be set between 62_F (17_C) and 88_F (31_C).NOTE: In Cooling mode, if the temperate selected is higher than the room temperature, the unit will not start. The same applies for the Heating mode if the selected temperature is lower than the room temperature.Selecting the Fan SpeedThe fan speed can be selected by pressing the FAN SPEED button.NOTE: When the unit is on, the fan will run continuously in cooling or heating. When in heating, there might be situations where the fan will slow down or shut off to prevent cold blow.Selecting the Horizontal Direction Louver PositionIn order to optimize comfort, the horizontal louvers can operate in a preset range as shown below.The horizontal louvers can be adjusted using the remote control. The horizontal louvers can be either stationary or moving continuously.Press the AIR DIRECTION button repeatedly to choose one of the louver positions. Every time the Air Direction button is pushed, the louver will swing by 6 degrees.In the Cooling, Dehumidification, and Fan Only mode, the louver will swing in the cooling range. In the Heating mode, the louver will swing in the heating range.NOTE: Always use the remote control to adjust the louver position, otherwise abnormal operation may occur. If the louver is manually adjusted out of its range, turn the unit off and then on again.Auto SwingT o have the louver moving continuously, push the SWING button. Push again to stop the louver.Selecting Vertical Direction of the LouverThe vertical louvers can be adjusted manually to direct the airflow to achieve the optimal comfort in the space.A07543 Timer FunctionTIMER ON (to start the unit) and TIMER OFF (to stop the unit) can be used separately or together.Timer ON onlyThis function will allow the unit to start automatically after a set number of hours. The TIMER ON can be set while the unit is on or off.UNIT ON-Press the TIMER button once. The current time flashes next to the TIMER ON. Press the Temp Y or B button to set the desired “Time On”. Every time the Y or B button is pushed, the time increases or decreases by 10 minutes.- When the TIMER ON is set, the TIMER light on unit illuminates. The unit will shut off and it will start at the set time.UNIT OFF- Set the timer described in the UNIT ON section.- The unit will start at the set time.To cancel Timer setting, press the Cancel button.421 02 9301 00 7Timer OFF onlyThis function will allow the unit to stop automatically after a set number of hours. The timer can be set while the unit is on or while it is off.UNIT ON-Press the TIMER button twice. The current time flashes next to the TIMER OFF. Press the Temp Y or Temp B button to set the desired “Time Off”. Every time the Y or B button is pushed, the time increases or decreases by 10 minutes.-When the TIMER OFF is set, the timer light on the unit illuminates and the unit turns off automatically at the set time.UNIT OFF-Set the TIMER off as described in the UNIT ON section.-The unit will turn on and will turn off at the set time.-If TIMER OFF is canceled (by pushing Cancel button) before the set time elapses, the unit will continue running. Timer ON and Timer OFFUse both functions to program the unit to turn on and shut off at specified times.UNIT OFF-Set TIMER ON as previously described.-Set TIMER OFF as previously described.-The unit will start automatically at the set TIME ON and will turn off at the set TIME OFF.UNIT ON-Set TIME OFF as previously described.-Set TIME ON as previously described.-The unit will turn off automatically at the set TIME OFF and will turn on at the set TIME ON.Sleep ModeThis mode is used to conserve energy and can be used when the unit is in the COOL, HEAT or AUTO mode only. Cool Mode-Push the SLEEP button. The SLEEP display will appear.-After 1 hour the set point will be raised by 1.8_F (1_C).-After another hour, the set point will be raised by another 1.8_F (1_C) and the fan will run in low speed.-The unit will shut off 7 hours after setting the SLEEP mode.-The SL EEP mode will be cancelled if any button on the remote control is pressed.Heat Mode-Same as cooling mode but set points will be lowered by 1.8_F (1_C).Turbo ModeThis function is available in COOL mode on 9k and 12k cooling only units. Use the TURBO mode to cool the room rapidly.-Press the TURBO button. An audible “beep” will be heard. -The fan will run on high speed.-The TURBO mode terminates automatically 20 minutes after pushing the TURBO button. It can also be terminated by pushing the TURBO button again. When the TURBO mode is terminated, the unit will go back to original settings.LockLockUse this function to lock the settings on the remote control and to prevent the settings being changed.To Lock and Unlock the remote control, press and hold the Y and B (Temp buttons) at the same time for approximately 3 seconds.Resetting the Remote ControlIf the remote control is not functioning properly, it can be reset by pressing the reset button with a paper clip or tip of a pen. Current settings will be cancelled and the controller will return to the initial settings and will be in standby mode. Push the ON/OFF button to activate it.Time DelayIf the On/Off button is pressed too soon after a stop, the compressor will not start for 3 minutes due to the inherent protection against frequent compressor cycling. The unit will only emit an audible beep when the signals are received correctly.Heating FeaturesIf the unit is in the heating mode, there will be a delay when the fan starts. The fan will start only after the coil is warmed up to prevent cold blow.Defrost OperationIn heating mode, if the outdoor coil is frosted, the indoor fan and outdoor fan will turn off while system removes the frost on the outdoor coil.The system will automatically revert to normal operation when frost is removed from the outdoor unit.Auto StartIf the power fails while the unit is operating, the unit stores the operating condition, and it will start operation automatically under those conditions when the power is restored.8 421 02 9301 00421 02 9301 00 9CLEANING, MAINTENANCE, AND TROUBLESHOOTINGPeriodic MaintenancePeriodic maintenance is recommended to ensure properoperation of the unit. Recommended maintenance intervals may vary depending on the installation environment, e.g.,dusty zones, etc. Refer to Table 1.Cleaning the CoilClean the coil at the beginning of each cooling season, or when necessary. Use a vacuum cleaner or a long-bristle brush to avoid damage to the coil fins.Air FiltersRemove and clean the air filters once a month.NOTE: If air filters show signs of excessive wear or are torn,they must be replaced. Contact your local dealer for replacement filters.1.Open front panel on unit.2.Pull filters down to remove.3.Vacuum filters.4.Clean with warm water.5.Shake filter to remove excess water and dry thoroughly.6.Replace filter by sliding filter behind front grille until filter snaps in place.7.Close front panel on unit.Indoor Unit Front PanelTo clean the front panel on the indoor unit, wipe the outside with a soft, dry cloth. If necessary, a mild liquid detergent can be applied and wiped off with a dry cloth.Preparing for Extended Shutdown PeriodClean the filters and reposition them in the unit. Operate the unit in Fan only mode for 12 hours to dry all internal parts.Turn main power supply off and remove batteries from the remote control.System Operation RecommendationsThe items outlined in the following list will help to assure proper system operation:S Replace both remote control batteries at the same time.S Point the remote control toward the unit display panel when transmitting a command.S Keep doors and windows closed while unit is operating.S Contact an authorized service representative if a problem arises that cannot be easily resolved.S Do not perform cleaning or maintenance activities while unit is on.S Keep display panel on unit away from direct sunlight and heat as this may interfere with remote control transmissions.S Do not block air intakes and outlets on the indoor or outdoor units.Energy Saving RecommendationsThe following recommendations will add greater efficiency to the ductfree system:S Select a comfortable thermostat setting and leave it at chosen setting. Avoid continually raising and lowering the setting.S Keep unit filter clean. Frequent cleaning may be necessary depending on indoor air quality.S Use drapes, curtains or shades to keep direct sunlight from heating room on very hot days.S Do not obstruct air intake on front panel.S Turn on air conditioning before indoor air becomes too uncomfortable.TroubleshootingRefer to Table 2 before contacting your local dealer.10 421 02 9301 00Table 1—Periodic Maintenance{Maintenance to be carried out by qualified service personnel. Refer to the Installation ManualTable 2—Troubleshooting*Diagnostic lights are a combination of lights that will illuminate in the display area on the unit. They are a combination of the lights you see during normal operation.International Comfort Products, LLCLewisburg, TN 37091。
大金空调操作方法大金空调操作方法大金空调是一种高质量、高性能的空调产品,为了最大程度地满足用户的需求,大金空调提供了一系列的操作方法。
以下是大金空调的操作方法,这些方法会详细介绍如何打开、关闭、调节温度以及使用其他额外功能。
1. 打开空调大金空调有多种打开方式,可以使用遥控器、面板按钮或者手机应用程序。
通常情况下,遥控器是最常用的选择。
使用遥控器打开空调的方法如下:1.1 找到遥控器上的电源按钮,通常用一个大的圆形图标表示。
1.2 按下电源按钮,空调的显示屏上会显示出当前空调的状态,并启动空调。
1.3 确保空调显示屏上显示的是当前的室内温度和设定的温度。
2. 关闭空调关闭空调同样可以使用遥控器、面板按钮或者手机应用程序。
使用遥控器关闭空调的方法如下:2.1 找到遥控器上的电源按钮,通常用一个大的圆形图标表示。
2.2 按下电源按钮,空调的显示屏上会不再显示温度,并停止工作。
3. 调节温度大金空调允许用户根据需要调节室内温度。
使用遥控器调节温度的方法如下:3.1 找到遥控器上的温度调节按钮,通常有两个按钮,一个用于调高温度,一个用于调低温度。
3.2 按下调高温度的按钮,将使室内温度上升;按下调低温度的按钮,将使室内温度下降。
3.3 注意,用户可以根据需要多次按下调高或调低温度的按钮,以达到合适的温度。
4. 空调模式选择大金空调提供多种模式供用户选择,如制冷模式、制热模式、通风模式和自动模式。
使用遥控器选择空调模式的方法如下:4.1 找到遥控器上的模式选择按钮,通常有一个按钮上有多个图标,表示不同的模式。
4.2 按下模式选择按钮,空调的显示屏上会显示出可供选择的模式,并根据用户的选择进行调整。
4.3 用户可以根据需要多次按下模式选择按钮,以切换到不同的模式。
5. 风速调节大金空调还允许用户调节风速,以更好地满足用户的需要。
使用遥控器调节风速的方法如下:5.1 找到遥控器上的风速调节按钮,通常有多个按钮,每个按钮表示不同的风速档位。
大金中央空调线控器使用说明书公司工程部制作年月日1.开/关钮:按下按钮,则系统开始运转,再按一次按钮,则系统停止运转。
2.运转指示灯(红色):在运转时,该指示灯点亮。
3.“”显示在控制下转换:当该显示出现时,不能使用控制器进行制冷、制热、、除湿运转的转换。
4.“”显示摆动挡板:可进行固定风向和自动摆动设定;可通过21键来进行调节。
5.“”显示(设定温度):可通过17键来调节温度。
6.“”“”“”“”显示(运转方式):该显示表示现在运转的方式;可通过20键来调节。
7.“”显示(程序设定的时间):该显示表示程序的系统开始运转和停止运转的时间。
8.“”显示(检验/试运转):当按下检验/试运转按钮时,该显示表示系统现在的运转方式。
9.“”显示(处于集中控制之下):当该显示出现时,表示系统处于集中控制之下(本显示不是标准规格)。
10.“”显示(送风速度):该显示表示风扇的速度,“低”或“高”。
11.“”显示(空气滤尘网清扫时期):请参照室内机附带的使用说明书。
12.“”显示(除霜/热起动):⑴除霜运转随着室外机盘管上凝结的冰霜增多,制热效果将降低,系统将自动进入除霜运转;室内机风扇停止运转,控制器上显示“”(除霜/热起动);除霜运转6至8分钟(最长10分钟)以后,系统将回到制热运转。
⑵热起动为了防止在制热开始运转时,从室内机吹出冷风,室内机的风扇自动停止运转。
控制器上显示“”(除霜/热起动)。
13.定时器方式启动/停止钮:由专业人员操作。
14.定时器开/关钮:由专业人员操作。
15.检验/运转钮:本按钮仅可由专业的维修人员进行维修时使用!正常运转时请勿使用!16.程序设定时间钮:使用该钮,可设定程序“启动或停止”系统运转的时间。
17.温度设定钮:使用该钮,可设定温度调节器的设定温度。
18.空气滤尘网清扫指示复位钮:请参照室内机附带的使用说明书。
19.风扇速度控制钮:按该钮,可根据您的要求选择风扇的速度,“低”或“高”。
1.开/关钮:按下按钮,则系统开始运转,再按一次按钮,则系统停止运转。
2.运转指示灯(红色):在运转时,该指示灯点亮。
3.“”显示在控制下转换:当该显示出现时,不能使用控制器进行制冷、制热、、除湿运转的转换。
4.“”显示摆动挡板:可进行固定风向和自动摆动设定;可通过21键来进行调节。
5.“”显示(设定温度):可通过17键来调节温度。
6.“”“”“”“”显示(运转方式):该显示表示现在运转的方式;可通过20键来调节。
7.“”显示(程序设定的时间):该显示表示程序的系统开始运转和停止运转的时间。
8.“”显示(检验/试运转):当按下检验/试运转按钮时,该显示表示系统现在的运转方式。
9.“”显示(处于集中控制之下):当该显示出现时,表示系统处于集中控制之下(本显示不是标准规格)。
10.“”显示(送风速度):该显示表示风扇的速度,“低”或“高”。
11.“”显示(空气滤尘网清扫时期):请参照室内机附带的使用说明书。
12.“”显示(除霜/热起动):⑴除霜运转随着室外机盘管上凝结的冰霜增多,制热效果将降低,系统将自动进入除霜运转;室内机风扇停止运转,控制器上显示“”(除霜/热起动);除霜运转6至8分钟(最长10分钟)以后,系统将回到制热运转。
⑵热起动为了防止在制热开始运转时,从室内机吹出冷风,室内机的风扇自动停止运转。
控制器上显示“”(除霜/热起动)。
13.定时器方式启动/停止钮:由专业人员操作。
14.定时器开/关钮:由专业人员操作。
15.检验/运转钮:本按钮仅可由专业的维修人员进行维修时使用!正常运转时请勿使用!16.程序设定时间钮:使用该钮,可设定程序“启动或停止”系统运转的时间。
17.温度设定钮:使用该钮,可设定温度调节器的设定温度。
18.空气滤尘网清扫指示复位钮:请参照室内机附带的使用说明书。
19.风扇速度控制钮:按该钮,可根据您的要求选择风扇的速度,“低”或“高”。
20.运转方式选择钮:按该钮,可选择系统的运转方式。
大金空调使用手册第一部分:安装与设置1.1 安装前的准备在安装大金空调之前,请确保您已阅读并理解本使用手册的内容。
确保安装位置符合以下要求:- 所选位置应有足够的空间容纳空调,并且要求周围没有阻挡物,以确保空气流通。
- 安装位置应远离热源、水源和其他可能影响空调性能的设备。
- 确保安装位置有稳固的支撑面,并且能够承受空调的重量。
- 安装位置应便于电源线和排水管的接入。
1.2 操作面板介绍大金空调的操作面板位于室内机上,包括以下主要部分:- 电源开关:控制空调的开启和关闭。
- 模式选择按钮:用于选择不同的操作模式。
- 温度控制按钮:用于调节设定温度。
- 风量控制按钮:用于调节风速。
- 定时功能:可以设置定时开关机的功能。
- 其他附加功能:根据空调型号的不同,还可能包括其他特殊功能按钮。
第二部分:基本操作2.1 开启与关闭按下电源开关键,空调将开启并运行。
再次按下电源开关键,空调将关闭。
2.2 模式选择通过模式选择按钮,您可以选择以下操作模式:- 制冷模式:用于降低室内温度。
可以通过温度控制按钮调节设定温度。
- 除湿模式:用于降低室内湿度。
可以通过温度控制按钮调节设定温度。
- 加热模式:用于提高室内温度。
可以通过温度控制按钮调节设定温度。
- 送风模式:仅向室内送风,不进行冷却或加热。
可以通过风量控制按钮调节风速。
2.3 温度控制与风速调节在制冷或加热模式下,您可以通过温度控制按钮调节设定温度。
调节温度较低时,空调将提供更强的冷却或加热效果。
在送风模式下,您可以通过风量控制按钮调节风速。
根据个人偏好,您可以选择低、中、高三档风速。
2.4 定时功能大金空调配备了定时功能,您可以在特定时间段内设置定时开关机。
通过按下定时功能按钮,并根据指示进行设定,空调将在设定的时间自动开启或关闭。
第三部分:高级功能3.1 睡眠模式大金空调的睡眠模式可以帮助您获得更好的睡眠质量。
通过按下睡眠模式按钮,空调将自动调整温度和风速,提供舒适的睡眠环境。
大金空调71ca使用说明书大金空调71CA使用说明书一、产品概述大金空调71CA是一款高效节能的家用空调产品。
该空调采用了先进的制冷技术,具有强劲的制冷能力和舒适的制热性能。
同时,它还具备智能化控制系统,可以根据室内温度和使用需求进行智能调节,为用户带来更舒适的使用体验。
二、产品特点1.强劲的制冷能力:大金空调71CA采用了高效制冷压缩机,能够迅速降低室内温度,为用户创造一个凉爽的环境。
2.舒适的制热性能:该空调还具备出色的制热能力,能够在寒冷的冬季为用户提供温暖的气流。
3.智能化控制系统:大金空调71CA配备了先进的智能化控制系统,可以根据室内温度和用户需求进行智能调节。
用户可以通过遥控器或手机APP进行空调的开关、温度调节、风速控制等操作。
4.舒适静音设计:该空调采用了静音技术,噪音小于40分贝,为用户提供一个安静舒适的环境。
5.节能环保:大金空调71CA具有高能效比,能够有效降低能耗,减少对环境的影响。
三、使用方法1.安装:首先,选择一个合适的安装位置,确保空调的散热口能够顺畅通风。
然后,将室内机和室外机固定在墙壁上,注意保持水平。
最后,连接室内机和室外机的管道,确保连接牢固。
2.开机:接通电源后,按下空调遥控器上的开关按钮,空调将开始运行。
在开机时,建议将温度设定在适宜的范围内,避免过度制冷或制热。
3.温度调节:用户可以通过空调遥控器上的温度调节按钮,调整空调的设定温度。
根据实际需求,选择合适的温度,以获得舒适的使用体验。
4.风速控制:大金空调71CA提供多档风速调节功能,用户可以根据需求选择合适的风速档位,以获得理想的风速。
5.睡眠模式:该空调还具备睡眠模式功能,用户可以在睡眠前选择该模式,空调将调整为适合睡眠的温度和风速,为用户提供一个舒适的睡眠环境。
6.定时开关机:大金空调71CA具备定时开关机功能,用户可以通过空调遥控器上的定时开关机按钮,设置定时开关机的时间,实现自动开关机,方便用户的使用。
大金空调使用说明大金空调是一种高品质、高性能的空调产品,它采用先进的技术和创新的设计,为用户提供了舒适宜人的室内环境。
本文将详细介绍大金空调的使用说明,包括开机前的准备工作、操作步骤、常见问题解答等方面。
一、开机前的准备工作1.确保空调的电源线插头与电源插座正常连接,同时检查电源线是否有损坏或松动的情况。
2.清洁空调的滤网,并确保滤网没有异物或灰尘的堆积。
3.检查空调的室外机是否有阻塞物,如杂物、积雪等。
若有,请及时清理。
注意:在进行任何操作前,请切断空调的电源,以避免电击或其他意外事故的发生。
二、操作步骤1.开关机:按下空调的电源开关按钮,空调将开始运行。
按下同样的按钮,可以关闭空调。
注意:在开机后,请耐心等待一段时间,空调需要一定的时间才能达到设定的温度。
2.温度调节:使用空调的温度调节按钮,可以根据个人需求调整空调的温度。
左转降低温度,右转增加温度。
注意:在调节温度时,请考虑到室内外环境的差异,以免造成不必要的能源浪费。
3.风速调节:使用空调的风速调节按钮,可以调整空调的送风速度。
可根据个人喜好选择高速、中速或低速。
注意:不建议长时间使用高速送风,以免引起身体不适或其他健康问题。
4.模式选择:大金空调提供多种模式供用户选择,包括制冷、制热、除湿等。
使用空调的模式选择按钮,可切换不同的工作模式。
注意:在选择制冷和制热模式时,请根据实际需要选择适当的温度,避免过度消耗能源。
5.定时开关机:大金空调还提供定时开关机功能,通过设置定时器,可自动控制空调的开关机时间。
注意:在使用定时开关机功能时,请确保内外温度差异不大,以免造成能源浪费或其他问题。
三、常见问题解答1.为什么空调无法正常启动?2.为什么室内温度无法达到设定值?3.如何保持空调的清洁和顺畅运行?答:定期清洁空调的滤网,并确保滤网没有灰尘或异物的堆积。
另外,定期进行空调的维护保养,包括清洗室外机和检查管路连接等。
大金空调面板使用方法大金空调面板主要分为两个部分,机身面板和遥控器。
下面将详细介绍这两个部分的使用方法。
一、机身面板的使用方法:1. 开关机:机身右侧有一个开关,向上为开机,向下为关机,使用时将开关拨到相应位置即可。
2. 工作模式选择:机身面板上有一个模式选择按钮,通过按下此按钮来选择不同的工作模式,一般包括制冷、制热、通风、温度保持等模式。
3. 温度调节:机身面板上有一个温度调节按钮,通过按下此按钮调整室内温度,一般范围是16-30,需根据实际需要进行调整。
4. 风量调节:机身面板上有一个风量调节按钮,通过按下此按钮来调整送风的风速,一般分为自动、低风、中风、高风等几个档位。
5. 开启/关闭风向摆动:机身面板上有一个风向摆动开关,通过将开关拨到相应位置来控制风向摆动,一般有左右摆动、上下摆动和定向吹风等模式。
6. 室温显示:机身面板上有一个大屏幕显示室内温度,供用户实时了解室内温度情况。
7. 故障显示:机身面板上有一个故障指示灯,当空调发生故障时,该指示灯会亮起,提醒用户进行相应的维修处理。
二、遥控器的使用方法:1. 开关机:遥控器上有一个开关机按钮,通过按下此按钮来控制空调的开机和关机。
2. 工作模式选择:遥控器上有一个模式选择按钮,通过按下此按钮来选择不同的工作模式,一般包括制冷、制热、通风、除湿等模式。
3. 温度调节:遥控器上有一个温度调节按钮,通过按下此按钮调整室内温度,一般范围是16-30,需根据实际需要进行调整。
4. 风量调节:遥控器上有一个风量调节按钮,通过按下此按钮来调整送风的风速,一般分为自动、低风、中风、高风等几个档位。
5. 开启/关闭风向摆动:遥控器上有一个风向摆动按钮,通过按下此按钮来控制风向摆动,一般有左右摆动、上下摆动和定向吹风等模式。
6. 预约定时功能:遥控器上有一个定时器按钮,通过按下此按钮来设置空调的预约定时功能,实现定时开关机的功能。
7. 睡眠模式:遥控器上有一个睡眠模式按钮,通过按下此按钮来启用睡眠模式,以提供更加舒适的睡眠环境。
CL-SZ-DLS-01 Specifications subject to change without notice. 1Installation DataSite Address:_______________________________________________________________________________________________________City:________________________________________________________ State:___________ Zip Code:__________________Installing Contractor :______________________________________________________ Contractor Contact #: ( ) _____-___________Job Name:_______________________________________________________________ Start-up Date:_____________________________Distributor:_______________________________________________________________System DetailsAre the outdoor unit and indoor unit compatible? YES:______ NO:______Wiring ElectricalWire Size and Type Used? AWG:__________ TYPE:_________Are there any breaks, splices, wire nuts or butt connectors between the outdoor unit and the indoor unit? YES:______ NO:______Was the wiring from the outdoor unit port to the correct indoor unit verified? YES:______ NO:______REMARKS:_________________________________________________________________________________________________________________________________________________________________________________________________________________________Voltage CheckWiring: Single ZoneUNITSMODEL NO.SERIAL NO.CONTROLLEROUTDOOR UNIT INDOOR UNIT AOutdoor Unit Disconnect1(L1):GNDOutdoor Unit Terminal Block1(L1):GND NOTES:______________________________________________________________________________________________________________________________________________________________________________________________________2(L2):GND 2(L2):GND 1(L1):L2(2)1(L1):2(L2)Indoor Unit Voltage Check @ Outdoor Unit1(L1):GNDIndoor Unit Voltage Check @ Indoor Unit 1(L1):GND NOTES:______________________________________________________________________________________________________________________________________________________________________________________________________2(L2):GND 2(L2):GND 1(L1):2(L2)1(L1):2(L2)2(L2):3(S)2(L2):3(S)Outdoor Unit Disconnect1(L1):GNDOutdoor Unit Terminal Block1(L1):GND NOTES:______________________________________________________________________________________________________________________________________________________________________________________________________2(L2):GND 2(L2):GND 1(L1):L2(2)1(L1):2(L2)Indoor Unit Voltage Check @ Outdoor Unit1(L1):GNDIndoor Unit Voltage Check @ Indoor Unit 1(L1):GND NOTES:______________________________________________________________________________________________________________________________________________________________________________________________________2(L2):GND 2(L2):GND 1(L1):2(L2)1(L1):2(L2)2(L2):3(S)2(L2):3(S)Copyright 2020 CAC/BDP D 3300 Riverwood Parkway Atlanta GA, 30339 Edition Date: 06/20 Catalog No. CL-SZ-DLS-01Manufacturer reserves the right to discontinue, or change at any time, specifications or designs without notice and without incurring obligations. Replaces: NEWDuctless Start-Up Checklist (CONT)PipingLeak Check:System held 500 psig (max. 550psi) for a minimum of 30 minutes using dry nitrogen. YES:______ NO:______Evacuation Method:•Was the Triple Evacuation Method used as outlined in the installation manual? YES:______ NO:______•Was the Deep Vacuum Method used as outlined in the installation manual? YES:______ NO:_______•Did the System Hold 500 microns for 1 hour? YES:______ NO:_______•Does the line set match the diameter of the evaporator connections? YES:______ NO:_______•For Conventional Fan Coils, does the line set match the outdoor unit size? YES:______ NO:_______Single Zone Piping:Has the liquid pipe length been measured and the additional charge calculated? Size:___________ Length:_________ Charge:____________Performance CheckNOTE:•T1 - Ambient Space Temperature Sensor •T2 - IDU Coil Temperature Sensor •T3 - Outdoor Coil Temperature Sensor •T4 - Outdoor Ambient Temperature •Tb - Suction Line Temperature @PMV •Tp - Discharge Temperature Sensor •Th - IPM Board Temperature •LA/Lr - PMV TemperatureError CodesWere there any error codes present at start-up?YES:______ NO:______Comments:______________________________________________________________________________________________________________________________________________________________________________________________________________________________________________________________________________________________________________________________________________________NOTES:PORT LIQUID SIZE SUCTION SIZE LENGTH CHARGENOTES:__________________________________________________________________________________________________________________________AFor 1:1 Single Zone Systems: Adjust the set-point to create an operational call for the desired testing operation. Allow the system to run for a minimum of 10 min. and record the following details:(Operational data recorded on applicable heads with the wireless remote controller’s Point Check function)UNIT SET-POINTMODET1T2T3T4TbTpThLA/LrAIndoor Unit Error Code:Notes:Outdoor Unit Error Code:Wall Controller:24V Interface:。
大金空调使用手册
VR腔调系统
环球财讯中心大厦空调系统采用的是日本大金公司的水环VRV (variable refrigera nt volume )中央空调系统。
VRV直译为变制冷剂流量,这是一种有用完善的独立区域控制能力的空调系统。
能够在一个制冷回路上连接多台不同规格型号的室内机,因为室外机是微电脑控制的变频式压缩机,所以每一台室内机都拥有完全独立的开关和调节的控制能力。
BRC1C61控制器介绍
1、开/关按下此钮,系统开始运转。
再按一
次该钮,系统停止运转。
2、运转指示灯(红色)运转时,该指示灯点亮。
当系统
出现故障时,该灯闪烁。
3、显示(风向挡板)只有四面出风和两面出
风的设备有该显示,内藏风管机没有该显示。
4、表示系统在预热或除霜
5、运转方式表示现在的运转方式。
由左至
右分别为通风、除湿、自动、制冷、制热。
& 显示(程序设定的时间)表示程式设定的系
统开始运转和停止运转的时间。
WOBRC1C61L
7、设定温度“ 27 C ”表示目前空调的设定温度
8空气过滤网清洗提示该图标只有当过滤网脏时才会出现
9、送风速度显示表示风扇的速度。
H高风L低风
10、显示表示处于集中控制下或非主控制器表示该控制器不能进行冷暖切换(没有该显示
的控制器为主控制器)
11、运转模式转换选择钮:按动该按钮则设备运转模式在通风、除湿、制冷、制热切换。
(非主控制器只能在主控制器执行的模式下进行转换:当主控制器为制冷时,可以进行通
风、除湿、制冷运转,当主控制器是制热时只能进行通风和制热运转。
)
12、风扇速度控制钮可根据要求选择风扇的速度,“高”“低”。
13、空气滤尘网清扫指示复位钮。
14、风向调节钮(风管机没有该功能)。
15、温度设定钮:可设定需要的使用温度,该温度为设备工作目标温度。
16、时间调节钮与17、18键配合使用
17、定时开、关机启动/ 停止钮
18、定时开、关机确定/ 取消钮
19、设置及检查钮(只有专业人员操作)
20、HRV^机风量高低设置钮
21、HRV^机工作模式选择钮
下列现象并不表示空调机异常。
1.系统不运转。
当按开/ 关钮,停止系统的运转以后,在某些特殊情况下系统不能立刻重新
启动。
如果运转指示灯常亮,则表示系统为正常状态,稍等一会便可恢复正常。
2.按动按钮11选择不到制冷或制热模式,这是因为系统中的主控制器工作模式不正确。
冷房
/暖房的切换只能由主控制器执行,保证主控制器在正常的工作模式,主控制器可以不开
机,但必备保证模式正确,否则整个系统的空调都不能正常工作。
3.从室内机吹出雾气。
A.在冷房运转时,室内湿度过高。
B.如果室内机内部的污垢过多,则房间内的温度分布将不均匀。
这时必须清扫室内机的内
部,请委托厂家专业技术服务人员清扫室内机,该作业只能由专业的维修人员进行。
4.空调机的噪音。
A、(室内机)当电源开关接通以后,立刻听到“吱”的声音,室内机内部的电动膨胀
阀开始动作,因而产生噪音,过1分钟以后,该噪音将自动结束;
B当系统在冷房运转时或停止运转后,可听到连续的“沙---”的声音,此声音为排
水泵在运转时发出这样的声音,署正常声音;
C当系统停止暖房运转后,可听到“啪唧啪唧”的挤压的声音。
这是由于温度的变化
引起塑料部件的热胀冷缩时发出的声音;
D当室内机停止运转后,可听到低微的“沙--”、“咕噜咕噜”的声音。
是因为同系统内
的其它室内机运转时,可听为了防止机油和制冷剂停留在室内机内,系统将保持少量的制冷剂通过停止运转的室内机。
5.(室外机)当运转噪音的声调发生变化时。
这是由于频率变化引起的声音。
6.室内机发出香味。
本室内机吸收房间、家具和香烟等的气味,并发出香味。
7.在电源接通以后,遥控器的液晶显示器立刻显示“88”。
这表示遥控器处于正常的状
态,这种状态将持续1分钟。
8.室外机的压缩机在短暂的暖房运转之后不停止运转。
这是为了防止机油和制冷剂停留在压缩机
内,系统将栽至10分钟以后停止运转。
9.系统停止运转时,室外机的内部发热。
这是由于曲轴箱加热器对压缩机加热,使压缩机可以灵活
启动。
10.如有面板开关指示灯闪烁表示空调运转不正常,请及时报修。