用VB编写画图程序
- 格式:doc
- 大小:212.50 KB
- 文档页数:10

题目: VB实现画图小工具VB实现画图小工具一、计算机图形学1.1计算机图形学的发展1950年,第一台图形显示器作为美国麻省理工学院(MIT)旋风I号(Whirlwind I)计算机的附件诞生了。
该显示器用一个类似于示波器的阴极射线管(CRT)来显示一些简单的图形。
1958年美国Calp公司由联机的数字记录仪发展成滚筒式绘图仪,GerBer公司把数控机床发展成为平板式绘图仪。
在整个50年代,只有电子管计算机,用机器语言编程,主要应用于科学计算,为这些计算机配置的图形设备仅具有输出功能。
计算机图形学处于准备和酝酿时期,并称之为:“被动式”图形学。
到50年代末期,MIT的林肯实验室在“旋风”计算机上开发SAGE空中防御体系,第一次使用了具有指挥和控制功能的CRT显示器,操作者可以用笔在屏幕上指出被确定的目标。
与此同时,类似的技术在设计和生产过程中也陆续得到了应用,它预示着交互式计算机图形学的诞生。
1962年,MIT林肯实验室的Ivan E.Sutherland 发表了一篇题为“Sketchpad:一个人机交互通信的图形系统”的博士,他在中首次使用了计算机图形学“puter Graphics”这个术语,证明了交互计算机图形学是一个可行的、有用的研究领域,从而确定了计算机图形学作为一个崭新的科学分支的独立地位。
他在中所提出的一些基本概念和技术,如交互技术、分层存储符号的数据结构等至今还在广为应用。
1964年MIT的教授Steven A. Coons提出了被后人称为超限插值的新思想,通过插值四条任意的边界曲线来构造曲面。
同在60年代早期,法国雷诺汽车公司的工程师Pierre Bézier发展了一套被后人称为Bézier 曲线、曲面的理论,成功地用于几何外形设计,并开发了用于汽车外形设计的UNISURF系统。
Coons方法和Bézier方法是CAGD最早的开创性工作。
值得一提的是,计算机图形学的最高奖是以 Coons的名字命名的,而获得第一届(1983)和第二届(1985) Steven A.Coons 奖的,恰好是Ivan E.Sutherland和Pierre B ézier,这也算是计算机图形学的一段佳话。

VB绘图.txt 画出单个像素即画点。
画点是最简单的图形操作。
VB 6 . 0 用 Pset 方法在指定位置处画点,并可以设置该点像素的色彩。
语句格式:[对象名.] Pset(x,y)[, < 颜色 >]功能:在指定对象上的指定位置画指定颜色的点。
说明:( 1 )对象名指窗体或图片框。
缺省时为窗体。
( 2 )参数 x 和 y 指定点的位置坐标,是单精度参数,可以接受整数或分数的输人。
该参数的输人可以是任何含有变量的数值表达式。
例如,执行下面语句:Picturel.Pset(1500,2000)则在图片框 Picture1中(1500,2000)处画一个点( 3 )如果缺省<颜色>参数,则将点设置为前景色。
选择<颜色>参数可以将点设置为指定的颜色。
该参数可以引用 QBColor 函数或 RGB 函数产生的颜色。
例如,以下语句在当前窗体画亮蓝色的点。
Pset ( 1500 , 2000 ) ,RGB ( 0 , 0 , 255 )若需要“擦除”一点,只要把该点的颜色设置为背景色即可。
Pset ( 1500 , 2000 ) , BackColor7.2.2用Line方法画线和矩形1.用Line方法绘制直线为了在两点之间绘制一条直线,除了使用直线控件外, VB还提供了Line方法。
语法格式:[对象.] Line [[ Step ]( xl , y1 )]一[ Step ]( x2 , y2 ) [ ,颜色 ]功能:在对象上的两个指定点之间画一条指定颜色的直线。
说明:对象是指窗体、图片框等,缺省指窗体。
第一个 Step表示它后面的一对坐标是相对于当前坐标的偏移量,第二个Step表示它后面的一对坐标是相对于第一对坐标的偏移量。
( 3)如果不指定颜色则使用所在控件的前景色作为直线的颜色。
当然也可以为直线指定其他颜色例如:Line(1000,1000)-(2000,2000)Line-(4000,4000)Picturel.Line(100,500)-Step(1000,350)Forml.Line Step(200,200)- Step(800,1000)Line(500,200)-(3000,3500),QBColor(12)上述五行命令使用 Line方法的不同形式画直线。

VB程序设计实验报告(画图板小程序)1、实验目的1.了解VB系统对计算机软、硬件的要求;2.熟悉VB的系统环境,了解VB程序的编写、保存和编译的方法过程;3.熟悉常用控件的使用方法。
4.会用VB编写一些简单的小软件。
2、实验要求作一个画图板小程序(本题由5人完成)功能:设计一个画图板程序,可模仿Windows操作系统中“画图”程序。
系统要求设计合理,逻辑性强,界面友好。
图片浏览器(功能:可浏览和添加相片。
)3、实验步骤(写出界面设计和代码设计)○1.先整体规划进行界面设计如图所示○2.分工合作进行各模块代码编写。
○3.大家共同合作将各自负责的那部分任务合在一起,然后修改完善程序。
再在一起讨论心得。
4、实验心得1.VB程序设计是一项很神奇的东西。
如同C语言,但比C语言简单。
2.在程序的学习过程中,实验准备是极其重要和环节,以前实验认真做的那方面就好做的多了。
但以前没有实践过的就两眼一摸黑。
3.VB的功能十分强大但要下功夫才能学得好。
尤其是程序设计中,字母的拼写,大小写,符号的准确性十分重要。
4.这次的课程实验,使我对于VB课程的实验和程序设计有了更深层次的了解,特别是明白了标签、文本、按钮等的属性的设置的应用,也学习了一些简单的函数。
的在老师的指导和帮助以及自己的努力下终于完成了程序设计课题。
5.VB的课程设计,对于我们来说是一个锻炼,它提升了我们的编程水平。
一学期的上机操作,使我们学到了更多的VB知识,而且我们在编程期间,学会了协作,团结,为我们积累了资本。
总之,这次课程设计让我受益匪浅,我将会继续学习VB知识,提高水平。
6.在学习VB之后,同样,对C语言、VF等产生了极大地兴趣。
1.2 任务与分析本段应详细阐述所选设计题目任务的具体内容及具体要求,分析设计软件的预期功能和涉及的VB知识点。
简易绘图板这小程序要求能完成简单的图形绘制,如直线、圆、矩形、椭圆;能实现基本的线型线宽的改变;能实现绘图界面的清空;能通过菜单栏实现文件的保存、打开以及在帮助菜单中找到使用说明和其它问题解决办法。
该程序中涉及:各种基本绘图语句的运用条件语句的使用控件数组的创建和使用active控件的创建和使用2 方案设计设计一个类似于windows附件中绘图板的程序画直线状态下点鼠标左键位置为直线的起点,松开鼠标所在位置点为终点。
画圆状态下圆心,松开鼠标所在位置点为圆上一点。
画矩形状态下点鼠标左键位置和松开鼠标所在位置点为所画矩形的两个对角点。
加载窗体默认绘图为黑色细实线画直线,通过点击界面上的相应控件改变线型、颜色、粗细。
点击“涂鸦”按钮实现自由绘画点击“清空”按钮清楚图纸上的内容在菜单栏中添加保存、打开和帮助项3 界面设计界面设计结果如下图界面设计步骤1、Ctrl+E打开菜单栏编辑器添加菜单项目3、添加图片框控件里的line及shape4 代码设计及程序调试1、声明必须的全局变量Dim reX As Integer, reY As Integer, k As Integer, xx As Integer, xk As Integer, ys As Integer, tuya As Integer ‘声明必要的全局变量2、清空绘图板上的图像Private Sub Command1_Click() ‘清空绘图板Picture1.ClsEnd Sub3、涂鸦状态选择Private Sub Command2_Click() ‘涂鸦状态选择If tuya = 0 Then ‘如果不是涂鸦状态则进入涂鸦状态,是则退出tuya = 1Elsetuya = 0End IfEnd Sub4、拾取起点坐标Sub picture1_mousedown(button As Integer, shift As Integer, X As Single, y As Single) reX = X ‘拾取坐标reY = yEnd Sub5、实现自由绘制Sub picture1_mousemove(button As Integer, shift As Integer, X As Single, y As Single) If xk = 0 Then ‘默认线宽为1xk = 1End IfIf tuya = 1 And button = 1 ThenPicture1.DrawWidth = xk ‘使用线宽Picture1.DrawStyle = xx ‘使用线型Picture1.Line (reX, reY)-(X, y), QBColor(ys) ‘画线reX = X ‘又将当前点坐标赋给reX、reYreY = yEnd IfEnd Sub6、绘制图像Sub picture1_mouseup(button As Integer, shift As Integer, X As Single, y As Single) If xk = 0 Thenxk = 1End If有、Picture1.DrawWidth = xkPicture1.DrawStyle = xxIf k = 0 And button = 1 Then ‘画直线Picture1.Line (reX, reY)-(X, y), QBColor(ys)End IfIf k = 1 And button = 1 Then ‘画圆rrr = Sqr((reX - X) ^ 2 + (reY - y) ^ 2)Picture1.Circle (reX, reY), rrr, QBColor(ys)End IfIf k = 2 And button = 1 Then ‘画矩形Picture1.Line (reX, reY)-(X, y), QBColor(ys), BEnd IfIf k = 3 And button = 1 Then ‘画椭圆rrr = Sqr((reX - X) ^ 2 + (reY - y) ^ 2)Picture1.Circle (reX, reY), rrr, QBColor(ys), , , 1 / 3End IfEnd Sub7、选择线型Private Sub Picture2_Click(Index As Integer) ‘选择线型xx = IndexEnd Sub8、选择颜色Private Sub Picture3_Click(Index As Integer) ‘选择颜色If Index = 0 Thenys = 0ElseIf Index = 1 Thenys = 12ElseIf Index = 2 Thenys = 14ElseIf Index = 3 Thenys = 9End If End Sub。
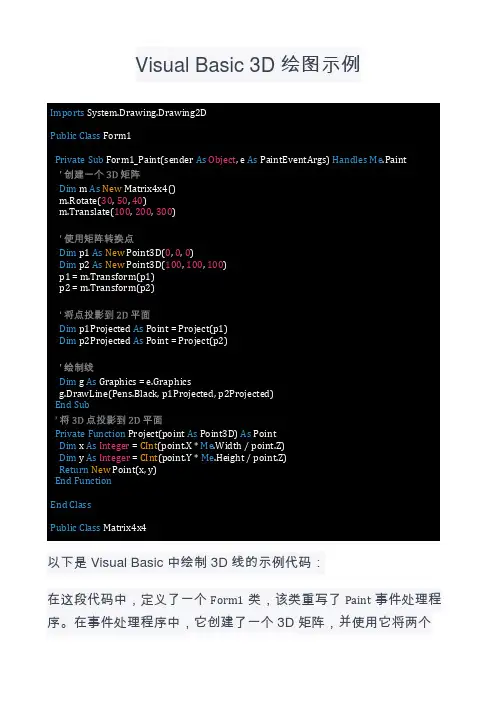
Visual Basic 3D 绘图示例
以下是 Visual Basic 中绘制 3D 线的示例代码:
在这段代码中,定义了一个 Form1 类,该类重写了 Paint 事件处理程序。
在事件处理程序中,它创建了一个 3D 矩阵,并使用它将两个 Imports Public Class
Private Sub As Object As Handles Me
Dim As New
305040100200300
Dim As New 000
Dim As New 100100100
Dim As Dim As
Dim As
End Sub
Private Function As As Dim As Integer CInt Me Dim As Integer CInt Me Return New
End Function End Class
Public Class
3D 点转换并投影到 2D 平面上。
然后,它使用Graphics对象的DrawLine方法连接这两个点。
请注意,这只是一个简单的示例,旨在演示 Visual Basic 中 3D 绘图的基本概念。
通常,一个完整的 3D 图形系统会包括额外的类和函数,用于更高级的 3D 操作,例如照明、阴影和透视投影。
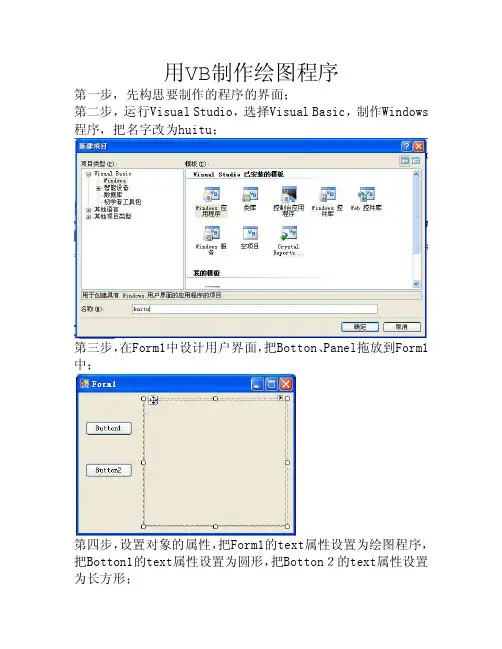
用VB制作绘图程序第一步,先构思要制作的程序的界面;第二步,运行Visual Studio,选择Visual Basic,制作Windows 程序,把名字改为huitu;第三步,在Form1中设计用户界面,把Botton、Panel拖放到Form1中;第四步,设置对象的属性,把Form1的text属性设置为绘图程序,把Botton1的text属性设置为圆形,把Botton2的text属性设置为长方形;第五步,编写代码,代码如下:Public Class Form1Private Sub Button1_Click(ByVal sender As System.Object, ByVal e As System.EventArgs) Handles Button1.ClickDim g As Graphics = Panel1.CreateGraphicsDim pen1 As Pen = Pens.Blackg.DrawEllipse(pen1, 20, 20, 30, 30)End SubPrivate Sub Button2_Click(ByVal sender As System.Object, ByVal e As System.EventArgs) Handles Button2.ClickDim g As Graphics = Panel1.CreateGraphicsDim pen1 As Pen = Pens.Blackg.DrawRectangle(pen1, 20, 20, 30, 30)End SubPrivate Sub Form1_Load(ByVal sender AsSystem.Object, ByVal e As System.EventArgs) Handles MyBase.LoadEnd SubPrivate Sub Panel1_Paint(ByVal sender As System.Object, ByVal e AsSystem.Windows.Forms.PaintEventArgs) HandlesPanel1.PaintEnd SubEnd Class第六步,编译、运行、调试程序;第七步,制作安装程序,点击生成按钮,点击生成下的菜单生成,再点击发布,即可完成发布!生成程序两个文件:。
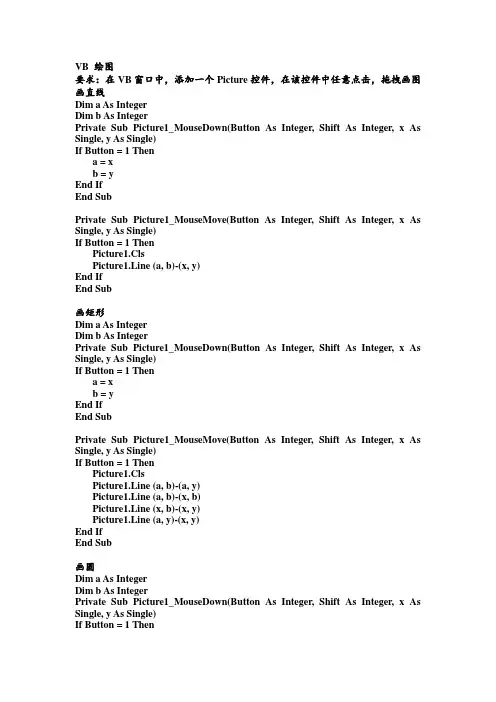
VB 绘图要求:在VB窗口中,添加一个Picture控件,在该控件中任意点击,拖拽画图画直线Dim a As IntegerDim b As IntegerPrivate Sub Picture1_MouseDown(Button As Integer, Shift As Integer, x As Single, y As Single)If Button = 1 Thena = xb = yEnd IfEnd SubPrivate Sub Picture1_MouseMove(Button As Integer, Shift As Integer, x As Single, y As Single)If Button = 1 ThenPicture1.ClsPicture1.Line (a, b)-(x, y)End IfEnd Sub画矩形Dim a As IntegerDim b As IntegerPrivate Sub Picture1_MouseDown(Button As Integer, Shift As Integer, x As Single, y As Single)If Button = 1 Thena = xb = yEnd IfEnd SubPrivate Sub Picture1_MouseMove(Button As Integer, Shift As Integer, x As Single, y As Single)If Button = 1 ThenPicture1.ClsPicture1.Line (a, b)-(a, y)Picture1.Line (a, b)-(x, b)Picture1.Line (x, b)-(x, y)Picture1.Line (a, y)-(x, y)End IfEnd Sub画圆Dim a As IntegerDim b As IntegerPrivate Sub Picture1_MouseDown(Button As Integer, Shift As Integer, x As Single, y As Single)If Button = 1 Thena = xb = yEnd IfEnd SubPrivate Sub Picture1_MouseMove(Button As Integer, Shift As Integer, x As Single, y As Single)If Button = 1 ThenPicture1.ClsPicture1.Circle (a, b), Sqr((x - a) ^ 2 + (y - b) ^ 2)End IfEnd Sub自由绘图Dim a As IntegerDim b As IntegerPrivate Sub Picture1_MouseDown(Button As Integer, Shift As Integer, x As Single, y As Single)If Button = 1 Thena = xb = yEnd IfEnd SubPrivate Sub Picture1_MouseMove(Button As Integer, Shift As Integer, x As Single, y As Single)If Button = 1 ThenPicture1.PSet (x, y)End IfEnd Sub实例:设计一个窗口,效果如下图,要求设置四个单选框,分别为画直线、画圆、画矩形、自由绘图,选中任意一项,便可在左侧的picture控件中任意地方拖拽出相应的图形。
vb画图板
在VB中实现画图板可以通过以下步骤:
1. 创建一个新的窗体,并设置窗体的标题和大小。
2. 在窗体上添加一个Panel控件,作为画布。
3. 添加鼠标按下、移动和松开的事件处理程序,用于绘制图形。
4. 在鼠标按下事件处理程序中,获取鼠标的起点坐标,并创建一个Graphics对象来绘制图形。
5. 在鼠标移动事件处理程序中,获取鼠标的当前坐标,并根据不同的绘图工具(例如画线、矩形、圆形等)来绘制图形。
6. 在鼠标松开事件处理程序中,释放Graphics对象,并更新画布。
下面是一个简单的示例代码,实现了在画布上绘制直线和矩形的功能:
```vb
Public Class Form1
Dim startPt As Point
Dim endPt As Point
Dim drawShape As String
Private Sub Panel1_MouseDown(sender As Object, e As MouseEventArgs) Handles Panel1.MouseDown
startPt = e.Location
End Sub
Private Sub Panel1_MouseMove(sender As Object, e As MouseEventArgs) Handles Panel1.MouseMove
If e.Button = MouseButtons.Left Then
endPt = e.Location
Select Case drawShape
Case \。
4.代码设计(1)引入命名空间:Imports System.Drawing.Drawing2D(2)在FrmPaint类里定义全局变量和mSelect枚举结构:1.Private g As Graphics '绘图句柄2.Private pstart As Point, pend As Point '定义画图的起始点,终点3.Private mChoice As Integer'选择图形枚举4.Private mWidth As Integer'画笔宽度5.Private mIcon As Icon '用户选择图标6.Private Enum mSelect '选择图形类别枚举7. Pencil '铅笔8. Line '直线9. Ellipse '椭圆10. FillEllipse '填充椭圆11. StyleEllipse '风格椭圆12. Rec '矩形13. FillRec '填充矩形14. StyleRec '风格矩形15. Icon '图标16. Eraser '橡皮17.End Enum(3)在FrmPaint的Load事件中初始化全局变量和Graphics对象:1.Private Sub FrmPaint_Load(ByVal sender As System.Object, _2.ByVal e As System.EventArgs) Handles MyBase.Load3.4. g = Me.picPaint.CreateGraphics '获取PictureBox的绘图句柄5. mChoice = mSelect.Pencil '默认选择选铅笔作为绘图工具6. mWidth = 1 '初始化画笔宽度7.End Sub(4)定义转换坐标起点和终点的过程Convert_Point()。
VB实现⿏标绘图实例代码本⽂所述为VB实现⿏标绘图的实例,该实例实现线条颜⾊和线宽可⾃设,当按下⿏标按键时绘图开始并记录最初的起点,如果不是处在绘图状态则退出该过程,如果处在绘图状态则从起点到⽬前⿏标所在点绘制直线,然后将当前⿏标所在点作为新的起点,当释放⿏标按键时绘图结束。
具体的功能代码如下:VERSION 5.00Object = "{F9043C88-F6F2-101A-A3C9-08002B2F49FB}#1.2#0"; "comdlg32.ocx"Begin VB.Form Form1Caption = "⿏标绘图"ClientHeight = 6420ClientLeft = 60ClientTop = 345ClientWidth = 7710LinkTopic = "Form1"ScaleHeight = 6420ScaleWidth = 7710StartUpPosition = 3 '窗⼝缺省Begin mandButton Command2Caption = "清除"Height = 495Left = 5640TabIndex = 7Top = 1440Width = 1335EndBegin VB.Frame Frame1Caption = "线宽"Height = 2655Left = 5520TabIndex = 2Top = 2880Width = 1935Begin VB.OptionButton Option4Caption = "8"Height = 495Left = 240TabIndex = 6Top = 1800Width = 1215EndBegin VB.OptionButton Option3Caption = "4"Height = 375Left = 240TabIndex = 5Top = 1320Width = 1335EndBegin VB.OptionButton Option2Caption = "2"Height = 375Left = 240TabIndex = 4Top = 840Width = 1095EndBegin VB.OptionButton Option1Caption = "1"Height = 255Left = 240TabIndex = 3Top = 480Value = -1 'TrueWidth = 1335EndEndBegin mandButton Command1Caption = "设置颜⾊"Height = 495Left = 5640TabIndex = 1Top = 600Width = 1215EndBegin monDialog CommonDialog1Left = 4200Top = 3840_ExtentX = 847_ExtentY = 847_Version = 393216EndBegin VB.PictureBox Picture1Height = 5535Left = 480ScaleHeight = 5475ScaleWidth = 4515TabIndex = 0Top = 480Width = 4575EndEndAttribute VB_Name = "Form1"Attribute VB_GlobalNameSpace = FalseAttribute VB_Creatable = FalseAttribute VB_PredeclaredId = TrueAttribute VB_Exposed = FalseDim x1 As Integer '起点X坐标Dim y1 As Integer '起点Y坐标Dim x2 As Integer '终点点X坐标Dim y2 As Integer '终点Y坐标Dim flag As Boolean '绘图标志'设置线的颜⾊Private Sub Command1_Click()On Error Resume NextCommonDialog1.CancelError = TrueCommonDialog1.DialogTitle = "颜⾊"CommonDialog1.ShowColorIf Err <> 32755 ThenPicture1.ForeColor = CommonDialog1.ColorEnd IfEnd Sub'清除Picture1中的图形Private Sub Command2_Click()Picture1.ClsEnd Sub'设置线宽Private Sub Option1_Click()Picture1.DrawWidth = 1End SubPrivate Sub Option2_Click()Picture1.DrawWidth = 2End SubPrivate Sub Option3_Click()Picture1.DrawWidth = 4End SubPrivate Sub Option4_Click()Picture1.DrawWidth = 8End SubPrivate Sub Form_Load()Picture1.Scale (0, 0)-(400, 400)flag = FalseEnd SubPrivate Sub Picture1_MouseDown(Button As Integer, Shift As Integer, _X As Single, Y As Single) '当按下⿏标按键时绘图开始并记录最初的起点flag = Truex1 = Xy1 = YEnd SubPrivate Sub Picture1_MouseMove(Button As Integer, Shift As Integer, _X As Single, Y As Single) '如果不是处在绘图状态则退出该过程'如果处在绘图状态则从起点到⽬前⿏标所在点绘制直线'然后将当前⿏标所在点作为新的起点If flag = False ThenExit SubEnd IfIf flag = True Thenx2 = Xy2 = YPicture1.Line (x1, y1)-(x2, y2)x1 = x2y1 = y2End IfEnd SubPrivate Sub Picture1_MouseUp(Button As Integer, Shift As Integer, _X As Single, Y As Single)'当释放⿏标按键时绘图结束flag = FalseEnd Sub程序中备有较为详细的注释,相信读者不难理解,读者可以根据⾃⼰的喜好对该程序进⾏修改,使之更加完善!。
画图板VB设计程序及截图Public xstart As SinglePublic ystart As SinglePublic xold As SinglePublic yold As SinglePublic lType As BytePrivate Declare Function FillRect Lib "user32" (ByV al hdc As Long, lpRect As RECT, ByV al hBrush As Long) As LongPrivate Declare Function GetDC Lib "user32" (ByV al hwnd As Long) As LongPrivate Declare Function StretchBlt Lib "gdi32" (ByV al hdc As Long, ByV al x As Long, ByV al y As Long, ByV al nWidth As Long, ByV al nHeight As Long, ByV al hSrcDC As Long, ByV al xSrc As Long, ByV al ySrc As Long, ByV al nSrcWidth As Long, ByV al nSrcHeight As Long, ByV al dwRop As Long) As LongPrivate Type RECTLeft As LongTop As LongRight As LongBottom As LongEnd TypePrivate Declare Function CreateSolidBrush Lib "gdi32" (ByV al crColor As Long) As Long Private Declare Function GetCursorPos Lib "user32" (lpPoint As POINTAPI) As LongPrivate Type POINTAPIx As Longy As LongEnd TypePrivate Declare Function ScreenToClient Lib "user32" (ByV al hwnd As Long, lpPoint As POINTAPI) As LongPrivate Declare Function GetWindowRect Lib "user32" (ByV al hwnd As Long, lpRect As RECT) As LongPrivate Declare Sub GetLocalTime Lib "kernel32" (lpSystemTime As SYSTEMTIME)Private Type SYSTEMTIMEwY ear As IntegerwMonth As IntegerwDayOfWeek As IntegerwDay As IntegerwHour As IntegerwMinute As IntegerwSecond As IntegerwMilliseconds As IntegerEnd TypePrivate Declare Function SetPixel Lib "gdi32" (ByV al hdc As Long, ByV al x As Long, ByV al y As Long, ByV al crColor As Long) As LongPrivate Sub Command1_Click()CommonDialog1.ShowColorPicture1.BackColor = CommonDialog1.ColorEnd SubPrivate Sub Form_Load()Picture1.BackColor = RGB(255, 255, 255)m_btn_store_ClickPicture1.ClslType = 100End SubPrivate Sub m_btn_c_Click()lType = 4End SubPrivate Sub m_btn_circle_Click()lType = 1End SubPrivate Sub m_btn_clr_Click()Picture1.ClsEnd SubPrivate Sub m_btn_color_Click()CommonDialog1.ShowColorPicture1.ForeColor = CommonDialog1.ColorEnd SubPrivate Sub m_Btn_Line_Click()lType = 3End SubPrivate Sub m_btn_load_Click()Picture1.Picture = LoadPicture(Text1.Text)End SubPrivate Sub m_btn_path_Click()On Error Resume NextCommonDialog1.FileTitle = "打开一个图片文件"CommonDialog1.Filter = "图片文件|*.bmp;*.jpg;*.gif;*.jpeg;*.png"CommonDialog1.ShowOpenText1.Text = CommonDialog1.FileNameEnd SubPrivate Sub m_Btn_Pen_Click()lType = 100End SubPrivate Sub m_Btn_Rect_Click()lType = 2End SubPrivate Sub m_btn_store_Click()On Error Resume NextDim wScreen As LongDim hScreen As LongDim w As LongDim h As LongDim pic As PictureBoxDim pRec As RECTPicture1.ClsPicture1.AutoRedraw = TruewScreen = Screen.Width \ Screen.TwipsPerPixelXhScreen = Screen.Height \ Screen.TwipsPerPixelYPicture1.ScaleMode = vbPixelsw = Picture1.ScaleWidthh = Picture1.ScaleHeighthdcScreen = GetDC(0)GetWindowRect Picture1.hwnd, pRecp = StretchBlt(Picture1.hdc, 0, 0, w, h, hdcScreen, pRec.Left + 2, pRec.Top + 2, pRec.Right - pRec.Left - 4, pRec.Bottom - pRec.Top - 4, vbSrcCopy)SavePicture Picture1.Image, Text1End SubPrivate Sub Picture1_DblClick()Picture1.ClsEnd SubPrivate Sub Picture1_MouseDown(Button As Integer, Shift As Integer, x As Single, y As Single) xstart = xystart = yIf lType = 1 Or lType = 100 Thenxold = xyold = yEnd IfIf lType = 4 ThenDim bru As LongDim pt As POINTAPIGetCursorPos ptScreenToClient Picture1.hwnd, ptDim rec As RECTrec.Left = pt.x - 10rec.Right = pt.x + 10rec.Top = pt.y - 10rec.Bottom = pt.y + 10FillRect Picture1.hdc, rec, CreateSolidBrush(Picture1.BackColor)End IfEnd SubPrivate Sub Picture1_MouseMove(Button As Integer, Shift As Integer, x As Single, y As Single) Dim pt2 As POINTAPIGetCursorPos pt2ScreenToClient Picture1.hwnd, pt2StatusBar1.Panels(2).Text = pt2.x & "," & pt2.yIf lType = 1 ThenIf Button <> 1 ThenExit SubEnd IfPicture1.Circle (xstart, ystart), Sqr((xold - xstart) * (xold - xstart) + (yold - ystart) * (yold - ystart)), Picture1.BackColorxold = xyold = yPicture1.Circle (xstart, ystart), Sqr((xold - xstart) * (xold - xstart) + (yold - ystart) * (yold - ystart)) ElseIf lType = 2 ThenIf Button <> 1 ThenExit SubEnd IfPicture1.Line (xstart, ystart)-(xold, ystart), Picture1.BackColorPicture1.Line (xstart, ystart)-(xstart, yold), Picture1.BackColorPicture1.Line (xold, ystart)-(xold, yold), Picture1.BackColorPicture1.Line (xstart, yold)-(xold, yold), Picture1.BackColorPicture1.Line (xstart, ystart)-(x, ystart)Picture1.Line (xstart, ystart)-(xstart, y)Picture1.Line (x, ystart)-(x, y)Picture1.Line (xstart, y)-(x, y)xold = xyold = yElseIf lType = 3 ThenIf Button <> 1 ThenExit SubEnd IfPicture1.Line (xstart, ystart)-(xold, yold), Picture1.BackColorPicture1.Line (xstart, ystart)-(x, y)xold = xyold = yElseIf lType = 4 ThenIf Button <> 1 ThenExit SubEnd IfDim pt As POINTAPIGetCursorPos ptDim bru As LongScreenToClient Picture1.hwnd, ptDim rec As RECTrec.Left = pt.x - 10rec.Right = pt.x + 10rec.Top = pt.y - 10rec.Bottom = pt.y + 10FillRect Picture1.hdc, rec, CreateSolidBrush(Picture1.BackColor)Picture1.RefreshElseIf lType = 100 ThenIf Button <> 1 ThenExit SubEnd IfPicture1.Line (xold, yold)-(x, y)xold = xyold = yEnd IfEnd SubPrivate Sub Picture1_MouseUp(Button As Integer, Shift As Integer, x As Single, y As Single) xold = 0yold = 0End SubPrivate Sub Timer1_Timer()Dim t As SYSTEMTIMEGetLocalTime tStatusBar1.Panels(1).Text = t.wHour & ":" & t.wMinute & ":" & t.wSecondEnd Sub。
第十一章绘图11-1 绘图基本观念在VB2005中绘图包含下列几个基本程序:1.建立或取得Graphics对象( 绘图对象),一般就是俗称画布。
2.定义画笔,提供绘图指令在绘图对象( 画布) 上绘画。
3.利用Graphics对象的DrawLine、DrawString、DrawImage…等方法绘制各种的图形。
4.释放Graphics对象所占用的系统资源。
11-2 绘图基本指令11-2-1 绘图对象的建立建立绘图对象(CreateGraphics ) Graphics使用CreateGraphics。
Dim 绘图对象As Graphics = 控制组件. CreateGraphics利用Graphics对象所绘制的图形显示在控制组件上。
例1 如设绘图对象g,其控制组件为窗体。
Dim g As Graphics = Me.CreateGraphics例2 如设绘图对象g1,其控制组件为图片方块(PictureBox1)。
Dim g1 As Graphics = PictureBox1.CreateGraphics11-2-2 画笔画笔(Pen ) 如绘画使用的画笔,提供绘图指令在绘图对象上绘画,画笔有二个特性:一为颜色,二为粗细。
Dim 画笔变数As New System.Drawing.Pen(Color.颜色, 粗细)设定画笔的颜色与粗细。
例如设画笔变量p1,其颜色为蓝色与粗细为2。
Dim p1 As New System.Drawing.Pen(Color.Blue, 2)11-2-3 画线DrawLine是在绘图对象上绘出一直线,画线(DrawLine) 就必须用到画笔,并且赋予起始点坐标及终点坐标。
绘图对象.DrawLine ( 画笔变数, x1, y1, x2, y2)依设定画笔的颜色与粗细,在绘图对象上绘出一直线。
1.直线颜色与粗细由画笔决定。
2.x1,y1是直线的起始点坐标。
3.x2,y2是直线的终点坐标。
graphic 简单的画图程序[vb]Public Class Form1Dim DrawState As BooleanDim PreX As SingleDim PreY As SingleDim eP As New Pen(Color.Black, 3) ' 构造黑色画笔,并将它赋给对象变量eP'Dim g As Graphics = Me.CreateGraphics ' 在窗体上构造一块画布,并将它赋给对象变量gPrivate Sub Form1_Load(ByVal sender As System.Object, ByVal e As System.EventArgs) Handles MyBase.Load' 将DrawState初始化为False,表示提笔DrawState = FalseEnd SubPrivate Sub Form1_MouseDown(ByVal sender As Object, ByVal e AsSystem.Windows.Forms.MouseEventArgs) Handles Me.MouseDown' 当鼠标左键被按下时,把DrawState设为True,表示落笔开始画线Dim g As Graphics = Me.CreateGraphicsIf e.Button = Windows.Forms.MouseButtons.Left ThenDrawState = True ' 设置画图状态PreX = e.X ' PreX和PreY保存了线条的起点。
PreY = e.YEnd If' 当按住鼠标右键时,画一个直径为50的圆If e.Button = Windows.Forms.MouseButtons.Right Theng.DrawEllipse(eP, e.X - 25, e.Y - 25, 100, 100)End IfEnd SubPrivate Sub Form1_MouseMove(ByVal sender As Object, ByVal e As System.Windows.Forms.MouseEventArgs) Handles Me.MouseMove' 当鼠标移动时,如果处于画线状态,则在(PreX,PreY)与(X,Y)之间画一条直线Dim g As Graphics = Me.CreateGraphicsIf DrawState = True Theng.DrawLine(eP, PreX, PreY, e.X, e.Y)PreX = e.XPreY = e.YEnd IfEnd SubPrivate Sub Form1_MouseUp(ByVal sender As Object, ByVal e AsSystem.Windows.Forms.MouseEventArgs) Handles Me.MouseUp' 当释放鼠标左键时,解除画线状态If e.Button = Windows.Forms.MouseButtons.Left ThenDrawState = FalseEnd IfEnd SubEnd ClassPublic Class Form1Dim DrawState As BooleanDim PreX As SingleDim PreY As SingleDim eP As New Pen(Color.Black, 3) ' 构造黑色画笔,并将它赋给对象变量eP'Dim g As Graphics = Me.CreateGraphics ' 在窗体上构造一块画布,并将它赋给对象变量gPrivate Sub Form1_Load(ByVal sender As System.Object, ByVal e As System.EventArgs) Handles MyBase.Load' 将DrawState初始化为False,表示提笔DrawState = FalseEnd SubPrivate Sub Form1_MouseDown(ByVal sender As Object, ByVal e AsSystem.Windows.Forms.MouseEventArgs) Handles Me.MouseDown' 当鼠标左键被按下时,把DrawState设为True,表示落笔开始画线Dim g As Graphics = Me.CreateGraphicsIf e.Button = Windows.Forms.MouseButtons.Left ThenDrawState = True ' 设置画图状态PreX = e.X ' PreX和PreY保存了线条的起点。
Option Base 1Dim bgn_line As BooleanDim bgn_circle As BooleanDim x1 As SingleDim y1 As SinglePrivate Type info_linex1 As Singley1 As Singlex2 As Singley2 As Singlewid As IntegerEnd TypePrivate Type info_circlex1 As Singley1 As Singler As Singlewid As IntegerEnd TypePrivate Type info_dotx1 As Singley1 As Singlewid As IntegerEnd TypeDim stack_cir() As info_circleDim stack_line() As info_lineDim stack_dot() As info_dotDim top_cir As LongDim top_line As LongDim top_dot As LongPrivate Sub redraw()Dim i As IntegerIf top_cir ThenFor i = 1 To top_cirpic.DrawWidth = stack_cir(i).widpic.Circle (stack_cir(i).x1, stack_cir(i).y1), stack_cir(i).rNext ipic.DrawWidth = com_width.TextEnd IfIf top_line ThenFor i = 1 To top_linepic.DrawWidth = stack_line(i).widpic.Line (stack_line(i).x1, stack_line(i).y1)-(stack_line(i).x2, stack_line(i).y2) Next ipic.DrawWidth = com_width.TextEnd IfIf top_dot ThenFor i = 1 To top_dotpic.DrawWidth = stack_dot(i).widpic.PSet (stack_dot(i).x1, stack_dot(i).y1)Next ipic.DrawWidth = com_width.TextEnd IfEnd SubPrivate Function s(x1 As Single, y1 As Single, x2 As Single, y2 As Single)s = Sqr((x1 - x2) ^ 2 + (y1 - y2) ^ 2)End FunctionPrivate Sub Combo2_Change()Picture1.DrawWidth = Int(Combo2.Text)End SubPrivate Sub Command1_Click()pic.Clstop_line = 0top_circle = 0top_dot = 0End SubPrivate Sub Command2_Click()EndEnd SubPrivate Sub pic_MouseDown(button As Integer, shift As Integer, x As Single, y As Single) If button = 1 ThenSelect Case com_style.TextCase "直线":If bgn_line Thenpic.Line (x1, y1)-(x, y)ReDim Preserve stack_line(top_line + 1)top_line = top_line + 1stack_line(top_line).x1 = x1stack_line(top_line).y1 = y1stack_line(top_line).x2 = x2stack_line(top_line).y2 = y2stack_line(top_line).wid = pic.DrawWidthElsex1 = xy1 = yEnd Ifbgn_line = Not bgn_lineCase "圆":If bgn_circle Thenpic.Circle (x1, y1), s(x1, y1, x, y)ReDim Preserve stack_cir(top_cir + 1)top_cir = top_cir + 1stack_cir(top_cir).r = s(x1, y1, x, y)stack_cir(top_cir).wid = pic.DrawWidthstack_cir(top_cir).x1 = x1stack_cir(top_cir).y1 = y1Elsex1 = xy1 = yEnd Ifbgn_circle = Not bgn_circleCase "点":pic.PSet (x, y)ReDim Preserve stack_dot(top_dot + 1)top_dot = top_dot + 1stack_line(top_dot).x1 = xstack_line(top_dot).y1 = ystack_dot(top_dot).wid = pic.DrawWidthCase ElseEnd SelectEnd IfEnd SubPrivate Sub pic_mousemove(button As Integer, shift As Integer, x As Single, y As Single) Select Case com_style.TextCase "直线":If bgn_line Thenpic.Clspic.Line (x1, y1)-(x, y)redrawEnd IfCase "圆":If bgn_circle Thenpic.Clspic.Circle (x1, y1), s(x1, y1, x, y)redrawEnd IfCase "点":End SelectEnd SubPrivate Sub Form_Load()Combo1.AddItem "直线"Combo1.AddItem "圆"Combo1.AddItem "点"Combo1.Text = "直线"Combo2.AddItem "1"Combo2.AddItem "3"Combo2.AddItem "5"Combo2.AddItem "10"Combo2.Text = "1"bgn_line = Falsebgn_circle = Falsetop_line = 0top_cir = 0top_dot = 0End SubPrivate Sub Picture1_Paint()Picture1.ClsPicture1.ScaleHeight = 7200Picture1.ScaleWidth = 8200Picture1.ScaleTop = -3600Picture1.ScaleLeft = -4100Picture1.Line (-4100, 0)-(4100, 0)Picture1.Line (0, -3600)-(0, 3600)Picture1.CurrentX = 100: Picture1.CurrentY = 0: Picture1.Print "0" Picture1.CurrentX = 3900: Picture1.CurrentY = 30: Picture1.Print "x" Picture1.CurrentX = 100: Picture1.CurrentY = -3500: Picture1.Print "y" End Sub。
VB画图首先,你应该用一个PictureBox做画布,然后使用其图形方法:Cls 洗画布Point (x,y)方法画第一点Line (x1,y1)-(x2,y2)画其他的点,这个Line有不同用法,可以Line -(x2,y2) 画一条线,从上次画完的地方开始,还可以是一个填充的方框,设置颜色等,慢慢看帮助。
在画线的同时要把这些数据保存起来,在Paint方法调用时重新画这些线。
Line,Circle,Pset,Cls.辅助命令:RGB,QBColor.API中绘图命令相当多。
1.设定图素SetPixelGetPixel2.画线LineTo 画直线。
Polyline和PolylineTo 画一系列相连的直线。
PolyPolyline 画多组相连的线。
Arc 画椭圆线。
PolyBezier和PolyBezierTo 画贝塞尔曲线。
ArcTo和AngleArc 画椭圆线。
PolyDraw 画一系列相连的线以及贝塞尔曲线3.既画线也填入所画图形的封闭区域的函数,边界框函数Rectangle 画矩形。
Ellipse 画椭圆。
RoundRect 画带圆角的矩形。
Pie 画椭圆的一部分,使其看起来像一个扇形。
Chord 画椭圆的一部分,以呈弓形。
//////////////////////////////////////////////////////////////////////////////////////////////////////////////////////////// /////////////////////////////////////////////////////////////////////////////////SetPixel函数在指定的x和y坐标以特定的颜色设定图素:SetPixel (hdc, x, y, crColor) ;如同在任何绘图函数中一样,第一个参数是设备内容的句柄。
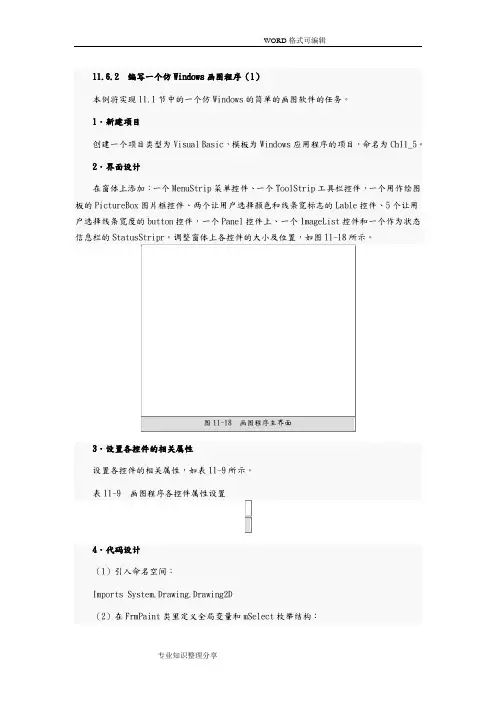
3.设置各控件的相关属性设置各控件的相关属性,如表11-9所示。
表11-9 画图程序各控件属性设置4.代码设计(1)引入命名空间:Imports System.Drawing.Drawing2D(2)在FrmPaint类里定义全局变量和mSelect枚举结构:1.Private g As Graphics '绘图句柄2.Private pstart As Point, pend As Point '定义画图的起始点,终点3.Private mChoice As Integer'选择图形枚举4.Private mWidth As Integer'画笔宽度5.Private mIcon As Icon '用户选择图标6.Private Enum mSelect '选择图形类别枚举7. Pencil '铅笔8. Line '直线9. Ellipse '椭圆10. FillEllipse '填充椭圆11. StyleEllipse '风格椭圆12. Rec '矩形13. FillRec '填充矩形14. StyleRec '风格矩形15. Icon '图标16. Eraser '橡皮17.End Enum(3)在FrmPaint的Load事件中初始化全局变量和Graphics对象:1.Private Sub FrmPaint_Load(ByVal sender As System.Object, _2.ByVal e As System.EventArgs) Handles MyBase.Load3.4. g = Me.picPaint.CreateGraphics '获取PictureBox的绘图句柄5. mChoice = mSelect.Pencil '默认选择选铅笔作为绘图工具6. mWidth = 1 '初始化画笔宽度7.End Sub(4)定义转换坐标起点和终点的过程Convert_Point()。
转换坐标起始点和终点,确保起始点始终在终点的左上方,代码如下:1.'确保起始点坐标位于左上角2.'结束点坐标位于右下角3.Private Sub Convert_Point()4.Dim ptemp As Point '用于交换的临时点5.If pstart.X < pend.X Then6.If pstart.Y > pend.Y Then7. ptemp.Y = pstart.Y8. pstart.Y = pend.Y9. pend.Y = ptemp.Y10.End If11.End If12.If pstart.X > pend.X Then13.If pstart.Y < pend.Y Then14. ptemp.X = pstart.X15. pstart.X = pend.X16. pend.X = ptemp.X17.End If18.If pstart.Y > pend.Y Then19. ptemp = pstart20. pstart = pend21. pend = ptemp22.End If23.End If24.End Sub(5)为工具栏ItemClick事件编写代码:1.Private Sub tsPaint_ItemClicked(ByVal sender As System.Object, _2.ByVal e As System.Windows.Forms.ToolStripItemClickedEventArgs) Handles tsPaint.ItemClicked3.'获取发生事件的索引号4.Me.mChoice = Me.tsPaint.Items.IndexOf(e.ClickedItem)5.If mChoice = mSelect.Icon Then6.'如果选择的是图标,则打开OpenFileDialog选取图标7.Dim dlgOpen As New OpenFileDialog8. dlgOpen.Filter = "图标文件|*.ico"9.If dlgOpen.ShowDialog = Windows.Forms.DialogResult.OK Then10. mIcon = New Icon(dlgOpen.FileName)11.End If12.End If(6)为btnSetColor控件的Click事件,编写代码,选择画笔颜色,代码如下:1.Private Sub btnSetColor_Click(ByVal sender As System.Object, _2.ByVal e As System.EventArgs) Handles btnSetColor.Click3.'打开"颜色"对话框4.Dim dlgColor As New ColorDialog5.If dlgColor.ShowDialog = Windows.Forms.DialogResult.OK Then6.Me.btnSetColor.BackColor = dlgColor.Color7.End If8.End Sub(7)编写选择线条宽度的共享事件过程btnLines_Click()代码:1.Private Sub btnLine_Click(ByVal sender AsSystem.Object, ByVal e As System.EventArgs) _2.Handles btnLine1.Click, btnLine2.Click,btnLine3.Click, btnLine4.Click, btnLine5.Click3.4.'把所有按钮的背景色都设为Black5.Me.btnLine1.BackColor = Color.White6.Me.btnLine2.BackColor = Color.White7.Me.btnLine3.BackColor = Color.White8.Me.btnLine4.BackColor = Color.White9.Me.btnLine5.BackColor = Color.White10.11.'用户选中的按钮背景色为Blue12.CType(sender, Button).BackColor = Color.Black13.14.'把画笔宽度设为用户选择按钮的Tag值15. mWidth = CType(sender, Button).Tag16.End Sub(8)为PictrueBox的MouseDown(鼠标按下)事件编写代码。
在FrmPaint的代码窗口顶部的"对象"下拉列表框中选择picPaint,然后在右侧的"事件"下拉列表框中选择MouseDown,此时代码编辑器中已经自动生成了picPaint_MouseUp的事件代码,并把鼠标定位于事件过程内部的第一行,在该过程中编写如下代码:1.Private Sub picPaint_MouseDown(ByVal sender As System.Object, _2.ByVal e As System.Windows.Forms.MouseEventArgs)Handles picPaint.MouseDown3.If e.Button = Windows.Forms.MouseButtons.Left Then4.5.'如果用户按下的是鼠标左键,则将当前点坐标赋给起始点6. pstart.X = e.X7. pstart.Y = e.Y8.End If9.End Sub11.6.2 编写一个仿Windows画图程序(3)(9)为PictrueBox的MouseUp(鼠标释放)事件编写代码:1.Private Sub picPaint_MouseUp(ByVal sender As System.Object, _2.ByVal e As System.Windows.Forms.MouseEventArgs)Handles picPaint.MouseUp3.4.If e.Button = Windows.Forms.MouseButtons.Left Then5.'如果用户按下的是鼠标左键,记录终点坐标6. pend.X = e.X7. pend.Y = e.Y8.'根据保存的mChoice绘制图形9.Select Case mChoice10.Case mSelect.Line '用户在工具栏中选择的是铅笔11.Dim myPen As New Pen(Me.btnSetColor.BackColor, mWidth)12. g.DrawLine(myPen, pstart, pend) '根据起点和终点绘制直线13.14.Case mSelect.Rec '用户在工具栏中选择的是空心矩形15. Convert_Point() '转换矩形的起点为其左上点16.Dim myPen As New Pen(Me.btnSetColor.BackColor, mWidth)17. g.DrawRectangle(myPen, pstart.X, pstart.Y, _18. pend.X - pstart.X, pend.Y - pstart.Y) '根据起点和终点绘制空心矩形19.20.Case mSelect.FillRec '用户在工具栏中选择的是填充矩形21. Convert_Point() '转换矩形的起点为其左上点22.Dim rec As New Rectangle(pstart.X, pstart.Y, _23. pend.X - pstart.X, pend.Y - pstart.Y)'根据起点和终点定义矩形24.Dim sbr As New SolidBrush(btnSetColor.BackColor) '定义画刷颜色为用户选择的颜色25. g.FillRectangle(sbr, rec) '绘制填充矩形26.27.Case mSelect.StyleRec '用户在工具栏中选择的是风格矩形28. Convert_Point() '转换矩形的起点为其左上点29.Dim rec As New Rectangle(pstart.X, pstart.Y, _30. pend.X - pstart.X, pend.Y - pstart.Y)'根据起点和终点定义矩形31.' 定义画刷风格为Cross型,前景色为白色,背景色为用户选择32.Dim hbr As New HatchBrush(HatchStyle.Cross,Color.White, btnSetColor.BackColor)33. g.FillRectangle(hbr, rec) '用画刷填充矩形34.35.Case mSelect.Ellipse '用户在工具栏中选择的是空心椭圆36. Convert_Point() '转换椭圆外接矩形的起点为其左上点37.Dim pen1 As New Pen(btnSetColor.BackColor, mWidth)38. g.DrawEllipse(pen1, pstart.X, pstart.Y, _39. pend.X - pstart.X, pend.Y - pstart.Y) '根据椭圆外接矩形的起点和终点绘制椭圆40.41.Case mSelect.FillEllipse '用户在工具栏中选择的是填充椭圆42. Convert_Point() '转换椭圆外接矩形的起点为其左上点43.Dim rec As New Rectangle(pstart.X, pstart.Y, _44. pend.X - pstart.X, pend.Y - pstart.Y) '定义椭圆的外接矩形45.Dim sbr As New SolidBrush(btnSetColor.BackColor) '定义画刷颜色为用户选择的颜色46. g.FillEllipse(sbr, rec) '用画刷填充矩形47.48.Case mSelect.StyleEllipse '用户在工具栏中选择的是风格椭圆49. Convert_Point() '转换椭圆外接矩形的起点为其左上点50.Dim rec As New Rectangle(pstart.X, pstart.Y, _51. pend.X - pstart.X, pend.Y - pstart.Y) '定义椭圆的外接矩形52.' 定义画刷风格为Cross型,前景色为白色,背景色为用户选择53.Dim hbr As New HatchBrush(HatchStyle.Cross,Color.White, btnSetColor.BackColor)54. g.FillEllipse(hbr, rec) '用画刷填充矩形55.End Select56.End If57.End Sub(10)为PictrueBox的MouseMove(鼠标移动)事件编写代码:1.Private Sub picPaint_MouseMove(ByVal sender As System.Object, _2.ByVal e As System.Windows.Forms.MouseEventArgs)Handles picPaint.MouseMove3.If e.Button = Windows.Forms.MouseButtons.Left Then4.'如果用户按下的是鼠标左键,根据保存的mChoice绘制图形5.Select Case mChoice6.Case mSelect.Pencil '用户在工具栏中选择的是铅笔7.Dim pen1 As New Pen(btnSetColor.BackColor, mWidth)8. pend.X = e.X9. pend.Y = e.Y10. g.DrawLine(pen1, pstart, pend)11. pstart = pend '将已经绘制的终点作为下一次的绘制的起点12.Case mSelect.Eraser '用户在工具栏中选择的是橡皮13.Dim myPen As New Pen(Color.White, mWidth)'定义白色画笔作为擦除效果14. pend.X = e.X15. pend.Y = e.Y16. g.DrawLine(myPen, pstart, pend) '将已经绘制的终点作为下一次绘制的起点17. pstart = pend '将已经绘制的终点作为下一次绘制的起点18.End Select19.End If20.End Sub(11)为PictrueBox的Mouse的Click(鼠标单击)事件编写代码:1.Private Sub picPaint_Click(ByVal sender As System.Object, _2.ByVal e As System.EventArgs) Handles picPaint.Click3.If mChoice = mSelect.Icon Then4.'画图标5. g.DrawIcon(mIcon, pstart.X, pstart.Y)6.End If7.End Sub(12)为"新建"miNew的Click事件编写代码:1.Private Sub miNew_Click(ByVal sender As System.Object, _2.ByVal e As System.EventArgs) Handles miNew.Click3.4.Me.picPaint.Refresh()5.End Sub(13)为"退出"菜单miExit的Click事件编写代码:1.Private Sub miExit_Click(ByVal sender As System.Object, _2.ByVal e As System.EventArgs) Handles miExit.Click3. Application.Exit()4.End Sub(14)调试运行程序。