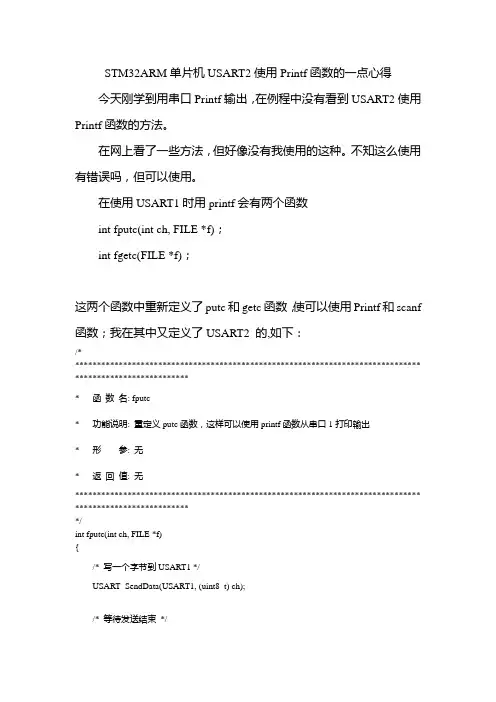
STM32使用printf发送数据配置方法--串口UART,JTAGSWO,JLINKRTT
- 格式:pdf
- 大小:2.00 MB
- 文档页数:6
STM32使⽤printf发送数据配置⽅法--串⼝UART,JTAGSWO,JLINKRTT
STM32串⼝通信中使⽤printf发送数据配置⽅法(开发环境 Keil RVMDK)
在STM32串⼝通信程序中使⽤printf发送数据,⾮常的⽅便。可在刚开始使⽤的时候总是遇到问题,常见的是硬件访真时⽆法进⼊main主函数,其实只要简单的配置⼀下就可以了。
下⾯就说⼀下使⽤printf需要做哪些配置。 有两种配置⽅法: ⼀、对⼯程属性进⾏配置,详细步骤如下
1、⾸先要在你的main ⽂件中 包含“stdio.h” (标准输⼊输出头⽂件)。
2、在main⽂件中重定义函数 如下:
// 发送数据
int
fputc(
int ch, FILE *f) {
USART_SendData(USART1, (unsigned
char
) ch);
// USART1 可以换成 USART2 等
while (!(USART1->SR & USART_FLAG_TXE));
return (ch); }
// 接收数据
int
GetKey (
void) {
while (!(USART1->SR & USART_FLAG_RXNE));
return
((
int
)(USART1->DR &
0x1FF)); }
这样在使⽤printf时就会调⽤⾃定义的fputc函数,来发送字符。
3、在⼯程属性的 “Target" -> "Code Generation" 选项中勾选 "Use MicroLIB"
MicroLIB 是缺省C的备份库,关于它可以到⽹上查找详细资料。
⼆、第⼆种⽅法是在⼯程中添加“Regtarge.c”⽂件
1、在main⽂件中包含 “stdio.h” ⽂件
2、在⼯程中创建⼀个⽂件保存为 Regtarge.c , 然后将其添加⼯程中在⽂件中输⼊如下内容(直接复制即可)#include #include
#pragma import(__use_no_semihosting_swi)
extern
int
SendChar(
int
ch);
// 声明外部函数,在main⽂件中定义
extern
int
GetKey(
void);
struct __FILE {
int
handle; // Add whatever you need here };FILE __stdout;FILE __stdin;
int
fputc(
int ch, FILE *f) {
return (SendChar(ch));}
int fgetc(FILE *f) {
return (SendChar(GetKey()));}
void
_ttywrch(
int ch) { SendChar (ch);}
int
ferror(FILE *f) { // Your implementation of ferror
return EOF;}
void
_sys_exit(
int return_code) {
label:
goto
label; // endless loop}
3、在main⽂件中添加定义以下两个函数
int
SendChar (
int ch) {
while
(!(USART1->SR & USART_FLAG_TXE));
// USART1 可换成你程序中通信的串⼝
USART1->DR = (ch &
0x1FF);
return (ch);}
int
GetKey (
void) {
while (!(USART1->SR & USART_FLAG_RXNE));
return
((
int
)(USART1->DR &
0x1FF));}
⾄此完成配置,可以在main⽂件中随意使⽤ printf 。
STM32程序添加printf函数后⽆法运⾏的解决⽅法(串⼝实验)
标准库函数的默认输出设备是显⽰器,要实现在串⼝或LCD输出,必须重定义标准库函数⾥调⽤的与输出设备相关的函数.
例如:printf输出到串⼝,需要将fputc⾥⾯的输出指向串⼝(重定向),⽅法如下:
只要⾃⼰添加⼀个int fputc(int ch, FILE *f)函数,能够输出字符就可以了
#ifdef __GNUC__/* With GCC/RAISONANCE, small printf (option LD Linker->Libraries->Small printf set to 'Yes') calls __io_putchar() */
#define PUTCHAR_PROTOTYPE int __io_putchar(int ch)#else
#define PUTCHAR_PROTOTYPE int fputc(int ch, FILE *f)
#endif /* __GNUC__ */PUTCHAR_PROTOTYPE{ /* Place your implementation of fputc here */ /* e.g. write a character to the USART */ USART_SendData(USART1, (uint8_t) ch); /* Loop until the end of transmission */
while (USART_GetFlagStatus(USART1, USART_FLAG_TC) == RESET);
return ch;}
因printf()之类的函数,使⽤了半主机模式。使⽤标准库会导致程序⽆法运⾏,以下是解决⽅法:
⽅法1.使⽤微库,因为使⽤微库的话,不会使⽤半主机模式.
⽅法2.仍然使⽤标准库,在主程序添加下⾯代码:
#pragma import(__use_no_semihosting)
_sys_exit(
int x) { x = x; }
struct __FILE {
int handle; }; FILE __stdout; IAR EWARM
General Options -- Library Configuration -- Library : Full < file descriptor support >#include #ifdef __GNUC__/* With GCC/RAISONANCE, small printf (option LD Linker->Libraries->Small printf set to 'Yes') calls __io_putchar() */
#define PUTCHAR_PROTOTYPE int __io_putchar(int ch)#else
#define
PUTCHAR_PROTOTYPE int fputc(int ch, FILE *f)
#endif /* __GNUC__ */PUTCHAR_PROTOTYPE{
/* Place your implementation of fputc here */
/* e.g. write a character to the USART */ USART_SendData(USART1, (uint8_t) ch);
/* Loop until the end of transmission */
while (USART_GetFlagStatus(USART1, USART_FLAG_TC) == RESET);
return ch;}
General Options -- Library Configuration -- Library : Normal < NO file descriptor support >#include size_t __write(int handle, const unsigned char * buffer, size_t size){ // byte by byte write
}size_t __dwrite(int handle, const unsigned char * buffer, size_t size){
// buffer[ 0x50 ]} Buffered Terminal Output : Enabledxxwritebuffered.c
#define STORE_SIZE 80
static
size_t storeLen =
0;
static
unsigned
char store[STORE_SIZE]; uint8_t store[ 0x50 ];uint32_t storelen;
printf() -->
__dwrite() : buffer[0x50] Buffered Terminal Output : Disabled
printf() -->
__write(), byte by byte ⾃定义输出缓冲区
#define LOG_MAX_STR_LEN 512
void
log_printf(
const
char * fmt, ... ){
char log_buf[ LOG_MAX_STR_LEN ]; va_list args; va_start( args, fmt );
int count = vsnprintf( log_buf, LOG_MAX_STR_LEN, fmt, args ); va_end( args ); // If an output error is encountered, a negative value is returned.
if ( count < 0 ) return; // "123456" [123456][0X] : count = 6, n = 8 // "1234567" [1234567][0] : count = 7, n = 8 // "12345678" [1234567][0] : count = 8, n = 8 // "123456789" [1234567][0] : count = 9, n = 8 if ( count >= LOG_MAX_STR_LEN ) count = LOG_MAX_STR_LEN - 1; // now log_buf is C string with the terminating null character __write(0, log_buf, count );}
log_printf --> __write()
, bufferred
stm32系列单⽚机之printf重定向在程序的调试过程中,除了那些⾼⼤上的调试⼿段外,printf⽆疑是我们最熟悉最顺⼿的调试⽅法。
通过使⽤printf,我们可以很⽅便很直观的获取当前程序的运⾏状态。
printf()函数是格式化输出函数, ⼀般⽤于向标准输出设备按规定格式输出信息。
但是在单⽚机开发中,⼀般情况下并不存在标准输出设备,因此我们需要将printf的输出信息重定向,也就是输出到其他输出设备中去。
在stm32平台上实现重定向的⽅式有两种,重定向⾄UART,或者通过JTAG的SW模式将printf重定向⾄SWO引脚输出。
⾸先介绍第⼀种,重定向⾄UART,这种⽅式我们⽐较熟悉,ST官⽅提供的固件库中也是使⽤的这种⽅法。代码如下:在对UART进⾏初始化后,通过如下代码对printf进⾏重定向int fputc(int ch, FILE *f){ USART_SendData(USART1, (uint8_t) ch); /* Loop until the end of transmission */
while (USART_GetFlagStatus(USART1, USART_FLAG_TC) == RESET)