瓦尔特刀盘型号说明
- 格式:pdf
- 大小:356.77 KB
- 文档页数:1


CNC刀柄标准加工中心的主轴锥孔通常分为两大类,即锥度为7:24的通用系统和1:10的HSK真空系统。
7:24锥度的通用刀柄锥度为7:24的通用刀柄通常有五种标准和规格,即NT(传统型)、DIN 69871(德国标准)、IS0 7388/1 (国际标准)、MAS BT(日本标准)以及ANSI/ASME(美国标准)。
NT型刀柄德国标准为DIN 2080,是在传统型机床上通过拉杆将刀柄拉紧,国内也称为ST;其它四种刀柄均是在加工中心上通过刀柄尾部的拉钉将刀柄拉紧。
目前国内使用最多的是DIN 69871型(即JT)和MAS BT 型两种刀柄。
DIN 69871型的刀柄可以安装在DIN 69871型和ANSI/ASME主轴锥孔的机床上, IS0 7388/1型的刀柄可以安装在DIN 69871型、IS0 7388/1 和ANSI/ASME主轴锥孔的机床上,所以就通用性而言,IS0 7388/1型的刀柄是最好的。
(1)DIN 2080型(简称 NT或ST)DIN 2080是德国标准,即国际标准ISO 2583 ,是我们通常所说NT型刀柄,不能用机床的机械手装刀而用手动装刀。
(2) DIN 69871 型(简称JT、 DIN、DAT或DV)DIN 69871 型分两种,即DIN 69871 A/AD型和DIN 69871 B型,前者是中心内冷,后者是法兰盘内冷,其它尺寸相同。
(3) ISO 7388/1 型(简称 IV或IT)其刀柄安装尺寸与DIN 69871 型没有区别,但由于ISO 7388/1 型刀柄的D4值小于DIN 69871 型刀柄的D4值,所以将ISO 7388/1型刀柄安装在DIN 69871型锥孔的机床上是没有问题的,但将DIN 69871 型刀柄安装在ISO 7388/1型机床上则有可能会发生干涉。
(4) MAS BT 型(简称 BT)BT型是日本标准,安装尺寸与 DIN 69871、IS0 7388/1 及ANSI 完全不同,不能换用。

Operating Instructions and Parts ManualArbor Press – ½-, 1-, 2-, 3-, 5-TonModel No. AP0-M, AP1-M, AP2-M, AP3-M, AP5-MWALTER MEIER (Manufacturing) Inc.427 New Sanford RoadLaVergne, Tennessee 37086 Part No. M-333605M Ph.: 800-274-6848 Revision A 05/2011 Copyright © 2011 Walter Meier (Manufacturing) Inc.Warranty and ServiceWalter Meier (Manufacturing) Inc., warrants every product it sells. If one of our tools needs service or repair, one of our Authorized Service Centers located throughout the United States can give you quick service. In most cases, any of these Walter Meier Authorized Service Centers can authorize warranty repair, assist you in obtaining parts, or perform routine maintenance and major repair on your JET® tools. For the name of an Authorized Service Center in your area call 1-800-274-6848.MORE INFORMATIONWalter Meier is consistently adding new products to the line. For complete, up-to-date product information, check with your local Walter Meier distributor, or visit .WARRANTYJET products carry a limited warranty which varies in duration based upon the product (MW = Metalworking, WW = Woodworking).WHAT IS COVERED?This warranty covers any defects in workmanship or materials subject to the exceptions stated below. Cutting tools, abrasives and other consumables are excluded from warranty coverage.WHO IS COVERED?This warranty covers only the initial purchaser of the product.WHAT IS THE PERIOD OF COVERAGE?The general JET warranty lasts for the time period specified in the product literature of each product.WHAT IS NOT COVERED?Five Year Warranties do not cover woodworking (WW) products used for commercial, industrial or educational purposes. Woodworking products with Five Year Warranties that are used for commercial, industrial or education purposes revert to a One Year Warranty. This warranty does not cover defects due directly or indirectly to misuse, abuse, negligence or accidents, normal wear-and-tear, improper repair or alterations, or lack of maintenance.HOW TO GET SERVICEThe product or part must be returned for examination, postage prepaid, to a location designated by us. For the name of the location nearest you, please call 1-800-274-6848.You must provide proof of initial purchase date and an explanation of the complaint must accompany the merchandise. If our inspection discloses a defect, we will repair or replace the product, or refund the purchase price, at our option. We will return the repaired product or replacement at our expense unless it is determined by us that there is no defect, or that the defect resulted from causes not within the scope of our warranty in which case we will, at your direction, dispose of or return the product. In the event you choose to have the product returned, you will be responsible for the shipping and handling costs of the return.HOW STATE LAW APPLIESThis warranty gives you specific legal rights; you may also have other rights which vary from state to state.LIMITATIONS ON THIS WARRANTYWALTER MEIER (MANUFACTURING) INC., LIMITS ALL IMPLIED WARRANTIES TO THE PERIOD OF THE LIMITED WARRANTY FOR EACH PRODUCT. EXCEPT AS STATED HEREIN, ANY IMPLIED WARRANTIES OR MERCHANTABILITY AND FITNESS ARE EXCLUDED. SOME STATES DO NOT ALLOW LIMITATIONS ON HOW LONG THE IMPLIED WARRANTY LASTS, SO THE ABOVE LIMITATION MAY NOT APPLY TO YOU.WALTER MEIER SHALL IN NO EVENT BE LIABLE FOR DEATH, INJURIES TO PERSONS OR PROPERTY, OR FOR INCIDENTAL, CONTINGENT, SPECIAL, OR CONSEQUENTIAL DAMAGES ARISING FROM THE USE OF OUR PRODUCTS. SOME STATES DO NOT ALLOW THE EXCLUSION OR LIMITATION OF INCIDENTAL OR CONSEQUENTIAL DAMAGES, SO THE ABOVE LIMITATION OR EXCLUSION MAY NOT APPLY TO YOU.Walter Meier sells through distributors only. The specifications in Walter Meier catalogs are given as general information and are not binding. Members of Walter Meier reserve the right to effect at any time, without prior notice, those alterations to parts, fittings, and accessory equipment which they may deem necessary for any reason whatsoever. JET® branded products are not sold in Canada by Walter Meier.Table of ContentsWarranty and Service (2)Table of Contents (3)Warnings (4)Introduction (5)Specifications (5)Arbor Press Features (6)Set-up and Operation (6)Changing Ram Position (6)Maintenance (6)Parts Lists (7)Exploded View (8)The specifications in this manual are given as general information and are not binding. Walter Meier (Manufacturing) Inc., reserves the right to effect, at any time and without prior notice, changes or alterations to parts, fittings, and accessory equipment deemed necessary for any reason whatsoever.1. Read and understand the entire owners' manual before attempting assembly or operation.2. Read and understand the warnings posted on the machine and in this manual. Failure to comply withall of these warnings may cause serious injury.3. Replace the warning labels if they become obscured or removed.4. This arbor press is designed and intended for use by properly trained and experienced personnelonly. If you are not familiar with the proper and safe operation of an arbor press, do not use until proper training and knowledge have been obtained.5. Do not use this arbor press for other than its intended use. If used for other purposes, Walter Meier(Manufacturing) Inc., disclaims any real or implied warranty and holds itself harmless from any injury that may result from that use.6. Always wear approved safety glasses/face shields while using this arbor press. Everyday eyeglassesonly have impact resistant lenses; they are not safety glasses.7. Do not operate this arbor press while tired or under the influence of drugs, alcohol or any medication.8. Make sure this arbor press is firmly secured to the floor or bench before use.9. Check damaged parts. Before further use of the arbor press, a part that is damaged should becarefully checked to determine that it will operate properly and perform its intended function. Check for alignment of moving parts, binding of moving parts, breakage of parts, mounting and any other conditions that may affect its operation. A guard or other part that is damaged should be properly repaired or replaced.10. Provide for adequate space surrounding work area and non-glare, overhead lighting.11. Keep the floor around the arbor press clean and free of scrap material, oil and grease.12. Keep visitors a safe distance from the work area. Keep children away.13. Make your workshop child proof with padlocks, master switches or by removing starter keys.14. Give your work undivided attention. Looking around, carrying on a conversation and “horse-play” arecareless acts that can result in serious injury.15. Maintain a balanced stance at all times so that you do not fall into the arbor press. Do not overreachor use excessive force to perform any machine operation.16. Use recommended accessories; improper accessories may be hazardous.17. Make sure the work piece is securely attached or clamped to the table.18. Remove loose items and unnecessary work pieces from the area before starting the machine.19. Do not overload the arbor press by using extension (cheater) bars.20. Use steel collars to support parts when pressing on bearings to prevent damage to the bearings. Familiarize yourself with the following safety notices used in this manual:This means that if precautions are not heeded, it may result in minor injury and/or possible machine damage.This means that if precautions are not heeded, it may result in serious injury or possibly even death.IntroductionThe arbor press is designed for riveting, swaging, bending, punching, and flattening. The arbor press can be used to press on or remove close-fitting bearings and bushings. It is suited for the production environment as well as machine shops, automobile repair shops, and home workshops.The anvil has four slots that are available for a variety of pressing operations.SpecificationsStock# ............................... 333605............... 333610............... 333620............... 333630 (333650)Model# ............................... AP0-M................ AP1-M................ AP2-M................ AP3-M................ AP5-M Capacity .............................. ½Ton.................. 1 Ton.................. 2 Ton.................. 3 Ton................... 5Ton Dimensions:Length ................................... 9”......................11”......................16”................18-1/8”................ 26-1/8” Width .............................. 5-1/2””................. 7-1/2”................. 9-1/2”......................11”................ 12-3/4” Height ............. ....................11”................. 8-3/4”................17-1/8”................20-1/2”................ 34-5/8” Max Working Height ........ 4-3/4”................. 5-7/8”....................... 9”................12-1/2”................ 18-1/6” Swing .............................. 6-5/8”....................... 8”................11-3/8”................10-3/4”...................... 17” Anvil Diameter ....................... 4”....................... 5”................. 7-3/8”................11-3/8”...................... 18” Ram Dimension ............ 3/4” Sq.................. 1” Sq.................. 1” Sq.................. 1” Sq................... 2” Sq. Net Weight ................... 16-1/2 lbs........... 24-1/4 lbs................. 64 lbs............... 105 lbs................ 248 lbs. The above specifications were current at the time this manual was published, but because of our policy of continuous improvement, Walter Meier (Manufacturing) Inc., reserves the right to change specifications at any time and without prior notice, without incurring obligations.Read and understand the entire contents of this manual before attempting assembly or operation! Failure to comply may cause serious injury!Arbor Press FeaturesThe arbor press (see Exploded view on page 8) consists of a cast iron base, an anvil, a pressing handle with lock knob, and a rack-type ram.The removable anvil has four cutouts that can be used for pressing off or pressing on bearings or bushings of various sizes.Set-up and OperationNote: The item numbers provided in the procedures that follow correspond with the item numbers in the exploded view in the Replacement Parts section, see page 8.Do not use the arbor press without first securing the arbor press to the workbench and anchoring the workbench to the floor.Mount the arbor press to the workbench or stand and secure with bolts using the holes in the base (1). Also, secure the workbench or stand to the floor..Changing Ram PositionThe ram has a flat surface on one end and a hole on the other end. The hole is used to accept the punch inserts. Change-out the ram as follows:A. Remove the handle by loosening the knob(17). Then remove one cap (5) from thehandle assembly. Remove handle (6) from the pinion (16).B. Remove the pinion retainer (14) by backingoff the Set Screw (13). Now slide the pinion retainer (14) off of the pinion (16).C. Pull up on the ram (4) enough to provideslack to remove the pinion (16) from the arbor press.D. Pull the ram (4) out the top of the arborpress body. Turn the ram (4) end-for-end.Hint: if ram does not freely come out of arbor press body loosening the two hex nuts (11) on side of arbor press body and the two hex nuts (11) on the front plate (12).E. Repeat steps A – D in reverse.MaintenanceA. Periodically lubricate the arbor press with alight machine oil.B. Wipe off or vacuum the accumulated debrisand dust after using the arbor press.C. Periodically check the ram for side-to-side andfront-to-back play. If the play is excessive, loosen the hex nuts (11) and adjust (tighten) the screws (10 on side, 9 in front) just enough to eliminate the excess play. Tighten them equally to assure even contact with the ram(4).D. Once the play is eliminated, hold the screw(10 or 9) in position and tighten the hex nut(11). Check to make sure the amount of playis acceptable.Parts ListsModel AP0-M – 1/2-ton Arbor PressIndex Part No. Description Qty1 .......... A P0-01 ............. B ase .. (1)2 .......... A P0-06 ............. A nvil (1)3 .......... A P0-16 ............. S pring Pin 6x16 . (1)4 .......... A P0-02 ............. R am (1)5 .......... A P0-5-1............ C ap . (2)6 .......... A P0-6-1............ H andle .. (1)7 .......... T S-1482051 ..... B olt, Hex M6x25 (4)8 .......... T S-1550041 ..... W asher M6.. (4)9 .......... T S-1482051 ..... B olt, Hex M6x25 (2)10 ........ T S-1482061 ..... B olt, Hex M6x30 (2)11 ........ T S-1540041 ..... N ut, Hex M6 (4)12 ........ A P0-12 ............. P late .. (1)13 ........ T S-1523011 ..... S HSS M6x6 (1)14 ........ A P0-10 ............. P inion Retainer.. (1)15 ........ T S-1482021 ..... B olt, Hex M6x12 (1)16 ........ A P0-03 ............. P inion . (1)17 ........ A P0-05 ............. K nob .. (1)18 ........ T S-2361061 ..... L ock Washer M6 .. (4)............ A P0-19 ............. I D Label (not shown) .. 1 Model AP1-M – 1-ton Arbor PressIndex Part No. Description Qty1 .......... A P1-01 ............. B ase .. (1)2 .......... A P1-06 ............. A nvil (1)3 .......... A P0-16 ............. S pring Pin 6x16 . (1)4 .......... A P1-02 ............. R am (1)5 .......... A P1-5-1............ C ap . (2)6 .......... A P1-6-1............ H andle .. (1)7 .......... T S-1482051 ..... B olt, Hex M6x25 (4)8 .......... T S-1550041 ..... W asher M6.. (4)9 .......... T S-1482051 ..... B olt, Hex M6x25 (2)10 ........ T S-1482061 ..... B olt, Hex M6x30 (2)11 ........ T S-1540041 ..... N ut, Hex M6 (4)12 ........ A P1-12 ............. P late .. (1)13 ........ T S-1523011 ..... S HSS M6x6 (1)14 ........ A P1-10 ............. P inion Retainer.. (1)15 ........ T S-1482021 ..... B olt, Hex M6x12 (1)16 ........ A P1-03 ............. P inion . (1)17 ........ A P1-05 ............. K nob .. (1)18 ........ T S-2361061 ..... L ock Washer M6 .. (4)............ A P1-19 ............. I D Label (not shown) .. 1 Model AP2-M – 2-ton Arbor PressIndex Part No. Description Qty1 .......... A P2-01 ............. B ase .. (1)2 .......... A P2-06 ............. A nvil (1)3 .......... A P2-16 ............. S pring Pin 6x25 . (1)4 .......... A P2-02 ............. R am (1)5 .......... A P2-5-1............ C ap . (2)6 .......... A P2-6-1............ H andle .. (1)7 .......... T S-1490051 ..... B olt, Hex M8x30 (4)8 .......... T S-1550061 ..... W asher M8................. 4 9 ..........TS-1490051 .....Bolt, Hex M8x30 (2)10 ........TS-1490051 .....Bolt, Hex M8x30 (2)11 ........TS-1540061 .....Nut, Hex M8 (4)12 ........AP2-12 .............Plate (1)13 ........TS-1523011 .....SHSS M6x6 . (1)14 ........AP2-10 .............Pinion Retainer .. (1)15 ........TS-1490021 .....Bolt, Hex M8x16 (1)16 ........AP2-03 .............Pinion . (1)17 ........AP2-05 .............Knob .. (1)18 ........TS-2361081 .....Lock Washer M8 .. (4)............AP2-19 .............ID Label (not shown) (1)Model AP3-M – 3-ton Arbor PressIndex Part No. Description Qty1 ..........AP3-01 .............Base (1)2 ..........AP3-06 .............Anvil (1)3 ..........AP2-16 .............Spring Pin 6x25 . (1)4 ..........AP3-02 .............Ram (1)5 ..........AP3-5-1 ............Cap . (2)6 ..........AP3-6-1 ............Handle (1)7 ..........TS-1490051 .....Bolt, Hex M8x30 (4)8 ..........TS-1550061 .....Washer M8 .. (4)9 ..........TS-1490051 .....Bolt, Hex M8x30 (2)10 ........TS-1490051 .....Bolt, Hex M8x30 (2)11 ........TS-1540061 .....Nut, Hex M8 (4)12 ........AP3-12 .............Plate (1)13 ........TS-1524011 .....SHSS M8x8 . (1)14 ........AP3-10 .............Pinion Retainer .. (1)15 ........TS-1490031 .....Bolt, Hex M8x20 (1)16 ........AP3-03 .............Pinion . (1)17 ........AP3-05 .............Knob .. (1)18 ........TS-2361081 .....Lock Washer M8 .. (4)............AP3-19 .............ID Label (not shown) (1)Model AP5-M – 5-ton Arbor PressIndex Part No. Description Qty1 ..........AP5-01 .............Base (1)2 ..........AP5-06 .............Anvil (1)3 ..........AP5-16 .............Spring Pin 6x24 . (1)4 ..........AP5-02 .............Ram (1)5 ..........AP5-5-1 ............Cap . (2)6 ..........AP5-6-1 ............Handle (1)7 ..........TS-1491061 .....Bolt, Hex M10x40 . (4)8 ..........TS-1550071 .....Washer M10 (4)9 ..........TS-1491061 .....Bolt, Hex M10x40 . (2)10 ........TS-2210501 .....Bolt, Hex M10x50 . (2)11 ........TS-1540071 .....Nut, Hex M10 . (4)12 ........AP5-12 .............Plate (1)13 ........TS-1524031 .....SHSS M8x12 .. (1)14 ........AP5-10 .............Pinion Retainer .. (1)16 ........AP5-03 .............Pinion . (1)18 ........TS-2361101 .....Lock Washer M10. (4)............AP5-19 .............ID Label (not shown) (1)Exploded ViewWALTER MEIER (Manufacturing) Inc.427 New Sanford RoadLaVergne, Tennessee 37086Ph: 800-274-6848。


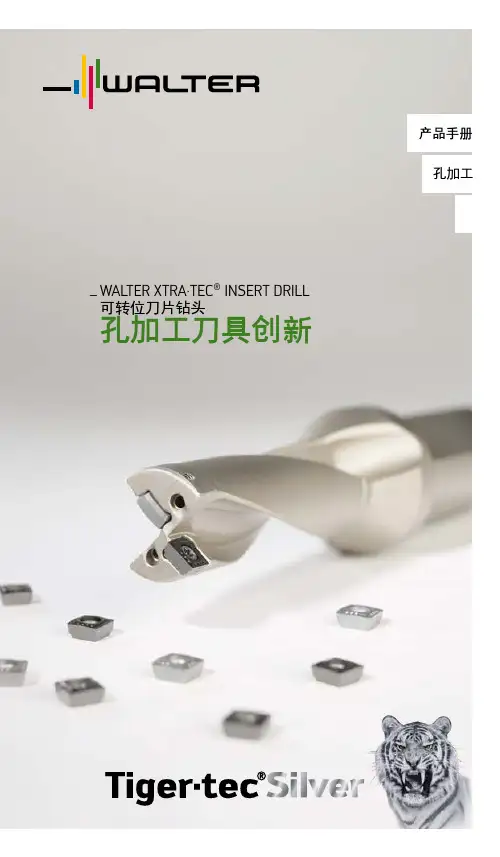
_ W ALTER XTRA·TEC ® INSERT DRILL 可转位刀片钻头孔加工刀具创新产品手册孔加工WALTER TIGER-TEC® SILVER 银虎刀片技术—切削领域内的全新技术2瓦尔特 (Walter) Xtra·tec ® Insert Drill 可转位刀片钻头: 非常精确、高效、经济刀具– 带四刃刀片的钻头– 直径范围 13.5–59 mm – 有效齿数 Z = 1– 钻深:2 x D 、3 x D 、4 x D 和 5 x D – 刀片的理想位置使加工时的受力 平衡均匀– 优化的排屑槽,可以使切屑顺畅 排出,并保证刀杆的稳定性– 硬质镀镍表面提供防腐和防磨损 保护,以及使切屑更好地排出– TorxPlus 螺钉更方便操作, 并提高了夹紧和松开扭矩– 圆柱形连接环使刀具直径的测量 简单方便Xtra·tec ® Insert Drill 可转位刀片钻头应用– 用于所有钢和铸铁材料以及不锈钢和难加工材料– 可在斜面或不平的表面进行孔加工以及链式钻孔– 非常适合于通用机械制造、汽车和批量生产行业以及航空和航天工业最优的刀片布置,有利于加工过程中的 力平衡镀镍的螺旋排屑槽 使排屑流畅顺利Xtra·tec ® Insert Drill 可转位刀片钻头 3客户收益:– 允许提高加工参数,从而提高生产效率– 优化了加工时的切削力,从而使孔加工公差更小– 降低成本:• 真正的 4 切削刃 • 较高的切削参数 • 节省了额外的工序– 通过钻孔直径上的 Wiper 修光刃 可获得优秀的表面质量– 使用正型夹紧刀片,具有更高的 工艺可靠性型号:B4212、B4213、B4214、B42154瓦尔特 (Walter) Xtra·tec ® Insert Drill 可转位刀片钻头: 高效的刀夹式解决方案刀具– 四刃刀片的钻头– 有效齿数 Z = 1– 刀夹式设计 (1 个中心 + 1 个周边)– 直径范围 59–120 mm (标准品至 80 mm)– 直径可调节,公称直径 +0.6 mm – 钻深 1 x D c 至 5 x D c (标准品 3 x D c )– 可提供瓦尔特 NCT 接口的模块化 钻头– 刀片的理想位置使加工时的受力 平衡均匀– 硬质镀镍表面提供防腐和防磨损 保护,以及使切屑更好地排出– TorxPlus 螺钉更方便操作, 并提高了夹紧和松开扭矩– 圆柱形连接环使刀具直径的测量 简单方便应用– 用于所有钢和铸铁材料以及不锈钢和难加工材料– 可在斜面或不平的表面进行孔加工以及链式钻孔– 非常适合于通用机械制造、汽车和批量生产工业以及航空和航天工业客户收益:– 允许提高加工参数,从而提高生产效率– 瓦尔特 (Walter) 模块化系统提高了灵活性– 降低成本:• 真正的 4 切削刃 • 较高的切削参数 • 刀夹结构方式– 通过钻孔直径上的 Wiper 修光刃 可获得优秀的表面质量– 使用正型夹紧刀片,具有更高的 工艺可靠性WALTER XPRESS 瓦尔特速致– 瓦尔特速致适用于直径范围59–120 mm 、长度至 5 x D c 的刀具– 提供的标准刀夹 (见产品信息) 完整地涵盖了该范围– 模块化结构形式可以缩短交货期– NCT 接口确保模块化刀具结构以及 刀柄可安装到几乎所有机床主轴中刀夹:FR743C-6刀夹:FR746P-6刀夹:FR744P-6Xtra·tec ® Insert Drill 可转位刀片钻头通过可径向调节的 外刀夹进行公差补偿采用刀夹结构方式, 磨损件更换简单镀镍的螺旋排屑槽 使排屑流畅顺利用于模块化结构的 Walter NCT 接口Xtra·tec ® Insert Drill 可转位刀片钻头 5刀具名称:B4212-5898410可转位刀片:P4840P-3R-E57 / P4841C-3R-E57切削材质:WKP25S / WKP35S直径:23.7 mm工件名称:连杆材料:C70钻孔深度:30 mm切削参数:原有刀具银虎刀片技术Tiger·tec®Silverv c210 m/min210 m/min n2820 rpm2820 rpmf z0.08 mm/转0.08 mm/转v f226 mm/min226 mm/min Z11刀具寿命2500 个零件4500 个零件客户收益:– 刀具寿命从 2500 件提高到 4500 件– 实现更高的加工参数和工艺可靠性– 更好的表面质量6刀具名称:B4214.F40.40.Z1.160R-6可转位刀片:P4848P-6R-E57 / P4841C-6R-E57切削材质:WKP35S / WXP40直径:40 mm工件名称:弹性连接件材料: 1.72钻孔深度:148 mm切削参数:原有刀具银虎刀片技术Tiger·tec®Silverv c220 m/min163 m/minn1751 rpm1297 rpmf z0.05 mm/转0.15 mm/转v f88 mm/min195 mm/minZ11加工时间101 秒46 秒刀具寿命2368 个零件7104 个零件客户收益:– 刀具寿命提升达 + 200%– 生产效率提升达 + 120%– 释放了机床能力Xtra·tec® Insert Drill 可转位刀片钻头 7应用示例 3:加工连杆刀具名称:B4212-5642880可转位刀片:P4841P-5R-E57 / P4841C-5R-E57切削材质:WKP25S / WKP35S直径:31.5 mm工件名称:连杆材料:36MnVS4钻孔深度:20 mm切削参数:原有刀具银虎刀片技术Tiger·tec®Silverv c120 m/min140 m/min n1200 rpm1400 rpmf z0.21 mm/转0.18 mm/转v f250 mm/min250 mm/min Z11刀具寿命800 个零件3600 个零件客户收益:– 刀具寿命从 800 件提高到 3600 件– 无振动– 更好的表面质量– 实现更高的加工参数和工艺可靠性8应用示例 4:加工离合器盖刀具名称:B4212-5538329可转位刀片:P4840P-3R-A57 / P4841C-3R-A57切削材质:WKP35S / WXP40直径:22 mm工件名称:离合器盖材料:GGG-40钻孔深度:15 mm切削参数:原有刀具银虎刀片技术 Tiger·tec ®Silver v c 120 m/min 130 m/min n 1737 rpm 1880 rpm f z 0.1 mm/转0.12 mm/转v f 174 mm/min 226 mm/min Z11加工时间5 秒4 秒客户收益:– 在保证相同刀具寿命的情况下生产效率提高 + 20%– 刀具寿命相同– 无振动– 实现更高的加工参数和工艺可靠性瓦尔特 (Walter) Xtra·tec ® Insert Drill 可转位刀片钻头: 非常精确、高效、经济周边刀片– 钻孔直径上可选择烧结的刀片, 为圆角形刀尖– 钻孔直径上也可选择磨削的刀片,刃口为修光刃设计,可实现非常好的表面质量– 银虎刀片技术 Tiger·tec ® Silver :这种切削材质带来最高切削速度和最大工艺可靠性中心刀片– 银虎刀片技术 Tiger·tec ® Silver :这种切削材质在加工 ISO P 和 ISO K 类工件材料时具有更长寿命和最大工艺可靠性– 新品:新 PVD 切削材质 WXP40 在 ISO P 、ISO M 和 ISO S 材料钻孔时 实现更长刀具寿命– 专门为中心刀片的要求而设计A 57 — 稳定型– 0° 前角– 用于不利的加工条件,主要用于铸铁和钢件E 57 — 通用型– 13° 前角– 用于中等加工条件– 用于铸铁和钢, 也用于不锈钢和 难加工材料切削刃标记切削刃口带 0° 加强型倒棱锋利的断屑槽型四周磨削E 67 — 专用型– 13° 前角– 特殊槽型确保最优的切屑成型– 适用于长切屑材料,例如 St37、不锈钢以及难加工的材料和铝不同的槽型步骤 1从瓦尔特综合样本第 H 8 页起的 材料表中找到要加工的材料。

目錄1.圓盤式刀庫性能規格表……………………………………12.使用前注意事項 (2)3.圓盤刀庫外形圖 (3)4.圓盤刀庫組合圖及零部件列表 (4)5.圓盤式刀庫換刀動作說明 (8)6.換刀動作時序圖 (17)7.換刀電器動作時序圖 (18)8.刀庫換刀保護程式注意事項 (19)9.ATC凸輪換刀機構 (20)10.刀庫用電接線圖 (25)11.圓盤刀庫氣路回路圖 (30)12.潤滑油 (31)13.圓盤式刀庫故障與處理方法 (32)刀庫性能規格表BT40ROTARY DISC TYPE TOOL MAGAZINE NO.項目規格1刀具最大直徑(mm)Φ782鄰空刀(mm)Φ1203刀具最大長度(mm)3004刀具最大允許重量(kg)85刀套與刀套移動時間(sec/pet)0.66刀套容許數16□20□24□7ATC交換時間(sec)1.36/50Hz□ 1.55/50Hz□1.75/50Hz□ 2.33/50Hz□8刀套間距(mm)80.93□96.99□9換刀角度30°□65°□70°□75°□90°□10刀柄標準MAS403BT4011拉釘標準MAS403P40T-112刀庫運轉動力源AC380V/220V50Hz1/4HP DC90V 13ATC運轉動力源AC380V/220V50Hz3/4HP DC90V 14近接開關(刀盤旋轉\計數\選刀)DC24V PM12-02P NO15近接開關(ATC煞車,原點,抓刀)DC24V E2E-CR8B1NO16倒刀用磁簧開關(水平,垂直)DC24V17倒刀氣缸外接PU軟管(mm)Φ1018刀號銘牌貼示方向逆時針方向19氣源壓力(MPa)0.5-0.620刀臂旋徑(mm)Φ480□Φ500□Φ530□Φ580□Φ650□21電磁閥電壓DC24V□AC110V□22ATC速比1:7□1:8□1:9□1:12□1使用前注意事項1.檢查換刀機構油位爲了確保換刀機構運轉順暢,必須每月定期檢查油位是否在正確狀態,油鏡在換刀機構前方,正常油位在靠近油鏡中心紅點上下附近,最低油位不可低於油鏡可見範圍。
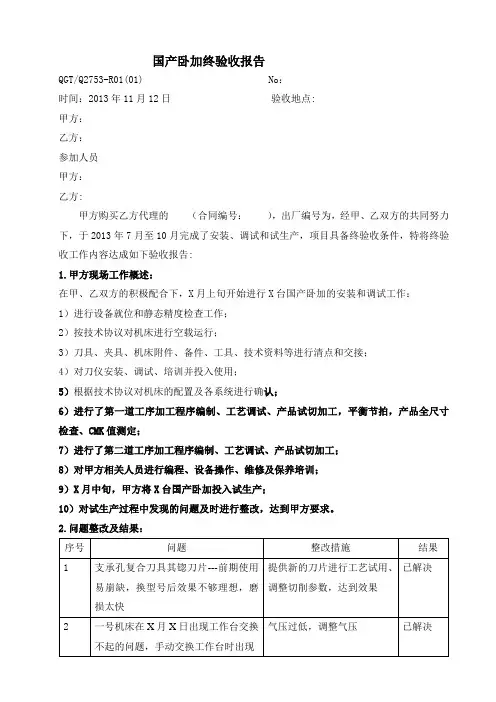
国产卧加终验收报告QGT/Q2753-R01(01) No:时间:2013年11月12日验收地点:甲方:乙方:参加人员甲方:乙方:甲方购买乙方代理的(合同编号:),出厂编号为,经甲、乙双方的共同努力下,于2013年7月至10月完成了安装、调试和试生产,项目具备终验收条件,特将终验收工作内容达成如下验收报告:1.甲方现场工作概述:在甲、乙双方的积极配合下,X月上旬开始进行X台国产卧加的安装和调试工作:1)进行设备就位和静态精度检查工作;2)按技术协议对机床进行空载运行;3)刀具、夹具、机床附件、备件、工具、技术资料等进行清点和交接;4)对刀仪安装、调试、培训并投入使用;5)根据技术协议对机床的配置及各系统进行确认;6)进行了第一道工序加工程序编制、工艺调试、产品试切加工,平衡节拍,产品全尺寸检查、CMK值测定;7)进行了第二道工序加工程序编制、工艺调试、产品试切加工;8)对甲方相关人员进行编程、设备操作、维修及保养培训;9)X月中旬,甲方将X台国产卧加投入试生产;10)对试生产过程中发现的问题及时进行整改,达到甲方要求。
2.问题整改及结果:3.项目验收记录表验收工作项目和记录见下表:4.遗留问题以下遗留问题,是在国产卧加上进行第二序加工内容时发现的问题和处置方法:5.遗留问题处置要求遗留问题处置要求见上表,待甲方进口卧加补充到位后,乙方负责第二序加工内容的工艺调试,保证刀具、夹具和工艺达到甲方要求。
6.结论国产卧加(合同编号:)通过终验收。
7.本报告末尽事宜,按技术协议和商务合同执行。
8.本报告一式肆份,甲乙双方签章(字)生效,各执两份,并与合同书具有同等法律效力。
XXX公司 XXX公司代表:代表:年月日年月日。
瓦尔特丝锥硬度等级解读1. 引言瓦尔特丝锥硬度等级是用来描述刚性和耐磨性的一种指标,广泛应用于金属材料的评估和选择中。
本文将深入探讨瓦尔特丝锥硬度等级的意义和解读,并分享我的观点和理解。
2. 什么是瓦尔特丝锥硬度等级瓦尔特丝锥硬度等级是根据瓦尔特硬度计(Walter Hardness Tester)所进行的硬度测试而得出的。
它是通过比较测试材料受力后的塑性变形程度来确定的。
瓦尔特硬度计利用一根锥形钻头施加力量,在一定时间内穿透材料表面形成的坑的尺寸来测量硬度。
3. 瓦尔特丝锥硬度等级的意义瓦尔特丝锥硬度等级可以帮助我们了解金属材料的硬度和耐磨性。
它们提供了一个标准化的评估方法,以便在材料选择、工艺设计以及质量控制等方面做出准确的决策。
硬度等级越高,代表着材料越坚硬,相应地具有更好的耐磨性和抗变形能力。
4. 瓦尔特丝锥硬度等级的解读瓦尔特丝锥硬度等级按照从低到高的顺序分为10个等级,分别为K0-K9。
在解读瓦尔特丝锥硬度等级时,我们应该注意以下几个方面:4.1 硬度等级越高,材料越坚硬。
K0代表最低硬度,K9代表最高硬度。
在材料选择过程中,我们需要根据具体应用的需求来选择适当的硬度等级。
4.2 硬度等级的变化带来的效果。
随着硬度等级的升高,材料的耐磨性和抗变形能力也会提高。
对于需要承受高压和高摩擦力的工作环境,选择高硬度等级的材料会更加合适。
4.3 硬度等级对加工和热处理的影响。
高硬度等级的材料往往更难加工,并且在热处理时也需要更高的温度。
在工艺设计中要注意硬度等级对加工和热处理工艺的要求。
5. 我的观点和理解瓦尔特丝锥硬度等级是材料硬度和耐磨性评估的重要指标之一。
在选择材料时,合理的硬度等级选择可以确保材料在不同工作环境下的稳定性和性能。
硬度等级也会影响材料的加工和热处理工艺。
在实际应用中,需综合考虑工作环境条件、材料性能需求以及加工工艺等因素,选择适当的瓦尔特丝锥硬度等级。
总结:瓦尔特丝锥硬度等级是描述材料硬度和耐磨性的重要指标。
日本标准拉钉Pull Stud Type of Japan 日本JIS B 6339-1998拉钉型号D D1D2D3L L1L2重量(kg)30P M12 12.5 12 16.5 43 23.4 18.4 0.04 40P M16 17 19 23 54 29 23 0.07 50P M24 25 28 38 74 34 25 0.25 60P M30 31 36 48 98 48 36 0.52Pull Stud Type of Japan 日本MAS 403 BT拉钉型号 D D1D2D3L L1L2重量(kg)L40Ⅰ/ⅡM16 17 15 23 60 35 28 0.07 L50Ⅰ/ⅡM24 25 23 38 85 45 35 0.25 L60Ⅰ/ⅡM30 31 32 56 115 65 53 0.52数控刀具常用工具锥柄标准简介国家标准GB 10945-89“自动换刀机床用7:24圆锥工具柄部40、45和50号圆锥柄用拉钉”是参照国际标准ISO 7388/2-1984制订的,外形尺寸相同,分为A型和B型两种:A型拉钉的拉紧面斜角为15°,用于不带钢球的拉紧装置,代号为“LDA”;B型拉钉的拉紧面斜角为45°,用于带钢球的拉紧装置,代号为“LDB”。
二者均带贯通孔,用于冷却液流通。
德国标准DIN 6988-1987的拉钉有A型和B型两种,A型带贯通孔;B型不带贯通孔,但有密封圈用环形槽,以防止冷却液从尾部泄漏。
两种拉钉的拉紧面斜角均为15°,用于不带钢球的拉紧装置。
日本标准JIS B 6339:1998的拉钉只有一种型式,拉钉的拉紧面斜角为15°,用于不带钢球的拉紧装置,代号为“xxP”。
日本工作机械工业会标准MAS -403的拉钉则有Ⅰ型和Ⅱ型两种:Ⅰ型拉钉的拉紧面斜角为30°,用于不带钢球的拉紧装置;Ⅱ型拉钉的拉紧面斜角为45°,用于带钢球的拉紧装置。
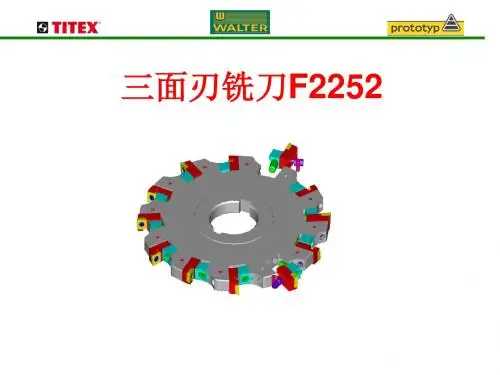
活性炭知识活性炭知识强力、精确、可靠是Walter BLAXX (黑锋侠) 铣刀刀片系列的成功要领。
凭借面铣刀F2010 的刀夹,瓦尔特将高性能切向可转位刀片也应用在可调面铣刀上。
新刀夹FR751M 和FR752M 体现了瓦尔特成熟技术与切削加工最新发展技术的结合。
进入市场一年半以来,Walter BLAXX (黑锋侠) 铣刀刀片系列与方肩铣刀、玉米铣刀和锯片铣刀相配合,充分证明了自己的实力。
而轴向可调整的面铣刀F2010 现在成为瓦尔特的又一款经典产品。
其最大的优势在于:刀夹式结构可确保刀具总是采用最新的切削技术。
刀体不变,刀夹和刀片底座能够轻而易举地更换。
切向可转位刀片(LNHU) 和Tiger tec Silver (银虎) 切削材料技术构成了Walter BLAXX (黑锋侠) 的核心。
进给率可提高30%。
此外,精密磨削的可转位刀片和高精刀体使得刀具具有很高的精度。
有了Walter BLAXX (黑锋侠),往往不再需要额外的精加工刀具:瓦尔特客户现在在进行面铣时也能体会到所有这些优点。
随着单级高速鼓风机的齿轮箱和高速叶轮及稀油站等部件试装运转实验的成功,现场人员无不欢欣鼓舞。
这意味着大通宝富在新产品市场拓展上又迈出坚实一步。
单级高速鼓风机是污水处理、发电厂等行业的节能先锋产品,其转速达转/小时,其加工精度以丝为单位计算(1丝=0.01毫米),大部分市场为西门子、日本川崎等企业所主导。
大通宝富根据用户需求独立研发,与外部优秀供应商充分交流合作,攻克重重技术难关和天气寒冷等不利因素,发挥连续作战的作风,通过连续48小时的调试,使出厂实验一次性成功,为公司单级高速鼓风机市场推广及技术参数的确定奠定坚实的基础。
燃煤烟气中的二氧化硫是大气污染的主要成因,随着人们对大气污染关注程度的增加,减少二氧化硫污染已成为当今大气治理的当务之急。
氧化风机是电站烟气脱硫净化处理过程中不可缺少的设备,大通宝富生产的单级高速离心鼓风机主要用于烟气脱硫工艺,对各类锅炉和焚烧炉尾气的治理也具有重要作用,而且完善了公司单级高速系列化型谱,为进入电厂脱硫等单级高速鼓风机应用领域积累经验,也为小型压缩机的开发奠定了基础。
Valtek SafeGuardGENERAL INFORMATIONThe following instructions are designed to assist in unpacking, installing and performing maintenance as required on Valtek SafeGuard TM and Valtek SureGuard TM fugitive emissions packing sets for Valtek® control valves. Product users and maintenance personnel should thor-oughly review this bulletin prior to working on the valve. Separate maintenance instructions cover control valves, actuators and positioners.To avoid possible injury to personnel or dam-age to valve parts, WARNING and CAUTION notes must be strictly adhered to. Modifying this product, substituting nonfactory parts, or using maintenance procedures other than out-lined could drastically affect performance, be hazardous to personnel and equipment, and may void existing warranties.WARNING: Standard industry safety practices must be adhered to when working on this, or any other, process control product. Specifically, per-sonal protective and lifting devices must be used as warranted.Unpacking1.While unpacking the packing set, check the packinglist against the materials received. Lists describing the packing set are included in each package.VALTEK SAFEGUARDValtek SafeGuard is designed to be a low maintenance, fugitive emission packing, which can be directly retrofit-ted into standard Valtek linear and rotary control valves. Valtek SafeGuard uses a combination of carbon-filled PTFE and virgin PTFE V-rings with specially designed, disc spring live-loading.Valtek SafeGuard utilizes a different set of packing spacers than standard Valtek PTFE packing sets. Ret-rofit kits include these spacers as well as the packing and the live-loading kit.When retrofitting a Valtek SafeGuard packing set into a valve, the bonnet bore should be free of scratches and have a 16 R a surface finish in the area where the packing makes contact. The stem should also be free of scratches and be polished with an 8 R a surface finish. In valves supplied with guide liners, the liners should be inspected to ensure a tight fit against the stem is achievable. Replace the guides or liners if damaged or worn.Valtek SafeGuard InstallationBe certain the packing bore and plug stem have been properly re-worked and installed in the valve according to the valve’s installation, operation, maintenance in-structions. To install the Valtek SafeGuard packing, refer to Figure 1 and proceed as follows.1.Place the lower stem guide (with liner, if applicable)in the bonnet bore. Next, place the thin, stainlessand SureGuard Fugitive Emissions Packingsteel, anti-extrusion washer into the bore followed by a male and then female carbon-filled PTFE adapter ring.NOTE : Wiper rings are not provided for rotary valve packing boxes, with twin packing sets, or recom-mended for extended bonnets in high temperature services. Twin packing includes a duplicate set of packing instead.Place the provided spacers into the bonnet bore except for the second anti-extrusion ring.2.Next, place Valtek SafeGuard sealing set, as anentire set, carefully into the packing box in the fol-lowing order:1 carbon-filled PTFE male adaptor,1 virgin PTFE V-ring,1 carbon-filled PTFE V-ring,1 virgin PTFE V-ring,1 carbon-filled female adaptor.NOTE : Although lubricating this packing set is not required for good performance, doing so will in-crease the packing life and decrease the friction.The lubricant should be a fluorinated-type grease.NOTE : Extreme care should be taken to not dam-age the V-rings on the plug stem threads.3.Place the stainless steel anti-extrusion washer andthe upper stem guide on top of the packing set. The gland flange will be installed with the actuator.4.Follow the appropriate actuator installation, opera-tion, maintenance instructions and attach the plug stem to the actuator stem.5.Before the packing is assembled, the live loadingdisc spring sets should be assembled. The ex-tended gland flange bolt should be lubricated and put in place.6.Next, the lower thrust washer, which is a roundstamping, is placed over the bolt and onto the gland flange. The internal sleeve is then put over the bolt so that the 30 degree angle is on top. The first disc spring is next placed o ver the internal sleeve so the inside diameter of the spring makes contact with the lower thrust washer. The other four springs should be placed alternately so that the last disc spring ’s outside diameter will make contact with the upper thrust washer. (See Figure 1)7.Next, place the upper indication thrust washer onthe disc washers so that indication arm is pointed down. Before putting the gland flange nut on the bolt, lubricate the surface of the nut that will come in contact with the upper thrust washer and make sure the indicating arm on the upper thrust washer is located on the opposite side of the valve stem.8.When tightening the live-loading configuration, se-quentially alternate the turns on each disc set until the indicating arm becomes flush with the bottom of the lower thrust washer. If the upper thrust washer turns while tightening, hold the thrust washer steady with pliers. As the packing consolidates dueto wear and cold flow, the indicating arm will show the magnitude of that consolidation.NOTE: To increase packing congevity on high-cycle applications, the disc springs should only be compressed until the indicating arm becomes flush with the top of lower thrust washer.Valtek SafeGuard MaintenanceAt least once every six months the Valtek SafeGuard indicating arm should be inspected.If the lower washer travels down below the end of the indicating arm due to consolidation, the live-loading disc springs should be retightened to ensure sufficient loading for the PTFE seals.NOTE: The torque required to compress the two disc spring stacks will be higher than usual because of the additional friction and axial loads being produced by the disc stack.VALTEK SUREGUARD AND VALTEK SUREGUARD XTValtek SureGuard and its high temperature counter-part, Valtek SureGuard XT, are designed to be low maintenance, fugitive emission packing sets, which can be directly retrofitted into standard Valtek linear and rotary valves. Valtek SureGuard uses carbon-filled PTFE while Valtek SureGuard XT uses PEEK backup rings. Valtek SafeGuard utilizes a different set of packing spacers than standard Valtek PTFE packing sets. Ret-rofit kits include these spacers as well as the packing and the live-loading kit.When retrofitting a Valtek SafeGuard packing set into a valve, the bonnet bore should be free of scratches and have a 16 R a surface finish in the area where the packing makes contact. The stem should also be free of scratches and be polished with an 8 R a surface finish. In valves supplied with guide liners, the liners should be inspected to ensure a tight fit against the stem is achievable. Replace the guides or liners if damaged or worn.Valtek SureGuard InstallationTo install Valtek SureGuard and Valtek SureGuard XT packing into a valve, refer to Figure 2 and Table I, and proceed as follows.1.Coat the packing set with a thin film of a fluorinatedhigh temperature grease (including between V-rings) prior to installation.2.Place the lower stem guide into the bonnet bore,followed by a thin stainless steel anti-extrusion ring.Next, place a male followed by a female carbon-filled PTFE or PEEK adaptor ring into the packing box as shown in Figure 2.NOTE: Wiper rings are not provided for rotary valve packing boxes, with twin packing sets, or recom-mended for extended bonnets in high temperature services. Twin packing includes a duplicate set of packing instead.3.The provided packing spacers should next beplaced in the packing box except for the second anti-extrusion ring.Table I:Valtek SureGuard Packing Torque ValuesStem (Shaft)Stud Torque *Diameter Diameter Value (in)(cm)(in)(cm)(in-lb)(Nm)0.5 1.270.3120.79222 2.50.562 1.430.3750.95324 2.750.5 1.2732 3.60.625 1.5870.3120.79224 2.750.3750.95325 2.80.75 1.9050.3750.95326 3.00.875 2.2220.3750.95328 3.150.5 1.2737 4.151.0 2.540.3750.95335 4.00.5 1.2746 5.21.1252.8570.5 1.27647.250.625 1.587809.00.5 1.27788.81.5 3.810.625 1.58710212.00.75 1.90512314.00.5 1.2710512.02.0 5.080.625 1.58713115.00.75 1.90515818.02.5 6.350.625 1.58716118.00.75 1.90519322.03.07.620.625 1.58729633.00.751.90535640.0*Listed torque values are for temperatures between 0° F and 350° F (-18° C and 177° C). For temperatures between 350° F and 550° F, decrease torque by 20 to 25 percent. If XT packing is used, increase torque by 10 percent.4.Place the Valtek SureGuard packing set over thevalve stem as an entire lubricated set in the follow-ing order:1 carbon-filled PTFE or PEEK male adaptor,1 PFE V-ring,1 carbon-filled PTFE or PEEK V-ring,1 PFE V-ring,1 carbon-filled PTFE or PEEK female adaptor.5.Finally, the stainless steel anti-extrusion washerand upper stem guide are placed on top of the packing set.6.Follow the appropriate actuator installation, opera-tion, maintenance instructions and attach the plug stem to the actuator stem.The compression of Valtek SureGuard packing sets is critical to packing performance. For this rea-son, the proper torque on the gland flange nuts must be applied. The torque values shown in Table I are provided as a reference for compressing stan-dard Valtek SureGuard packing sets with any type of backup material for packing temperatures be-tween 0° F and 350° F (-18° C and 177° C). For Valtek SureGuard packing temperatures between 350° F and 550° F (177° C and 288° C), the torque on each stud should be decreased 20 to 25 percent less than those listed in Table I. If the fire-safe Valtek SureGuard XT option is being used, the above referenced torque values should be in-creased by 10 percent.7.Torque the gland flange nuts to the value listed inTable I.Valtek SureGuard MaintenanceAt least once every six months, check that the above torque values are still being maintained by the valve.Although consolidation (resulting in torque reduction) is not likely with the Valtek SureGuard sets, the above torque values should be verified. Where large processFlowserve Corporation has established industry leadership in the design and manufacture of its products. When properly selected, this Flowserve product is designed to perform its intended function safely during its useful life. However, the purchaser or user of Flowserve products should be aware that Flowserve products might be used in numerous applications under a wide variety of industrial service conditions. Although Flowserve can (and often does) provide general guidelines, it cannot provide specific data and warnings for all possible applications. The purchaser/user must therefore assume the ultimate responsibility for the proper sizing and selection, installation, operation and maintenance of Flowserve products.The purchaser/user should read and understand the Installation Operation Maintenance (IOM) instructions included with the product, and train its employees and contractors in the safe use of Flowserve products in connection with the specific application.While the information and specifications presented in this literature are believed to be accurate, they are supplied for informative purposes only and should not be considered certified or as a guarantee of satisfactory results by reliance thereon. Nothing contained herein is to be construed as a warranty or guarantee, express or implied, regarding any matter with respect to this product. Because Flowserve is continually improving and upgrading its product design, the specifications, dimensions and information contained herein are subject to change without notice. Should any question arise concerning these provisions, the purchaser/user should contact Flowserve Corporation at any of its worldwide operations or offices. For more information, contact:For more information about Flowserve, contact or call USA 972 443 6500Regional Headquarters 1350 N. Mt. Springs Prkwy.Springville, UT 84663Phone 801 489 8611Facsimile 801 489 371912 Tuas Avenue 20Republic of Signapore 638824Phone (65) 862 3332Facsimile (65) 862 4940Flowserve and Valtek are registered trademarks of Flowserve Corporation.12, av. du Qu ébec, B.P. 64591965, Courtaboeuf Cedex,FrancePhone (33 1) 60 92 32 51Facsimile (33 1) 60 92 32 99Quick Response Centers 5114 Railroad StreetDeer Park, TX 77536 USA Phone 281 479 9500Facsimile 281 479 8511104 Chelsea ParkwayBoothwyn, PA 19061 USA Phone 610 497 8600Facsimile 610 497 66801300 Parkway View Drive Pittsburgh, PA 15205 USA Phone 412 787 8803Facsimile 412 787 1944temperature swings are experienced in the valve,Flowserve recommends live-loading be applied to the packing sets. Often, the Valtek SafeGuard live-loading kit will fulfill this need.。