GPRS巡检仪使用说明书
- 格式:doc
- 大小:259.00 KB
- 文档页数:12

智能巡检管理系统使用说明书V3.0 2014一、系统组成 (3)二、自动感应巡更机 (3)1、产品介绍 (3)2、使用方法 (4)开机 (4)读卡 (4)删除数据 (5)更换电池 (5)如何下载巡更数据及校正设备时间 (5)故障对照表 (6)3、配套配件 (6)巡更地点钮 (6)巡逻地点钮的安装 (6)巡更人员钮 (7)USB 数据线 (7)巡检机电池充电器 (8)三、巡更管理软件说明 (9)1、功能特点 (9)2、配置要求 (9)3、软件及驱动安装过程 (10).NETFramework2.0 安装 (11)设备驱动安装 (11)测试巡更机通讯是否正常? (13)清除巡更机及校验设备 (14)4、软件操作流程: (15)添加线路: (15)添加巡检机: (15)添加地点钮: (16)添加保安身份人名钮 (17)线路设置 (19)计划设置 (20)按周计划 (20)统计报表 (22)系统 (24)四、注意事项与系统维护 (29)五、常见故障处理 (29)六、包装、运输及贮存 (29)七、客户服务和技术支持承诺 (29)八、安全警告 (30)九、产品保修卡、保修款 (30)一、系统组成巡检管理系统主要由以下几部分组成:巡检仪、地点钮、人员扣、充电器、锂电池、数据线、巡检软件、布套、管理电脑、打印机。
二、自动感应巡更机读卡方式:全自动感应读卡技术,无需按钮,自动感应金属结构:金属外壳、坚固耐用、防水、防震、防高低温读卡技术: 瑞士EM感应读卡技术大容量: 数据存储记录5万条安全性:掉电后数据可保存30年下载快:下载全部数据只需要180秒提示方式:震动+LED闪烁+声音读卡时间:<1秒待机时间:待机时间为1-2个月左右外壳材质:外壳采用合金外壳防水等级:完全防水设计,达到IP60电池更换方式:可更换锂电池通讯方式:USB通讯读卡种类:EM卡1、产品介绍自动感应巡更机采用感应式读卡技术(RFID),具有防水,防震等特点,巡检人员将巡检仪在地点钮读卡,巡检机会记录卡号、读卡时间、巡检完成后,巡检机通过USB数据线传送到电脑管理软件,管理人员可对被检对象进行准确分析。
![汽车跟踪定位仪使用说明书[1]](https://uimg.taocdn.com/3f1db024ccbff121dd3683be.webp)
GPS &GSM/GPRS 汽车跟踪定位仪使用说明书121. 安装操作说明1.1接口说明1: 扩展接口42: 扩展接口53: 断电路/油路4: ACC(12V)点火线5: DC(12V)6: 扩展接口37: SOS 紧急呼叫8: 扩展接口19: 扩展接口210: 电源地SIM 卡接口MIC/PHONE:耳机与话筒组合LED:状态指示灯LED状态指示LED灯全灭表示未工作,亮1秒灭1秒表示GSM注册成功亮0.1秒灭2.9秒表示GPS定位常亮表示GSM注册成功并且GPS定位1.2安装检查第一步:检查配件的完整性:主机盒、10Pin连接线、油路控制器、GSM天线、GPS天线、紧急报警报钮、说明书。
第二步: SIM准备购买SIM手机卡(只支持GSM网络,不支持CDMA和小灵通卡),记录好SIM卡对应的号码(即手机号码),SIM卡必须开通来电显示功能,否则无法进行电话监听。
第三步:安装注意电源DC(12V)、电源地与汽车电瓶的正负极、ACC(车钥匙打火)和GSM天线、GPS天线即可。
油路控制接法参照图纸,注意要请专业人员安装第四:GPS天线安装时必须正面朝上,平放对准天空第五:油路控制接线方法注意:油路控制器分12V和24V两种规格,所以在安装时一定要看清油路控制器上的标识规格。
3继电器SOS紧急呼叫42.使用说明3.1位置请求短信功能发送短信:A+密码+,+000(初始密码:000000)例如:A000000,000设备收到短信后,回复位置信息,格式如下:Longitude E114.04577 Latitude N22.32405 08-10-2017:38:30注:如果没有定位,则经纬度时间都是0,为无效值,时间为格林威治时间,具体时间与本地时区有关,如北京,小时数要加8才能与具全时间相符。
3.2修改主用户密码功能发送短信:A+原密码+,+001+,+新密码例如:A000000,001,123456注:000000为旧密码,123456为新密码设备收到短信后,回复位置信息,格式如下:Set Password OK!53.3设置实时反馈位置信息发送短信:A+密码+,+002+,+X注:X=0表示停止 ,X的取值[30~64800]秒钟,当ACC断掉后,即汽车的发动机熄火后,不发送位置位信息。

GPS监控查询系统使用手册浙江洲海科技有限公司功能介绍GPS监控查询系统主要包括实时监控,轨迹查询,统计信息(考勤表),巡查区域,终端管理,系统设置六个部分。
1.实时监控1.1登录登录地址:122.224.8.167:8080,浏览器建议使用IE9以上,谷歌浏览器。
以下图片使用IE10浏览器截取所得。
图1登录界面输入用户名和密码,点击登陆,然后系统会自动转入主界面1.2实时监控图2 实时监控如图2所示左侧导航栏中粉红色头像代表在线,黑色头像代表离线通过点击头像图标可以在地图中看到信息窗口,信息窗口包含姓名,最近一次发送数据的时间,设备号,区域(True 代表在巡查区域中,False代表不在巡查区域中),地址,联系方式,备注。
2.轨迹查询图3 轨迹查询点击蓝色字体的轨迹查询,右侧会弹出图3. 如图3所示历史轨迹查询条件有镇,村,姓名,起始时间,结束时间,巡查区域。
比如查询葛继岳,选择好姓名,村,镇,选择好要查询的时间段,点击播放,就会出现图4所示,蓝色的点是接收到的信号点,红线代表运动的轨迹。
(如果点击巡查区域前的方框后,再点击播放,还会出现设置的个人巡查区域)关于地图的使用,在地图的右上角有地图、卫星字样,默认的情况下平面地图,图4使用的是卫星地图(点击卫星就会转成卫星地图模式)。
移动地图,把光标放在地图上长按鼠标左键,移动鼠标就可以拖动地图了。
放大地图,光标移至需要放大的位置,双击鼠标左键即可放大地图,也可以使用图4所示的+,-完成地图的缩放,鼠标的左右键中间的滚轮也可以实现地图的放缩。
图4 轨迹查询实例3.统计信息图5 统计信息单击统计信息,左侧导航栏会出现每日考勤,月度考勤,年度考勤,及考勤设置。
然后单击每日考勤出现图5,右侧框架弹出日考勤,默认出现全部的日考勤信息,可以查询某一日的考勤信息,如图5所示。
同样,月度考勤,年度考勤也是如此操作。
查询成功后,可以导出,便于打印。
考勤设置,用于考勤参数的设置,建议不要随意改动,添加信息。
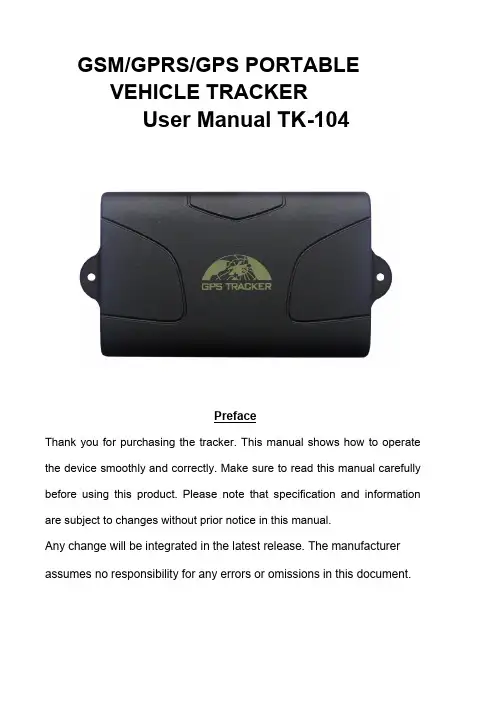
GSM/GPRS/GPS PORTABLEVEHICLE TRACKERUser Manual TK-104PrefaceThank you for purchasing the tracker. This manual shows how to operate the device smoothly and correctly. Make sure to read this manual carefully before using this product. Please note that specification and information are subject to changes without prior notice in this manual.Any change will be integrated in the latest release. The manufacturer assumes no responsibility for any errors or omissions in this document.ContentsI.Introduction (2)1.Main Features (2)2. Applications (2)3.Hardware Description (2)4.Accessories (4)5.Specifications (5)II.Installation and operating (5)1.Production installation (5)2.SIM card installation (6)3.Battery Charging (6)III.Basic functions (7)1.ON/OFF Function (7)2.Initialization (7)3.Change Password (7)4. Add and Delete Authorization (7)5.Single Locating (8)6. Auto track (8)7.Get location in absolute street address (8)8.Check the Vehicle State. (8)9.Check IMEI (9)10. Terminal (local) Time Setting (9)11. Location Based Service (LBS) (9)12 Monitor (Voice Surveillance) (9)13. Cut off the Oil and Power System (Option) (9)14. Resume the Oil and Power System (Option) (10)15. Tracker’s Hardware Resetting (10)IV.Alarm Function and settings (10)1.Geo-fence (10)2. Movement Alarm (10)3.Over Speed Alarm (11)4.Shock Sensor Alarm (11)5.SOS (Option) (11)6.Low power alarm (11)V.GPRS Setting (11)1.Setting up APN (11)2.GPRS User Name and password Setup (12)3.IP and Port Setup (12)4. Modes Switch between “SMS” and “GPRS” (12)5. GPRS tracking & monitoring platform (12)VI.Sleep Function (12)VII. Cautions (13)VIII.Simple Faults & the Solutions (13)IX. LED indicator status (14)I. IntroductionThis tracker is a new product based on the GSM / GPRS network and GPS satellite positioning system, which set multiple functions of security, positioning, monitoring surveillance, emergency alarms and tracking in its entirety. It can track and monitor remote target by SMS or internet.1. Main Features1.1 Waterproof shell1.2 Built-in large capacity 6000MA battery, long standby time of 60 days.1.3 Powerful magnets to absorb to vehicle firmly.1.4 Real-time tracking, retrieve of lost vehicles, cargo.1.5 Movement alarm, Geo-fence alarm, shock sensor alarm, remote monitoring.1.7 Support map viewing on mobile phone screen, get absolute address by SMS, GPRS realtime tracking on web based server.1.8 Built-in high sensitivity GPS and GSM antenna to make it can be used alone withoutinstallation, convenient and quick.1.9 Support for external GSM antenna, GPS antenna, and external power supply for thetracker to be installed on the device which can provide power for long-term using.2. ApplicationsApplies to: Locating and tracking service for cars, trucks, container trucks, special vehicles, cargo and criminal investigation officer.3. Hardware Description3.1 Front faceBuilt-inGSMantenna3.3 Side face3.4 Side face3.5 Side face Built-in GPS 3.2 Rear faceantennaBuilt-inpowerfulmagnet&batteryLED Indicator EXT. GPS antenna EXT. GSM antennaSIM SlotEXT. Power, Relay USBON/OFFBuilt-in Mic Built-in shock sensor 4. Accessories1AC Adapter Input: AC 110-220V,Output DC: 1.5A,12V2Lighter car adapter Car 12V OR 24V power3GPS Antenna3 meters4GSM Antenna2 meters5Harness4PIN612V/40A OR24V/40A Relay depends on the vehicle type5. SpecificationsII. Installation and operating1. Production installation1.1 The product is easy to install. The built-in powerful magnet can make it to be directly adsorbed on theiron objects.1.2 Built-in GPS and GSM antenna, external antenna can be an optional.1.3 The tracker is waterproof, but please still avoids the long-term placement in the places ofwater infiltration.1.4 If you need an external power supply, cut oil & power system and SOS feature, Please find4PIN main wire (if optional), wiring diagram is as follows:Note: Please install SOS button on the hidden place driver can touch.2. SIM card installation2.1 Open the waterproof sealant, use tweezers or pointed objects to touch the SIMcard switch lightly, the SIM card slot will pop up, and install the SIM card correctly, and then put the SIM card slot back.2.2 Please make sure that the SIM card is GSM network and able to execute the functionof incoming calls display, no calls can be diverted and the PIN code is locked. The SMS format must be TXT format, and can’t recognize the PDU format.3. Battery ChargingPlease fully charge the product for the first use and charge as following:3.1 Home charge, find the AC adapter from the accessories and connect 4-PIN pluginto 4-PIN socket, and then connect the other end to mains supply.3.2 Car charge, find the car lighter charger from the accessories and connect to car cigarettelighter.Note: The tracker is being charged if the LED is red constantly during the charge, and charging is finished when the LED change from red to green, and then you can stop charging.III. Basic functionsNote: You don't need to type "+" for all the command in this manual,"space" means press the space button on the cell phone keyboard.1. ON/OFF Function1.1 In the OFF state, switch ON/OFF to ON position, then the three LED will bright flash 1 time, whichmeans the tracker had been switched on.2. InitializationSend SMS "begin+password" to tracker from your cell phone, it will reply "begin ok" and return to the default factory settings state. (Default password is: 123456).For example: Send SMS "begin123456" to tracker, it will reply "begin ok".3. Change PasswordSend SMS "password+old password+space+new password" to the tracker from your cell phone to change the password. For example: Send SMS "password123456 888888" to tracker, it will reply “password OK”, and it means the password has changed successfully. And please keep the new password in mind.Note: The new password must be 6 digits, or the tracker can't recognize.4. Add and Delete Authorization4.1 Authorization phone number is the phone number you used for tracking,controlling, alarms, etc, and only 5 phone numbers to be allowed to authorized in the tracker at most. Add authorization as following two ways:4.2 For the first authorization, Call and track the tracker device for 10 times from cellphone in success, it will make the cell phone number as the authorized number automatically, and reply “add master ok”.4.3 Authorization: Send SMS “admin+password+space+cell phone number” to set up anauthorized number, the other authorized numbers should be set by the first authorized number, if the number is successfully authorized, the unit will reply” admin OK” .If you need to track the target tracker device when it enters into another country, you must add the country code before the cell phone number, for example, send SMS” admin123456 0086133****1111”tothedevice.Note:133********willbesetupastheauthorized number.4.4 Delete authorization: Send SMS “noadmin+password+space+authorized number”to delete the authorized number.5. Single LocatingAny number call the tracker device, it will reply a SMS including the position of latitude and longitude if don’t set up the authorized number. If authorized number has set successfully, the device won’t reply SMS including the positioning of latitude and longitude when the unauthorized number dials up it. Dialing the tracker device from the authorized number, it will hang up your calling and respond to a real-time latitude and longitude information as following:When GPS signal is weak, the position oflatitude and longitude included in SMS isthe position that the tracker received GPSsignals at last. If it is different with itsexact current location, pay attention tocheck the time included in the SMS.6. Auto track continuously6.1 Limited intervals and times tracking: Send SMS “fix+intervals+time unit+tracking times+n+password” to tracker. For example: Send SMS “fix030s005n+password” to tracker, it means tracker will send GPS coordinates each 30 seconds for 5 times. The intervals and tracking times must be in 3 digits and the maximum value is 255, the interval must be not less than 20s. Time unit is (s: second, m: minute, h: hour).6.2 Non-limited continuously tracking: Send SMS “fix+intervals+timeunit+***n+password”, For example “fix030s***n+password”, it means tracker will send GPS coordinates each 30 seconds continuously.6.3 Cancel automatically locating: Send SMS “nofix+password” to tracker.7. Get location in absolute street addressYou must set up the APN of your local GSM network for the SIM card in tracker first before using this function, if your local GSM network need user name and password for gprs , please setup according to the GPRS instructions in chapter V. Send SMS “address+password” to tracker after setup APN, tracker will reply detailed absolute address including street name.8. Check the Vehicle State.Send SMS “check+password” to tracker to check charge status, battery status, GPSstatus, GSM reception status. For example, send SMS “check123456” to tracker, and the tracker will reply following information after execute the SMS command: Power: Power off /charging/chargefinish Battery: 100%GPS: OK/NO GPSGSM Signal: 1-32 (The higher digit it shows; the stronger of GSM signals it receives.)9. Check IMEISend SMS "imei+password" to the unit. For example, Send SMS "imei123456" to the tracker device, an IMEI number in 15 digits will reply to your cell phone.10.Terminal (local) Time SettingSend SMS “time+space+zone+password+space+time” to the tracker unit, If succeed, It will reply “time OK”. For example: Send SMS “time zone123456 8”, 8 is Chinese time zone, If your country time zone is minus, send SMS “time zone123456 -8”.11.Location Based Service (LBS)When the tracker device doesn’t received valid GPS signals, tracker will positioning by location based service(LBS), the messages includes the GPS coordinates of the last position in SMS mode, but the LAC in message is the current new position, the location can be seen by input the LA C code in the menu “Manual Track” of web platform , you can also send command “address+password” to tracker to get the newest absolute address and GPS coordinates as well; tracker will automatically switch to track by location based service in GPRS mode, and actualized on the map of web server with LBS mark. And there may be some inaccuracy with actual location by LBS tracking; the bias depends on GSM reception. Note: This feature can be used normally in most areas according to the signal of GSM network. It may not be available in some areas.12 Monitor (Voice Surveillance)12.1 The command to switch between Track and Monitor are “tracker” and “ monitor”.12.2 T he default mode is “track” (Track mode).12.3 S end SMS “monitor+password” to the unit, and it will reply “monitor ok!” and switch to “monitor” mode.12.4 Send SMS “tracker+password” to the unit, it will reply “tracker ok!” and restore to “track” mode13. Cut off the Oil and Power System (Option)Send SMS “stop+password” to the tracker device, it will reply “Stop engine Succeed” to yourcell phone from the tracker device, and stop your car engine as well, at the same time. It will remain the immobile state until receiving the next SMS command of resuming the oil and power once receiving SMS command to cut off the oil and power system.14. Resume the Oil and Power System (Option)Send SMS “resume+password” to the unit, It will reply “Resume engine Succeed”and resume your car engine as well, at the same time. It will remain this state until receiving the next SMS command to cut off the oil and power system once receiving SMS command to resume the oil and gas system.15. Tracker’s Hard ware ResettingSend SMS “reset+password” to tracker device to reset the GSM module and GPS module of the tracker device, it will reply “reset ok”.IV. Alarm Function and settingsAll the alarms will be send to all the authorized phone numbers once the alarms are triggered in SMS mode, if the tracker keep in triggered status and alarms are not be cancelled, tracker will keep sending alarms to authorized phone numbers every 3 minutes. If tracker works in GPRS mode instead of SMS mode, tracker will send alarms to web based online system.1. Geo-fence1.1 Set up a geo-fence for the tracker device to restrict its movements within a district.The unit will send SMS to the authorized numbers when it goes out of this district.Set up: When the unit stays immobile in a place for 3-10 minutes, the user can sendSMS “stockade+password+space+latitude,longitude;latitude,longitude” to unit to set therestricted district. In case of breach, it will send SMS “stockade!+geo-info” tothe authorized numbers. Tracker will stop sending alarm if tracker returns tothe fence after geo-fence triggered1.2 Cancel: Send SMS “nostockade+password” to deactivate this function.2. Movement AlarmMovement alarm refers to the alarm which will be triggered if tracker device movebeyond a certain distance. (Default distance is 200 meters.)Setup: when the unit stays immobile in a place for 3-10 minutes, the user can send SMS “move+password” to the tracker device. It will reply “move ok!”. In case of breach, movement alarm will be triggered, and tracker will send SMS “Move” along with a Geo-info to the authorized numbers.Cancel: Send SMS “nomove+password” to deactivate the movement alarm.3. Over Speed Alarm3.1 Over speed alarm will be triggered when tracker exceed the speed you setup.Setup: Send SMS “speed+password+space+speed” to tracker device and it will reply “speed ok!”, it means you have set up over speed alarm successfully. For example: “speed123456 080” 080 refers to 80km/h, when tracker’s speed exceed 80km/h, tracker will send SMS “speed+080!+ Geo-info” to authorized numbers.3.2 Cancel: Send SMS “nospeed+password” to deactivate the over speed alarm.Remark:The recommended speed should be not less than 30km/h. For below that rate, it will be effected the accuracy by gps signals drift etc.4. Shock Sensor AlarmSetup: Shock sensor alarm is deactivated in default settings. If this function is needed, please send SMS “shock+password” to tracker device, and tracker will reply “Shock is activated!”, it means shock sensor alarm has set up successfully. When the tracker was shocked, it will send SMS “Sen sor alarm+Geo-info” to authorized numbers.Cancel: Send SMS “noshock+password” to deactivate shock sensor alarm.Note: tracker will send alarm once for each shock, and it stop sending alarm if it isn’t shocked.5. SOS (Option)Long Press the SOS button for 3 seconds, the tracker device will send SMS “help me!+lat./long. to all the authorized numbers in 3 minutes interval. It will stop sending SMS “help me” when received a reply from any one of the authorized numbers.6. Low power alarmWhen the battery capacity is below 15%, tracker will send SMS “low battery+lat./long information to the authorized numbers. And it will stop sending alarms if external power is connected to charge.V. GPRS SettingUser must send SMS via cell phone to set up APN, IP and port before startingtracking by GPRS. Please setup according to following steps1. Setting up APNSend SMS “APN+password+space+APN”, the tracker will reply “APN OK” ifsucceeded. For example: Send SMS “ APN123456 CMNET”.Note: CMNET is the APN of china GSM network, the APN varies with different GSMnetwork operator in different countries, please check with your local GPRS network operator to get the correct APN.2. GPRS User Name and password SetupIn most countries, the user name and password involving GPRS login are not compulsorily necessary, therefore, the entry can be skipped. For those countries requiring user name and password, please configure as following:Send SMS “up+password+space+user+space+password”, If succeeded, tracker will reply “user, password ok!”, for example: send SMS “up123456 jonnes 666666”Note: 123456 is password of tracker, jonnes is the user name for GPRS login, 666666 is the password for GPRS login.3. IP and Port SetupSend SMS “adminip+password+space+IP+space+port”, tracker will reply “adminip ok” if succeed. For example: send SMS “adminip123456 202.105.131.245 9000”, tracker will reply “adminip ok” if succeed.Note: 123456 is the password of tracker, and 202.105.131.245 is the ip, 9000 is the port.4. Modes Switch between “SMS” and “GPRS”4.1 The default mode is “SMS”.4.2 Send SMS “GPRS+password” to the unit, and it will reply “GPRS ok!” it meanstracker device has switched to “GPRS” mode.4.3 Send SMS “SMS+password” to the unit, it will reply “SMS ok!” and restore to“SMS” mode.5. GPRS tracking & monitoring platform5.1 Web based platform . Configuration IP:202.105.131.245 Port: 9000. Please check “software platform user manual”included in the CD for detailed operation information.5.2 PC based installation tracking software included in the CD in package.VI. Sleep FunctionSleep can save power to extend the standby time, tracker will sleep as following:1. In the absence of movement, geo-fence, over speed alarm, Successive LocatingAutomatically and charging, without any trigger events, and tracker will fall sleep in 5 minutes if tracker get normal GPS signals and doesn’t work in GPRS mode. All the LED will off during the sleep.2. Wake up, if any alarms was triggered including shock, incoming calling, SMS,keyboard pressing, the tracker will wake up to work as normal.VII. Cautions1. Don’t put the unit in overheated or overcooled places.2. Handle carefully. Don’t vibrate or shake it violently.3. Clear the unit with a piece of dry cloth. Don’t clean in chemicals, detergent.4. Don’t paint the unit, this may cause some foreign materials left in between the parts.5. Don’t disassemble or refit the unit.。
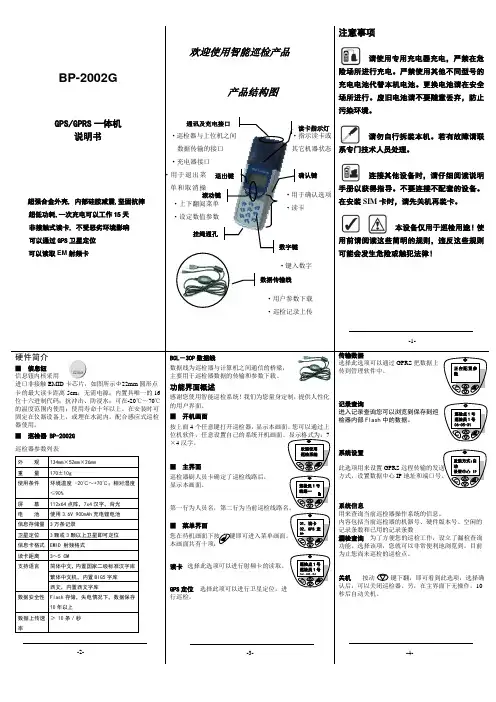
BP-2002GGPS/GPRS一体机说明书超强合金外壳, 内部硅胶减震,坚固抗摔超低功耗,一次充电可以工作15天非接触式读卡, 不受恶劣环境影响可以通过GPS卫星定位可以读取EM射频卡注意事项请使用专用充电器充电,严禁在危险场所进行充电。
严禁使用其他不同型号的充电电池代替本机电池。
更换电池请在安全场所进行。
废旧电池请不要随意丢弃,防止污染环境。
请勿自行拆装本机。
若有故障请联系专门技术人员处理。
连接其他设备时,请仔细阅读说明手册以获得指导。
不要连接不配套的设备。
在安装SIM卡时,请先关机再装卡。
本设备仅用于巡检用途!使用前请阅读这些简明的规则,违反这些规则可能会发生危险或触犯法律!硬件简介■信息钮信息钮内核采用进口非接触EMID卡芯片,如图所示Φ22mm圆形点卡的最大读卡距离5cm;无需电源;内置具唯一的16位十六进制代码;抗冲击、防浸水;可在-20℃~70℃的温度范围内使用;使用寿命十年以上。
在安装时可固定在仪器设备上,或埋在水泥内。
配合感应式巡检器使用。
■巡检器 BP-2002G巡检器参数列表外观134mm×52mm×26mm重量170±10g使用条件环境温度 -20℃~+70℃;相对湿度≤90%屏幕112x64点阵,7x4汉字,背光电池使用3.6V 900mAh充电锂电池信息存储量3万条记录卫星定位3颗或3颗以上卫星即可定位信息卡格式 EMID 射频格式读卡距离3~5 CM支持语言简体中文,内置国家二级标准汉字库繁体中文机,内置BIG5字库西文,内置西文字库数据安全性Flash存储,失电情况下,数据保存10年以上数据上传速率≥ 10条/秒BCL-30P数据线数据线为巡检器与计算机之间通信的桥梁,主要用于巡检器数据的传输和参数下载。
功能界面概述感谢您使用智能巡检系统!我们为您量身定制,提供人性化的用户界面。
■开机画面按上面4个任意键打开巡检器,显示本画面。
您可以通过上位机软件,任意设置自己的系统开机画面。
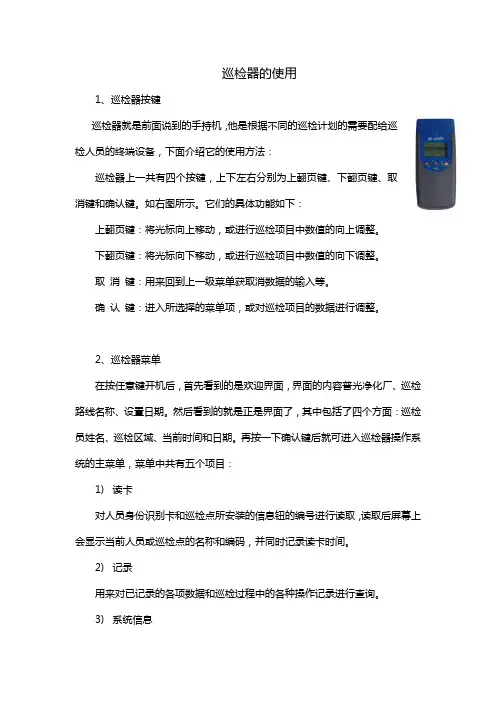
巡检器的使用1、巡检器按键巡检器就是前面说到的手持机,他是根据不同的巡检计划的需要配给巡检人员的终端设备,下面介绍它的使用方法:巡检器上一共有四个按键,上下左右分别为上翻页键、下翻页键、取消键和确认键。
如右图所示。
它们的具体功能如下:上翻页键:将光标向上移动,或进行巡检项目中数值的向上调整。
下翻页键:将光标向下移动,或进行巡检项目中数值的向下调整。
取消键:用来回到上一级菜单获取消数据的输入等。
确认键:进入所选择的菜单项,或对巡检项目的数据进行调整。
2、巡检器菜单在按任意键开机后,首先看到的是欢迎界面,界面的内容普光净化厂、巡检路线名称、设置日期。
然后看到的就是正是界面了,其中包括了四个方面:巡检员姓名、巡检区域、当前时间和日期。
再按一下确认键后就可进入巡检器操作系统的主菜单,菜单中共有五个项目:1)读卡对人员身份识别卡和巡检点所安装的信息钮的编号进行读取,读取后屏幕上会显示当前人员或巡检点的名称和编码,并同时记录读卡时间。
2)记录用来对已记录的各项数据和巡检过程中的各种操作记录进行查询。
3)系统信息用来查询当前巡检器操作系统的信息,内容包括当前巡检器的机器号、当前的巡检人员、空闲的记录条数和已用的记录条数。
4)线路查询对现有的巡检点检查情况进行查询。
共分为两级菜单,第一级是设备单元的选择,第二级是巡检点的情况查询,在已经巡检过的巡检点的后面都会有一个对号,表示该点已经巡检完毕,反之则是未巡检的巡检点名称,这就使巡检工作的目的。
5)关机关闭巡检器。
一定时间内没有操作时自动关机。
3、巡检器操作流程当一个巡检人员开始进行巡检时,主要通过下面几个步骤完成巡检。
1)对自己的身份识别卡进行确认。
巡检器的确认只需将身份识别卡放在巡检器前端60mm之内,再随意按四个键中的一个即可完成身份的确认,或进入主菜单选择读卡项进行确认也可。
2)对巡检点的信息钮进行确认。
确认方法与身份识别卡的方法相同,在确认后巡检器会自动记录巡检人员到达当前巡检点的时间,并列出在该点需要检查的项目信息。
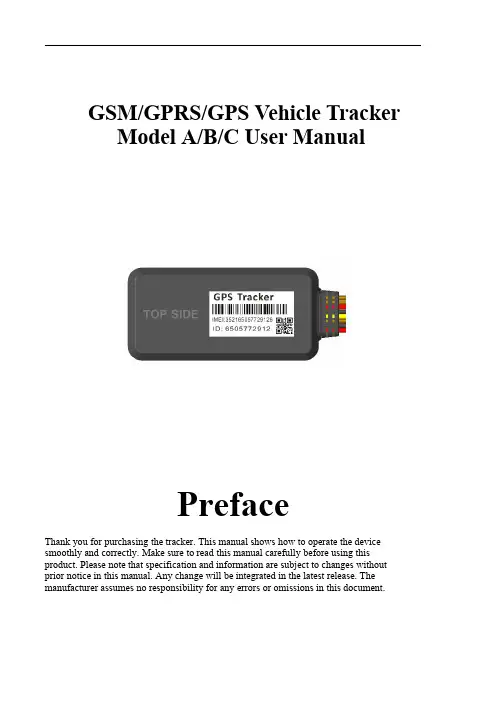
GSM/GPRS/GPS Vehicle TrackerModel A/B/C User ManualPrefaceThank you for purchasing the tracker.This manual shows how to operate the device smoothly and correctly.Make sure to read this manual carefully before using this product.Please note that specification and information are subject to changes without prior notice in this manual.Any change will be integrated in the latest release.The manufacturer assumes no responsibility for any errors or omissions in this document.Contents1.Function Introduction (3)2.Applications (3)3.Hardware Description (3)4.Accessories.......................................................................................错误!未定义书签。
5.Specifications (5)6.Operating Instructions (5)6.1Terminal Installation (5)6.2SIM CARD Installations (6)6.3Turn on the Tracker Device (7)6.4GSM/GPS LED Indicator (7)6.5Change Password (7)6.6Authorization (8)6.7Single Locating (8)6.8Exact street address (9)6.9Location based service(LBS)/Cell-ID Locating (9)6.10Change Work Mode (10)6.11Monitor....................................................................................................................10.6.12.Location Data Logging and Loading (10)6.13Armed by ACC (11)6.14Cut off the Oil and Power System (11)6.15Armed Setting (11)6.16Disarmed Setting (11)6.17Alarms (12)6.17.1Power off alarm (12)6.17.2SOS Alarm (12)6.17.3Movement alarm (12)6.17.4Over speed alarm (12)6.17.5ACC Alarm (12)6.18Check the Vehicle State (13)6.19Check IMEI (14)6.20Terminal(local)Time Setting (14)6.21Reset Hardware (14)6.22GPRS Setting (14)6.23Less GPRS traffic (15)6.24Instructions for web platform and mobile APP (15)7.Cautions (19)8.Faults&the Solutions (20)1.Function Introduction1.1.This tracker is a new product based on the GSM/GPRS network and GPS satellitepositioning system,which set multiple functions of security,positioning,monitoring surveillance,emergency alarms and tracking in its entirety.It can track and monitor remote target by SMS or internet.1.2.Features1.2.1Support both GPS&LBS(Location based service).1.2.2Support SMS/GPRS/Internet Network data transmission1.2.1Support GPRS on-line and GPRS re-connected automatically if GPRS drops1.2.3Support SMS/GPRS dual-mode switching1.2.4Support configuration by remote terminal.1.2.5Support for point-to-point,point to group,group-to-group monitoring.1.2.6Set multiple functions of security,positioning,monitoring surveillance, emergency alarms and tracking in its entirety.2.ApplicationsUsed widely for vehicle and other moving objects tracking.3.Hardware Description4.AccessoriesNo.Photoes NAME Note1Harness(Default)4PIN2Microphone 1.5meters3Relay 12VDC/40A to24VDC/40A according to vehicles4SOS Key SOS Key/Cable for HelpCall5.SpecificationsContent specificationsDIM68.0X33.0X10.5mmWeight35gNetwork GSM/GPRSBand850/900/1800/1900MhzGPS Sensitivity-159dBmGPS Accuracy5mGPS Start time Cold status45s Warm status35s Hot status1sV oltage9V~40VBackup battery Chargeable3.7V70mAh Polymer Li-Battery Storage Temp.-40°C to+85°COperation Temp.-20°C to+65°CHumidity5%--95%non-condensing6.Operating Instructions6.1Terminal Installation6.1.1Please ask the qualified engineers to install it.6.1.2Do not install it in an environment which is over GSM performance index,andplease pay attention to fix the antennas in an appropriate position with good signals.6.1.3Pay attention to make installation location preventing water and dust.6.1.4Find the4PIN harness and insert it into the corresponding holes of the products,andconnect the wires with the original car circuit showing below:Wiring diagramNote:The orange wire can be connected to the original car horn6.1.5Please put SOS button at the place driver can touch.6.1.6Insert the external monitor Microphone into the monitor jack.6.1.7Please let the TOP SIDE of Tracker upwards the sky,make sure it receivesGPS signals well.6.2Micro SIM CARD Installations6.2.1Take out the SIM card Slot and put Micro SIM card in it.And then put the SIM cardslot back to its original position after confirm the Micro SIM card in the right place.6.2.2Please make sure the Micro SIM card is for GSM network and able to execute thefunction of incoming calls display,no calls can be diverted and the PIN code is locked.The SMS format must be TXT format,and can’t recognize the PDU format.6.3Turn on the Tracker DeviceConnect the positive and negative wire,red and black ones,with12V or24V car power system,It will be powered on after20seconds.6.4GSM/GPS LED IndicatorLED Indicator TypeBehavior Meaning Red LED On(Not Flash)SIM not Ready Flash quicklyGSM search Network(1time per second)GPRS uploading data(3time per second)Flash slowlyGPRS Normal or in Sleep mode (1time per 5seconds)Off(Optional)After bootup 5minutes Blue LEDFlash SlowlyFix to satellites (1time per 5seconds)Flash quicklyLost fix to satellites (1time per second)Off(Optional)After bootup 5minutes 6.5Change Password6.5.1Send SMS“Password,CURRENT PASSWORD,NEW PASSWORD”to the unit to change the password.For Example:Send SMS “Password,123456,888888”to the tracker.If succeeded,“Password setting ok!”will reply to your cell phone from the tracker.Note:the default Password is 123456,seperator is comma.6.5.2Be sure to keep the new password in mind,you have to upload the software to restore the original setting in case of losing the new password.6.5.3Attention:Make sure the new password is in 6digits Arabic numbers,or else the tracker cannot recognize the password.6.5.4When reading this user manual,you will notice that we have used English format ","between some words;6.6Authorization6.6.1You should setup the authorized phone number before using SOS,Movement,Over Speed alarm,etc.Up to3numbers can be authorized.6.6.2Authorization:Send SMS“Admin,password,index,cell phone number”to set up anauthorized number,if the number is successfully authorized,the unit will reply “Admin phone number setting ok!”by SMS.6.6.3Delete authorization:Send SMS“Admin,password,index,d”to delete the authorizednumber.6.6.4If you want to track the target when it enters into another country,you must add thecountry code before the cell phone number.You should authorize your number in international format as follows:“admin,123456,1,0086134****2519”to tracker to set 134****2519as an authorized number.Note:the value of index is from1~36.7Single Locating6.7.1Send SMS“Url,password”to the tracker to get the location report.If there aren’t any authorized number set-up,it will reply all SMS from all the mobile number;if there are authorized numbers set-up,then it only reply the authorized numbersFor example:6.8Exact street address6.8.1You must set up the APN of your local GSM network for the SIM card intracker first before using this function.(APN set Up refer6.22GPRS Setting)6.8.2Send SMS"Loc,password"to get the real street/address name,After configure theAPN.Reply example:No.118,Chuangyue2nd Rd,Bao An district,Huizhou,Guangdong, china.6.9Location based service(LBS)/Cell-ID LocatingIf the tracker cannot establish a solid GPS Fix,it will calculate its location using Cell-ID GSM locating,Location reports will include the GPS coordinates of the last known positions as well as a LAC code,Entering the LAC code to the web tracking platform will enable you to see the tracker’s current location.You can also send command“Loc,password”to the tracker to request exact address,track will automatically switch to tracking by LBS in GPRS mode.Accuracy of LBS depends on the distance to the nearest GSM Network Cell Tower or Base Station.Note:This feature can be used normally in most areas according to the signal of GSM network.It may not be available in some areas.6.10Change Work ModeSend command“Mode,password,value”to tracker to set up the work mode.If successful it will reply“Work mode setting ok!”.Note:value:0~50–Sleep Mode(GPS/GPRS OFF,GSM ON),No Time parameter.Example:mode,123456,01–Normal Mode(GPS/GSM/GPRS ON).No Time parameter.Example:mode,123456,12–LBS Mode(GPS/GSM/GPRS ON).No Time parameter.Example:mode,123456,23–Air Mode(GPS/GSM/GPRS OFF,it will change to Normal Mode after some minutes).Example:mode,123456,3,30(enter air mode30minutes)4–Deep Sleep Mode(GPS/GSM/GPRS OFF,it will wake up once very day).Example:mode,123456,4,2300(wake up and upload location to serverwhen23:00very day)5--Location Logging Mode(GPRS off,GPS On).The location info will be save to the internal memory of tracker.They will be uploaded when back to normal mode.Example:mode,123456,56–Tracking Mode(GSM/GPRS ON,GPS no Sleep).No Time parameter.Example:mode,123456,6Note:the default Mode is1(Normal Mode).6.11Monitor6.11.1Send SMS“Monitor,password,monitor phone number”to the unit,and it will call back the phone number,if you accept the call it willenter the monitor mode.Example:Monitor,123456,134****25196.11.2It will be switched to“track”mode after ending the call.6.11.3It will accept the call if the monitor phone number is the incoming call.6.12Location Data Logging and Loading6.12.1Auto logging:When the tracker device lost GSM signals or fall offline from GPRS,tracker will log the tracking position and alerts automatically in the memory ofdevice,when GSM signals get back,the logged tracking data should be loaded to theweb platform automatically.6.12.2Current location data logging:Send SMS:“Mode,password,5”to tracker device,itwill reply:“Work mode setting ok!”and the tracker will stop upload location info togprs server,and logging them into the memory of tracker.6.12.3Loading save data to the gprs server:Send SMS:“Mode,password,1”to trackerdevice,it will reply:“Work mode setting ok!”and loading the tracking data to theweb server platform.6.13Armed by ACC6.13.1Alarm will be disarmed when ACC on,if in auto Armed mode.(which Setting bySMS:armed,password,3)6.13.1Alarm will be armed when ACC off,if in auto Armed mode.(which Setting bySMS:armed,password,3)6.14Cut off the Oil and Power System6.14.1Send SMS command“Relay,password,1”to tracker,tracker will execute it andreply“Stop engine will be executed!”.And it will remain immobile state until nextcommand to resume.It will be executed after speed less than20KM/H.Example:Relay,123456,16.14.1Resume the Oil and Power SystemSend SMS command“Relay,password,0"to tracker,it will reply"Resume enginesucceed!",it means the oil supply is resumed.Note:This function can be executed by the administrator only.So we must use SMS Admin command to set the Authorization before using this command.6.15Armed Setting6.15.1Set up arm by SMS“armed,password,value”to the tracker device in the vehicle.It will reply“Armed!”。
巡更仪使用说明全文共四篇示例,供读者参考第一篇示例:巡更仪是一种用于安保巡逻和监控的工具,广泛应用于各种领域,如社区、学校、工厂、商场等。
它能够帮助监控人员更高效地进行巡逻和监控工作,提高安全防范能力。
下面就为大家介绍一下关于巡更仪的使用说明。
一、巡更仪的功能1. 实时定位:巡更仪能够通过GPS定位技术准确显示当前位置,并记录下巡逻轨迹,实时监控巡逻人员的位置变化。
2. 时间戳记录:巡更仪能够自动记录每次巡逻的具体时间,以便后续查看和分析。
3. 报警功能:当出现异常情况时,巡更仪可以通过预设的报警功能发出警报,及时通知相关人员进行处理。
4. 数据传输:巡更仪可以通过蓝牙、WIFI等方式将巡逻数据传输到监控中心或管理平台,方便管理人员进行实时监控和数据分析。
5. 耐用性:巡更仪一般具有防水、防震、耐高温等功能,适应各种环境条件下的使用。
二、巡更仪的使用方法1. 开机:按下巡更仪上的开机键,待设备启动完成后,即可开始正常使用。
2. 巡逻设置:在巡逻前,需在巡更仪上设定好巡逻路线和时间间隔等参数,以确保巡逻的准确性和有效性。
3. 巡逻过程:在巡逻过程中,巡更仪会自动记录下每次巡逻的时间、位置等信息,同时实时上传数据到监控中心,以便管理人员监控和分析。
5. 巡逻结束:巡逻结束后,记得及时关闭巡更仪,并导出巡逻数据到相关统计软件进行分析和备份。
三、巡更仪的注意事项1. 巡逻人员应严格按照巡更仪上设定的巡逻路线进行巡逻,不可私自更改。
2. 巡更仪应定期进行充电和维护保养,确保设备的正常使用。
3. 若发现巡更仪故障或异常情况,应及时联系维修人员进行处理,切勿私自拆卸或修理。
4. 巡逻人员需按时完成巡逻任务,不得擅自离开巡逻区域,以免影响巡逻效果。
5. 在使用巡更仪时,需遵守相关安全规定,确保设备的正常使用和个人安全。
通过以上介绍,相信大家对巡更仪的使用方法和注意事项有了更全面的了解。
巡更仪在安保巡逻和监控工作中扮演着重要的角色,只有合理正确地使用巡更仪,才能更好地提高安全防范和监控效果,保障人员和财产的安全。
目录1、概述 (1)2、型号规格 (2)3、技术规格 (4)4、安装与接线 (6)5、前面板及功能操作 (12)5.1 前面板.…….……...…………………………………..………. . 125.2 功能操作 (13)6、参数设置 (15)6.1 设置报警值 (15)6.2 设置公用组态参数 (16)6.3 设置打印参数 (21)6.4 设置各通道组态参数 (25)7、功能及相应参数说明 (27)7.1 输入信号及显示 (27)7.2 零点和满度修正 (30)7.3 冷端补偿 (32)7.4 报警 (33)7.5 控制单元 (34)7.6 打印 (38)7.7 通信 (39)1、概述XSL系列智能巡回检测报警仪适用于5~80点过程量的检测和报警。
可输入热电阻、热电偶、直流电流、直流电压等传感器、变送器信号。
基本误差小于0.2%F·S,显示范围-1999~9999各通道独立设定输入信号类型、量程、报警值各通道独立设定数字滤波时间常数,有效提高抗干扰能力各通道独立设定零点和满度修正,有效减小传感器误差,提高系统测量精度可任意关闭不使用的通道2级参数。
第2级参数受密码控制,防止误操作。
具备参数复制功能,大大减小参数设置的工作量独特实用的报警功能,可配接XSLCU多点控制单元实现各通道的报警输出手动、定时、报警启动打印快速、高效的通信接口,大大缩短通信时间2、型号规格1 2 3 4 5 6 7 8 9XSL / ☐—☐☐☐ S ☐ P ☐ V ☐☐☐☐1:尺寸A:横式160×84×182 开孔152+1×76+1(宽×高)B:竖式84×160×182 开孔76+1×152+1(宽×高)C:方形160×160×182 开孔152-0.5×152-0.5D:台式,盘装通用318×104×300 开孔312+1×96+1(宽×高) 2:通道数3:输入信号R:全部通道均为热电阻仪表内装的分度号包括:Pt100,Cu100,Cu50,BA1,BA2,G53E:全部通道均为热电偶仪表内装的分度号包括:K,S,R,B,N,E,J,T B:全部通道均为4mA~20mA或1V~5V等电流、电压信号,需在订货时明确电流,电压信号的输入通道X:输入为热电阻、热电偶混用。
16通道智能巡检仪使用说明书特点:1、1-16通道数可选择(即可屏蔽2-16通道中的任何一个通道);2、各通道输入类型可任意设置(通过软件设置和硬件跳线相结合的方式完成);3、各通道可根据需要分别设置小数点位置和显示范围;4、多种报警方式可选择:16通道相同输入类型情况下可实现集中设置报警值统一继电器输出、独立设置报警值统一继电器输出、独立设置报警值独立继电器输出;16通道不同输入类型情况下可实现独立设置报警值统一继电器输出、独立设置报警值独立继电器输出;分别报警由副机完成;5、多种变送输出类型和方式可选择:可选择输出0-10mA、0-20mA、4-20mA信号;可选择所有通道测量值的平均值、最大值、最小值变送输出;可指定16通道中任何一通道进行变送输出;所有输出方式的变送范围均可设置;6、采用双排四位数码管显示方式,每通道采用双色指示灯指示报警状态,红色亮表示上限报警,绿色亮表示下限报警;7、具备手动巡检功能,可手动查看各通道测量值;8、具备485通讯输出,采用标准modbus协议,通用性强,可靠性高;设置方式:长按SET键(2秒)即可进入设置菜单,增加键∧、减小键∨修改参数值,SET键确认并保存参数值,同时跳至下一菜单,按MAN键可回到上一个参数,同时按SET键和MAN键即可退出设置状态;在设置状态下如50秒无按键操作,即自动退回测量状态;参数设置表Sn代码表:[表二报警指示:在巡检仪面板上有16只双色指示灯,用于各通道报警状态显示,即任意通道有上限报警信号时,其对应通道的指示灯红灯亮,统一报警时上限报警继电器吸合,分别报警时对应通道的上限报警继电器吸合;有下限报警信号时,对应通道的指示灯绿灯亮,统一报警时下限报警继电器吸合,分别报警时对应通道的下限报警继电器吸合,若没有报警信号则指示灯不指示。
统一报警时,16通道中任何一通道进入报警状态,即相应的报警继电器吸合,例如第2通道有上限报警信号时,仪表上限报警继电器即吸合,如果有多个通道同时有报警信号存在,则只有当所有通道的报警信号解除后相应的继电器才释放。
技术方案目录一、系统概述 (3)1.1.1. RFID识别技术的巡检方式 (3)1.1.2. 先进的GPRS数据传输方式 (3)1.1.3. 电话和短信发送功能 (3)1.1.4. 远程控制 (4)1.1.5. 实时性强 (4)1.1.6. 超大存储容量 (4)1.1.7. 数据高度安全 (4)1.1.8. 高可靠性设计 (4)1.1.9. 易于使用 (4)1.1.10. 防水设计,防摔设计 (4)1.2 BP-3000RR用途 (4)1.3 应用领域 (5)1.4基本工作原理框图 (5)1.5 原理框图说明 (5)1.5.1 微处理控制器 (5)1.5.2 GSM模块 (6)1.5.3 电源模块 (6)1.5.4 OLED显示模块 (6)1.5.5 Flash存储器 (6)1.5.6 充电模块 (6)1.5.7 键盘输入 (6)1.5.8 读卡模块 (6)二、系统组成 (6)GPS系统拓扑图 (7)RFID系统拓扑图 (8)巡检系统的使用示意图 (9)三、RFID工作原理 (9)四、巡更管理系统软硬件配置 (10)1、智能巡逻管理系统软件 (10)2、BP-3000R(GPS/GPRS/RFID)手机型巡检器 (10)3、巡检点 (11)4、人员卡 (12)5、事件夹 (12)6、巡检器通讯线 (12)五、软件系统介绍 (13)软件名称及版本 (13)运行环境 (13)主界面 (13)TCP Server (14)参数下载 (14)下载设置 (16)GPRS传输 (17)报表 (18)原始记录查询 (18)简化原始记录 (19)核查明细查询 (19)核查汇总统计 (21)六、传统签到方式与电子巡逻方式的比较 (23)七、安装、售后服务及技术培训 (24)1、安装 (24)2、售后服务 (25)3、软件升级 (25)4、技术培训 (25)八、系统配置清单 (26)一、系统概述现代化的企业需要有一个安全、高效的办公环境。
GSM/GPRS/GPS Portable TrackerUser ManualPrefaceThank you for purchasing the tracker.This manual shows how to operate the device smoothly and correctly.Make sure to read this manual carefully before using this product.Please note that specification and information are subject to changes without prior notice in this manual.Any change will be integrated in the latest release.The manufacturer assumes no responsibility for any errors or omissions in this document.Content1.Introduction (2)2.Hardware Description (2)3.Specifications (2)4.Instructions for web platform and mobile App (3)5.Insert SIM card,turn on the device (7)6.Function introduction (8)6.1.Initialization (8)6.2.Change Password (8)6.3.Add and Delete Authorized phone number (8)6.4.Single tracking (9)6.5.Auto track continuously (9)6.5.1.Track with limited times upon time interval (9)6.5.2.Track with unlimited times upon time interval (9)6.5.3.Track with unlimited times upon distance (10)6.5.4.Smart track upon time and distance interval (10)6.6.Exact street address (10)6.7.SIM card Balance Inquiry (10)6.8.Decide how many times of alarm message (11)6.9.Alarm functions (11)6.9.1.Low battery alarm (11)6.9.2.Geo-fence (11)6.9.3.Movement alarm (11)6.9.4.Over speed alarm (12)6.9.5.Shock sensor Alarm (12)6.9.6.Anti-tamper alarm (12)6.10.Sleep mode (12)6.10.1.Always online (13)6.10.2.Sleep by shock (13)6.10.3.Sleep by time (14)6.10.4.Deep Sleep by Shock (14)6.10.5.Schedule report (14)6.10.6.Deep sleep by shock+Schedule report (14)6.11.Check the status (14)6.12.Check IMEI (15)6.13.GPRS configuration (15)7.Cautions (16)8.Faults&the Solutions (16)1.Introduction1.1.This tracker is based on the GSM/GPRS network and GPS satellite positioningsystem to track and monitor remote target by SMS or internet.1.2.Features1.2.1.Waterproof Grade IP66.1.2.2.Strong magnet to absorb to vehicle firmly.1.2.3.Built-in large capacity10000MA battery.1.2.4.Super long time standby,6months if it works under“sleep by time”mode and6.9years if it works under“schedule”mode.1.2.5.Real-time tracking,movement alarm,Geo-fence alarm,shock alarm,removeanti-tamper alarm.1.2.6.Support real-time tracking by mobile applications and web platform,and you cancheck the exact street address by cell phone as well.1.2.7.Built-in high sensitivity GSM and GPS antenna,no installation,convenient and fast.2.Hardware Description①USB Port②TF card slot③SIM card slot④Microphone⑤Infrared window⑥Rear cover of magnet3.SpecificationsContent Specifications DIM.106mm x63mm x37.5mmWeight343gNetwork2G GSM/GPRSBand850/900/1800/1900MhzGPS sensitivity-165dBmGPS Accuracy5mTime To First Fix Cold starts:30s Aided starts:5s Reacquisition:1sCharger voltage 110-220V input5V outputBattery Chargeable3.7V10000mAh Li-ion batteryStorage Temp.-40°C to+85°COperation Temp.-20°C to+55°CWaterproof Grade IP66Schedule mode10000*0.85(battery self-lost)/0.14mA/24h/365d=6.9years4.Instructions for web platform and mobile AppUsers need to register an account on before use web platform or mobile App,account name and password is the same on web platform and mobile App.4.1.Register an account4.2.Login4.3.Add a terminal 1.choose the rightserver to login in2.Validate yourIMEI is valid or not3.Click"register".Pop-up a dialog box,register an account4.Input the newlyregistered user ID andpassword,click"login"4.4.Configureyour tracker to web platform to track it online Step 1:Set APN ,refer to 6.13.1Step 2:Set GPRS user name and password ,refer to 6.13.2Step 3:Set IP and port,please use the corresponding IP and port of the server you choose,Refer to 6.13.3Step 4:Switch to GPRS mode ,refer to 6.13.45.add terminal6.add terminal7.enter IMEI 10.Save11.The newlyregistered device is offline in grey color12.After receiving GPRS OK,wait about one minute,tracker will be online in green color,then you can operate the tracker.8.Device name 9.Choose icon4.5.If the tracker is always offline (grey color),make sure the SIM card subscribe theGPRS service,and the credit is enough to surf the Internet,you can use phone to test if the SIM card can surf the Internet.Besides,please check the APN,user name,password,IP,port settings are correct,refer to 6.11.4.6.IOS &Android mobile APP4.6.1.Download and install the mobile application.According to your phone type,download and install mobile app below the home page on web tracking platform.4.6.1.1.Login and use the GPRS version2.Filling the registered user ID and password3.Choose the right server 1.Click“GPRS login”4.Click “login”5.Insert SIM card,turn on the deviceAttention:Please be sure to open the voice call function,caller display function and data flow function,and PIN code is off,no call forwarding function.The recommended data flow package is not less than 30MB permonth.Please use the manufacturer’s original charger and battery,the charge time of the5.Click “the online device”to operate the device①Open the soft glue plug.②Insert MicroSD as the picture shows.③Insert SIM Card as the picture shows,and tracker will be turned on automatically.④Cover the soft glue plugbattery is about7-9hours.Warning:Lithium batteries contain harmful chemical constituents and may explode, please do not slam,stab or put into the fire.When you first use,bring the device outdoors,wait for the device to search for GSM and GPS signals,and in normal conditions the lights of the device will flash once every3 seconds.6.Function introduction6.1.InitializationSend SMS"begin+password"to tracker,it will reply"begin ok"and return to the default factory settings.(Default password:123456).For example:Send SMS "begin123456",it will reply"begin ok".6.2.Change Password6.2.1.Send SMS"password+old password+space+new password"to the tracker tochange the password.For example:Send SMS"password123456888888"to tracker, it will reply“password OK”,it means the password has changed successfully.And please keep the new password in mind6.2.2.Note:The new password must be6digits Arabic numbers,or the tracker can'trecognize.6.2.3.When reading this user manual,you will notice that we have used"+"and"space"between some words;"+"between two words means they should be written together as one word and"space"between two words means you should leave one character space between two words.6.3.Add and Delete Authorized phone number6.3.1.You must setup the authorized phone number before using SOS,geo-fencealarm,etc.Up to5numbers can be authorized.6.3.2.Call the tracker for10times continuously and get its position,then it will savethe cell phone number as the authorized number automatically.and reply“add master ok”.6.3.3.Authorization:Send SMS“admin+password+space+cell phone number”to setup an authorized number,the other authorized numbers should be set by the first authorized number,if the number is successfully authorized,the unit will reply “admin OK”by SMS.6.3.4.Delete authorization:Send SMS“noadmin+password+space+authorizednumber”to delete the authorized number.6.3.5.If you want to track the target when it enters into another country,you mustadd the country code before the cell phone number.You should authorize your number in international format as follows:“admin1234560086133****1111”to tracker to set133****1111as an authorized number.6.4.Single tracking6.4.1.If there aren’t any authorized number set-up,it will reply all calls with alocation report;if there are authorized numbers set-up,then it will not respond when an unauthorized number calls it.6.4.2.If you call it from authorized phone number,it will hang up and report areal-time location as below:6.4.3.When lost fix to satellites,the message will includes the GPS coordinates of lastknown position and LAC code of current position as well.6.5.Auto track continuously6.5.1.Track with limited times upon time intervalSend SMS command“fix030s005n+password”to the tracker device,it will report the latitude&longitude at intervals of30seconds for5times.(s:second,m:minute,h:hour). This command set must be in3digits Arabic numbers and the maximum value is255.e.g.fix030s005n123456.6.5.2.Track with unlimited times upon time intervalSend SMS“fix030s***n+password”to the tracker device,it will reply the latitude& longitude continuously at30seconds intervals.Note:the interval must not less than10s.6.5.3.Track with unlimited times upon distance6.5.3.1.Send SMS command “Distance+password+space+distance value”,tracker will reply “Distance ok”,and then tracker will track according to this distance value interval.E.g Send “Distance1234560050”,that means the distance interval is 50meter,the value must be 4digits Arabic numbers.Cancel:Send SMS “nofix+password”to the tracker.6.5.4.Smart track upon time and distance interval6.5.4.1.Send SMS command “fix030s600s***n+password+space+distance value”to tracker.The unit of distance value is meter.E.g.Send SMS command“fix030s600s***n1234560200”,that means track interval is 600seconds when tracker is motionless,and tracker interval is 30seconds when tracker is moving,or track each 200meters movement.6.5.4.2.Cancel:Send SMS “nofix+password”to the tracker.6.6.Exact street address6.6.1.You must set up the APN of your local GSM network for the SIM card intracker first before using this function,if there is user name and password for GPRS login,Please refer to 6.12section of this manual to configure the APN,user name and password for GPRS login.6.6.2.After configure the APN,send "address+password"to device,it will replySMS including exact street/address name.For example:No.113,Guankou 2nd Rd,Nantou,Nanshan district,Shenzhen,Guangdong,china.6.7.SIM card Balance Inquiry6.7.1.Send SMS command "balance+password+space+carrier’s phonenumber+space+code"to tracker,it will forward the code to carrier’s phone number and return the balance message received from carrier’s phone number.6.7.2.How it works:Take the carrier “China Mobile”for example,after accept balancecommand,tracker will remember the “mobile phone number”,carrier’s number and the code;6.7.3.And then send the code to carrier’s number,and forward the message from carrier tomobile phone number which send the balance command.Send balance backMobilebalance12345610086yeTrackerReceived and executeSend ye out to 1008610086(China mobile)Received ye from number in theForward balance message to mobile phone6.8.Decide how many times of alarm messageFor those alarm messages sent in cycle,you can decide how many SMS messages of alarm to be sent.Send SMS“xtime+password+005“to tracker,alarm message will be sent 5times once alarms are triggered.Alarm SMS will be sent5times by default.6.9.Alarm functions6.9.1.Low battery alarm6.9.1.1.Send SMS“lowbattery+password+space+on”,it will send SMS“lowbattery+latitude/longitude”to authorized numbers2times in total at15minutesinterval when voltage of battery is going to be about3.5V.6.9.1.2.This function activates by default,send SMS“lowbattery+password+space+off”to deactivate.6.9.2.Geo-fence6.9.2.1.Set up a geo-fence for the tracker to restrict its movements within a district.The unit will send SMS to the authorized numbers when it goes out of this district.6.9.2.2.Set up:When the unit stays immobile in a place for3-10minutes,the usercan send SMS“stockade+password+space+latitude,longitude;latitude,longitude”tounit to set the restricted district.In case of breach,it will send SMS“stockade!+latitude&longitude”to the authorized numbers.Attention:The first latitude&longitude is coordinate of the top left corner of the Geo-fence,while the second latitude&longitude is the coordinate of the bottom right corner,it will send alarm SMS at interval of3minutes once beyond the restricted district.6.9.2.3.Cancel:Send SMS“nostockade+password”to deactivate this function.6.9.3.Movement alarm6.9.3.1.Set up:when the unit stays immobile in a place for3-10minutes with GPSsignal reception,the user can send SMS“move+password+space+0200”to thetracker(Suppose area of a radius of200meters,it supports4digits at most.Unit:Meter).It will reply“move OK”.In case of such a movement(the defaultdistance is200m),it will send SMS“Move+latitude&longitude”to theauthorized numbers.6.9.3.2.Cancel:Send SMS“nomove+password”to deactivate the movement alarm.6.9.4.Over speed alarm6.9.4.1.Set up:Send SMS“speed+password+space+080”to the unit(suppose thespeed is80km/h),and it will reply“speed OK!”.When the target moves exceeding80km/h,the unit will send SMS“speed+080!+latitude&longitude”to theauthorized numbers,it will send only one SMS in3minutes in SMS mode.6.9.4.2.Cancel:Send SMS“nospeed+password”to deactivate the overspeed alarm.Attention:The recommended speed should be not less than30km/h.For below that rate,it will be effected the accuracy by GPS signals drift etc.6.9.5.Shock sensor AlarmThe built-in3-axis acceleration sensor can detect it when the vehicle move,tilt or vibrate。
此说明乃是按照智能巡检系统正常操作流程编写,如还有不明白或是带疑问的地方请与卖方联系,感谢您使用此机器和软件!!巡检系统使用大致步骤:巡更机装好电池→连接好电脑→校时→设置巡检点→设置人员→设置线路→设置计划→下载数据→计划分析→计划考核巡检系统使用各步骤详情:装软件打开智能巡检系统的软件,然后按照提示装好软件,然后点击【确定】进入巡检系统(初始密码为空,不用输入)校时图解:1.巡检机先装好电池,然后用数据线与电脑连接好,在【系统设置】中点开【参数设置】。
2.在【参数设置】里面点击【校时】,提示校时成功即可完成对巡检机的校时。
(PS:当巡检机断电过久时就要对巡检机进行校时才能正常读点)设置巡检点图解:1.先依次标记并排好要设置的巡检点,然后依次按顺序的读好排列好的巡检点;把巡检机与电脑连接好,打开智能巡检系统,在【资源设置】中点开【巡检点设置】。
2.点击【采集数据】采集巡检机里面的巡检的数据。
3.显示巡检机里面采集到的巡检点数据并注册到【巡检点设置】中。
4.在巡检点名称中编辑巡检点所对应的地点名称,双击“名称”可直接修改您所需要对应的地点名称。
设置人员图解:1.先依次标记并排好要设置的人员钮,然后依次按顺序的读好排列好的人员钮;把巡检机与电脑连接好,打开智能巡检系统,在【资源设置】中点开【人员设置】。
2.点击【采集数据】采集巡检机里面的巡检的数据。
3.显示巡检机里面采集到的人员钮数据并注册到【人员设置】中。
4.在人员名称中编辑人员钮所对应的人员名称。
设置线路图解:1.在【资源设置】中点开【线路设置】。
2.点击【增加】以增加线路。
3.输入线路名称。
4.点击【保存】以保存线路。
5.选择要设置的线路然后勾选线路中要巡逻的巡检点。
6.勾选好巡检点后点击【左移】把勾选的巡检点添加到线路下。
设置计划图解:1.在【资源设置】中点开【计划设置】。
2.勾选要巡检的是星期几。
3.选择线路。
4.选择每天开始巡检时间和结束时间。
第二代gps探测分析仪使用说明书
1、正确连接仪器,打开接收器,开始接收星星。
2、打开设置,在“配置”蓝牙与接收机连接的选择。
3、系统设置-选择所需的坐标系统,打开此任务。
4、设置电台频率,配置基准站,启动基准站,电台开始正常发射。
5、配置移动站,频率与电台上的频率一致,启动移动站,开始测量。
6、利用GPS测量仪(接收器)用于定位。
7、在起点,在第一个界面长按开始键3秒进行测量,走到终点,按停止键结束测量,自动计算测量数据并显示在屏幕上。
8、最后在屏幕上显示自动计算的测量数据。
GPRS巡检仪使用说明书
GPRS巡检仪使用说明书
V3.9
目录
GPRS巡检仪使用说明书 ..... 错误!未定义书签。
1.产品介绍 (5)
2.使用方法 (5)
如何开机 (5)
如何待机 (5)
如何关机 (5)
如何读卡 (6)
如何输入项目数据 (6)
如何更换电池,电池充电 (6)
指纹管理(限指纹巡检仪) (6)
如何登记指纹 (6)
如何删除指纹 (6)
如何查询指纹编号 (6)
如何校对日期、时间 (7)
3.数据通讯 (7)
GPRS数据传输 (7)
4.提示信息 (7)
5.性能指标: (7)
6、注意事项 (9)
7、保修条例 (10)
巡检仪功能示意图
1.产品介绍
GPRS巡检仪采用感应式读卡技术(RFID)技术,具有防水、防震、GPRS 无线传输、指纹识别防止代检、对每一个巡逻点可自定义项目、有数字键盘输入与逻辑功能选择等特点为。
巡检员用巡检仪在巡检点读卡,巡检仪会记录卡号、读卡时间、项目参数,巡检完成后,巡检仪通过GPRS将数据传回服务中心管理软件,传上的数据包括巡检员信息、巡检点、巡检时间、项目记录等,设备有指纹的还有代检信息。
以实现对巡检人员、巡检过程中检查的数据及时准确的传回服务中心,方便管理人员对被检对象的准确分析。
2.使用方法
如何开机
按“上电键”开机,机器液晶屏上显示开机中……,设备进入主界面。
如何待机
主界面无操作1分钟,巡检仪将进入休眠模式,此状态GPRS处理正常接收状态,若30分钟内,任无操作巡检仪,将进入完全关机状态。
如何关机
在主界面,按住“上电键”2秒,设备进入完全关机状态。
如何读卡
将巡检义开机,在主界面下,靠近巡检点时,巡检仪会发出“嘀”的一声,左上方蓝色操作指示灯闪烁1次,液晶屏上会显示相应的巡检点信息,表示读卡成功。
注意:仅在主界面下才能读卡。
如何输入项目数据
读卡成功后,会进入项目数据界面,数字型项目刚直接录入数据,逻辑型刚选择对应的逻辑项,退出保存成功。
如何更换电池,电池充电
巡检仪液晶屏上显示电池电压过低时,请更换电池,或者将数据线联接电脑,对巡检仪进行充电。
更换电池方法为:将后盖镙丝旋开,取下电池,装上新的电池后,重新旋紧镙丝,电池更换完成。
指纹管理(限指纹巡检仪)
如何登记指纹
进入“菜单”→“指纹管理”选择注册管理员、操作员进行指纹登记。
登记指纹时请保护手指正确的方向放入指纹头。
确保登记的方向与巡检操作方向一致。
如何删除指纹
进入“菜单”→“指纹管理”(有管理员指纹需要管理员指纹才能进入),选择“删除指纹”输入对巡检员的指纹编号,确定删除。
一旦指纹删除,巡检员的指纹将不能识别。
如何查询指纹编号
进入“菜单”→“指纹管理”(有管理员指纹需要管理员指纹才能进入),选择“指纹查询”后,将手指放入指纹头,巡检仪将登记的指纹编号显示出来。
如何校对日期、时间
下载界面,读取信息后,点设备时间后,将巡检仪的日期与时间与电脑同步。
3.数据通讯
线缆通讯:打开通讯口后盖,用数据线ZL001将巡检仪与计算机USB连接,运行巡检管理系统软件,打开项目巡检通讯界面,巡检仪开机后,可进行数据有线下载、上传、校时、删除数据等操作。
GPRS数据传输
自动传送
巡检完成后自动传送。
手动传送
若有未发成功的数据,将会在记录信息中显示出来,可通过进入“菜单”→“数据传输”。
如:记录信息为:8899/0002 其中“/”前的8899表示总记录数,“/”后的0002表示未发送成功数据。
在下一个巡检点巡完后,也可自动将未发送成功的数据一同传送。
4.提示信息
GPRS信号正常:绿色信号指示灯慢闪,约为1秒闪烁一次
GPRS信号不正常:绿色信号指示灯慢闪,约为0.5秒闪烁一次,表示信号不稳
定,或者手机卡异常。
巡检记录满:屏幕的记录信息达到9999时,表示数据已满,删除数据后,方可使用。
日期、日间错误:液晶屏上显示的日期与时间与实际的时间有差异,请与计算机通讯校时。
5.性能指标:
(带指纹)
读卡方式EM、TI全协议感应式
读卡
存储记录数9999条
指纹记录数300枚
单点项目数15个
数据值型最大输入位数小数点前8位,后4位,
可输入
逻辑型选择项5项
计量单位数250个
读卡反应时间<0.1S
显示方式TFT 2.4寸 240*320 高
清彩屏
通讯波特率115200
通讯方式USB+GPRS
工作温度-40-----+70
尺寸170 MM *75 MM
*40MM
读卡方式EM、TI全协议感应式
读卡
存储记录数9999条
单点项目数15个
数据值型最大输入位数小数点前8位,后4位,
可输入
逻辑型选择项5项
计量单位数250个
读卡反应时间<0.1S
显示方式TFT 2.4寸 240*320 高
清彩屏
通讯波特率115200
通讯方式USB+GPRS
工作温度-40-----+70
尺寸170 MM *75 MM
*3MM
6、注意事项
1)计算机的使用应遵循一般的操作要求,不能随意关机或重新启动。
必须在正常退出
巡查管理系统后才能关机或重新启动,否则有可能损坏数据。
2)当出现电压低提示时,请尽快对电池充电,否则可能造成数据的错误或丢失。
3)必须在巡查仪的效范围内读卡,在听到提示音后拿回巡查仪。
4)本系统需配专人管理和操作,操作人员应具备必要的计算机操作经验。
5)非专业人员不得随意拆卸巡查管理系统
的各个部件,不得随意更改和删除巡查管理系统软件的文件或文件夹。
6)当系统出现故障后应及时通知厂商或厂商指定的售后服务部门联系,不得自行处理,以免造成不必要的损失
7、保修条例
产品保修条款
1)正常使用出现质量问题,用户自购买产品之日起三个月免费更换本公司同一型号的产品;一年之内可享受免费保修;超过一年终生维护,需要换零件时收取材料费。
2)购买时间以经销商开出的购机发票或收据日期为准。
3)购机三个月内如有人为外观损坏包换失效,只提供保修服务。
4)但当用户对本产品有下列行为时,本承诺自动终止。
1.用户自行改装、拆卸以及其他不能保证本产品软硬件完整性的操作时。
2.用户未按照说明书的内容进行正确的使用而导致产品全部或部分损坏的。
5)本公司产品均保修卡包换,保修。
并请带齐购机发票或收据。
6)无论您在何处购买的本公司产品,均可在就近的售后服务中心得到同样完
善的服务。
如果问题没有得到妥善的
解决,请致电或来函本公司客户服务
部,我们将在最短的时间内为您解决
问题。
产品保修卡(用户联)
客户购机后请填写以下内容并妥善保存此卡,以便提供完善的售后服务。
使用前请仔细阅读保修条款。
客户姓名:________________ 客户联系电话:_____________________
产品型号:________________ 机仪号:_____________________
购买日期:________________ 经销商:_____________________
发票号码:________________ 经销单
位盖章:_____________________。