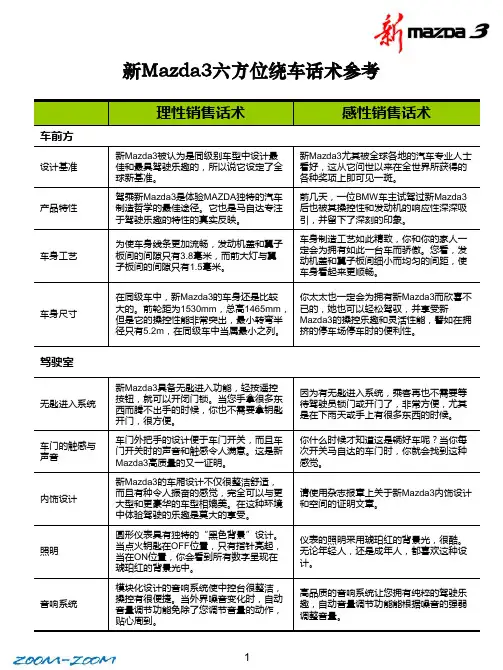
马自达3星骋六方位商品说明练习卡
- 格式:xls
- 大小:21.50 KB
- 文档页数:4
AuraStar說明書繁體中文Instruction manualEN This product is a stroller with Intelligent Auto-Brake device. Operation of the Intelligent Auto-Brake function is conditional. Please read this manual for details. ■Before use, please read this instruction carefully and use it correctly. ■Please keep this manual for future reference. ■Follow the instructions in this manual when assembling the required parts. ■Please also attach this manual if you transfer this product to others. 本產品是附帶自動刹車輔助裝置的嬰兒手推車。
自動刹車運作是有條件的。
詳情請閱讀本書。
■使用前,請仔細閱讀本說明書,並正確使用。
■請妥善保管本說明書,以供日後參考之用。
■需要安裝部件時,請詳閱本說明書後正確安裝。
■若將本產品轉讓他人,請將本說明書一併移交對方。
Please read this instruction manual carefully and keep it for future reference. The safety of the child may be seriously endangered if the instructions are not followed. You are personally responsible for the safety of your child.• The stroller is suitable for children from newborn 1 month to 15kg.(approximately 3 years old) under EN 1888-1:2018 safety standard and CNS 12940.• Always apply the parking brake when you are stationary.• Do not rely too much on the stopper even when the stroller is parked empty.• Even with all stopper engaged, always stay close to the stroller when it is carrying a child, in case of any danger.• Keep all small parts away from children as they are choking hazard.• To prevent the risk of suffocation, always keep the plastic bags out of the reach of children.• Overloading, incorrect folding and the use of non-approved accessories may damage this stroller.• Make sure to use the seat belt (crotch belt, waist belt and shoulder belt) when the child is seated. The front guard is not designed to prevent the child from standing up. Check if the seat belt fits properly, otherwise the baby may fall off from the stroller.• Pay attention to child even when seat belt is in use in case of any sudden movement of child causing it to fall off.• Do not cross the shoulder belts with each other when securing the shoulder belts to the insert plastic. Otherwise excessive pressure may be caused to child’s neck.• Do not use the seat cushion on which rift is found. Otherwise the seat cushion may not function as designed or the child may have chance to swallow the material inside the cushion.• Seat cushion can play a protective role. When the stroller is not installed with a seat cushion, please stop using the stroller. Otherwise, there may be risk of injury.• Do not leave the stroller when the child is seated.• Make sure the open-fold lock is engaged completely before use. Otherwise the stroller may fold suddenly in use.• Do not let the child operate the front guard. It may make the child to fall off from the stroller.• Do not allow your child to stand in or on the stroller, it may be dangerous.• Do not lean on or hang loads on the handle.• Do not hang parcels or accessory items (except Combi original accessories) on the stroller, otherwise tipping over may happen to stroller.• Never carry more than one child in the stroller. Do not allow a child to ride or sit on any area other than the seat.• Excessive weight may cause a hazardous and unstable condition exist.(Maximum load:15kg. Basket maximum load:5kg)• Do not use the stroller on stairs.• Do not let children operate the baby stroller to avoid tipping over or accident.• Be careful of those around you to avoid pinching their fingers when you are opening or folding the stroller or adjusting the seat angle.• Keep your child’s fingers/hands away from moving/folding parts when folding or unfolding or adjusting the stroller.• Do not apply a lifted seat to baby who cannot sit straight by itself, the most reclined seat must be used.• When pushing the stroller, please walk slowly to avoid any damage to the stroller swivel wheels or any tipping over.• Don’t let others touch when you open the stroller to avoid accidental injuries.• The used insert outlet from base seat and the cushion should be matched. (e.g. upperinsert outlet of base seat should match with upper insert outlet of cushion) . Otherwise, the shoulder belt may not be long enough to harness the baby.• It is extremely dangerous to adjust the seat angle when pushing the stroller. Stop thestroller first before operation.• Mind the road when move the stroller and prevent any wheel get stuck in the gap of the drainage ditch cover(s).• Never leave the child unattened. It may be dangerous to leave your child unattended.• Ensure that all the locking devices are engaged before use. Such as adjust yourseat belt length, fasten your seat belt correctly and the stroller is fully opened.• Always use the restraint system to avoid any possible accident.• Do not use in a reclined angle less than 150° for a child under 6 months old.• Any loading attached to the handle affects the stability of the stroller.• Please always fasten the five-point seat belt to ensure the baby's safety.• Check that the stroller body or seat unit attachment devices are correctly engaged before use.• This product is not suitable for running or skating.• Do not let the child play with this product.• To avoid injury ensure that your child is kept away when unfolding and foldingthis product.• Do not place the stroller near fire, high temperature, pool, or electric source.• Only replacement parts supplied or recommended by the manufacturer/distributorshall be used. Only use original accessories and parts that have been approved bythe manufacturer. Do not make any modifications to the product.• For low-power RF motors that have obtained the type approval, the company, store or user is not allowed to change its frequency, increase its power or change characteristics and functions of the original design without permission.• Usage of the low-power RF motors must not affect flight safety and interfere with legalcommunications; if any interference is found, stop using it immediately and improve toclear the interference before continuing to use it. The foregoing legal communication refers to the radio communication operated in accordance with the provisions of thetelecommunications laws. Low-power RF motors must tolerate the interference from legal communications or from industrial, scientific and medical motor equipment with radioradiation.• Excessive collision may cause failure in component.• Do not charge the Main battery in high temperature (such as in the sun).• To fold the main body, you need to fold the handle first, and then fold the stroller frame. • Charge the Main battery regularly. Otherwise the function may be failed and cannot be used normally (it is recommended to charge the Main battery at least once every month).• If the Main battery will not be used for a long time, turn off the power switch of it.• Do not disassemble the Main battery by yourself or pierce or cut it with a sharp object. Otherwise liquid leakage may be caused.• If leakage, smoking or burning occur to the Main battery, please keep it away from children, prevent children from touching and contact the after-sales service.• It is forbidden to throw the Main battery into fire or place it in a high temperatureenvironment. Otherwise an explosion may be caused.• Children are prohibited from playing with the Main battery to avoid accidents or damage.• During use, if the rear wheel, Main battery or front pedal is submerged in water completely, the circuit board may be damaged and the functions may be failed. Please stop usingfunctions of the Intelligent Auto-Brake and front pedal light, and contact after-sales service.• Make sure all snaps are secured when attach the seat cushion to stroller. Otherwise accident or damage to stroller may happen.• Loosen the shoulder belts and support the backrest with the other hand before lowering the seat angle with a child seated. Do not suddenly change the seat angle while a child is seated.• Adjust the length of seat belt properly after change of the backrest angle.• Please do not touch the folding lever except when folding the stroller.• When opening or folding up the stroller, be careful and avoid the seat cushion, seat belt, blanket and toys, etc., being pinched into the stroller body.• If one gives excessive shock to the front wheels when getting over the step, stroller may fall down and cause damages. When stepping over, such as a curb, please slow down even a slight difference level, pull downward the handle and step on the foot-step, and make sure to pass the front wheels to get over the step. When going over any step, be cautious of the bumping of the self-supporting rod against the step.• Never lift the stroller or use it on escalators or stairs when your child is sitting or lying in the stroller.• This stroller requires regular maintenance by the user.• Before use, check that the product and all its components have not been damaged during transportation.• Please do not use the stroller in whatever purposes other than seating a baby. Failure to comply may result in damage of the stroller.• Do not pull or twist or forcibly press down the front guard hardly. Otherwise the stroller may be damaged.• Lift the backrest a little to use if the seat is found too narrow when fully reclined. However, the baby should be able to sit straight when stroller is used in such way.• Do not let an adult sit on the stroller, or add loading on the stroller to avoid any damage to it.• When used in summer, outdoor weather and road conditions will increase the temperature of the stroller, that using for a long time should be avoided.• Avoid storing the stroller in places under high temperature, near a heat source or inside a car. Exposure to high temperature may damage or deform the stroller.• Check regularly that all screws, bolts and nuts are engaged tightly.• For use on trains:This product is not designed to be used on trains. When user attempts to use the product at his /her own risk, please lock stopper in case of sudden brake or turning. Otherwise stroller may fall off.• Do not press on the folding lever while lift the stroller to avoid damage to the part.• Make sure the basket is empty before folding up the stroller.• Make sure the canopy is completely folded up before folding the stroller to avoid damage of the parts.• Do not lay down the stroller and do not put things on the canopy to avoid deformation.• Do not get hold of an opened front guard to pull the baby stroller.• Even have stopper, this stroller may also be accidentally slip or overturned.• Do not leave baby stroller at road side or slope even when it is not in use.• Do not use the stroller on steep slopes, stairs, escalators, rough roads, beaches, mud, etc.• When pushing the stroller, please pay attention to any hole or track on the ground to avoid the front wheel from accidentally getting jammed and tipping over.• In the event of damage or operation problems, stop using the stroller immediately and keep it out of reach of children.• Never leave the stroller close to stairs or steps.• In the event of damage or operation problems, please contact customer service center (or local distributor).• Only use on a flat, relatively smooth, stable and non-slippery surface. Do not use the stroller in snowy, windy days or wet road to avoid the stroller or guardian from slipping.• Do not use the stroller in lightning days to avoid thunder stroke.• Do not attach other accessory like buggy board on the main body during a child being carried in stroller, otherwise accident or damage to stroller may happen.• Do not use the stroller on public vehicles.• Lift front wheels and pay particular attention to gaps or ditch when crossing rail road and the intersection of the motor road to avoid the front wheels from accidentally getting to jammed and tipping over.• No continuous use for a long period: Continuous use for a long period of time may exhaust baby. No continuous use of more than 2 hours for a baby in a reclined seat and 1 hour in an upright seat.• When feel jammed, please do not forcibly fold the stroller to prevent from any damage. You should reopen the stroller to check and operate again.• Do not put things that are too sharp or too large into the basket since it may cause damage to the basket.• Please regular cleaning and checking the stroller. Only use neutral detergent to clean the stroller body.• Make sure no oil or lubricant is left on parts such as front guard or armrest where baby may have chance to lick.• Please contact customer service center (or local distributor) for replacement if you find the tyre wear seriously affect movement.• Parking device shall be engaged when placing and removing the children.• Any load attached to the handle and/or on the back of the backrest and/or on the sides of stroller will affect the stability of the stroller.• Fasten the safety belt securely, but do not have it too tight.• Do not hold the front guard to lift the stroller while a child seated. Failure to comply may cause the stroller to fold up suddenly, release the front guard accidentally, or cause the stroller to slip off.CAUTION (Incorrect operation may cause injury or component damage)• When traveling on vehicles such as subways / high-speed rails, please mind that the wheels of your baby strollers are not caught by the door, and please mind the gap between the platform and the train.• When the child’s foot comes into contact with the floor or the wheel, stop using the stroller lest it be hurt.• Do not use in a lying angle if the child’s head is beyond the backrest.• After the Intelligent Auto-Brake is started, be sure to put your hand on the handle light strip. The stroller cannot be pushed normally until the light strip lights in blue.• The Intelligent Auto-Brake assist system is not applicable to all situations. Therefore, do not rely too much on it.• When the Intelligent Auto-Brake is off, use the manual brake.• If rechargeable batteries or a mix of used and new batteries are used in the handle dry cell compartment, the voltage may be insufficient. Using zinc-manganese batteries may cause dry cell leakage and thus damage the dry cell compartment.• No matter whether the Intelligent Auto-Brake function is activated or not, do not release your hands on a slope to prevent any danger.• When the handle light is lighting in red, stop using the electronic functions and check the status of the dry cell and the Main battery.• Follow the instructions of the airline when taking this product along on the aircraft.• This product generates 2.4GHz frequency band radio wave used by industrial, chemical and medical equipment such as microwave ovens. When there is a equipment using the same frequency band radio wave nearby, radio waves may not be received or transmitted normally.警告(錯誤操作可能引致重大傷害或死亡)不按照本使用說明書指引使用手推車,可能對幼兒造成重大傷害。
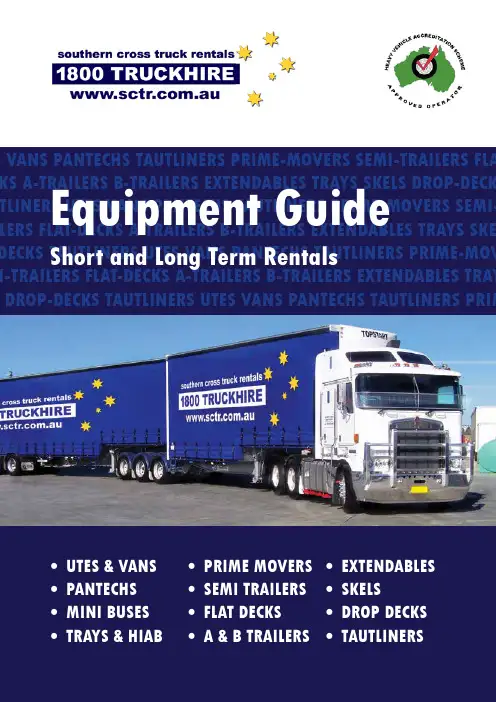
S VANS PANTECHS TAUTLINERS PRIME-MOVERS SEMI-TRAILERS FLA KS A-TRAILERS B-TRAILERS EXTENDABLES TRAYS SKELS DROP-DECK TLINERS UTES VANS PANTECHS TAUTLINERS PRIME-MOVERS SEMI-LERS FLAT-DECKS A-TRAILERS B-TRAILERS EXTENDABLES TRAYS SKE DECKS TAUTLINERS UTES VANS PANTECHS TAUTLINERS PRIME-MOV I-TRAILERS FLAT-DECKS A-TRAILERS B-TRAILERS EXTENDABLES TRAYDROP-DECKS TAUTLINERS UTES VANS PANTECHS TAUTLINERS PRIM• UTES & VANS • PANTECHS • MINI BUSES • TRAYS & HIAB • PRIME MOVERS• SEMI TRAILERS• FLAT DECKS• A & B TRAILERS• EXTENDABLES• SKELS• DROP DECKS•TAUTLINERSUtes1T UteVans1T Van1.5T vanMini Buses (drivers available)s8 seater Mini Bus12 seater Mini Bus14 seater Mini Bus25 seater Mini BusLuggage TrailersPantechs3T Pantech with tail lift (auto or manual)6T Pantech with full tail lift6T Pantech with walk up board8T Pantech with tuck away tail lift8T Pantech with walk up board Tautliners6T Tautliner - 10 pallet with tail lift6T Tautliner - 10 pallet without tail lift8T Tautliner - 12 pallet with tuck away tail lift 8T Tautliner - 12 pallet without tail lift8T Tautliner - 14 pallet with full tail lift8T Tautliner - 14 pallet without tail lift12T Tautliner - 14 pallet with full tail lift 12T Tautliner - 14 pallet without tail lift Trays2T Tray with drop sides3T Tray with tail lift & gates6T Tray with or without gates8T Tray with or without gates12T Tray with container pins Prime MoversSingle rated with sleeperBDouble rated with sleeperBrand new Kenworths & Argosys available in automatic or manualHiab8T Tray with front mounted craneSemi TrailersFlat Decks40’ Flat Deck Tri Axle45’ Flat Deck Tri AxleExtendables19 mtr Flat Deck extendable18 mtr Drop Deck extendable21mtr Flat Extendable Tri AxleSkels40’ Skel with 3 way pins40’ Retractable Skel Tri axleOpen Drop Decks45’ Open Drop Deck with 3 way pins - With or without gatesTautliners45’ Flat Tautliner45’ Drop Deck Tautliner with mezz floor 45’ Drop Deck TautlinerA TrailersA Flat with container pinsA Drop Deck with mezzanine floorA+B SetsFlat open setsFlat Tautliner setsDrop deck Tautliner setsECKS TAUTLINERS UTES VANS PANTECHS TAUTLINERS PRIME-MOVERS SEMI-TRAILERS FLAT-DECKS A-TRAILERS B-TRAILERS EXTENDAB RAYS SKELS DROP-DECKS TAUTLINERS UTES VANS PANTECHS TAUTLINERS PRIME-MOVERS SEMI-TRAILERS FLAT-DECKS A-TRAILERS B-T XTENDABLES TRAYS SKELS DROP-DECKS TAUTLINERS UTES VANS PANTECHS TAUTLINERS PRIME-MOVERS SEMI-TRAILERS FLAT-DECKS A -TRAILERS B-TRAILERS EXTENDABLES TRAYS SKELS DROP-DECKS TAUTLINERS UTES VANS PANTECHS TAUTLINERS PRIME-MOVERS SEM RAILERS FLAT-DECKS A-TRAILERS B-TRAILERS EXTENDABLES TRAYS SKELS DROP-DECKS TAUTLINERS UTES VANS PANTECHS TAUTLINERSShort or long term hireSouthern Cross Truck Rentals offer shortor long term rentals. Our vehicles can be hired as needed – hourly, daily, weekly or monthly.24 Hour emergency service Southern Cross Truck Rentals provides24 hour roadside assistance. In caseof emergency, breakdown or accident involving your hire vehicle call 4633 6100.1800TRUCKHIRE mobile AppIf you’re in and out of the office, why not download our App from the App Store for a quick quote.One way rentalsSouthern Cross offers One Way rentals from Sydney to most capital cities.Call us or visit our website to see our One Way deals.Corporate cardOur CorporateCard offers asignificant discountto businesses whichhave a large fleetor contracted drivers. To find out more about our Corporate Card contact our Sales Department.Truck & Driver Hire Equipment GuideLet us do the driving for youSouthern Cross Truck & Bus Driver Hiresupplies both truck & bus drivers.Depending on your job, you can choose tohire Southern Cross Truck & Bus Driver Hiredrivers either at an hourly or project rate.Included in your price are all drivers’workers’ compensation and travelrequirements and, having a fleet of over140 vehicles at our disposal, we can easilysupply vehicles should you require.S VANS PANTECHS TAUTLINERS PRIME-MOVERS SEMI-TRAILERS FLA KS A-TRAILERS B-TRAILERS EXTENDABLES TRAYS SKELS DROP-DECK TLINERS UTES VANS PANTECHS TAUTLINERS PRIME-MOVERS SEMI-LERS FLAT-DECKS A-TRAILERS B-TRAILERS EXTENDABLES TRAYS SKE DECKS TAUTLINERS UTES VANS PANTECHS TAUTLINERS PRIME-MOV I-TRAILERS FLAT-DECKS A-TRAILERS B-TRAILERS EXTENDABLES TRAYDROP-DECKS TAUTLINERS UTES VANS PANTECHS TAUTLINERS PRIMFor more informationCall 02 4633 6100or visit .auSouthern Cross Truck Rentals149 Smeaton Grange Road, Smeaton Grange NSW 2567• Long & short term hire • Vehicle relocations • Vehicle delivery• Vehicle pick up • One way rentals • Corporate card• Driver hire (LR to MC)• Truck & driver hire。

马自达3星骋中控台说明书
马自达3 用户手册,我拍了一些注意事项和部分功能使用说明。
用户手册(正面)
用户手册(背面)
遥控钥匙电池型号
(AC冷风)空调系统最好每个月启动次10分钟左,以保持内部零件得到润滑。
原厂CD系统按钮及功能解读
功能解读
按钮及功能解读
按钮及功能解读
按钮及功能解读
功能解读
功能解读
如果显示 CHECK CD 说明CD机故障,需要去专修CD 机的店检查维修。
功能按键的使用说明(配合原厂CD才能使用)
功能方向盘按键说明
厂家规定的维护保养周期,这个只能做参考。
级别的机油是向下兼容的。
级别的机油是在环保方面出色省油的。
检查机油量标准做法。
(研究)
轮胎换位,保证四轮的均匀磨损。
新换的轮胎很有必要,每1万公里四轮换位。
发动机舱保险盒说明图
(洗节气门就需要匹配,用T版说的方法拔保险丝快捷又有效)
副驾驶保险盒说明图
副驾驶保险盒说明图
内饰清洁注意事项
车身车架号、发动机号位置说明。
这两个号码过户的时候需要用到。
1.6的是Z6发动机,
2.0的是LF发动机
发动机不同使用的火花塞也不同
变速箱油、转向助力油、刹车/离合器油的型号灯泡瓦数和型号,轮胎型号的含义。
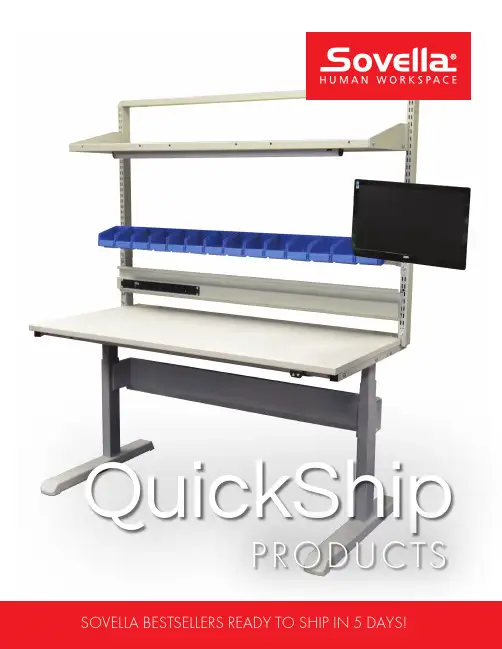
PRODUCTS SOVELLA BESTSELLERS READY TO SHIP IN 5 DAYS!Sovella Best-sellers, shipped FAST2Sovella - QuickShip Products 800-437-6772Wide variety of bench styles• Choose from 3 frame styles: 4-leg, light motor table, or C-leg manual • All frames are height adjustable and able to be equipped with casters • Standard light grey powder-coated ESD paintLarge selection of accessories • Accessories include: shelves, lighting, power, storage, drawers, and more!Ready to ship in just 5 days!•Products ship from Sovella warehouse in Canton, GA 30114TPLMTConcept60” x 30” (59.1” x 27.6”)Laminate 66025.6”-35.4”US-TP3060TPK 72” x 30” (70.9” x 27.6”)Laminate 66025.6”-35.4”US-TP3072TPK 48” x 30” (47.2” x 27.6”)ESD Laminate 66025.6”-35.4”US-TP3048TPKESD 60” x 30” (59.1” x 27.6”)ESD Laminate 66025.6”-35.4”US-TP3060TPKESD 72” x 30” (70.9” x 27.6”)ESD Laminate 66025.6”-35.4”US-TP3072TPKESD LMT48” x 30” (47.2” x 29.5”)Laminate 33025.39”-45.08”854667-4160” x 30” (59.1” x 29.5”)Laminate 33025.39”-45.08”854668-4172” x 30” (70.9” x 29.5”)Laminate 33025.39”-45.08”854669-4148” x 30” (47.2” x 29.5”)ESD Laminate 33025.39”-45.08”854667-4960” x 30” (59.1” x 29.5”)ESD Laminate 33025.39”-45.08”854668-4972” x 30” (70.9” x 29.5”)ESD Laminate 33025.39”-45.08”854669-49Concept Manual48” x 30” (47.2” x 29.1”)Laminate 110026.62”-44.34”US-10049560P 60” x 30” (59.1” x 29.1”)Laminate 110026.62”-44.34”US-10049562P 72” x 30” (70.9” x 29.1”)Laminate 110026.62”-44.34”US-10049564P 48” x 30” (47.2” x 29.1”)ESD Laminate 110026.62”-44.34”US-10049561P 60” x 30” (59.1” x 29.1”)ESD Laminate 110026.62”-44.34”US-10049563P 72” x 30” (70.9” x 29.1”)ESD Laminate110026.62”-44.34”US-10049565P• 1” low pressure laminate • Light grey surface •Plastic edging• 1” low pressure laminate • Light grey surface •Plastic edging• Light-grey, ESD laminate surface • Grey 180° rolled front edge • Thickness 1 3/16 inches• Grey laminate surface • Black molded “waterfall” edges •Thickness 1 3/16 inches3Sovella - QuickShip ProductsPreconfigured Workstations with Uprights72” x 30”Laminate Double Bay 14-CTP916-4160” x 30”ESD Laminate Double Bay 14-CTP915-4972” x 30”ESD Laminate Double Bay 14-CTP916-49Concept Manual60” x 30”Laminate Double Bay 14-C1004143472” x 30”Laminate Double Bay 14-C1004143560” x 30”ESD Laminate Double Bay 14-C1004943472” x 30”ESD LaminateDouble Bay14-C10049435*Double Bay upright modules not compatible with LMT workstations.60” x 30”Laminate Single Bay 14-CTP911-4172” x 30”Laminate Single Bay 14-CTP912-4148” x 30”ESD Laminate Single Bay 14-CTP910-4960” x 30”ESD Laminate Single Bay 14-CTP911-4972” x 30”ESD Laminate Single Bay 14-CTP912-49LMT48” x 30”Laminate Single Bay 14-C8544131660” x 30”Laminate Single Bay 14-C8544131772” x 30”Laminate Single Bay 14-C8544131848” x 30”ESD Laminate Single Bay 14-C8544931660” x 30”ESD Laminate Single Bay 14-C8544931772” x 30”ESD Laminate Single Bay 14-C85449318Concept Manual48” x 30”Laminate Single Bay 14-C1004139660” x 30”Laminate Single Bay 14-C1004139772” x 30”Laminate Single Bay 14-C1004139848” x 30”ESD Laminate Single Bay 14-C1004939660” x 30”ESD Laminate Single Bay 14-C1004939772” x 30”ESD LaminateSingle Bay14-C10049398Shown above: TP bench with double bay uprights Order No. 14-CTP915-41Shown above: TP bench with single bay uprights Order No.14-CTP911-414Sovella - QuickShip Products 800-437-6772Well-chosen accessories optimize workstation functionality and increase usability. When a workstation is well-organized and well-equipped, workflow becomes easier and more efficient, improving ergonomics and making it easier to keep tools in place.Below are some of Sovella’s in-stock and ready to ship accessories!Customize, personalize and reconfigure – it’s easy!Slotted uprights are the basic element for accessorizing Sovella tables. Accessories are attached to Sovella tables with the aid of slotted upright modules. The uprights are attached to the back of the table.121 x M60US-9074908P 1 x M72US-9074909P 2 x M30US-90349001P 2 x M36US-90449001Ph = module’s height attached from the worksurface*Double Bay upright modules not compatible with LMT workstations.1 x M60US-854924-491 x M72US-854928-49M6059.05”33US-91849006P M7270.86”33US-91849008P5Sovella - QuickShip ProductsM6057.75 x 11.81176US-854481-49M7269.80 x 11.81176US-854482-49M3634.25 x 11.81110US-852283-49M3635.23 x 3.54110US-859152-49M4847.04 x 3.54110US-859157-49M6058.89 x 3.54110US-859154-49M7270.66 x 3.54110US-859155-4936” Dual Intensity LED, balancer rail 33.46” x 1.26” x 1.81”14-9503515248” Dual Intensity LED, balancer rail 44.48” x 1.26” x 1.81”14-9503515324” Dual Intensity LED, magnetic 22.44” x 1.26” x 1.81” 14-9503515436” Dual Intensity LED, magnetic 33.46” x 1.26” x 1.81”14-9503515548” Dual Intensity LED, magnetic44.48” x 1.26” x 1.81”14-95035156ESD Footrest with massage rollerJT2ESDCaster Set Ø 3.93” nonESD (2 - locking, 2 - non-locking)834734-00M36 Bin rail w/6 outlet power 14-9114910M48 Bin rail w/6 outlet power 14-9114915M60 Bin rail w/6 outlet power 14-9114919M72 Bin rail w/6 outlet power14-91149237451011336Accessories6Sovella - QuickShip Products 800-437-6772Accessories,Bins4 stacking bins, blue(2) 1525-6 (9.84"x5.87"x5.12") (2) 1520-6 (7.56"x5.87"x4.13")SBS4-24 ESD Stacking bins, black (6.5” x 4.13” x 2.95”)SBS4-1015-4ESD 4 ESD stacking bins, black(2) 1525-4ESD (9.84"x5.87"x5.12") (2) 1520-4ESD (7.56"x5.87"x4.13")SBS4-2ESD*Order No includes 4 bins. Individual bins available with standard delivery time.152056*********56810126 Shelf bins, blue (11.81” x 5.20” x 3.94”)SBS6-3015-66 Shelf bins, blue (11.81” x 7.32” x 3.23”)SBS6-3020-66 ESD Shelf bins, black (11.81” x 3.62” x 3.23”)SBS6-3010-4ESD 6 ESD Shelf bins, black (11.81” x 5.20” x 3.94”)SBS6-3015-4ESD 6 ESD Shelf bins, black (11.81” x 7.32” x 3.23”)SBS6-3020-4ESD*Order No includes 6 bins. Individual bins available with standard delivery time.Stacking binsOur stacking bins have been designed for daily use in stores, production facilities and warehouses. These bins have been designed to fit all standard shelves, paternosters and industrial workstations. Bins of the same width stack securely, even if they are of different lengths. Straight sides ensure an efficient use of space.Shelf binsShelf bins are designed to fit all standard shelves, cabinets and industrial workstations.Bins of the same width stack securely, even if they are of different lengths. Straight sides ensure an efficient use of space, and the bins are available in several bright colors to facilitate product identification. Each drawercomes with a label and protective cover.Terms and ConditionsQuickShip only available for item numbers listed in this brochure. Shipping method must be specified at the time of order. QuickShip productsare ready to ship in five days. Sovella is not responsible for delayed pickups by freight company. Ship time may vary for large orders over 10 benches.Freight is FOB shipping point, Canton, GA. Freight will be pre-paid and added to the invoice or freight collect according to your written instructions. We will coordinate shipments with your representatives. If the job site is not ready to accept shipments at the time scheduled, wewill not be responsible for moving material in or out of storage or other job site locations and any costs incurred. ”FOB shipping point” indi-cates the buyer pays shipping cost to the end user, and takes responsibility for the goods when the goods leave the Sovella’s premises or the premises of the Sovella subcontractor when drop shipping direct from the Sovella subcontractor to the end user.All material is shipped knocked-down unless otherwise noted. Assembly and installation is not included.Receipt of goods must be inspected and inventoried. Any shortage must be reported in writing within 48 hours. Sovella’s freight terms areFOB Canton, GA. Any freight damage should be noted on the freight bill at the time of receipt. Claims should be reported to the freight com-pany directly as soon as possible. Sovella will assist in the claims process but cannot file the claims.Return policy; All returned goods require a RMA number (Return Merchandise Authorization) issued by Sovella, Inc. prior to the return of any goods. All Requests for return authorization must be within 60 days of original invoice. All returns should be packaged so that it is re-turned in re-sellable condition; returned freight prepaid. Upon receipt and inspection of product, Sovella, inc. will issue an 80% credit against applicable invoice if product is deemed re-sellable. Custom or non-standard products may not be returned.Authorization of partial shipments requires written approval from the distributor and acceptance by Sovella, Inc.Terms are NET 30 days from the date of invoice.Warranty: Steel construction and weldments, (5) five years from date of shipment. Mechanical cranks, fixtures and devices, (1) one yearfrom date of shipment. Electrical motors, fixtures, and devices, (1) one year from date of shipment. All in accordance with established Sovella warranty statements.All products are Sovella gray (RAL 7035) in color unless otherwise noted.All items noted with ESD properties are guaranteed to meet ESD requirements specified in the IEC-61340-5-1 standard.Connection, grounding, any local requirements and verification of same is the responsibility of the end user.Sovella will not accept any contract or agreement that contains any penalties or liquidated or actual damages.All orders are subject to credit approval by Sovella, Inc.Any order under our $100.00 minimum will be subject to a $25.00 handling fee. Spare parts excluded.PackagingSovella takes pride in protecting our shipments from damage. Shipments are carefully packed to ensure shipments are received damage-free. Upon shipping, ”DO NOT STACK” cones are placed on top of the boxes. A photograph of the shipment is placed on the outside ofthe package to display the state of the shipment as it is shipped. The photograph provides photo proof to the receiver as to the state of the shipment upon departure from origin.7Sovella - QuickShip ProductsLong story in shortCONTACT INFORMATIONTreston Deutschland GmbH Thomas-Mann-Str. 2122175 HamburgTel. +49 40 8816 5022 - 0Fax +49 40 8816 5022 - 10info.de@ www.treston.deTreston International Trading (Shanghai) Ltd15/F, Tower 2, Plaza 66No. 1266 West Nanjing Road Jing’an District, Shanghai 200040Tel. +86 21 6039 8572info@ (Chinese) (international)Treston Deutschland GmbH Niederlassung Raunheim Frankfurter Straße 10165479 RaunheimTel. +49 6142 992 50Fax +49 6142 218 75mail.de@ www.treston.deTreston Ltd Treston House5b Bone Lane, Newbury Berkshire, RG14 5SH Tel. +44 1635 521521Fax +44 1635 37452salesuk@ Industrimøbler AS Stålfjæra 10975 OsloTel. +47 22 25 05 00post@industrimobler.no www.industrimobler.noTreston Group Russia LLC197375, Russia, Saint-Petersburg,Marshala Novikova street 42Tel. +7 812 677 76 20info.ru@ Sovella, Inc.156 Bluffs Court Canton, GA 30114Tel. +1 770 721 7980+1 800 437 6772Fax +1 770 720 6584infousa@ Treston Ergonaul. E. Orzeszkowej 6 lok. 2A 05-825 Grodzisk Mazowiecki Tel. +48 604 11 98 64info@ergona.pl www.ergona.plTreston France SARLZ.A.C. de la Bonne Rencontre1, voie Gallo Romaine,Quincy-Voisins 77334 Meaux Cedex Tel. +33 1 64 17 11 11Fax +33 1 64 17 11 10infofr@ www.treston.frTreston ABTumstocksvägen 9 A 187 66 TäbyTel. +46 8 511 791 60Fax +46 8 511 797 60info.se@ www.treston.seSovella Human Workspace BV Mechelaarstraat 174903 RE Oosterhout Tel. +31 162 454 383Fax +31 162 434 712infoben@humanworkspace.nl www.humanworkspace.nlGERMANYRUSSIAFRANCESWEDENBENELUXCHINAUNITED KINGDOMNORWAYUSA HEADQUARTERSPOLANDTreston Oy, Turku plant Sorakatu 120730 TurkuTel. +358 10 4469 11Fax +358 10 4469 789sales@ www.treston.fiTreston Oy Sorakatu 120730 TurkuTel. +358 10 4469 11Fax +358 10 4469 789sales@ Treston Oy, Jyväskylä plant PO Box 33 (Sohlberginkatu 10)40351 JyväskyläTel. +358 10 4469 11Fax +358 10 4469 290sales@ www.treston.fiFACTORIESHEADQUARTERSPremium partnersC o p y r i g h t © 2016 S o v e l l a . A l l r i g h t s r e s e r v e d . S p e c i f i c a t i o n s a r e s u b j e c t t o c h a n g e w i t h o u t p r i o r n o t i c e .Thanks to our global sales network, you can receive local support and customer service anywhere in the world. We have offices in Europe and North America as well as an extensive network of selected dealers in more than 30 countries.Sovella has a long history in professional furniture design and manufacture, and well over four decades of experience in ergonomic workspace development. Our design and manufacturing facilities are located in Finland.。
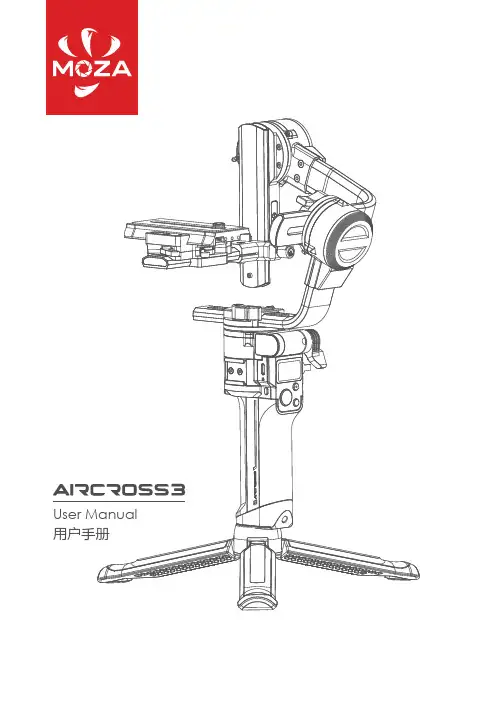
1. Tilt Motor Lock2. Extension Port3. Quick Release Plate4. Tilt Adjustment Slider5. Pan Motor Lock6. Foldable Safety Lock7. Smart Trigger8. Quick Release Plate Knob9. Quick Release Baseplate Knob 10. Roll Knob 11. Roll Motor Lock 12. Pan Knob 13. USB-C Charging Port 14. Battery Indicator Light 15. Power Button 116. OLED Screen 17. Joystick 18. 1/4’’ Extension Port 19. Camera Control Port 20. AI Extension Port 21. Tilt Knob 22. Foldable Knob 23. Camera Control Button 24. Function ButtonUnfold the Gimbal 1. Screw the mini tripod into the screw hole at the bottom of the handle.1.Rotate the foldable Knob;2. Unfold the handle until it is locked.3. Tighten the knob to prevent the handle from loosening.Please charge the battery through the USB-C charging port using a USB-C cable Attaching the TripodBattery Charging2. Expand the mini tripodUnlock the GimbalMounting the Cameramay be damaged. If the gimbal is turned on before unlocking, the gimbal will enter sleep mode.Make sure to prepare the camera before mounting, confirm the battery is fully charged and a memory card with sufficient storage space is inserted.1. Place the camera on the quick release plate with 1/4”or 3/8”screws and keep2. Slide the quick release plate onto the baseplate to the locked position.release plate is locked.Rotate the motor lock to the unlocked position, and then each motor canBalance Adjustment1. Balancing the tilt axis vertical a. Rotate the camera so that the lens is pointing upward b. Unlock the tilt axis and loosen the knob, slightly adjust the position of the tilt adjustment slider.c. The balancing is completed when the camera is steady while pointing2. Balancing the tilt axis horizontal a. Rotate the camera so that the lens is pointing forward;b. Unlock the quick release plate, slightly adjust the position of the plate;c. The balancing is completed when the camera is steady while pointing forward,:Enter or exit sleep mode.Left Button: Return Right Button: Confirm3. Balancing the Roll Axis a. Unlock the Roll axis.b. Slightly adjust the roll arm left and right until it’s completely horizontal.c. Lock the roll axis.4. Balancing the Pan Axisa. Hold the gimbal at an angle of 45° horizontally, turn the pan arm to a horizontal angle.b. Unlock the Pan axis and slightly adjust the pan arm left and right.c. The Pan axis is balanced when the camera is steady, lock the pan axis.Please visit for the complete user manual. It will guide you:● Language Switch● Camera Control● Button Customization● Motor Output● FPV, Sport Gear Mode, Manual Positioning● User Configuration● Calibration and Firmware UpdatesScan the code or search in the app store to download the MOZA Master App.MOZA Master provides functions like Virtual Joystick Control, Motion Sensing Control, Parameter settings, Time-Lapse, Panorama, Calibration and Firmware Updates.MOZA Master AppModel: AirCross 3Weight: 1.3kg without tripodDimension: Unfold: 170*190*310mm, folded: 52*225*270mmBattery Type: Li-ion Intelligent Battery(built-in), 24.718WhBattery Capacity: 3400mAhStandard Votage: 7.27VCharging Votage: 5V/2A, 9V/2AWorking hours: 20HFast-charging time: 1.4HBluetooth: BT5.0,2.400 GHz -2.4835 GHzEnvironmental requirements: 1. This product is powered by a built-in battery; please do not disassemble it, do not put it into liquid or fire in order to avoid damage or risk of injury.2. Before powering on the gimbal, please adjust the balance follow theinstructions in this document. If the gimbal works in an unbalanced state for a long time, the surface temperature of the motor can get hot, which will seriously shorten the battery life.3. Do not let children touch and use this product, do not use fingers to obstruct the motor operation to avoid finger injury.4. This product is not waterproof or dustproof; please keep the gimbal clear of dust and water to avoid damage.(W*D*H)Working temperature: -10 ℃ -50 ℃;Charging temperature: 5 ℃-40 ℃11. 俯仰电机锁2. 外设扩展接口3. 快装板4. 俯仰调节滑块5. 航向电机锁6. 折叠安全锁扣7. 扳机键8. 快装板锁紧扳手9. 快装板底座缩紧扳手10. 横滚臂锁紧旋钮11. 横滚电机锁12. 航向臂锁紧旋钮13. USB-C充电接口14. 充电指示灯15. 电源键16. OLED显示屏17. 摇杆18. 1/4” 螺丝孔19. 相机控制接口20. AI拓展接口21. 俯仰臂锁紧旋钮22. 折叠锁紧旋钮23. 录制键24. 功能键展开云台1.将三脚架拧入手柄底部的螺丝孔中1.折叠锁紧旋钮;2.将手柄折回到竖直位置,直到折叠安全锁扣已经锁住手柄;3.锁紧折叠锁紧旋钮,防止手柄松动。

10款马自达3手动挡按件说明书
马自达3功能键包含功能:音响、空调、除霜,FM,灯光等常用功能。
1、CD以及AM/FM调频位于中控台中心,其它各项音响控件均错落有序地分布在其四周。
2、配备了HVAC左右独立恒温空调,并且装有颗粒过滤器,能让车内空气更加洁净。
3、转向灯,大灯和远近光的切换都要通过方向盘左侧的拨杆,方向盘右侧的拨杆还是最常用的雨刷开关。
4、两侧遮阳板之间分别是独立式的阅读灯,方便车主与乘员在夜间查看地图等,车辆的天窗控件置于中间,将两个阅读灯左右分隔开来。
5、智能钥匙一键启动,驾驶员只需将钥匙置于衣袋或包中即可开启车门启动车辆。
6、马自达表按键可以记录行驶里程,音响按键可以调节收音机。
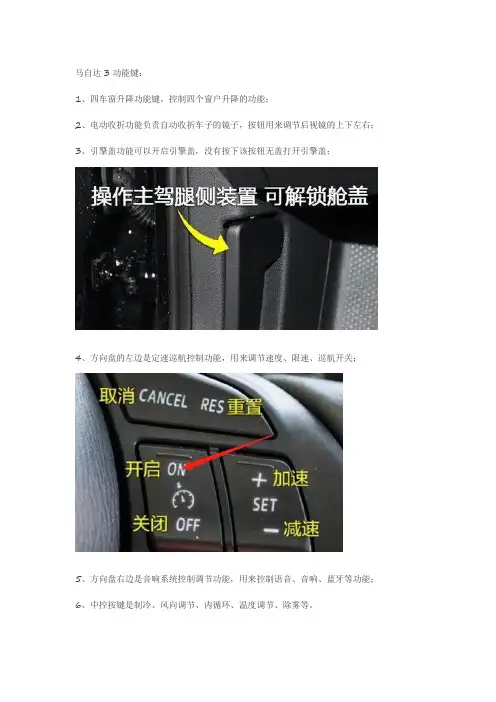
马自达3功能键:
1、四车窗升降功能键,控制四个窗户升降的功能;
2、电动收折功能负责自动收折车子的镜子,按钮用来调节后视镜的上下左右;
3、引擎盖功能可以开启引擎盖,没有按下该按钮无盖打开引擎盖;
4、方向盘的左边是定速巡航控制功能,用来调节速度、限速、巡航开关;
5、方向盘右边是音响系统控制调节功能,用来控制语音、音响、蓝牙等功能;
6、中控按键是制冷、风向调节、内循环、温度调节、除雾等。
马自达保养技巧有以下4点:
1、润滑系统:
对发动机各个部件进行润滑,以防过度磨损,汽车每行驶5000千米到10000千米时就需清洗保养一次,在遇到发动机噪声过大,加速无力,水温过高时也需清洗保养一次;2、燃油系统:
行驶10000千米到15000千米时需清洗保养1次,或当发现引擎喘抖,迟滞和加速不良,冒黑烟,无力、费油时清洗保养1次。
清除系统内部的胶质和积碳,防止有害的腐蚀发生,避免并制止密封件和水箱的渗漏,彻底更换旧的冷却液;
3、冷却系统:
在冬夏换季时应清洗保养一次,正常行驶中每6个月至8个月清洗保养一次,或者遇水温过高、漏水、开锅时清洗保养一次;
4、变速箱:
行驶20000千米到25000千米时清洗保养一次,或遇变速箱打滑、水温偏高、换挡迟缓、系统渗漏时清洗保养一次。
清除有害的油泥和漆膜沉积物,恢复密封垫和O型圈的弹性,使变速箱换挡平顺,提高动力输出。
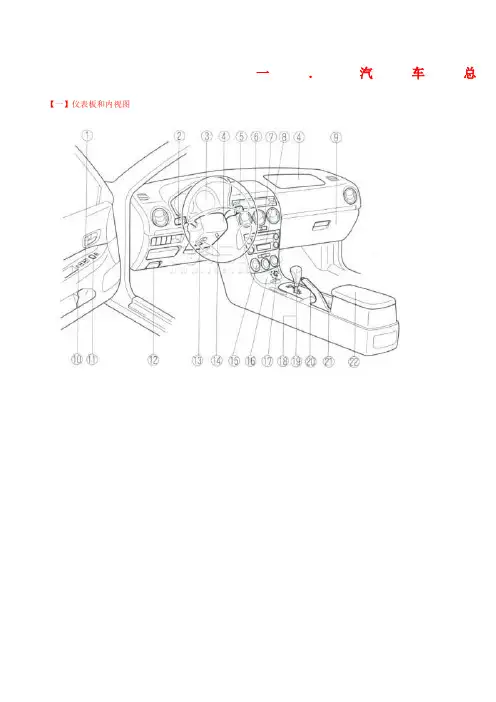
一.汽车总【一】仪表板和内视图根据不同的车型和汽车级别,装置及其安装位置会有所变化【二】外视图四门轿车(4SD)/有仓门式后背的轿车(5HB)根据不同的车型和汽车级别,装置及其安装位置会有所变化二.安全重要性【一】座椅---(1)前座椅(手动操作座椅)座椅前座椅(手动操纵座椅)警告前座椅的改装:改装或者更换前座椅,例如更换车内装饰或者松开螺栓是很危险的。
前座椅包括安全气囊组件,是辅助约束系统的重要组成部分。
诸如此类的改装会损坏辅助约束系统,并由此导致严重的伤害。
如果有必要拆除或者重新安装前座椅,请咨询马自达公司的授权服务店。
被损坏的前座椅:如果前座椅被损坏,则此时驾驶车辆将是非常危险的。
即使是一次不足以使安全气囊充气的碰撞也会损坏包含有安全气囊这个重要组件的前座椅。
如果在此之后又发生一次碰撞,安全气囊可能无法充气,则可能导致人身伤害。
在发生碰撞后,一定要请马自达公司的授权维修商检查前座椅、前座椅安全带预紧装置和安全气囊。
警告固定座椅:未经固定锁死的可调式座椅和座椅靠背都是危险的。
在突发性停车或者碰撞过程中,座椅和座椅靠背可能会移动,并由此导致伤害。
通过向前、向后滑动座椅以及摇晃座椅靠背,确定座椅的可调节部件已经被锁紧到位。
▼座椅滑动警告驾驶员座椅的调整:在行车过程中调整驾驶员座椅是危险的。
驾驶员可能会失去对汽车的控制,并由此引发事故。
只有在车辆停止行驶时,才能调整驾驶员座椅。
如果要向前或者向后移动座椅,抬起调节杆,并朝着目标方向滑动座椅,然后放开调节杆。
通过向前、向后推动座椅,确定调节杆已经回到原位,而且座椅已经被锁定到位。
警告倾斜:在行车过程中,如果乘坐的位置是倾斜的,那么此时您无法得到座椅安全带的全面保护,因此这是非常危险的。
在突发性的刹车或者碰撞中,您会从安全腰带下滑脱,并由此导致严重的内伤。
为了最大限度的获得保护,请向后并直立坐好。
未锁定的座椅靠背:座椅靠背对于在汽车中保护您起着非常重要的作用。
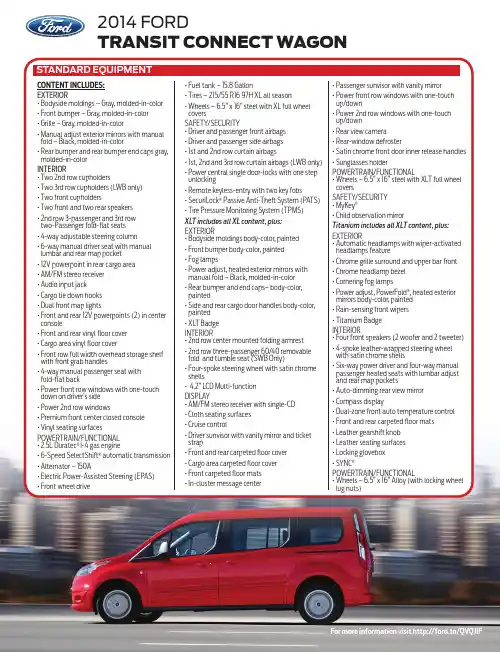
Link to Mazda3 Digital Owner’s Manual:SMART START GUIDEm{zd{3LDWS(P. 21)P. 21)TPMS SET(P. 6)DSCOFFHEATED STEERING WHEEL(P. 8)START/STOPENGINE BUTTON(P. 4)Electric Trunk Lid OpenerLiftgate Request SwitchElec. Liftgate OpenerWhile Carrying the Advanced Key…Vehicles equipped with the Advanced Keyless Entry System and the KeylessEntry System both use the same type of keyless entry transmitter. However, only vehicles equipped with the Advanced Keyless Entry System allow you to lock and unlock the doors with the door request switches (without taking the key out of your purse or pocket).Vehicles equipped with the Keyless Entry System do not have request switches on the doors/trunk. To lock and unlock the doors, the corresponding transmitter Advanced Key Lock UnlockPanic AlarmTrunk(4-door sedan only)Door Request SwitchNOTE: Refer to your Owner’sManual for additional details about “Personalization Features”.Indicator LightIndicator Lightark the vehicle in a safe place and rmly apply the parking brake.et the tires cool, then adjust the tire pressure to(left side of dash) until the TPMS warning lightin the instrument cluster ashes twice and a beepReturning rear seats to upright position: 1 Install the headrest (if removed).2 Raise the seatbacks until they lock into position.NOTE: For tall drivers and front passengers who adjust the front seats all the way back, the headrests on the rear seats need to be removed when folding the rear seatbacks down. If not removed, the rear headrest 4-doorRemote HandleHeated Steering Wheel (if equipped)Heated AreaHeated Steering Wheel Switchoice control (p. 12).TalkPush TALK button and say “Applications.”and say “Settings.”Push TALK buttonand say “Entertainment.”Push TALK button and say “Navigation.”say “Communication.”Safety SettingsActive Driving Display Settings Sound Settings Vehicle Settings System SettingsDevice SettingsDisplay SettingsENTERSelect an item on the screen by:1 M oving the knob up or down, left or right,BACK (to previous screen)FAVORITES The following can be stored in Favorites: • 50 stations total for AM, FM, and XM. • 50 contacts in theTALK13PAIRING YOUR BLUETOOTH® PHONE OR AUDIO DEVICENOTE: Some phone models do not support all features. If your phone ordevice does not pair, please visit /mazdaconnect or contact (800) 430-0153 for further assistance or to report a phone/audio device concern. Pairing Instructions:1M anually turn on Bluetooth on your phone or audio device.2S elect Communication from the Home screen.3S elect Settings.4S elect Bluetooth.5S elect Add New Device, and switch to theoperation on your mobile device.6On your mobile device, select “Mazda”.7V erify the displayed 6-digit code both on the display and on your mobile device. For iPhone:8S elect “Pair” on the phone and select “Yes” on the system.For phones compatible with SMS and MMS:9O n your mobile device, hit “Allow” to let Mazda Connect download yourphonebook and text messages (SMS).IMPORTANT:• I f your mobile device was paired to any Mazda vehicle in the past, “Mazda” on the Bluetooth device list on your mobile device must be deleted.10F or iPhone, go to Settings>Bluetooth. Select the “i” information icon for the connected device. Switch “Show Noti cations” to ON.NOTE:• For safety reasons, you cannot pair a phone while driving.• F or customer service and device compatibility, visit/mazdaconnect or call 800-430-0153.• W hen in range of another Wi-Fi device, the Bluetooth connection between yourphone and the system may disconnect for a short time if you have Wi-Fi enabled.Turn off Wi-Fi on your phone if needed.o end voice recognition session HANG UPTALK Receive /SwapSD CardResume CANCEL /OFF Cruise Control (Set+/Set-)Distance Control (Longer /Shorter )MODEHow to set the distance between vehicles:event of a collision; however, the SCBS has limitations. Do not rely solely on theForward Sensing Camera Array Radar sensorSBS system can be turned off using Safety Settings in MAZDA CONNECT(see page 10).The Lane-keep Assist System (LAS) and Lane Departure Warning System (LDWS) recognize the painted lane lines using the Forward Sensing Camera (FSC) installed steering assistance and uses the following indicationsImages are for reference.Images are for reference.Object Detected Object Detected Rear View MonitorHigh Beams to Flash High BeamsPull leverto dispensewindshield washer uid 123HI LOAUTOOFFMIST :AUTO29AUDIO OPERATIONThe following icons are displayed on the screen:SOURCES: Displays Audio menuto change audio source (FM / AM/ XM / Aha / Pandora / Stitcher /Bluetooth / USB / CD / AUX).AUTO MEMORY: Displays alist of the 10 strongest radiostations. Because stationstrength changes as you drive,select Update Station List iconto re-scan for strong stations.FAVORITES: Displays list ofyour favorite AM, FM, and XMradio stations.HD RADIO: Switches HD RadioOn/Off.SCAN: Scans radio stations orsongs (scanning stops at each onefor 5 seconds). Select again to stop.TUNER: Displays manual radio tuner.TAG: Saves artist and titleand sends them to your Appledevice (for Apple deviceswith USB use only).SEEK PREVIOUS/NEXT:Selects previous or nextreceivable radio station or song.Press and hold to change radiostation continually.SETTINGS: Adjusts the audioquality level (bass, treble, etc.).The following icons are displayedon the CD screen only:TRACK LIST: Displays the tracklist of the CD.REPEAT: Repeats the currentsong. Select again to stop.SHUFFLE: Plays the songs onthe CD in random order. Selectagain to stop.PLAY/PAUSE: Plays and pausesthe CD.Playing Bluetooth® (BT) Audio1M ake sure the BT audio device is paired toyour vehicle.2T urn on the BT audio device.3S elect Bluetooth from Sources.See your Owner’s Manual for further information on:· Pandora · Aha · StitcherBLUETOOTH® AUDIOBluetooth® enabled phones and audio playersprovide an opportunity to play music through theaudio system with no wires attached.Some phone models do not support all features.Go to /mazdaconnector contact (800) 430-0153 for further assistanceor to report a phone/MP3 device concern.NOTE: In order to use Aha, Pandoraand Stitcher as audio sources, the Appmust be installed on your phone. TheseApps stream music using your data planand listening to them counts toward yourmonthly cellular data usage.30AUDIO OPERATION USING VOICEAudio operation and media selection can be done using voice recognition. Push the TALK button on the steering wheel, wait for a beep, then say a command in a clear, natural voice (not too fast or too slow). Some common commands are listed below.Play (and any of the following):AM, FM, XM, CD, Bluetooth, Aha, Pandora, Stitcher, USB, AUX Play or Resume / Pause or Stop / Next or PreviousPlay (and any of the following):Song, Playlist <playlist name>, Artist <artist name>, Album <album name>, Genre <genre name>, Folder <folder name>Tune to Station <frequency AM or FM>Tune to Channel Number (XM)HD RADIOHD radio has a special receiver which allows it to receive digital broadcasts (where available) in addition to the analog broadcasts it already receives. Digitalbroadcasts have better sound quality than analog broadcasts as digital broadcasts provide free, crystal clear audio.When the HD radio button is ON (red), there could be a noticeable difference in sound quality and volume when a change from digital to analog signals occurs. If the sound quality and volume become noticeably diminished or cut off, select the HD button to turn OFF HD radio (not red).NOTE: To use BT audio, make sure the musical icon is displayed by going to Bluetooth in Device settings. Some Bluetooth ® audio devices need a certain amount of time before the icon is displayed.NOTE: Push the TALK button and say “Help” at any time to hear a list ofavailable commands.New Mazda vehicles equipped with SiriusXM ® Satellite Radio will receive an introductoryfour-month trial subscription that starts on the day the vehicle is sold. Enjoy over 150 channels including commercial-free music, plus sports, comedy, entertainment, news and much more.T o start listening to SiriusXM, select XM from audio sources, then push channel up and down to listen to over 150 channels. If you do not hear audio, please activate service to your radio with a simple refresh process. 1 S croll to XM Radio, go to channel 1 and push “previous” to channel 0to nd your radio ID.2 G o to /refresh and enter radio ID or call1-855-MYREFRESH (1-855-697-3373).31NOTE:You will need an audio cable with an 1/8 inch (3.5 mm)mini stereo plug (available as a Genuine Mazda accessory) toconnect your portable audio player into the AUX jack.IMPORTANT:• S et the volume level on your portable audio player to the highest level beforedistortion starts, then use the vehicle’s audio system to adjust the volume.• U nplug any device from the USB port and accessory socket before turning offthe vehicle. Leaving devices plugged in can drain the battery and cause issues during the Bluetooth pairing process at start-up. Wait about 15 seconds afterstarting the vehicle before plugging anything into the USB port.1L ocate the USB port or AUX jack.2C onnect the device plug into the portable audio player and into theUSB port or AUX jack.3Turn the vehicle audio system on.4Select AUX or USB from the Sources menu.5USB Port: Use the vehicle’s audio system or steering wheel controls to control the connected USB device.AUX Jack: Use the portable audio player controls to play music.Refer to the Owner’s Manual for additional information.5 mm)y) toPORTABLE AUDIO PLAYER INTEGRATIONUSING THE USB PORT OR AUX JACKYour vehicle is equipped with a USB port andauxiliary AUX jack, conveniently located in thecenter console, that allows you to play your iPod,USB device, or portable audio player through thevehicle’s audio system. The center console is usefulfor storing your personal media/phone devices.Learn the system when parked and do not let itdistract you while driving.12 VOLT ACCESSORY SOCKETSThe accessory socket in the dash is on with the ignition ON and the accessory socket in the center console is always on.NOTE: When using a USB memory stick, the system plays the rst audio le when restarting the vehicle. It does not start where it left off when turning off the engine.NOTE: When using the accessory socket in the center console, make sure to disconnect any device from it when turning off the ignition; otherwise, the vehicle’s battery could go dead.Push to select theTEMPERATURE DISPLAYThe outside temperature unit can be switched between °C and °F using System Settings in the SPEED UNIT SELECTOR 3IMPORTANT:Mazda Connect display setting is set on “AUTO”, the instrument cluster and display may become dimmer when the headlights are on. If the display and instrument cluster become too dim or too bright when the headlights are on, simply rotate the dimmer knob located on your instrument cluster to adjust the brightness.DASHBOARD ILLUMINATION/ DIMMER 1/ TRIP METER 2TPMS NOTE:The outside temperature unit can bepressing the INFO button for veseconds or longer after switchingIMPORTANT:Mazda Connect display setting is set on “AUTO”, the instrument cluster and display may become dimmer when the headlights are on. If the display and instrument cluster become too dim or too bright when the headlights are on, simply rotate the dimmer knob located on your instrument cluster to adjust the brightness.The Active Driving Display displays the following information:373839TRAFFIC SIGN RECOGNITION (TSR) SYSTEMThe Traffic Sign Recognition (TSR) System helps prevent the driver from overlooking traffic signs, and provides support for safe driving by displaying traffic signs on the Active Driving Display. TSR recognizes traffic signs using the Forward Sensing Camera (FSC) or the navigation system while driving.When vehicle speed exceeds the speed limit sign displayed in the Active Driving Display, the system noti es the driver with an indication in the display and a warning sound.The TSR displays the speed limit (including auxiliary signs), do not enter, and traf c stop signs.NOTE:• T he Traf c Sign Recognition (TSR) System is not supported in some countries or regions. For more information, consult an Authorized Mazda Dealer.• T he Traf c Sign Recognition (TSR) System operates only if the navigationsystem SD card (Mazda Genuine) is inserted in the SD card slot. Consult an Authorized Mazda Dealer for details.modePush the center of Push and hold the center of the INFO button Information display—The Official Site for M{zd{ OwnersRegister today at —the ultimate destination for Mazda Owners. Once registered, you’ll be able to take advantage of bene ts exclusively for Mazda Owners: • I nsider access to exclusive events and promotions • Personalized maintenance schedules • Zoom-Zoom Owner Magazine • W arranty information and on-line Owner’s Manuals • Wallpaper, videos and other fun stuff • A ccessories speci cally designed for your vehicle • C ar Care Discount Coupons available from your Authorized Mazda Dealer Visit and register at today!—MAZDA MOBILEThe following apps are available for iPhone ® and Android smartphones:• M azda Assist app - Provides roadside assistance 24 hours a day, 365 days a year. Toll free number 1-800-866-1998 can also be used for roadside assistance.• M yMazda app - Keep track of your Mazda from the palm of your hand with these features:The apps can be downloaded, free of charge, from the App store for the iPhone ® and Google Play (Android Market) for Android powered devices. After downloading the app, customer name, email, smartphone number and VIN are required. Maintenance schedule Service coupons Promotional alerts Service history Recall information Parked car locator S can VIN barcode capability when registering a vehicle Mazda Dealer locator Update owner pro leLink to Mazda Assist Free MyMazda appiPhone and AndroidFree Mazda Assist appiPhone and AndroidTHE MAZDA3 | DRIVING MATTERS ZOO}-zoo}Genuine Mazda ServiceBecause you and your Mazda deserve the bestYour new Mazda deserves nothing less than the very best. To keep it running like new for years to come, trust the experts at your local Authorized Mazda Dealer . Simply bring your vehicle in for your scheduled maintenance and any needed repairs.*At participating Mazda Full Circle Service Centers,** our technicians willautomatically perform a complimentary Full Circle inspection on your vehicle and issue a detailed report card at every visit. This is designed to help you keep track of your Mazda’s critical operating condition. Our factory-trained technicians know your vehicle inside out and use Genuine Mazda Parts, giving your vehicle the optimum care and maintenance it requires to run with flawless precision.Remember to further enhance your driving experience, visit your local Mazda Service Center for your scheduled maintenance. It’s also the place where you can find a wide variety of tires, parts and accessories that are just right for your vehicle. *See vehicle’s scheduled-maintenance program for details.** T o learn more about Mazda Full Circle Service, visit and click on the “Owners” tab, scroll down and click on “Service & Parts”, and scroll down to “Mazda FULL CIRCLE SERVICE”.Customer Experience Center: 1-800-222-5500Roadside Assistance Contact: 1-800-866-1998This easy-to-use Smart Start Guide is intended to help you more fully appreciate some of the unique features and functions of your new vehicle. However , it is not intended to replace your Owner’s Manual. The Owner’s Manual contains more detailed information to help you better understand the important safety warnings, features, operation, and maintenance of your vehicle. All information, specifications, photographs and illustrations in this publication are those in effect at the time of printing. Mazda reserves the right to change specifications or design without obligation.© Mazda North America OperationsPrinted in U.S.A 4/17Print 49999 95 038C 17SS。
在您驾驶马自达汽车之前您的Mazda6的设计与制造是用来载客与装载货物的绝对不要用您的Mazda6牵引货车与拖车,如果这样的话会对车辆或乘员造成严重伤害。
如果您需要进一步详细了解,请向经过授权的Mazda6销售服务店咨询。
新车在第一个1000km(600英里)内,不要牵引车辆如果这样可能会损坏车辆。
驾驶技巧磨合无需特殊的磨合,但是,在最初的1,000公里(600英里)中,有以下几项防护措施可以使您的马自达汽车提高性能、经济性及使用寿命。
1.不要使发动机高速空转。
2.不要长时间地保持一个恒定的速度,无论是慢速还是快速。
3.不要过长时间地恒定在节气门全开或者发动机高速运转。
4.避免不必要的紧急制动。
5.避免节气门全开时起动汽车。
6.不要牵引拖车。
省钱的建议您如何操作您的马自达汽车将决定一箱燃油能够使它行驶多远的距离。
采纳这些建议会帮助您节省燃油及维修费用。
1、避免长时间预热。
一旦发动机平稳运转,则开始驾驶。
2、避免快速起动。
3、保持发动机的调整。
遵循维修保养计划(第8-3页),并要求专业的维修人员检查维修汽车,我们向您推荐马自达公司授权的维修人员。
4、仅当必要时使用空调设备。
5、在崎岖不平的道路上减慢车速。
6、保持轮胎适当充气压力。
7、不要承载不必要的重量。
8、在行驶时,不要将您的脚放在制动器踏板上。
9、使方向盘保持正确的调整。
10、在高速行驶时,保持车窗关闭。
11、侧风及逆风行驶时,减慢车速。
滑行:当下坡时,使发动机停止运转是非常危险的。
这会导致失去动力转向或助力制动的控制,并有可能导致动力系统的损坏。
失去转向或者制动控制可能导致事故发生。
在下坡时,不要使发动机停止运转。
危险驾驶在光滑的路面换低档:当在光滑的表面上驾驶时,换低档是非常危险的。
车轮速度的突然变化会导致轮胎打滑。
这会造成汽车失去控制,并导致事故。
如果必须在光滑的表面上换低档,则一定要非常注意。
当在冰上或水中、雪中、泥中、沙中、或类似的危险情况下行驶时:1、注意谨慎,并且确保较长的制动距离。
The City of WinnipegBid Opportunity No. 4-2018Template Version: C420160226 - RWAPPENDIX ‘D’HITEX CM PRIME AND PUMATRACK ROLLABLE ROAD SURFACE SYSTEMPavement MarkingsPuma TrackMMA Cold Applied Surface TreatmentPumaTrack manually rollable surface treatment is engineered to achieve the highest levels of durabillity, adhesion and colour stabillity. PumaTrack is the ideal application for cycle tracks and walk ways.Hitex North AmericaUnit 2 , 2153 192 Street, Surrey, British Columbia , Canada, V3Z 3X2MAIN 604.239.3858 TOLL-FREE 1.877.265.5304 EMAIL **************** PumaTrack comprises an MMA binder system, lead / heavy metal free pigments, aggregates and fillers.PumaTrack is available in a range of colours for different applications.Why PumaTrack?• Roller application ensures high quality, even finish• Provides enhanced safety for cyclists and vulnerable road users • Tough and durable with a long service life• Catalyst controlled, rapid curing, typically 10 - 30 minutes • Non-toxic binder system • Fast and easy to apply• Highly resistant to discolouration•Can be adapted to suit particular climatic requirementsTypical uses:• Cycle routes • Paths/ walkways• Smaller scale works e.g. car parks, factory markingsCompliances/approvalsHitex design and develop road marking and surfacing products to the highest level of international or customer specific requirements.The management system of Hitex Traffic Safety Ltd has beenassessed and registered as meeting the requirements of ISO 9001 and ISO 14001.ColorsPumaTrack is available in a range of colours. Standard colours are red, green, yellow and blue. Other colours available on request.Application methodPumaTrack can be applied as follows:• B y squeegee to regulate surface, finished with a roller to achieve textured skid-resistant finish • By hand screedPumaTrack requires the use of a catalyst to enable curing of thesystem. Please refer to the relevant Installation Method Statement for full instructions on the application process.Technical dataTable 1 Physical propertiesTypical coverage rate 4.6 lb/yd² (2.5kg/m²)Pot life*5–15 mins Curing time*10–30 minsRoad surface temperature range32–104°F (0–40°C)* Dependant on ambient temperature and catalyst dosagePackaging & storagePumaTrack is supplied in pre-weighed 22lb (10kg) or 44lb (20kg)pails. Other pack sizes available upon request. The catalyst (hardener) is supplied separately. Dosage of the catalyst varies according to material temperature.It is recommended that PumaBrite and PumaSpray product should be kept totally dry and stored away from direct sunlight and areas of potential contamination.The binder component must be stored away from any catalyst. Stable for 6 months when stored in a cool, dry place. Long periods of over-heating (e.g. external storage in summer) may lead to gelling of the material.Health & safetyFor further information consult the relevant Safety Data Sheet (SDS).DisclaimerThe information contained herein is accurate to the best of our knowledge and belief as of the date issued. The information and recommendations are offered for the user’s consideration and examination for the purposes of health, safety and environmental requirements only. It should not therefore be construed as guaranteeing any specific property of the product. It is the user’s responsibility to satisfy themselves as to thesuitability of such information for its use and to carry out their own risk assessment.Puma TrackPRIMER FOR HITEX PUMAMMA SYSTEMS ON METAL AND CONCRETE SUBSTRATESPRODUCT INFORMATION DescriptionCM Primer is a low viscosity, colourless, 2component reactive resin based on methyl methacrylate (MMA).UsageCM Primer is used as primer to give excellent bonding to concrete and metal substrates (e.g. iron, aluminium, stainless steel).We strongly recommend with CM primer that curing and adhesion tests are conducted on the particular substrate prior to general use on site.Packaging180 kg steel drums, 20 kg pailsShelf life6 months when stored in a cool and dry place and in originally closed packaging.The optimal storage temperature is 15-20°C.TECHNICAL INFORMATIONTechnical characteristics (liquid state)Viscosity, 25°C:100-130mPa*s DIN 53018Density, 25°C:0.99 g/ml ISO 2811Pot life / processing time at 20°C:approx. 15min.Curing time at 20°C:approx. 30min.Flash point:+ 11.5°CISO 1516Technical characteristics (curedstate)Tensile strength:13.8 N/mm²ISO 527Elongation atmaximum strength: 1.3 %Elongation at fracture:1.3 %Modulus of elasticity:1500 N/mm 2Density, 20°C:1.16 g/cm 3ISO 1183Please note that an objective comparison with other data is only possible if norms and parameters are identical.USAGE GUIDELINES Substrate preparationAll substrates must be dry, firm, solid and free of dust, fat and oil. Loose tiles and tiles over hollows must also be removed. Laitance and loose articles must be thoroughly removed. Steel substrates must be prepared to SA 2.5 (according to DIN 55929).Surface structure shall allow the correct application of the primer.-Surface tensile strength shall be min. 1.5 MPa.-Mechanical preparation shall expose concrete aggregate.-Visible pin holes and craters shall be filled separately using filled primer or suitable cement mortar.For further details, see our Installation Method Statements for Hitex PUMA MMA systems.MixingPrior to use CM Primer must be carefully stirred to achieve a uniform distribution of the paraffin contained in the product.CM Primer is thoroughly mixed together withthe Catalyst (50% dibenzoyl peroxide), in accordance with the below guidelines.It should be noted that the amount of catalyst powder to be added depends upon the substrate temperature.at 30°C add 1% by weight of resin at 20°C add 2% by weight of resin at 10°C add 4% by weight of resin at 0°C add 6% by weight of resin Note:Weight to Volumetric conversion of Catalyst.1 cm³ of Catalyst weighs 0.64 g 1 g of Catalyst = 1.57 cm³KEY BENEFIT SUMMARY•Exhibits excellent adhesion to metal and concrete substrates •Easy to applyCM PRIMERDate:Data Sheet:Page:08.06.2017CMPDS011/ 2APPLICATION-Substrate surface temperature may range from 0°C to 40°C.-Do not apply when surface temperature is above 40°C and/or rapidly rising. Special care must be observed if area is under exposure to direct sunshine.-Substrate temperature must be at least 3°C higher than the actual dew point.After the catalyst has been stirred in, the primer is poured onto the substrate in stripes and distributed with a short-pile paint roller. A notched rubber squeegee can be used for fast distribution of large quantities. Apply at a rate of between 300 g/m²to 500 g/m² depending on density and porosity of the substrate. In any case, continue applying primer until saturation occurs to obtain a continuous resin film. On extremely porous substrates a second prime coat may be required. When a continuous resin film is obtained, broadcast fire-dried quartz sand (particle size 0.7-1.2 mm or 0.3-0.7 mm)into the still wet primer.Consumption of this broadcast sand:approximately 0.3 kg/m 2.For further details, see our Installation Method Statements for Hitex PUMA MMA marking and surfacing Systems.HEALTH AND SAFETY PRECAUTIONSSuitable protective clothing, gloves and safety goggles must be worn during mixing and application of CM Primer.When the product is applied in enclosed areas without natural ventilation, forced ventilation must be arranged. Avoid strong concentration of vapour as well as direct contact with skin or eyes.CM Primer is highly flammable; keep away from heat and all sources of ignition and do not smoke.The stirrer as well as all the other electric appliances used on the application site must be explosion-proof versions.For further information see our Material Safety Data Sheet.TECHNICAL SERVICEContact Hitex Traffic Safety LtdThe information and recommendations herein are believed by Hitex International to be accurate and reliable.The information on this data sheet supersedes all previous data concerning this product and its application. The application instructions and the technical data concerning our products are indicative. The buyer is responsible for the application, also in respect of third parties.CMPRIMERPROPOSED METHOD STATEMENTFOR THE INSTALLATION AND QUALITY CONTROL OFPUMATRACK ROLLABLE ROAD SURFACING SYSTEM1.General1.1The installation and composition of PumaTrack Rollable Road Surfacing System shall beas stated in the product specification and this installation method statement.1.2PumaTrack Rollable Road Surfacing System consists of a Methyl Methacrylate binder,blended fillers, pigment(s),aggregate,and property modifying additives.1.3 A programme of work shall be agreed with the purchaser prior to commencement ofinstallation. Requirements for the provision of sufficient working area, plant, safety and,if required, protection to the system shall be agreed.1.4The current installation method statement together with all the necessary Health & Safetydata sheets and COSHH risk assessment shall be deposited with the purchaser andmaintained on-site.2.Quality Control2.1Every batch shall be subject to quality control checks to ensure compliance with thesystem specification.2.2Each component received on-site shall be logged and stored to prevent contaminationor deterioration, in accordance with the manufacturer’s instructions.3.Suitability of the Road Surface3.1The system is deemed suitable for use on highways with concrete or bituminoussurfaces.3.2The purchaser should ensure that the pavement structure is adequate to support thetraffic without undue cracking or deformation during the expected life of the system3.3New bituminous substrates should be allowed to weather for at least 6-8 weeks prior tothe installation of the system.This is because bituminous substrates can contain residuesof oils, bitumen and additives which can inhibit adhesion and curing. Depending on thetype of substrate, this can take even longer than 8 weeks, and tests should be carriedout on a small area before the full application commences to ensure the adhesion is fine.3.4Concrete surfaces should be a minimum of 28 days old and must be primed using a CMPrimer prior to the installation of the system.4.Traffic ManagementTraffic Management shall be in accordance with Department of Transport Traffic Signs Manual Chapter 8 current edition, or as agreed between the Purchaser and Installer.5.Preparation of the Road Surface5.1The areas to which the system is to be applied shall be clearly defined and marked bythe Purchaser prior to commencement of work on-site.5.2Any imperfections in the road surface not acceptable to the Installer shall be reinstatedwith a material approved by the Purchaser in consultation with the Installer.5.3The road surface shall be clean, dry and free from ice, frost, loose aggregate, oil, grease,road salt and other loose matter that may impair the adhesion of the system.5.4Where the road surface does not comply with Section 5.3 it shall be cleaned by theInstaller or others, by grit blasting, high pressure water jetting, low pressurewater/abrasive blast cleaning, scarifying, scabbling or other means approved by thePurchaser. To remove dust and other loose matter the road surface should be vigorouslybrushed or treated with hot compressed air. Any oil visible on the road surface shall beremoved by washing and scrubbing with a suitable detergent solution followed by flushingwith clean water or by other suitable means.5.5Existing road markings, ironwork, road edges of area to be treated and road studs shallbe suitably masked.5.6On concrete substrates, CM primer shall be applied using a short pile paint roller orserrated edge squeegee at a typical coverage rate of 0.4kg/m², depending on thesubstrate texture and porosity. The road surface temperature shall be between 0 and40°C. The CM primer needs to be catalysed according to the following table:Table 1:Catalyst Addition Levels when using CM primerSubstrate temperature (ºC)Primer pack (kg)BPO powder catalystrequired(g)0–5201,2005–152080015–252040025–4020200Primer choice is critical and should be approved by the certificate holder before use. 6.Weather Conditions6.1Installation of the system shall only be carried out with a road surface temperature of 0°Cto 40°C and with a relative humidity of≤85%. At temperatures below 5 C, the pails shouldbe warmed to above 5 C6.2Ambient and road surface temperatures shall be recorded at the start and, if the weatheris variable, during the installation process.6.3Road surfaces shall be dry before and during the installation of the system.6.4The curing period for the prevailing weather conditions shall be notified to the Purchaser.7.Installation7.1System Installation Procedure:7.1.1The PumaTrack system is available as a single grade for use at substratetemperatures from 0°C to 40°C.7.1.2PumaTrack pails should be kept out of direct sunlight during storage and use.Storage at elevated temperatures can lead to degradation of the system.Application of hot PumaTrack material can lead to premature gelling or curing,which can adversely affect product performance.7.1.3PumaTrack rollable surfacing system is a two-component cold appliedchemically curing Methyl Methacrylate compound, consisting of a pre-accelerated base resin, blended fillers, pigment(s),aggregate,trace amounts ofproperty modifying additives and a powder catalyst (BPO), supplied in pre-weighed quantities ready for on-site mixing.For the amount of BPO powdercatalyst required for the installation temperature, see the following table:Table 2:Catalyst Addition Levels when using PumaTrackSubstrate temperature (ºC)PumaTrack packsize(kg)BPO powder catalystrequired(g)0–15204002020300252020030–40201007.1.4The catalyst level is critical–the minimum catalyst level is 100g per 20kg pail.Using less catalyst will cause partial curing and lead to product failure. Excessive levels of catalyst can lead to premature gelling and curing, which can lead to reduced adhesion to the substrate and product failure.7.1.5Immediately prior to use, stir the binder thoroughly using a mechanical mixeruntil the resin is fully homogenised. Add the correct amount of BPO powder catalyst and mix thoroughly for at least 30 seconds. Ensure that the binder at the bottom and sides of the container is completely mixed in. Do not delay once the catalyst has been added, a chemical reaction is occurring that if left in the pail will ruin the mix.7.1.6The mixed binder and catalyst shall then be immediately spread onto the dryprepared road surface uniformly with a serrated squeegee at the desired thickness. Typically a 4mm serrated squeegee will be used to give a uniform thickness of 2mm. For the highest levels of durability,a thicker squeegee may be required (e.g. 6mm).The binder should then be backrolled to give the desired texture depth. A short pile roller can be used to give a finer texture depth.7.1.7The applied material should be rolled as soon as possible after being squeegeedto avoid any gelling or partial curing before the texture has been rolled in.7.1.8If there is any delay to the work, the squeegee must be checked before workrestarts to ensure that no cured material is left on the squeegee, which could lead to lower coverage rates, and thus reduced durability.7.1.9The squeegee should also be regularly inspected to ensure that there is no wearto the teeth, as this can also lead to lower coverage rates and reduced durability.7.1.10PumaTrack is made to tight quality tolerances. However, for larger areas, usematerial with the same batch number wherever possible. If different batchnumbers are used on a single area, colour comparison checks should be madebetween each batch of product being used before any application starts.7.1.10On more open textured surfaces a greater material usage may be required toensure adequate coverage of the surface.7.1.11The masking tape shall be removed promptly as the work progresses, before thebinder begins to gel.7.2System Installation Checks by the Installer7.2.1 A visual check shall be carried out for uniform surface texture,blemishes,andany discernible faults.7.2.2 A check shall be made on completion of each site to determine the quantities ofmaterial used.7.3Sampling and Testing of Materials used on-siteIf required, materials shall be sampled and tested at a frequency as requested andagreed between the Purchaser and Installer.7.4Maintenance and Repair7.4.1In the event that damage occurs during the installation or during service thesystem shall be repaired as follows:7.4.1.1The damaged and or de-bonded system shall be cut back to firmlyadhering material, squaring off the area to be reinstated.7.4.1.2The area to be repaired shall be cleaned, dried and the perimetermasked, allowing a 50 mm overlap on the existing well adhered system.7.4.1.3The system shall then be applied in accordance with Section 7.1.8.Aftercare8.1Any remaining masking shall be removed and the system allowed to fully cure. Duringthe curing period,no disturbance or trafficking of the system shall be permitted.8.2The Installer should endeavour to inspect the site after 24 hours and carry out anynecessary remedial work.End of Method Statement。
马自达3星骋全系车型购车手册实用推荐每每当提起马自达这个品牌之时,运动、活力、时尚等辞藻都成为了其最具代表性的名词,而同样也是因为这几点,马自达一直不缺少拥趸。
时隔3年之后,马自达3星骋继承了海外全新马自达3的外形设计来到了国内市场,在11.28-15.38万元的售价区间内,通过1.6L、2.0L两种排量的五款车型抢占国内紧凑级市场。
当消费者面对这款极具动感的车型时,究竟该选择哪一款才是最合算的呢?下面,我们一起来通过配置的对比来选择吧。
马自达3星骋全系车型购车手册外部配置对比没有高端配置,2.0L车型表现更为丰富马自达3星骋的车身尺寸为4580x1755x1470毫米,轴距为2640毫米。
相比于上一代马自达3车型而言,星骋的轴距没有变化,只是基于外形设计的因素在尺寸上分别多出了65毫米、10毫米、5毫米。
马自达3星骋全系车型购车手册马自达3星骋全系车型购车手册在灯光配置方面,星骋全系车型均采用了卤素材质大灯,并且在近光灯位置应用了凸透镜的设计,相比于同级别合资对手而言,星骋在细节方面占据了一定优势。
大灯高度可调成为了全系标配的功能,值得认可。
值得说道的一点是,星骋在1.6L入门级的两款车型中没有应用前雾灯的设计还是比较遗憾,毕竟雾灯的设计是以安全为前提的。
马自达3星骋全系车型购车手册马自达3星骋全系车型购车手册在车外后视镜方面,星骋全系车型均采用了电调后视镜的设计,并且在2.0L 车型的后视镜中集成了侧向转向灯,同时,2.0L车型还配备有车外侧后视镜电动折叠功能,为驻车状态提供了安全保证。
顶配的2.0L豪华型车型配备有无钥匙进入系统按键,在方便了乘用者的同时也提升了整车档次。
马自达3星骋全系车型购车手册马自达3星骋全系车型购车手册星骋2.0L车型在轮胎规格方面与上一代车型同样为205/55 R16,只是在轮胎品牌方面更换为普利司通泰然者ER300轮胎,其主要诉求表现在操控性与舒适性的兼顾。
在1.6L车型中,星骋配备了规格为195/65 R15的韩泰轮胎。