apache网页服务器配置
- 格式:pptx
- 大小:979.15 KB
- 文档页数:39
在Linux下配置Apache服务器一、实验目的完成本次实训,将能够:●配置基本的Apache服务器●配置个人用户Web站点。
●配置虚拟目录别名功能。
●配置主机访问控制。
●配置用户身份验证功能.。
●配置基于IP地址的虚拟主机.二、实验环境1、RedHat Linux4AS.2、Apache 2.0三、实验内容1.配置基本的Apache服务器2.配置个人用户Web站点。
3.配置虚拟目录别名功能。
4.配置主机访问控制。
5.配置用户身份验证功能.。
6.配置基于IP地址的虚拟主机。
四、实验要求在Linux操作系统下配置Apache服务器。
五、注意事项1.在修配置文件下注意区分大小写、空格。
2.在每次重新开机后都必须启动Apachec服务器。
3.在每次修改完主配置文件后保存起来,必须重启Apachec服务器,如果不重启会导致配置无效,最终导致实验失败。
六、实验步骤1、检测是否安装了Apache软件包:A、首先为服务器网卡添加一个固定的IP地址。
B、在Web浏览器的地址栏中输入本机的IP地址,若出现Test Page测试页面(该网页文件的默认路径为var/www/html/index.html)如下图1所示就说明Apache已安装并已启动。
另一种方法是使用如下命令查看系统是否已经安装了Apache软件包:[root@rhe14~]# rpm –aq | grep httpdHttpd-suexec-2.0.52-9.entHttpd-manual-2.0.52-9.entSystem-config-httpd-1.3.1-1Httpd-devel-2.0.52-9.ent出现以上内容表明了系统已安装Apache软件包。
2、安装Apache软件包超级用户(root)在图形界面下选择“应用程序”|“系统设置”|“添加/删除应用程序”命令,选择“万维网服务器”软件包组,在单击“更新”按钮就可以安装与Apache相关的软件包。

项目6-Apache服务器配置与管理项目情景:在多数网络公司中,都以Linux上的Apache作为页面服务器。
这样做的理由有三:第一,Windows上的IIS服务器效能较差,特别是在访问人数较多的时候;第二,NUIX价格高,专门作为网页服务器成本过高;第三,Linux上的Apache可以装在一般的个人计算机上,不需要额外的开支。
事实上重要的一点就是Apache的效能确实相当优异,这点从目前市面上的网页服务器占有率就可以得知。
项目说明:Apache服务器安装便捷,架设简单,本项目首先介绍安装和控制Apache服务器,然后通过架设简单的静态网页服务器,web虚拟目录,以及基于PHP的动态网络服务器来介绍如何架设Linux的网页服务器。
Apache只是单纯的页面服务器,若要整合程序的后台管理与数据库,就必须搭配其他程序或服务器,例如PHP、MYSQl、PERL等。
能力目标:1、掌握Apache的安装及其开启、关闭方法2、掌握Apahce服务器的静态网页服务3、掌握Apahce的虚拟目录服务4、掌握Apache的动态站点服务任务1 www服务及Apache服务器见解【任务目标】通过Apache服务器的安装、调试、运行等操作掌握Apache服务器的基本功能及其特色,了解Apache服务器的特点及其发展历史。
【任务说明】本任务主要为学者介绍Apache服务器的功能,以及安装Apache,开启、关闭Apache 服务的几种方法,大多属于概念性内容,操作性内容也较简单。
【相关知识】所谓Run Level是指Linux操作系统为了适应不同的需求,在启动的时候规定了不同的执行模式,大部分的类Unix都根据System V对于init的定义,将Run Level分为表中的7种模式:一般最常用的Run Level为3或5,可以修改/etc/inittab文件内容来重新指定开机时的执行模式,但应避免设为Run Level 0或6 因为这两个启动模式会在开机后直接执行关机或重新启动的命令。


实训十四架设Apache服务器一、实验目的1.掌握利用图形化配置工具配置Apache服务器的方法。
2.掌握配置用户个人站点的方法。
3.掌握配置目录访问控制与用户认证的方法。
4.掌握其于域名的虚拟主机的架设方法。
二、实验相关知识1.访问控制的配置指令(1)Deny:定义拒绝访问列表。
(2)Allow:定义允许访问列表。
(3)Order:指定执行允许访问列表和拒绝访问列表的先后顺序。
(4)访问列表使用以下形式:All:表示所有客户。
域名:表示域内的所有客户,如。
IP:指定完整的IP或部分IP。
(5)Order参数有两种形式:Order allow,deny:表示在执行拒绝访问列表前先执行充许访问列表,默认情况下拒绝所有没有明确被允许的客户。
Order deny,allow:表示在执行允许访问列表前先执行拒绝访问列表,默认情况下允许所有没有明确被拒绝的客户。
2.认证(1)两种认证类型:(2)基本认证(Basic)(3)摘要认证(Digest)安全,但浏览器支持不好(4)认证的配置指令:AuthName 领域名称:指定认证领域的名称。
AuthType Basic|Digest:设定认证方式。
AuthUserFile 文件名:指定认证用户文件名和路径。
AuthGroupFile 文件名:指定认证组群文件名和路径。
3.授权(1)配置了认证后,需使用Require 参数进行授权,指定哪些认证用户或认证组群有权访问指定的目录。
(2)Require user 用户名 [用户名]:授权指定用户(3)Require group 组名 [组名]:授权指定组(4)Require valid-user:授权认证用户文件中所有的用户4.认证用户文件(1)使用htpasswd命令创建认证用户文件,并设置认证用户。
(2)创建新的认证用户文件#htpasswd –c 认证用户文件名用户名#htpasswd -c /var/www/userpass chen(3)修改认证用户文件,添加新认证用户#htpasswd 认证用户文件名用户名#htpasswd /var/www/userpass user2(4)修改认证用户文件,删除指定的认证用户#htpasswd –D 认证用户文件名用户名#htpasswd –D /var/www/userpass user2三、实验内容1.启动Apache服务器。


《组网技术》 第06课1.教学目的:使学生熟练掌握Linux环境常规与高级WEB服务和配置、验证方法。
使学生了解Linux环境LAMP及HTTPS相关知识2.教学内容:⑴Apache 常规服务器的配置⑵站点配置后的一般检测步骤和方法⑶Apache 高级服务器的配置⑷LAMP模型⑸实现HTTPS3.内容难点:配置Apache 虚拟主机Apache访问控制与安全网站4.学习要求:理解Web服务器的概念,正确建立和配置WEB 服务器。
在客户端检验WEB 服务器。
5.教学纲要㈠ Apache服务器非图形工具配置方法从上一讲中Apache服务器图形工具配置方法中可以知道,Apache服务器的核心配置文件是/etc/httpd.conf/conf/httpd.conf。
httpd.conf是Apache服务器中最核心的配置文件,大部分的设置都是通过该文件来完成的。
httpd.conf文件的内容非常多,其中包含很多的注释与说明,用来告诉读者可以提供哪些功能以及用法等。
从下图中Apache服务器图形工具配置的界面可以领略到httpd.conf文件的内容。
还有一些隐性的设置不能从中解读到。
主要的几种配置参数①Apache服务器根目录设置字段ServerRoot本字段用来设置Apache服务器的配置文件、错误文件和日志文件的存放目录。
默认情况下为:ServerRoot "/etc/httpd"可以根据需要进行修改。
②Apache服务器客户端连接数限制字段MaxClients<IfModule prefork.c>StartServers 8MinSpareServers 5MaxSpareServers 20ServerLimit 256MaxClients 256MaxRequestsPerChild 4000</IfModule>③设置主机名称字段ServerNameServerName字段定义服务器名称和端口号,用以标明自己的身份。
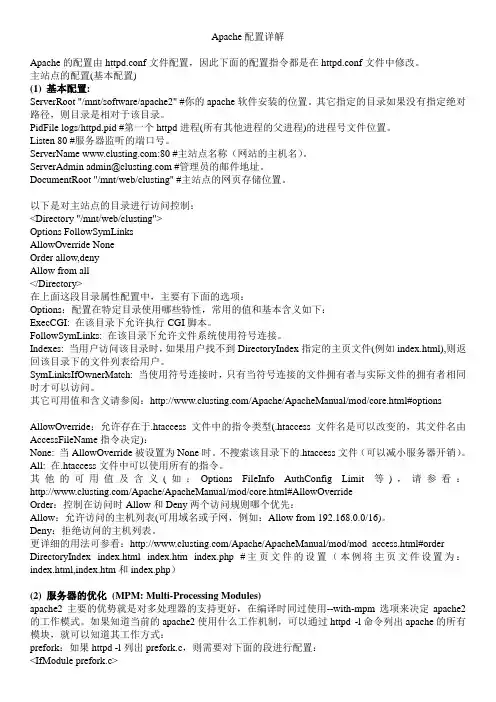
Apache配置详解Apache的配置由httpd.conf文件配置,因此下面的配置指令都是在httpd.conf文件中修改。
主站点的配置(基本配置)(1) 基本配置:ServerRoot "/mnt/software/apache2" #你的apache软件安装的位置。
其它指定的目录如果没有指定绝对路径,则目录是相对于该目录。
PidFile logs/httpd.pid #第一个httpd进程(所有其他进程的父进程)的进程号文件位置。
Listen 80 #服务器监听的端口号。
ServerName :80 #主站点名称(网站的主机名)。
ServerAdmin admin@ #管理员的邮件地址。
DocumentRoot "/mnt/web/clusting" #主站点的网页存储位置。
以下是对主站点的目录进行访问控制:<Directory "/mnt/web/clusting">Options FollowSymLinksAllowOverride NoneOrder allow,denyAllow from all</Directory>在上面这段目录属性配置中,主要有下面的选项:Options:配置在特定目录使用哪些特性,常用的值和基本含义如下:ExecCGI: 在该目录下允许执行CGI脚本。
FollowSymLinks: 在该目录下允许文件系统使用符号连接。
Indexes: 当用户访问该目录时,如果用户找不到DirectoryIndex指定的主页文件(例如index.html),则返回该目录下的文件列表给用户。
SymLinksIfOwnerMatch: 当使用符号连接时,只有当符号连接的文件拥有者与实际文件的拥有者相同时才可以访问。
其它可用值和含义请参阅:/Apache/ApacheManual/mod/core.html#options AllowOverride:允许存在于.htaccess文件中的指令类型(.htaccess文件名是可以改变的,其文件名由AccessFileName指令决定):None: 当AllowOverride被设置为None时。
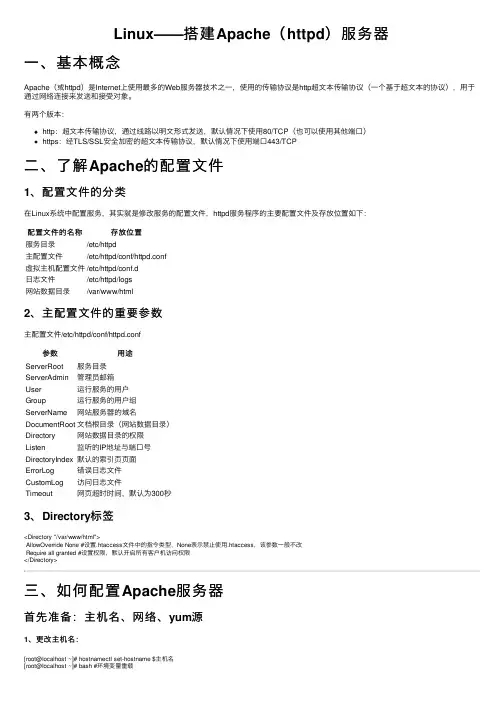
Linux——搭建Apache(httpd)服务器⼀、基本概念Apache(或httpd)是Internet上使⽤最多的Web服务器技术之⼀,使⽤的传输协议是http超⽂本传输协议(⼀个基于超⽂本的协议),⽤于通过⽹络连接来发送和接受对象。
有两个版本:http:超⽂本传输协议,通过线路以明⽂形式发送,默认情况下使⽤80/TCP(也可以使⽤其他端⼝)https:经TLS/SSL安全加密的超⽂本传输协议,默认情况下使⽤端⼝443/TCP⼆、了解Apache的配置⽂件1、配置⽂件的分类在Linux系统中配置服务,其实就是修改服务的配置⽂件,httpd服务程序的主要配置⽂件及存放位置如下:配置⽂件的名称存放位置服务⽬录/etc/httpd主配置⽂件/etc/httpd/conf/httpd.conf虚拟主机配置⽂件/etc/httpd/conf.d⽇志⽂件/etc/httpd/logs⽹站数据⽬录/var/www/html2、主配置⽂件的重要参数主配置⽂件/etc/httpd/conf/httpd.conf参数⽤途ServerRoot服务⽬录ServerAdmin管理员邮箱User运⾏服务的⽤户Group运⾏服务的⽤户组ServerName⽹站服务器的域名DocumentRoot⽂档根⽬录(⽹站数据⽬录)Directory⽹站数据⽬录的权限Listen监听的IP地址与端⼝号DirectoryIndex默认的索引页页⾯ErrorLog错误⽇志⽂件CustomLog访问⽇志⽂件Timeout⽹页超时时间,默认为300秒3、Directory标签<Directory "/var/www/html">AllowOverride None #设置.htaccess⽂件中的指令类型,None表⽰禁⽌使⽤.htaccess,该参数⼀般不改Require all granted #设置权限,默认开启所有客户机访问权限</Directory>三、如何配置Apache服务器⾸先准备:主机名、⽹络、yum源1、更改主机名:[root@localhost ~]# hostnamectl set-hostname $主机名[root@localhost ~]# bash #环境变量重载2、配置⽹络(1)虚拟交换机、⽹络适配器选择仅主机模式,并且配置为192.168.100.0⽹段;(2)编辑⽹络配置⽂件:[root@localhost ~]# vim /etc/sysconfig/network-scripts/ifcfg-ens33修改: BOOTPROTO=static #改为静态IP地址ONBOOT=yes #改为开机⾃启IPADDR=192.168.100.10PREFIX=24 或者 NETMASK=255.255.255.0(3)重启⽹络服务:[root@localhost ~]# systemctl restart network3、配置yum源(1)先在VMware⾥⾯把系统镜像⽂件连接到虚拟机的光驱上;(2)挂载光驱⾥的镜像:[root@localhost ~]# mount /dev/cdrom /media(3)修改yum源配置⽂件:[root@localhost ~]# vim /etc/yum.repos.d/local.repo[rhel]name=rhelbaseurl=file:///mediaenabled=1gpgcheck=0(4)清空yum源缓存信息:[root@localhost ~]# yum clean all(5)检索当前yum源信息:[root@localhost ~]# yum repolist任务⼀:配置简单的httpd服务1、安装httpd服务[root@server ~]# yum -y install httpd2、启动httpd服务[root@server ~]# systemctl restart httpd[root@server ~]# systemctl enable httpd3、配置防⽕墙[root@server ~]# firewall-cmd --permanent --add-service=http[root@server ~]# firewall-cmd --reload4、关闭SELinux[root@server ~]# setenforce 05、客户端测试[root@client ~]# firefox http://IP地址或者 curl http://IP地址任务⼆:配置基于⽤户的个⼈⽹站注意:该⽤户必须在Linux系统中存在1、新建⼀个⽤户(⽹站基于该⽤户)[root@server ~]# useradd user0[root@server ~]# passwd user02、修改⽤户的家⽬录权限,使其他⽤户具有读取和执⾏的权限[root@server ~]# chmod -R 705 /home/user03、创建存放⽤户个⼈主页空间的⽬录,写user0的⽹页⽂件[root@server ~]# mkdir /home/user0/public_html[root@server ~]# cd /home/user0/public_html[root@server ~]# echo "this is user0's web">>index.html4、修改基于⽤户的httpd配置⽂件[root@server ~]# vim /etc/httpd/conf.d/userdir.conf修改: UserDir enabled #开启,表⽰让httpd服务程序开启个⼈⽤户主页功能UserDir public_html #去注释,UserDir参数表⽰⽹站数据在⽤户家⽬录中的保存⽬录名称5、配置防⽕墙(同上)[root@server ~]# firewall-cmd --permanent --add-service=http[root@server ~]# firewall-cmd --reload6、修改selinux权限[root@server ~]# getsebool -a|grep home[root@server ~]# setsebool httpd_enable_homedirs on7、重启服务[root@server ~]# systemctl restart httpd8、客户端测试[root@client ~]# firefox http://IP地址/~username 或者curl http://IP地址/~username任务三:配置基于域名访问的虚拟主机1、新建虚拟主机的⽹页⽂件[root@server ~]# mkdir /www/one /www/two[root@server ~]# cd /www/one[root@server ~]# echo "this is a web for virtual host one">>index.html[root@server ~]# cd /www/two[root@server ~]# echo "this is a web for virtual host two">>index.html[root@server ~]# chmod o+x /www2、配置虚拟主机的⽂件[root@server ~]# cd /etc/httpd/conf.d[root@server ~]# vim vhost.conf<Directory /www/one> #设置⽹站⽬录权限Require all granted #开启所有客户机访问权限</Directory><VirtualHost 192.168.100.10> #虚拟主机ServerName #定义服务器名称DocumentRoot /www/one/ #⽹站数据⽬录</VirtualHost><Directory /www/two>Require all granted</Directory><VirtualHost 192.168.100.11>ServerName DocumentRoot /www/two/</VirtualHost>3、做域名解析⽂件server/client[root@server ~]# vim /etc/hosts192.168.100.10 192.168.100.11 4、配置防⽕墙(同上)[root@server ~]# firewall-cmd --permanent --add-service=http[root@server ~]# firewall-cmd --reload5、修改虚拟主机⽹页⽂件的selinux上下⽂类型[root@server ~]# semanage fcontext -a -t httpd_sys_content_t '/www(/.*)?'[root@server ~]# restorecon -RFv /www6、重启服务[root@server ~]# systemctl restart httpd任务四:配置基于端⼝访问的虚拟主机1——新建虚拟主机的⽹页⽂件[root@server ~]# mkdir /www/8088[root@server ~]# echo "this is a web for port 8088 ">>index.html[root@server ~]# mkdir /www/8089[root@server ~]# echo "this is a web for port 8089 ">>index.html2——配置虚拟主机的⽂件[root@server ~]# cd /etc/httpd/conf.d[root@server ~]# vim vhost.conf<Directory /www/8088/>Require all granted</Directory><virtualHost 192.168.100.10:8088>DocumentRoot /www/8088/</virtualHost><Directory /www/8089/>Require all granted</Directory><virtualHost 192.168.100.10:8089>DocumentRoot /www/8089/</virtualHost>3、配置防⽕墙[root@server ~]# firewall-cmd --permanent --zone=public --add-port=8089/tcp[root@server ~]# firewall-cmd --permanent --zone=public --add-port=8088/tcp[root@server ~]# firewall-cmd --reload4、关闭SELinux[root@server ~]# setenforce 05、重启服务[root@server ~]# systemctl restart httpd6、使⽤浏览器访问任务五:配置基于TLS加密的虚拟主机注意:经TLS/SSL安全加密的超⽂本传输协议,默认情况下使⽤端⼝443/TCP 1、安装TLS加密软件,⽹站内容不⽤明⽂传输[root@server ~]# yum -y install mod_ssl2、⽣成密钥[root@server ~]# openssl genrsa >tlsweb.key3、⽣成证书请求⽂件[root@server ~]# openssl req -new -key tlsweb.key > tlsweb.csr4、⽣成证书⽂件[root@server ~]# openssl req -x509 -days 365 -key tlsweb.key -in tlsweb.csr >tlsweb.crt5、修改ssl.conf配置⽂件[root@server ~]# vim /etc/httpd/conf.d/ssl.confSSLCertificateFile /etc/pki/tls/certs/tlsweb.crtSSLCertificateKeyFile /etc/pki/tls/private/tlsweb.key6、把证书⽂件拷贝到ssl.conf配置⽂件⾥的对应路径下⾯[root@server ~]# cp tlsweb.crt /etc/pki/tls/certs/7、把秘钥⽂件拷贝到ssl.conf配置⽂件⾥的对应路径下⾯[root@server ~]# cp tlsweb.key /etc/pki/tls/private/。

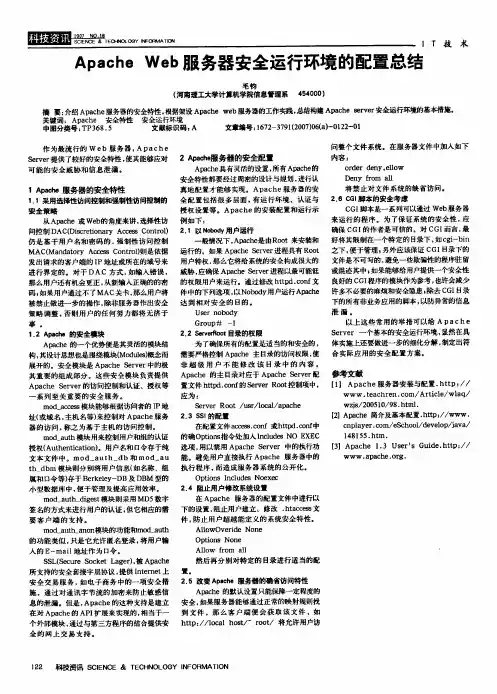
阿帕奇服务器的配置摘要:Apache技术是目前互联网上的主要应用之一,它是实现信息发布、资料查询、数据处理、视频点播等诸多应用服务的基本平台,并采用超级的方式,将信息透过internet在世界围开展信息传递,本课题就Linux上安装与配置Apache、Php、tomcat,等详细地说明了在安装过程中。
在linux中安装Apache后能很好支持动态网页。
关键词:Linux apache1.apahce的介绍:根据著名的服务器公司所做的调查,世界上百分之五十的服务器都在使用apache,是世界上排名第一的服务器。
Apache的诞生富有戏剧性。
但NCSA 服务器的人们开始交换他们勇于该服务器的补丁程序,他们也很快认识到成立管理这些补丁程序的论坛是必要的。
就这样,诞生了apache group,后来这个团体在NCSA 的基础上创建了apache。
2.Apahce的主要特征:可以运行上所有计算机平台;支持最新的HTTP1.1协议;简单而强有力的基于文件的配置;支持通用网关接口CGI;支持虚拟主机;支持HTTP认证;集成per 脚本编程语言;集成代理服务器;具有可定制的服务器日志;支持服务器端包含命令;支持安全socket层;用户会话过程的跟踪能力;3.Apache服务器的常用命令(1)启动Apache服务器:service httpd start(2)重启Apache服务器:service httpd restart(修改了配置文件后要执行此命令) (3)停止Apache服务器:service httpd stop(4)打开“Apache配置”:redhat-config-httpd(注:有时为system-config-httpd) 4.主服务器设置Apache服务器需要各种设置,以定义自己使用各种参数以提供Web服务。
对于使用虚拟主机的情况,除了在虚拟主机的定义项中覆盖的设置之外(有的设置必须重新定义),这里的设置也是虚拟主机的缺省设置。
Apache是一个历史悠久并且功能十分强大的WEB服务器,但其丰富的功能对于一个新手来说往往不知道从何下手。
我个人感觉Apache的设计充分体现了模块化设计的优势,通过在动态模块加载(DSO)模式下的安装,任何子应用模块都可以通过配置文件的简单修改进行积木式的灵活配置。
安装的过程可以从简单的静态html服务开始,一个模块一个模块的学习使用。
从单纯的HTML静态服务(core),到复杂的动态页面服务(core + php, core + resin, core + php + mod_gzip, core + resin + mod_expire)。
本文主要从简化安装==>性能调优==>维护方便的角度,介绍了WEB服务的规划、HTTPD安装/应用模块配置、升级/维护等过程。
让Apache和PHP,Resin等应用模块的独立升级,完全互不影响。
1.WEB应用容量规划:根据硬件配置和WEB应用的特点进行WEB服务的规划及一些简单的估算公式;2.Apache安装过程:apache的通用的简化安装选项,方便以后的应用的模块化配置;修改 HARD_SERVER_LIMIT:vi /path/to/apache_src/src/include/httpd.h#define HARD_SERVER_LIMIT 2560 <===将原来的 HARD_SERVER_LIMIT 256 后面加个“0”apache编译:./configure --prefix=/home/apache --enable-shared=max --enable-module=most3.可选应用模块/工具的安装:php resin mod_gzip mod_expire及各个模块之间的配合;mod_php安装:./configure --with-apxs=/home/apache/bin/apxs --enable-track-vars --with-mysqlmod_resin安装:./configure --with-apxs=/home/apache/bin/apxsmod_gzip安装:修改Makefile中的 apxs路径:然后make make install工具:日志轮循工具cronolog安装:4.升级/维护:看看通用和模块化的安装过程如何简化了日常的升级/维护工作;按照以上的方法:系统管理员和应用管理员的职责可以清楚的分开,互相独立。
Apache服务器配置默认首页文件名和网站路径默认首页的配置:第一种:直接修改apache服务器的配置文件./conf/httpd.conf中的DirectoryIndex,如:(项目web以index.php为首页)<IfModule dir_module>DirectoryIndex index.html index.php</IfModule>第二种:apache服务器的配置文件./conf/httpd.conf中DirectoryIndex默认不变为index.html,此时需要当前项目下增加一个index.html文件,文件的内容如下编辑:(项目web以index.php为首页)index.html文件的内容如下:<meta http-equiv="refresh" content="0; url=index.php">以上两种方式,在地址栏中输入http://localhost/web就可以直接访问到index.php的页面。
默认网站的配置:(项目以web为例)第一种:直接修改apache服务器的配置文件./conf/httpd.conf中的DocumentRoot和Directory,如:DocumentRoot "/usr/local/apache/htdocs/web"<Directory "/usr/local/apache/htdocs/web">第二种:不修改apache服务器的默认配置文件httpd.conf,而是,修改./htdocs/目录下的index.html文件:index.html文件的内容如下:<meta http-equiv="refresh" content="0; url=/web">以上两种方式,在地址栏中输入http://localhost就可以直接访问到web 项目的网站。
apache2服务器的搭建和配置步骤详解前⾔这篇⽂章主要给⼤家介绍了在linux下apache2服务器的搭建和配置的相关资料,具有⼀定的参考价值,下⾯来⼀起学习学习吧。
步骤如下⾸先当然是下载包包:myths@myths-X450LD:~$ sudo apt-get install apache2装完后就可以⽤了,在地址栏输⼊本地回送地址127.0.0.1或者localhost就可以进⼊到默认的界⾯了。
默认的界⾯当然就是apache2的说明界⾯了。
其实很多情况下并不需要在⽹上寻找帮助⽂档,⼏乎所有的软件都会⾃带使⽤说明,只是略长,我们⼀般都懒得看。
但是其实很多重要的东西就在这当中,⽐如apache2的默认界⾯⾥:Ubuntu Logo Apache2 Ubuntu Default PageIt works!This is the default welcome page used to test the correct operation of the Apache2 server after installation on Ubuntu systems. It is based on the equivalent page on Debian, from which the Ubuntu Apache packaging is derived. If you can read this page, it mea If you are a normal user of this web site and don't know what this page is about, this probably means that the site is currently unavailable due to maintenance. If the problem persists, please contact the site's administrator.Configuration OverviewUbuntu's Apache2 default configuration is different from the upstream default configuration, and split into several files optimized for interaction with Ubuntu tools. The configuration system is fully documented in /usr/share/doc/apache2/README.Debian.gz. Refe The configuration layout for an Apache2 web server installation on Ubuntu systems is as follows:/etc/apache2/|-- apache2.conf| `-- ports.conf|-- mods-enabled| |-- *.load| `-- *.conf|-- conf-enabled| `-- *.conf|-- sites-enabled| `-- *.confapache2.conf is the main configuration file. It puts the pieces together by including all remaining configuration files when starting up the web server.ports.conf is always included from the main configuration file. It is used to determine the listening ports for incoming connections, and this file can be customized anytime.Configuration files in the mods-enabled/, conf-enabled/ and sites-enabled/ directories contain particular configuration snippets which manage modules, global configuration fragments, or virtual host configurations, respectively.They are activated by symlinking available configuration files from their respective *-available/ counterparts. These should be managed by using our helpers a2enmod, a2dismod, a2ensite, a2dissite, and a2enconf, a2disconf . See their respective man pages for The binary is called apache2\. Due to the use of environment variables, in the default configuration, apache2 needs to be started/stopped with /etc/init.d/apache2 or apache2ctl. Calling /usr/bin/apache2 directly will not work with the default configuration. Document RootsBy default, Ubuntu does not allow access through the web browser to any file apart of those located in /var/www, public_html directories (when enabled) and /usr/share (for web applications). If your site is using a web document root located elsewhere (such as i The default Ubuntu document root is /var/www/html. You can make your own virtual hosts under /var/www. This is different to previous releases which provides better security out of the box.Reporting ProblemsPlease use the ubuntu-bug tool to report bugs in the Apache2 package with Ubuntu. However, check existing bug reports before reporting a new bug.Please report bugs specific to modules (such as PHP and others) to respective packages, not to the web server itself.Valid XHTML 1.0 Transitional仅仅从这个⽂件中,我们就可以⾄少得到以下的重要信息:当访问本机的时候,默认进⼊的页⾯是/var/www/html/index.html。