datagridview在vbnet中的操作技巧
- 格式:doc
- 大小:121.00 KB
- 文档页数:6

中DataGridView控件中对于表格数据的显⽰经常使⽤到DataGridView控件,其以丰富多样的数据表呈现形式被程序猿喜爱。
本⼈在做⼀个⼩系统中运⽤DataGridView控件的部分属性,这些功能的使⽤在使⽤之初⽐較不易去理清,随着系统接近尾声,如今对⼀些运⽤进⾏整理回想。
控件的⾮常多属性都是相通的,整理回想,尽量让⾛的路在后⾯看起来不是更弯的。
⼀、怎样刷新对DataGridView⾥⾯的数据进⾏增删改查之后的内容详细实现:假设某操作没有查表,也就是在操作时。
不应该有数据,⽽原来的数据可能还停留在表中,这在界⾯上有可能会产⽣误解,这时。
能够加⼀句:DataGridView1.DataSource =Nothing。
在操作完毕之后。
若需显⽰时,再⼀次调⽤DataGridView1.DataSource = 数据源。
理论⾮常easy:採⽤⼜⼀次绑定数据。
也就是再⼀次查数据表。
(可能你已经想到。
但会考虑到执⾏效率、速度的问题⼀直没有下⼿。
但是,我⾮常确定地告知,在没有对控制⾃⾝进⾏优化之前,这是唯⼀的办法)。
⼆、取消⾃⼰主动选择DataGridView1.CurrentCell = Nothing或 DataGridView1.ClearSelection() ’这是⼀个⽅法,⽆需參数,⽆需赋值,直接引⽤。
三、单击本⾏中的任⼀单元格,选中整⾏属性SelectionMode = FullRowSelect(选中整⾏)还有其它设置:CellSelect(选单元格[默认])。
FullColumnSelect(选中整列),RowHeaderSelect(选中⾏⾸)。
ColumnHeaderSelect(选中列⾸)。
四、设置表头DataGridView1.Columns(“数据表列名”).HeaderText = “表头列名” ’列名设置DataGridView1.Columns(“数据表列名”).Width = 数值 ’列宽度设置。

NET中DataGridView数据绑定方法详解
1.使用数据集进行数据绑定
-创建一个数据集对象,并指定相应的表结构。
-从数据库中填充数据到数据集中。
- 将DataGridView的数据源属性设置为数据集中的表。
- 设置DataGridView的自动列生成属性为True,以自动生成列。
2.使用数据表进行数据绑定
数据表是数据集中的一种结构,它由行和列组成。
使用数据表进行数据绑定的步骤如下:
-创建一个数据表对象,并定义列名称和类型。
-从数据库中填充数据到数据表中。
- 将DataGridView的数据源属性设置为数据表。
3. 使用BindingSource进行数据绑定
- 创建一个BindingSource对象。
- 设置BindingSource的DataSource属性为数据源。
- 将BindingSource绑定到DataGridView的数据源属性上。
4.使用数据绑定源进行数据绑定
-创建一个数据绑定源对象,并指定相应的数据源。
- 将数据绑定源绑定到DataGridView的数据源属性上。
5.自定义数据绑定
如果以上方法无法满足需求,还可以使用自定义数据绑定方法。
自定义数据绑定通常涉及以下几个方面:
- 创建一个数据源类,实现数据源接口,如IList、IBindingList或ICollectionView。
- 创建一个继承自DataGridView的自定义控件。

版的GridView经典使用Protected Sub Page_Load(ByVal sender As Object, ByVal e As System.EventArg s) Handles Me.LoadIf Not IsPostBack Thenbinddata()End IfEnd SubPublic Sub binddata()'End Sub'编辑中Protected Sub GridView1_RowEditing(ByVal sender As Object, ByVal e As Syste m.Web.UI.WebControls.GridViewEditEventArgs) Handles GridView1.RowEditingGridView1.EditIndex = e.NewEditIndex'当前编辑行背景色高亮GridView1.EditRowStyle.BackColor = Color.FromName("#F7CE90")binddata()End Sub'分页Protected Sub GridView1_PageIndexChanging(ByVal sender As Object, ByVal e As System.Web.UI.WebControls.GridViewPageEventArgs) Handles GridView1.P ageIndexChangingGridView1.PageIndex = e.NewPageIndexbinddata() '重新绑定GridView数据的函数End Sub'更新Protected Sub GridView1_RowUpdating(ByVal sender As Object, ByVal e As Sy stem.Web.UI.WebControls.GridViewUpdateEventArgs) Handles GridView1.RowUp datingDim clsB As New sqlDLTP.businessDim sqlstr As StringDim ds As New DataSetsqlstr = "select hbdwno from etsshbd where hbdcnm='" & CType(GridView1. Rows(e.RowIndex).FindControl("Text Box1"), TextBox).Text.ToString().Trim() & "' "ds = clsB.queryitem s(sqlstr)Dim wno As String = ds.Tables(0).Rows(0)(0).ToString().Trim()sqlstr = "update etsdl set okscore1='" & _CType(GridView1.Rows(e.RowIndex).FindControl("TextBox6"), TextBox).Tex t.ToString().Trim() & "',okscore2='" & _CType(GridView1.Rows(e.RowIndex).FindControl("TextBox7"), TextBox).Tex t.ToString().Trim() & "',okscore='" & _CType(GridView1.Rows(e.RowIndex).FindControl("TextBox8"), TextBox).Tex t.ToString().Trim() & "',okreport='" & _CType(GridView1.Rows(e.RowIndex).FindControl("TextBox9"), TextBox).Tex t.ToString().Trim() & "',okgrad='" & _CType(GridView1.Rows(e.RowIndex).FindControl("TextBox10"), TextBox).Te xt.ToString().Trim() & "',memo='" & _CType(GridView1.Rows(e.RowIndex).FindControl("TextBox12"), TextBox).Te xt.ToString().Trim() & "' where trano='" & _GridView1.DataKeys(e.RowIndex).Value.ToString() & "' and wno='" & wno & "'"clsB.ExeSqlCmd(sqlstr)GridView1.EditIndex = -1binddata()End Sub'取消Protected Sub GridView1_RowCancelingEdit(ByVal sender As Object, ByVal e A s System.Web.UI.WebControls.GridViewCancelEditEventArgs) Handles GridView1. RowCancelingEditGridView1.EditIndex = -1binddata()End Sub'删除Protected Sub GridView1_RowDeleting(ByVal sender As Object, ByVal e As System.Web.UI.WebControls.GridViewDeleteEventArgs) Handles GridView1.RowDelet ingDim clsB As New sqlDLTP.businessDim sqlstr As StringDim ds As New DataSetsqlstr = "select hbdwno from etsshbd where hbdcnm='" & CType(GridView1. Rows(e.RowIndex).FindControl("Label1"), Label).Text.ToString().Trim() & "'"ds = clsB.queryitem s(sqlstr)Dim wno As String = ds.Tables(0).Rows(0)(0).ToString().Trim()sqlstr = "delete etsdl where trano=" & GridView1.DataKeys(e.RowIndex).Va lue.ToString().Trim() & "and wno='" & wno & "'"clsB.ExeSqlCmd(sqlstr)binddata()End Sub'绑定行,特效及链接列属性分配等Protected Sub GridView1_RowDataBound(ByVal sender As Object, ByVal e As S ystem.Web.UI.WebControls.GridViewRowEventArgs) Handles GridView1.RowData BoundIf e.Row.RowType = DataControlRowType.DataRow Then'鼠标经过时,行背景色变e.Row.Attributes.Add("onmouseover", "this.style.backgroundColor='#E6F 5FA'")'鼠标移出时,行背景色变e.Row.Attributes.Add("onmouseout", "this.style.backgroundColor='#FFFF FF'")' HyperLink列给链接值CType(e.Row.Cells(1).FindControl("HyperLink1"), HyperLink).NavigateUr l = "javascript:void window.open('trashow.aspx?tno=" + CType(e.Row.Cells(1).Fi ndControl("HyperLink1"), HyperLink).Text + "','', 'left='+(window.top.screen.widt h-454)/2+',top='+(window.top.screen.height-454)/2+',width=625,height=500,sc rollbars=yes,resizeable=yes');"'当有编辑列时,避免出错,要加的RowState判断If e.Row.RowState = DataControlRowState.Normal Or e.Row.RowState = DataControlRowState.Alternate ThenIf CType(e.Row.Cells(12).FindControl("Label11"), Label).Text = "1" Th enCType(e.Row.Cells(12).FindControl("Label11"), Label).Text = "在职"End IfEnd IfEnd IfEnd Sub前台:<asp:GridView ID="GridView1" runat="server" AutoGenerateColumns="False" Wi dth=100% BackColor="White" BorderColor="White" BorderStyle="Ridge" Border Width="2px" CellPadding="3" CellSpacing="1" GridLines="None" AllowPaging="T rue" AllowSorting="T rue"><!-- --></asp:GridView>。

最近把我们的b/s系统,增加智能客户端的功能。
确实智能客户端是非常好用的东西。
可惜winform的控件功能不怎么强大,相比vb差很多啊。
比如DataGridView不支持二维表头,不支持表尾合计,相比之下web的好办多了(还是喜欢Web的排版、导航,但喜欢Win的操作性,希望WPF早日流行)。
但是MIS系统没有二维表头确实是客户不能接受的,尝试了com控件flexgrid或者开源的SourceGrid3,但都不怎么好用,于是想改造一下DataGridView。
我的做法是在CellPainting做手脚。
花了一天时间尝试,只是做出原型,还没有完善,希望有需要的朋友少走弯路。
1,继承DataGridView,添加表头信息类。
2,添加CellPainting,代码如下:private void DataGridViewEx_CellPainting(object sender, DataGridViewCellPaintingEventArgs e){if (e.RowIndex == -1){// int w = dataGridView1.HorizontalScrollingOffset + dataGridView1.TopLeftHeaderCell.Size.Width + dataGridView1.Columns[0].Width + 10;Rectangle newRect = new Rectangle(e.CellBounds.X + 1,e.CellBounds.Y + 1, e.CellBounds.Width - 4,e.CellBounds.Height - 4);using (Brush gridBrush = new SolidBrush(this.GridColor),backColorBrush = new SolidBrush(e.CellStyle.BackColor)){using (Pen gridLinePen = new Pen(gridBrush)){// Erase the cell.e.Graphics.FillRectangle(backColorBrush, e.CellBounds);// Draw the grid lines (only the right and bottom lines;// DataGridView takes care of the others).e.Graphics.DrawLine(gridLinePen, e.CellBounds.Left,e.CellBounds.Bottom - 1, e.CellBounds.Right - 1,e.CellBounds.Bottom - 1);if (e.ColumnIndex > -1 && topRow!=null&&topRow.Cells[e.ColumnIndex].ColSpan>1){e.Graphics.DrawLine(gridLinePen, e.CellBounds.Right - 1,e.CellBounds.Top + e.ClipBounds.Height / 2, e.CellBounds.Right - 1,e.CellBounds.Bottom);}else{e.Graphics.DrawLine(gridLinePen, e.CellBounds.Right - 1,e.CellBounds.Top, e.CellBounds.Right - 1,e.CellBounds.Bottom);// Draw the inset highlight box.// e.Graphics.DrawRectangle(Pens.Blue, newRect);int scale = e.CellBounds.Height/3;if (e.ColumnIndex > -1 && topRow.Cells[e.ColumnIndex].Text != null){scale= e.CellBounds.Height / 2;e.Graphics.DrawLine(gridLinePen, e.CellBounds.Left, e.CellBounds.Bottom - e.CellBounds.Height / 2, e.CellBounds.Right, e.CellBounds.Bottom - e.CellBou nds.Height / 2);}// Draw the text content of the cell, ignoring alignment.if (e.Value != null){e.Graphics.DrawString(e.Value.ToString(), e.CellStyle.Font,Brushes.Crimson, e.CellBounds.X + 2,e.CellBounds.Y + scale+ 2, StringFormat.GenericDefault);}if (e.ColumnIndex > -1 && topRow.Cells[e.ColumnIndex].RelateIndex > -1 && topRow.Cells[e.ColumnIndex].Text!=null){Rectangle recCell = new Rectangle(e.CellBounds.X - 1 - topRow.Cells[e.ColumnIndex].SpanRowWith,e.CellBounds.Y + 1, topRow.Cells[e.ColumnIndex].SpanRowWith,e.CellBounds.Height / 2);StringFormat sf = new StringFormat();sf.Alignment = StringAlignment.Center;e.Graphics.DrawString(topRow.Cells[e.ColumnIndex].Text, e.CellStyle.Font, Brushes.Crimson, recCell, sf);e.Handled = true;}}}}3,调用方法dataGridViewEx1.TopRow.Cells[2].Text = "入库";dataGridViewEx1.TopRow.Cells[2].ColSpan = 2;dataGridViewEx1.TopRow.Cells[4].Text = "出库";dataGridViewEx1.TopRow.Cells[4].ColSpan = 2;4,效果图至于表尾合计,也做出了原型。

探讨技术DataGridView控件的应用作者:朱瑞芳来源:《电脑知识与技术》2014年第28期摘要:该文主要介绍了一种数据控件DataGridView,它是3.5中新增加的一种网格控件,能以表格的形式显示数据,在数据库的操作中会经常用到。
该文阐述如何运用通过 DataGridView控件操纵SQL Server数据库,从而为数据库管理系统的开发与应用提供方便。
关键词:DataGridView;添加;更改;删除中图分类号:TP311 文献标识码:A 文章编号:1009-3044(2014)28-6607-04随着计算机应用技术的迅猛发展和网络技术的日益成熟并实用化,计算机进入各个领域,大量大规模的信息系统的建立,要求计算机应用领域由集中到分布,由单机到网络。
因此,几乎所有主流的数据库管理系统产品都包含了分布式数据库管理系统的功能。
只要轻点鼠标按钮就能完成查询、添加、修改、删除等数据维护操作。
友好的界面设计,使非计算机专业的人员也能适应各种工作岗位。
因此熟练掌握数据库开发技术尤为重要。
1 运行环境本文通过Visual Studio 2010 的访问数据库Sql Server 2008为例,重点说明DataGridView控件的使用方法。
因此,首先要在Windows系统上正确安装好Visual Studio 2010和Sql Server。
1.1 数据准备打开SQL Server,服务器类型为数据库引擎,服务器名称为本地计算机名称,身份验证为Sql server身份验证,用户名和密码分别为sa和sa123。
为了便于理解,现假设数据库文件名称和位置为: c:\StudentInf.mdf该数据库中有一个名称为 Grade的数据库表。
表的内容如图1所示。
1.2 运行Visual Studio 2010打开Visual Studio 2010,新建项目,名称设为“StudentInfo”(如果有公用模块,将该项目名称用作空间名称)。

中的DataGrid在.NET编程中,我们常常要通过控件DataGrid来显示数据库中的数据信息。
DataGrid 按应用不同分为基于网页用的WEBform DataGrid和基于windows应用程序的WINform DataGrid。
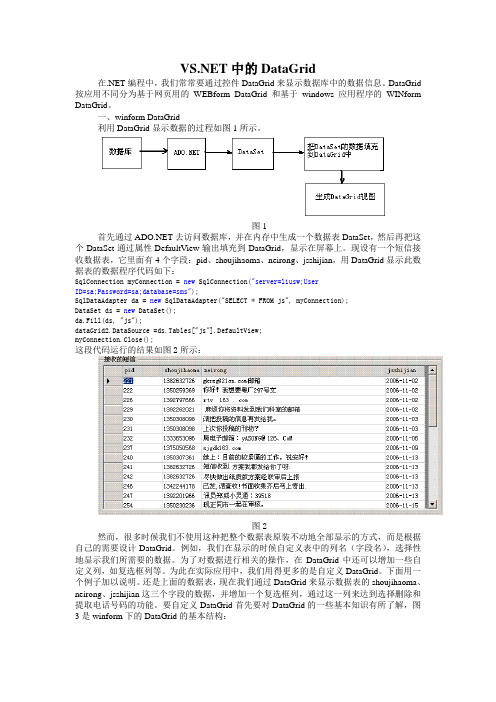
一、winform DataGrid利用DataGrid显示数据的过程如图1所示。
图1首先通过去访问数据库,并在内存中生成一个数据表DataSet,然后再把这个DataSet通过属性DefaultView输出填充到DataGrid,显示在屏幕上。
现设有一个短信接收数据表,它里面有4个字段:pid、shoujihaoma、neirong、jsshijian,用DataGrid显示此数据表的数据程序代码如下:SqlConnection myConnection = new SqlConnection("server=liusw;UserID=sa;Password=sa;database=sms");SqlDataAdapter da = new SqlDataAdapter("SELECT * FROM js", myConnection);DataSet ds = new DataSet();da.Fill(ds, "js");dataGrid2.DataSource =ds.Tables["js"].DefaultView;myConnection.Close();这段代码运行的结果如图2所示:图2然而,很多时候我们不使用这种把整个数据表原装不动地全部显示的方式,而是根据自己的需要设计DataGrid。
例如,我们在显示的时候自定义表中的列名(字段名),选择性地显示我们所需要的数据。
为了对数据进行相关的操作,在DataGrid中还可以增加一些自定义列,如复选框列等。
为此在实际应用中,我们用得更多的是自定义DataGrid。
新的 DataGridView 是 .NET 2.0 中的一个新控件,是针对 .NET 1.x 中功能较差的标准 DataGrid 控件而设计的。
Matthew MacDonald 在本文中论述了许多改进,包括:DataGridView 支持大量自定义和细致的格式设置、灵活的大小调整和选择、更好的性能以及更丰富的事件模型。
.NET Framework 的前两个版本(.NET 1.0 和 .NET 1.1)在数据绑定方面留下了明显的空白。
尽管开发人员拥有一个灵活的可配置模型,可以将几乎所有的控件链接到几乎所有的数据源,但却没有一种有效的方法来显示完整的信息表。
可以实现此目的的唯一工具就是 DataGrid 控件,这种控件非常适合于处理简单的演示,但是不太适合实际代码。
填补这项空白是 .NET 2.0 的主要目标之一,并且 Microsoft 已经用全新的网格控件 DataGridView 来实现此目标。
DataGridView 有两个指导原则。
首先,其目标是支持常见任务(如主控/详细列表、验证和数据格式设置),而不需要您编写许多代码。
更重要的是,设计过程中始终考虑了扩展性,因此您可以集成所需的专用功能,而不必采用低级别的复杂编程。
本页内容基本数据绑定美化 DataGridView使用 DataGridView 选择单元格DataGridView 对象DataGridView 样式自定义单元格格式按钮列图像列编辑 DataGridView处理错误验证输入使用列表列约束选择小结基本数据绑定熟悉 DataGridView 的最佳方法就是实际尝试一下,无需配置任何属性。
就像 DataGrid 一样,您可以使用 DataSource 属性来绑定 DataTable 对象(或从 DataTable 派生的对象)。
Dim ds As DataSet = GetDataSet()DataGridView1.DataSource = ds.Tables(‖Customers‖)与 DataGrid 不同的是,DataGridView 一次只能显示一个表。
:以DataGridView控件添加复制粘贴功能一、引言我们在平时项目开发中经常会遇到这种情况,开发需要一些特定的功能控件,而现有的控件又只能满足部分的要求,这个时候一般采利用现有控件功能,对其进行扩展以满足项目需要。
但如何在没有源码的情况下扩展控件功能,并且可以用和原来一致的方法调用扩展控件就需要一点技巧了。
借助VS2005的强大功能和面向对象编程的继承思想可以很容易实现这个需求,而且具体实现过程就如同我们有这些控件的源码一样。
二、实例在大多数基于数据库应用的开发中DataGridView控件使用很多,DataGridView为微软自家产品,可以方便地绑定到数据库表以及泛型容器List,但其有个缺点就是不支持表格数据的粘贴功能,使得对数据进行批量修改很不方便。
有人将ContextMenuStrip关联到DataGridView上,通过右键菜单实现了DataGridView的粘贴、复制等功能,但其有个缺点就是在需要这些扩展功能的地方要写大量相同的代码。
如何采用更加优雅的方式实现这个功能,使右键菜单就像DataGridView原生的功能一样,首先想到的就是创建一个包含DataGridView的扩展控件,使之响应ContextMenuStrip定义的菜单命令,而我们只要从工具箱拖一个DataGridView控件到窗体,修改其类型为我们前面创建的自定义控件类型就能满足要求。
由于代码以经包含在下文中,且本文的主要目以介绍方法为主,不再另附工程实例,见谅。
实例具体实现如下:1,启动VB2005新建类库项目DataGridViewExt(C#等其它.NET语言实现方法一样,这里不另行介绍,见谅)。
[attach]691254[/attach]2,添加组件类DataGridViewExt。
[attach]691255[/attach]3,添加控件ContextMenuStrip,然后给ContextMenuStrip1添加两个子菜单menu_copy和menu_paste,并把相应的text属性设为复制和粘贴,使得右键菜单直观明了。
datagridview的操作'空值判斷If IsDBNull(DataGridView1.Item(1, 1).Value) = True ThenDataGridView1.Item(1, 1).Value = "空值"End If'删除所有⾏DataGridView1.Rows.Clear()'删除第⼀⾏DataGridView1.Rows.RemoveAt(0)'删除選定的⾏For Each r As DataGridViewRow In DataGridView1.SelectedRowsIf Not r.IsNewRow ThenDataGridView1.Rows.Remove(r)End IfNext'删除所有列Me.DataGridView1.Columns.Clear()'新增⼀列Me.DataGridView1.Columns.Add("1", "列1")'設定列寛Me.DataGridView1.Columns(0).Width = 100'關閉重新排序DataGridView1.Columns(0).SortMode = DataGridViewColumnSortMode.NotSortable'获取当前被选中的⾏号Me.DataGridView1.CurrentCell.RowIndex'获取当前被选中的列号Me. DataGridView1.CurrentCell.ColumnIndex'改變⾏顏⾊DataGridView1.Rows(1 ).DefaultCellStyle.BackColor = Color.Yellow'改變單元格顏⾊Me.DataGridView1.Rows(1).Cells(1).Style.BackColor = Color.Lime'改變字顏⾊Me.DataGridView1.Rows(1).Cells(1).Style.ForeColor = Color.Red'新增⼀⾏DataGridView1.Rows.Add()'附與值DataGridView1.Item(1, 1).Value = 1'表單選擇TextBox1.Text = DataGridView1.CurrentRow.Cells("Column1").Value.ToString()'表單筆數TextBox1.Text = Me.DataGridView1.RowCount'⾧度調整DataGridView1.Height = Me.Height – 150'寬度調整DataGridView1.Width = Me.Width – 80'列只讀DataGridView1.Columns(0).ReadOnly = True'⾏只讀DataGridView1. Rows(0).ReadOnly = True'單元格只讀DataGridView1(0, i - 1).ReadOnly = True'DataGridView按Enter鍵Protected Overrides Function ProcessCmdKey(ByRef msg As System.Windows.Forms.Message, ByVal keyData As System.Windows.Forms.Keys) As BooleanIf msg.WParam.ToInt32() = CInt(Keys.Enter) Then SendKeys.Send("{Tab}")Return TrueReturn MyBase.ProcessCmdKey(msg, keyData)End Function'設置單元格位置DataGridView1.CurrentCell = DataGridView1(0, 0)'取得當前列寬TextBox1.Text=Me.DataGridView1.Columns(0).Width'設置列寬Me.DataGridView1.Columns(0).Width = drVB.Item(0)。
DataGridView在中的操作技巧目录:1、取得或者修改当前单元格的内容2、设定单元格只读3、不显示最下面的新行4、判断新增行5、行的用户删除操作的自定义6、行、列的隐藏和删除7、禁止列或者行的Resize8、列宽和行高以及列头的高度和行头的宽度的自动调整9、冻结列或行10、列顺序的调整11、行头列头的单元格12、剪切板的操作13、单元格的ToolTip的设置14、右键菜单(ContextMenuStrip)的设置15、单元格的边框、网格线样式的设定16、单元格表示值的设定17、用户输入时,单元格输入值的设定18、设定新加行的默认值1、DataGridView 取得或者修改当前单元格的内容:当前单元格指的是DataGridView 焦点所在的单元格,它可以通过DataGridView 对象的CurrentCell 属性取得。
如果当前单元格不存在的时候,返回Nothing(C#是null)[]' 取得当前单元格内容MessageBox.Show(DataGridView1.CurrentCell.Value)' 取得当前单元格的列IndexMessageBox.Show(DataGridView1.CurrentCell.ColumnIndex)' 取得当前单元格的行IndexMessageBox.Show(DataGridView1.CurrentCell.RowIndex)另外,使用DataGridView.CurrentCellAddress 属性(而不是直接访问单元格)来确定单元格所在的行:DataGridView.CurrentCellAddress.Y 和列:DataGridView.CurrentCellAddress.X 。
这对于避免取消共享行的共享非常有用。
当前的单元格可以通过设定DataGridView 对象的CurrentCell 来改变。
可以通过CurrentCell 来设定DataGridView 的激活单元格。
将CurrentCell 设为Nothing(null) 可以取消激活的单元格。
[]' 设定(0, 0) 为当前单元格DataGridView1.CurrentCell = DataGridView1(0, 0)--------------------------------------------------------------------------------2、DataGridView 设定单元格只读:1)使用ReadOnly 属性如果希望,DataGridView 内所有单元格都不可编辑,那么只要:[]' 设置DataGridView1 为只读DataGridView1.ReadOnly = True如果希望,DataGridView 内某个单元格不可编辑,那么只要:[]' 设置DataGridView1 的第2列整列单元格为只读DataGridView1.Columns(1).ReadOnly = True' 设置DataGridView1 的第3行整行单元格为只读DataGridView1.Rows(2).ReadOnly = True' 设置DataGridView1 的[0,0]单元格为只读DataGridView1(0, 0).ReadOnly = True2)使用EditMode 属性DataGridView.EditMode 属性被设置为DataGridViewEditMode.EditProgrammatically 时,用户就不能手动编辑单元格的内容了。
但是可以通过程序,调用DataGridView.BeginEdit 方法,使单元格进入编辑模式进行编辑。
[]DataGridView1.EditMode = DataGridViewEditMode.EditProgrammatically3)根据条件设定单元格的不可编辑状态当一个一个的通过单元格坐标设定单元格ReadOnly 属性的方法太麻烦的时候,你可以通过CellBeginEdit 事件来取消单元格的编辑。
[]'CellBeginEdit 事件处理方法Private Sub DataGridView1_CellBeginEdit(ByVal sender As Object, _ByVal e As DataGridViewCellCancelEventArgs) _Handles DataGridView1.CellBeginEditDim dgv As DataGridView = CType(sender, DataGridView)' 是否可以进行编辑的条件检查If dgv.Columns(e.ColumnIndex).Name = "Column1" AndAlso _Not CBool(dgv("Column2", e.RowIndex).Value) Then' 取消编辑e.Cancel = TrueEnd IfEnd Sub--------------------------------------------------------------------------------3、DataGridView 不显示最下面的新行:通常DataGridView 的最下面一行是用户新追加的行(行头显示* )。
如果不想让用户新追加行即不想显示该新行,可以将DataGridView 对象的AllowUserToAddRows 属性设置为False。
[]' 设置用户不能手动给DataGridView1 添加新行DataGridView1.AllowUserToAddRows = False补足:如果DataGridView 的DataSource 绑定的是DataView, 还可以通过设置DataView.AllowAdd属性为False 来达到同样的效果。
--------------------------------------------------------------------------------4、DataGridView 判断新增行:DataGridView的AllowUserToAddRows属性为True时也就是允许用户追加新行的场合下,DataGridView的最后一行就是新追加的行(*行)。
使用DataGridViewRow.IsNewRow 属性可以判断哪一行是新追加的行。
另外,通过DataGridView.NewRowIndex 可以获取新行的行序列号。
在没有新行的时候,NewRowIndex = -1。
[]If DataGridView1.CurrentRow.IsNewRow ThenConsole.WriteLine("当前行为新追加行。
")ElseConsole.WriteLine("当前行不是新追加行。
")End If--------------------------------------------------------------------------------5、DataGridView 行的用户删除操作的自定义:1)无条件的限制行删除操作。
默认时,DataGridView 是允许用户进行行的删除操作的。
如果设置DataGridView对象的AllowUserToDeleteRows属性为False 时,用户的行删除操作就被禁止了。
[]' 禁止DataGridView1的行删除操作。
DataGridView1.AllowUserToDeleteRows = False但是,通过DataGridViewRowCollection.Remove 还是可以进行行的删除。
补足:如果DataGridView 绑定的是DataView 的话,通过DataView.AllowDelete 也可以控制行的删除。
2)行删除时的条件判断处理。
用户在删除行的时候,将会引发erDeletingRow 事件。
在这个事件里,可以判断条件并取消删除操作。
[]' DataGridView1 的UserDeletingRow 事件Private Sub DataGridView1_UserDeletingRow(ByVal sender As Object, _ByVal e As DataGridViewRowCancelEventArgs) _Handles erDeletingRow' 删除前的用户确认。
If MessageBox.Show("确认要删除该行数据吗?", "删除确认", _MessageBoxButtons.OKCancel, MessageBoxIcon.Question) <> _Windows.Forms.DialogResult.OK Then' 如果不是OK,则取消。
e.Cancel = TrueEnd IfEnd Sub--------------------------------------------------------------------------------6、DataGridView 行、列的隐藏和删除:1)行、列的隐藏[]' DataGridView1的第一列隐藏DataGridView1.Columns(0).Visible = False' DataGridView1的第一行隐藏DataGridView1.Rows(0).Visible = False2)行头、列头的隐藏[]' 列头隐藏DataGridView1.ColumnHeadersVisible = False' 行头隐藏DataGridView1.RowHeadersVisible = False3)行和列的删除[]' 删除名为"Column1"的列DataGridView1.Columns.Remove("Column1")' 删除第一列DataGridView1.Columns.RemoveAt(0)' 删除第一行DataGridView1.Rows.RemoveAt(0)4)删除选中行[]For Each r As DataGridViewRow In DataGridView1.SelectedRowsIf Not r.IsNewRow ThenDataGridView1.Rows.Remove(r)End IfNext--------------------------------------------------------------------------------7、DataGridView 禁止列或者行的Resize:1)禁止所有的列或者行的Resize[]' 禁止用户改变DataGridView1的所有列的列宽DataGridView1.AllowUserToResizeColumns = False'禁止用户改变DataGridView1の所有行的行高DataGridView1.AllowUserToResizeRows = False2)禁止指定行或者列的Resize[]' 禁止用户改变DataGridView1的第一列的列宽DataGridView1.Columns(0).Resizable = DataGridViewTriState.False' 禁止用户改变DataGridView1的第一列的行宽DataGridView1.Rows(0).Resizable = DataGridViewTriState.False关于NoSet当Resizable 属性设为DataGridViewTriState.NotSet 时,实际上会默认以DataGridView 的AllowUserToResizeColumns 和AllowUserToResizeRows 的属性值进行设定。