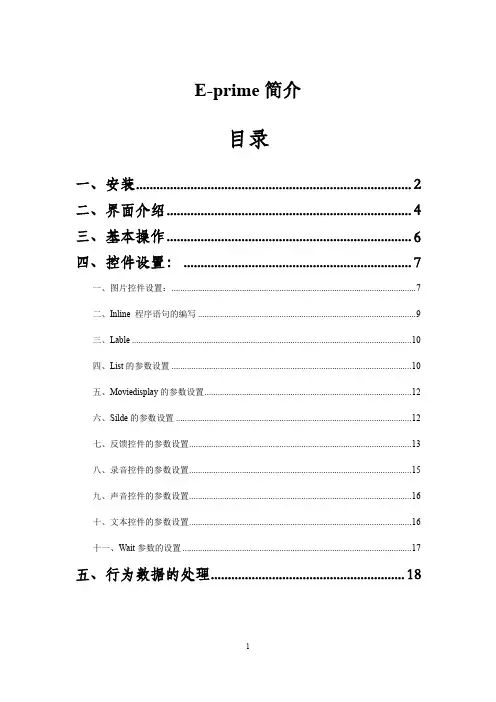
E-prime中常用的inline语句
- 格式:doc
- 大小:35.50 KB
- 文档页数:3
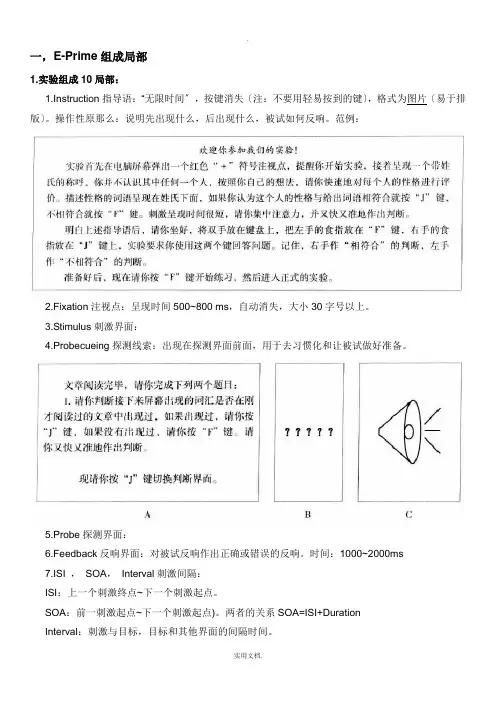
一,E-Prime组成部分1.实验组成10部分:1.Instruction指导语:“无限时间”,按键消失(注:不要用轻易按到的键),格式为图片(易于排版)。
操作性原则:说明先出现什么,后出现什么,被试如何反应。
范例:2.Fixation注视点:呈现时间500~800 ms,自动消失,大小30字号以上。
3.Stimulus刺激界面:4.Probecueing探测线索:出现在探测界面前面,用于去习惯化和让被试做好准备。
5.Probe探测界面:6.Feedback反馈界面:对被试反应作出正确或错误的反应。
时间:1000~2000ms7.ISI ,SOA,Interval刺激间隔:ISI:上一个刺激终点~下一个刺激起点。
SOA:前一刺激起点~下一个刺激起点)。
两者的关系SOA=ISI+DurationInterval:刺激与目标,目标和其他界面的间隔时间。
8.Buffer Interval 实验缓冲:500~1200ms。
被试作反应后推迟下一个Trial的呈现。
反馈界面也起到缓冲的效果。
9.Mask 掩蔽界面:400~1000ms,常用于启动效应实验和记忆实验。
在记忆实验中,消除刺激的感觉记忆。
10.Exp End 结语界面:1000~1500ms,如,“实验完毕,谢谢您的参与!”2.实验程序控制5要素Duration呈现时间:固定时间,变化时间(设置变量或数组),无限时间(“-1”,“infinite”)Mode呈现方式(=消失方式):自动(不需要设置),按键(无限时间+设置按键在刺激界面),反应(无限时间+反应键在探测界面),自动+反应(固定时间+反应键)Format呈现格式:刺激物属性:字符(字体,大小,前景颜色?,背景颜色,下划线),图片(尺寸大小,文件大小,亮度,色调?,饱和度?,灰度?,对比度);位置;边框(大小,颜色)Response反应方式:键盘反应(字母,数字,功能键);语音反应;外接反应键;脚踏板反应Data logging数据收集:反应时Response Time ;RT ,正误Accuracy;ACC,反应Response;RESP,实验流程示意图3.实验过程Procedure:Session Procedure全过程;CEP Core Experimental Procedure(运行一次是一次Trial,一个Block=指导语+CEP+结束语)4.实验设计的4模式:Paralleling并联模式:(图B)完成CEP1再完成CEP2。


我学E-prime的疑问1、block是什么意思?翻译为组块,⼀个完整的block包含了指导语+核⼼实验过程+结语。
2、trial是神马意思?翻译为试验,⼀个刺激在核⼼实验过程运⾏完成,就是完成⼀次trial。
⼀个trial中可能有Probe—ISI—Mask—ISI—Prime.3、CEP是神马东西CEP:Core Experimental Procedure指⼀个刺激单元能够运作完成的、最⼩的、可重复的实验程序组成过程。
⼀个刺激在核⼼实验过程运⾏完成即完成⼀次Trial,有多少个刺激就运⾏多少次核⼼实验过程。
⼀个Block的全过程就等于“指导语”、“核⼼实验过程”和“结语”之和。
Core experimental procedure (最⼩、可重复)——is a minimal,repetitive portion of an experimental in which different conditions are selected,stimuli are presented,and the subject responds.4、probe是神马意思?翻译为探测,是指探测刺激呈现的过程,或者是把它当做探测界⾯。
5、ISI是神马东西?是刺激间隔ISI、SOA、Interva都是刺激间隔。
按实验要求延迟⼀下界⾯(刺激或⽬标)的出现6、BufferInterval是神马?实验缓冲:被试在作出反应后延迟下⼀个Trial的呈现,使整个实验过程变得舒缓⽽流畅。
(疑问:刺激间隔和实验缓冲是不是⼀样)7、Probecueing:探测线索,⽐如做启动实验时,会先呈现探测刺激,再呈现探测线索。
8、在Textdisplay中,写下括号[]如[stimulus],意思是到时候程序会调⽤list中stimulus这⼀纵列的值。
同样,在Imagedisplay的property页⾯中的filename中写下[stimulus],同样也会调⽤list中的stimulus⼀列的值。
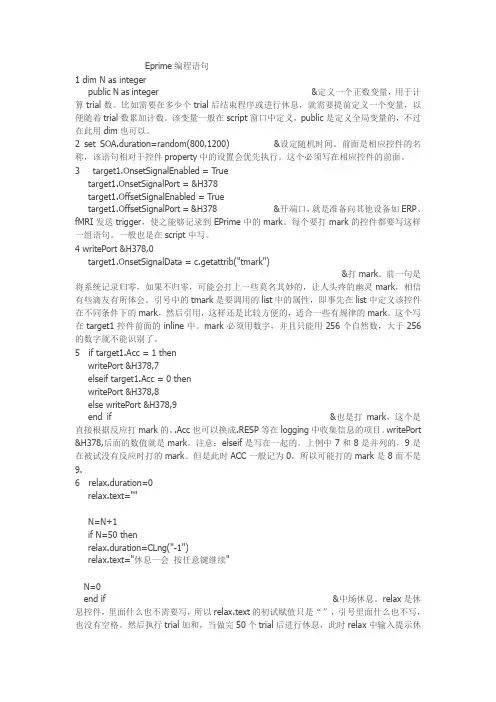
Eprime编程语句1 dim N as integerpublic N as integer &定义一个正数变量,用于计算trial数。
比如需要在多少个trial后结束程序或进行休息,就需要提前定义一个变量,以便随着trial数累加计数。
该变量一般在script窗口中定义,public是定义全局变量的,不过在此用dim也可以。
2 set SOA.duration=random(800,1200) &设定随机时间。
前面是相应控件的名称,该语句相对于控件property中的设置会优先执行。
这个必须写在相应控件的前面。
3 target1.OnsetSignalEnabled = Truetarget1.OnsetSignalPort = &H378target1.OffsetSignalEnabled = Truetarget1.OffsetSignalPort = &H378 &开端口,就是准备向其他设备如ERP、fMRI发送trigger,使之能够记录到EPrime中的mark。
每个要打mark的控件都要写这样一组语句。
一般也是在script中写。
4 writePort &H378,0target1.OnsetSignalData = c.getattrib("tmark")&打mark。
前一句是将系统记录归零,如果不归零,可能会打上一些莫名其妙的,让人头疼的幽灵mark,相信有些滴友有所体会。
引号中的tmark是要调用的list中的属性,即事先在list中定义该控件在不同条件下的mark,然后引用,这样还是比较方便的,适合一些有规律的mark。
这个写在target1控件前面的inline中。
mark必须用数字,并且只能用256个自然数,大于256的数字就不能识别了。
5 if target1.Acc = 1 thenwritePort &H378,7elseif target1.Acc = 0 thenwritePort &H378,8else writePort &H378,9end if &也是打mark,这个是直接根据反应打mark的。

E-Prime2.0实验软件⼀些实⽤的技巧以下为⼀些使⽤E-Prime过程中学习到、总结到的实⽤做法。
有没有⽤,见仁见智。
E-Prime实验软件,知道的知道,不知道就跳过吧。
适合在E-Prime上有⼀定经验的⼈。
事先声明:这篇东西并不能让你学会E-Prime,所以为了学会E-Prime⽽搜到本篇东西的初学者可以绕过。
⾄于这篇东西有没有⽤,这么说吧,当你需要⽤到其中介绍的某些功能时,能给你⼀些参考,仅此⽽已。
⽽要是觉得说这⾥的东西⾃⼰看教程都能学会,这篇东西⼀点价值都没有的同学,试问:学问、知识本来就存在这世界上,⾃⼰探索都能学会,那为什么还要书籍和教师呢?想学习E-Prime,或求E-Prime程序等等的,推荐⼀个论坛:“我爱脑科学⽹”的“⼼⼼⽔滴论坛”,⾥⾯的“⾏为实验技术”栏⽬包含着E-Prime的很多内容:注:该论坛活跃着不少E-Prime、科研⾼⼿。
这是第⼀次写了篇被分享的东西,还真不知道原来作者本⼈是可以看到有些⽹友对分享后的回复的。
请⼤家发表评论时注意⽤词,以免他⼈对你的情商作出错误的估计,并卷⼊⽆谓的⼝⾆之争。
有新东西,继续添加。
1.当存储达到⼀定次数后,即使重装E-Prime2.0,也不能继续使⽤。
(这不是新东西,但可能会碰到。
只在XP系统中试过,其他系统不详)(1)此时需要卸载掉E-Prime2.0。
(2)“开始”->“运⾏”:输⼊“regedit”。
打开注册表。
然后找到并删除注册表中“HKEY_CURRENT_USER\Software\psychology software\E-Prime”“HKEY_LOCAL_MACHINE\Software\psychology software\E-Prime”两个条⽬。
(E-Prime在注册表中残留的信息)(3)重新安装E-Prime2.0,就可以继续使⽤了。
2.弹出窗⼝让被试输⼊答案在需要被试输⼊答案的地⽅,加⼊Inline,填⼊以下三⾏代码。
![心思学软件eprime题目总汇[精彩]](https://uimg.taocdn.com/9c4f1a2582c4bb4cf7ec4afe04a1b0717fd5b3a9.webp)
1、刺激间隔用语——I S I ,I T I , S O A有什么区别呢?SOA,前一个刺激开始到下一个刺激开始之间的时间,简单说即“从开始到开始”;ISI,两个刺激的间隔,即“结束到开始”。
比如在图片命名实验中,每幅图片呈现8s,之后呈现2s的“+”,然后再呈现下一张图片。
在这个实验序列中,SOA为8+2=10s,ISI为2s。
ITI:intertrial interval,指的是两个trial之间的间隔,类似于ISI。
感觉在认知实验中,当一个实验呈现很多刺激时,常用ISI这个术语;而在fMRI实验中,好像多用ITI这个术语。
如上图,SOA如果是指刺激开始到结束,是指一个trial的起始到下一个trial的开始,还是指一个图片刺激的开始到下一个图片刺激的开始呢?虽然两个时间一样长,都是2+8,但是感觉含义还是不一样的,如果对于前面“+”时间随机的时候,两者的时间长会不一样,所以再问下,呵呵...ISI是指指两相邻图片刺激的时间间隔吗,如果两个trial之间还存在1s的时间间隔,那么是不是ISI变为了2+1s了呢?那么此时ITI还是类似于ISI吗?是等于1s还是3s呢?呵呵...在一些研究中,“+”有时候是随机呈现的(比如4s,6s,8s),所以SOA或ISI有时候可能不是一个固定的值。
如果两个trial中还有1s的时间间隔,得看呈现的是什么以及你怎么定义了,根据你提供的那幅图,ITI 可以看做是1s,ISI可以看做是3s2、以下是自己编程时以及在帮同学检查程序时遇到的问题总结,希望对大家有所帮助。
(1).关于中文字符不兼容的问题可以通过把所有的文字转成图片的方法,或者在*.es文件中用英文字母表示中文,generate之后,在*.ebs文件中将英文字母用中文替换。
(2).文件每编完一段之后便generate,以便尽早发现错误。
(3).如果generate顺利,但是在运行过程中出现稀奇古怪的问题,直接去检查*.ebs文件,看是否*.ebs 文件在生成过程中是否自己增加了某些特殊符号,我给我的同学排查错误时遇到过两次这种情况。
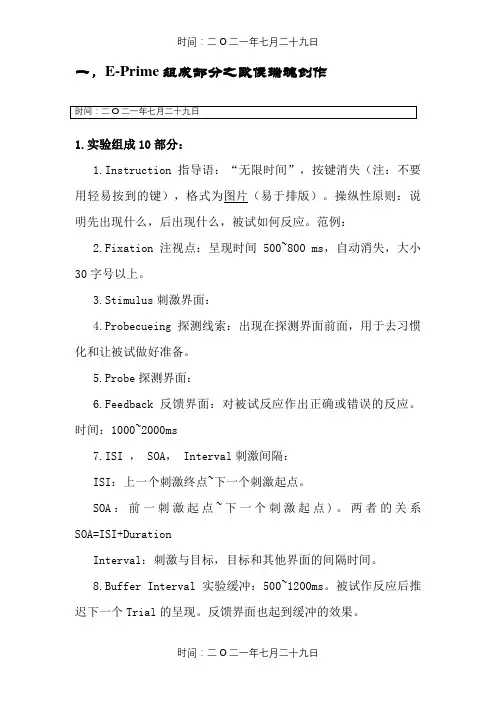
一,E-Prime组成部分之欧侯瑞魂创作1.实验组成10部分:1.Instruction指导语:“无限时间”,按键消失(注:不要用轻易按到的键),格式为图片(易于排版)。
操纵性原则:说明先出现什么,后出现什么,被试如何反应。
范例:2.Fixation注视点:呈现时间500~800 ms,自动消失,大小30字号以上。
3.Stimulus刺激界面:4.Probecueing探测线索:出现在探测界面前面,用于去习惯化和让被试做好准备。
5.Probe探测界面:6.Feedback反馈界面:对被试反应作出正确或错误的反应。
时间:1000~2000ms7.ISI , SOA, Interval刺激间隔:ISI:上一个刺激终点~下一个刺激起点。
SOA:前一刺激起点~下一个刺激起点)。
两者的关系SOA=ISI+DurationInterval:刺激与目标,目标和其他界面的间隔时间。
8.Buffer Interval 实验缓冲:500~1200ms。
被试作反应后推迟下一个Trial的呈现。
反馈界面也起到缓冲的效果。
9.Mask 掩蔽界面:400~1000ms,经常使用于启动效应实验和记忆实验。
在记忆实验中,消除刺激的感觉记忆。
10.Exp End 结语界面:1000~1500ms,如,“实验完毕,谢谢您的介入!”Duration呈现时间:固定时间,变更时间(设置变量或数组),无限时间(“-1”,“infinite”)Mode呈现方式(=消失方式):自动(不需要设置),按键(无限时间+设置按键在刺激界面),反应(无限时间+反应键在探测界面),自动+反应(固定时间+反应键)Format呈现格式:刺激物属性:字符(字体,大小,前景颜色?,布景颜色,下划线),图片(尺寸大小,文件大小,亮度,色调?,饱和度?,灰度?,对比度);位置;边框(大小,颜色)Response反应方式:键盘反应(字母,数字,功能键);语音反应;外接反应键;脚踏板反应Data logging数据收集:反应时Response Time ;RT ,正误Accuracy;ACC,反应Response;RESP,实验流程示意图Procedure:Session Procedure全过程;CEP Core Experimental Procedure(运行一次是一次Trial,一个Block=指导语+CEP+结束语)4.实验设计的4模式:Paralleling并联模式:(图B)完成CEP1再完成CEP2。
1 DisplayDevice Object (topic)DisplayDevice is an abstract object derived from Device. DisplayDevice adds functionality related to the configuration of the display, such as the refresh rate and resolution.PropertiesCalculatedRefreshDuration ID SegmentCopyVerticalOffset VerticalBlankSimulatedCount CalculatedRefreshRate Name Tag VerticalBlankSimulationEnabledColorDepth RefreshDurationStats VerticalBlankDetectedCount XResEchoClients SegmentCopyMaxHeight VerticalBlankDurationStats YResMethodsCalcActualRefreshRate C lose Open SuspendCalculateRefreshRate CreateCanvas Palette WaitForVerticalBlankCanvas GetState ResumeSee AlsoCanvas Object (topic)Device Object (topic)Palette Object (topic)2 DisplayDevice.CreateCanvas (method)SyntaxSet CanvasName = Display.CreateCanvasDescriptionCreates the current canvas, CanvasName, as an offscreen canvasCommentsThe offscreen canvas will remain offscreen until it is set as the current display canvasPortions of the offscreen canvas can be copied to the current display canvas by using the Canvas.Copy methodExample'This example loads the BlueCar.bitmap onto the offscreen canvas, then copies it to the display canvas.'Declare two canvases, one off-screen, and one as the active displayDim cnvs As CanvasDim offScreenCnvs As Canvas'use the Canvas method to create an active display canvasSet cnvs = Display.Canvas'use the CreateCanvas to create an off-screen canvasSet offScreenCnvs = Display.CreateCanvas'Declare two rectangles to define the source and destination areasDim src As RectDim dest As Rect'define source rect as full screensrc.Left = 0src.Top = 0src.Right = Display.XRessrc.Bottom = Display.YRes'define destination rect as top left quadrantdest.Left = 0dest.Top = 0dest.Right = Display.XRes/2dest.Bottom = Display.YRes/2'cnvs.TextColor = CColor ("blue")cnvs.Text Display.XRes/2, Display.YRes/2, "Loading image...."Sleep(3000)'Load the image to off screen canvasoffScreenCnvs.FillColor = CColor("Blue")offScreenCnvs.ClearoffscreenCnvs.LoadImage "bluecar.bmp"'Copy image to display canvascnvs.Text Display.XRes/2, Display.YRes/2, "Copying image...."cnvs.Copy offScreenCnvs, src, destSleep 3000'Note: To run this example with E-BasicExample.es, copy the script above 'and paste it into the Setup InLine object. Also, be sure to copy the'BlueCar bitmap from PictureRT folder to the My Experiments/Tutorials'folder where E-BasicExample.es is located.See AlsoDisplayDevice Object (topic)3 DisplayDevice.Canvas (method)SyntaxSet CanvasName = Display.CanvasDescriptionSets a reference to create the canvas, CanvasName, as the current, onscreen canvasCommentsAll changes made to CanvasName will be immediately visible when CanvasName is the current, onscreen canvasExample'This example draws a single red line on the onscreen canvas.'Create a CanvasDim cnvs As Canvas'Make cnvs the current, onscreen canvasSet cnvs = Display.Canvas'Set the width and color of the pencnvs.PenWidth = 5cnvs.PenColor = CColor("255,0,0")'Draw a Line in redcnvs.Line 100, 100, 200, 100Sleep 1000'Note: To run this example with E-BasicExample.es, copy the script above'and paste it into the Before InLine object.See AlsoCanvas Object (topic)DisplayDevice Object (topic)4 Canvas Object (topic)The Canvas Object abstracts the programming interface to a particular canvas.PropertiesBackStyle FontName ID ROPMode TextColorFillColor FontSize Name SourceColorKeyFontBold FontStrikeout P enColor TagFontItalic FontUnderline PenWidth T extBackColorMethodsArc Clear LineTo Pie SaveImageCalculateTextSize Copy LoadImage Polygon SetPixelChord GetPixel Move To Rectangle TextCircle Line Oval R oundedRectangleSee AlsoDisplayDevice Object (topic)5 RteObject (topic)The RteObject is an abstract object and is the root of all other objects. PropertiesName ID TagSee AlsoClock Object (topic) InputMask Object (topic)Debug Object (topic) Order Object (topic)PRNG Object (topic) Palette Object (topic)Rte (topic) ResponseData Object (topic)Canvas Object (topic) RteAuditObject (topic)CellSpec Object (topic) RteCollection Object (topic)Context Object (topic) SlideState Object (topic)DataFile Object SlideStim Object (topic)Deletion Object (topic) SoundBuffer Object (topic)Device Object (topic) Summation Object (topic)DeviceManager Object (topic) Trigger Object (topic)EchoClient Object (topic)6 Clock Object (topic)The Clock Object abstracts the current real-time clock that is in use. The Clock Object is run-time only.PropertiesID Name Scale TagMethodsRead Read100thMillisec Microsec ResetScaleRead10thMillisec Read1000thMillisec ReadMillisecSee AlsoRteObject (topic)DisplayDevice.WaitForVerticalBlank (method)Syntax7 DisplayDevice.WaitForVerticalBlankDescriptionWaits for the start of the next refresh cycle before moving to next statementComments?This property returns or sets a Boolean value?Waiting for the vertical blank is essential to ensure contents drawn to the screen occur within one screen refresh.?Consider preparing items in an off screen Canvas and the using Canvas.Copy after a call to DisplayDevice.WaitForVerticalBlank to ensure contents drawn to the screen occur within one screen refresh.?When DisplayDevice.VerticalBlankSimulationEnable = True the system will use both hardware and software operations to wait for the vertical blank event. The system collects statistics on the timing of the hardware vertical blank events and then uses mathematical calculations to predict the start time of the next refresh cycle. If a hardware vertical blank event is not observed within the predicted time, the call will simulate the vertical blank event in software and continue.?When calling DisplayDevice.WaitForVerticalBlank in succession, a Sleep command should be called between successive calls since the vertical blank could be occurring and would immediately return. A Sleep duration of ?of the refresh duration should be used.Example'This example loads an image to the current canvas, copies that image 'to an off-screen canvas, then uses that image to present animation.'Create a CanvasDim cnvs As CanvasSet cnvs = Display.CanvasDim x, y, i, carlength As Integerx = 10y = 150carlength = 250'Create off-screen canvasDim offScreenCnvs As CanvasSet offScreenCnvs = Display.CreateCanvasoffScreenCnvs.ClearoffScreenCnvs.SourceColorKey = CColor("black")'Define the source and destination rectanglesDim carRect As RectcarRect.Left = 0carRect.Right = carlengthcarRect.Top = 0carRect.Bottom = 150'Load the image to the active display, then copy off-screen ImageDisplay1.DrawSleep 2000offScreenCnvs.Copy cnvs, carRect, carRect'Define destination rectangleDim destRect As RectdestRect.Left = xdestRect.Right = x+carlengthdestRect.Top = ydestRect.Bottom = y+150cnvs.FillColor = CColor("blue")For i = 1 to Display.XRes-carlengthcnvs.clearDisplay.WaitForVerticalBlankcnvs.Copy offScreenCnvs, carRect, destRect, _ ebEffectSourceColorKeyx = x+1destRect.Left = xdestRect.Right = x+carlengthSleep 20Next i'To run this example with E-BasicExample.es, copy the script 'above and paste it into the After InLine object. Create the 'ImageDisplay1 object in the Unreferenced E-Objects folder. 'In the Properties Window for ImageDisplay1, set Filename to '"redcar.bmp", and BackColor to "blue". In addition, set the 'AlignHorizontal to "left" and 'AlignVertical to "top".See AlsoCanvas Object (topic)DisplayDevice Object (topic)8 Canvas.Clear (method)SyntaxCanvas.ClearDescriptionClears the Canvas.CommentsThe Canvas will be cleared using the current FillColor setting. Example'This example clears the canvas to blue.'Create a CanvasDim cnvs As CanvasSet cnvs = Display.Canvascnvs.FillColor = CColor ("Blue")cnvs.ClearSleep (1000)'Note: To run this example with E-BasicExample.es, copy the script above'and paste it into the After InLine object.9 Canvas.SourceColorKey (property)SyntaxCanvas.SourceColorKeyDescriptionSets the source color key for transparency during copy operations.CommentsThe source color key allows the source to designate areas of itself to be transparent during copy operations. Any areas appearing in the source color key will be transparent when copied to a different surface.Example'This example loads an image to the current canvas, copies that image to'an off-screen canvas, then uses that image to present animation.'Create a CanvasDim cnvs As CanvasSet cnvs = Display.CanvasDim x, y, i, carlength As Integerx = 10y = 150carlength = 250'Create off-screen canvasDim offScreenCnvs As CanvasSet offScreenCnvs = Display.CreateCanvasoffScreenCnvs.ClearoffScreenCnvs.SourceColorKey = CColor("black")'Define the source and destination rectanglesDim carRect As RectcarRect.Left = 0carRect.Right = carlengthcarRect.Top = 0carRect.Bottom = 150'Load the image to the active display, then copy off-screen ImageDisplay1.DrawSleep 2000offScreenCnvs.Copy cnvs, carRect, carRect'Define destination rectangleDim destRect As RectdestRect.Left = xdestRect.Right = x+carlengthdestRect.Top = ydestRect.Bottom = y+150cnvs.FillColor = CColor("blue")For i = 1 to Display.XRes-carlengthcnvs.clearDisplay.WaitForVerticalBlankcnvs.Copy offScreenCnvs, carRect, destRect, ebEffectSourceColorKey x = x+1destRect.Left = xdestRect.Right = x+carlengthSleep 20Next i'To run this example with E-BasicExample.es, copy the script'above and paste it into the After InLine object. Create the'ImageDisplay1 object in the Unreferenced E-Objects folder.'In the Properties Window for ImageDisplay1, set Filename to '"redcar.bmp", and BackColor to "blue". RedCar.bmp is located'in the Samples\PictureRT folder as part of the E-Prime install. In'addition, set the AlignHorizontal to "left" and 'AlignVertical to "top".See AlsoCanvas Object (topic)10 PointInRect (method)SyntaxbIsInRect = PointInRect(point, rect)DescriptionDetermines if the point coordinate is a part of any of the coordinates for a given rectangle. Comments?The 1st parameter, point, is a required Point structure that represents the coordinate to test.?The 2nd parameter, rect, is a required Rect structure that represents the rectangle to test against.?The value returned, bIsInRect, is a Boolean value representing if the coordinate is part of any of the rectangles coordinates.Example'The following example shows how PointInRect can be used to 'determine what quadrant of the screen contains the 'current mouse cursor position.'Ensure the mouse cursor is shownMouse.ShowCursor True'Create four rectangles and inform the user'what quadrant the mouse cursor is inDim rcUpperLeft As RectrcUpperLeft.Left = 0rcUpperLeft.Top = 0rcUpperLeft.Right = Display.XRes / 2rcUpperLeft.Bottom = Display.YRes / 2Dim rcUpperRight As RectrcUpperRight.Left = (Display.XRes / 2) + 1rcUpperRight.Top = 0rcUpperRight.Right = Display.XRes rcUpperRight.Bottom = Display.YRes / 2Dim rcLowerLeft As RectrcLowerLeft.Left = 0rcLowerLeft.Top = (Display.YRes / 2) + 1 rcLowerLeft.Right = (Display.XRes / 2) + 1 rcLowerLeft.Bottom = Display.YResDim rcLowerRight As RectrcLowerRight.Left = (Display.XRes / 2) + 1 rcLowerRight.Top = (Display.YRes / 2) + 1 rcLowerRight.Right = Display.XRes rcLowerRight.Bottom = Display.YRes'Get the current mouse position andDim ptCurrent As PointMouse.GetCursorPos ptCurrent.x, ptCurrent.yDim strQuadrant As String'Determine what quadrant it is inIf PointInRect(ptCurrent, rcUpperLeft) ThenstrQuadrant = "Upper Left"ElseIf PointInRect(ptCurrent, rcUpperRight) Then strQuadrant = "Upper Right"ElseIf PointInRect(ptCurrent, rcLowerLeft) Then strQuadrant = "Lower Left"ElseIf PointInRect(ptCurrent, rcLowerRight) Then strQuadrant = "Lower Right"ElsestrQuadrant = ""End If'Setup the user messageDim strUserMessage As StringIf Len(strQuadrant) > 0 ThenstrUserMessage = "The mouse cursor is in the " &_ strQuadrant & " part of the screen"ElsestrUserMessage = "The mouse cursor is off the screen!" End If'Display the message to the userDisplay.Canvas.ClearDisplay.Canvas.Text 0, 100, strUserMessageSleep 2000'Note: To run this example with E-BasicExample.es, copy the 'script above and paste it into the After InLine object.SeeAlsoRect (topic)Point(topic)MouseDevice Object (topic)。
一,E-Prime组成局部1.实验组成10局部:1.Instruction指导语:“无限时间〞,按键消失〔注:不要用轻易按到的键〕,格式为图片〔易于排版〕。
操作性原那么:说明先出现什么,后出现什么,被试如何反响。
范例:2.Fixation注视点:呈现时间500~800 ms,自动消失,大小30字号以上。
3.Stimulus刺激界面:4.Probecueing探测线索:出现在探测界面前面,用于去习惯化和让被试做好准备。
5.Probe探测界面:6.Feedback反响界面:对被试反响作出正确或错误的反响。
时间:1000~2000ms7.ISI ,SOA,Interval刺激间隔:ISI:上一个刺激终点~下一个刺激起点。
SOA:前一刺激起点~下一个刺激起点)。
两者的关系SOA=ISI+DurationInterval:刺激与目标,目标和其他界面的间隔时间。
8.Buffer Interval 实验缓冲:500~1200ms。
被试作反响后推迟下一个Trial的呈现。
反响界面也起到缓冲的效果。
9.Mask 掩蔽界面:400~1000ms,常用于启动效应实验和记忆实验。
在记忆实验中,消除刺激的感觉记忆。
10.Exp End 结语界面:1000~1500ms,如,“实验完毕,谢谢您的参与!〞Duration呈现时间:固定时间,变化时间〔设置变量或数组〕,无限时间〔“-1〞,“infinite〞〕Mode呈现方式〔=消失方式〕:自动〔不需要设置〕,按键〔无限时间+设置按键在刺激界面〕,反响〔无限时间+反响键在探测界面〕,自动+反响〔固定时间+反响键〕Format呈现格式:刺激物属性:字符〔字体,大小,前景颜色?,背景颜色,下划线〕,图片〔尺寸大小,文件大小,亮度,色调?,饱和度?,灰度?,比照度〕;位置;边框〔大小,颜色〕Response反响方式:键盘反响〔字母,数字,功能键〕;语音反响;外接反响键;脚踏板反响Data logging数据收集:反响时Response Time ;RT ,正误Accuracy;ACC,反响Response;RESP,实验流程示意图Procedure:Session Procedure全过程;CEP Core Experimental Procedure〔运行一次是一次Trial,一个Block=指导语+CEP+结束语〕4.实验设计的4模式:Paralleling并联模式:〔图B〕完成CEP1再完成CEP2。
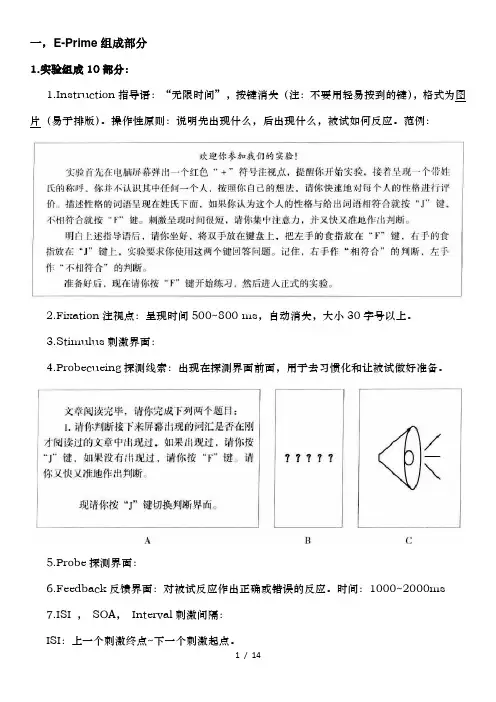
一,E-Prime组成部分1.实验组成10部分:1.Instruction指导语:“无限时间”,按键消失(注:不要用轻易按到的键),格式为图片(易于排版)。
操作性原则:说明先出现什么,后出现什么,被试如何反应。
范例:2.Fixation注视点:呈现时间500~800 ms,自动消失,大小30字号以上。
3.Stimulus刺激界面:4.Probecueing探测线索:出现在探测界面前面,用于去习惯化和让被试做好准备。
5.Probe探测界面:6.Feedback反馈界面:对被试反应作出正确或错误的反应。
时间:1000~2000ms7.ISI ,SOA,Interval刺激间隔:ISI:上一个刺激终点~下一个刺激起点。
SOA:前一刺激起点~下一个刺激起点)。
两者的关系SOA=ISI+DurationInterval:刺激与目标,目标和其他界面的间隔时间。
8.Buffer Interval 实验缓冲:500~1200ms。
被试作反应后推迟下一个Trial的呈现。
反馈界面也起到缓冲的效果。
9.Mask 掩蔽界面:400~1000ms,常用于启动效应实验和记忆实验。
在记忆实验中,消除刺激的感觉记忆。
10.Exp End 结语界面:1000~1500ms,如,“实验完毕,谢谢您的参与!”2.实验程序控制5要素Duration呈现时间:固定时间,变化时间(设置变量或数组),无限时间(“-1”,“infinite”)Mode呈现方式(=消失方式):自动(不需要设置),按键(无限时间+设置按键在刺激界面),反应(无限时间+反应键在探测界面),自动+反应(固定时间+反应键)Format呈现格式:刺激物属性:字符(字体,大小,前景颜色?,背景颜色,下划线),图片(尺寸大小,文件大小,亮度,色调?,饱和度?,灰度?,对比度);位置;边框(大小,颜色)Response反应方式:键盘反应(字母,数字,功能键);语音反应;外接反应键;脚踏板反应Data logging数据收集:反应时Response Time ;RT ,正误Accuracy;ACC,反应Response;RESP,实验流程示意图3.实验过程Procedure:Session Procedure全过程;CEP Core Experimental Procedure(运行一次是一次Trial,一个Block=指导语+CEP+结束语)4.实验设计的4模式:Paralleling并联模式:(图B)完成CEP1再完成CEP2。
E-Prime发送Marker到Biopac生理仪E-Prime发送Mark到Biopac生理仪(Sending signals from E-Prime to the Biopac system)设备要求:1、硬件:MP150主机、STP100C模块、DB25线缆、电脑2台(1台要有25针并口)2、软件:AcqKnowledge生理仪采集软件、 E-Prime刺激呈现软件E-Prime设置:1、首先将DB25连接到带并口的电脑,单个刺激材料在E-Prime的Inline控件中命令如下:WritePort &H378,0***.OnsetSignalEnabled = True***.OnsetSignalPort = &H378***.OffsetSignalEnabled = True***.OffsetSignalPort = &H378***.OnsetSignalData = "1" (建议OnsetSignalData为1、2、4、8、16、32、64,见附录A)其中***为刺激材料名称,不同名称的刺激材料可设置成不同的OnsetSignalData值; 以上语句的意思是:名称为***的刺激材料呈现的同时发送一个Signal到Biopac生理仪。
2、List同类型刺激材料,在E-Prime如何编辑,首先看例子程序的结构图:其中Inline1语句如下:stim.OnsetSignalEnabled = Truestim.OnsetSignalPort = &H378stim.OffsetSignalEnabled = Truestim.OffsetSignalPort = &H378 其中Inline2语句如下:WritePort &H378,0stim.OnsetSignalData = c.GetAttrib("code")其中list1中的"code"如下图(建议为1、2、4、8、16、32、64,见附录A)AcqKnowledge设置:1、首先将Biopac生理仪与电脑连接;2、打开AcqKnowledge软件,设置如下:MP150菜单——Set Up Channels如下图:选中Digital标签,选中OnsetSignalData或"code"设置的值对应的通道,1对应D0、2对应D1、4对应D2,以此类推,最多选中到D7通道。
一,E-Prime组成部分1.实验组成10部分:1.Instruction指导语:“无限时间”,按键消失(注:不要用轻易按到的键),格式为图片(易于排版)。
操作性原则:说明先出现什么,后出现什么,被试如何反应。
范例:2.Fixation注视点:呈现时间500~800 ms,自动消失,大小30字号以上。
3.Stimulus刺激界面:4.Probecueing探测线索:出现在探测界面前面,用于去习惯化和让被试做好准备。
5.Probe探测界面:6.Feedback反馈界面:对被试反应作出正确或错误的反应。
时间:1000~2000ms7.ISI ,SOA,Interval刺激间隔:ISI:上一个刺激终点~下一个刺激起点。
SOA:前一刺激起点~下一个刺激起点)。
两者的关系SOA=ISI+DurationInterval:刺激与目标,目标和其他界面的间隔时间。
8.Buffer Interval 实验缓冲:500~1200ms。
被试作反应后推迟下一个Trial的呈现。
反馈界面也起到缓冲的效果。
9.Mask 掩蔽界面:400~1000ms,常用于启动效应实验和记忆实验。
在记忆实验中,消除刺激的感觉记忆。
10.Exp End 结语界面:1000~1500ms,如,“实验完毕,谢谢您的参与!”2.实验程序控制5要素Duration呈现时间:固定时间,变化时间(设置变量或数组),无限时间(“-1”,“infinite”)Mode呈现方式(=消失方式):自动(不需要设置),按键(无限时间+设置按键在刺激界面),反应(无限时间+反应键在探测界面),自动+反应(固定时间+反应键)Format呈现格式:刺激物属性:字符(字体,大小,前景颜色?,背景颜色,下划线),图片(尺寸大小,文件大小,亮度,色调?,饱和度?,灰度?,对比度);位置;边框(大小,颜色)Response反应方式:键盘反应(字母,数字,功能键);语音反应;外接反应键;脚踏板反应Data logging数据收集:反应时Response Time ;RT ,正误Accuracy;ACC,反应Response;RESP,实验流程示意图3.实验过程Procedure:Session Procedure全过程;CEP Core Experimental Procedure(运行一次是一次Trial,一个Block=指导语+CEP+结束语)4.实验设计的4模式:Paralleling并联模式:(图B)完成CEP1再完成CEP2。
一设随机间隔:inline中:set TextDisplay4.duration= random (2000,6000)解释: TextDisplay4为控件类型(2000,6000)随机刺激间隔2000ms 4000ms 6000ms随机间隔TextDisplay1.duration=2000* random(1,3)解释同上二打开端口命令inline1:打开端口命令:SoundOut1.OnsetSignalEnabled = True请打开控件SoundOut1的端口SoundOut1.OnsetSignalPort = &H378打开SoundOut1端口为H378(固定的)SoundOut1.OffsetSignalEnabled = True关闭控件SoundOut1的端口SoundOut1.OffsetSignalPort = &H378关闭控件SoundOut1的端口为H378inline2:SoundOut1.OnsetSignalData = c.GetAttrib("Condition")向ERPs发送控件SoundOut1的刺激信号(Mark),这个刺激信号从List中的condition(code)获取三选择语句使用inline3:1.假如反应为“1”或“3”,则标记为“1”或“3”;不反应则标记为“2”if Answer.resp=”1” or Answer.resp=”3” thenWritePort &H378,c.GetAttrib(“Answer.resp”)else WritePort &H378,2end if“Answer”是刺激的名称此句应放在“Answer”后面2. 当反应的按键是字母(如j、f)时:“按f键读为1,按j键读为2,无需按键时读为3。
”标在后面if Target.resp = "f" thenwritePort &H378,1elseif Target.resp = "j" thenwritePort &H378,2else writePort &H378,3end if3.if语句还可以写成if thenIf Target.GetAttrib(“code”)=“5” and back.GetAttrib(“code2”)>0 and resp = "j" and Target. c.GetAttrib(“code”)=“5”then writePort &H378,3如果Target获得的刺激类型5,同时反馈刺激为J 那么向端口输出,mark为3当然还可以继续增加And多个条件。
e-prime inline原则E-Prime是创造性思维和有效沟通的工具和原则之一。
其核心思想是通过避免使用"是"字,即"to be"动词,来增强语义准确性和思维的灵活性。
这一原则最早由Alfred Korzybski于1933年提出,并由D. David Bourland Jr.在20世纪70年代进一步发展。
E-Prime原则已经被广泛应用于科学、教育和哲学的领域中。
E-Prime原则的目标是去除主观倾向和以偏概全的陈述,使语言更加客观、准确和具体。
通过避免使用"是"字,人们被迫使用更具体的动词和形容词来描述事物和观点,从而避免了抽象和笼统的说法。
E-Prime原则也强调行动和动态性,从而增强了思维的活力和创造力。
E-Prime原则的一个重要应用领域是科学研究。
科学研究需要严谨和客观的表达,而E-Prime原则正是为此而设计的。
科学家使用E-Prime原则来定义和陈述实验假设,而不是简单地以"是"字句式陈述。
这样做可以促使科学家更好地思考和解释实验结果,从而推动科学研究的发展。
E-Prime原则也可以用于改善人际关系和有效沟通。
通过避免使用"是"字,我们能够表达出更具体、具体和准确的观点。
这有助于减少歧义和误解,并使对话更加明确和有效。
例如,当我们说"他是个坏人"时,这是一个主观评价,不具备客观性。
但是,如果我们改为说"他做了一些坏事",这样就更加具体和准确,可以让人更好地理解我们的观点。
E-Prime原则还有助于我们对自己和世界的理解。
通过避免使用"是"字,我们可以更加客观地思考和表达自己的想法和情感。
我们能够更清楚地描述自己的经历、感受和观点,从而更好地了解自己和他人。
这种思考方式也有助于我们更好地理解和处理复杂的问题和情境。
尽管E-Prime原则有很多优点和好处,但它也有一些局限性。
E-prime设计中常用的inline语句一设随机间隔:inline中:TextDisplay4.duration= random (2000,6000)解释: TextDisplay4为控件类型(2000,6000)随机刺激间隔2000ms4000ms 6000ms随机间隔TextDisplay1.duration=2000*random(1,3)解释同上二打开端口命令inline1:打开端口命令:SoundOut1.OnsetSignalEnabled= True请打开控件SoundOut1的端口SoundOut1.OnsetSignalPort= &H378打开SoundOut1端口为H378(固定的)SoundOut1.OffsetSignalEnabled= True关闭控件SoundOut1的端口SoundOut1.OffsetSignalPort= &H378关闭控件SoundOut1的端口为H378inline2:SoundOut1.OnsetSignalData= c.GetAttrib("Condition")向ERPs发送控件SoundOut1的刺激信号(Mark),这个刺激信号从List中的condition(code)获取三选择语句使用inline3:1.假如反应为“1”或“3”,则标记为“1”或“3”;不反应则标记为“2”ifAnswer.resp=”1” or Answer.resp=”3” thenWritePort&H378,c.GetAttrib(“Answer.resp”)elseWritePort &H378,2endif“Answer”是刺激的名称此句应放在“Answer”后面2. 当反应的按键是字母(如j、f)时:“按f键读为1,按j键读为2,无需按键时读为3。
”标在后面ifTarget.resp = "f" thenwritePort&H378,1elseifTarget.resp = "j" thenwritePort&H378,2elsewritePort &H378,3endif3.if语句还可以写成ifthenIfTarget.GetAttrib(“code”)=“5” and back.GetAttrib(“code2”)>0 and resp = "j" and Target. c.GetAttrib(“code”)=“5”then writePort &H378,3如果Target获得的刺激类型5,同时反馈刺激为J 那么向端口输出,mark为3当然还可以继续增加And多个条件。
eprime打mark或发送trigger语句1 dim N as integerpublic N as integer &定义一个正数变量,用于计算trial数。
比如需要在多少个trial后结束程序或进行休息,就需要提前定义一个变量,以便随着trial 数累加计数。
该变量一般在script窗口中定义,public是定义全局变量的,不过在此用dim 也可以。
2 set SOA.duration=random(800,1200) &设定随机时间。
前面是相应控件的名称,该语句相对于控件property中的设置会优先执行。
这个必须写在相应控件的前面。
3 target1.OnsetSignalEnabled = Truetarget1.OnsetSignalPort = &H378target1.OffsetSignalEnabled = Truetarget1.OffsetSignalPort = &H378 &开端口,就是准备向其他设备如ERP、fMRI 发送trigger,使之能够记录到EPrime中的mark。
每个要打mark的控件都要写这样一组语句。
一般也是在script中写。
4 writePort &H378,0target1.OnsetSignalData = c.getattrib("tmark")&打mark。
前一句是将系统记录归零,如果不归零,可能会打上一些莫名其妙的,让人头疼的幽灵mark,相信有些滴友有所体会。
引号中的tmark是要调用的list中的属性,即事先在list中定义该控件在不同条件下的mark,然后引用,这样还是比较方便的,适合一些有规律的mark。
这个写在target1控件前面的inline中。
mark必须用数字,并且只能用256个自然数,大于256的数字就不能识别了。
5 if target1.Acc = 1 thenwritePort &H378,7elseif target1.Acc = 0 thenwritePort &H378,8else writePort &H378,9end if &也是打mark,这个是直接根据反应打mark的。
E-prime设计中常用的inline语句
一设随机间隔:
inline中:
TextDisplay4.duration= random (2000,6000)
解释: TextDisplay4为控件类型
(2000,6000)随机刺激间隔
2000ms4000ms 6000ms随机间隔
TextDisplay1.duration=2000*random(1,3)
解释同上
二打开端口命令
inline1:
打开端口命令:
SoundOut1.OnsetSignalEnabled= True
请打开控件SoundOut1的端口
SoundOut1.OnsetSignalPort= &H378
打开SoundOut1端口为H378(固定的)
SoundOut1.OffsetSignalEnabled= True
关闭控件SoundOut1的端口
SoundOut1.OffsetSignalPort= &H378
关闭控件SoundOut1的端口为H378
inline2:
SoundOut1.OnsetSignalData= c.GetAttrib("Condition")
向ERPs发送控件SoundOut1的刺激信号(Mark),这个刺激信号从List中的condition(code)获取
三选择语句使用
inline3:
1.假如反应为“1”或“3”,则标记为“1”或“3”;不反应则标记为“2”
ifAnswer.resp=”1” or Answer.resp=”3” then
WritePort&H378,c.GetAttrib(“Answer.resp”)
elseWritePort &H378,2
endif
“Answer”是刺激的名称
此句应放在“Answer”后面
2. 当反应的按键是字母(如j、f)时:
“按f键读为1,按j键读为2,无需按键时读为3。
”标在后面
ifTarget.resp = "f" then
writePort&H378,1
elseifTarget.resp = "j" then
writePort&H378,2
elsewritePort &H378,3
endif
3.if语句还可以写成ifthen
IfTarget.GetAttrib(“code”)=“5” and back.GetAttrib(“code2”)>0 and resp = "j" and Target. c.GetAttrib(“code”)=“5”then writePort &H378,3
如果Target获得的刺激类型5,同时反馈刺激为J 那么向端口输出,mark为3
当然还可以继续增加And多个条件。
四,被试休息语句
inline4:
dima as Integer
a=c.getattrib("List1.sample")
ifa mod 9=0 then
msgbox("Itis time to rest,you havefinished"&int(a/9)&"/10"&",Press SPACE tocontinute") Endif
说明:
每9个trial休息一次,休息时已经完成了全部trial的10分之(a/9),"10"可根据具体实验修改dimss as string
ss=inputbox("请输入文字","数据输入")
让被试输入中文,然后判断他答案的对错吗?
那样的话可以插入一个inline,复制以下语句
dimans as string
InputAns:
ans = AskBox("你的问题","默认的答案,没有可以省略")
if ans = "正确答案"then
'正确的情况
else
'错误的情况
'goto InputAns '如果需要被试输错了重新输入的话去掉本行开头的单引号
end if
五行为数据提取,很复杂没有看懂感兴趣的可以自己学习
write the response of the stimulus to thedat file inorder to merge data
Dim x,y,z,a,g,j As string
x=List1.Order.Count
y=TextDisplay1.RESP
a=c.GetAttrib("code")
g=c.getattrib("stim")
j=c.getattrib("resp")
IF TextDisplay1.RESP = "a" THEN
y = 1
END IF
IF TextDisplay1.RESP = "b" THEN
y = 2
END IF
Dim y1,z1,a1,x2,x3,x4 As integer
x1=x1+1
y1=val(y)
z1=val(z)
a1=val(a)
x2=x1+1
x3=val(g)
x4=val(j)
if TextDisplay1.RESP<>""then
Write#1,x1,y1,a1,TextDisplay1.ACC,TextDisplay1.RT,g Write #1,x2,0,y1,0,0,j
x1=x1+1
else
Write #1,x1,y1,a1,TextDisplay1.ACC,TextDisplay1.RT,g x1=x1
end if
'Write #1,x1,0,z1,1,0。