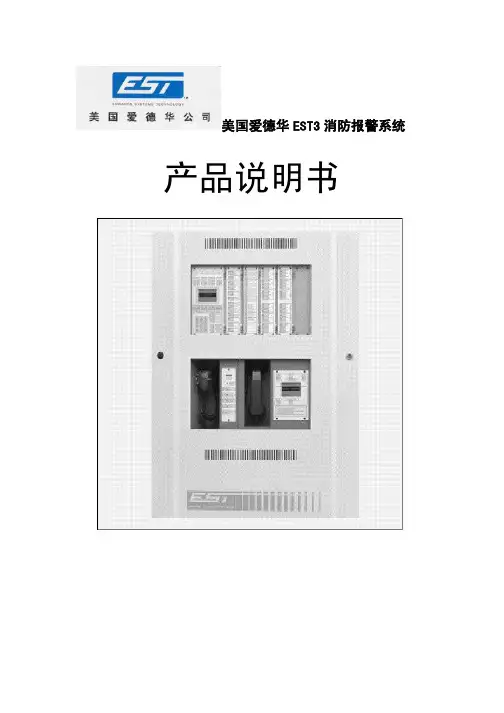
GE爱德华产品技术手册
- 格式:doc
- 大小:118.50 KB
- 文档页数:36


Page 1 of 4 D A T A S H E E TE85010-0071Not to be used for installation purposes. Issue 1.1EDWARDS ® Catalog u EST3 Life Safety PlatformL I F E S A F E T Y&I N C I D E N T M A N A G E M E N TOverviewThe Main Display interface is the primary user interface in the EST3 Life Safety System. The main display interface focuses on the emergency user by putting information important to the user up front. Hands free, the first highest priority event is shown. The display always gives the last highest priority event. Arriving at the panel and without opening the door the first and last alarm is given. Simple to understand lights and switches help the emer-gency user execute system commands with confidence.A menu system supports maintenance functions such as disables or reports for use by staff or service personnel.Standard Features• Uses simple lights and switches • Displays information important to user • Hands free first alarm display• Last event of highest priority always displays • Eight lines by 21 character graphic LCD display — 168 characters total • MultlingualSupports English, French, Spanish, and Russian • Uses queues to sort eventsA queue is a list of messages Alarm, Supervisory, Trouble and Monitor • Slide in LED and switch labelsMakes customization for regional language easySLiquid Crystal Display Module3-LCD0186APPROVEDEN 54-2: 1997 + A1: 2006EN 54-4: 1997 + A1: 2002 + A2: 2006EN 54-16: 2008Page 2 of 4 D A T A S H E E TE85010-0071Not to be used for installation purposes. Issue 1.1ApplicationThe 3-LCD module mounts to the local rail over the nodes Central Processing Unit Module (3-CPU). The 3-LCD module is optional in any network node.Ensuring information clarity the 3-LCD uses a backlit high contrast supertwist graphical display. Eight lines of 21 characters provide the room needed to convey emergency information in a useful format.The 3-LCD always displays the last highest priority event even when the user is viewing other message queues. Further message flexibility is provided with EST3’s message routing ability. Messag-es from a node can display at every node on the network or mes-sages can route to specific nodes only. Routing can be initiated at a specific time/shift change. There is no need to have messages display in areas that are not affected by an event.The 3-LCD can display messages in English, Spanish, French, and Russian. The bilingual display lets the operator select between either of two languages. Consult your representative for available language combinations.The EST3 system configures for Proprietary, Local or EN54 market operations. The mode of operation is selected through the System Definition Utility (SDU) which may adjust the following operations slightly to fit the system operation selected.LEDs and SwitchesFurther enhancing the 3-LCD user interface are easy to read and understand lights and switches. All functions are laid out in a logi-cal order. At the top of the 3-LCD are five system status LEDs. Here determining the general condition of the system is easy.Power LED : Green, on when AC power is on.Test LED : Yellow, on when any portion of the system (Group) isunder test.CPU Fail LED : Yellow, on when CPU stops running.Gnd Fault LED : Yellow, on when a ground exists on the system (group)Disable LED : Yellow, on when any point or zone is disabled by a user.Below the general status LEDs are located four, LED / Switch common controls. The versatility of EST3 allows system design-ers to define the features as affecting a domain (defined group of nodes) or as global (affects all nodes) across the network. This feature is very useful when configuring systems with multiple build-ings on one network. As an example, operating the reset in one building may have adverse effect in other buildings. With EST3 having operational differences between buildings on the same network is not a problem.Pressing Reset starts the system’s reset operation. The yellow LED has three flash rates during reset. The LED flashes fast during the smoke power down phase of reset, flashes slow during the re-start phase, and turns on steady for the restoral phase. The Reset LED turns off when the system is normal.Pressing Alarm Silence turns off all Notification Appliance Circuits defined as audible. The yellow LED turns on when silence is activevia the Alarm Silence switch or via alarm silence software timers.Pressing Panel Silence turns off the system’s internal audible signal. The yellow LED turns on when panel silence is active. The EST3 panel buzzer has user programmable signal rates for alarm, supervisory, trouble and monitor conditions.Pressing Drill turns on the drill LED and all signals sound evacua-tion. Drill does not activate city tie connections. Auxiliary relays willnot activate unless programmed to do so with drill.Liquid Crystal Display. In the normal condition the date and time plus a definable system title display on the LCD. The last line of the display gives an alarm history. This total equals the number oftimes the system has entered the alarm state from the normal state.When active events are on display, the LCD formats into fourlogical windows.In the system status window, the display shows the time and the status of active and disabled points.The current event window, lines 2, 3, 4 automatically display the first active event of the highest priority if the user has not taken control of the system. Once the emergency user takes control, thiswindow displays user message selections.The second line of the display shows system event information. Inthe example above the display shows the chronological number of the event (0001 is the first alarm) followed by the event type (Alarm Active). EST3 supports over 45 event type messages from which system designers choose. The last two lines of the current event window are custom programmable location message lines with space for 42 characters.The last event window shows the last highest priority event. This window is always displayed and updated automatically by the sys-tem. Here the emergency user can monitor the progress of a fire.system viewing the second alarm message iseasy, just press the NEXT key. The nextmessage scrolls into the current event window. The last highest priority event always remainson view. No matter what queue the user selects for viewing, the LCD always displays the most recent alarm. A new alarm event resounds the panel audible signal and appears immediately on display without overwriting information the user selected for view.The final window of the LCD the type status window shows the total number of active events by queue type. A is alarm, S is supervisory, T is trouble, and M is monitor. The number following each letter is the number of active events existing in each queue.EST3 breaks down event types into queues and automatically displays the first event of the highest priority type.Page 3 of 4 D A T A S H E E TE85010-0071Not to be used for installation purposes. Issue 1.1EN54 ComplianceEST3 has passed the British-based Loss Prevention Certification Board (LPCB) certified EST3 control panels and power supplies as having surpassed the requirements of the pivotal EN54 standard, parts two and four as well as part 16. LPCB Certificate #262ab In order to meet these standards, display and control functions have undergone slight modifications for the EN54 marketplace. These differences are highlighted below. All other control and annunciation features remain unchanged.Note: EN 54-2: 1997 + A1: 2006, EN 54-4: 1997 + A1: 2002 + A2: 2006, and EN 54-16: 2008.System Status LEDsPower LED (Green): on when DC power is on.Test LED (Yellow): on when any portion of the system (Group) is under test.CPU Fault LED (Yellow): on when CPU stops running (processor failures must be manually reset).Gnd Fault LED: Not available.Sounder LED (Yellow):flashing indicates fault on sounder circuit. Steady indicates a disabled sounder circuit.Disable LED (Yellow): on when any point or zone is disabled by a user (disabled conditions have priority over fault conditions).Switch FunctionsPressing Sounder On/Off turns off all sounder circuits defined asaudible. The yellow LED turns on when silence is activated via the Sounder On/Off or via the alarm silence software timers.See Page 2 for descriptions of Reset, Panel Silence, and Drill func-tions.Event QueuesFor EN54 compliance, EST3 configures for remote proprietary system operation. This requires that every event must be acknowl-edged by viewing them before the internal buzzer will silence. Thepriority order is Fire, Fault, Disable, Monitor.Priority order is alarm, supervisory, trouble, monitor. By usingqueues an emergency user does not waste time scrolling through a mixed event list looking for alarms or confusing an alarm mes-sage with other message types.EST3 configures for Remote proprietary system operation where every event must be acknowledged by viewing them before the internal buzzer will silence. Or the EST3 will configure for Local operation. Here the internal buzzer silences by pressing panel silence. If any events exist in queues that have not been viewedthe queue LED continues to flash informing the user of un-seen events.When all events in a queue are acknowledged or ‘seen’, theLED associated with the queue turns on steady. If a new event is added to the queue, the EST3 internal buzzer resounds and the queue LED flashes.EST3 allows device grouping into logical group zones. Here two or more alarm devices (such as detectors or pull stations) make up the zone. When a device in the zone activates, the LCD displays the zone description. Each zone only displays once, regardless of the number of devices active within the zone.DetailsTo display device information the user presses the Details key. The device with the lowestaddress displays in the first window.If multiple devices are active each is available for viewing by using the arrow associated with the Previous Message Next key andscrolling through the device list.expand beyond the Main Display interface by adding a Control Display Module and assigning features to its switch controls.For Maintenance users, the EST3 provides a smooth operatingmenu system providing powerful tools for system management, reports, and trouble shooting.Installation and MountingLIFE SAFETY & INCIDENT MANAGEMENTContact usPhone: 800-655-4497 (Option 4) Email: ************************ Website: 8985 Town Center PkwyBradenton, FL 34202© 2020 CarrierAll rights reserved.Engineering SpecificationThe system shall provide a user interface that displays system events in a text format, and supports basic common control LEDs and switches. The Common Control Switches and LEDs provided as minimum will be; Reset switch and LED, Alarm Silence switch and LED, Panel Silence switch and LED, Drill switch and LED. It must be possible to add additional common controls as required through the use of modular display units. The user interface must provide an LCD that will allow custom event messages of up to 42 characters. The interface must provide a minimum of eight lines by 21 characters and provide the emer-gency user, hands free viewing of the first and last highest priority event. The last highest priority event must always display and update automatically. Events shall be automati-cally placed in easy to access queues. It shall be possible to view specific event types separately. Having to scroll through a mixed list of event types is not acceptable. The total number of active events by type must be displayed. Visual indication must be provided of any event type which has not been acknowledged or viewed. It must be possible to cus-tomize the designation of all user interface LEDs and Switches for local language require-ments. It shall be possible to have a custom message for each device in addition to zone messages. Custom device messages must support a minimum of 42 characters each. Instructional text messages support a maximum of 1,000 characters each. The display shall be capable of displaying English, Spanish, French, or Russian messages. Technical SpecificationsCatalog Number3-LCDAgency Listings UL, ULC, FM, CE, LPCB, EN54*.LCD Display Eight lines by 21 characters backlit LCDMounting Two local rail spaces on top of 3-CPUCommon ControlSwitches and LEDsReset switch and LEDAlarm Silence switch and LEDPanel Silence switch and LEDDrill Switch and LEDAlarm Current42mAStandby Current40mA* EN 54-2: 1997 + A1: 2006, EN 54-4: 1997 + A1: 2002 + A2: 2006, and EN 54-16: 2008.3-LCDAdd suffix “-E” for EN54 compliant version.8 (.36)3-LKE UK English Label Kit.25 (.11)3-LKF French Label Kit.25 (.11)3-LKR Russian Label Kit.25 (.11)3-LKS Spanish Label Kit.25 (.11)Page 4 of 4D A T A S H E E T E85010-0071Not to be used for installation purposes. Issue 1.104-01-20。


INTRODUCTIONThese magnetic resonance (MR) protocols were developed by an expert consensus panel for use on General Electric (GE) MR imaging machines, and were developed for high-end platform scanners with multichannel phased array coils and parallel reconstruction capabilities. The protocols are divided into 3 sections:•Body MR imaging•Body MR angiography•Central nervous system (CNS) MR imagingThe protocol parameters can generally be adapted to work with other software platforms or releases and hardware configurations but may require small modifications that can be made by a knowledgeable and experienced MR technologist. Scan times may increase in some circumstances.These protocols provide field strength–specific parameters for 1.5T and 3T. Attention has also been given to patient preparation, streamlining the exam, and making the best use of contrast material, whether it is a standard gadolinium-based extracellular fluid agent, a high-relaxivity gadolinium-based contrast agent (GBCA), such as MultiHance® (gadobenate dimeglumine [Gd-BOPTA]), or agents with hepatobiliary uptake such as Eovist®(gadoxetic acid) and MultiHance®.Each protocol contains a brief description of patient preparation, special notes on coil choice and placement, suggestions for contrast dose and administration rate, and suggestions concerning timing of fluoroscopic triggering, if appropriate.The consensus panel consisted of the following experts in radiology:Thomas Grist, MD University of Wisconsin School of Medicine and Public Health, Madison, Wisconsin Mark C. DeLano, MD ̶ Michigan State University, Advanced Radiology Services, PC, Grand Rapids, Michigan Scott B. Reeder, MD, PhD ̶ University of Wisconsin School of Medicine and Public Health, Madison, Wisconsin Howard A. Rowley, MD ̶ University of Wisconsin School of Medicine and Public Health, Madison, Wisconsin Steffen Sammet, MD, PhD, DABR, DABMRS, FAMP ̶ The University of Chicago Medical Center, Chicago, Illinois Megan E. Vadnais, BSRT, (R)(MR) ̶ University of Wisconsin School of Medicine and Public Health, Madison, WisconsinDisclaimerThe content and views presented in this educational activity are those of the authors and do not necessarily reflect those of Medical Education Resources, ABC Medical Education, and/or Bracco Diagnostics Inc. The authors have disclosed if there is any discussion of published and/or investigational uses of agents that are not indicated by the US Food and Drug Administration (FDA) in their presentations. The protocols presented here were developed for pediatric and adult patients of average weight.Before prescribing any medicine, primary references and the full prescribing information for each product should be consulted. Any procedures, medications, or other courses of diagnosis or treatment discussed or suggested in this activity should not be used by clinicians without evaluation of their patient’s conditions and possible contraindications or dangers in use, review of any applicable manufacturer’s product information, and comparison with recommendations of other authorities. The information presented in this activity is not meant to serve as a guideline for patient management.Off-Label StatementThis educational activity contains discussion of published and/or investigational uses of agents that are not on-label by the FDA. The opinions expressed in the educational activity are those of the faculty. Please refer to the official prescribing information for each product for discussion of approved indications, contraindications, and warnings. Further, participants should critically appraise the information presented and are encouraged to consult appropriate resources for any product or device mentioned in this activity.MR Protocols for Body MR ImagingContrast timing is extremely important for abdominal MR imaging, particularly for high-quality liver imaging. We recommend the use of fluoro-triggering or “SmartPrep” methods rather than the use of a timing bolus.All body MR imaging protocols presented here were developed by Scott B. Reeder, MD, PhD, Steffen Sammet, MD, PhD, DABR, DABMRS, FAMP, and Megan E. Vadnais, BSRT, (R)(MR) for 1.5T and 3T systems. Specific protocols include:•Abdomen‒ Generic Abdomen Pelvis 1.5T and 3T‒ Appendicitis Noncontrast 1.5T and 3T‒ MR Enterography 1.5T and 3T•Liver‒ Liver/Pancreas Extracellular Agent 1.5T and 3T‒ Liver/Pancreas Hepatobiliary Agent 1.5T and 3T‒ Magnetic Resonance Cholangiopancreatography (MRCP) Noncontrast 1.5T and 3T‒ Diffuse Liver Disease 1.5T and 3T•Pelvis‒ Generic Pelvis 1.5T and 3T‒ Female Pelvis Malignant 1.5T and 3T‒ Female Pelvis Benign 1.5T and 3T‒ Uterine Anomaly 1.5T and 3T‒ Rectal Cancer 1.5T and 3T‒ Perianal Fistula 1.5T and 3T‒ Prostate 1.5T and 3T•Adrenal and Renal‒ Adrenal 1.5T and 3T‒ Renal 1.5T and 3TGeneral Notes•Intravenous access should be obtained with an 18- to 22-gauge needle•We suggest the use of a contrast injector and a saline flush of a minimum of 20 to 30 mL at the same injection rate as the contrast injection (1.5-2.0 mL/sec)•Breath-holding is essential for good image quality for thoracic or abdominal MR imaging. Precontrast scans should be used to ensure that the patient can both breath-hold adequately and understand the instructions. We recommend breath-holding at end-expiration (end tidal volume)•When parallel imaging is used, care must be taken to increase the field of view sufficiently to avoid residual aliasing artifact. This is generally more often a problem for coronal imaging, which may require placing the arms over the head or elevating the arms by the patient’s side•In patients with renal failure, consider using a half-dose (0.05 mmol/kg) of a high-relaxivity Group II contrast agent such as MultiHance® (gadobenate dimeglumine), particularly at 3TMR Protocols for Body MR AngiographyAll protocols should use Fluoro-Triggered (FT) magnetic resonance (MR) angiography fluoroscopic imaging for bolus detection. MR imaging protocols for MR angiography presented here include 1.5T and 3T systems, and were developed by Thomas Grist, MD, and Megan E. Vadnais, BSRT, (R)(MR) for the following procedures:•Cardiac MRA–Cardiac Basic Anatomy and Function 1.5T and 3T–Pulmonary Artery 1.5T and 3T–Pulmonary Vein Mapping 1.5T and 3T•Thoracic MRA–Thoracic Aorta MRA 1.5T and 3T–Gated Thoracic Aorta 1.5T and 3T•Abdominal MRA–Contrast-enhanced MRA Abdomen 1.5T and 3T–Noncontrast-enhanced MRA Abdomen 1.5T and 3T–Thoracoabdominal Aortic Aneurysm MRA 1.5T and 3T•Peripheral MRA–Lower Extremity Contrast-enhanced MR Venography (CE MRV) 1.5T and 3T–Runoff Abdomen to Lower Extremity MRA 1.5T and 3T–Peripheral Runoff Noncontrast 1.5T and 3T–Arteriovenous Malformation (AVM) Evaluation 1.5T and 3TThe rationale for the patient preparation for contrast-enhanced MR angiography is based on a hypothetical generic patient. Individual protocols may include important variations and will be delineated in the specific protocol. General Notes•Intravenous access should be obtained with an 18- to 22-gauge needle, inserted preferably in the antecubital fossa. Right side is preferred (when possible) for thoracic or carotid MR angiography•Use respiratory bellows – gating parameters:–R-R intervals = 2-3–Trigger point = 40%–Trigger window = 30%–Delay = minimum•The basic sequences recommended are intended to achieve both anatomic localization and high-quality anatomic imaging to complement the angiographic sequences that are performed. These include:–3-plane localizer–Coronal single-shot fast spin-echo (FSE)–Axial T2 FSE (respiratory triggered)–3D (three-dimensional) contrast-enhanced MR angiography FT (precontrast-practice breath-hold)–3D contrast-enhanced MR angiography FT (postcontrast)–3D contrast-enhanced MR angiography FT (2nd postcontrast)–Axial fast spoiled gradient-echo postcontrast fat-saturated•A power injector is highly recommended with a minimum of 20- to 30-mL saline flush delivered at the same injection rate as the contrast injection•Breath-holding is critical to good image quality for thoracic or abdominal MR angiography. Precontrast or practice scans help ensure that the patient can both breath-hold adequately and understand the instructions•When parallel imaging is used, care must be taken to not have wraparound artifact on the vascular structures. This generally requires prescribing a large field of view beyond the body wall, and for abdominal imaging, it requires placing the arms over the head or elevating the arms at the patient’s side. When performing the calibration scan, overprescribe by one-fourth the area of interest in the superior and inferior directions to reduce scan cutoff. Calibration scans are performed in the axial plane MR Protocols for Central Nervous System (CNS) MR Imaging Newer hardware and software platforms at both 1.5T and 3T allow efficient protocol options for a wide range of CNS indications. This section suggests multiple consensus methods for optimizing examination of patients undergoing MR imaging in the CNS. Core sequences in each protocol are identified, and their aggregate use constitutes a complete examination for each protocol. Alternative sequences of interest are included for emerging technologies, specific target anatomy, or subspecialty preference.1.5T and 3T CNS MR imaging protocols presented here were developed by Howard A. Rowley, MD, Mark C. DeLano, MD, and Megan E. Vadnais, BSRT, (R)(MR) for the following procedures:•Brain–Routine Adult Brain 1.5T and 3T–Brain Neck Magnetic Resonance Angiography (MRA)/Magnetic Resonance Venography (MRV) 1.5T and 3T –Motion Brain 1.5T and 3T–Routine Stroke Fast 1.5T and 3T–Hyperacute Stroke Brain 1.5T and 3T–Tumor Brain 1.5T and 3T–Multiple Sclerosis Brain 1.5T and 3T–Pediatric Brain 1.5T and 3T–Epilepsy Brain 1.5T and 3T•Specialty Brain–Hydrocephalus Brain 1.5T and 3T–Cerebrospinal Fluid Flow 1.5T and 3T–Pituitary 1.5T and 3T–Cranial Nerves/Internal Auditory Canals 1.5T and 3T–Vessel Wall 1.5T and 3T•Head and Neck–Orbits 1.5T and 3T–Soft Tissue Neck 1.5T and 3T–Sinuses/Face 1.5T and 3T•Spine–Cervical Spine 1.5T and 3T–Lumbar Spine 1.5T and 3T–Thoracic Spine 1.5T and 3T–Routine Total Spine 1.5T and 3T–Focused Total Spine 1.5T and 3T–Specialty Spine 1.5T and 3T–Brachial Plexus 1.5T and 3T–Lumbar Plexus 1.5T and 3TGeneral CNS Protocol Notes•Standard brain. There are multiple approaches to obtain various tissue parameter weightings at both1.5T and 3T, such that “standard” imaging refers more to the general-purpose nature of the protocolrather than the core sequence choices. The core preferences of our consensus panel are indicated within each protocol•T1.Six techniques for obtaining T1-weighting are included: spin echo (SE), fast spin echo (FSE), T1 fluid-attenuated inversion recovery (T1-FLAIR), 3D IR-prepared FSPGR (BRAVO), 3D T1 CUBE, and magnetization transfer (MT)–SE is the T1 reference standard for image contrast at 1.5T, although the other sequences have unique advantages and are included as options. Due to T1 prolongation at 3T and associated loss of gray-white contrast there is no consensus standard for T1-weighting, and many sites use inversion recovery preparation to restore tissue contrast–FSE with its intrinsic magnetization transfer effects results in decreased gray-white contrast but may depict contrast enhancement to better advantage–T1-FLAIR and BRAVO are inversion prepared, facilitating excellent gray-white differentiation but with the potential disadvantage of inconspicuous contrast enhancement due to the marked precontrast hypointensity of many lesions and subsequent isointensity to surrounding brain postcontrast –BRAVO, as a standard 3D sequence, has the key advantage of multiplanar reconstruction capability of the isotropic data sets, and excellent gray-white contrast desirable for most applications –T1 CUBE. This T1-weighted FSE-based volumetric sequence can be performed either before or after contrast. Beyond the usual 3D attributes (such as high resolution and multiplanar reconstructions), it has particular advantages postcontrast, where it provides black blood imaging, supports fat saturation, and shows outstanding tissue contrast for enhancing lesions. T1 CUBE is suitable for routine brain imaging and also orbital, cranial nerve, and vessel wall imaging exams. Many sites now use T1 CUBE as a supplement to postcontrast T1 BRAVO and other sequences–MT is an optional feature that can be added to increase contrast enhancement conspicuity on SE imaging, but at the cost of increased SAR and decreased gray-white distinction•T2. Most sites use FSE sequences rather than SE. PROPELLER is effective for dealing with patient motion, and is the primary FSE sequence used at many sites. Some users add fat saturation to T2 imaging as an option•T2-FLAIR.Improves lesion detection particularly at the brain-CSF interface. When done as the first sequence postinjection, postcontrast T2-FLAIR imaging effectively inserts a time delay for subsequent T1-weighted scans, which improves lesion detection on subsequent T1 imaging. The T2-FLAIR images also have some intrinsic T1 contrast that allows visualization of both edema and enhancement on one sequence for many lesions. Both 2D and 3D T2-FLAIR sequences are commonly performed, with the advantage of multiplanar reconstruction capability and fewer CSF pulsation artifacts of the 3D CUBE •Susceptibility. Due to the reduced susceptibility weighting of FSE methods, a T2*-GRE sequence can be added as an option to detect blood products and calcium. The SWAN sequence has been shown to more sensitively detect subtle areas of blood and calcium and has become a common protocol choice•Diffusion. Most brain protocols include a diffusion-weighted imaging sequence that is useful for stroke, infection, and tumor imaging. Apparent diffusion coefficient maps should be included to assess T2 shine-through. In areas near the skull base or orbits, PROPELLER DWI can be a good option to reduce signal pile-up and geometric distortion artifacts•Perfusion. Dynamic susceptibility contrast, perfusion-weighted imaging is becoming increasingly important and can provide clinically significant information regarding blood volume and/or transit time for both stroke and tumor imaging. Arterial spin labeling is also an option for assessing cerebral blood flow at 3T, but must be obtained precontrast•Contrast. The protocols presented here do not list separate imaging sequences for postcontrast imaging; rather, the T1-weighted sequence of choice is typically repeated after contrast agent administration. Most neurologic sequences with contrast are acquired with at least a 3- to 5-minute delay after injection to optimize visualization of disorders of the blood-brain barrier. Some protocols use more than one sequence “family” postcontrast, such as T2-FLAIR, T1-BRAVO, and T1-CUBE Fat Sat due to their complementary information. Many centers prefer routinely acquiring such volumetric series postcontrast to facilitate retrospective multiplanar reconstructions, treatment planning, and neuronavigation applications. T2-FLAIR is an excellent complement to T1 series, and may be done first postcontrast to intentionally provide a time delay before the T1 series are acquired. The method of injection is not important in these cases, and manual injection is typically used. However, power injectors are needed for contrast-enhanced MR angiography and perfusion imaging. Rates of injection vary, but 4 to 5 mL/sec is standard for perfusion, and 1.5 to 2 mL/sec is used for MR angiography. Dosing is weight based and at 0.1 mmol/kg for most protocols aimed at standard extracellular fluid distribution. The dose for an individual injection may be lower for first-pass MRA or perfusion exams, where a split-dose protocol can often be used, keeping overall dose within the standard 0.1 mmol/kg guideline. The ACR has recommended that the lowest dose feasible be used for diagnostic purposes. Because standard dosing recommendations are mostly influenced by lean body mass, and ECF volume in fatty tissues is low, some sites cap the upper limit of contrast for heavier adults at 20 mL total, especially when a high-relaxivity agent is being used.A useful contrast dose calculator (“GadCalc”) is available at https:///contrastCorner/ gadcalc.php and is also available for free download at the Apple and Droid App Stores.。

Page 1 of 2 D A T A S H E E T270062Not to be used for installation purposes. Issue 1.2Edwards Signaling Catalog u Power Supplies and AccessoriesOverviewThe MRSeries Multi-Voltage Control Relays offer SPDT or DPDT 10 Amp contacts which may be operated by one of four input control voltages. A single relay may be energized from a voltage source of 24 Vdc, 24 Vac, 115 Vac or 230 Vac by wiring to ap-propriate input terminals.Each relay position contains a red light emitting diode (LED) which indicates the relay coil is energized. Relays may be “snappedapart” from a standard four-module assembly and used independ-ently.These devices are ideal for applications where local contacts are required for system status, remote contacts for control of electri-cal loads and general purpose switching. They are suitable for use with HVAC Temperature Control, Fire Alarm, Security, Energy Management, and Lighting Control Systems.MR104TMR101/C, MR201/C“RELAY ON”LEDLED VIEWING HOLE‘SNAP APART” SEAMSLED VIEWING HOLESMR101/TMR104C, MR204/CMulti-Voltage Control RelaysMR100 & MR200 SeriesStandard Features• Each relay position may be energized from one of four input voltages • Each relay position contains a red LED which illuminates when the coil is energized. This provides a timesaving convenience when checking an installed system; no metering is required.• Single, dual or triple relay modules may be “snapped apart” from a standard four-position master • SPDT or DPDT relays available• Available in dustproof metal enclosures with LED viewing port • Track mounting hardware to facilitate installation in standard cabinets • UL recognized relays rated at 10 million mechanical operations • ULI listed as control unit accessoryContact us...Phone: 1-800-336-4206Web: Edwards Signaling isan EDWARDS brand.3 Farm Glen BoulevardFarmington, CT 06032In Canada, contact Chubb Edwards... Email: ************************** Web: © 2013 UTC Fire & Security Americas Corporation, Inc. All rights reserved. Specifications subject to change without notice. Edwards is part of UTC Climate, Controls & Security, a unit of United Technologies Corporation.Installation Wiring(TYPICAL FOR ONE MODULE POSITION)MR101 (MR104)MR201 (MR204) SpecificationsOrdering InformationMR101/C Single SPDT relay with LED mounted in metal enclosureMR104T Four-position SPDT relay with LEDs and track mounting hardwareMR104C Four-position SPDT relay with LEDs mounted in metal enclosureMR201/T Single DPDT relay with LED and track mounting hardwareMR201/C Single DPDT relay with LED mounted in metal enclosureMR204/T Four-position DPDT realy with LEDs and track mounting hardwareMR204/CFour-position DPDT relay with LEDs mounted in metal enclosureMR104T and MR204/T 3.0 H x 8.5 W x 1.5 D in (76 H x 216 W x 38 D mm)MR101/C and MR201/C 6.125 H x 3.25 W x 2.5 D in (156mm H x 83mm W x 64 D mm) MR104C and MR204/C 6.125 H x 9.5 W x 2.5 D in (156 H x 241 W x 64 D mm)Page 2 of 2D A T A S H E E T 270062Not to be used for installation purposes. Issue 1.206-27-13。
P/N 3100661 ISSUE 1 © 2003CHESHIRE, CT 203-699-3300 CUST SERV . FAX 203-699-3365 TECH SERV . FAX 203-699-3078Installation Instructions for the HSL SeriesHomeland Security LightDescriptionThe Edwards Homeland Security Light is a unique audible-visual signaling device that contains either five LED light modules or five incandescent light modules and a multiple tone module in a single "stack."All components of the Triliptical Stackable Beacon Lighting System are UL listed subas-semblies. The units are UL listed for indoor and outdoor applications and CSA certified.The enclosures are NEMA 3R, 4X, and IP65rated. CE Marked Visual Signal.The stacklight comes assembled with five color modules as used by the Homeland Security Advisory System: green, blue, yellow,orange, and red. See Table 1. Each lens module contains a remov-able cover to allow for easy relamping. The lens module cover features a molded-in gasket for weather tight reliability.The unit features a large base with a terminal block with a multiple tone module installed. The larger base also functions as a junc-tion box.A pipe mount kit, Cat. No. 102PMF (sold separately) and one of three extension pipes (sold separately) allows the status indicator to be raised above the mounting surface for increased visibility.PLC CompatibilityThe electrical input characteristics for PLC compatible signals are listed in Table 2. Signals with these characteristics may be di-rectly connected to PLC output cards that do not exceed these input characteristics.InstallationInstallation must be in accordance with the latest edition of the National Electrical Code and other governing standards and codes for standard installation.1.If using the 102PMF mounting kit, perform the following:c.Screw the pipe extension (purchased separately) into the mounting flange.d.Ground the flange by pulling the ground wire through the mounting surface clearance hole and center hole of the gasket. Connect earth ground to the bottom of the base mount flange using the ground screw (G) and wire retention terminal cup washer (H).e.Pull the remaining field wiring through center clearance hole of mounting surface, center hole of the gasket, pipe mount flange and extension pipe.f.Align the mounting gasket (D) and flange (A) on the panel. Secure using (4) #10-24 x 1" (25 mm) pan head screws (B), (4) external tooth #10 star washers (E) and (4) #10-24 hex nuts (F).g.Mount the base as instructed below.NOTE:For NEMA3R, 4X, and outdoor applications, it isrecommended that the unit be conduit mounted vertically facing up.2.Install base on 3/4" (19 mm) conduit (not supplied). Pull field wiring through conduit entrance hole.3.Connect field wiring to the terminal blocks as shown in Figures 1 and 2.NOTE: The tone module may be wired to sound independentlyor in conjunction with a light signal.a.To sound tone module independently, connect to separate hot lead.b.To sound tone module with a particular light, connect horn hot terminal to selected light terminal on Cat.No. 102TBS terminal block.4.Apply power to the unit and verify proper operation.NOTE:All references below are to Figure 4.a.Using the supplied gasket (D) as a guide, mark the four mounting holes and the center clearance hole on an appropriate surface.b.Punch the four mounting holes. Punch the wiring clearance hole in the mounting surface to be sufficiently larger than that in the gasket to ensure the wiring insulation is protected from abrasion by the gasket (without interfering with the mounting screw holes), or provide other appropriate wire insulation abrasionprotection as needed.Figure 1. Wiring Cat. No. 102TBSP/N 3100661 ISSUE 1MaintenanceLight Source Replacement 1.Loosen captive screws and remove cover of affected lens module.2.Remove the light source assembly from the lens module.3.Install new light source assembly ensuring that the four prongs on the PC board are aligned with the plug located in the back of the lens module.illustration purposes only)4.Replace lens cover and secure using two captive screws.CleaningThe lens surfaces should be periodically dusted and cleaned with a dry soft clean cloth to maintain optimum light visibility. If necessary, the outside of the lens may be cleaned with water and a mild detergent on a well rung-out, soft, clean cloth.Figure 4. Optional 102PMF Mounting Kit AssemblyP/N 3100661 ISSUE 1Table 1. SpecificationsElectrical Manufacturers Replacement Lamp Life (hours) Catalog No.Ratings Lamp Ratings Lamp Calculated#Projected##Base Units102TBS-G124V DC, 1.75A+N/A N/A N/A N/A102TBS-N5120V AC, 0.60A+Optional Pipe Mount Flange102PMF N/A N/A N/A N/A N/AOptional Extension Pipes102MP-4N/A N/A N/A N/A N/A102MP-10N/A N/A N/A N/A N/A102MP-15N/A N/A N/A N/A N/AHorn Assembly102SIGMT-G124V DC, 0.05A N/A N/A N/A N/A102SIGMT-N5120V AC, 0.07ALens Modules102LM-*N/A N/A N/A N/A N/ALight Sources102LS-SIN-G124V DC, 0.32A10 Watts Ind. Trade 30310,000--102LS-SIN-N5120V AC, 0.08A10 Watts50LMP-10W2,500--102LS-SLEDA-G1**24V DC, 0.062A--N/A100,000--102LS-SLEDB-G1**102LS-SLEDG-G1**102LS-SLEDR-G1**102LS-SLEDW-G1**102LS-SLEDA-N5**120V AC, 0.022A--N/A100,000--102LS-SLEDB-N5**102LS-SLEDG-N5**102LS-SLEDR-N5**102LS-SLEDW-N5**+Currents shown are for a stackable indicator with 5 light modules.*Signifies lens module color (A - amber/orange, B - blue, C - clear, G - green, R - red, Y - yellow)**Signifies lens and LED module color (A - amber/orange, B - blue, G - green, R - red) NOTE: LED light sources must be used with thecorresponding color lens module (e.g., a blue LED light source, 102LS-SLEDB-G1, must be used with a blue lens, 102LM-B). For yellowmodules, use the 102LS-SLEDW light source.#At nominal operating voltage.##Projected lamp life based on manufacturer's calculated lamp life @ 65 fpm and 50% duty cycle.Table 2. PLC CompatibilityUnit input Maximum leakage Continuous on Peak current Cat. No.voltage*current (mA)current (mA)inrush/duration (A/ms**) 102SIGMT-G124V DC5500.24/0.2102SIGMT-N5120V AC5700.35/0.5102LS-SIN-G124V DC25320.36/1102LS-SIN-N5120V AC25800.15/8102LS-SLED( )-G124V DC5650.07/1102LS-SLED( )-N5120V AC5250.09/8*All AC volts at 60 Hz**Amps/millisecondsP/N 3100661 ISSUE 1。
E S T3火灾报警主机中文版操作手册第1章基本的系统操作概述本章叙述基本的系统操作指令。
内容面板控制显示信息处理显示开关的功能简介在本章所描述的操作系统中,必需确认每个事件。
每条信息可用“上一信息、下一信息”键查阅。
自动恢复(修复)的故障(Trouble)和状态(Monitor)等低优先权事件将被确认后自动地从信息队列中删去,而不必让操作员按复位(Reset)键,系统即可恢复正常工作。
注意:被清除后的报警(Alarm)和监视(Supvr)事件不能自动恢复,并将存于报警信息队列和监视信息队列中,直到人工按复位(Reset)键系统才能恢复正常工作。
面板控制面板控制开关的功能或者特点,其作用范围定义为,网络内当功能被激活时,火灾报警机箱受到影响的三种作用范围:·局部——其功能特性只影响安装了LCD显示屏的机箱·分组——其功能特性影响网络上预先定义好分组的机箱·全局——其功能特性影响网络上所有的机箱分组局部[3GROUP.CDR]└────────┬────────┘全局一个网络可以是一个或多个分组的一部分。
火灾报警系统配置的特性与功能因安装不同而异,可根据现场的特殊情况,来决定是否已经把用户需要的功能与特点设计进去。
LCD显示屏LCD显示屏是系统的主要的操作界面,它显示系统工作状态。
1.电源状态指示灯:当交流电源接通时绿灯亮。
(Power)2.测试状态指示灯:当系统的任何一部分处于测试状态时黄灯亮。
如果系统经过一段时间,没有(Test)动作,可编程的定时器会自动退出测试模式。
3.CPU故障指示灯:当中央处理器CPU的监视单元检测到处理器故障后,黄灯亮。
(CPU Fail)4.接地故障指示灯:当连接机箱的非接地线与地相连时黄灯亮。
(Ground Fault)5.屏蔽状态指示灯:当一些点或区域被人工屏蔽时黄灯亮。
(Disable)6.群呼开关/指示灯:按群呼键激活群呼功能。
nXRiHIGH PERFORMANCE COMPACT DRY VACUUM PUMPEDWARDSTHE PARTNER OF CHOICEEdwards is a world leader in the design, technology and manufacture of vacuum pumps with over 100 years of history and more than 80 years of manufacturing experience.We believe in delivering results that bring value to our customers by using our breadth of industry experience to identify and apply solutions to your problems. Using the most innovative and up-to-date modeling techniques, we can optimise the pumping configuration for customers to provide a system design giving the maximum performance in the most reliable and cost-effective way.nXRi HIGH PERFORMANCE COMPACTDRY VACUUM PUMPWhen performance mattersEdwards has revolutionised the vacuum pump market with the new nXRi high performance, compact dry pump. It delivers unrivalled pumping speeds in the most compact package, with pumping speeds of 30 to 120 m3h-1. The nXRi’s lower input power and zero maintenance create real performance improvements and cost benefits across a range of applications. Analytical Instrument OEMs benefit from the ease of integration into most vacuum systems for a ready to go vacuum solution, perfect for mass spectrometry, electron microscopy and leak detection.R&D and Industrial customers will enjoy the design flexibility, oil-free and low maintenance features.• Energy efficiency. Reduce your costs!• Unrivalled performance. When you need it!• Zero contamination. Experience the difference!• Compact footprint. Optimise your space!Analytical instruments • Electron miscroscopy • Mass spectrometry • RGA Scientific research anddevelopment• UHV• High energy physics• General useIndustrial• Drying• Plasma cleaning• Cryo regenerationAPPLICATIONSCOMPACT FOOTPRINTOptimise your space!Designed with size in mind, the compact footprint and height allow the nXRi dry pump to fit easily under a benchtop saving valuable space in your laboratory; and at under 30 kg offers a highly portable vacuum pump for changing work flows and environments. UNRIVALLEDPERFORMANCEWhen you need it!When performance matters look no further than the nXRi dry pump, with pumping speed performance of 30 to 120 m3h-1 from our most compact footprint. It delivers six times more pumping speed than similar sizeddry pumps, and with low ultimate and high reliability you are assured a consistent and stable vacuum for years to come.ZERO CONTAMINATIONExperience the difference!Clean processes and clean results are guaranteed with the nXRi compact dry pump, fully oil-free, and dust-free within the vacuum chamber. Being free of oil and smells guarantees a more pleasant working environment. CONTROL WITH EASEEquipped with a single-phase pump controller covering a wide voltage range of 100-127V/200-240V, the pump achieves consistent performance anywhere in the world. The pump can be controlled easily with the convenient dashboard or remotely via parallel or serial control. The integrated USB port allows monitoring with our free nST2 software. The additional accessory port allows automatic control of valves as our VIV Vacuum IsolationValve for full power loss protection.nXR30/40i A478 mm B443 mm C103 mm D339 mm nXR60/90/120i494 mm461 mm107 mm370 mmA D B2m electrical supply cable, UK, three pin plug A50505003 2m electrical supply cable, Europe A50506003 2m electrical supply cable, China A50509003 Gas ballast blank plug A73501806 Gas ballast adaptor for inert gas (1/4" quick connect) A73501811 Floor/cart mounting kit A90590000Publication Number: 3601 0591 01© Edwards Limited 2021. All rights reserved Edwards and the Edwards logo are trademarks of Edwards LimitedWhilst we make every effort to ensure that we accurately describe our products and services, we give no guarantee as to the accuracy or completeness of any information provided in this brochure.Edwards Ltd, registered in England and Wales No. 6124750, registered office: Innovation Drive, Burgess Hill, West Sussex, RH15 9TW, UK.GLOBAL CONTACTSEMEAUK+44 1444 253 000(localrate************Belgium+44 1293 60 3350France+33 1 4121 1256Germany 0800 000 1456Italy+ 39 02 48 4471Israel+ 972 8 681 0633Russia +7 495 933 55 50Ext. 1800/1803+8 800 775 80 99ASIA PACIFICChina+86 400 111 9618India+91 20 4075 2222Japan+81 47 458 8836Korea+82 31 716 7070Singapore+65 6546 8408Taiwan +886 3758 1000AMERICASUSA+1 800 848 9800Brazil+55 11 3952 5000。
爱德华nes200机械泵说明书爱德华NES200机械泵说明书一、引言爱德华NES200机械泵是一种高效、可靠的工业泵,被广泛应用于各个行业的液体输送领域。
本文将详细介绍NES200机械泵的结构、工作原理、操作方法及维护保养等方面的内容,帮助用户全面了解和正确使用该机械泵。
二、结构与组成部件1. 泵体:NES200机械泵的泵体采用优质铸铁材料制成,具有良好的耐腐蚀性和耐磨性。
2. 泵轴:采用不锈钢材料制成,具有较高的强度和刚性,能够承受较大的工作压力和负荷。
3. 叶轮:泵的叶轮采用先进的涡流设计,能够提供更高的泵送效率,并降低能耗。
4. 机械密封:NES200机械泵采用可靠的机械密封装置,确保泵体内的液体不会外泄,并提供良好的密封性能。
5. 电机:泵的驱动部分采用高效节能的电机,能够提供稳定的功率输出,以确保泵的正常运行。
三、工作原理1. 吸入过程:当泵启动后,泵轴带动叶轮旋转,产生负压区域,使液体从吸入口进入泵体内。
2. 推送过程:随着叶轮的旋转,液体在离心力的作用下被推送到出口,并通过出口排出。
3. 循环过程:泵体内的液体不断循环,实现液体输送的连续性。
四、操作方法1. 泵的安装:在安装泵之前,应先确保安装基础牢固平稳,然后将泵与管道连接,确保连接紧固可靠,避免泄漏。
2. 电机连接:将泵与电机连接,确保电机能够正常驱动泵的运行。
3. 启动与停止:在确认泵的连接正常后,打开电源,按下启动按钮,泵将开始工作;停止时,按下停止按钮,泵将停止工作。
4. 注意事项:在操作过程中,应注意泵的工作状态,如有异常情况及时停机检查,避免产生故障。
五、维护保养1. 泵的清洁:定期清洗泵体和叶轮,确保泵的内部清洁,避免污物堆积影响泵的工作效率。
2. 润滑保养:定期检查泵轴的润滑情况,如有需要,添加适量的润滑油,确保泵轴的正常运转。
3. 密封检查:定期检查机械密封的工作状态,如有泄漏现象,及时更换密封件,确保泵的密封性能。
H062-00-880Issue G Original Instruction ManualElectropneumatic Control ValvesDescription Item Number3-port Control Valves24 V d.c.H062-00-12424 V a.c., 1-phase, 50 or 60 Hz H062-00-125110 V a.c., 1-phase, 50 or 60 Hz H062-00-126230 V a.c., 1-phase, 50 or 60 Hz H062-00-1385-port Control Valve Kits24 V a.c., 1-phase, 50 or 60 Hz B287-03-030110 V a.c., 1-phase, 50 or 60 Hz B287-03-031230 V a.c., 1-phase, 50 or 60 Hz B287-03-03224 V d.c.B287-03-055© Edwards Limited 2009. All rights reserved.Page i Edwards and the Edwards logo are trademarks of Edwards Limited.Contents H062-00-880 Issue GContentsSectionPage 1INTRODUCTION ....................................................................................11.1Scope and definitions ...................................................................................................11.2Product description (12)TECHNICAL DATA .................................................................................52.1Electrical data ............................................................................................................52.2Mechanical data . (73)INSTALLATION .....................................................................................93.1Unpack and Inspect ......................................................................................................93.2Fit the 3-port Control Valve ............................................................................................93.3Fit the 5-port Control Valve kit .......................................................................................103.4Electrical connections ..................................................................................................123.5Adjust the 5-port Control Valve (if necessary) (144)MAINTENANCE (155)STORAGE AND DISPOSAL .......................................................................175.1Storage ...................................................................................................................175.2Disposal . (17)For return of equipment, complete the HS Forms at the end of this manual.IllustrationsFigurePage 1Pneumatic circuit diagrams: single 3-port and 5-port Control Valves (32)Pneumatic circuit diagrams: 2 x 5-port Control Valves (43)Dimensions of 3-port and 5-port Control Valves (mm) (64)Components of the 3-port Control Valve (105)Components of the 5-port Control Valve (116)5-port Control Valve fitted to GV gate valve (127)Electrical supply socket - 3-Port Control Valve ....................................................................138Electrical supply socket - 5-Port valve kit * ........................................................................13g e a /0065/12/09H062-00-880 Issue GPage ii © Edwards Limited 2009. All rights reserved.Edwards and the Edwards logo are trademarks of Edwards Limited.Contents TablesTablePage 1Control valve configurations (22)Mechanical data (73)Checklist of items for the 5-port Control Valve kits ................................................................94Opening and closing times of the gate valve .. (14)© Edwards Limited 2009. All rights reserved. Page 1Edwards and the Edwards logo are trademarks of Edwards Limited.INTRODUCTION H062-00-880 Issue G1INTRODUCTION1.1Scope and definitionsThis manual provides installation, operation and maintenance instructions for the Edwards Electropneumatic Control Valves. You must use the Control Valves as specified in this manual.Read this manual before you install and operate the Edwards Control Valve. Important safety information is highlighted as WARNING and CAUTION instructions; you must obey these instructions. The use of WARNINGS and CAUTIONS is defined below.CAUTION Cautions are given where failure to observe the instruction could result in damage to the equipment, associated equipment and process.The following warning symbols appear on the Control Valves:The units used throughout this manual conform to SI international system of units of measurement.1.2Product descriptionUse Electropneumatic Control Valves to control the operation of pneumatically-actuated vacuum valves in your vacuum system.The Control Valves are available in 3-port and 5-port versions and with different electrical supply voltages and frequencies to suit your application.Select the Control Valve(s) you will need according to your electrical supply and the type of vacuum valve in your vacuum system, as shown in Table 1.WARNINGWarnings are given where failure to observe the instruction could result in injury or death to people.Warning - refer to accompanying documentation.Warning - hot surfaces.H062-00-880 Issue GPage 2© Edwards Limited 2009. All rights reserved.Edwards and the Edwards logo are trademarks of Edwards Limited.INTRODUCTION Notes: 1.The Control Valve can be installed directly on the vacuum valve.2.The Control Valve must be installed remote from the vacuum valve.3.This configuration allows the use of the ’isolated’ position of the vacuum valve.4.This configuration only allows use of the ’roughing’ and ’backing’ positions of the vacuum valve.5.The flow of air from the exhaust port(s) can be used to identify the position of the vacuum valve.Table 1 - Control valve configurations Vacuum valve typeEdwards model Recommended Control Valve configuration Figure Number detail Notes Single-acting cylinder withspring return PVPK Pipeline Valves 1 x 3-port 1 x 5-port kit1, A 1, B 12QSB250 Quarter Swing Butterfly Valve 1 x 3-port1 x 5-port kit1, A 1, B 12Double-acting cylinder with no spring return GV Gate Valves 1 x 5-port kit1, C -Double-acting cylinder with spring return to the mid-position (that is, isolated position)BRV Backing/ Roughing Valve2 x 5-port kits2, A 31 x 5-port kits2, B 4, 5Double-acting cylinder with no spring return QSB63/100/160 QuarterSwing Butterfly Valves,Diffstak pump vacuumisolation-valves 1 x 5-port kit 2, B 5© Edwards Limited 2009. All rights reserved. Page 3Edwards and the Edwards logo are trademarks of Edwards Limited.INTRODUCTION H062-00-880 Issue GFigure 1 - Pneumatic circuit diagrams: single 3-port and 5-port Control ValvesA 3-port Control Valve and PVPK or QSB250 valve pressed air supplyB 5-port Control Valve and QSB250 valve 2.Shut-off valveC 5-port Control Valve and GV gate valve 3.Filter(GV gate valve normally open) 4.Pressure regulator5.Control Valve6.Vacuum valve7.Electrical connectionsH062-00-880 Issue GPage 4© Edwards Limited 2009. All rights reserved.Edwards and the Edwards logo are trademarks of Edwards Limited.INTRODUCTIONFigure 2 - Pneumatic circuit diagrams: 2 x 5-port Control Valves A2 x 5-port Control Valves and BRV valve pressed air supply B5-port Control Valve and BRV , QSB valve 2.Shut-off valve or Diffstak inlet-isolation valve 3.Filter 4.Pressure regulator 5.Control Valve 6.Vacuum valve 7.Electrical connections 8.Vacuum valve (electrical fail to closed position, except for BRV valve)9.Vacuum valve (electrical fail to open position, except for BRV valve)© Edwards Limited 2009. All rights reserved. Page 5 Edwards and the Edwards logo are trademarks of Edwards Limited.TECHNICAL DATA H062-00-880 Issue G2TECHNICAL DATA2.1Electrical data3-port Control ValveElectrical supply voltage tolerance-10 %, +15 % Electrical supply(Nominal power)24 V d.c. 5.0 W24 V a.c., 1-phase, 50 or 60 Hz 6.0 VA110 V a.c., 1-phase, 50 or 60 Hz 5.3 VA230 V a.c., 1-phase, 50 or 60 Hz7.5 VA5-port Control Valve kitsElectrical supply voltage tolerance-10 %, +10 %VA holding(Nominal power)24 V d.c.0.6 W24 V a.c., 1-phase, 50 or 60 Hz0.5 VA110 V a.c., 1-phase, 50 or 60 Hz 1.1 VA230 V a.c., 1-phase, 50 or 60 Hz 5.6 VAH062-00-880 Issue GPage 6© Edwards Limited 2009. All rights reserved.Edwards and the Edwards logo are trademarks of Edwards Limited.TECHNICAL DATAFigure 3 - Dimensions of 3-port and 5-port Control Valves (mm)A3-port Control Valve B5-port Control Valve 24 V d.c., 24 V a.c., 110 V a.c C 5-port Control Valve 230 V A B C2.2Mechanical dataTable 2 - Mechanical dataControl Valve3-port5-port Approximate mass (kg)0.140.17 *** Operating ambient temperature range (°C)-10 to 50-10 to 50Pneumatic supply pressure range (barg)0 to 8 1.5 to 7Maximum cycles.min-1600300Inlet port size1/8 inch BSPfemale Ø 6 mm pushfittingOutlet port size1/8 inch BSPmale Ø4 mm push fittingCable diameter 6 - 8 mm 3.5 - 7 mm **** 230 V 5-port kit has mass of 0.25 kg** Edwards recommends the use of dry air at low temperatures to prevent bedewing*** 6 - 8 mm on 230 V valve kit.TECHNICAL DATAThis page has been intentionally left blank.INSTALLATION 3INSTALLATION3.1Unpack and InspectRemove all packing materials and protective covers and check the Control Valve. If the Control Valve is damaged, notify your supplier and the carrier in writing within three days; state the Item Number of the Control Valve together with your order number and your supplier’s invoice number. Retain all packing materials for inspection. Do not use the Control Valve if it is damaged.If you have a 5-port Control Valve, check that you have received the items listed in Table 3. If any item is missing, notify your supplier in writing within three days.If the Control Valve is not to be used immediately, replace the protective covers. Store the Control Valve in suitable conditions as described in Section 5.1.3.2Fit the 3-port Control ValveFit the 3-port Control Valve directly to a pneumatic inlet-port by the threaded vacuum valve connector on the Control Valve (Figure 4, item 3). Figure 1 detail A shows the pneumatic circuit for the use of the 3-port Control Valve.WARNINGElectropneumatic valves should not be used in applications where in the event of a valve failure,injury could be caused to people or damage could be caused to equipment.WARNINGCompressed air can be dangerous. Ensure that you control the release of compressed air whenyou connect or disconnect the pneumatic supply. If you do not, the sudden release of high-pressure air may cause injury.WARNINGWhen an electropneumatic Control Valve changes state, compressed air can be released from theexhaust ports. You must ensure that such a release of compressed air will not cause injury topeople or damage to equipment.WARNINGThe surface temperature of electropneumatic Control Valves can reach temperatures above70 °C.Table 3 - Checklist of items for the 5-port Control Valve kits Quantity Description Check (√)1Control Valve □2Pneumatic fittings □1Plug □1Fitting-plate □2Screws □11 m length of Ø 4 mm nylon tube □INSTALLATION Refer to Figure 4 and use the procedure below to fit the 3-port Control Valve to a PVPK valve. Refer to the instructionmanual supplied with the PVPK valve for an illustration of the Control Valve fitted to the PVPK valve.1.Make sure that the nylon washer (6) is correctly located on the Control Valve.2.Place the threaded pneumatic supply port (3) in the inlet-port of the PVPK valve.3.Tighten the bolt (2) to secure the Control Valve in place.e suitable fittings and pipe or tube to connect the pneumatic supply to the supply port (5).5.Ensure that the manual override (4) is in the off position, that is, is in the ’0’ position, at right-angles to thebody of the valve.Figure 4 - Components of the 3-port Control Valve3.3Fit the 5-port Control Valve kitTo fit the Control Valve directly onto a GV gate valve (as shown in Figure 5):e the screws supplied to secure the fitting-plate (9) to the base of the Control Valve (7).2.Secure the fitting-plate (9) to the GV gate valve (1); if necessary, refer to the instruction manual supplied withthe gate valve.WARNING Do not dismantle the electrical actuator mechanism on the 5-port valve. The valve contains nouser serviceable parts and hazardous voltages may exist within the unit.1.Electrical connector 4.Manual override 2.Bolt 5.Pneumatic supply port 3.Vacuum valve connector 6.Nylon washerINSTALLATIONAlternatively, use suitable screws through the fixing-holes on the base of the Control Valve to secure the ControlValve to your system.Make the pneumatic connections as follows:1.If necessary, screw the pneumatic fittings supplied into the ports on the vacuum valve.2.Cut two suitable lengths of the 4 mm diameter tube supplied to make two outlet pneumatic pipes, and fit themto the pneumatic fittings on the vacuum valve and to the outlet ports on the Control Valve. Refer to Section1.2and to Figure1 to select the best pneumatic circuit for your application.3.If you fit the Control Valve to a QSB250 valve, you must blank off one of the Control Valve ports (refer toFigure1 detail B for the pneumatic circuit diagram); a blanking-plug is supplied with the 5-port Control Valve kitto place in one of the adaptors fitted to the ports.e a suitable length of 6 mm diameter tube (not supplied) to make an inlet pneumatic pipe, and fit the pipe toyour compressed air supply and to the inlet port on the Control Valve.Figure 5 - Components of the 5-port Control Valve1.Electrical connector 5.Inlet pneumatic pipe2.Control Valve 6.Exhaust flow-controller B3. flow-controller A7.Outlet pneumatic pipes4.Inlet portINSTALLATIONFigure 6 - 5-port Control Valve fitted to GV gate valve 3.4Electrical connections1.Check that the electrical supply corresponds with the voltage stated on the Control Valve.2.Refer to Figures 7 and 8. Undo the screw (4) and remove the electrical supply socket (3) from the Control Valve.Remove the sealing-gland (1) and prise out the connector block (2).3.Loosen the strain-relief nut and pass the electrical supply cable through the nut and into the socket.4.Connect the electrical supply cable to the connector block (2) as shown in Figures 7 and 8 detail A.5.Push the connector block back into the socket; ensure that it is orientated correctly so that the sockets matewith the corresponding pins on the Control Valve.6.Gently pull on the cable to ensure that the cable is trapped inside the connector . Tighten the strain-relief nut.7.Refit the sealing-gland over the socket and push the socket onto the three connector pins on the Control Valve.8.Refit the retaining screw and tighten until there is a slight compression of the sealing-gland.WARNINGEnsure that the electrical installation of the Control Valve conforms with your local and nationalsafety requirements. It must be connected to a suitably fused and protected electrical supply anda suitable earth point.1.Gate valve 6.Inlet pneumatic pipe 2.Gate valve pneumatic actuator 7.Control Valve 3.Pneumatic fittings 8.Exhaust flow-controller B 4.Pneumatic outlet pipes 9.Fitting-plate5.Exhaust flow-controller AINSTALLATION Figure 7 - Electrical supply socket - 3-Port Control ValveFigure 8 - Electrical supply socket - 5-Port valve kit ** For 230 V 5-Port valve kit refer to Figure 7.1.Sealing-gland 6.Electrical cable2.Connector block 7.Live3.Electrical supply socket 8.Neutral4.Screw 9.Earth (ground)5.Strain-relief nut1.Sealing-gland 6.Washer2.Connector block 7.Strain relief nut3.Electrical supply socket 8.Live4.Screw 9.Neutral5.Sealing-gland 10.Earth (ground)INSTALLATION3.5Adjust the 5-port Control Valve (if necessary)CAUTIONYou must correctly set the opening and closing times of the gate valve. If you do not, you can damage the gate valve.Note:The ISO200, ISO250 and ISO320 gate valves are spring assisted when they close. To adjust the Control Valve to operate one of these valves, set the opening time first and then check the closing time.If you have fitted a 5-port Control Valve to a GV Gate Valve, use the following procedure to adjust the opening and closing times of the gate valve. Refer to Figure6.1.Operate the Control Valve to actuate the gate valve; use a stopwatch to measure the opening and closing timesof the gate valve.2.Adjust exhaust flow-controllers (5,8) to set the opening time and closing times; the times must not be less thanthe values shown in T able4:z T urn a flow-controller clockwise to increase the opening/closing time;z T urn a flow-controller anticlockwise to decrease the opening/closing time.Table 4 - Opening and closing times of the gate valveGate valve size Opening time(s)Closing time(s)NW400.50.5NW500.50.5ISO63 1.0 1.5ISO100 1.5 1.5ISO160 1.5 1.5ISO200 3.0 3.0ISO250 4.0 4.0ISO320 4.0 4.0MAINTENANCE 4MAINTENANCEThe Control Valves contain no parts which you can service.To maintain the Control Valves in normal use, do the following checks when you maintain the components of yourvacuum system:z Check that the pneumatic connections are securez Check that the pneumatic pipelines are not damagedz Check that the electrical connections are securez Check that the electrical cables are not damaged.This page has been intentionally left blank.© Edwards Limited 2009. All rights reserved. Page 17 Edwards and the Edwards logo are trademarks of Edwards Limited.STORAGE AND DISPOSAL H062-00-880 Issue G5STORAGE AND DISPOSAL5.1StoragePlace protective covers over the ports of the Control Valve and store in cool, dry conditions.When required for use, install the Control Valve as described in Section3.5.2DisposalDispose of the Control Valve and any components removed from it safely in accordance with all local and national safety and environmental requirements.H062-00-880 Issue GThis page has been intentionally left blank.Page 18© Edwards Limited 2009. All rights reserved.Edwards and the Edwards logo are trademarks of Edwards Limited.。