
PENTAX K2英文使用说明书
- 格式:pdf
- 大小:1.01 MB
- 文档页数:39
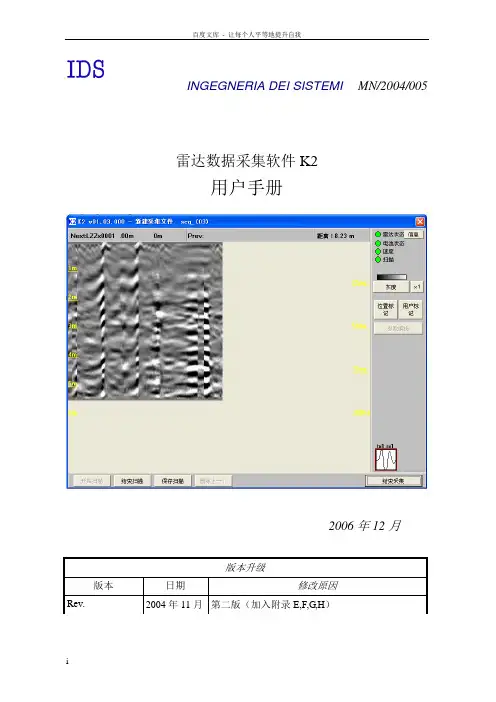
INGEGNERIA DEI SISTEMI MN/2004/005雷达数据采集软件K2用户手册2006年12月版本升级版本日期修改原因Rev. 2004年11月第二版(加入附录E,F,G,H)Rev. 2005年8月升级,加入手动增益和删除扫描Rev. 2005年12月增加结构物工具类型(和附录J)Rev. 2006年3月引入Webex支持中心(第节)本手册所涵盖的软件版本01.01.000,,声明IDS 公司对设备不正常使用所造成的后果不承担相关责任IDS 公司对软件不正常使用所造所的后果不承担相关责任.IDS 作为该专用软件的知识产权拥有者,有权在未提前通知用户的情况下对软件进行更改。
联系方式IDS Ingegneria dei Sistemi Sterpulino 2056121 PISA(Loc. Ospedaletto)Tel:+:+客户服务中心:目录1. 概览 (1)1.1如何使用本手册 (1)2. K2系统硬件的配置 (2)2.1DAD控制单元 (2)2.2笔记本电脑 (3)2.3连接DAD控制单元与笔记本电脑 (3)3. K2系统的软件设置 (6)3.1软件安装与设置 (6)4. K2采集软件的使用 (9)4.1启动K2采集软件 (9)4.2选择驱动 (10)4.3增益标定 (13)4.3.1 高级设置菜单 (19)4.4选择测区 (20)4.5设置采集参数 (23)4.6数据采集 (27)4.7查看模式操作 (30)5. 错误信息及报警 (34)5.1错误信息 (34)6. 在线帮助 (35)6.1如何安装“S YMANTEC PCA NYWHERE”软件 (35)6.1.1 使用电话连接养护 (36)6.2使用W EBEX S UPPORT C ENTER远程协助 (37)6.2.1 如何使用Webex服务 (37)1.概览1.1如何使用本手册此K2采集软件使用手册被细分为以下几部分: •:概览•:K2系统的硬件配置•:K2 采集软件操作程序•:K2 采集软件的设置•:错误信息及报警•:在线帮助2.K2系统硬件的配置K2系统由以下几部分组成:•DAD控制单元•笔记本电脑•网络电缆•电池电缆•电池包2.1DAD控制单元DAD控制单元直接与天线相连,把采集的雷达数据数字化的控制单元。


Quick Couplings — Pneumatic10 Series (Tru-Flate Interchange) 20 Series (Industrial Interchange) 30 Series (Push To Connect)GF Series (Special Purpose Propane)HF Series (Industrial Interchange) 50 Series (ARO 210 Interchange) 70 Series (Lincoln Interchange) UC Series (Universal Coupler) Tool-Mate SeriesE-z-mate SeriesIndustrial Interchange Nipples RF Series (High Flow European Interchange)Link to Section Table of Contents Link to Master Table of ContentsQ u i c k C o u p l i n g s P n e u m a t i c : V i s u a l I n d e xTable of ContentsFor Selection Guide, Media Chart, and complete descriptions, specifications and performance charts, contact your Authorized Parker Fleet Distributor or consult Catalog 3800.General Description ................................................................................................................K2Visual Index ............................................................................................................................K310 Series (T ru-Flate Interchange) . .........................................................................................K6May be used only with 10 Series Nipples. Rated pressure 300 psi. Temperature ranges -40°F to +250°F .Vacuum data: Disconnected — not recommended; Connected — 27.4 inches Hg 20 Series (Industrial Interchange). ..........................................................................................K7 Sleeve type Couplers will interchange push-type Couplers and other manufacturers’ Couplers which accept Industrial Interchange “&” Nipples that conform to MIL-C4109. Rated pressure 300 psi. Temperature ranges -40°F to +250°F .Vacuum data: Disconnected — not recommended; Connected — 27.4 inches Hg 30 Series ................................................................................................................................K7Push To Connect GF Series – Natural & Propane Gas ......................................................................................K8Special Purpose Propane HF Series (Industrial Interchange). .........................................................................................K8Push type coupler which will accept the Industrial Interchange Nipples that conform to MIL-C-4109. Rated pressure 300 psi. Temperature ranges -40°F to 250°F .50 Series (ARO 210 Interchange) ..........................................................................................K9Rated pressure 300 psi. T emperature ranges -40°F to +250°F .Interchanges with ARO 210 and similar design Couplers and Nipples.70 Series (Lincoln Interchange) ..............................................................................................K9Rated pressure 300 psi. T emperature ranges -40°F to +250°F . Interchanges with Lincoln “Long Stem” series couplings.UC Series (Universal Coupler) ...............................................................................................K9Universal design interchangeable with 10 Series, 20 Series and 50 Series Nipples. Rated pressure 150 psi.Tool-Mate Series ...................................................................................................................K10PBS Tool-Mate Series is built to the Industrial Interchange profile.PES Tool-Mate Series is designed for use with high flow RF Series Nipples. Exhaust style T ool-Mate Couplers meet the ISO 4414 specification to allow trapped air pressure to be vented prior to disconnection.E-z-mate Series ....................................................................................................................K10Rated pressure 300 psi. Push-to-connect, exhaust-style coupler.Use industrial 20 Series interchange Nipples.Industrial Interchange Nipples ..............................................................................................K11Q u i c k C o u p l i n g s P n e u m a t i c : V i s u a l I n d e xRF Series ..............................................................................................................................K12High Flow European Interchange“How to Order” Information ......................................................................................................16Chemical Compatibility Guide..................................................................O10, Visual Index10 Series Couplers, Tru-Flate Design*Female Pipe Threadpage K6Male Pipe Threadpage K6Standard Hose Barbpage K6Push-Lok Hose Barbpage K6Female Pipe Threadpage K6Male Pipe Threadpage K6Standard Hose Barbpage K6Push-Lok Hose Barbpage K6Repair Kits page K620 Series Couplers*Female Pipe Threadpage K7Male Pipe Threadpage K7Standard Hose Barbpage K7Push-Lok Hose Barbpage K7Repair Kits page K730 Series Couplers*Female Pipe Threadpage K7Male Pipe Threadpage K7Standard Hose Barbpage K7Push-Lok Hose Barbpage K7CouplersNipplesRepair KitsCouplersRepair KitsCouplersQ u i c k C o u p l i n g s P n e u m a t i c : V i s u a l I n d e xGF Series – Natural & Propane Gas*Couplerspage K8Nipplespage K8HF Series CouplersFemale Pipe Threadpage K8Male Pipe Threadpage K8Standard Hose Barbpage K8Push-Lok Hose Barbpage K8Female Pipe Threadpage K8Male Pipe Threadpage K8Push-Lok Hose Barbpage K850 Series CouplersFemale Pipe Threadpage K9Male Pipe Threadpage K9Push-Lok Hose Barbpage K9Female Pipe Threadpage K9Male Pipe Threadpage K9Standard Hose Barbpage K9Push-Lok Hose Barbpage K970 Series CouplersFemale Pipe Threadpage K9Male Pipe Threadpage K9Female Pipe Threadpage K9Male Pipe Threadpage K9UC Series CouplersFemale Pipe Threadpage K9Male Pipe Threadpage K9Couplers Nipples1/4", 3/8", 1/2"Body Size CouplersHeavy Duty CouplersCouplersNipplesCouplers NipplesCouplersQ u i c k C o u p l i n g s P n e u m a t i c : V i s u a l I n d e xTool-Mate Series CouplersFemale Pipe Threadpage K10Male Pipe Threadpage K10Female Pipe Threadpage K10Male Pipe Threadpage K10Female Pipe Threadpage K10Male Pipe Threadpage K10Female Pipe Threadpage K10Male Pipe Threadpage K10E-z-mate Series CouplersFemale Pipe Threadpage K10Male Pipe Threadpage K10Standard Hose Barbpage K10Push-Lok Hose Barbpage K10Industrial Interchange NipplesFemale Pipe Threadpage K11Male Pipe Threadpage K11Standard Hose Barbpage K11Push-Lok Hose Barbpage K11RF Series CouplersFemale Pipe Threadpage K12Male Pipe Threadpage K12Standard Hose Barbpage K12Push-Lok Hose Barbpage K12Female Pipe Threadpage K12Male Pipe Threadpage K12Standard Hose Barbpage K12Push-Lok Hose Barbpage K12Industrial Interchange RFInterchangeExhaust Industrial Inter- changeExhaust RF InterchangeCouplersNipplesCouplersNipplesQ u i c k C o u p l i n g s P n e u m a t i c : 10 S e r i e s C o u p l e r s , T r u -F l a t e D e s i g nRepair KitsPart Number Body Size Seal Material 21K 1/4Nitrile21KW 1/4Ethylene Propylene 21KY 1/4Fluorocarbon 14K 3/8Nitrile14KW 3/8Ethylene Propylene 14KY 3/8Fluorocarbon 16K 1/2Nitrile16KW 1/2Ethylene Propylene 16KY1/2FluorocarbonPart Number Brass Part Number Steel Body Size Thread Size B13A –1/41/8-27 NPTF B13 –1/41/4-18 NPTF B13E –1/43/8-18 NPTF –15C 3/81/4-18 NPTF B15*153/83/8-18 NPTF –15F 3/81/2-14 NPTF –17E 1/23/8-18 NPTF B17*171/21/2-14 NPTF –17G1/23/4-14 NPTF* Coupler has Brass body and steel sleeve.CouplerFemale Pipe ThreadPart Number Brass Part Number Steel Body Size Thread Size B12A –1/41/8-27 NPTF B12 –1/41/4-18 NPTF B12E –1/43/8-18 NPTF –14C 3/81/4-18 NPTF B14*143/83/8-18 NPTF –14F 3/81/2-14 NPTF –16E 1/23/8-18 NPTF B16*161/21/2-14 NPTF –16G1/23/4-14 NPTF* Coupler has Brass body and steel sleeve.CouplerMale Pipe ThreadPart Number Brass Part Number Steel Body Size Hose ID B10-3B –1/41/4B10-4B –1/45/16B10-5B –1/43/8 –14-5B 3/83/8 –14-6B 3/81/2 –16-5B 1/23/8 –16-6B 1/21/2 –16-7B1/23/4Add suffix “N” to Brass coupler Part Number for stainless steel springs and locking balls (ie B15N).Add suffix “-SL” for Sleeve-Lok option.Add suffix “R” for grip-ring sleeve (1/4” size only).CouplerStandard Hose BarbPart Number Brass Part Number Steel Body Size Hose ID B10-3BP –1/41/4B10-5BP –1/43/8 –14-5BP 3/83/8 –16-5BP 1/23/8 –16-6BP1/21/2* Push-Lok Hose Barbs are designed for use with Parker Push-Lok hose and do not require clamps.CouplerPush-Lok Hose Barb*NipplesFemale Pipe ThreadPart Number Brass Part Number Steel Body Size Thread Size –1C 1/41/8-27 NPTF B3C 3C 1/41/4-18 NPTF –3C-E 1/43/8-18 NPTF –1E 3/81/4-18 NPTF –3E 3/83/8-18 NPTF –1F 1/23/8-18 NPTF –3F 1/21/2-14 NPTF –H3F-G1/23/4-14 NPTFPart Number Brass Part Number Steel PartNumberStainlessBodySizeThread Size –0C 1/41/8-27 NPTFB2C 2C S2C 1/41/4-18 NPTF –2C-E –1/43/8-18 NPTF –0E –3/81/4-18 NPTF –2E –3/83/8-18 NPTF –0F –1/23/8-18 NPTF –2F –1/21/2-14 NPTF –H2F-G –1/23/4-14 NPTFNipplesMale Pipe ThreadPart Number Steel Body Size Hose ID 8C 1/41/49C 1/43/85E 3/83/8H4F 1/23/85F 1/21/2H5F-G1/23/4NipplesStandard Hose BarbPart Number Steel Body Size Hose ID 8CP 1/41/49CP 1/43/85EP 3/83/8H4FP 1/23/8H5FP1/21/2* Push-Lok Hose Barbs are designed for use with Parker Push-Lok hose and do not require clamps.NipplesPush-Lok Hose Barb*10 Series Couplers, Tru-Flate DesignQ u i c k C o u p l i n g s P n e u m a t i c : 20 S e r i e s C o u p l e r s , 30 S e r i e s C o u p l e r sPart Number Brass Part Number SteelPartNumber Stainless Steel (303)Body Size Thread Size B23A – –1/41/8-27 NPTFB23 –S231/41/4-18 NPTF B23E – –1/43/8-18 NPTF –25C –3/81/4-18 NPTF B2525 –3/83/8-18 NPTF –25F –3/81/2-14 NPTF –17E –1/23/8-18 NPTF B1717 –1/21/2-14 NPTF –17G–1/23/4-14 NPTFFemale Pipe Thread–24-5BP 3/83/8 –16-5BP 1/23/8 –16-6BP 1/21/2* Push-Lok Hose Barbs are designed for use with Parker Push-Lok hose and do not require clamps.Note: See Table of Contents for pneumaticIndustrial Interchange nipples used with 20 Series couplers.Couplers Push-Lok Hose Barb*Part Number Brass Part Number Steel Part NumberStainlessSteel (303)BodySizeThread SizeB22A – –1/41/8-27 NPTFB22 –S221/41/4-18 NPTF B22E – –1/43/8-18 NPTF –24C –3/81/4-18 NPTF B2424 –3/83/8-18 NPTF –24F –3/81/2-14 NPTF –16E –1/23/8-18 NPTF B1616 –1/21/2-14 NPTF –16G–1/23/4-14 NPTFCouplersMale Pipe ThreadPart NumberBody Size Seal Material21K 1/4Nitrile21KW 1/4Ethylene Propylene 21KY 1/4Fluorocarbon 14K 3/8Nitrile14KW 3/8Ethylene Propylene 14KY 3/8Fluorocarbon 16K 1/2Nitrile16KW 1/2Ethylene Propylene 16KY 1/2Fluorocarbon 38K 3/4Nitrile38KW 3/4Ethylene Propylene 38KY3/4FluorocarbonRepair KitsPart Number Brass Part Number Steel Body Size Hose ID B20-3B –1/41/4B20-4B –1/45/16B20-5B –1/43/8 –24-5B 3/83/8 –24-6B 3/81/2 –16-5B 1/23/8 –16-6B 1/21/2 –16-7B1/23/4CouplersStandard Hose BarbPart Number Brass Body Size Thread Size B33A 1/41/8-27 NPTF B331/41/4-18 NPTF B33E 1/43/8-18 NPTF B35C 3/81/4-18 NPTF B353/83/8-18 NPTF B35F 3/81/2-14 NPTF B37E 1/23/8-18 NPTF B371/21/2-14 NPTF B37G 1/23/4-14 NPTF B39F 3/41/2-14 NPTF B393/43/4-14 NPTF B39J3/41-11 1/2 NPTFCouplersFemale Pipe ThreadPart Number Brass Body Size Hose ID B30-3B 1/41/4B30-4B 1/45/16B30-5B 1/43/8B34-5B 3/83/8B34-6B 3/81/2B36-6B 1/21/2B36-7B 1/23/4B38-7B 3/43/4B38-8B3/41CouplersStandard Hose BarbPart Number Brass Body Size Thread Size B32A 1/41/8-27 NPTF B321/41/4-18 NPTF B32E 1/43/8-18 NPTF B34C 3/81/4-18 NPTF B343/83/8-18 NPTF B34F 3/81/2-14 NPTF B36E 1/23/8-18 NPTF B361/21/2-14 NPTF B36G 1/23/4-14 NPTF B383/43/4-14 NPTF B38J3/41-11 1/2 NPTFCouplersMale Pipe ThreadPart Number Brass Body Size Hose ID B30-3BP 1/41/4B30-5BP 1/43/8B34-5BP 3/83/8B36-6BP1/21/2* Push-Lok Hose Barbs are designed for use with Parker Push-Lok hose and do not require clamps.CouplersPush-Lok Hose Barb*30 Series Couplers 20 Series CouplersQ u i c k C o u p l i n g s P n e u m a t i c : G F S e r i e s – N a t u r a l & P r o p a n e G a s , H F S e r i e s C o u p l e r sPart Number Brass Body Size Port End BVGFC4-4F 1/41/4-18 NPTF BVGFC6-6F 3/83/8-18 NPTF BVGF-1C8-8F 1/21/2-14 NPTF BVGF-1C12-12F 3/43/4-14 NPTF BVGFC16-16F 11-11-1/2 NPTF BVGFC20-20F1-1/41-1/4-11-1/2 NPTFCouplersPart Number BrassBody Size Port End BPGFN4-4F 1/41/4-18 NPTF BPGFN6-6F 3/83/8-18 NPTF BPGF-1N8-8F 1/21/2-14 NPTF BPGF-1N12-12F 3/43/4-14 NPTF BPGFN16-16F 11-11-1/2 NPTF BPGFN20-20F1-1/41-1/4-11-1/2 NPTFNipplesPart Number Brass Body Size Thread Size HF-251-4FP 1/41/4-18 NPSF HF-251-6FP 1/43/8-18 NPSF HF-371-4FP 3/81/4-18 NPSF HF-371-6FP 3/83/8-18 NPSF HF-371-8FP 3/81/2-14 NPTF HF-501-8FP 1/21/2-14 NPTF1/4", 3/8", 1/2" Body Size CouplersFemale Pipe ThreadPart NumberBrass Body Size Thread Size HF-251-4MP 1/41/4-18 NPTF HF-251-6MP 1/43/8-18 NPTF HF-371-4MP 3/81/4-18 NPTF HF-371-6MP 3/83/8-18 NPTF HF-371-8MP 3/81/2-14 NPTF HF-501-8MP 1/21/2-14 NPTF1/4", 3/8", 1/2" Body Size CouplersMale Pipe ThreadPart Number Brass Body Size ID HF-251-4HB 1/41/4HF-251-6HB 1/43/8HF-371-6HB 3/83/8HF-371-8HB 3/81/21/4", 3/8" Body Size CouplersStandard Hose BarbPart Number Brass Body Size Hose ID HF-251-4PL 1/41/4HF-251-6PL 1/43/8HF-371-6PL 3/83/8HF-371-8PL 3/81/2* Push-Lok Hose Barbs are designed for use with Parker Push-Lok hose and do not require clamps.1/4", 3/8" Body Size CouplersPush-Lok Hose Barb*Part Number Steel Body Size Thread Size HF-251-4FP-S 1/41/4-18 NPSF HF-251-6FP-S 1/43/8-18 NPSF HF-371-4FP-S 3/81/4-18 NPSF HF-371-6FP-S 3/83/8-18 NPSF HF-371-8FP-S 3/81/2-14 NPTFHeavy Duty CouplersFemale Pipe ThreadPart Number SteelBody Size HF-251-4MP-S 1/41/4-18 NPTF HF-251-6MP-S 1/43/8-18 NPTF HF-371-4MP-S 3/81/4-18 NPTF HF-371-6MP-S 3/83/8-18 NPTF HF-371-8MP-S 3/81/2-14 NPTFHeavy Duty CouplersMale Pipe ThreadPart Number SteelBody Size HF-251-4PL-S 1/41/4HF-251-6PL-S 1/43/8HF-371-6PL-S 3/83/8HF-371-8PL-S 3/81/2* Push-Lok Hose Barbs are designed for use with Parker Push-Lok hose and do not require clamps.Heavy Duty CouplersPush-Lok Hose Barb*HF Series Couplers GF Series – Natural & Propane GasQ u i c k C o u p l i n g s P n e u m a t i c : 50 S e r i e s C o u p l e r s , 70 S e r i e s , U C S e r i e s – U n i v e r s a l C o u p l e r sPart Number Steel Body Size Hose ID A8CP1/41/4* Push-Lok Hose Barbs are designed for use with Parker Push-Lok hose and do not require clamps.**This dimension represents portion of nipple that is exposed when nipple is inserted in a Parker 50 Series couplerPart Number Steel Body Size Hose ID A8C1/41/4Part Number Brass Body Size Thread Size B531/41/4-18 NPTF B53E1/43/8-18 NPTFCouplersFemale Pipe ThreadPart Number Steel Body Size Thread Size A2C1/41/4-18 NPTFNipplesMale Pipe ThreadPart Number Brass Body Size Thread Size B521/41/4-18 NPTF B52E1/43/8-18 NPTFCouplersMale Pipe ThreadNipplesStandard Hose BarbPart Number Brass Body Size Hose ID B50-3BP 1/41/4B50-5BP 1/43/8* Push-Lok Hose Barbs are designed for use with Parker Push-Lok hose and do not require clamps.CouplersPush-Lok Hose Barb*NipplesPush-Lok Hose Barb*Part Number Steel Body Size Thread Size A3C1/41/4-18 NPTFNipplesFemale Pipe ThreadPart Number Brass Body SizeThread Size B731/41/4-18 NPTFCouplersFemale Pipe ThreadPart Number Brass Body Size Thread Size B721/41/4-18 NPTFCouplersMale Pipe ThreadPart Number Steel Body Size Thread Size L3C1/41/4-18 NPTFNipplesFemale Pipe ThreadPart Number Steel Body Size Thread Size L2C1/41/4-18 NPTF* This dimension represents portion of nipple that is exposed when nipple is inserted in a Parker 70 Series coupler.NipplesMale Pipe Thread70 Series Couplers UC Series CouplersPart Number Brass Body Size Thread Size UC-251-4FP 1/41/4-18 NPSF UC-251-6FP 1/43/8-18 NPSFCouplersFemale Pipe ThreadPart Number Brass Body Size Thread Size UC-251-4MP 1/41/4-18 NPTF UC-251-6MP1/43/8-18 NPTFCouplersMale Pipe Thread50 Series CouplersQ u i c k C o u p l i n g s P n e u m a t i c : T o o l -M a t e S e r i e s C o u p l e r s , E -z -m a t e S e r i e s C o u p l e r sPart Number Body Size Thread Size PER-251-4MP 1/41/4-18 NPTF PER-251-6MP1/43/8-18 NPTFPart Number Body Size Thread Size PER-251-4FP 1/41/4-18 NPTF PER-251-6FP 1/43/8-18 NPTFPart Number Body Size Thread Size PBH-251-4MP 1/41/4-18 NPTF PBH-251-6MP 1/43/8-18 NPTF PBH-371-4MP 3/81/4-18 NPTF PBH-371-6MP 3/83/8-18 NPTFPart Number Body Size Thread Size PBH-251-4FP 1/41/4-18 NPTF PBH-251-6FP 1/43/8-18 NPTF PBH-371-4FP3/81/4-18 NPTF PBH-371-6FP 3/83/8-18 NPTF PBH-371-8FP 3/81/2-14 NPTFPart Number Body Size Thread Size PBS-251-4MP 1/41/4-18 NPTF PBS-251-6MP 1/43/8-18 NPTF PBS-371-6MP 3/83/8-18 NPTF PBS-371-8MP 3/81/2-14 NPTF PBS-501-8MP 1/21/2-14 NPTFPart Number Body Size Thread Size PES-251-6FP 1/43/8-18 NPTFPart Number Body Size Thread Size PBS-251-4FP 1/41/4-18 NPTF PBS-251-6FP 1/43/8-18 NPTF PBS-371-6FP 3/83/8-18 NPTF PBS-371-8FP 3/81/2-14 NPTF PBS-501-6FP 1/23/8-18 NPTF PBS-501-8FP 1/21/2-14 NPTF PBS-501-12FP 1/23/4-14 NPTFIndustrial InterchangeFemale Pipe ThreadIndustrial Interchange Male Pipe ThreadRF InterchangeFemale Pipe ThreadRF InterchangeMale Pipe ThreadExhaust Industrial InterchangeFemale Pipe ThreadExhaust IndustrialInterchangeMale Pipe ThreadExhaust RF InterchangeFemale Pipe ThreadExhaust RF InterchangeMale Pipe ThreadPart Number Body Size Thread Size PES-251-4MP1/41/4-18 NPTFPart Number Body Size Thread Size EZ-251-4FP1/41/4-18 NPTF EZ-251-6FP 1/43/8-18 NPTF EZ-371-6FP 3/83/8-18 NPTF EZ-371-8FP 3/81/2-14 NPTF EZ-501-8FP 1/21/2-14 NPTF EZ-501-12FP 1/23/4-14 NPTF EZ-751-12FP 3/43/4-14 NPTF EZ-751-16FP3/41-11 1/2 NPTFCouplersFemale Pipe ThreadPart Number Body Size Hose ID EZ-251-4PL 1/41/4EZ-251-6PL 1/43/8EZ-371-6PL 3/83/8EZ-501-8PL1/21/2* Push-Lok Hose Barbs are designed for use with Parker Push-Lok hose and do not require clamps.CouplersPush-Lok Hose Barb*Part Number Body Size Thread Size EZ-251-4MP 1/41/4-18 NPTF EZ-251-6MP 1/43/8-18 NPTF EZ-371-6MP 3/83/8-18 NPTF EZ-501-8MP1/21/2-14 NPTF EZ-751-12MP3/43/4-14 NPTFCouplersMale Pipe ThreadPart Number Body Size Hose ID EZ-251-4HB 1/41/4EZ-251-6HB 1/43/8EZ-371-6HB 3/83/8EZ-501-8HB1/21/2CouplersStandard Hose BarbE-z-mate Series Couplers Tool-Mate Series CouplersQ u i c k C o u p l i n g s P n e u m a t i c : I n d u s t r i a l I n t e r c h a n g e N i p p l esPart Number Brass Part Number Steel Part Number Stainless Steel (303)Body Size Hose ID –H8C –1/41/4 – –SH8C 1/41/4 –H8C-D –1/45/16 –H9C SH9C 1/43/8 –H5E –3/83/8 –H6E –3/81/2 –H4F –1/23/8 –H5F –1/21/2 –H5F-G –1/23/4 –H5G-F –3/41/2BH5G H5G –3/43/4 –H5G-J–3/41PartNumber Brass Part Number Steel Body Size Hose ID BH8CP H8CP 1/41/4 –H9CP 1/43/8 –H4EP 3/81/4 –H5EP 3/83/8 –H6EP 3/81/2 –H4FP 1/23/8 –H5FP 1/21/2 –H6FP1/25/8**Push-Lok Hose Barbs are designed for use with Parker Push-Lok hose and do not require clamps.NipplesStandard Hose BarbNipplesPush-Lok Hose Barb**Part Number Brass Part Number Steel Part Number Stainless Steel (303)Body Size Thread Size –H1C –1/41/8-27 NPTF BH3C H3C SH3C 1/41/4-18 NPTF –H3C-E SH3C-E 1/43/8-18 NPTF –H1E –3/81/4-18 NPTF BH3E H3E –3/83/8-18 NPTF –H3E-F –3/81/2-14 NPTF –H1F –1/23/8-18 NPTF BH3F H3F –1/21/2-14 NPTF –H3F-G –1/23/4-14 NPTF –H3G-F –3/41/2-14 NPTF –H3G –3/43/4-14 NPTF –H3G-J–3/41-11 1/2 NPTFNipplesFemale Pipe ThreadPart Number Brass Part Number Steel Part Number Stainless Steel (303)Body Size Thread Size –H0C –1/41/8-27 NPTF BH2C H2C SH2C 1/41/4-18 NPTF –H2C-E SH2C-E 1/43/8-18 NPTF –H00E –3/81/8-27 NPTF –H0E –3/81/4-18 NPTF BH2E H2E –3/83/8-18 NPTF –H2E-F –3/81/2-14 NPTF –H0F –1/23/8-18 NPTF BH2F H2F –1/21/2-14 NPTF –H2F-G –1/23/4-14 NPTF –H2G-F –3/41/2-14 NPTF BH2G H2G –3/43/4-14 NPTF –H2G-J–3/41-11 1/2 NPTFNipplesMale Pipe ThreadIndustrial Interchange NipplesQ u i c k C o u p l i n g s P n e u m a t i c : R F S e r i e s C o u p l e r sPart NumberBrassBody Size Thread Size RF-251-4FP 1/41/4-18 NPSF RF-251-6FP 1/43/8-18 NPSF RF-371-6FP 3/83/8-18 NPSF RF-371-8FP3/81/2-14 NPTFPart Number Brass Body Size Thread Size RF-251-4MP 1/41/4-18 NPTF RF-251-6MP 1/43/8-18 NPTF RF-251-8MP 1/41/2-14 NPTF RF-371-6MP 3/83/8-18 NPTF RF-371-8MP 3/81/2-14 NPTFPart Number Brass Body Size Hose ID RF-251-4HB 1/41/4RF-251-6HB 1/43/8RF-371-6HB 3/83/8RF-371-8HB 3/81/2Part Number Brass Body Size Hose ID RF-251-4PL 1/41/4RF-251-6PL 1/43/8RF-251-8PL 1/41/2RF-371-6PL 3/83/8RF-371-8PL 3/81/2* Push-Lok Hose Barbs are designed for use with Parker Push-Lok hose and do not require clamps.Part Number Steel Body Size Thread Size RF-254-4FP 1/41/4-18 NPTF RF-254-6FP 1/43/8-18 NPTF RF-374-6FP 3/83/8-18 NPTF RF-374-8FP3/81/2-14 NPTFPart Number Steel Body Size Thread Size RF-254-4MP 1/41/4-18 NPTF RF-254-6MP 1/43/8-18 NPTF RF-374-6MP 1/43/8-18 NPTF RF-374-8MP3/81/2-14 NPTFPart Number Steel Body Size Hose ID RF-254-4HB 1/41/4RF-254-6HB 1/43/8RF-374-6HB 3/83/8RF-374-8HB3/81/2Part Number Steel Body Size ID RF-254-4PL 1/41/4RF-254-6PL 1/43/8RF-374-6PL 3/83/8RF-374-8PL3/81/2* Push-Lok Hose Barbs are designed for use with Parker Push-Lok hose and do not require clamps.CouplersFemale Pipe ThreadNipplesFemale Pipe ThreadNipplesMale Pipe ThreadNipplesStandard Hose BarbNipplesPush-Lok Hose Barb*CouplersMale Pipe ThreadCouplersStandard Hose BarbCouplersPush-Lok Hose Barb*RF Series Couplers。

Quick Help/Reference Guide for LX Winder CONTENTSFour 1.5-volt AA-size batteries are required to operate the winder. Alkaline, manganese or rechargeable Nickel Cadmium (Nicad) types may be used• Press the battery cartridge lock release button (BATT.) at the base of the winder until the cartridge pops out slightly• Remove the cartridge from the chamber and insert the four AA-size batteries into the cartridge in accordance with the (+) (-) diagrams on the sides of the cartridge.• Place the loaded cartridge inside the battery chamber by sliding it all the way inside until it locks in place.Battery Care* Battery performance tends to vary in accordance with the brand and type. When doing a lot of shooting with the winder, high performance alkaline batteries are recommended, Rechargeable Nicad batteries are also convenient when used in conjunction with a commercially available battery charger, * When replacement is required, replace all four batteries at the same time with equivalent 1.5-volt batteries.* Protect the winder from battery leakage by removing the batteries whenever the winder will not be in use for long periods of time.IMPORTANT! NEVER THROW USED BATTERIES INTO FIRE OR EXCESSIVE HEAT TO PROTECT AGAINST EXPLOSION: ALWAYS KEEP BATTERIES OUT OF THE REACHOF CHILDREN.ATTACHING/DETACHING THE WINDERAttaching the Winder• Hold the base of the camera away from the light and remove the caps covering the camera film transport and auto rewind couplings. Screw both caps into the cap holders on top of the winder to prevent loosing them.CAUTION: When attaching the winder with film already loaded in the camera, be sure to hold the base of the camera away from sunlight or other bright lighting sources. Until the winder is fully coupled with the camera, there is possibility that bright lighting seeping through the auto rewind coupling could adversely affect your exposures. Likewise, when detaching the winder before the film roll has been completed and rewound, be sure to replace the auto rewind coupling cap on the camera immediately.• Set the winder C/S dial to OFF. Attach the winder to the camera by lining up the attachment screw with the tripod socket at the base of the camera. Making sure that all contact points line up properly, secure the winder to the camera by turning the thumbscrew clockwise. Be sure to tighten the screw firmly to ensure proper electrical contact.To Detach the WinderLoosen the screw and separate the winder and the camera. Replace the coupling caps over the couplings at the base of the camera immediately. Be sure to replace the auto rewind cap immediately to avoid the danger of ruining future exposures when shooting without the winderFilm Loading/Blank Exposures (With Unloaded Cameras):Set the camera shutter dial to a manual shutter speed and load the film in the usual manner by extending the film leader and inserting it between the magic needles of the take-up sPool. At this point, you may continue by making blank exposures in the usual manner (provided the winder C/S dial is set to OFF) or you can make them with the winder as follows:• Set the winder C/S dial to S, and press the shutter button so that the film wraps around the take-up spool. Then, press the shutter button again until the film perforations engage both sides of the sprocket. Close the back cover and take up slack with the film rewind crank. Press the shutter button successively until the dot representing "1" registers in the exposure counter window. Make your exposures as described in the "Shooting" on the next page.Praparations with Loaded Cameras:If the shutter is uncocked, temporarily set the C/S dial to''S" and press the shutter button once to cock the shutter: proceed to the "Shooting" section beginning on the next page. If the shutter is already cocked (the shutter cocked indicator on top of the camera wili be red) proceed directly to the "Shooting" section on the next page.SHOOTINGThe Winder LX features two modes of film advance which are controlled by the C/S dial on the back of the winder. The S setting permits single-frame film advance, and the "C" setting, consecutive or sequential film advance. When the dial is set to OFF, the automatic film advance system disengagesfrom the camera."S" (Single-Frame) Setting:If you wish only to use the winder to advance the film after each individual exposure, set the winder C/S dial to S and press the shutter button: when the exposure is completed, the film advances automaticaliv to the next exposure and prepares the shutter for shooting. Press the shutter button again for each additional exposure. (It is not necessary to hold the shutter button depressed for the duration of the exposure with long exposures.)NOTE: If the shutter is not cocked when you set the dial to "S" it will be necessary to press the shutter button twice before you can take the picture: once to cock the shutter (the shutter cocked indicator on top of the shutter will turn red) and again to release the shutter."C" (Consecutive Exposure) Setting:When you wish to use the winder to capture the action in sequence as it happens, set the dial to "C" and release the shutter: the winder advances the film continuously in sequence until you let go of the shutter button or the film runs out. Film advance rate varies in synchronization with shutter operation and battery condition; synchronization is not featured at the "B" shutter speed setting~ When shutter speeds in excess of 1/60 sec. are used the top film advance rate of 2 frames-per-second is possible.NOTE: If the shutter is not cocked when you set the dial to "C' shutter release will be delayed when you press the shutter button until the film advances. To avoid this delay, press the shutter button once quickly and let go before beginning the shooting sequence (the shutter is cocked if the shutter cocked indicator on top of the camera turns red).Exposure Check:When the winder is attached to the camera the stroke required for shutter release is shortened somewhat. As a precaution against accidental shutter release while checking the exposure with the winder attached press the shutter button very lightly. (If you; fingers aren't steady, temporarily set the C/S dial to OFF before checking the exposure.)LED Indicator:The LED Indicator on the back of the winder flickers each time the take-up spool turns and again when you release the shutter as a signal that the winder is functioning properly. When you reach the end of the film, it glows continuously to indicate that it's time to rewind the film (see page 16).IMPORTANT: Although the LED flickers when the take-up spool rotate', it does not confirm that the film is taking up. For this reason, when you make your blank exposures after loading the camera be sure to check that the film rewind knob is rotating.SHOOTING PRECAUTIONSThe OFF-SettingWhen the CIS dial is set to OFF, the winder is disengaged from the camera, so it's a good idea to keep the dial set to "C" or "S" while shooting so as not to miss shooting opportunities, However, when storing the camera and the winder, the dial should be set to OFF.Also, when not using the winder for long periods of time, set the dial to OFF and remove the battery cartridge to guard against battery leakage.IMPORTANT: When you reach the end of the film roll and do not intend to rewind the film immediately, promptly set the C/S dial to OFF. Batteries wili deplete with the C/S dial set to "C" or "S" while the LED is continuously lit.Self-TimerTo use the self-timer with the winder attached, set the C/S dial to OFF beforehand. The self-timer does not function while the automatic film advance system is engaged.Multiple ExposuresTo make multiple exposures with the winder attached, set the C/S dial to OFF before releasing the shutter. Make the exposure in the same manner as you would without the winder attached, but by pressing the winder film rewind release button once for each additional exposure on the same frame. The C/S dial may be set back to C or S before the last multiple exposure for automatic advance to the next frame. NOTE: Do not use the automatic film rewind system to make multiple exposures on previously exposed frames (see page 19).TripodWhen required, a tripod may be affixed swiftly to the tripod socket at the base of the winder, Be sure that the length of the tripod screw does not exceed the depth of the socket: if the screw is too long and tightened tightly it could damage the camera's internal mechanism.Shooting in Cold ClimatesBattery performance tends to deteriorate when temperatures drop to near or below freezing, Although normal functioning will return when the batteries have been subjected to warmer temperatures for sometime, when shooting in cold climates, it's a good idea to have spare sets of batteries on hand wrapped or stored in a pocket etc., to keep warm.Low BatteriesWhen the film advance rate becomes sluggish, it indicates that batteries are low. When this occurs, change all four batteries promptly to ensure uninterrupted winder operation. If batteries become too weak to advance the film, the winder will stop in-between frames and the LED indicator will glow continuously. Normal operation will resume when you change the batteries. If this should occur and you are caught without spares, set the C/S dial to OFF and wind the film manually the rest of the way for the frame in use.Shooting Without Camera BatteriesShould camera battery failure occur while operating the camera in the automatic mode or within the electronically controlled manual shutter speed range (1/60 sec. - 4 sec.), the mirror will lock up as a warning. To continue picture-taking, leave the Winder C/S dial where it is, and turn the shutter speed dial to any of the mechanically operated shutter speeds (112000 sec. to "X").AUTOMATIC FILM REWINDWinder LX is equipped with a convenient automatic film rewind mechanism that enables you to rewind a complete 36-exposure film roll in just seconds.• When you reach the end of the film, the winder will cease to operate and the LED indicator on the back will light continuously as a signal that it's time to rewind the film. As a precaution, however, double check by glancing at the exposure counter to make sure that it has reached the last exposure (this is because the LED also lights continuously when battery voltage is low).• Keeping the C15 dial set either to S or C, press the film rewind button at the base of the winder and slide the film rewind lever clockwise. The LED indicator will go out and the film will rewind automatically. When the film is rewound inside its cartridge, the motor will stop and the film rewind lever will disengage. Glance at the exposure counter to make sure that the film is rewound all the way back; then, open the camera back to remove the cartridge.NOTE: If the film fails to rewind when you slide the film rewind lever clockwise, you may have pressed the battery chamber lock release instead of the film rewind button by mistake. If so, push the battery cartridge back in, press the film rewind button and try again.Manual Film Rewind: The film also may be rewound manually during emergencies such as battery failure. In this instance, set the C/S dial to OFF and press the film rewind button. Keeping the button depressed, rewind the film with the camera film rewind crank all the way back into the cartridge.CAUTION: During automatic film rewind, synchronization with the camera's two-way exposure counter is not sufficiently accurate to permit use of the random access multiple exposure feature of the LX as described in the,camera instruction manual. If you wish to make random access multiple exposures while the winder is attached, set the CiS dial to OFF, and keeping the film rewind button depressed, rewind the film manually, Make the multiple exposure as described in the camera instruction manual.REMOTE CONTROL OPERATION(with optional Remote Control Cord)The winder may be used both for single-frame and consecutive remote control shutter release when it is used in conjunction with the optional Remote Control Cord.Cord Hook-up:• Remove the cap over the remote controlsocket at the side of the winder by grasping itbeneath the rim with your fingernail and pullingit off. Place the cap over the remote releasebutton of the Remote Control Cord to preventloss• Connect the plug of the Remote Control Cordto the winder remote control socket by liningthe plug up with the guides on the terminal andplugging it in.• Other instructions for remote control operationare identical to those for operating the winderwith the camera shutter release. The remoterelease button operates in the same manner asthe camera shutter release button, except thatexposure readings are made with the camerashutter release.• Replace the cap over the winder remotecontrol terminal when no longer using theRemote Control Cord.。