气动扳手设计说明书
- 格式:doc
- 大小:852.50 KB
- 文档页数:29
风动扳手说明书
汽修资料
风动扳手使用压缩空气,并用于拆卸和更换螺栓/ 螺母。
它们能使工作很快完成。
操作警告:
1. 永远在正确的气压下是使用。
(正确值: 686kPa (7kg/cm2))
2. 定期检查风动工具并用风动工具油润滑和防锈。
3. 如果用风动工具从螺丝上完全取下螺母,则旋转力可使螺母飞出。
4. 往往先用手将螺母对准螺钉。
如果一开始就打开风动工具,则螺纹会被损坏。
注意不要拧得过紧。
使用较小的力拧紧。
5. 最后,使用扭矩扳手检查紧固扭矩。
应用:
用于要求较大扭矩的螺栓/ 螺母。
1. 扭矩可调到4-6 级。
2. 旋转方向可以改变。
3. 与专用的套筒扳手结合使用。
专用的套筒扳手经过专门加工,其特点是能防止零件从传动装置上飞出。
切勿使用专用套筒扳手以外的其它套筒扳手。
注意:
•在操作时必须用两只手握住工具。
因为按按钮释放大的扭矩,可能引起振动。
提示:
•扭矩调整按钮和旋转方向按钮的位置和形状因制造厂的不同而不同。
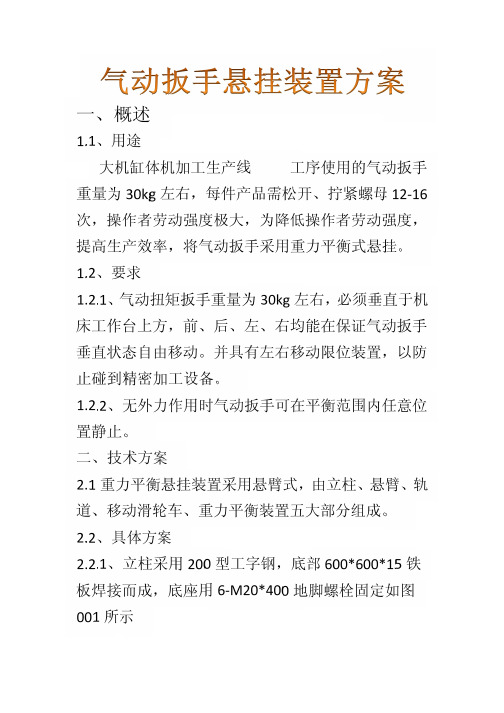
一、概述
1.1、用途
大机缸体机加工生产线工序使用的气动扳手重量为30kg左右,每件产品需松开、拧紧螺母12-16次,操作者劳动强度极大,为降低操作者劳动强度,提高生产效率,将气动扳手采用重力平衡式悬挂。
1.2、要求
1.2.1、气动扭矩扳手重量为30kg左右,必须垂直于机床工作台上方,前、后、左、右均能在保证气动扳手垂直状态自由移动。
并具有左右移动限位装置,以防止碰到精密加工设备。
1.2.2、无外力作用时气动扳手可在平衡范围内任意位置静止。
二、技术方案
2.1重力平衡悬挂装置采用悬臂式,由立柱、悬臂、轨道、移动滑轮车、重力平衡装置五大部分组成。
2.2、具体方案
2.2.1、立柱采用200型工字钢,底部600*600*15铁板焊接而成,底座用6-M20*400地脚螺栓固定如图
001所示
2.2.2、旋转采用臂绕轴旋转,臂与轴之间用圆锥滚动轴承连接,如图002所示。
图001 图002
2.2.3、悬臂采用100型工字钢,上加拉杆。
滑动方式一:直接利用工字钢做滑轨如图003所示、滑动方式二:工字钢下安装专用轨道图004所示
图003
图004
2.2.4、重力平衡装置如图005、006所示
气动平衡器图005 弹簧平衡器图006 2.2.5、结构形式及整体尺寸如图007所示
图007
2.2.6、左、右极限位置限位方式。
如图008所示
图008
三、示意效果图。
四、保修
4.1、悬臂装置保修三年。
4.2、气动平衡器保修二年。
4.3、弹簧平衡器保修半年。
方案设计陈康
联系电话1592611868。

产品类别
产品
编号
产品
名称
产品
图片
011311"气动冲击扳手
01113A1/2"专业级强力气动冲击扳手
021213/8"强力气动冲击扳手
021223/8"工业级大扭力复合材料气动冲击扳手
021311/2"强力气动冲击扳手
专业气动工具系列
耐用可靠,稳定高效轻巧灵活,强劲有力重量更轻,扭力更大
与传统的用于流水线生产的金属冲击扳手相比,以1/2”冲击扳手为例,在扭力提升15%的情况下,重量降低了一半操作更方便
正向&反向切换滑动钮,可单手操控使用正向&反向切换滑动钮,可单手操控使用
打磨力强,振动低轻松高效!
工业级气动打磨机无需昂贵吸尘系统,到达同样的吸尘效果
低振动设计,操作时手感平滑柔顺
轻量化:0.78kg
两种偏心距可供选择:2.5mm,5mm 可满足不同表面打磨需求。

气动扳手的毕业设计
气动扳手是一种利用气压能源驱动的工具,在工业领域中广泛应用。
它具有扭力大、使用方便、高效节能等优点,对于提高生产效率、降低劳动强度具有重要意义。
本文将重点从气动扳手的原理、设计、优化以及应用方面进行探讨。
首先,气动扳手的原理是利用气体压力推动活塞产生力矩,然后将力矩传递给扳手头,实现螺栓或螺母的拧紧或解开操作。
其关键组成部分包括气缸、活塞、传动装置等。
在设计方面,需要考虑气动扳手的结构,选用合适的材料和尺寸,使其能够承受较大的扭矩,并具备耐用性和稳定性。
同时,还需要设计出合适的气动控制系统,包括压力控制、气源供应以及控制手柄等,以保证气动扳手的正常工作和调节。
设计完成后,可以通过优化来提高气动扳手的性能。
例如,可以对气缸和传动装置进行加工和改进,以减小摩擦损失和能量损失,提高工作效率。
另外,可以通过改变气源供应系统的压力控制方式,达到最佳工作状态和调节参数。
最后,气动扳手在工业应用中有着广泛的应用前景。
它适用于各个行业的装配生产线,可以用于机械制造、汽车维修、航空航天、电力设备等领域。
通过合理的设计和优化,可以使气动扳手更好地满足实际需求,提高工作效率和产品质量。
综上所述,气动扳手的毕业设计需要考虑其原理、设计、优化和应用等方面。
只有充分了解和研究这些内容,才能够设计出性能优良、稳定可靠的气动扳手,满足工业生产的需求。
┊┊┊┊┊┊┊┊┊┊┊┊┊装┊┊┊┊┊订┊┊┊┊┊线┊┊┊┊┊┊┊┊┊┊┊┊┊气动扳手概述首先说起气动扳手不得不说起气压传动。
气压传动是风动技术与液压技术演变、发展而来。
气压传动是以压缩空气作为工作介质传递运动和动力。
由于气压传动的动力传递介质是取之不尽的空气,所以污染小,因此在自动化领域中具有广阔的发展前景。
气压传动广泛应用于纺织、机械、汽车、电子、军事、钢铁、化工、食品、包装等行业中。
随着原子能、空间技术、计算机技术等的发展,气压传动技术必将更加广泛地应用于各个工业领域。
气动板手(Impact wrench),也称为是棘轮板手及电动工具总合体,主要提供高扭矩输出最小的消耗的工具。
压缩空气是最常见的动力源,尽管电动或液压动力也使用。
气动板手被广泛应用在许多行业,如汽车修理,重型设备维修,产品装配(通常称为“脉冲工具”和专为精确的扭矩输出),重大建设项目,以及其他任何一个地方的高扭矩输出需要。
气动板手可在每一个标准的棘轮插座驱动器大小,从小型的1 / 4“驱动器的工具小组装和拆卸,到3.5 ”都有。
气动扳手是用气压推动叶片,压力能转化为扳手内轴的机械能。
紧固强度通过设置气压的大小来设置。
比较形象的比喻就是把电风扇反过来使用就是气动扳手。
气动扳手的扭矩值是以改变气压的大小来控制的,且没有精度,而是以重复度表示。
但若在气动扳手上加装气动扳手专用的传感器,则可用精度表示。
现今主要流行的气动扳手有双转速型式等其主要特点是:∙基于传统的气动扭力扳手,标准系列的气动扳手是经过40年的经验累积下来的成果,也达成到今日工业的要求.∙应用于全世界上千种场合,气动扭力扳手持续展现着NORBAR大扭力工个范围的根基.∙此型式适合于各种有螺丝的应用.∙正反转操作.∙静音、非冲击式可降低操作者的疲劳.∙扭力重复度+/-5%.∙各式各样的反作用力臂型式可供各种工作场合搭配使用.┊┊┊┊┊┊┊┊┊┊┊┊┊装┊┊┊┊┊订┊┊┊┊┊线┊┊┊┊┊┊┊┊┊┊┊┊┊1 总体方案设计1.1参数要求(1)最大扭矩: 6公斤.米(2)无负荷转速: 4000转/分(3)工作气压: 4~6公斤/厘米1.2 整体结构概述机电一体化机械系统是由计算机信息网络协调与控制,用于完成包括机械力,运动和能量流等动力学任务的机械和机电部件相互联系的系统。

工具操作产品说明书——气动扳手一、工作环境:1.严格禁止在任何可能发生爆炸的环境中使用气动扳手。
2.当使用气动扳手时务必站在坚实稳固的物体或位置上。
3.使用气动扳手的场所,其通风条件必须十分良好。
4.滑倒、绊倒和从高处跌落等乃操作气动扳手时最容易发生的意外状况,因此在操作之前,务必先将工作场所整理干净。
二、风源及按装需求:1.操作气动扳手的最大空气压力值不得超过90psi。
高于此压力值时将可能对气动扳手或使用者带来危险。
2. 用于气动扳手的压缩空气必须经过冷却处理,在空压机出口端亦务必加装一只过滤器,以便过滤压缩空气中的水分。
即便如此,仍会有少部分的水气凝结于空压管路当中,甚至渗进气动扳手的机械结构内部,造成气动扳手难以预期的损害。
是故,压缩空气的管路在进入气动扳手之前的某适当位上,应予加装一只三点组合。
3. 使用者应根据各种不同气动工具的需求,选择不同规格的空气压缩机。
4. 开始操作气动扳手之前应先将管路中的水气与予吹除干净。
如此,当可避免残留在压缩空气中的水分或灰尘进入气动扳手内部,以免影响气动扳手的正常性能,甚至造成损坏。
三、理想的管路按装方式:空压管径与长度需求:1.连结气动扳手的空压软管⑩之管径∮A清楚标示于下页规格表当中,请参照使用。
2.连接主管路及空压软管的岐管(从⑦到⑨),其管径∮B最少必须是空压软管∮A的两倍。
3.主管路(从①到⑧)的管径∮C应为空压软管∮A的三倍。
4.连接气动扳手的空压软管其长度不得短于15英尺(4.5米以上)。
四、作业注意事项:1. 气动扳手完全采用压缩空气来加以驱动,仅限以手动方式进行操作。
因气动扳手并不具备绝缘效果,故,使用时应特别注意不可接近电源。
2. 气动扳手是专为固定或松脱螺丝钉或螺帽而设计的气动工具,任何不同于上述使用时应特别注意不可接近电源。
3. 限使用气动扳手套筒及零配件,严禁使用气动工具的套筒或零配件。
4. 高分贝的噪音可能会使听力受损。
故,当使用气动扳手时请务必戴上防护耳罩。
机械气动扳手的毕业设计机械气动扳手是一种常用的工业工具,用于紧固和松开螺栓和螺母。
在工业领域中,它们被广泛应用于汽车制造、航空航天、机械制造和电子设备等多个行业。
本篇文章将以机械气动扳手的设计作为毕业设计的主题,设计并制造一款性能稳定、高效可靠的机械气动扳手。
在进行机械气动扳手的设计之前,必须了解气动原理和机械原理。
气动系统由压缩空气和气动元件组成,通过压缩空气的动力来驱动机械气动扳手的运动。
而机械原理则包括杠杆原理、传动原理、摩擦原理等。
在设计机械气动扳手时,需要充分考虑这些原理,以确保设计的合理性和可操作性。
首先,我们需要确定机械气动扳手的使用需求和性能指标。
例如,工作压力、扭矩要求、重量、尺寸等。
这些指标将指导整个设计过程,并且对于后续的零件选型和结构设计非常重要。
接下来,我们需要进行气动元件的选型。
气动元件主要包括气缸、驱动装置、控制装置等。
在选择气缸时,需要考虑工作压力和扭矩要求,以确保气缸的动力能够满足工作需求。
同时,驱动装置和控制装置的选型也需要与气缸相匹配,以实现机械气动扳手的稳定运行。
然后,我们需要进行机械结构的设计。
机械结构主要由杠杆机构、传动机构、支撑装置等组成。
在设计杠杆机构时,需要根据工作需求选择合适的杠杆比例,以保证扭矩传递的效果。
在传动机构的设计中,可以选择螺旋传动、齿轮传动等方式,以实现高效的能量转换。
另外,支撑装置的设计也非常重要,需要保证机械气动扳手在工作中具有足够的稳定性和可靠性。
最后,我们需要进行零件的选型和装配的设计。
在选型过程中,需要注意零件的质量和可靠性,以确保机械气动扳手的使用寿命和性能。
在装配设计中,需要考虑零件之间的配合尺寸和装配顺序,以确保装配的正确性和方便性。
总结起来,机械气动扳手的毕业设计包括气动元件的选型、机械结构的设计、零件的选型和装配的设计等多个方面。
在设计的过程中,需要充分考虑气动原理和机械原理,并根据使用需求和性能指标进行设计。
气动扳手操作说明一、参数设定1、设定方法:(1)按“设定”键,当“设定”键指示闪亮起时可进入设定操作;(2)按下需设定参数对应的键盘,指示闪亮起时有效;(3)输入所需参数的数值(键盘上对应数字),数字依次往前移动;(4)输入参数值后按“输入”键,设定完毕;(5)关闭电源5秒以上,再次开启电源,设定生效。
2、参数功能说明(1)CH1:通路1,通常使用,指示灯亮起有效;(数字7)(2)CH2:通路2,通常不使用,无需设定;(数字8)(3)打击停止:指气动扳手的“动作状态”和“停止状态”区分的时间;(参考值:2)(数字9)(4)回弹力:指动作时气管内产生压力波动,打击力大时就会产生大的回弹力;(参考值:4)(数字4)(5)打击数:指有效打击的次数,当有效打击次数达到设定值时认为拧紧结束,一定时间(解除时间)后电磁阀动作把气源断开,拧紧一根完毕;(参考值:5—20,数值越大,扭力越大)(数字5)(6)解除时间:指电磁阀的工作时间,过了这个时间后就可以再次让扳手工作;也就是拧紧一根气源自动断开到拧下一根之间的时间;(参考值:15)(数字6)(7)打击根数:指一个工件需要拧紧的螺栓数(参考值:等于螺栓个数)(数字1)(8)作业时间:指将一个工件上所有螺栓拧紧完毕的作业时间,工作需要在这个时间内完成,否则重新计数;(参考值:99)(数字2)(9)覆盖打击:把有效打击覆盖上计数,通常不需设定;(参考值:3)(数字3)二、使用操作说明1、先将所有螺栓预放至孔位;2、设定相应参数,有以下几个:(1)打击根数:数值等于工件螺栓的个数(2)回弹力:根据螺栓大小设定,螺栓越大回弹力越大,见附表(3)打击数:根据螺栓大小设定,螺栓越大回弹力越大,见附表3、依次将预放的螺栓拧紧完毕,拧紧是否完毕请将键盘显示“打击根数”,每成功拧紧一根,“打击根数”数值会自动减一,直至全部完毕。
三、注意事项:1、打击不同大小工件时,需要设定“打击数”,打击数的数值与螺栓拧紧的扭矩成正比,(建议:记下每个机型螺栓的拧紧扭矩对应的打击数,做成表格张贴在设备显眼位置)2、打击时请预先用手将螺栓旋紧2到4个牙3、打击时一直按住气动扳手开关,无须中断,一直到自动停止4、当一直按住开关时,回弹力指数会一直跳动,每经过一次设定值,打击数数值增1,当打击数数值增加到设定数值时,一个螺栓拧紧完毕5、拧紧完毕后,气动扳手会断气一段时间(解除时间),此后可以拧紧第二个螺栓,依次反复。
气动扳手操作说明(一)引言概述:气动扳手是一种常用的工具,在机械维修和装配领域具有广泛的应用。
本文将为用户提供气动扳手的操作说明,以帮助用户正确、安全地使用气动扳手。
正文内容:一、准备工作:1. 确保工作区域清洁整齐,没有杂物和障碍物。
2. 检查气动扳手及其配件是否完好无损,如发现有任何损坏或故障,应立即停止使用并联系维修人员。
3. 为气动扳手连接空气源,在连接前确保空气源的压力符合操作要求。
二、安全操作:1. 在使用气动扳手前,必须戴好防护手套和护目镜等必要的个人防护设备。
2. 在启动气动扳手前,确保周围没有其他人员,以免造成意外伤害。
3. 操作时要保持稳定的姿势,避免过度用力或不当姿势引起的劳损。
4. 不要将手指或其他物体放置在气动扳手工作区域内,以免发生夹伤或撞击事故。
5. 在工作过程中,如有异常情况或听到异响,应立即停止使用并进行检查。
三、正确使用气动扳手:1. 根据需要选择合适的扳手头和扭矩大小。
2. 将扳手头正确地安装在气动扳手上,确保连接紧固,以避免脱落导致意外发生。
3. 在使用前,检查扳手头的清洁情况,并在需要时清洁或更换。
4. 扳手头与工件接触时,应保持垂直,不应有侧斜或斜向施力的情况。
5. 使用时应根据需要调整气动扳手的扭矩大小和速度。
四、维护保养:1. 每次使用后,应将气动扳手清洁干净,并存放在干燥通风的地方。
2. 定期检查气动扳手的气源接口和软管,如有损坏或老化应及时更换。
3. 气动扳手的润滑油应定期更换,按照使用说明书的要求加注适量的润滑油。
4. 定期检查气动扳手各部件的工作状态,如有异常或损坏应及时修理或更换。
五、注意事项:1. 在使用气动扳手过程中,应遵循安全作业规范,并避免使用不当或超负荷操作。
2. 长时间操作气动扳手时,应注意适度休息,防止疲劳累积。
3. 在潮湿或易燃场所禁止使用气动扳手,以免引发安全事故。
4. 在长时间不使用气动扳手时,应将其存放在干燥、阴凉处,以延长其使用寿命。
PNEUTORQUE®PTM & PTME SERIESINTERNAL CONTROL (IC) SHUT-OFF TOOLSCONTENTSPart Numbers Covered By This Manual 2Safety 3Introduction 4Parts Included 4Accessories 5Features and Functions 6Set Up Instructions 7PneuTorque® Hanger 7Connecting Air Supply 7Connecting Electricity Supply 8Air Lubrication 8Torque Reaction 8Clockwise / Counter-Clockwise 10Setting Shut-Off Torque/ Angle 11Operating Instructions 13Tightening 13Releasing 15Maintenance 16Air Lubrication 16Gearbox 16Silencer 16Drive Square 17Calibration 17Cleaning 17Disposal 17Specification 18Declaration of Conformity 20Trouble Shooting 21Glossary of Terms 2112 PART NUMBERS COVERED BY THIS MANUALThis handbook covers the setup and use of Norbar PneuTorque ®PTM & PTME Series Internal Control (IC) shut-off tools.NOTE: The main PTM & PTME models are listed above. Other PTM & PTME internal control toolswith minor variances are also covered.Description of options:3SAFETYIMPORTANT:DO NOT OPERATE THE TOOL BEFORE READING THESE INSTRUCTIONS. FAILURE TO DO SO MAY RESULT IN PERSONAL INJURY OR DAMAGE TO THE TOOL.This tool is intended for use with threaded fasteners.The use of ear protectors is recommended.Do not use these tools in potentially explosive atmosphere as they contain grease, which may cause an explosion hazard in the presence of pure oxygen. These tools also contain aluminium alloy components which may cause a hazard in certain explosive environments.Unexpected tool movement due to reaction forces or breakage of drive square or reaction bar may cause injuries.Isolate the tool from all energy sources before changing or adjusting the drive square or socket. There is a risk of crushing between the reaction bar and work piece. Keep hands away from reaction bar. Keep hands away from tool output.Keep loose clothing, hair, etc. from being caught in any rotating part of the tool.These tools require a reaction bar. See section on Torque Reaction.Ensure all hoses are correctly fitted before switching on the air supply. This avoids the risk of injury by whipping air hoses.Unexpected direction of drive square movement can cause a hazardous situation.Use only sockets and adaptors which are in good condition and are intended for use with power tools.PneuTorque ®Wrenches are non-impacting, torque controlled threaded fastener tightening tools and must always be operated with the following:∙ Clean dry air supply with a minimum flow of 19 litres/sec (40 CFM).∙ Lubro Control Unit or similar Filter, Regulator and Lubricator Unit 1/2” Bore (12 mm). ∙ Impact or high quality sockets. ∙Reaction bar.4 INTRODUCTIONThe PneuTorque ®PTM & PTME Internal Control (IC) tools are air driven power tools designed for applying torque to threaded fasteners. A target torque or angle value is set on the tool, when the measured torque or angle reaches this target the tool’s control system shuts off the air supply for accurate and repeatable torque application. There are models to cover torque capacities of 500 N·m to 2000 N·m.Parts IncludedDisposalThis symbol indicates that the product must not be disposed of in the general waste. Please dispose of according to your local recycling laws and regulations.Contact your distributor or see the Norbar web site () for further recycling information.AccessoriesNOTE 1: Requires both ‘Reaction Plate’ and ‘Reaction Adaptor’ to be used together.5FEATURES AND FUNCTIONSTwin MotorThe tools use two motors; motor 1 to quickly run-down the fastener and motor 2 to achieve final torque.Torque TransducerAll tools are fitted with a torque transducer, the transducer forms part of the tool and cannot be removed. The applied torque is accurately shown on the display in Newton metres (N·m) or pound force feet (lbf·ft.). The display captures the peak torque and holds this value for an operator defined time before resetting.Angle MeasurementThe tool can be fitted with an angle sensor. The applied clockwise angle is then accurately shown on the display in degrees of rotation from an operator defined torque value. The display captures the peak angle and holds this value for an operator defined time before resetting. Angle measurement is accurate in the clockwise direction only. The angle measurement can be switched off when not required.TriggerThe trigger controls the flow of air. The more the trigger is pressed the more air flows into the tool. This allows for slow positioning of socket and reaction bar. Once positioning is complete, the trigger must be fully pressed for correct torque application.Clockwise / Counter-Clockwise SelectorTools can tighten and release both clockwise & counter-clockwise threaded fasteners. Angle measurement is accurate in the clockwise direction only.Reaction BarThe reaction bar ensures all reaction forces are contained, so that torque reaction is not passed back to the operator. Several reaction bar types are available, including the PTME / Nose Extension reaction. The PTME / Nose Extension are for use where tool access is restricted including applications on heavy vehicle wheel nuts.Non-ImpactingLow vibration levels make these tools comfortable and safe for the operator to use. In addition there is less damage to the tool, socket and threaded assembly.Replaceable Drive SquareTo avoid internal damage to the tool (especially due to torque overload), the output drive square has been designed to shear first. PneuTorque® tools are fitted with a drive square that can easily be replaced; alternative drive square sizes may be available.HangerThe hanger can be used to suspend the PneuTorque® from a balancer.67SET UP INSTRUCTIONSThe PneuTorque ®set up covers the following items:1. PneuTorque ®Hanger 2. Connecting Air Supply 3. Connecting Electric Supply 4. Air Lubrication 5. Torque Reaction6. Clockwise / Counter-Clockwise7. Setting Shut-Off Torque/ AnglePlease complete the set up in the order shown.PneuTorque ® HangerThe PneuTorque ®hanger (Figure 1-E) is designed to be used with a suitable balancer to provided comfortable tool use. Remove hanger if not required.Connecting Air SupplyWARNING:TO AVOID HAZARD FROM WHIPPING AIR HOSES MAKE ALLCONNECTIONS TO THE TOOL BEFORE TURNING ON THE AIR SUPPLY.Make sure all hoses are clean, in good condition and free from dirt / water.Connect the tool air inlet hose (Figure 1-C) to the outlet side of the lubro control unit (Figure 1-B) (not supplied), observing air flow direction arrows.TIP: On tools supplied with quick air couplings, fit the coupling plugto the tool inlet and the coupling socket to air hose.To connect, push couplings together.To disconnect, pull back lock on socket coupling.Connect the inlet side of the lubro control unit (Figure 1-B) to the air supply (Figure 1-A) using a minimum hose size of 1/2” bore (12mm). Avoid using 1/2” bore hoses of longer than 5 meters from the supply to the pressure regulator unit as this will reduce the performance of the tool.Turn on air supply and check for air leaks.FIGURE 1 – ConnectionsA BC D EFG8 Connecting Electricity SupplyAttach the power supply extension lead between the power tool lead (Figure 1-F) and the power supply (Figure 1-G).Fit the mains power lead to the power supply (Figure 1-G). The display and LED’s will illuminate for a short time.TIP: If the power lead has no plug fitted, wire as follows:BROWN-LIVE BLUE-NEUTRAL GREEN / YELLOW-EARTHAir LubricationThe tool must be used with oil lubrication in the supplied air, this is achieved by using a Lubro Control Unit (not supplied).Set the air lubrication:a. Fill Lubro Control Unit with hydraulic oil (Shell Tellus S2M 32 or equivalent good quality hydraulic oil).b. Ensure the tool drive square is free to rotate.c. Run the tool by pressing the trigger.d. Adjust the Lubro Control Unit for maximum tool air pressure. Air pressureis shown on the gauge.TIP:Using maximum air pressure will give maximum tool speed.e. Adjust Lubro Control Unit to supply 6 drops of oil per minute.f. Release trigger.IMPORTANT:THE WRENCH MUST BE FREE RUNNING WHILE ADJUSTING THE AIR PRESSURE TO GIVE THE CORRECT SETTING.See Lubro Control Unit handbook for more details.Torque ReactionThe reaction bar ensures all reaction forces are contained, so torque reaction is not passed back to the operator. Several reaction bar types are available.Fit reaction bar as detailed below: Factory fitted, not removable.9It is essential the reaction bar rests squarely against a solid object or surface adjacent to the fastener to be tightened. The contact area must be within the shaded area of figure 2, with the contact area as large as possible.FIGURE 2 – Safe reaction windowWARNING: CARE MUST BE TAKEN TO ENSURE THAT THE REACTION BAR IS ONLYUSED WITHIN THE LIMITATIONS SHOWN IN FIGURE 2.For special applications or where extra deep sockets must be used the standard bar may be extended but only within the limitations shown on Figure 2. Alternative reaction bars are available, see page 5.WARNING: FAILURE TO OBSERVE THE LIMITATIONS SHOWN IN FIGURE 2 WHENMODIFYING STANDARD REACTION BARS MAY RESULT IN PREMATURE WEAR OR DAMAGE TO THE TOOL.Standard drive square extensions MUST NOT be used as these will cause serious damage to the tool output drive. A range of nose extensions is available for applications where access is restricted. These are designed to support the final drive correctly.The dimensions of the standard reaction bars are shown in the following table:Extra LengthSocketStandard Length Socket Torque Reaction should be taken in the shaded areas onlyWhen the PneuTorque ®is running the reaction bar rotates in the opposite direction to the output drive square and must be allowed to rest squarely against a solid object or surface adjacent to the fastener to be tightened. See figure 3(a), 3(b), 3(c) and 3(d).FIGURE 3(a)FIGURE 3(b )FIGURE 3(c)FIGURE 3(d)WARNING:ALWAYS KEEP HANDS CLEAR OF THE REACTION BAR WHEN THE TOOL IS IN USE OR SERIOUS INJURY MAY RESULT.Clockwise / Counter-ClockwiseSet clockwise / counter-clockwise as required. Angle measurement is accurate in the clockwise direction only.NOTE: This setting only applies to bi-directional tools.WARNING:FAILURE TO FULLY ENGAGE THE CLOCKWISE / COUNTER- CLOCKWISE SELECTOR WILL RESULT IN DAMAGE TO THE GEARBOX.FIGURE 4(a) – Clockwise (Arrow towards drive square )FIGURE 4(b) – Counter-Clockwise (Arrow away from drive square)Setting Shut-Off Torque/ AngleThe torque applied by the PneuTorque ®depends on the shut-off setting.The following values need to be entered:FIGURE 5a – Tool Torque Display FIGURE 5b – Tool Angle DisplayFIGURE 6 – Typical Torque ApplicationNOTE: The tool will not operate whilst setting the shut-off torque or angle.TIP: When altering the limit settings press and hold ⇩ or ⇧ to increase speed of change.Unit selected LED’s (Red)T o r q u eTorque appliedON ON ONTIP: Trial the tool on the fastener and check the actual torque applied.If the torque applied (AnGLE = OFF) is consistently above the torque required then the ‘StOP’ limit can be reduced.If the torque applied (AnGLE = OFF) is consistently below the torque required then the ‘StOP’limit can be increased.OPERATING INSTRUCTIONSWARNING: KEEP HANDS CLEAR OF THE REACTION BAR.WARNING:WHEN USING THIS TOOL IT MUST BE SUPPORTED AT ALL TIMES IN ORDER TO PREVENT UNEXPECTED RELEASE IN THE EVENT OF FASTENER OR COMPONENT FAILURE.TighteningNOTE: Ensure ‘SET UP INSTRUCTIONS’ have been followed.1. Fit the PneuTorque ®with the correct size impact or high quality socket to suit fastener.TIP: For added safety it is recommended to secure the socket to the drive square.This is often achieved using a pin and O ring, see socket manufacturer for guidance.2. Ensure shut-off torque has been set for current fastener.3. Ensure the clockwise / counter-clockwise selector is correctly set. Angle measurement is accurate in the clockwise direction only.Figure 7a – Torque Display. Figure 7b – Angle Display.4. Press ⇩ to zero the reading in torque mode (AnGLE = OFF).5. Press ⇧ to reset the reading in torque mode and torque and angle mode.6. Rotate the handle into a convenient position relative to the reaction bar. Fit the tool onto the fastener tobe tightened with the reaction bar adjacent to the reaction point. See Figure 8.7. Adopt a suitable posture to counteract normal or unexpected movement of the tool due to reactionforces.8. Squeeze the trigger partially to bring the reaction bar into contact with the reaction point.9. Fully press trigger and keep fully pressed until tool shuts off, then release trigger. If the trigger is not fully pressed full torque or angle may not be applied to the fastener.10. The trigger must be released before the tool resets to prevent a further joint application.FAIL LED (Red)Torque overload Zero reading Manual resetPASS LED (Green) Manual reset PASS LED (Green) FAIL LED (Red)11. The display captures the peak torque (AnGLE = OFF) or peak angle (AnGLE = ON) and holds this valuefor the reset time of between 1 second and 9 seconds when the tool automatically resets.Note the status of the PASS / FAIL LED’s:12. Remove the tool from the fastener.13. Press to manually reset the tool and display if required.FIGURE 8 – Tightening Clockwise FastenerReleasing1. Fit the PneuTorque® with the correct size impact or high quality socket to suit the fastener to bereleased.TIP: For added safety it is recommended to secure the socket to the drive square.This is often achieved using a pin and O ring, see socket manufacturer for guidance.2. Ensure the clockwise / counter-clockwise selector is correctly set.3. Rotate the handle into a convenient position relative to the reaction bar. Fit the tool onto the fastener tobe released with the reaction bar adjacent to the reaction point. See Figure 9.4. Adopt a suitable posture to counteract normal or unexpected movement of the tool due to reactionforces.5. Squeeze the trigger partially to bring the reaction bar into contact with the reaction point.6. Fully press trigger and keep fully pressed until threaded fastener releases.TIP: If unable to release the fastener due to the tool shutting off, increase the ‘StOP’ limit.If unable to release the fastener due to the tool stalling, increase the air pressure to the tool.Do not exceed the maximum air pressure for the tool.WARNING: EXCEEDING THE MAXIMUM AIR PRESSURE WILL CAUSE OVERLOADINGAND MAY LEAD TO SERIOUS DAMAGE.FIGURE 9 – Releasing Clockwise FastenerFIGURE 10 – Silencer Replacement MAINTENANCEFor optimum performance and safety, regular tool maintenance is required. The operator maintenance is limited to the replacement of the drive square and the silencer. All other maintenance and repair should be carried out by Norbar or a Norbar distributor. Maintenance intervals will depend on the tool usage and the environment in which it is being used. The maximum recommended maintenance and recalibration interval is 12 months.TIP: Steps the operator can take to reduce the amount of maintenance required include:1. Use the tool in a clean environment.2. Use an air compressor fitted with a dryer.3. Ensure the Lubro Control Unit has sufficient hydraulic oil.4. Ensure the Lubro Control Unit delivers hydraulic oil at the correct rate.5. Ensure the Lubro Control Unit is regularly maintained, see product handbook.6. Maintain the correct torque reaction.Air LubricationAdd Shell Tellus S2M 32 or equivalent good quality hydraulic oil to the Lubro Control Unit.GearboxUnder normal operating conditions it is not necessary to re-grease the gearbox. The gearbox contains Lubcon Turmogrease Li 802 EP or equivalent good quality grease.SilencerThe silencer (part number 18591) must be changed every 12 months. This may be more frequent for high tool usage or dirty environments.TIP: Change silencer with tool upside down, as shown, to ensure internal parts (spring & valve)are kept in place.1. Remove M4 screw (A) (part number 25381.10) using a2.5mm hexagon key.2. Remove pin (B) (part number 26284) using a pin punch.3. Pull out air inlet tube (D) with base plate & silencer.4. Remove silencer (E) from air inlet tube.5. Fit new silencer (part number 18591) over air inlet tube.6. Fit air inlet tube assembly (C, D & E) into handle against spring resistance.7. Fit pin (B) with a hammer.8. Fit screw (A) and torque to 0.5 N·m. Do not over tighten this screw as it is likely to break the base plate moulding.TIP: When refitting air inlet tube assembly into handlecare should be taken to ensure correct alignmentbetween air inlet tube & spring. It may be easier to fit the spring into air inlet tube first and secure with a small amount of grease.B AD EDrive SquareTo avoid internal damage (especially due to torque overload), the output drive square has been designed to shear first. This saves major internal damage and allows easy square removal. For drive square part numbers see page 5.FIGURE 11 – Drive Square ReplacementTo replace drive square:1. Remove the air supply.2. Support tool in a horizontal position3. Remove the screw or spring pin, then remove drive square.If the square has sheared it may be necessary to use pliers to remove the broken parts4. Fit new drive square.5. Fit new screw and tighten between 4 N·m to 5 N·m (for PTM52) or 8 N·m to 9 N·m (for PTM72/92/119)or insert new spring pin.6. Connect air supply.TIP: If the drive square fails continually then seek advice from Norbar or a Norbar distributor.CalibrationTo maintain the PneuTorque® accuracy it is recommended the tool is recalibrated at least every 12 months. Contact Norbar or a Norbar distributor for more information.CleaningKeep the tool in a clean condition to aid safety. Do not use abrasives or solvent based cleaners.DisposalRecycling Considerations:SPECIFICATIONSFIGURE 12 – Tool DimensionsRepeatability: Torque shut-off: ± 2% of reading.Angle shut off: ± 1 degree of rotationAccuracy: Torque shut off: +/- 2% of reading.Angle shut off: ± 1 degree of rotation: 6 degrees in 999 degrees maximum Display: 4 digit LED with refresh rate of 2.5 times per second.Units of Measurement: Newton metres (N·m) or pound force foot (lbf·ft.) - Operator selectable. Reset Time: 1, 2, 3, 4, 5, 6, 7, 8 or 9 seconds - Operator selectable.Air Supply: Maximum pressure 6.3 bar (For maximum output speed).Lubrication: Shell Tellus S2M 32 recommended for the Lubro Control Unit. Temperature Range: +5°C to +40°C (operating). -20°C to +60°C (storage).Operating Humidity: 85% Relative Humidity @30°C maximum.Power Adapter: 100 to 240 Volts +/- 10% AC at 50-60 Hz input.Power Consumption: 15 W - maximum.Power Plug Fuse (if fitted): 1 Amp.Power Cable: 2 meters (6ft 6ins) long minimum.Extension Cable: 3 meters (9ft 9ins.) long minimum.Handle Vibration: < 2.5 m/s2 Maximum. Tested in accordance with ISO 8662-7 Hand heldportable tools. Measurement of vibrations at the handle.Sound Pressure Level: 84 dBA measured at 1m equivalent continuous A weighted sound.Tested to BS ISO 3744: 1994 Acoustics. Determination of sound power levelsof noise sources using sound pressure. Engineering method in an essentiallyfree field over a reflecting plane.Test conducted in free running condition with a supply pressure of 6.3 bar. Environment: Indoor use within a light industrial environment.To environmental conditions Pollution Degree 2& Installation Category (Over voltage Category) II.Store in a clean & dry environment.Due to continuous improvement all specifications are subject to change without prior notice.NOTE: If equipment is used in a manner not specified by the manufacturer, the protection provided by the equipment could be impaired.20TROUBLE SHOOTINGThe following is only a guide, for more complex faults please contact Norbar or a Norbar distributor.GLOSSARY OF TERMS21NORBAR TORQUE TOOLS LTD Wildmere Road, Banbury, Oxfordshire, OX16 3JUUNITED KINGDOMTel + 44 (0)1295 270333***********************NORBAR TORQUE TOOLS45–47 Raglan Avenue, Edwardstown, SA 5039AUSTRALIATel + 61 (0)8 8292 9777***********************.auNORBAR TORQUE TOOLS INC 36400 Biltmore Place, Willoughby, Ohio, 44094USATel + 1 866 667 2279**********************NORBAR TORQUE TOOLS PTE LTD194 Pandan Loop#07-20 Pantech Business Hub SINGAPORE 128383Tel + 65 6841 1371***********************NORBAR TORQUE TOOLS (SHANGHAI) LTD 7 / F, Building 91, No. 1122, Qinzhou North Road, Xuhui District, ShanghaiCHINA 201103Tel + 86 21 6145 0368*********************.cnNORBAR TORQUE TOOLS INDIA PVT. LTD Plot No A-168, Khairne Industrial Area,Thane Belapur Road, Mahape,Navi Mumbai – 400 709INDIATel + 91 22 2778 8480**********************。
┊┊┊┊┊┊┊┊┊┊┊┊┊装┊┊┊┊┊订┊┊┊┊┊线┊┊┊┊┊┊┊┊┊┊┊┊┊气动扳手概述首先说起气动扳手不得不说起气压传动。
气压传动是风动技术与液压技术演变、发展而来。
气压传动是以压缩空气作为工作介质传递运动和动力。
由于气压传动的动力传递介质是取之不尽的空气,所以污染小,因此在自动化领域中具有广阔的发展前景。
气压传动广泛应用于纺织、机械、汽车、电子、军事、钢铁、化工、食品、包装等行业中。
随着原子能、空间技术、计算机技术等的发展,气压传动技术必将更加广泛地应用于各个工业领域。
气动板手(Impact wrench),也称为是棘轮板手及电动工具总合体,主要提供高扭矩输出最小的消耗的工具。
压缩空气是最常见的动力源,尽管电动或液压动力也使用。
气动板手被广泛应用在许多行业,如汽车修理,重型设备维修,产品装配(通常称为“脉冲工具”和专为精确的扭矩输出),重大建设项目,以及其他任何一个地方的高扭矩输出需要。
气动板手可在每一个标准的棘轮插座驱动器大小,从小型的1 / 4“驱动器的工具小组装和拆卸,到3.5 ”都有。
气动扳手是用气压推动叶片,压力能转化为扳手内轴的机械能。
紧固强度通过设置气压的大小来设置。
比较形象的比喻就是把电风扇反过来使用就是气动扳手。
气动扳手的扭矩值是以改变气压的大小来控制的,且没有精度,而是以重复度表示。
但若在气动扳手上加装气动扳手专用的传感器,则可用精度表示。
现今主要流行的气动扳手有双转速型式等其主要特点是:∙基于传统的气动扭力扳手,标准系列的气动扳手是经过40年的经验累积下来的成果,也达成到今日工业的要求.∙应用于全世界上千种场合,气动扭力扳手持续展现着NORBAR大扭力工个范围的根基.∙此型式适合于各种有螺丝的应用.∙正反转操作.∙静音、非冲击式可降低操作者的疲劳.∙扭力重复度+/-5%.∙各式各样的反作用力臂型式可供各种工作场合搭配使用.┊┊┊┊┊┊┊┊┊┊┊┊┊装┊┊┊┊┊订┊┊┊┊┊线┊┊┊┊┊┊┊┊┊┊┊┊┊1 总体方案设计1.1参数要求(1)最大扭矩: 6公斤.米(2)无负荷转速: 4000转/分(3)工作气压: 4~6公斤/厘米1.2 整体结构概述机电一体化机械系统是由计算机信息网络协调与控制,用于完成包括机械力,运动和能量流等动力学任务的机械和机电部件相互联系的系统。
其核心是由计算机控制的,包括机械,电力,电子,气压,光学等技术的伺服系统。
他的主要功能是完成一系列机械运动。
每一个机械运动可单独由控制电动机,传动机构和执行机构组成的子系统来完成,而这些子系统要由计算机协调控制,以完成其功能要求。
因此机电一体化机械系统的设计要求考虑产品的总体布局,机构选型,结构造型的合理化和最优化。
1.3气压传动的工作原理气压传动工作原理是利用空气压缩机把电动机或其他原动机输出的机械能转换为空气的压力能,然后在控制元件的控制下,通过执行元件把压力能转换为直线运动或回转运动形式的机械能,从而完成各种动作并对外做功。
具体例子:图11.1为气动剪切机的气动系统工作原理图。
图示位置为工料被剪前,即非工作位置。
当工料5由上料装置送入剪切机并到达规定位置时,行程阀8的顶杆受压使阀内通路打开,气控换向阀7的控制腔便与大气相通,阀芯受弹簧力作用而下移,由空气压缩机4产生并经过初次净化处理后储藏在储气罐1中的压缩空气,经分水滤气器11、减压阀10和油雾气9及气控换向阀7,进入气缸6的下腔;汽缸上腔的压缩空气通过气控换向阀7排入大气。
此时,气缸6活塞向上运动,带动剪刀将工料5切断。
当工料剪下后,随之与行程阀8脱开,行程阀在弹簧作用下复位,阀芯封住排气通道,气控换向阀7的控制腔C中的气压升高,使阀芯上移,B口与P口相通,A口与O相通,气路变换。
此时压缩空气便进入气缸6的上腔,而下腔空气则通过气控控制阀7上的A从O口排气,活塞下移,带动剪刀复位准备第二次剪切工料。
┊┊┊┊┊┊┊┊┊┊┊┊┊装┊┊┊┊┊订┊┊┊┊┊线┊┊┊┊┊┊┊┊┊┊┊┊┊图1.3.11.4气压传动的组成图11.1为典型气压传动系统图。
与液压传动系统相似,也是由四部分组成。
(1)气源装置:是将原动机的机械能转变为气体的压力能。
包括空气压缩机。
(2)执行元件:是将气体的压力能转变为机械能。
包括各种气缸和气马达等。
(3)控制元件:用以控制系统中空气的压力、流量和流动方向以及执行元件的工作程序,以便使执行机构完成预定的动作。
包括各种压力、流量、方向控制阀等。
┊┊┊┊┊┊┊┊┊┊┊┊┊装┊┊┊┊┊订┊┊┊┊┊线┊┊┊┊┊┊┊┊┊┊┊┊┊(4)辅助元件:保证气压系统正常工作所必需的部分。
包括油水分离器、干燥器、过滤器等气源净化装置以及贮气罐、消声器、油雾器、管网、压力表及管件等。
1.5 整体方案图1-1 整体外观图1-马达轴;2-转子;3-定子;4-内齿轮;5-行星架;6,7-牙嵌离合器【等边梯形齿】;8-牙嵌离合器【锯齿型齿】;9-扳手轴。
本气动扳手可装成夹紧扳手或者松开扳手,两者的主要区别为:气动马达得转子和定子得安装方向相反。
本扳手采用两套牙嵌离合器,在空载时和加载后可分别使扳手轴自动获得高,低两种转速。
空载时,马达轴1的旋转运动经过一级行星齿轮减速器后传至行星架5,然后接住等边梯形牙嵌离合器6和7传至扳手轴9使其高速回转。
此时由于牙嵌离合器8【与轴9花键连接】得转速大于内齿轮4得转速,因此牙嵌离合器8便沿锯齿形牙的斜面打滑。
加载后,牙嵌离合器6和7过载打滑,马达轴1得运动便经由二级行星齿轮减速传至内齿轮4,并通过牙嵌离合器8将运动传至扳手轴9,使其低速回转。
此时由于内齿轮4是主动┊┊┊┊┊┊┊┊┊┊┊┊┊装┊┊┊┊┊订┊┊┊┊┊线┊┊┊┊┊┊┊┊┊┊┊┊┊件,牙嵌离合器8是从动件【与告诉回转时正好相反】因此由锯齿形牙的垂直面传递扭矩,并继续迫使牙嵌离合器6和7过载打滑。
对于夹紧扳手,牙嵌离合器8只能传递右旋扭矩;对于松开扳手,只能传递左旋扭矩。
1.6方案选择本设计提供两套方案:第一套方案:采用液压传动方式第二套方案:采用气压传动方式两种方案的优缺点如下:第一套方案;1)液压元件制造精度要求高由于元件的技术要求高和装配比较困难,使用维护比较严格。
2)实现定比传动困难液压传动是以液压油为工作介质,在相对运动表面间不可避免的要有泄漏,同时油液也不是绝对不可压缩的。
因此不宜应用在在传动比要求严格的场合,例如螺纹和齿轮加工机床的传动系统。
3)油液受温度的影响由于油的粘度随温度的改变而改变,故不宜在高温或低温的环境下工作。
4)不适宜远距离输送动力由于采用油管传输压力油,压力损失较大,故不宜远距离输送动力。
5)油液中混入空气易影响工作性能油液中混入空气后,容易引起爬行、振动和噪声,使系统的工作性能受到影响。
6)油液容易污染油液污染后,会影响系统工作的可靠性。
7)发生故障不易检查和排除。
第二套方案:1、空气容易获取、且工作压力低,用过的空气可就地排放,无需回收管道。
┊┊┊┊┊┊┊┊┊┊┊┊┊装┊┊┊┊┊订┊┊┊┊┊线┊┊┊┊┊┊┊┊┊┊┊┊┊ 2、气的粘性小、流动阻力损失小,便于集中供气和远距离输送。
3、气动执行元件运动速度高。
4、气动系统对环境的适应能力强,能在温度范围很宽,潮湿和有灰尘的环境下可靠工作,稍有漏泄不会污染环境,无火灾爆炸危险,使用安全。
5、结构简单、维护方便、成本低廉。
6、气动元件寿命长。
7、气动元件的执行输出比液压小、运动较快、适应性强、可在易然、易爆、多沉、潮湿、冲击的恶劣环境中工作,不污染环境,工作寿命长,构造简单,便于维护,价格低廉。
所以本次设计采用气动方式。
1.7气动机械的优势特点气动机械排放的是空气及微量冷凝水,在躁音得以控制的情况下,气动机械如下特点电动机械无法比拟。
1.三防:即防潮、防爆、防尘,适应恶劣的工作环境。
2.在相同转速及负载条件下, 气动机械比电动机械占用空间小得多。
3.可无级调速。
根据需要,通过调节供气流量、压力,实现无级调速。
4.可实现远控、自控。
5.过载自动保护。
在一定范围内,超载自动停车,降载自动启动。
从而自动保护。
对极限扭矩有衡定要求的场合特别适宜。
综上所述,气动机械在当今世界,特别是我国国内,有待开拓的空间巨大。
┊┊┊┊┊┊┊┊┊┊┊┊┊装┊┊┊┊┊订┊┊┊┊┊线┊┊┊┊┊┊┊┊┊┊┊┊┊2 气压系统设计2.1 拟订气压系统原理图2.1.1确定气压马达本次设计气动马达采取叶片式气动马达因为其特点1.可以无级调速。
只要控制进气阀或排气阀的流量,就能调节气动马速的功率和转速.2.能够在瞬时间改变转向、并可在一转至两转内升至全速运行。
3.工作安全,适用于恶劣的环境,在易燃易爆、高温、潮湿等不利条件下均能正常工作。
4.有过载保护作用,不会因过载而发生故障。
过载时,马达只是转速降低或停转,并不产生机件损坏等故障.5.操纵方便,维修容易.。
2.1.2叶片式气动马达的性能上图是在一定工作压力下作出的叶片式气马达的特性曲线。
由图可知,气动马达具有软特性的特点。
当外加转矩丁等于零时,即为空转,此时速度达到最大值nmax气动马达输出的功率等于零;当外加转矩等于气动马达的最大转矩Tmax时,马达停止转动,此时功率也等于零;当外加转矩等于最大转矩的一半时,马达的转速也为最大转速的1/2,此时马达的输出功率P 最大。
所以将下面所列数据带入上图所示曲线可以得出:(1)最大扭矩:12kgm;18nm┊┊┊┊┊┊┊┊┊┊┊┊┊装┊┊┊┊┊订┊┊┊┊┊线┊┊┊┊┊┊┊┊┊┊┊┊┊(2)无负荷转速: 4000转/分(3)工作气压: 0.63MPa结果:马达输出功率最大时转速2000转/分当马达转速小于2000转/分时其工作效率降低较慢实际使用时可以时候但不能大于最大扭矩18nm.当马达转速大于2000转/分时候其工作效率降低较快实际使用时将造成不必要的浪费。
2.1.3夹紧或松开扳手时气动马达的转换本气动扳手可装成夹紧扳手或者松开扳手,两者的主要区别为:气动马达得转子和定子得安装方向相反。
图2.1.3图示:两种情况下气动马达的变化2.1.4气压马达选用材料1.输出轴(转子):40铬40cr钢材化学成分和力学性能成分:碳0.37~0.45%,硅0.17~0.37%,锰0.5~0.8,铬0.8~1.1%退火硬度:小于207HBS正火硬度:小于250HBS调质处理:试样直径:25mm,850度淬火加热油淬,520度回火后:抗拉1000兆帕,屈服800兆帕,延伸9%,断面收缩45%,冲击韧性588.3千焦/平方米2.定子:球墨铸铁从材料性能以及性价比分析可得定子采用球墨铸铁。
其机械性能良好。
1【夹紧】2【松开】┊┊┊┊┊┊┊┊┊┊┊┊┊装┊┊┊┊┊订┊┊┊┊┊线┊┊┊┊┊┊┊┊┊┊┊┊┊机械性能的好是因为球铁是石墨以球状存在在基体上,石墨的强度可以认为为零,从机械性能的角度上看铸铁就是钢材的基体上有许多的孔洞,孔洞就是石墨的位置,这些孔洞会对基体有割裂作用,而石墨的形状就决定了其的割裂作用的程度,球状的割裂作用最小,所以其的机械性能在铸铁中最好.而铸造性能差就因为流动性差.2.2其他辅助元件设计2.2.1气压管道在气压传动装置中,常用的管子有钢管、铜管、胶管、尼龙管和塑料管等。