ubuntu 下安装apache与配置Digest认证_Carly
- 格式:docx
- 大小:17.90 KB
- 文档页数:2


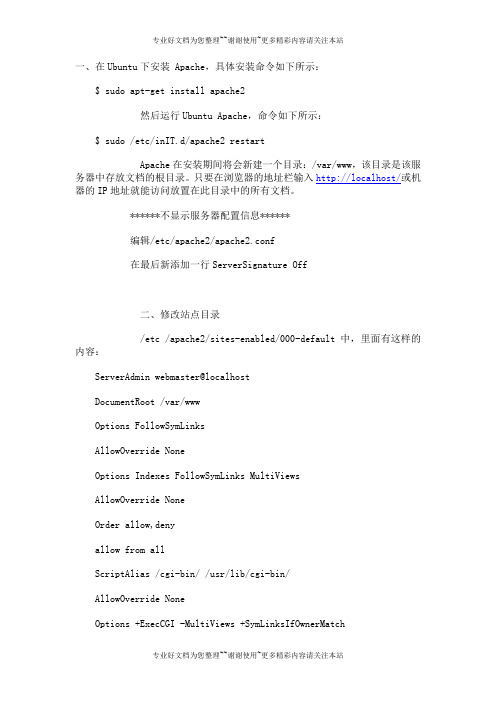
一、在Ubuntu下安装 Apache,具体安装命令如下所示:$ sudo apt-get install apache2然后运行Ubuntu Apache,命令如下所示:$ sudo /etc/inIT.d/apache2 restartApache在安装期间将会新建一个目录:/var/www,该目录是该服务器中存放文档的根目录。
只要在浏览器的地址栏输入http://localhost/或机器的IP 地址就能访问放置在此目录中的所有文档。
******不显示服务器配置信息******编辑/etc/apache2/apache2.conf在最后新添加一行ServerSignature Off二、修改站点目录/etc /apache2/sites-enabled/000-default中,里面有这样的内容:ServerAdmin webmaster@localhostDocumentRoot /var/wwwOptions FollowSymLinksAllowOverride NoneOptions Indexes FollowSymLinks MultiViewsAllowOverride NoneOrder allow,denyallow from allScriptAlias /cgi-bin/ /usr/lib/cgi-bin/AllowOverride NoneOptions +ExecCGI -MultiViews +SymLinksIfOwnerMatchOrder allow,denyAllow from all修改方法:将上面的/var/www修改为/home/www即可。
三、找回丢失的/etc /apache2/sites-enabled/000-default文件不知何种原因,000-default竟然丢了,apache服务也不能正常运行了。
还好我有一个备用服务器,经查000-default实际上是一个软链接,指向../sites-available/default文件。

ubuntu下php环境搭建安装hdwiki标签:apachephp5mysqlhdwiki杂谈分类:linux迷第一步:安装apachesudo apt-get install apache2ubuntu下apache的配置文件为/etc/apache2/apache2.conf https.conf是用户配置文件,默认为空的,可以在里面配置虚拟主机启用rewrite模块a2enmod rewriteApaceh2 多了一组a2enmod a2dismod指令,用于启用和禁用Apache的模块。
第二步:安装phpsudo apt-get install php5 sudo apt-get install php5-gdsudo apt-get install libapache2-mod-php5sudo /etc/init.d/apache2 restart // 重启apache,此时php5已经可用了第三步:安装mysqlsudo apt-get install mysql-serversudo apt-get install libapache2-mod-auth-mysqlsudo apt-get install php5-mysqlsudo /etc/init.d/apache2 restart // 再次重启apache,使新服务正常激活第四步:检测然后在终端输入:sudo ls /etc/apache2/mods-enabled看看这个目录下,有没有php5.conf 和php5.load,如果没有则:sudo a2enmod php5启用php 模块,然后重启apache即可。
至此,apache、php5、mysql都已经可用了。
第五步:安装phpmyadmin在phpmyadmin网站上下载软件包/home_page/downloads.php解压缩到本地目录/var/www/phpmyadmin(/home/user/www/phpmyadmin)。

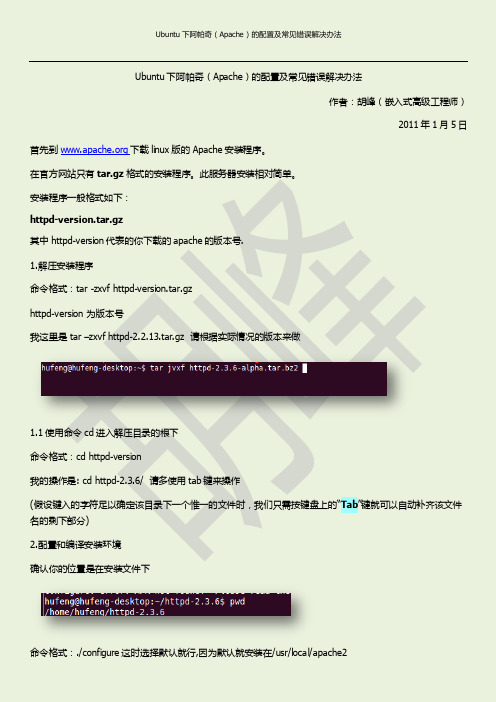
Ubuntu下阿帕奇(Apache)的配置及常见错误解决办法作者:胡峰(嵌入式高级工程师)2011年1月5日首先到下载linux版的Apache安装程序。
在官方网站只有tar.gz格式的安装程序。
此服务器安装相对简单。
安装程序一般格式如下:httpd-version.tar.gz其中httpd-version代表的你下载的apache的版本号.1.解压安装程序命令格式:tar -zxvf httpd-version.tar.gzhttpd-version 为版本号我这里是 tar –zxvf httpd-2.2.13.tar.gz 请根据实际情况的版本来做1.1使用命令cd进入解压目录的根下命令格式:cd httpd-version我的操作是: cd httpd-2.3.6/ 请多使用tab键来操作(假设键入的字符足以确定该目录下一个惟一的文件时,我们只需按键盘上的“Tab”键就可以自动补齐该文件名的剩下部分)2.配置和编译安装环境确认你的位置是在安装文件下命令格式:./configure这时选择默认就行,因为默认就安装在/usr/local/apache2我的操作是: ./configure此处如有错误解决如下hufeng@hufeng-desktop:~/httpd-2.3.6$ ./configurechecking for chosen layout... Apachechecking for working mkdir -p... yeschecking build system type... i686-pc-linux-gnuchecking host system type... i686-pc-linux-gnuchecking target system type... i686-pc-linux-gnuConfiguring Apache Portable Runtime library ...checking for APR... noconfigure: error: APR not found. Please read the documentation.解决可以用./configure --help | grep apr 查看帮助。

Ubuntu 10.04 apache+php+mysql安装订阅apache2.4.1 php-5.4.0 mysql一、安装apache解压 httpd-2.4.1.tar.gztar -zxvf httpd-2.4.1.tar.gz然后 sudo mv httpd-2.4.1 /usr/lib/apache./configure --prefix=/usr/lib/apache --enable-module=so出现 bash: ./configure: 权限不够就用 chmod 777 configure,然后再执行上面那命令Apache Portable Runtime library 没安装下载apr apr-util参考/kylelee/blog/item/56170afbf380bb244e4aeaee.html安装apr库cd apr-1.x.x./configure –prefix=/usr/lib/apache/aprmakesudo make install安装apr-util库tar xzvf apr-util-1.x.x.tar.gzcd apr-util-1.x.x./configure --prefix=/usr/lib/apache/apr-util --with-apr=/usr/lib/apache/aprmakesudo make install安装apache服务root@:/usr/lib/apche/httpd-2.4.1# ./configure --prefix=/usr/lib/apache/httpd --enable-so --enable-modes-shared=all --with-apr=/usr/lib/apache/apr --with-apr-util=/usr/lib/apache/apr-util小心注意,别写错参数。
然後,又出现configure: error: pcre-config for libpcre not found. PCRE is required and available from /Then we need to download PCRE from this link page安装pcre正则下载pcretar -jxvf pcre-8.30.tar.bz2如果遇到无法open,则要sudo在根用户root 下执行:root@:/usr/lib/apche/httpd-2.4.1# ./configure --prefix=/usr/lib/apache/pcre --with-apr=/usr/lib/apache/apr --with-apr-util=/usr/lib/apache/apr-util --with-pcre=/usr/lib/apche/pcre然后用makemake install都是在root权限下用的。
Apache默认使用basic模块验证,都是明文传输,不太安全,所以本文使用Digest 来验证,以提高安全性。
1.Apache配置:A、目录权限配置Alias /nagios "/usr/local/nagios/share"<Directory "/usr/local/nagios/share">Options NoneAllowOverride NoneOrder allow,denyAllow from all</Directory>B、认证配置<Location /nagios>AuthType DigestAuthName "Nagios Access"AuthDigestDomain /nagios http://192.168.0.205/nagios AuthDigestProvider fileAuthUserFile /usr/local/nagios/etc/ersRequire valid-user</Location>C、认证模块配置查看httpd.conf里面是否有LoadModule auth_digest_module modules/mod_auth_digest.so和LoadModule auth_basic_module modules/mod_auth_basic.so首先确认要有mod_auth_digest.so,这个没有就要重新编译apache了。
其次确保把mod_auth_basic.so这行给注释掉。
因为apache默认是用basic来认证的,如果不注释的话,即使你配置好了digest认证,也不会成功2.创建密码文件htdigest -c /usr/local/nagios/etc/ers "Nagios Access" nagiosadminAdding password for nagiosadmin in realm Nagios Access.New password:Re-type new password:这句命令里面有几个要注意的,我测试了好长时间才发现。
Ubuntu下kaldi安装配置图⽂教程因公司业务需要需使⽤kaldi语⾳识别⼯具,现将kaldi环境配置等步骤列出来,⽤于记录:1.安装虚拟机: 下载虚拟机VMware,并安装,虚拟机安装⽐较简单,可⾃⾏百度进⾏安装,在此不再重复。
2.Ubuntu操作系统安装: 下载Ubuntu镜像⽂件,本⼈选择的事Ubuntu16.04版本。
3.在虚拟机上安装Ubuntu系统,该步骤会进⾏详细说明,如下: 3.1 VMware安装完成之后选择创建新虚拟机 3.2 选择下载好的镜像⽂件 3.3选择下⼀步,设置系统名称及密码 3.4 继续点击下⼀步设置系统安装位置,这⾥选择⾃⼰⽐较⼤的⼀个盘即可 3.5 继续下⼀步选择磁盘容量,此处建议稍微选⼤⼀些,否则之后kaldi跑数据会出现容量不⾜的错误 3.6 下⼀步,选择⾃定义硬件设置建议将内存和处理器进⾏调整,本⼈电脑内存8G此处设置6G, 因kaldi数据集⼀般都⽐较⼤,运⾏时⽐较耗费内存,此处调⼤,处理器个数根据⾃⼰电脑的配置 进⾏相应调整 3.7 返回上⼀页,点击完成。
等待VMware⾃动安装Ubuntu系统4.ubuntu下安装kaldi 4.1 打开unbuntu终端使⽤Ctrl+Alt+T快捷键可直接打开,输⼊ 即从github上下载kaldi最新版本,因kaldi在github上是持续更新维护,所以该路径下的kaldi 版本⽐较完整,需要的例⼦及运⾏例⼦的源码什么的都有, 如果ubuntu没有安装git使⽤⼀下命令安装即可: sudo apt-get install git 4.2 下载完成之后进⾏解压缩,找到kaldi的压缩包直接右键提取。
4.3 ⽬录介绍:tools⽬录全是kaldi依赖的包,egs为kaldi提供的实例,其中包含常⽤的数据集运⾏的 源码,src⽬录为kaldi 的源代码 4.4 kaldi编译 4.4.1 编译之前确保安装了⼀下组件: apt-get,subversion,automake,autoconf,libtool,zlib,wget,libatal 使⽤如下命令安装即可: sudo apt-get install <组件名称> 4.4.2 进⼊tools⽬录下进⾏编译 cd kaldi/tools 进⼊到kaldi/tools⽬录 make或make -j 4(多核并⾏) 下载编译 该过程⽐较慢,第⼀次进⾏make时会下载安装⼀些组件。
Apache Server Ubuntu 下安装目录Apache Http Server 官网下载 (2)Apache Http Server 安装 (2)解压httpd-2.4.10.tar.gz (3)安装依赖 (3)APR and APR-Util下载与安装 (4)Perl-Compatible Regular Expressions Library (PCRE)下载与安装 (8)Gcc与G++的安装 (11)安装httpd-2.4.10 (11)Apache Http Server运行 (12)Apache Http Server 2.4 官方文档 (12)基于Apache 的音视频播放 (13)防盗链配置 (13)方法一 (14)方法二 (16)补充说明 (17)Apache Http Server 官网下载Apache Http Server 官方网站:/进入下一页面,操作如图:Apache Http Server 安装Apache Http Server官方安装文档:/docs/2.4/install.html解压httpd-2.4.10.tar.gz利用工具把下载好的gz包上传到ubuntu系统(如果是直接在ubuntu 上下载的话,忽略此步),在这里我把下载好的httpd-2.4.10.tar.gz上传的ubuntu的~/Document 目录下,如图:利用gzip命令进行解压:利用tar命令再次解压:安装依赖1.APR and APR-Util2.Perl-Compatible Regular Expressions Library (PCRE)3.Gcc与G++APR and APR-Util下载与安装官方网址:/下载方式如图(与Apache Server下载类似):在弹出的页面中选择镜像,然后下载ARP 与APR-Util:官方Unix安装说明:/compiling_unix.html利用工具把下载好的gz包上传到ubuntu系统(如果是直接在ubuntu 上下载的话,忽略此步),在这里我把下载好的apr-1.5.1.tar.gz和apr-util-1.5.4.tar.gz上传的ubuntu的~/Document目录下,如图:利用gzip命令对其进行解压:同理加压apr-util。
1.安装
root@ubuntu:~# apt-get install apache2
完成后在可见/etc/apache2
2.开启auth_digest
root@ubuntu:~# a2enmod auth_digest
完成后可见/etc/apache2/mods-enabled/auth_digest.load
3.配置authentication
1>创建密码文件,并添加一个用户
root@ubuntu:~# htdigest -c /home/carly/password/user.txt Digest user1 Adding password for user1 in realm “Digest”
New password:
Re-type new password:
2>编辑/etc/apache2/sites-avaible/default,参考Default.txt
Default.tx t
<VirtualHost *:80>
ServerAdmin webmaster@localhost
DocumentRoot /home/carly
<Directory />
Options FollowSymLinks
AllowOverride None
</Directory>
<Directory /home/carly>
Options Indexes FollowSymLinks Multiviews
AllowOverride None
Order allow,deny
allow from all
</Directory>
<Location />
AuthType Digest
AuthName "Digest"
AuthUserFile /home/carly/password/user.txt
Require valid-user
</Location>
ScriptAlias /cgi-bin/ /usr/lib/cgi-bin/
<Directory "/usr/lib/cgi-bin">
AllowOverride None
Options +ExecCGI -MultiViews +SymLinksIfOwnerMatch
Order allow,deny
Allow from all
</Directory>
ErrorLog /var/log/apache2/error.log
# Possible values include: debug, info, notice, warn, error, crit, # alert, emerg.
LogLevel warn
CustomLog /var/log/apache2/access.log combined
Alias /doc/ "/usr/share/doc/"
<Directory "/usr/share/doc/">
Options Indexes MultiViews FollowSymLinks
AllowOverride None
Order deny,allow
Deny from all
Allow from 127.0.0.0/255.0.0.0 ::1/128
</Directory>
</VirtualHost>。