课题_nginx搭建rtmp协议流媒体服务器总结
- 格式:docx
- 大小:36.00 KB
- 文档页数:10
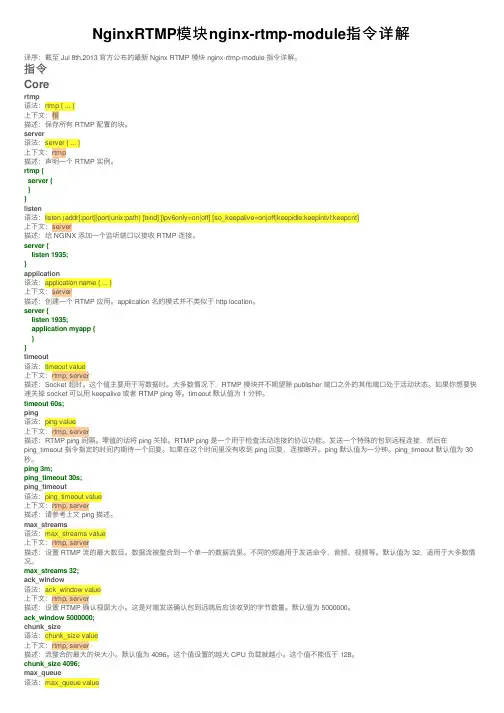
NginxRTMP模块nginx-rtmp-module指令详解译序:截⾄ Jul 8th,2013 官⽅公布的最新 Nginx RTMP 模块 nginx-rtmp-module 指令详解。
指令Corertmp语法:rtmp { ... }上下⽂:根描述:保存所有 RTMP 配置的块。
server语法:server { ... }上下⽂:rtmp描述:声明⼀个 RTMP 实例。
rtmp {server {}}listen语法:listen (addr[:port]|port|unix:path) [bind] [ipv6only=on|off] [so_keepalive=on|off|keepidle:keepintvl:keepcnt]上下⽂:server描述:给 NGINX 添加⼀个监听端⼝以接收 RTMP 连接。
server {listen 1935;}application语法:application name { ... }上下⽂:server描述:创建⼀个 RTMP 应⽤。
application 名的模式并不类似于 http location。
server {listen 1935;application myapp {}}timeout语法:timeout value上下⽂:rtmp, server描述:Socket 超时。
这个值主要⽤于写数据时。
⼤多数情况下,RTMP 模块并不期望除 publisher 端⼝之外的其他端⼝处于活动状态。
如果你想要快速关掉 socket 可以⽤ keepalive 或者 RTMP ping 等。
timeout 默认值为 1 分钟。
timeout 60s;ping语法:ping value上下⽂:rtmp, server描述:RTMP ping 间隔。
零值的话将 ping 关掉。
RTMP ping 是⼀个⽤于检查活动连接的协议功能。
发送⼀个特殊的包到远程连接,然后在ping_timeout 指令指定的时间内期待⼀个回复。

2020年8月25日第4卷第16期现代信息科技Modern Information Technology Aug.2020Vol.4 No.16052020.8收稿日期:2020-07-03基金项目:江苏高校哲学社会科学研究一般项目(2019SJA0342)Nginx-rtmp-module流媒体服务器鉴权应用研究林旻(南京审计大学 实验中心(教育技术中心),江苏 南京 211815)摘 要:随着信息技术和通信技术的不断发展,直播教育成为高等教育中不可或缺的一环,文章是在南京审计大学实验中心原有的基于开源架构Nginx-rtmp-module 流媒体服务器的基础上,通过on_publish 和on_play 两个HTTP 回调通知模块来调用FLASK 编写的验证页面以达到流媒体服务器的推拉流鉴权功能的应用研究,解决了原Nginx-rtmp-module 的信息安全隐患,提高了直播教学平台的整体安全性。
关键词:Nginx ;rtmp-module ;Flask ;流媒体服务器;鉴权中图分类号:TP274;TN919.8 文献标识码:A 文章编号:2096-4706(2020)16-0005-04Research on Authentication Application of Nginx-rtmp-moduleStreaming Media ServerLIN Min(Experimental Center (Educational Technology Center ),Nanjing Audit University ,Nanjing 211815,China )Abstract :With the continuous development of information technology and communication technology ,live education has gradually become an indispensable part of higher education. This paper is based on the original Nginx-rtmp-module streaming media server based on the open source architecture of the Experimental Center of Nanjing Audit University. Through on_publish and on_play two HTTP callback notification modules to call the verification page written by FLASK to achieve the application research of the streaming media server ’s push-pull streaming authentication function ,solves the information security hidden danger of the original Nginx-rtmp-module ,and improves the overall security of the live teaching platform.Keywords :Nginx ;rtmp-module ;Flask ;streaming media server ;authentication0 引 言随着信息技术和5G 通信技术的高速发展,各类在线课程、直播课程成为解决我国有限的优质教育资源和巨大的教育需求间矛盾的一个重要方法。
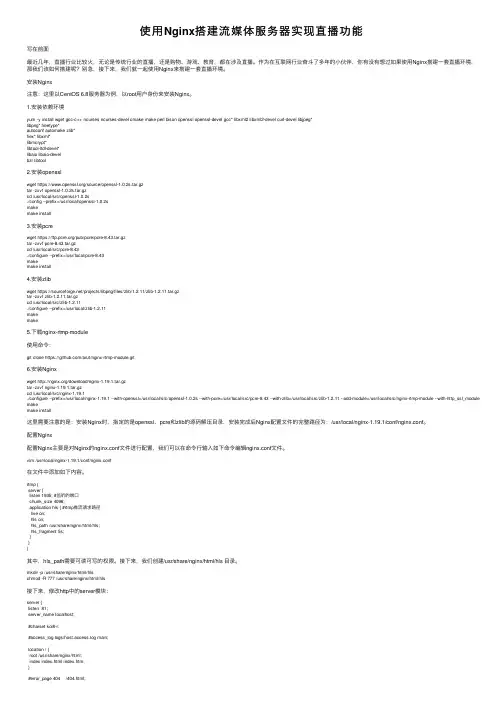
使⽤Nginx搭建流媒体服务器实现直播功能写在前⾯最近⼏年,直播⾏业⽐较⽕,⽆论是传统⾏业的直播,还是购物、游戏、教育,都在涉及直播。
作为在互联⽹⾏业奋⽃了多年的⼩伙伴,你有没有想过如果使⽤Nginx搭建⼀套直播环境,那我们该如何搭建呢?别急,接下来,我们就⼀起使⽤Nginx来搭建⼀套直播环境。
安装Nginx注意:这⾥以CentOS 6.8服务器为例,以root⽤户⾝份来安装Nginx。
1.安装依赖环境yum -y install wget gcc-c++ ncurses ncurses-devel cmake make perl bison openssl openssl-devel gcc* libxml2 libxml2-devel curl-devel libjpeg*libpng* freetype*autoconf automake zlib*fiex* libxml*libmcrypt*libtool-ltdl-devel*libaio libaio-develbzr libtool2.安装opensslwget https:///source/openssl-1.0.2s.tar.gztar -zxvf openssl-1.0.2s.tar.gzcd /usr/local/src/openssl-1.0.2s./config --prefix=/usr/local/openssl-1.0.2smakemake install3.安装pcrewget https:///pub/pcre/pcre-8.43.tar.gztar -zxvf pcre-8.43.tar.gzcd /usr/local/src/pcre-8.43./configure --prefix=/usr/local/pcre-8.43makemake install4.安装zlibwget https:///projects/libpng/files/zlib/1.2.11/zlib-1.2.11.tar.gztar -zxvf zlib-1.2.11.tar.gzcd /usr/local/src/zlib-1.2.11./configure --prefix=/usr/local/zlib-1.2.11makemake5.下载nginx-rtmp-module使⽤命令:git clone https:///arut/nginx-rtmp-module.git6.安装Nginxwget /download/nginx-1.19.1.tar.gztar -zxvf nginx-1.19.1.tar.gzcd /usr/local/src/nginx-1.19.1./configure --prefix=/usr/local/nginx-1.19.1 --with-openssl=/usr/local/src/openssl-1.0.2s --with-pcre=/usr/local/src/pcre-8.43 --with-zlib=/usr/local/src/zlib-1.2.11 --add-module=/usr/local/src/nginx-rtmp-module --with-http_ssl_module makemake install这⾥需要注意的是:安装Nginx时,指定的是openssl、pcre和zlib的源码解压⽬录,安装完成后Nginx配置⽂件的完整路径为:/usr/local/nginx-1.19.1/conf/nginx.conf。
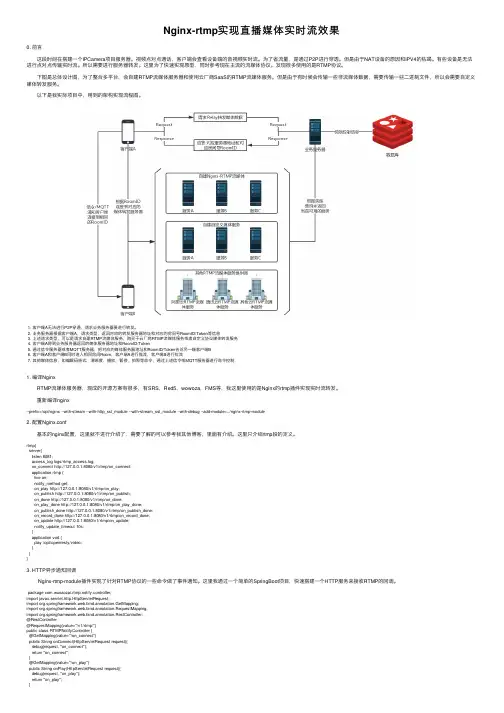
Nginx-rtmp实现直播媒体实时流效果0. 前⾔ 这段时间在搭建⼀个IPCamera项⽬服务器。
视频点对点通话,客户端会查看设备端的⾳视频实时流。
为了省流量,是通过P2P进⾏穿透。
但是由于NAT设备的原因和IPV4的枯竭。
有些设备是⽆法进⾏点对点传输实时流。
所以需要进⾏服务器转发。
这⾥为了快速实现原型,同时参考现在主流的流媒体协议。
发现很多使⽤的是RTMP协议。
下图是总体设计图,为了整合多平台,会⾃建RTMP流媒体服务器和使⽤云⼚商SaaS的RTMP流媒体服务。
但是由于有时候会传输⼀些⾮流媒体数据,需要传输⼀些⼆进制⽂件,所以会需要⾃定义媒体转发服务。
以下是我实际项⽬中,⽤到的架构实现流程图。
1. 客户端A⽆法进⾏P2P穿透,请求业务服务器要进⾏转发。
2. 业务服务器根据客户端A,请求类型,返回对应的转发服务器地址和对应的房间号RoomID/Token等信息3. 上述请求类型,可以是请求⾃建RTMP流媒体服务,购买于云⼚商RTMP流媒体服务或者⾃定义协议媒体转发服务4. 客户端A得到业务服务器返回的媒体服务器地址和RoomID/Token5. 通过信令服务器或者MQTT服务器,把对应的媒体服务器地址和RoomID/Token告诉另⼀端客户端B6. 客户端A和客户端B同时进⼊相同房间Room,客户端A进⾏推流,客户端B进⾏拉流7. 其他媒体信息,如编解码格式,清晰度,播放,暂停,拍照等命令,通过上述信令或MQTT服务器进⾏命令控制1. 编译Nginx RTMP流媒体服务器,现成的开源⽅案有很多,有SRS,Red5,wowoza,FMS等,我这⾥使⽤的是Nginx的rtmp插件实现实时流转发。
重新编译nginx--prefix=/opt/nginx --with-stream --with-http_ssl_module --with-stream_ssl_module --with-debug --add-module=../nginx-rtmp-module2. 配置Nginx.conf 基本的nginx配置,这⾥就不进⾏介绍了,需要了解的可以参考我其他博客,⾥⾯有介绍。

linux的nginx训练总结在进行Linux的Nginx训练期间,我深入学习了Nginx的基本概念和功能,并通过实践掌握了它的安装和配置方法。
下面是我对此次训练的总结。
首先,Nginx是一款高性能的开源Web服务器软件,它可以用于反向代理、负载均衡、静态文件服务等。
在训练中,我了解了Nginx的工作原理和特点,它采用异步非阻塞的方式处理请求,能够高效地处理大量的并发连接。
在安装Nginx时,我按照官方文档的指引,使用包管理器或源代码进行安装。
安装完成后,我对Nginx的配置文件进行了仔细的了解和修改。
配置文件位于`/etc/nginx/nginx.conf`,我根据需要进行了一些基本的配置调整,如监听的端口、服务器路径等。
在训练中,我学会了如何设置虚拟主机来托管多个网站或应用,并实践了反向代理和负载均衡的配置。
通过配置反向代理,我可以将来自客户端的请求转发到后端的多个服务器,实现负载均衡和高可用性。
这对于处理大量的并发请求非常有用。
另外,我还学习了Nginx的日志记录功能和HTTP基本身份验证的配置方法。
Nginx可以将访问日志记录在文件中,方便后续分析和监控。
我还学会了通过配置HTTP基本身份验证,在访问特定网站或应用时,要求用户输入用户名和密码进行认证,提高安全性。
通过这次训练,我深刻理解了Linux平台下Nginx的使用方法和功能特性。
它作为一款高性能的Web服务器软件,在处理大量并发请求和实现负载均衡方面具有优势。
我相信在今后的工作中,我会充分应用这些知识,并不断提升自己在Linux和Nginx领域的技术能力。
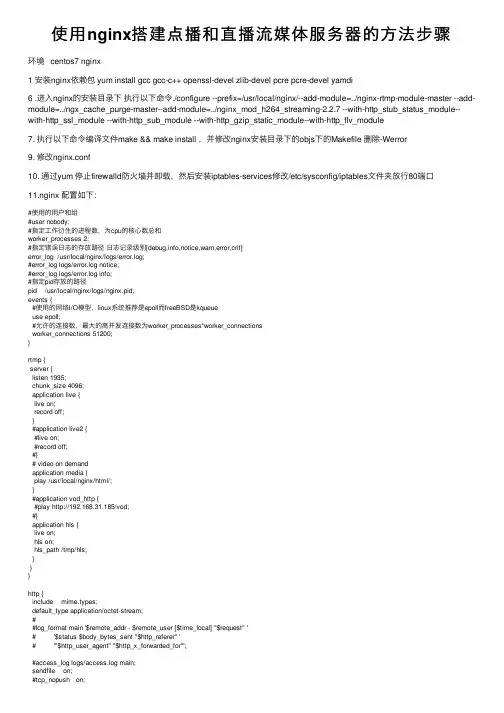
使⽤nginx搭建点播和直播流媒体服务器的⽅法步骤环境 centos7 nginx1 安装nginx依赖包 yum install gcc gcc-c++ openssl-devel zlib-devel pcre pcre-devel yamdi6 .进⼊nginx的安装⽬录下执⾏以下命令./configure --prefix=/usr/local/nginx/--add-module=../nginx-rtmp-module-master --add-module=../ngx_cache_purge-master--add-module=../nginx_mod_h264_streaming-2.2.7 --with-http_stub_status_module--with-http_ssl_module --with-http_sub_module --with-http_gzip_static_module--with-http_flv_module7. 执⾏以下命令编译⽂件make && make install ,并修改nginx安装⽬录下的objs下的Makefile 删除-Werror9. 修改nginx.conf10. 通过yum 停⽌firewalld防⽕墙并卸载,然后安装iptables-services修改/etc/sysconfig/iptables⽂件夹放⾏80端⼝11.nginx 配置如下:#使⽤的⽤户和组#user nobody;#指定⼯作衍⽣的进程数,为cpu的核⼼数总和worker_processes 2;#指定错误⽇志的存放路径⽇志记录级别[debug,info,notice,warn,error,crit]error_log /usr/local/nginx/logs/error.log;#error_log logs/error.log notice;#error_log logs/error.log info;#指定pid存放的路径pid /usr/local/nginx/logs/nginx.pid;events {#使⽤的⽹络I/O模型,linux系统推荐是epoll⽽freeBSD是kqueueuse epoll;#允许的连接数,最⼤的⾼并发连接数为worker_processes*worker_connectionsworker_connections 51200;}rtmp {server {listen 1935;chunk_size 4096;application live {live on;record off;}#application live2 {#live on;#record off;#}# video on demandapplication media {play /usr/local/nginx/html/;}#application vod_http {#play http://192.168.31.185/vod;#}application hls {live on;hls on;hls_path /tmp/hls;}}}http {include mime.types;default_type application/octet-stream;##log_format main '$remote_addr - $remote_user [$time_local] "$request" '# '$status $body_bytes_sent "$http_referer" '# '"$http_user_agent" "$http_x_forwarded_for"';#access_log logs/access.log main;sendfile on;#tcp_nopush on;#keepalive_timeout 0;keepalive_timeout 65;gzip on;server {listen 80;server_name localhost;#charset koi8-r;#access_log logs/host.access.log main;location / {root html;index index.html index.htm;}location ~ \.flv$ {root /usr/local/nginx/html/media/;flv;}location ~ \.mp4$ {root /usr/local/nginx/html/media/;mp4;}location /stat {rtmp_stat all;# Use this stylesheet to view XML as web page# in browserrtmp_stat_stylesheet stat.xsl;}location /stat.xsl {# XML stylesheet to view RTMP stats.# Copy stat.xsl wherever you want# and put the full directory path hereroot /path/to/stat.xsl/;}location /hls {# Serve HLS fragmentstypes {application/vnd.apple.mpegurl m3u8;video/mp2t ts;}root /tmp;add_header Cache-Control no-cache;}location /dash {# Serve DASH fragmentsroot /tmp;add_header Cache-Control no-cache;}#error_page 404 /404.html;# redirect server error pages to the static page /50x.html#error_page 500 502 503 504 /50x.html;location = /50x.html {root html;}# proxy the PHP scripts to Apache listening on 127.0.0.1:80##location ~ \.php$ {# proxy_pass http://127.0.0.1;#}# pass the PHP scripts to FastCGI server listening on 127.0.0.1:9000 ##location ~ \.php$ {# root html;# fastcgi_pass 127.0.0.1:9000;# fastcgi_index index.php;# fastcgi_param SCRIPT_FILENAME /scripts$fastcgi_script_name; # include fastcgi_params;#}# deny access to .htaccess files, if Apache's document root# concurs with nginx's one##location ~ /\.ht {# deny all;#}}# another virtual host using mix of IP-, name-, and port-based configuration##server {# listen 8000;# listen somename:8080;# server_name somename alias another.alias;# location / {# root html;# index index.html index.htm;# }#}# HTTPS server##server {# listen 443 ssl;# server_name localhost;# ssl_certificate cert.pem;# ssl_certificate_key cert.key;# ssl_session_cache shared:SSL:1m;# ssl_session_timeout 5m;# ssl_ciphers HIGH:!aNULL:!MD5;# ssl_prefer_server_ciphers on;# location / {# root html;# index index.html index.htm;# }#}}12. 输⼊xxx.xxx.xxx.xxx/*.mp4/*.flv就能播放视频了以上就是本⽂的全部内容,希望对⼤家的学习有所帮助,也希望⼤家多多⽀持。
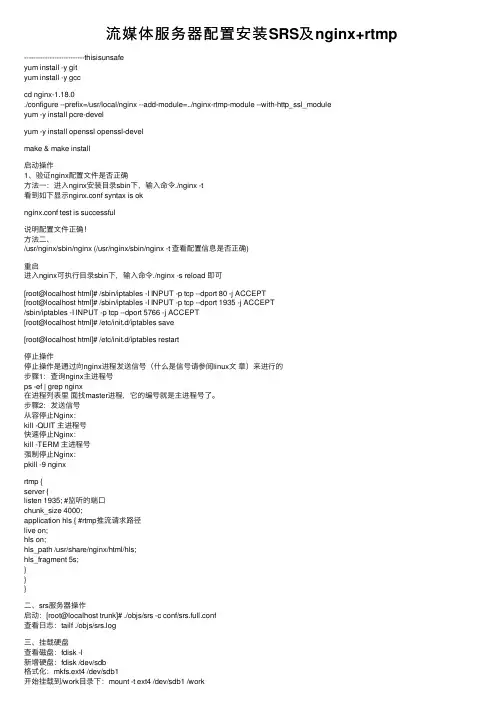
流媒体服务器配置安装SRS及nginx+rtmp --------------------------thisisunsafeyum install -y gityum install -y gcccd nginx-1.18.0./configure --prefix=/usr/local/nginx --add-module=../nginx-rtmp-module --with-http_ssl_moduleyum -y install pcre-develyum -y install openssl openssl-develmake & make install启动操作1、验证nginx配置⽂件是否正确⽅法⼀:进⼊nginx安装⽬录sbin下,输⼊命令./nginx -t看到如下显⽰nginx.conf syntax is oknginx.conf test is successful说明配置⽂件正确!⽅法⼆、/usr/nginx/sbin/nginx (/usr/nginx/sbin/nginx -t 查看配置信息是否正确)重启进⼊nginx可执⾏⽬录sbin下,输⼊命令./nginx -s reload 即可[root@localhost html]# /sbin/iptables -I INPUT -p tcp --dport 80 -j ACCEPT[root@localhost html]# /sbin/iptables -I INPUT -p tcp --dport 1935 -j ACCEPT/sbin/iptables -I INPUT -p tcp --dport 5766 -j ACCEPT[root@localhost html]# /etc/init.d/iptables save[root@localhost html]# /etc/init.d/iptables restart停⽌操作停⽌操作是通过向nginx进程发送信号(什么是信号请参阅linux⽂章)来进⾏的步骤1:查询nginx主进程号ps -ef | grep nginx在进程列表⾥⾯找master进程,它的编号就是主进程号了。

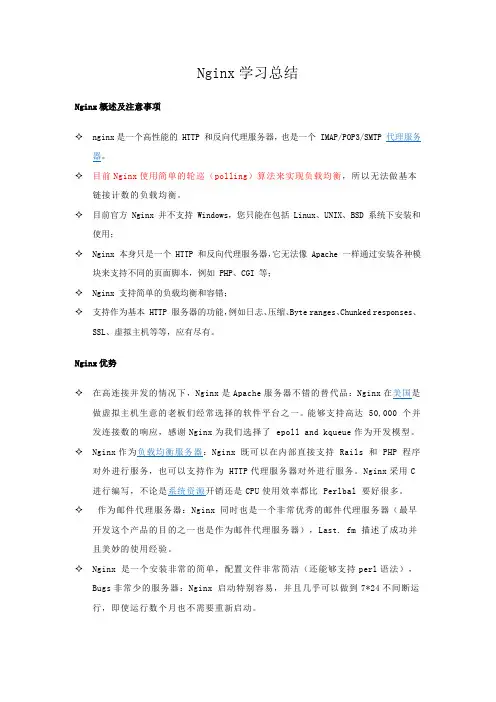
Nginx学习总结Nginx概述及注意事项✧nginx是一个高性能的 HTTP 和反向代理服务器,也是一个 IMAP/POP3/SMTP 代理服务器。
✧目前Nginx使用简单的轮巡(polling)算法来实现负载均衡,所以无法做基本链接计数的负载均衡。
✧目前官方 Nginx 并不支持 Windows,您只能在包括 Linux、UNIX、BSD 系统下安装和使用;✧Nginx 本身只是一个 HTTP 和反向代理服务器,它无法像 Apache 一样通过安装各种模块来支持不同的页面脚本,例如 PHP、CGI 等;✧Nginx 支持简单的负载均衡和容错;✧支持作为基本 HTTP 服务器的功能,例如日志、压缩、Byte ranges、Chunked responses、SSL、虚拟主机等等,应有尽有。
Nginx优势✧在高连接并发的情况下,Nginx是Apache服务器不错的替代品:Nginx在美国是做虚拟主机生意的老板们经常选择的软件平台之一。
能够支持高达 50,000 个并发连接数的响应,感谢Nginx为我们选择了epoll and kqueue作为开发模型。
✧Nginx作为负载均衡服务器:Nginx 既可以在内部直接支持Rails 和PHP 程序对外进行服务,也可以支持作为HTTP代理服务器对外进行服务。
Nginx采用C 进行编写,不论是系统资源开销还是CPU使用效率都比 Perlbal 要好很多。
✧作为邮件代理服务器:Nginx 同时也是一个非常优秀的邮件代理服务器(最早开发这个产品的目的之一也是作为邮件代理服务器),Last. fm 描述了成功并且美妙的使用经验。
✧Nginx 是一个安装非常的简单,配置文件非常简洁(还能够支持perl语法),Bugs非常少的服务器:Nginx 启动特别容易,并且几乎可以做到7*24不间断运行,即使运行数个月也不需要重新启动。
Nginx等单线程服务器设计原理与性能优势Nginx是以单线程为基础的,nginx通过异步IO来解决主线程阻塞的问题。
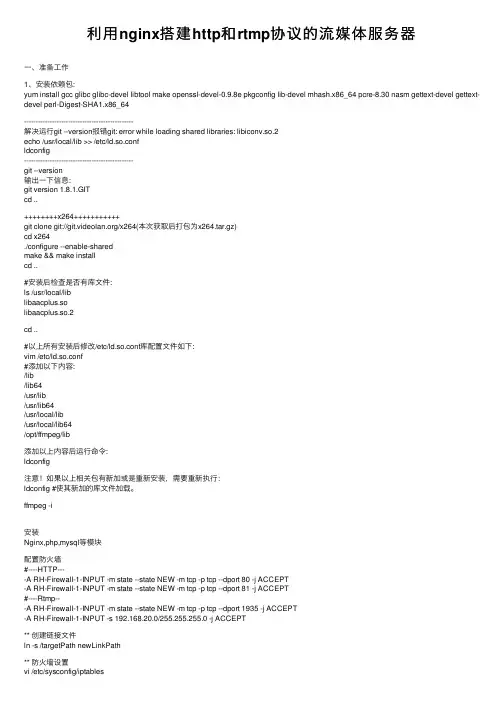
利⽤nginx搭建http和rtmp协议的流媒体服务器⼀、准备⼯作1、安装依赖包:yum install gcc glibc glibc-devel libtool make openssl-devel-0.9.8e pkgconfig lib-devel mhash.x86_64 pcre-8.30 nasm gettext-devel gettext-devel perl-Digest-SHA1.x86_64-----------------------------------------------解决运⾏git --version报错git: error while loading shared libraries: libiconv.so.2echo /usr/local/lib >> /etc/ld.so.confldconfig-----------------------------------------------git --version输出⼀下信息:git version 1.8.1.GITcd ..++++++++x264+++++++++++git clone git:///x264(本次获取后打包为x264.tar.gz)cd x264./configure --enable-sharedmake && make installcd ..#安装后检查是否有库⽂件:ls /usr/local/liblibaacplus.solibaacplus.so.2cd ..#以上所有安装后修改/etc/ld.so.conf库配置⽂件如下:vim /etc/ld.so.conf#添加以下内容:/lib/lib64/usr/lib/usr/lib64/usr/local/lib/usr/local/lib64/opt/ffmpeg/lib添加以上内容后运⾏命令:ldconfig注意!如果以上相关包有新加或是重新安装,需要重新执⾏:ldconfig #使其新加的库⽂件加载。
方案:Nginx搭建流媒体服务器
方案:Nginx搭建流媒体服务器
目的:搭建流媒体服务,支持edx在本地服务器上的视频播放(开源、
高性能、轻量级的HTTP服务器、反向代理服务器以及电子邮件(SMTP、POP3、IMAP)服务器)
优势:比Apache轻量级。
调研内容:自行搭建视频服务器的准备工作,此处我们的视频文件存储系统为ceph,视频应用网站为edx,考虑如何在edx播放视频问题。
(注意:open edx视频是存放在youtube或者亚马逊云,与我们研究情况不符)概念解释:流媒体指以流方式在网络中传送音频、视频和多媒体文件的媒体形式。
相对于下载后观看的网络播放形式而言,流媒体的典型特征是把连续的音频和视
频信息压缩后放到网络服务器上,用户边下载边观看,而不必等待整个文件下载
完毕。
由于流媒体技术的优越性,该技术广泛应用于视频点播、视频会议、远程
教育、远程医疗和在线直播系统中。
nginx+ffmpeg搭建rtmp直播flash服务器linux服务器应用-电脑资料nginx是非常优秀的开源服务器,用它来做hls或者rtmp流媒体服务器是非常不错的选择,。
本文介绍了一种简易方法快速搭建rtmp流媒体服务器。
csdn 固本培元:******************.开发环境:centos6.4 (主流的linux服务器选择,30%以上的市场占有率)需要这几个包。
版本号:nginx 1.7.3 openssl 1.0.2 rtmp-module(版本未知)资源:这些都是公网下载的资源,有需要的朋友,可以给我email 或者评论留言。
email:******************注意:先编译openssl 然后编译nginx编译选项:./configure --add-module=../nginx-rtmp-module-master --without-http_rewrite_module --with-openssl=../openssl-1.0.2-beta2一路通过启动时可能出现错误:Starting nginx: nginx: [emerg] unknown directive "rtmp" in /etc/nginx/nginx.conf:9没有识别rtmp模块。
另外一种可能,原有centos从源安装了nginx,它不带rtmp模块,需要卸载。
安装编译好的nginx后:进入:./nginx -c /usr/local/nginx/conf/nginx.conf(注意:后面的需要是绝对地址)ffmpeg推流(如果没有flv文件,可以用264,ts这些文件转换,ffmpeg的常用命令本博客另一篇文章也有简要介绍)ffmpeg -re -i IpCam.flv -f flv rtmp://localhost/myapp/test1ffmpeg -re -i IpCam.flv -f flv -b 20000000 rtmp://localhost/myapp/test1实时rtsp转rtmp直播流(其实转了rtmp之后会多几秒钟的延迟,不同客户端还不一定一致,我们这里测试的是JWplayer 3秒左右,vlc播放器更长了10秒 ~_~!)ffmpeg -re -i RealStream.fifo -f flv -b 20000000 rtmp://localhost/myapp/test1RealStream.fifo 是创建的fifo,电脑资料《nginx+ffmpeg搭建rtmp直播flash服务器linux服务器应用》(https://www.)。
基于Nginx搭建RTMPHLS视频直播服务器服务器环境服务器OS:CentOS Linux release 7.2.1511nginx版本:1.14.1nginx-rtmp-module:基于Nginx的开源流媒体服务器安装nginx + nginx-rtmp-module到nginx官网官网下载最新的源码包,到nginx-rtmp-module项目地址下载最新源码编译安装nginx,注意在参数里指定nginx-rtmp-module:1.# cd /software2.# rz nginx-1.14.1.tar.gz3.# tar xf nginx-1.14.1.tar.gz4.# git clone https:///arut/nginx-rtmp-module.git5.# cd nginx-1.14.16.# ./configure --prefix=/usr/local/nginx --user=nginx --group=nginx --with-http_ssl_module --with-http_stub_status_module --add-module=/soft/nginx-rtmp-module7.# make && make install/soft/nginx-rtmp-module 改为服务器存放的实际地址配置nginx虚拟主机在nginx.conf中添加rtmp服务配置:1.# vim /usr/local/nginx/conf/nginx.conf2.rtmp {3.server {4.listen 1935; #监听的端口5.chunk_size 4096;6.application hls {7.live on;8.hls on;9.hls_path /usr/local/nginx/html/hls; #视频流文件目录(自己创建)10.hls_fragment 3s;11.}12.}13.}参数说明1.rtmp 是协议名称2.server 说明内部中是服务器的相关配置3.listen 监听的端口,rtmp协议的默认端口为19354.application 访问的应用路径是hls5.live on 启用rtmp直播6.record off 不记录数据7.hls on 启用hls直播8.hls_path 切片保存位置9.hls_fragment 每个切片的长度配置直播,hls支持以及状态监控页面1.location /hls {2.types {3.application/vnd.apple.mpegurl m3u8;4.#或 application/x-mpegURL5.video/mp2t ts;6.}7.alias /usr/local/nginx/html/hls; #视频流文件目录(自己创建)8.expires -1;9.add_header Cache-Control no-cache;10.}11.location /stat {12.rtmp_stat all;13.rtmp_stat_stylesheet stat.xsl;14.}15.16.location /stat.xsl {17.root /usr/local/extend_module/nginx-rtmp-module/;18.}19.}20.}nginx最终配置1.worker_processes 1;2.3.events {4.worker_connections 1024;5.}6.7.8.http {9.include mime.types;10.default_type application/octet-stream;11.sendfile on;12.keepalive_timeout 65;13.server {14.listen 80;15.server_name localhost;16.location / {17.root html;18.index index.html index.htm;19.}20.error_page 500 502 503 504 /50x.html;21.location = /50x.html {22.root html;23.}24.25.location /hls {26.types {27.application/vnd.apple.mpegurl m3u8;28.#或 application/x-mpegURL29.video/mp2t ts;30.}31.alias /usr/local/nginx/html/hls; #视频流文件目录(自己创建)32.expires -1;33.add_header Cache-Control no-cache;34.}35.location /stat {36.rtmp_stat all;37.rtmp_stat_stylesheet stat.xsl;38.}39.40.location /stat.xsl {41.root /usr/local/extend_module/nginx-rtmp-module/;42.}43.44.}45.}46.rtmp {47.server {48.listen 1935;49.chunk_size 4096;50.51.application hls {52.live on;53.hls on;54.hls_path /usr/local/nginx/html/hls; #视频流文件目录(自己创建)55.hls_fragment 3s;56.}57.}58.}nginx常用操作1.# cp /usr/local/nginx/sbin/nginx /usr/local/bin/ #把nginx加入到环境变量里,不用输入全路径了2.# nginx #第一次启动3.# nginx -t #检查配置文件是否正确4.# nginx -s reload #平滑重启,修改配置文件后,不断服务重启5.# nginx -s stop #停止服务客户端推送直播推流端使用rtmp协议推流,端口为1935。
【官⽅⽂档】Nginx模块Nginx-Rtmp-Module学习笔记(⼀)RTMP命令详解说明: rtmp的延迟主要取决于播放器设置,但流式传输软件,流的⽐特率和⽹络速度(以及响应时间“ping”)可能会对延迟产⽣影响,具有播放器的本地rtmp服务器使⽤“否”缓冲区(如0.1-0.2秒缓冲区等)可能会在0.8-1.2秒之间总是延迟,当事情正好⼯作时nginx配置⽂件rtmp {server {listen 1935;chunk_size 4096;application live {live on;record off; exec ffmpeg -i rtmp://localhost/live/$name -threads 1 -c:v libx264 -profile:v baseline -b:v 350K -s 640x360 -f flv -c:a aac -ac 1 -strict -2 -b:a 56k rtmp://localhost/live360p/$name;}application live360p {live on;record off;allow publish 127.0.0.1;allow publish 0.0.0.0;deny publish all;}}}以上为vlc播放测试结果:分别为720 和 360命令详解RTMP语法:rtmp {...}上下⽂:root保存所有RTMP设置的块server语法:server {...}上下⽂:rtmp声明RTMP服务器实例rtmp {server {}}listen语法:listen(addr [:port] | port | unix:path)[bind] [ipv6only = on | off] [so_keepalive = on | off | keepidle:keepintvl:keepcnt | proxy_protocol]上下⽂:服务器将监听套接字添加到NGINX以接受RTMP连接server {listen 1935;}application语法:应⽤程序名称{...}上下⽂:服务器创建RTMP应⽤程序。
centos7安装部署rtmp(nginx、rtmp或支持http)直播服务器安装必要的组件yum -y install gcc gcc-c++yum install -y pcre pcre-develyum install -y zlib zlib-develyum install -y openssl openssl-devel安装nginx+ nginx-rtmp-module或nginx-http-flv-module 1、安装部署支持rtmp协议:wget /download/nginx-1.17.0.tar.gz wget https:///arut/nginx-rtmp-module/archive/master.zipyum -y install gcc gcc-c++yum install -y pcre pcre-develyum install -y zlib zlib-develyum install -y openssl openssl-develulimit -n 65535 并发数groupadd nginxadduser nginx -g nginxtar -xvf nginx-1.17.0.tar.gzunzip master.zipcd nginx-1.17.0./configure --with-http_ssl_module --add-module=../nginx-rtmp-module-mastermakesudo make install或部署支持http协议则安装wgethttps:///winshining/nginx-http-flv-module/archive/master.zip动态加载(推荐使用,以后可加载其他扩展)./configure --add-dynamic-module=../nginx-http-flv-module-mastermakemake install部署rtmp协议修改配置文件。
nginx的rtmp搭建流媒体服务器实现直播流1.下载nginx rtmp module,然后安装(这⾥不做详细介绍)下载之后解压 unzip master.zip安装nginx2.安装成功后,配置rtmp模块rtmp { server { listen 1935; chunk_size 4000; application mylive { live on; record all; record_path /home/live_record; record_max_size 200M; hls on; hls_path /home/hls; hls_fragment 1s; hls_playlist_length 5; allow play all; } application live{ live on; }}重启 /usr/local/nginx/sbin/nginx -s reload直播推流地址:rtmp://192.168.0.83:1935/live/xxxx直播播放地址:rtmp://192.168.0.83:1935/live/xxxx利⽤obs直播软件进⾏推流:(播放路径填写的www,则拉取路径就是rtmp://192.168.0.83:1935/live/www)利⽤video.js进⾏直播观看:<!DOCTYPE html><html><head><title>123</title><link href="/css/video-js.css" rel="stylesheet"><script src="/js/video.min.js"></script></head><body><video id="my-player" class="video-js" controlspreload="auto" data-setup='{}' style="width: 780px;height: 500px;"><source src='rtmp://192.168.0.83:1935/live/www' type='rtmp/flv'/></video><script type="text/javascript">var player = videojs('my-player');var options = {};var player = videojs('my-player', options, function onPlayerReady() {videojs.log('Your player is ready!');// In this context, `this` is the player that was created by Video.js.this.play();// How about an event listener?this.on('ended', function() {videojs.log('Awww...over so soon?!');});});</script></body></html>只是做了⼀个简单的本地播放,后来到线上测试,发现这玩意对带宽要求⽐较⾼,我的渣渣服务器玩不过来更多的研究中......。
nginx搭建rtmp协议流媒体服务器总结最近在ubuntu12.04上搭建了一个rtmp服务器,感觉还挺麻烦的,所以记录下。
大部分都是参考网络上的资料。
前提:在linux下某个目录中新建一个nginx目录。
然后进入该目录去下载搭建环境所需要的一些资源包。
此处在/root/ 目录下新建一个nginx目录即:/root/nginx/====================================1、安装依赖包:#yum -y install gcc glibc glibc-devel make nasm pkgconfig lib-devel openssl-devel expat-devel gettext-devel libtool mhash.x86_64 perl-Digest-SHA1.x86_642、安装相关工具包1). git# mkdir soft-source# cd soft-source# wget :///projects/git-snapshots/git/git-latest.tar.xz# xz -d git-latest.tar.xz# tar xzvf git-latest.tar# cd git-2014-06-27# autoconf# ./configure# make && make install# git --versiongit version 2.0.0.GIT# cd ..2). zlib# wget :///zlib-1.2.8.tar.gz# tar -zxvf zlib-1.2.8.tar.gz cd zlib-1.2.8# ./configure# make# make install# cd ..3). pcre# wget ://exim.mirror.fr/pcre/pcre-8.12.tar.gz# tar zxvf pcre-8.12.tar.gz# cd pcre-8.12# ./configure# make && make install# cd ..4). yadmiyadmi的作用是为flv文件添加关键帧,才能实现拖动播放# wget :///projects/yamdi/files/yamdi/1.4/yamdi-1.4.tar.gz/download# tar xzvf download# cd yamdi-1.4# make && make install# cd ..使用方法:# yamdi -i input.flv -o out.flv给input.flv文件添加关键帧,输出为out.flv文件5). OpenSSL# wget :///source/openssl-1.0.1c.tar.gz# tar -zxvf openssl-1.0.1c.tar.gz# ./config# make# make install3、安装ffmpeg及其依赖包:1). Yasm# wget :///projects/yasm/releases/yasm-1.2.0.tar.gz# tar xzvf yasm-1.2.0.tar.gz# cd yasm-1.2.0# ./configure# make# make install# cd ..2). x264# git clone git:///x264# cd x264# ./configure --enable-shared# make# make install# cd ..3). LAME# wget :///project/lame/lame/3.99/lame-3.99.5.tar.gz# tar xzvf lame-3.99.5.tar.gz# cd lame-3.99.5#./configure --enable-nasm# make# make install# cd ..4). libogg# wget :///releases/ogg/libogg-1.3.0.tar.gz# tar xzvf libogg-1.3.0.tar.gz# cd libogg-1.3.0# ./configure# make# make install# cd ..5). libvorbis# wget :///releases/vorbis/libvorbis-1.3.3.tar.gz# tar xzvf libvorbis-1.3.3.tar.gz# cd libvorbis-1.3.3# ./configure# make# make install# cd ..6). libvpx# git clone :///webm/libvpx.git# cd libvpx# ./configure --enable-shared# make# make install# cd ..7). FAAD2# wget :///project/faac/faad2-src/faad2-2.7/faad2-2.7.tar.gz # tar zxvf faad2-2.7.tar.gz# cd faad2-2.7# ./configure# make# make install# cd ..8). FAAC# wget :///project/faac/faac-src/faac-1.28/faac-1.28.tar.gz # tar zxvf faac-1.28.tar.gz# cd faac-1.28# ./configure# make# make install# cd ..注:编译时可能遇到一下错误:mpeg4ip.h:126: error: new declaration ‘char* strcasestr(const char*, const char*)’解决方法:从123行开始修改此文件mpeg4ip.h,到129行结束。
修改前:#ifdef __cplusplusextern "C" {#endifchar *strcasestr(const char *haystack, const char *needle);#ifdef __cplusplus}#endif修改后:#ifdef __cplusplusextern "C++" {#endifconst char *strcasestr(const char *haystack, const char *needle);#ifdef __cplusplus}#endif9). Xvid# wget :///downloads/xvidcore-1.3.2.tar.gz# tar zxvf xvidcore-1.3.2.tar.gz# cd xvidcore/build/generic# ./configure# make# make install# cd ..10). ffmpeg# git clone git:///ffmpeg# cd ffmpeg# ./configure --prefix=/opt/ffmpeg/ --enable-version3--enable-libvpx --enable-libfaac --enable-libmp3lame--enable-libvorbis --enable-libx264 --enable-libxvid--enable-shared --enable-gpl --enable-postproc --enable-nonfree--enable-avfilter --enable-pthreads# make && make install# cd ..修改/etc/ld.so.conf如下:include ld.so.conf.d/*.conf/lib/lib64/usr/lib/usr/lib64/usr/local/lib/usr/local/lib64/opt/ffmpeg/lib# ldconfig二、安装Nginx相关模块1. 模块安装# wget :///download/nginx_mod_h264_streaming-2.2.7.tar.gz # tar zxvf nginx_mod_h264_streaming-2.2.7.tar.gz# git clone git:///arut/nginx-rtmp-module.git2. 创建用户和组# groupadd# useradd -g3. nginx安装# wget :///download/nginx-1.6.0.tar.gz# tar zxvf nginx-1.6.0.tar.gz# cd nginx-1.6.04.编译安装nginx在nginx-1.6.0目录下新建文件:nginx_configure.sh然后使用gedit 打开进行编辑:#!/bin/shecho "configure start ..."./configure \--prefix=/usr/local/nginx \--sbin-path=/usr/local/nginx/nginx \--conf-path=/usr/local/nginx/nginx.conf \--pid-path=/usr/local/nginx/nginx.pid \--error-log-path=/usr/local/nginx/logs/error.log \--add-module=../nginx_mod_h264_streaming-2.2.7 \--with-pcre=../pcre-8.12 \--with-zlib=../zlib-1.2.8 \--with-_dav_module \--with-_flv_module \--with-_stub_status_module \--without-_scgi_module \--without-_uwsgi_module \--without-_gzip_module \--without-_ssi_module \--without-_proxy_module \--without-_memcached_module \--without-_empty_gif_module \--without-mail_pop3_module \--without-mail_imap_module \--without-mail_smtp_module \--with-_ssl_module \--with-openssl=../openssl-1.0.1c \--add-module=../nginx-rtmp-module \--with-cc-opt=-I/opt/ffmpeg/include \--with-ld-opt=`-L/opt/ffmpeg/lib -Wl, -rpath=/opt/ffmpeg/lib`echo "configure end!"【保存并退出】# chmod +x nginx_configure.sh# ./nginx_configure.sh# make# make install备注:在执行make的时候可能出现错误1:adding module in ../nginx_mod_h264_streaming-2.2.7+ ngx__h264_streaming_module was configuredadding module in ../nginx-rtmp-module+ ngx_rtmp_module was configuredchecking for OpenSSL library ... not found./configure: error: SSL modules require the OpenSSL library.You can either do not enable the modules, or install the OpenSSL libraryinto the system, or build the OpenSSL library statically from the sourcewith nginx by using --with-openssl=<path> option.configure end!root@ubuntu:/home/song/nginx-t/nginx-1.6.0# makemake: *** No rule to make target `build', needed by `default'. Stop.解决方法:a)可以安装sslapt-get install opensslapt-get install libssl-devb)也可以添加--with-openssl=<path>在执行make的时候可能出现错误2:/root/nginx_mod_h264_streaming-2.2.7/src/ngx__streaming_module.c: In function ‘ngx_streaming_handler’:/root/nginx_mod_h264_streaming-2.2.7/src/ngx__streaming_module.c:158: error: ‘ngx__request_t’ has no member named ‘zero_in_uri’make[1]: *** [objs/addon/src/ngx__h264_streaming_module.o] Error 1make[1]: Leaving directory `/root/nginx-0.8.54'make: *** [build] Error 2解决方法:那么将src/ngx__streaming_module.c文件中以下代码删除或者是注释掉就可以了:/* TODO: Win32 */if (r->zero_in_uri){return NGX_DECLINED;}在执行make的时候可能出现错误3:../nginx_mod_h264_streaming-2.2.7/src/mp4_reader.c: 在函数‘esds_read’中:../nginx_mod_h264_streaming-2.2.7/src/mp4_reader.c:377:16: 错误:变量‘stream_priority’被设定但未被使用[-Werror=unused-but-set-variable] ../nginx_mod_h264_streaming-2.2.7/src/mp4_reader.c:376:12: 错误:变量‘stream_id’被设定但未被使用[-Werror=unused-but-set-variable]../nginx_mod_h264_streaming-2.2.7/src/mp4_reader.c: 在函数‘stsd_parse_vide’中:../nginx_mod_h264_streaming-2.2.7/src/mp4_reader.c:529:22: 错误:变量‘level_indication’被设定但未被使用[-Werror=unused-but-set-variable] ../nginx_mod_h264_streaming-2.2.7/src/mp4_reader.c:528:22: 错误:变量‘profile_compatibility’被设定但未被使用[-Werror=unused-but-set-variable] ../nginx_mod_h264_streaming-2.2.7/src/mp4_reader.c:527:22: 错误:变量‘profile_indication’被设定但未被使用[-Werror=unused-but-set-variable] ../nginx_mod_h264_streaming-2.2.7/src/mp4_reader.c:526:22: 错误:变量‘configuration_version’被设定但未被使用[-Werror=unused-but-set-variable] cc1: all warnings being treated as errorsmake[1]: *** [objs/addon/src/mp4_reader.o] 错误1解决方法:# vim objs/Makefile (修改objs/Makefile文件, 去掉其中的"-Werror"), 然后就能够正常编译了.然后在make就能过了。