微型打印机说明书
- 格式:pdf
- 大小:1.27 MB
- 文档页数:46
SPRT®微型针式打印机使用说明书V1.2北京思普瑞特科技发展有限公司使用本产品前,请先阅读本手册并妥善保存以备后用2011年9月文件版本说明日期版本修订内容2008年 V1.0 /2010年 V1.1 增加DⅦ系列机型的相关内容2011年 V1.2 更改DⅦ开口尺寸目录目录 (3)产品简介 (5)第一章 特征与性能指标 (6)1.1 主要特征 (6)1.2 性能指标 (6)第二章 系统安装 (8)2.1 安装尺寸 (8)A机型图2-1 (8)T机型图2-2 (9)C机型图2-3 (9)DN机型图2-4 (10)DⅦ机型图2-5 (10)2.2 纸的安装 (11)A系列: (11)DⅦ系列: (14)2.3 电源连接 (16)第三章操作说明 (17)3.1 串行接口连接 (17)3.1.1 CF系列接口管脚定义 (18)3.1.2 DⅦ系列接口管脚定义 (18)3.1.3 其他系列(CF、DⅦ除外)接口管脚定义 (19)3.1.4 CF系列和TF系列串行口的设置 (19)3.1.5 DⅦ系列串行口的设置 (20)3.1.6 其他系列(CF、TF和DⅦ除外)串行口的设置 (21)3.2 并行接口连接 (23)3.3指示灯和按键操作 (24)3.4 自检测 (25)3.5 打印机初始化 (25)第四章 打印命令 (26)4.1 概述 (26)4.2 命令详解 (26)4.2.1 纸进给命令 (26)4.2.2 格式设置命令 (27)4.2.3 字符设置命令 (33)4.2.4 用户自定义字符设置命令 (37)4.2.5 图形打印命令 (39)4.2.6 初始化命令 (40)4.2.7 数据控制命令 (40)4.2.8汉字打印控制命令 (42)4.3 打印机默认参数设置指令 (45)4.3.1 进入、退出设置模式 (46)4.3.2 打印机基本参数设置 (46)第五章使用与维护 (48)5.1 机头维护 (48)5.2 其他 (48)第六章 打印机在WINDOWS下的使用 (48)附录1 有效代码表 (49)附录2 打印命令表 (51)产品简介SP系列针式微型打印机是北京思普瑞特科技发展有限公司面向二十一世纪而开发生产的点阵式智能打印机。
体积:102*78*46mm 重量:134g(含电池)充电:红灯充满:蓝灯重量:134g(含电池)充电:红灯充满:蓝灯9V9V充电:红灯充满:蓝灯9V纸仓切纸锯齿充电指示灯()报错指示灯电量显示灯开关按键走纸键模式键9V DC充电插槽USB 端口重量:192g(含电池)体积:107X75X51.5mm型号:58054.通信接口1. RS232(COM /串口):标准RS232串口通信协议。
2. USB :标准USB 通信协议。
3. 蓝牙2.0:通用蓝牙2.0通信协议。
4. 双模蓝牙:通用蓝牙2.0和蓝牙4.0协议。
纸拉出一小段至盒外,合上上盖。
用机器的刀口撕掉多余的纸卷。
将打印体积:1重量:型号:580充电:红灯充满:蓝灯未连接:灭连接:亮(绿)步:在安卓设备“桌面”找到“ ”图标,然后打开 点击“连接”,然后搜索蓝牙打印机,配对好密码(蓝连接成功后,屏幕会提示打开机连接设备连接成功,点击“打印测试页”,打印机将工作。
连接成功,如图所示选择搜索到的蓝牙名称BlueTooth Printer,输入配对码,默认是1234或者0000,点击确定连接成功,在编辑框中输入要打印测试的内容(中英文都可以)。
打开苹果手机蓝牙后,再打开刚下好的“POS-Printer”软件。
点击“选择打印机”后启动蓝牙,蓝牙启动成功,可看到电脑右下方显示 图标。
点击 图标,然后点“添加Bluetooth 设备”,进入下一画面, 勾选“我设备已经设置并且准备好,可以查找”,然后点“下一步” (如图)。
把蓝牙打印机打开(通电)。
如果电脑进入如图画面,说明电脑正在搜寻蓝牙设备,请等待。
选中“让我选择自己的密钥”,输入配对码”1234”,然后点“下一步”。
当出现如下画面,说明蓝牙打印机已经配对成功,请记住分配给COM(串行)端口。
、请详细阅读软件条款说明,选择接受并继续安装,如下图所示:、点击“下一步”操作之后出现如下图(客户可以修改驱动安装的路径也 可以选择默认的路径)、再点击“下一步”操作之后出现如下图,择“安装”,如果您的电脑装有杀毒软件等,出现阻止安装的窗口请允许此操作、等待安装完成之后出现如下界面,选择符合你的计算机的操作系统,然后 在选择打印机的型号(POS58系列打印机),如果您使用USB端口检测”会自动识别电脑USB接口,点击下一步继续安装,如下、点击开始安装,出现如下图所示的框,选择 安装 或者‘始终安装此驱动 程序软件’:1920请在端口列表中选择“COM1”→“配置端口”, 打印机出厂默认设置如下如果打印机打印一个正常的页面,那么它表明工作成功。
微型打印机说明书1. 引言1.1 目的1.2 范围2. 打印机概述2.1 功能特点- 高精度打印功能,可实现细节丰富的图像和文字输出。
- 小巧便携设计,方便随身携带并使用。
- 多种连接方式(如蓝牙、USB等),与各类设备兼容性强。
3. 硬件规格及配置要求3 .l 主要硬件参数:a) 分辨率:XXX dpi;b) 打印速度:XX mm/s;c) 连接方式:支持蓝牙4.O, USB;l.l 最低系统需求:a)操作系统: Windows XP/Vista/7/8/10; Mac OS Xv10以上版本;Android/iOS.b)CPU : Intel Core i5或更高级别处理器 ;c ) 内存:至少4GB RAM ;4.软件安装指南此章节详细介绍了如何在不同操作系统上正确地安装驱动程序以使得微型打开能够正常工作。
包括以下内容:- 安装步骤及注意事项5.基本操作指引在此章节中将描述一些最基本但重要的用户界面和操作说明,以帮助用户快速上手使用微型打印机。
包括以下内容:- 打开/关闭设备- 连接到其他设备的步骤(如蓝牙连接)- 软件界面介绍及功能解释6.高级功能指南本章节将详细描述一些更复杂但实用的高级功能,并提供相应的操作指引。
这些特性可能需要较长时间来掌握并正确地运行。
- 图像编辑与调整- 文字样式设置- 纸张尺寸选择7. 常见问题解答在此章节中了常见问题及其解决方案,旨在帮助用户自己排除故障或遇到困惑时找到相关信息。
8. 法律名词及注释a) 版权:版权是对作品、表演等所享有专属利益支配权力;9. 附件10 . 结束语感谢您阅读我们为您准备的微型打印机说明书!如果还有任何疑问,请联系客服人员获取进一步咨询和技术支持。
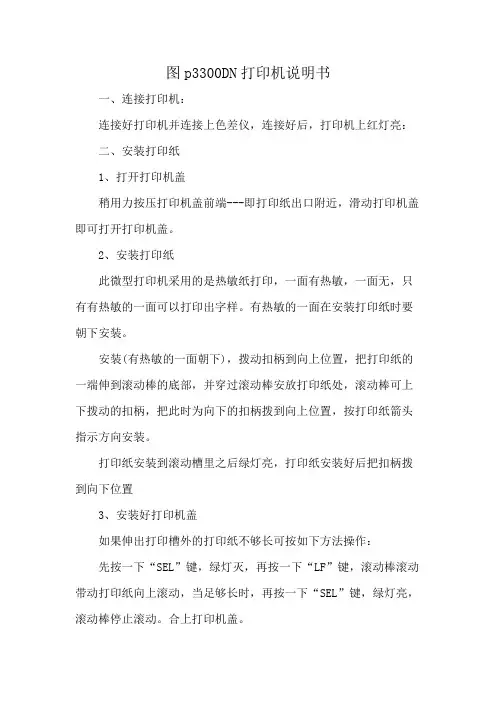
图p3300DN打印机说明书
一、连接打印机:
连接好打印机并连接上色差仪,连接好后,打印机上红灯亮:
二、安装打印纸
1、打开打印机盖
稍用力按压打印机盖前端---即打印纸出口附近,滑动打印机盖即可打开打印机盖。
2、安装打印纸
此微型打印机采用的是热敏纸打印,一面有热敏,一面无,只有有热敏的一面可以打印出字样。
有热敏的一面在安装打印纸时要朝下安装。
安装(有热敏的一面朝下),拨动扣柄到向上位置,把打印纸的一端伸到滚动棒的底部,并穿过滚动棒安放打印纸处,滚动棒可上下拨动的扣柄,把此时为向下的扣柄拨到向上位置,按打印纸箭头指示方向安装。
打印纸安装到滚动槽里之后绿灯亮,打印纸安装好后把扣柄拨到向下位置
3、安装好打印机盖
如果伸出打印槽外的打印纸不够长可按如下方法操作:
先按一下“SEL”键,绿灯灭,再按一下“LF”键,滚动棒滚动带动打印纸向上滚动,当足够长时,再按一下“SEL”键,绿灯亮,滚动棒停止滚动。
合上打印机盖。
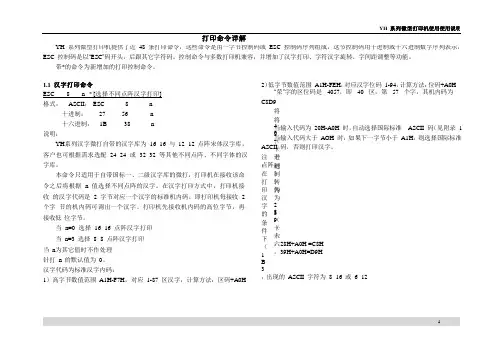
打印命令详解YH 系列微型打印机提供了近48 条打印命令,这些命令是由一字节控制码或ESC 控制码序列组成,这节控制码用十进制或十六进制数字序列表示,ESC 控制码是以“ESC”码开头,后跟其它字符码。
控制命令与多数打印机兼容,并增加了汉字打印、字符汉字旋转、字间距调整等功能。
带*的命令为新增加的打印控制命令。
1.1 汉字打印命令ESC 8 n * [选择不同点阵汉字打印]格式:ASCII: ESC 8 n十进制:27 56 n十六进制:1B 38 n说明:YH系列汉字微打自带的汉字库为16×16 与12×12 点阵宋体汉字库,客户也可根据需求选配24×24 或32×32 等其他不同点阵、不同字体的汉字库。
本命令只适用于自带国标一、二级汉字库的微打,打印机在接收该命令之后将根据n 值选择不同点阵的汉字。
在汉字打印方式中,打印机接收的汉字代码是 2 字节对应一个汉字的标准机内码,即打印机每接收 2 个字节的机内码可调出一个汉字。
打印机先接收机内码的高位字节,再接收低位字节。
当n=0 选择16×16 点阵汉字打印当n=3 选择8×8 点阵汉字打印当n为其它值时不作处理针打n 的默认值为0。
汉字代码为标准汉字内码:1)高字节数值范围A1H-F7H,对应1-87 区汉字,计算方法:区码+A0H 2)低字节数值范围A1H-FEH,对应汉字位码1-94,计算方法:位码+A0H 例:“荣”字的区位码是 4057,即 40 区,第 57 个字,其机内码为C8D9将40(十进制)转为28(十六进制),28H+A0H =C8H将57(十进制)转为39(十六进制),39H+A0H=D9H当输入代码为20H-A0H 时,自动选择国际标准ASCII 码(见附录1)当输入代码大于AOH 时,如果下一字节小于A1H,则选择国际标准ASCII 码,否则打印汉字。
注:在打印汉字的条件下(1B38n),出现的ASCII 字符为8×16 或6×12点阵。

Micro Dot PrinterM-150IISpecificationSTANDARDRev. No.BNotesCopied Date, ,Copied bySEIKO EPSON CORPORATIONMATSUMOTO MINAMI PLANT2070 KOTOBUKI KOAKA, MATSUMOTO-SHI, NAGANO, 399-8702 JAPAN PHONE(0263)86-5353 FAX(0263)86-9923Sheet 1 of 2 The table below indicates which pages in this specification have been revised.Before reading this specification, be sure you have the correct version of each page.Revisions Design Section Sheet Rev. No.Rev.Document WRT CHK APL Sheet Rev.Sheet Rev.Sheet Rev.--Enactment Tezuka--Mori I A1Change Tezuka--Tamai II A2Change Tezuka--Tamai III AA Change Aoki Narita Arai IV BB Change1B2B3B4A5A6A7A8B9A10A11A12A13A14A15ATITLE Front PartM-150IISpecification CoverRev.Sheet ScopeGeneralDescriptionTable ofContents Contents Appendix Total(STANDARD)12--3115--22Sheet 2 of 2 REV.SHEET CHANGED CONTENTS11 1.3 Print Speed “Print condition” is added.1.5 Paper Paper width is “44,5mm”, was “45mm”1.11 Print solenoid “Terminal voltage” is changed.4 2.3 Ribbon cassette “Life” is added.“Print condition “ is added.6 2.6 2) Wave form, Phase“TYP.0.6ms” is added.“MIN. 0.2ms” is added.8 2.8 Print solenoid “Terminal voltage” is changed.3) Current “Current value” is “3A”, was “2.5A”.8) Spark Killer “Prepared by the customer side refer the circuit and case designrecommendations.”9Note: Note 1 is “t1 =t2 ≤ 50 µs”, was “t1 =t2 ≤ 28 µs”.3,12,13Column number is “1 column, 2 column, 3 column --- from left side”, was “1 column, 2 column, --- from right side”.14 2.11 “Overall Dimensions” is changed.15“Attached Table 1” is added.26 2.6 2) Pulse Wave form, Phase“MAX 2.5 ms” is added.2.7 2) “stopping at abnormality” is added.8 2.8 9) “protection of Solenoid at abnormality” is added.9Max 2.5 ms is added.All All pages are re-formatted due to add the “Confidential” in the header.A5 2.5 1) Timing Pulse “threshold level to be 0 ± 0.1 V”, was “threshold level to be 0 ± 1 V”2.5 2) Output Waveform Sample circuit is deleted.6 2.7 1) Driving and Stopping Sample circuit is deleted.BIV Table of Contents1.16 Weight → 1.16 Mass1 1.3 Print Speed1 l/s → 1 lps (lps: lines per second)2 1.16 Weight → 1.16 Mass3In Figure [Units: mm] (added)8 2.8 Print Solenoid3 mj/dot → 3 mJ/dotTITLEM-150IISpecification(STANDARD)Points You Must Observe To Assure Product SafetyIn order to assure the safe operation of this product, carefully observe thespecifications as well as the notes provided below.Seiko Epson Corporation will not bear any responsibility for any damage orinjuries arising from use of this product that is not in accordance with thespecifications and the notes provided below.Printer Control Precautions1. Absolute Maximum voltage1) Printer driver voltage: 5 VDC(Apply to the print solenoid, and motor.)2) Detector input voltage: 20 VDC(Apply to the reset sensor.)2.When designing drive circuitry for solenoids, motors, magnets, and other electrical parts, alwaysprovide for proper energizing time limit control and include overcurrent protection.1) MotorThe motor is DC brush motors which can be short-circuited and must there fore be protectedusing a fuse that is properly matched to the power supply.2) Print solenoidThe energizing time must not always exceed 1 second.3) Reset sensorThe input voltage must not exceed the maximum rating of the sensor.Usage Precautions•Because the print head can become very hot, it must not be exposed in such a way that it can be touched.Touching the print head could cause burns.•The case must be designed so that movable parts such as gears, etc., are not exposed.Touching moving parts could cause a laceration or other injury.CONFIDENTIALITY AGREEMENTBY USING THIS DOCUMENT, YOU AGREE TO ABIDE BY THE TERMS OF THIS AGREEMENT. PLEASE RETURN THIS DOCUMENT IMMEDIATELY IF YOU DO NOT AGREE TO THESE TERMS.1.This document contains confidential, proprietary information of Seiko Epson Corporation or its affiliates.You must keep such information confidential. If the user is a business entity or organization, you must limit disclosure to your employees, agents, and contractors who have a need to know and who are also bound by obligations of confidentiality.2.On the earlier of (a) termination of your relationship with Seiko Epson, or (b) Seiko Epson's request, youmust stop using the confidential information. You must then return or destroy the information, asdirected by Seiko Epson.3.If a court, arbitrator, government agency or the like orders you to disclose any confidential information,you must immediately notify Seiko Epson. You agree to give Seiko Epson reasonable cooperation and assistance in the negotiation.4.You may use confidential information only for the purpose of operating or servicing the products to whichthe document relates, unless you obtain the prior written consent of Seiko Epson for some other use. 5.Seiko Epson warrants that it has the right to disclose the confidential information. SEIKO EPSONMAKES NO OTHER WARRANTIES CONCERNING THE CONFIDENTIAL INFORMATION OR ANY OTHER INFORMATION IN THE DOCUMENT, INCLUDING (WITHOUT LIMITATION) ANYWARRANTY OF TITLE OR NON-INFRINGEMENT. Seiko Epson has no liability for loss or damage arising from or relating to your use of or reliance on the information in the document.6.You may not reproduce, store, or transmit the confidential information in any form or by any means(electronic, mechanical, photocopying, recording, or otherwise) without the prior written permission of Seiko Epson.7.Your obligations under this Agreement are in addition to any other legal obligations. Seiko Epson doesnot waive any right under this Agreement by failing to exercise it. The laws of Japan apply to thisAgreement.Cautions1.This document shall apply only to the product(s) identified herein.2.No part of this document may be reproduced, stored in a retrieval system, or transmitted in any form orby any means, electronic, mechanical, photocopying, recording, or otherwise, without the prior written permission of Seiko Epson Corporation.3.The contents of this document are subject to change without notice. Please contact us for the latestinformation.4.While every precaution has been taken in the preparation of this document, Seiko Epson Corporationassumes no responsibility for errors or omissions.5.Neither is any liability assumed for damages resulting from the use of the information contained herein.6.Neither Seiko Epson Corporation nor its affiliates shall be liable to the purchaser of this product or thirdparties for damages, losses, costs, or expenses incurred by the purchaser or third parties as a result of: accident, misuse, or abuse of this product or unauthorized modifications, repairs, or alterations to this product, or (excluding the U.S.) failure to strictly comply with Seiko Epson Corporation's operating and maintenance instructions.7.Seiko Epson Corporation shall not be liable against any damages or problems arising from the use ofany options or any consumable products other than those designated as Original EPSON Products or EPSON Approved Products by Seiko Epson Corporation.TrademarksEPSON® is a registered trademark of Seiko Epson Corporation.General Notice: Other product and company names used herein are for identification purposes only and may be trademarks of their respective companies.SummaryM-150II is the mechanical dot printer, whose Print Head consists of 4 Print Solenoids laying horizontally and moves for 24 dots horizontally. Print Head which moves horizontally prints unidirectionally as each Print Solenoid of it is energized in order.When Print Head return, paper is fed for 1 pitch automatically. By repetition of this dot line printing and paper feed desired Print Format can be obtained.It is characterized by the following features:1.Clear dot printing2.Small-side, Light weight (60 g) and Super thin thickness (12.8 mm)3.44.5 mm width normal paper4.Ni-Cd Battery Drive5.Low priceTable of Contents1. GENERAL SPECIFCATIONS (1)1.1 Printing Method (1)1.2 Printing Format (1)1.3 Print Speed (1)1.4 Character Size (1)1.5 Paper (1)1.6 Paper Feed (1)1.7 Inking (1)1.8 Motor (1)1.9 Timing Detector (1)1.10 Reset Detector (1)1.11 Print Solenoid (1)1.12 Connection (2)1.13 Ambient Temperature Operating (2)1.14 Reliability (2)1.15 Dimensions (2)1.16 Mass (2)2. DETAIL SPECIFICATIONS (3)2.1 Print Format (3)2.2 Paper Feed (4)2.3 Ribbon Cassette (4)2.4 Paper (4)2.5 Timing Detector (5)2.6 Reset Detector (6)2.7 Motor (6)2.8 Print Solenoid (8)2.9 Terminal Assignment (10)2.10 Time Chart (11)2.11 Overall Dimensions (14)Attached Table 1 Print Mode (15)1. GENERAL SPECIFCATIONS1.1 Printing MethodImpact Dot Matrix Printer1.2 Printing Format1)Number of Total Dot:Max. 96 dots/1 dot line2)Number of Column:Max. 16 columns(In case of 5 × 7 dot matrix and 1 dot column space)1.3 Print Speed1)1 Dot Line:Approximately 100 ms (continuous printing, 4.5 VDC, 25°C)2)5 × 7 dot Matrix:Approximately 1 lps (continuous printing, 4.5 VDC, 25°C)(3 dots line space)(lps: lines per second)1.4 Character Size1)Dot Space :Horizontal 0.35 mmmmVertical 0.352)5 × 7 Dot Matrix: 1.8 (W) × 2.5 (H) mm1.5 Paper44.5 mm width woodfree paper1.6 Paper FeedPaper is fed automatically per dot line. With a manual feed knob (option).1.7 InkingRibbon CassetteRibbon is fed automatically during Motor revolution.1.8 Motor1)Terminal Voltage: 4.5 +0.5/–0.7 VDC2)Mean Current:Approximately 0.17 A (4.5 VDC, 25°C)1.9 Timing DetectorTachometer−Generator (directly connected with motor)1.10 Reset DetectorReed-Switch1.11 Print Solenoid 4 columns / sol. × 4 pcs. of solenoids1)Terminal Voltage: 4.5 +0.5/–1.2 VDCNOTE:Print Solenoid terminal voltage and Motor terminal voltageshould satisfy the voltage relationship which is shown in item2.8.1.)2)Ohmic Resistance: 1.5 ± 0.15 Ω (at 25°C)1.12 Connection1)Printer side:P.C. Board with 2.54 mm pitch copper leaf pattern that is fixed onprinter frame.2)Circuit side:Cable or Lead wires1.13 Ambient Temperature Operating0 to 50°C1.14 ReliabilityMCBF 5 × 10⁵ limes1.15 Dimensions73.2 (W) × 42.6 (D) × 12.8 (H) mm1.16 MassApproximately 60 g2. DETAIL SPECIFICATIONS2.1 Print FormatPrint Head consists of 4 Print Solenoids (A. B. C. D) which are laid horizontally. Print Head moves to right direction from left side on stand-by condition. Moving amount of Print Head is 24 dots per Print Solenoid. One dot line is formed by energizing Print Solenoid one by one as Print Head is moving.Number of total dots per dot line is 96 dots (24 dots × 4 Print Solenoids)1)5 × 7 Dot MatrixDivide 24 dots which one Print Solenoid is printable into four equal parts. And 6 dots in one part are used as one column; That is 5 dots for printing and one dot for column space. Accordingly one dot line is formed of 96 dots which are divided into 16 parts and 5 × 7 dot matrix character can be got by repeating 7 times in the direction of paper feed. Number of columns is 16.(5+1) × 16 = 96 dots/1 dot linePrint SolenoidColumn space 1 dotEPSONTITLESHEET REVISIONNO.SHEETNEXTAM-150II Specification (STANDARD)542.2 Paper Feed1)One dot line Feed:Paper is fed automatically for 0.35 mm (one pitch) when Print Head is returned to left from right side.2)Space Feed:Line space feed is done by feeding one dot line continuously.3)Paper Free Mechanism:Paper can be pulled out forward when the printer is in the halted state.4)Manual Paper Feed Knob:Option2.3 Ribbon Cassette1)Color:Purple or Black2)Dimensions:Approximately 74 (W) × 25 (D) × 7 (H) mm3)Life:Purple Approximately 1 × 10⁴lines (4.5 VDC 25°C continuous printing)Black Approximately 7 × 10³lines (4.5 VDC 25°C continuous printing)(Life test is done with print mode in Attached Table 1.)4)Parts number:EPSON ERC-052.4 Paper1)Kind:Woodfree paper 2)Width:44.5 ± 0.5 mm 3)Diameter:Max. φ50 mm4)Thickness:Approximately 0.07 mm5)Basis weight:52.3 g/m 2(141 b/ 500 sheet /17 × 22")EPSONTITLESHEET REVISIONNO.SHEETNEXTAM-150II Specification (STANDARD)652.5 Timing DetectorTiming Detector is tachometer-generator that is directly connected with motor. Detector generates 168output signals per dot line; 96 output signals correspond to dot position of Print Head and 72 output signals correspond to Print Head return. These output signals are arranged in a pulse wave form on the customer side, and are used as Timing Pulse.1)Timing Pulse:Timing Pulses should be obtained for threshold level to be 0 ± 0.1 V of Timing Detector output signal.2)Output Waveformdenotes the signal to be generated by the customer side.EPSONTITLESHEET REVISIONNO.SHEETNEXTAM-150II Specification (STANDARD)762.6 Reset DetectorReset Detector has Lead-switch that makes at each time of dot lines. Reset Detector output signal is used as Reset Signal which denotes standard position of dot position at each time of print cycles.1)Rating:Voltage 2.85 – 20 VDC Current20 µA – 1 mAInstantaneous power5 mW or less (Resistance load)2)Pulse waveform, phaseNOTES 1.denotes the signal to be generated by the customer side.2.During motor steady driving (except for period from motor starting to generation of Reset signal R 1)2.7 Motor1)Driving and StoppingThe motor is in the halted state when the printer is in the stand-by state (i.e., non-printing condition).Application of electric brake to quickly stop the motor must be performed by interrupting Motor Drive signal within 0.5 ms after the leading edge of Reset signal Rn (Rn is R 10 in case of 5 × 7 dot matrix and 3dots line space.), and applying the Motor stop signal more than 100 ms, and short-circuiting a cross theMotor terminals with a transistor.2)Stopping at abnormalityMotor driving signal is cut off before the interval of timing pulse (Tn - Tn+1) is performed more than 1second.EPSONTITLESHEET REVISIONNO.SHEETNEXTAM-150II Specification (STANDARD)873)Terminal Voltage: 4.5 +0.5/–0.7 VDC4)Currenta)Peak Current:Approximately 0.8 A (4.5 VDC, 25°C)(Worst case 1.2 A or less)b)Mean Current:Approximately 0.17 A (4.5 VDC, 25°C)c)Current wave form(s)2.8 Print SolenoidDot Print is done by energizing Print Solenoid.1)Terminal Voltage:4.5 +0.5/–1.2 VDCPrint Solenoid terminal voltage and Motor terminal voltage should satisfy the voltage relationship of the extent of an oblique line in the following figure.Print Solenoidterminal voltage (V)Motor terminal voltage (V)5.04.33.83.35.03.82)Ohmic Resistance: 1.5 ± 0.15 Ω (at 25°C)3)Current: 3 A / Print Solenoid (Peak current)4)Pulse Width:Form the leading edge of Timing signal Tn to the leading edge ofTiming signal Tn+1 (See following figure)5)Watt consumption: 3 mJ/dot 6)Energizing Duty:1/47)Continuous Energizing:One Print Solenoid can be energized continuously by 400 dot lines (24 ×400 = 9600 dots). But it is necessary to take non-printing time longer than continuous energizing time.8)Spark Killer:Prepared by the customer side refer the M-150II designer’s guide.9)Protection of solenoid at abnormality:Energizing pulse to solenoid should be cut off less than 1 sec.EPSONTITLESHEET REVISIONNO.SHEETNEXTAM-150II Specification (STANDARD)109denotes the signal to be generated by the customer side.NOTES: 1.t 1 = t 2 ≤ 50 µs2.In case of printing 5 × 7 matrix character, Print Solenoid A is energized with Print Pulse Pn which has Pulse width of Timing signal Tn to Tn+1, and next Print Solenoid B is energized with Print Pulse Pn+1 which has Pulse width of Timing signal Tn+1 to Tn+2. In the same way Print Solenoid C is energized with Print Pulse Pn+2, Print Solenoid D is energized with Print Pulse Pn+3, and the Print Solenoid A is energized with Print Pulse Pn+4 again.As upper mentioned four Print Solenoids should be energized according to the order of Print Solenoid A, B, C, D.3.Max. 2.5 ms:During motor steady driving (except for period from motor starting to generation of Reset signal R1)EPSONTITLESHEET REVISIONNO.SHEETNEXTAM-150II Specification (STANDARD)11102.9 Terminal AssignmentNOTE:Terminal numbers are 1, 2, ...... 11 from left side of cupper leaf patern of P.C. Board. (See2.11 Overall Dimensions)ConfidentialEPSONTITLESHEET REVISIONNO.SHEETNEXTAM-150II Specification (STANDARD)12112.10 Time Chart1)Time Chart Diagram (5 × 7 Dot Matrix, 3 dots line space)<S c a l e e n l a r g e d >P a N O T E : d e n o t e s t h e s i g n a l t o b e g e n e r a t e d b y t h e c u s t o m e r s i d e .EPSONTITLESHEET REVISIONNO.SHEETNEXTAM-150II Specification (STANDARD)13122)Detail Timing Pulse distribution ( 5× 7 Dot Matrix, 3 dots line space)Pn = Tn – Tn+1 (Pn; Print Pulse, Tn; Timing Pulse)EPSONTITLESHEET REVISIONNO.SHEETNEXTAM-150II Specification (STANDARD)1413Print Solenoid A is energized with Print Pulse P1 of Timing Pulse T1 to T2, and the left-upper-most dot of first column character is printed. Next Print Solenoid B is energized with Print Pulse P2 of Timing Pulse T2 to T3, and the left-upper-most dot line of 5th column characters is printed. Upper-mentioned control is done in order, and Print Solenoid D is energized with Print Pulse P92 of Timing Pulse T92 to T93, and the right-upper-most dot of 16th column characters is printed.Column space of 4th, 8th, 12th and 16th column are kept one dot, and Print Head is returned to home position between Timing signal T96 and T168. And paper is fed automatically one dot. Upper-mentioned movement is done continuously through 7 dot lines, and Print Solenoid D is energized with Print Pulse P1100 of Timing Pulse T1100 to T1101, and the right-down-most dot of 16th column characters is printed. And printing of 5 × 7 dot matrix character has completed. Next, to keep 3 dots line space, paper is fed in 3 dots line; that is 8, 9, and 10 dot line, and one print cycle has completed at Timing signal T1680.3)Discrimination of R1 and R signalAfter the motor is started by applying Motor Drive Signal, Timing Signal should be counted. The Reset Signal after 63 times of Timing Signal counting should be set as R1 signal. After R1 signal is set, the Reset Signal from R2 to Rn is set as same as R1 signal is set. Initial setting to confirm that Print Head is set at the stand-by state is completed by detecting R1 signal. Timing signal T1 that shows standard dot position of each one print cycle is determined by detecting R1 signal.4)Continuous printing or continuous Paper feedIt is performed by applying Motor Drive Signal continuously without interrupting Motor Drive Signal.5)Reset SignalReset Signal does not sometimes make at stand-by state.NOTES: 1.More than 63 Timing Pulses are generated between Motor starting and generation of R1signal.2.Term of energizing Print Solenoid prohibitted1)From Motor starting to the leading edge of R1 signal (from Motor starting to regular revolution)2)From Timing Signal T97+168n to T168+168n (n = 0∼10, 5 × 7 dot matrix, 3 dots line space)3.Print Solenoid Print Pulse should not be energized and interrupted with electric noise.4.After the Reset Signal R1 is confirmed per each one print cycle, count of Timing Signal should be cleared per each one print cycle.ConfidentialAttached Table 1 Print Mode0123456789:;<=>?123456789:;<=>?@23456789:;<=>?@A 3456789:;<=>?@A B 456789:;<=>?@A B C 56789:;<=>?@ABCD 6789:;<=>?@ABCDE 789:;<=>?@ABCDEF 89:;<=>?@ABCDEFG 9:;<=>?@ABCDEFGH :;<=>?@ABCDEFGHI ;<=>?@ABCDEFGHIJ <=>?@ABCDEFGHIJK =>?@ABCDEFGHIJKL >?@ABCDEFGHIJKLM ?@ABCDEFGHIJKLMN @ABCDEFGHIJKLMNO ABCDEFGHIJKLMNOP BCDEFGHIJKLMNOPQ CDEFGHIJKLMNOPQR DEFGHIJKLMNOPQRS EFGHIJKLMNOPQRST FGHIJKLMNOPQRSTU。
用户手册MP-310T高速热敏微型打印机安全指引请在使用本产品前仔细阅读本手册,不要执行本手册中没有明确说明的操作。
未经授权的操作会导致错误或意外。
制造商对因错误操作而导致打印机出现的任何问题均不负责。
请严格遵守标示在打印机上的所有警告和指导。
热敏打印头是精密电子部件,任何时候不要用手直接碰触热敏打印头。
安装卷纸的时候,不要用手指触摸锯齿状的手动切纸刀。
请勿带电或用酒精等化学用品清洁打印机。
如需清洁,请先把电源插头拔下,用微湿的柔软布料擦拭。
请勿在容易被液体溅到的地方使用打印机。
请勿堵塞机壳上的小槽或开孔。
不要把打印机放在睡床、沙发、地毯或其它类似物品的表面,以防堵塞通风孔。
如果打印机被置于比较拥挤的环境中工作,应采取相应的通风措施。
打开包装之前,应考虑好放置打印机的位置。
应选择一个平稳的台面或坚固的打印机台架,并要确保打印机周围有足够的空间,以便纸张容易进出。
避免与其他大功率电器或容易引起电压波动的电器设备使用同一交流电源插座。
将整个计算机系统远离可能引起电磁干扰的器件,例如扬声器或无线电元件。
请勿把电源线放在容易被踩到的地方。
如果电源线或电源插头已破损或断裂,请马上停止使用并更换新部件。
避免把打印机放在温度和湿度变化较大的地方,如:阳光直射、靠近热源、多尘或多油烟的地方。
为防止触电或引起短路,请勿把任何物体从打印机通风孔推入机体内。
请勿自行检修打印机,或打开打印机的外壳,以免触电或产生其它危险。
如需检修应找专业维修人员。
联接或拔除电源线及数据线时,请确保电源开关处于OFF状态。
在不用打印机时,应关闭打印机电源并拔掉电源线。
外接插座应安装在接近打印机的地方。
出现以下情况时,请拔掉打印机电源线,并与专业维修人员联系:A:当电缆或插头损坏、磨损时。
B:当有液体溅入机内时。
C:当打印机被雨淋湿或进水时。
D:当遵从操作手册操作,机器却不能正常工作时。
E:当机器被摔落,造成机壳损坏时。
F:当打印机特性明显变坏,需要维修时。
HTHL-100P高精度回路电阻测试仪微型打印机操作说明1.更换纸卷第一步:按下圆按钮将打印机前盖打开,把剩下的纸芯取出,如图31所示。
图31 打开前盖第二步:放入新纸卷,如图32所示。
HTHL-100P高精度回路电阻测试仪图32 放入纸卷第三步:拉出一部分纸头,放在居中位置,合上前盖,如图33所示。
图33 合上前盖注意:合上前盖时要让纸从出纸口中伸出一段,让胶轴将纸卷充分压住,否则无法打印。
热敏式打印机上纸时,必须确认热敏打印纸的热敏涂层在上面,再将热敏纸放入打印机仓,如果热敏图层不在上面打印不出字迹。
如果出现打印纸走偏现象,可以重新打开前盖,调整打印纸位置。
2.指示灯和按键操作打印机面板上有两个透明按键,分别标有SEL(选择)和LF(走 HTHL-100P高精度回路电阻测试仪样)字样。
SEL透明按键同时还可以显示红色状态,LF透明按键同时还可以显示绿色状态。
红色指示灯的亮灭表示打印机在线/离线状态,绿色指示灯常亮表示打印机已通电。
通电后绿色指示灯常亮,如没有上好打印纸,红色指示灯间歇闪两下。
上好打印纸后红色指示灯常亮。
在线/离线状态选择:上电后或退出自检测方式后,打印机进入在线工作状态,红色指示灯亮;按一下SEL键后,红色指示灯灭,进入离线工作状态;再次按一下SEL键后,红色指示灯亮,又重新进入在线工作状态。
离线时,打印机不再接收来自主机的数据。
SEL键的另一个功能是在打印过程中实现暂停,即在打印过程中按一下SEL键后,红色指示灯灭,打印机在打印完当前一行文字后,会暂停下来,此时可以进行走纸操作。
再次按下SEL键,红色指示灯亮,打印机又继续打印。
走纸操作:在离线状态下,按一下LF键,打印机将空走纸不打印;再按一下LF键,打印机停止走纸。
在走纸方式下,按一下SEL键打印机可直接进入在线方式。
自检测操作:打印机自检测样张,有两种操作方法:第一种:通电前,先按住SEL键再接通电源,待一秒钟后松开SEL键,打印机打出自检测样张;第二种:打印机处于通电状态下,如果当前红色指示灯亮,则先按住SEL键使等熄灭(如果当时指示灯不亮,可省去此步),然后按 HTHL-100P高精度回路电阻测试仪住LF键同时再按下SEL键,则可打印出自检测样张。
炜煌微型打印机说明书概述WH-E系列本安型防爆微型打印机,是针对室内外恶劣环境和易燃易爆区开发的研制的微型打印机.防爆标志:Exib IIBT4防爆合格证号:本安型防爆微型打印机包括(WH-E092R101-00E007PTGA ,WH-E093R101-00E0072TGA)防爆性能:符合GB3836.1-2000和GB3836.4-2000国家标准的有关要求.本产品已应由已取得防爆合格证的,防爆等级不低于ExibIIB的安全栅给产品供电及通讯。
第一部分 性能指示1、打印方法: 直接热敏打印2、打印纸宽: 57.5±0.5mm3、打印密度: 8点/mm,384点/行http://www. - 1 -炜煌热敏打印机说明书4、打印头寿命: 6×10⁶字符行5、有效打印宽度: 48mm6、走纸速度: 25%的字符率的情况下为50mm/s7、打印字符:6*8点阵西文字符集1、2;20h—7fh间的标准ASCII码半角字符。
国标一、二级汉字(16*16点阵、24*24点阵两种,可根据需要选用不同点阵类型的打印机)8、接口形式: 并行接口 20针插座,TTL电平串行接口 10针插座,232电平9、 操作温度: 5~50℃10、操作相对湿度: 10~80%11、储存温度: -20~60℃12、储存相对湿度: 10~90%13、电源: DC3.5V-9V 15Whttp://www. - 2 -炜煌微型打印机说明书14、防爆等级:Exib IIBT4产品最大输入参数:第二部分 操作说明2.1 并行接口连接2.1.1接口与引脚定义并行接口插座引脚序号如下图所示:http://www. - 3 -炜煌热敏打印机说明书并行接口插座引脚序号IDE 20针并行接口各引脚信号的定义如下图表所示:http://www. - 4 -炜煌微型打印机说明书2.1.2 并行接口引脚信号时序并口时序如下图所示:炜煌热敏打印机说明书并行接口信号时序图2.2.1串行接口引脚定义本系列打印机串口电平标准为两种:TTL电平与232电平,当设为232电平时,其串口与标准RS-232接口兼容。
匡亘鬻萤雯匝墅豳因嵌入式系统应用文童编"目':1008-0570(2007)10-.-2-0015--03基于增强型单片机的针式微型打印机MicroDotPr|nterbaseonstrongMCU(中国矿业大学)刘大伟李威王禹桥蔡文娟LIUDAWEILIWEIWANGYUQIAOCAIWENJUAN摘薯:本文在分析微型打印机机芯M15011结构的基础上,详细介绍了竹点式氍型打印机的骚动原理.提出了一种以增强型单片机STCl2C5412AD为橱心的擞型打印机设计方案。
本文在打印同步信号检测、字库芯片的连用、不同电平信号器件的混夸接口、通讯挂口、系统EMc性髓等方面较现有钟点式饭型打印机系统有所创前和改进。
这种基于坩强型单片机的微型打印机系统设计,不仅具有盘}好的打印速度和打印效果,还大大地简化了硬件电路。
节约了成奉。
为用户提供了一种低成奉、·高可靠性的产品。
美键词:增强型单片机;嵌入式系统;微型打印机;SPIFlash;电磁兼窖中图分类号:1T216文献标识码:BAbstract:lketheana]yslsofthestrtlctttreofM150II.thispaperintroducedthedriveprincipleoftheMieroDotPrinterandputforwarda口l如abouthowtodesignaMicmD0tPrinterwiththestrungMCU眦12C5412AD越山eCOi*E.11li8atticlehasgreatin.novationandtheimprovementrelativetoexistingMicroDotPrinterIⅡtheprintingsynchronizedsignaldetecfion.intlleselection0fflashchip,inthemixconnectionofdifferent缸即_allevd,incommunicationinterfaceandinEMCpedormanceofsystem,etc.11】i8kiM。
便携热敏打印机开发手册V1.2本手册适用于:M07,M08,M09,M102016-12-29版本控制信息目录版本控制信息 0目录 (I)第1章安全信息............................................................................................................ V I1.1 读者 (vi)1.2 关于本手册 (vi)1.3 安全上的注意事项 (vi)1.3.1 人身伤害 (vi)1.3.2 无线电波管制 (vi)1.3.3 纸卷规格 (vi)1.3.4 开纸仓 (vi)1.3.5 专用配件 (vi)1.3.6 拆卸 (vi)第2章概述 (7)2.1 特点 (7)2.2 性能指示 (7)第3章操作说明 (9)3.1 结构图 (9)3.2 开机 (9)3.2.1 电源键开机 (9)3.3 关机 (9)3.3.1 电源键关机 (9)3.3.2 超时自动关机 (9)3.4 休眠 (10)3.5 唤醒 (10)3.6 走纸 (10)3.7 自检 (10)第4章打印机参数设置 (11)4.1 自检 (11)4.3 设置向导 (11)第5章状态指示 (14)5.1 开机提示 (14)5.2 关机提示 (14)5.3 工作状态指示 (14)5.4 少纸状态指示 (14)5.5 参数设置状态指示 (14)5.6 电池电量显示 (14)5.7 充电指示 (15)5.8 打印头过热提示 (15)5.9 电池电量低提示 (15)第6章USB接口 (16)6.1 USB接口打印机 (16)6.2 USB+为打印机供电 (16)第7章RS232接口 (17)7.1 配置参数 (17)7.2 缓冲区大小 (17)7.3 奇偶校验 (17)7.4 自适应波特率 (17)第8章蓝牙接口 (18)8.1 直接通过COM口控制打印机 (18)8.2 通过打印机驱动程序控制打印机 (18)8.3 蓝牙开关 (18)第9章WIFI接口 (19)9.1 AP模式wifi连接打印机 (19)9.3 通过打印机驱动程序控制打印机 (19)9.4 WIFI开关 (19)第10章打印指令 (20)10.1 基本控制指令 (20)10.1.1 【初始化打印机1B 40】 (20)10.1.2 【唤醒打印机00】 (20)10.1.3 【回车0D】 (20)10.1.4 【换行0A】 (20)10.1.5 【执行n点行走纸1B 4A n】 (20)10.1.6 【打印并走纸到黑标处0C】 (20)10.2 选择字符集命令 (20)10.2.1 【选择字库1B 38 n】 (20)10.3 字符参数设置命令 (21)10.3.1 【灰度打印1B 6D n】 (21)10.3.2 【横向放大1B 55 n】 (21)10.3.3 【纵向放大1B 56 n】 (21)10.3.4 【等比放大1B 57 n】 (21)10.3.5 【允许/禁止下划线打印1B 2D n】 (21)10.3.6 【允许/禁止上划线打印1B 2B n】 (21)10.3.7 【允许/禁止反白打印1B 69 n】 (21)10.3.8 【允许/禁止反向打印1B 63 n】 (21)10.3.9 【字符旋转打印1C 49 n】 (22)10.4 打印排版参数设置命令 (22)10.4.1 【设置n点行间距1B 31 n】 (22)10.4.2 【设置字符间距1B 70 n】 (22)10.4.3 【设置行对齐方式1B 61 n】 (22)10.4.4 【设置垂直造表值1B 42 d1 d2...dn 00】 (22)10.4.5 【执行垂直造表0B】 (22)10.4.6 【设置水平造表值1B 44 d1 d2 ... dn 00】 . (23)10.4.7 【执行水平造表09】 (23)10.4.8 【设置右边距1B 51 n】 (23)10.4.9 【设置左边距1B 6C n】 (23)10.5 图形/图象打印命令 (23)10.5.1 【打印点阵图形1B 4B nL nH d1...dn】 (23)10.5.2 【打印点行图形1C 4B M n d1...dn】 (24)10.5.3 【打印模式位图1B 2A M nL nH d1...dn】 .. (24)10.5.4 【打印光栅位图1D 76 30 M yL yH Xl xH d1...dn】. (25)10.5.5 【打印散点行1B 27 nL nH l1 h1 l2 h2 l3 h3 ...ln hn】 .. (25)10.5.6 【打印坐标曲线1B 2C nL nH l1 h1 l2 h2 l3 h3 ...ln hn】 . (25)10.6一维条码打印命令 (26)10.6.1 【打印一维国标条形码1D 6B n m [d]】 (26)10.6.2 一维条码编码规则简介 (26)10.6.3 条形码例子 (26)10.6.4 【允许/禁止打印HRI字符1D 48 n】 (27)10.6.5 【设置条形码高度1D 68 n】 (27)10.6.6 【设置条形码宽度1D 77 n】 (27)10.7打印二维条码 (27)10.7.1 【打印PDF417条码1D 28 6b ml mh c e [d]】 (27)10.7.2 【打印QR矩阵码1D 28 31 ml mh v e [d]】 (28)第11章扩展指令 (29)11.1 【马达转速1F 55 20 K】 (29)11.2 【高速打印1F 55 21 K】 (29)11.3 【指令禁能1F 55 22 K】 (29)11.4 【退纸轴系数1F 55 23 K】 (29)11.5 【休眠1F 55 24 K】 (29)11.6 【关机1F 55 25 K】 (29)11.7 【指令容错1F 55 26 K】 (29)11.8 【设置波特率1F 55 27 BL BH P】 (29)11.9 【下载字库1F 55 28 nL nH v1...v4】.. (30)11.10 【退纸1F 55 29 K】 (30)11.11 【回车符扩展1F 55 2A K】 (30)11.12 【测试蜂鸣器1F 55 2B K】 (30)11.13 【删除线1F 55 2C K】 (30)11.14 【图文混排模式1F 55 2D K】 (30)11.15 【设置时间1F 55 2E D1...D5】 (31)11.16 【打印时间1F 55 2F M】 (31)11.17 【等宽字符1F 55 30 K】 (31)11.18 【固件升级1F 55 31 v1...v4】. (31)11.19 【纸传感器参数1F 55 32 d1...d3】 . (31)11.20 【保存配置1F 55 33 K M】 (32)11.21 【打印样张1F 55 34 K】 (32)11.22 【加重打印1F 55 35 K】 (32)11.23 【U盘开关1F 55 36 K】 (32)11.24 【黑标检测开关1F 55 37 K】 (32)11.25 【无线通信开关1F 55 38 K】 (32)11.26 【自动休眠设置1F 55 39 K】 (32)11.27 【自动关机设置1F 55 3A K】 (32)11.28 【接口模块配置1F 55 3B M n d1...dn】 (32)字库预览 (33)附录 (34)1.字符样式设置命令 (34)2.黑标印刷 (34)3.联系我们 (35)第1章安全信息为有效、安全地使用您的打印机,请遵守以下规定。
微型打印机说明书微型打印机说明书一、产品介绍1.1 产品概述1.2 主要特点1.3 适用范围二、产品外观与组成2.1 外观描述2.2 配件清单2.3 硬件组成2.4 按钮和接口说明三、使用前准备3.1 硬件连接3.2 电源及充电3.3 安装耗材3.4 驱动安装四、打印设置4.1 打印机驱动设置4.2 页面设置4.3 打印质量设置4.4 语言设置4.5 其他高级设置五、打印操作5.1 文档打印5.2 图片打印5.3 打印参数调整5.4 打印维护六、故障排除6.1 常见故障及原因分析6.2 解决方案6.3 售后服务附件:附件一:配件清单表附件二:打印机安装示意图附件三:打印机驱动安装文件法律名词及注释:1.专利:指对发明、实用新型、外观设计等技术领域中的新技术、新产品、新工艺或新设计所享有的排他性权利。
2.许可证:指凭许可申请人的申请,由相应的权力机关发给的,证明某一项专利技术、商标或其他独占或准独占权益已授权给某个特定的、指定的受许可人使用的证照。
3.版权:指作者或其继承人按照法律规定对其作品享有的形式所有权与精神财产权。
4.商标:指用于标示商品来源的标识,包括文字、图形、字母、数字、三维标志、颜色组合等。
本文档涉及附件:附件一:配件清单表附件二:打印机安装示意图附件三:打印机驱动安装文件本文涉及的法律名词及注释:1.专利:指对发明、实用新型、外观设计等技术领域中的新技术、新产品、新工艺或新设计所享有的排他性权利。
2.许可证:指凭许可申请人的申请,由相应的权力机关发给的,证明某一项专利技术、商标或其他独占或准独占权益已授权给某个特定的、指定的受许可人使用的证照。
3.版权:指作者或其继承人按照法律规定对其作品享有的形式所有权与精神财产权。
4.商标:指用于标示商品来源的标识,包括文字、图形、字母、数字、三维标志、颜色组合等。