Spring讲解解析
- 格式:ppt
- 大小:440.50 KB
- 文档页数:35
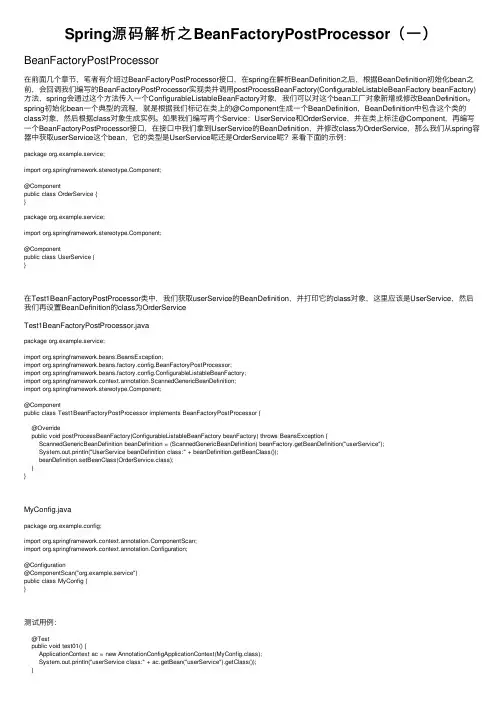
Spring源码解析之BeanFactoryPostProcessor(⼀)BeanFactoryPostProcessor在前⾯⼏个章节,笔者有介绍过BeanFactoryPostProcessor接⼝,在spring在解析BeanDefinition之后,根据BeanDefinition初始化bean之前,会回调我们编写的BeanFactoryPostProcessor实现类并调⽤postProcessBeanFactory(ConfigurableListableBeanFactory beanFactory)⽅法,spring会通过这个⽅法传⼊⼀个ConfigurableListableBeanFactory对象,我们可以对这个bean⼯⼚对象新增或修改BeanDefinition。
spring初始化bean⼀个典型的流程,就是根据我们标记在类上的@Component⽣成⼀个BeanDefinition,BeanDefinition中包含这个类的class对象,然后根据class对象⽣成实例。
如果我们编写两个Service:UserService和OrderService,并在类上标注@Component,再编写⼀个BeanFactoryPostProcessor接⼝,在接⼝中我们拿到UserService的BeanDefinition,并修改class为OrderService,那么我们从spring容器中获取userService这个bean,它的类型是UserService呢还是OrderService呢?来看下⾯的⽰例:package org.example.service;import ponent;@Componentpublic class OrderService {}package org.example.service;import ponent;@Componentpublic class UserService {}在Test1BeanFactoryPostProcessor类中,我们获取userService的BeanDefinition,并打印它的class对象,这⾥应该是UserService,然后我们再设置BeanDefinition的class为OrderServiceTest1BeanFactoryPostProcessor.javapackage org.example.service;import org.springframework.beans.BeansException;import org.springframework.beans.factory.config.BeanFactoryPostProcessor;import org.springframework.beans.factory.config.ConfigurableListableBeanFactory;import org.springframework.context.annotation.ScannedGenericBeanDefinition;import ponent;@Componentpublic class Test1BeanFactoryPostProcessor implements BeanFactoryPostProcessor {@Overridepublic void postProcessBeanFactory(ConfigurableListableBeanFactory beanFactory) throws BeansException {ScannedGenericBeanDefinition beanDefinition = (ScannedGenericBeanDefinition) beanFactory.getBeanDefinition("userService");System.out.println("UserService beanDefinition class:" + beanDefinition.getBeanClass());beanDefinition.setBeanClass(OrderService.class);}}MyConfig.javapackage org.example.config;import ponentScan;import org.springframework.context.annotation.Configuration;@Configuration@ComponentScan("org.example.service")public class MyConfig {}测试⽤例:@Testpublic void test01() {ApplicationContext ac = new AnnotationConfigApplicationContext(MyConfig.class);System.out.println("userService class:" + ac.getBean("userService").getClass());}运⾏结果:UserService beanDefinition class:class erServiceuserService class:class org.example.service.OrderService可以看到,spring容器会回调我们编写的bean⼯⼚后置处理器BeanFactoryPostProcessor实现类Test1BeanFactoryPostProcessor ,在回调⽅法中,我们可以从bean⼯⼚获取spring容器已经解析的UserService对应的BeanDefinition对象,打印这个BeanDefinition对象的class对象也确实是UserService的class对象,之后我们修改UserService对应的BeanDefinition的class对象为OrderService的class对象,之后我们从spring容器获取beanName为userService的bean可以看到bean的实现类已经被替换成OrderService对象。
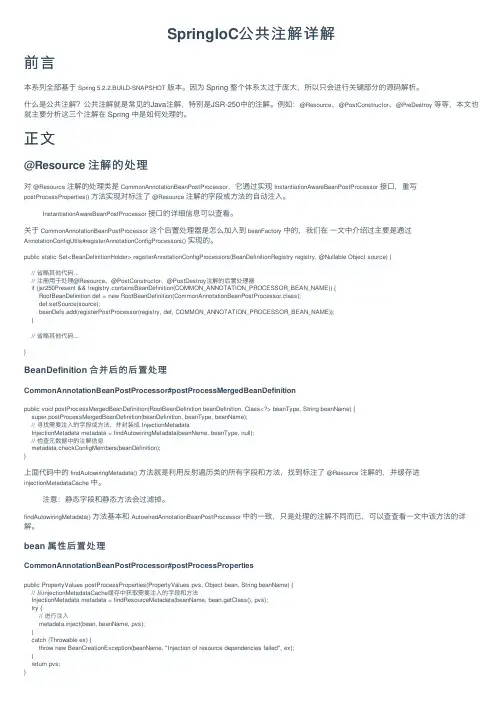
SpringIoC 公共注解详解前⾔本系列全部基于 Spring 5.2.2.BUILD-SNAPSHOT 版本。
因为 Spring 整个体系太过于庞⼤,所以只会进⾏关键部分的源码解析。
什么是公共注解?公共注解就是常见的Java 注解,特别是JSR-250中的注解。
例如:@Resource 、@PostConstructor 、@PreDestroy 等等,本⽂也就主要分析这三个注解在 Spring 中是如何处理的。
正⽂@Resource 注解的处理对 @Resource 注解的处理类是 CommonAnnotationBeanPostProcessor ,它通过实现 InstantiationAwareBeanPostProcessor 接⼝,重写postProcessProperties() ⽅法实现对标注了 @Resource 注解的字段或⽅法的⾃动注⼊。
InstantiationAwareBeanPostProcessor 接⼝的详细信息可以查看。
关于 CommonAnnotationBeanPostProcessor 这个后置处理器是怎么加⼊到 beanFactory 中的,我们在 ⼀⽂中介绍过主要是通过AnnotationConfigUtils#registerAnnotationConfigProcessors() 实现的。
BeanDefinition 合并后的后置处理CommonAnnotationBeanPostProcessor#postProcessMergedBeanDefinition上⾯代码中的 findAutowiringMetadata() ⽅法就是利⽤反射遍历类的所有字段和⽅法,找到标注了 @Resource 注解的,并缓存进injectionMetadataCache 中。
注意:静态字段和静态⽅法会过滤掉。
findAutowiringMetadata() ⽅法基本和 AutowiredAnnotationBeanPostProcessor 中的⼀致,只是处理的注解不同⽽已,可以查查看⼀⽂中该⽅法的详解。
Spring注解之@Lazy注解使⽤解析
@Lazy⽤于指定该Bean是否取消预初始化。
主要⽤于修饰Spring Bean类,⽤于指定该Bean的预初始化⾏为,
使⽤该Annotation时可以指定⼀个boolean型的value属性,该属性决定是否要预初始化该Bean
lazy代表延时加载,lazy=false,代表不延时,如果对象A中还有对象B的引⽤,会在A的xml映射⽂件中配置b的对象引⽤,多对⼀或⼀对多,不延时代表查询出对象A的时候,会把B对象也查询出来放到A对象的引⽤中,A对象中的B对象是有值的。
lazy=true代表延时,查询A对象时,不会把B对象也查询出来,只会在⽤到A对象中B对象时才会去查询,默认好像是false,你可以看看后台的sql语句的变化就明⽩了,⼀般需要优化效率的时候会⽤到
@Lazy(true)
@Component
public class Chinese implements Person{
//codes here
}
@DependsOn⽤于强制初始化其他Bean。
可以修饰Bean类或⽅法,使⽤该Annotation时可以指定⼀个字符串数组作为参数,每个数组元素对应于⼀个强制初始化的Bean
@DependsOn({"steelAxe","abc"})
@Component
public class Chinese implements Person{
//codes here
}
以上就是本⽂的全部内容,希望对⼤家的学习有所帮助,也希望⼤家多多⽀持。
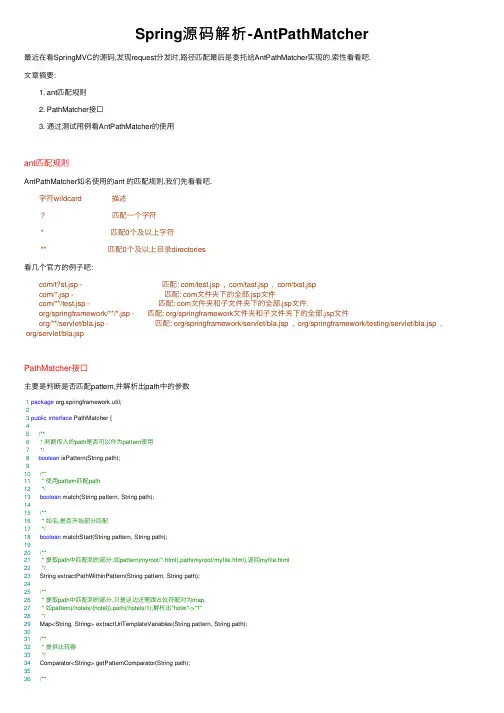
Spring源码解析-AntPathMatcher最近在看SpringMVC的源码,发现request分发时,路径匹配最后是委托给AntPathMatcher实现的.索性看看吧.⽂章摘要: 1. ant匹配规则 2. PathMatcher接⼝ 3. 通过测试⽤例看AntPathMatcher的使⽤ant匹配规则AntPathMatcher如名使⽤的ant 的匹配规则,我们先看看吧. 字符wildcard 描述 ? 匹配⼀个字符 * 匹配0个及以上字符 ** 匹配0个及以上⽬录directories看⼏个官⽅的例⼦吧: com/t?st.jsp - 匹配: com/test.jsp , com/tast.jsp , com/txst.jsp com/*.jsp - 匹配: com⽂件夹下的全部.jsp⽂件 com/**/test.jsp - 匹配: com⽂件夹和⼦⽂件夹下的全部.jsp⽂件, org/springframework/**/*.jsp - 匹配: org/springframework⽂件夹和⼦⽂件夹下的全部.jsp⽂件 org/**/servlet/bla.jsp - 匹配: org/springframework/servlet/bla.jsp , org/springframework/testing/servlet/bla.jsp , org/servlet/bla.jspPathMatcher接⼝主要是判断是否匹配pattern,并解析出path中的参数1package org.springframework.util;23public interface PathMatcher {45/**6 * 判断传⼊的path是否可以作为pattern使⽤7*/8boolean isPattern(String path);910/**11 * 使⽤pattern匹配path12*/13boolean match(String pattern, String path);1415/**16 * 如名,是否开始部分匹配17*/18boolean matchStart(String pattern, String path);1920/**21 * 提取path中匹配到的部分,如pattern(myroot/*.html),path(myroot/myfile.html),返回myfile.html22*/23 String extractPathWithinPattern(String pattern, String path);2425/**26 * 提取path中匹配到的部分,只是这边还需跟占位符配对为map,27 * 如pattern(/hotels/{hotel}),path(/hotels/1),解析出"hotel"->"1"28*/29 Map<String, String> extractUriTemplateVariables(String pattern, String path);3031/**32 * 提供⽐较器33*/34 Comparator<String> getPatternComparator(String path);3536/**37 * 合并pattern,pattern1然后pattern238*/39 String combine(String pattern1, String pattern2);4041 }通过测试⽤例看AntPathMatcher的使⽤⼀看测试⽤例,瞬间服了,⼈家开发真是规范.⼈家整这么规范,还是有空直接看源码好了.这边挑⼏个简单的例⼦看看就好1. match 跟 matchStart 的差异,这个我们在测试⽤例看下⾯的情况会⽐较明确 这边的代码,我截取了⼀⼩部分1package org.springframework.util;2public class AntPathMatcherTests {3 @Test4public void match() {5// ...6assertFalse(pathMatcher.match("/x/x/**/bla", "/x/x/x/"));7// ...8 }9 @Test10public void withMatchStart() {11// ...12assertTrue(pathMatcher.matchStart("/x/x/**/bla", "/x/x/x/"));13// ...14 }15 }2. extractPathWithinPattern,代码很清楚,不废话1package org.springframework.util;2public class AntPathMatcherTests {3 @Test4public void extractPathWithinPattern() throws Exception {5// ...6 assertEquals("", pathMatcher.extractPathWithinPattern("/docs/commit.html", "/docs/commit.html"));7 assertEquals("cvs/commit", pathMatcher.extractPathWithinPattern("/docs/*", "/docs/cvs/commit"));8 assertEquals("docs/cvs/commit", pathMatcher.extractPathWithinPattern("/d?cs/*", "/docs/cvs/commit")); 9// ...10 }11 }3. extractUriTemplateVariables1package org.springframework.util;2public class AntPathMatcherTests {3 @Test4public void extractUriTemplateVariables() throws Exception {5 Map<String, String> result = pathMatcher.extractUriTemplateVariables("/hotels/{hotel}", "/hotels/1");6 assertEquals(Collections.singletonMap("hotel", "1"), result);7// ...8 result = pathMatcher.extractUriTemplateVariables("/{page}.*", "/42.html");9 assertEquals(Collections.singletonMap("page", "42"), result);10// ...11 }12/**13 * SPR-778714*/15 @Test16public void extractUriTemplateVarsRegexQualifiers() {17 Map<String, String> result = pathMatcher.extractUriTemplateVariables(18 "{symbolicName:[\\p{L}\\.]+}-sources-{version:[\\p{N}\\.]+}.jar",19 "com.example-sources-1.0.0.jar");20 assertEquals("com.example", result.get("symbolicName"));21 assertEquals("1.0.0", result.get("version"));22// ...23 }24 }4. combine1package org.springframework.util;2public class AntPathMatcherTests {3 @Test4public void combine() {5// ...6 assertEquals("/hotels", bine("/hotels", null));7 assertEquals("/hotels/booking", bine("/hotels/*", "/booking"));8 assertEquals("/hotels/**/booking", bine("/hotels/**", "booking"));9 assertEquals("/hotels/**/booking", bine("/hotels/**", "/booking"));10 assertEquals("/hotels/booking", bine("/hotels", "/booking"));11 assertEquals("/hotels/{hotel}", bine("/hotels/*", "{hotel}"));12 assertEquals("/hotels/**/{hotel}", bine("/hotels/**", "{hotel}"));13 assertEquals("/hotels/*/booking/{booking}", bine("/hotels/*/booking", "{booking}"));14 }15 }。
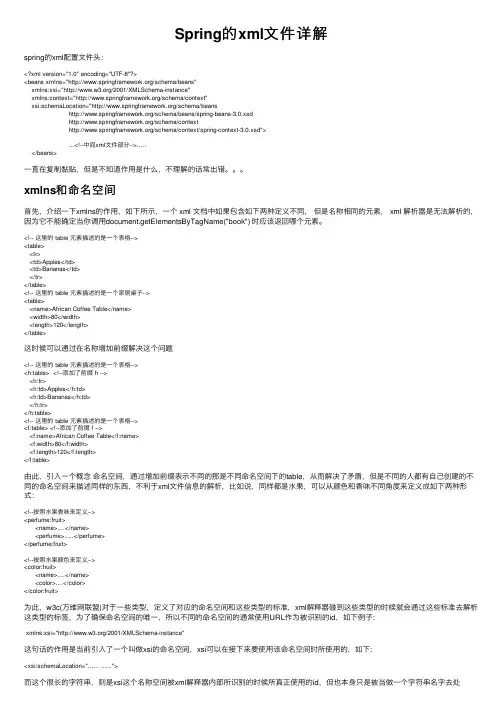
Spring的xml⽂件详解spring的xml配置⽂件头:<?xml version="1.0" encoding="UTF-8"?><beans xmlns="/schema/beans"xmlns:xsi="/2001/XMLSchema-instance"xmlns:context="/schema/context"xsi:schemaLocation="/schema/beans/schema/beans/spring-beans-3.0.xsd/schema/context/schema/context/spring-context-3.0.xsd">...<!--中间xml⽂件部分-->.....</beans>⼀直在复制黏贴,但是不知道作⽤是什么,不理解的话常出错。
xmlns和命名空间⾸先,介绍⼀下xmlns的作⽤,如下所⽰,⼀个 xml ⽂档中如果包含如下两种定义不同,但是名称相同的元素, xml 解析器是⽆法解析的,因为它不能确定当你调⽤document.getElementsByTagName("book") 时应该返回哪个元素。
<!-- 这⾥的 table 元素描述的是⼀个表格--><table><tr><td>Apples</td><td>Bananas</td></tr></table><!-- 这⾥的 table 元素描述的是⼀个家居桌⼦--><table><name>African Coffee Table</name><width>80</width><length>120</length></table>这时候可以通过在名称增加前缀解决这个问题<!-- 这⾥的 table 元素描述的是⼀个表格--><h:table> <!--添加了前缀 h --><h:tr><h:td>Apples</h:td><h:td>Bananas</h:td></h:tr></h:table><!-- 这⾥的 table 元素描述的是⼀个表格--><f:table> <!--添加了前缀 f --><f:name>African Coffee Table</f:name><f:width>80</f:width><f:length>120</f:length></f:table>由此,引⼊⼀个概念命名空间,通过增加前缀表⽰不同的那是不同命名空间下的table,从⽽解决了⽭盾,但是不同的⼈都有⾃⼰创建的不同的命名空间来描述同样的东西,不利于xml⽂件信息的解析,⽐如说,同样都是⽔果,可以从颜⾊和⾹味不同⾓度来定义成如下两种形式:<!--按照⽔果⾹味来定义--><perfume:fruit><name>....</name><perfume>.....</perfume></perfume:fruit><!--按照⽔果颜⾊来定义--><color:fruit><name>....</name><color>....</color></color:fruit>为此,w3c(万维⽹联盟)对于⼀些类型,定义了对应的命名空间和这些类型的标准,xml解释器碰到这些类型的时候就会通过这些标准去解析这类型的标签,为了确保命名空间的唯⼀,所以不同的命名空间的通常使⽤URL作为被识别的id,如下例⼦:xmlns:xsi="/2001/XMLSchema-instance"这句话的作⽤是当前引⼊了⼀个叫做xsi的命名空间,xsi可以在接下来要使⽤该命名空间时所使⽤的,如下:<xsi:schemaLocation="...... ......">⽽这个很长的字符串,则是xsi这个名称空间被xml解释器内部所识别的时候所真正使⽤的id,但也本⾝只是被当做⼀个字符串名字去处理,xml解释器根据这个id去获取它对应的标准,从⽽知道这个命名空间定义有什么样的标签(xml解释器⾃带有⼀些通⽤的命名空间的标准),这个字符串虽然看起来是URL,但是和对应的⽹页上的信息没有关系,只是⽤来提供命名空间唯⼀性的作⽤,⽹址有时可以被打开,上⾯会有关于该命名空间的信息。
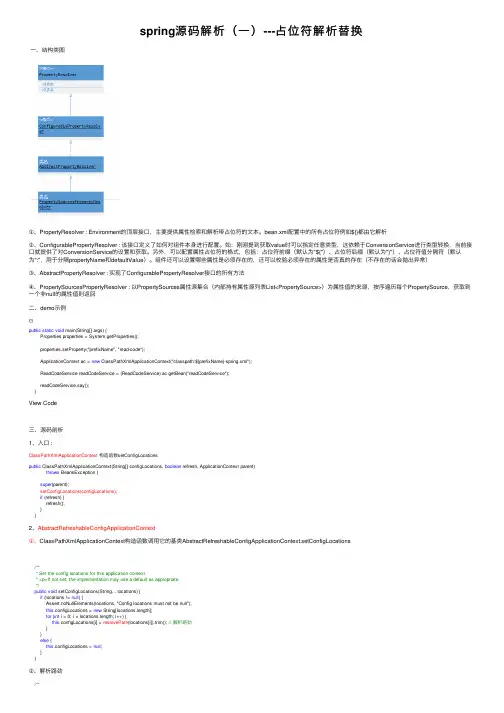
spring源码解析(⼀)---占位符解析替换⼀、结构类图①、PropertyResolver : Environment的顶层接⼝,主要提供属性检索和解析带占位符的⽂本。
bean.xml配置中的所有占位符例如${}都由它解析②、ConfigurablePropertyResolver : 该接⼝定义了如何对组件本⾝进⾏配置。
如:刚刚提到获取value时可以指定任意类型,这依赖于ConversionService进⾏类型转换,当前接⼝就提供了对ConversionService的设置和获取。
另外,可以配置属性占位符的格式,包括:占位符前缀(默认为"${")、占位符后缀(默认为"}")、占位符值分隔符(默认为":",⽤于分隔propertyName和defaultValue)。
组件还可以设置哪些属性是必须存在的,还可以校验必须存在的属性是否真的存在(不存在的话会抛出异常)③、AbstractPropertyResolver : 实现了ConfigurablePropertyResolver接⼝的所有⽅法④、PropertySourcesPropertyResolver : 以PropertySources属性源集合(内部持有属性源列表List<PropertySource>)为属性值的来源,按序遍历每个PropertySource,获取到⼀个⾮null的属性值则返回⼆、demo⽰例public static void main(String[] args) {Properties properties = System.getProperties();properties.setProperty("prefixName", "read-code");ApplicationContext ac = new ClassPathXmlApplicationContext("classpath:${prefixName}-spring.xml");ReadCodeService readCodeService = (ReadCodeService) ac.getBean("readCodeService");readCodeService.say();}View Code三、源码剖析1、⼊⼝ :ClassPathXmlApplicationContext构造函数setConfigLocationspublic ClassPathXmlApplicationContext(String[] configLocations, boolean refresh, ApplicationContext parent)throws BeansException {super(parent);setConfigLocations(configLocations);if (refresh) {refresh();}}2、AbstractRefreshableConfigApplicationContext①、ClassPathXmlApplicationContext构造函数调⽤它的基类AbstractRefreshableConfigApplicationContext.setConfigLocations/*** Set the config locations for this application context.* <p>If not set, the implementation may use a default as appropriate.*/public void setConfigLocations(String... locations) {if (locations != null) {Assert.noNullElements(locations, "Config locations must not be null");this.configLocations = new String[locations.length];for (int i = 0; i < locations.length; i++) {this.configLocations[i] = resolvePath(locations[i]).trim(); // 解析路劲}}else {this.configLocations = null;}}②、解析路劲/*** Resolve the given path, replacing placeholders with corresponding* environment property values if necessary. Applied to config locations.* @param path the original file path* @return the resolved file path* @see org.springframework.core.env.Environment#resolveRequiredPlaceholders(String)*/protected String resolvePath(String path) {return getEnvironment().resolveRequiredPlaceholders(path);}3、AbstractPropertyResolverpublic String resolveRequiredPlaceholders(String text) throws IllegalArgumentException {if (this.strictHelper == null) {this.strictHelper = createPlaceholderHelper(false);}return doResolvePlaceholders(text, this.strictHelper);}上述⽅法主要做了两件事 :①、初始化占位符解析器createPlaceholderHelper : 主要是初始化占位符的常量,eg : 前缀 ${ 后缀} and so on②、调⽤私有⽅法---替换占位符具体值private String doResolvePlaceholders(String text, PropertyPlaceholderHelper helper) {return helper.replacePlaceholders(text, new PropertyPlaceholderHelper.PlaceholderResolver() {@Overridepublic String resolvePlaceholder(String placeholderName) {return getPropertyAsRawString(placeholderName);}});}4、占位符 key - > value ,实现PropertyPlaceholderHelper内部接⼝PlaceholderResolver⽅法resolvePlaceholder。
Spring源码分析基本介绍摘要:本⽂结合《Spring源码深度解析》来分析Spring 5.0.6版本的源代码。
若有描述错误之处,欢迎指正。
前⾔作为⼀名开发⼈员,阅读源码是⼀个很好的学习⽅式。
本⽂将结合《Spring源码深度解析》来分析Spring 5.0.6版本的源代码,若有描述错误之处,欢迎指正。
Spring是2003年兴起的⼀个轻量级Java开源框架,旨在解决企业应⽤开发的复杂性。
Spring发展⾄今,衍⽣出⾮常丰富的模块,并应⽤在多种场景,⽐如:桌⾯应⽤,Web应⽤等。
Spring的模块化可以允许你只使⽤需要的模块,⽽不必全部引⼊。
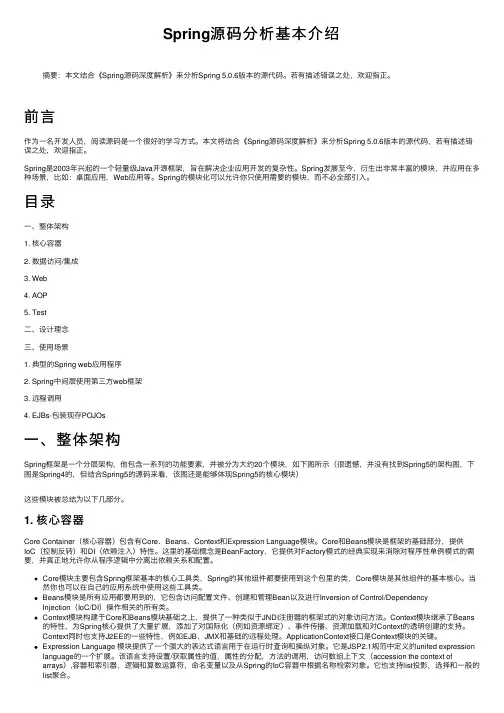
⽬录⼀、整体架构1. 核⼼容器2. 数据访问/集成3. Web4. AOP5. Test⼆、设计理念三、使⽤场景1. 典型的Spring web应⽤程序2. Spring中间层使⽤第三⽅web框架3. 远程调⽤4. EJBs-包装现存POJOs⼀、整体架构Spring框架是⼀个分层架构,他包含⼀系列的功能要素,并被分为⼤约20个模块,如下图所⽰(很遗憾,并没有找到Spring5的架构图,下图是Spring4的,但结合Spring5的源码来看,该图还是能够体现Spring5的核⼼模块)这些模块被总结为以下⼏部分。
1. 核⼼容器Core Container(核⼼容器)包含有Core、Beans、Context和Expression Language模块。
Core和Beans模块是框架的基础部分,提供IoC(控制反转)和DI(依赖注⼊)特性。
这⾥的基础概念是BeanFactory,它提供对Factory模式的经典实现来消除对程序性单例模式的需要,并真正地允许你从程序逻辑中分离出依赖关系和配置。
Core模块主要包含Spring框架基本的核⼼⼯具类,Spring的其他组件都要使⽤到这个包⾥的类,Core模块是其他组件的基本核⼼。
当然你也可以在⾃⼰的应⽤系统中使⽤这些⼯具类。
Spring技术内幕深入解析Spring架构与设计原理(一)引子缘起已经很久没有写帖子了,现在总算是有点时间写些东西,也算是对自己的一个记录吧。
刚刚完成了一个软件产品,从概念到运营都弄了一下,正在推广当中,虽然还没有能够达到盈亏平衡,但是这个过程,对自己也算是一种历练。
先不管结果如何,好呆走过这么一遭了。
我打算用这个帖子,把自己在这个过程中的一些心得,特别是对Spring新的理解,记录下来。
使用这个帖子的标题,持续下来。
简单来说,自己的软件产品是一个基于互联网的SaaS协同软件平台,操作简单,支持流程定义,管理和多种客户端 -像短信,MSN,智能手机什么的(我这里就不多做什么广告了),也有一个企业版的版本,使用的技术框架是Hibernate + Spring + Wicket,下面是Linux和MySQL,还有云计算的平台的使用,以支持其扩展性,虽然现在还没有可扩展性的需求,但似乎不难从SaaS上,就会想到云计算, 其实,它们真的是天生的一对!关于云计算,自己对这个技术很感兴趣,觉得和开源软件的结合,是很有意思的,因为它们都有基于服务的基因,在云计算平台的使用上,也有一些初步的实践。
云计算是一个很有意思的话题,但在这里主要是想谈Spring,所以对云计算,这里就先不多说了,但非常欢迎有兴趣的朋友和一起另外找地方讨论!回到正题,在我自己的产品中,其中除了Wicket和云计算外,其他都是大家非常熟知的了,像Hibernate, Spring, MySQL什么的。
在这个过程中,发现自己对一些技术点也有了新的认识,最有体会的是Spring。
当然,在这个过程中,更大的收获是对产品开发整个过程的认识,在这点上,真是一言难尽........回到自己还算了解的Spring, 这次我使用的是3.0的代码,所以,有机会也把这些代码读了几遍,比原来的理解要加深了许多,也发现了不少和2.0代码不同的地方,以及自己一些对 Spring的新的理解,这些,就让我就用这个帖子系列,给自己总结一下,也算是对自己以前的那个代码分析的帖子做一个新的交代吧。
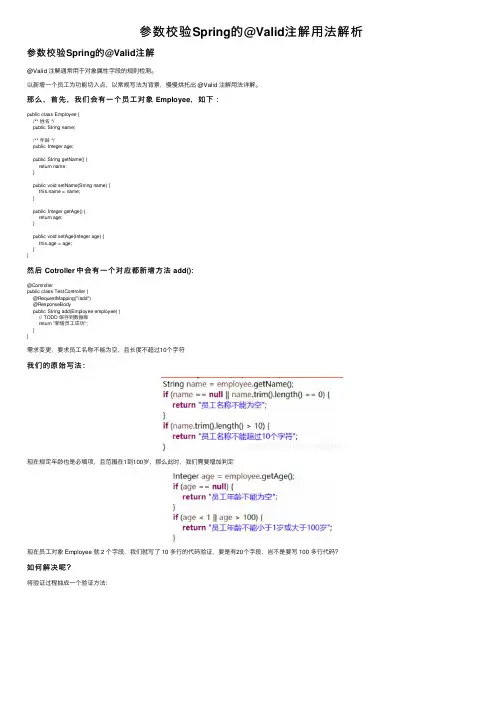
参数校验Spring的@Valid注解⽤法解析参数校验Spring的@Valid注解@Valid 注解通常⽤于对象属性字段的规则检测。
以新增⼀个员⼯为功能切⼊点,以常规写法为背景,慢慢烘托出 @Valid 注解⽤法详解。
那么,⾸先,我们会有⼀个员⼯对象 Employee,如下:public class Employee {/** 姓名 */public String name;/** 年龄 */public Integer age;public String getName() {return name;}public void setName(String name) { = name;}public Integer getAge() {return age;}public void setAge(Integer age) {this.age = age;}}然后 Cotroller 中会有⼀个对应都新增⽅法 add():@Controllerpublic class TestController {@RequestMapping("/add")@ResponseBodypublic String add(Employee employee) {// TODO 保存到数据库return "新增员⼯成功";}}需求变更,要求员⼯名称不能为空,且长度不超过10个字符我们的原始写法:现在规定年龄也是必填项,且范围在1到100岁,那么此时,我们需要增加判定现在员⼯对象 Employee 就 2 个字段,我们就写了 10 多⾏的代码验证,要是有20个字段,岂不是要写 100 多⾏代码?如何解决呢?将验证过程抽成⼀个验证⽅法:但这种⽅式只是抽了⼀个⽅法,有⼀种换汤不换药的感觉,虽然业务⽅法看起来清爽了很多,但书写代码量并没有下降,反⽽还多出了⼀个⽅法。
此时引出 Spring 的 @valid 注解即可:⾸先,我们在 Maven 配置中引⼊ @valid 的依赖:如果你是 springboot 项⽬,那么可以不⽤引⼊了,已经引⼊了,他就存在于最核⼼的 web 开发包⾥⾯。
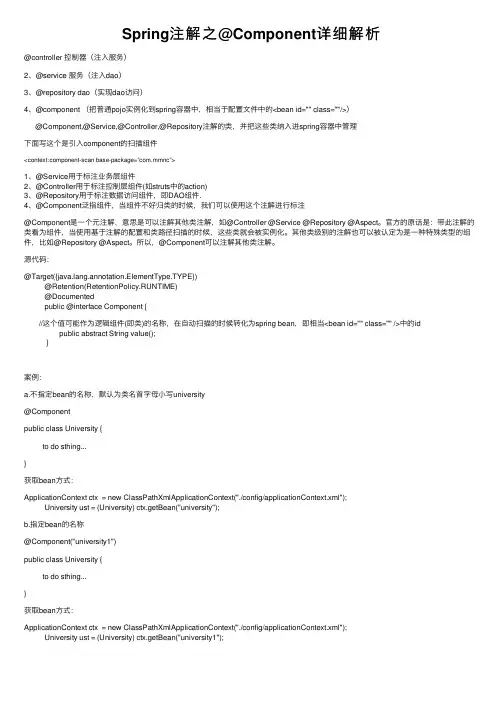
Spring注解之@Component详细解析@controller 控制器(注⼊服务)2、@service 服务(注⼊dao)3、@repository dao(实现dao访问)4、@component (把普通pojo实例化到spring容器中,相当于配置⽂件中的<bean id="" class=""/>) @Component,@Service,@Controller,@Repository注解的类,并把这些类纳⼊进spring容器中管理下⾯写这个是引⼊component的扫描组件<context:component-scan base-package=”com.mmnc”>1、@Service⽤于标注业务层组件2、@Controller⽤于标注控制层组件(如struts中的action)3、@Repository⽤于标注数据访问组件,即DAO组件.4、@Component泛指组件,当组件不好归类的时候,我们可以使⽤这个注解进⾏标注@Component是⼀个元注解,意思是可以注解其他类注解,如@Controller @Service @Repository @Aspect。
官⽅的原话是:带此注解的类看为组件,当使⽤基于注解的配置和类路径扫描的时候,这些类就会被实例化。
其他类级别的注解也可以被认定为是⼀种特殊类型的组件,⽐如@Repository @Aspect。
所以,@Component可以注解其他类注解。
源代码:@Target({ng.annotation.ElementType.TYPE})@Retention(RetentionPolicy.RUNTIME)@Documentedpublic @interface Component {//这个值可能作为逻辑组件(即类)的名称,在⾃动扫描的时候转化为spring bean,即相当<bean id="" class="" />中的idpublic abstract String value();}案例:a.不指定bean的名称,默认为类名⾸字母⼩写university@Componentpublic class University {to do sthing...}获取bean⽅式:ApplicationContext ctx = new ClassPathXmlApplicationContext("./config/applicationContext.xml");University ust = (University) ctx.getBean("university");b.指定bean的名称@Component("university1")public class University {to do sthing...}获取bean⽅式:ApplicationContext ctx = new ClassPathXmlApplicationContext("./config/applicationContext.xml");University ust = (University) ctx.getBean("university1");。
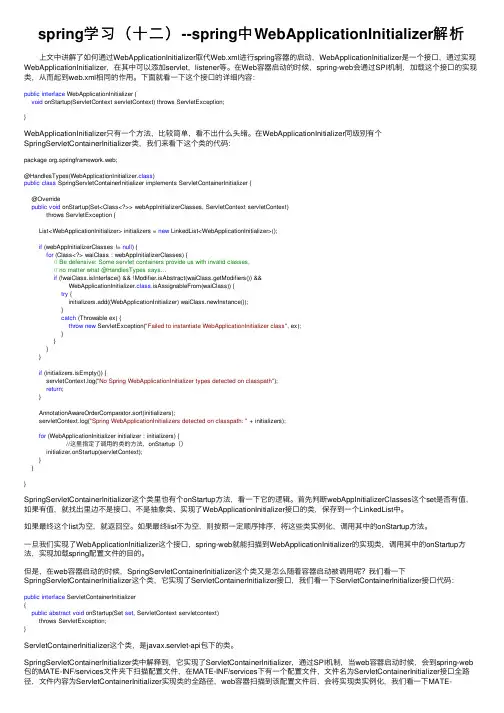
spring学习(⼗⼆)--spring中WebApplicationInitializer解析 上⽂中讲解了如何通过WebApplicationInitializer取代Web.xml进⾏spring容器的启动,WebApplicationInitializer是⼀个接⼝,通过实现WebApplicationInitializer,在其中可以添加servlet,listener等。
在Web容器启动的时候,spring-web会通过SPI机制,加载这个接⼝的实现类,从⽽起到web.xml相同的作⽤。
下⾯就看⼀下这个接⼝的详细内容:public interface WebApplicationInitializer {void onStartup(ServletContext servletContext) throws ServletException;}WebApplicationInitializer只有⼀个⽅法,⽐较简单,看不出什么头绪。
在WebApplicationInitializer同级别有个SpringServletContainerInitializer类,我们来看下这个类的代码:package org.springframework.web;@HandlesTypes(WebApplicationInitializer.class)public class SpringServletContainerInitializer implements ServletContainerInitializer {@Overridepublic void onStartup(Set<Class<?>> webAppInitializerClasses, ServletContext servletContext)throws ServletException {List<WebApplicationInitializer> initializers = new LinkedList<WebApplicationInitializer>();if (webAppInitializerClasses != null) {for (Class<?> waiClass : webAppInitializerClasses) {// Be defensive: Some servlet containers provide us with invalid classes,// no matter what @HandlesTypes says...if (!waiClass.isInterface() && !Modifier.isAbstract(waiClass.getModifiers()) &&WebApplicationInitializer.class.isAssignableFrom(waiClass)) {try {initializers.add((WebApplicationInitializer) waiClass.newInstance());}catch (Throwable ex) {throw new ServletException("Failed to instantiate WebApplicationInitializer class", ex);}}}}if (initializers.isEmpty()) {servletContext.log("No Spring WebApplicationInitializer types detected on classpath");return;}AnnotationAwareOrderComparator.sort(initializers);servletContext.log("Spring WebApplicationInitializers detected on classpath: " + initializers);for (WebApplicationInitializer initializer : initializers) { //这⾥指定了调⽤的类的⽅法,onStartup()initializer.onStartup(servletContext);}}}SpringServletContainerInitializer这个类⾥也有个onStartup⽅法,看⼀下它的逻辑。
Spring技术内幕——深入解析Spring架构与设计原理(二)AOPAOP联盟定义的AOP体系结构把与AOP相关的概念大致分为了由高到低、从用法到实现的三个层次。
关于这个体系结构,个人的理解是这样的,从上往下,最高层是语言和开发环境,在这个环境中可以看到几个重要的概念:base可以视为待增加对象,或者说目标对象;aspect指切面,通常包含对于base的增加应用;configuration可以看成是一种编织或者说配置,通过在AOP体系中提供这个configuration配置环境,可以把base和aspect结合起来,从而完成切面向目标对象的编织实现。
对Spring平台或者说生态系统来说,AOP是Spring框架的核心功能模块之一。
AOP与IOC容器的结合用法, 为应用开发或者Spring自身功能的扩展都提供了许多方便。
Spring AOP的实现和其他特性的实现一样,十分丰盛,除了可以用法Spring本身提供的AOP实现之外,还封装了业界优秀的AOP解决计划AspectJ来让应用用法。
在这里,主要对Spring自身的AOP实现原理做一些解析;在这个AOP实现中,Spring 充分利用了IOC容器Proxy代理对象以及AOP拦截器的功能特性,通过这些对AOP基本功能的封装机制,为用户提供了AOP的实现框架。
所以,要了解这些AOP的基本实现,需要我们对Java 的Proxy机制有一些基本了解。
AOP实现的基本线索 AOP实现中,可以看到三个主要的步骤,一个是代理对象的生成,然后是拦截器的作用,然后是Aspect编织的实现。
AOP框架的丰盛,很大程度体现在这三个详细实现中,所具有的丰盛的技术挑选,以及如何实现与IOC容器的无缝结合。
究竟这也是一个十分核心的模块,需要满足不同的应用需求带来的解决计划需求。
在Spring AOP的实现原理中,我们主要举ProxyFactoryBean的实现作为例子和实现的基本线索举行分析;很大一个缘由,是由于ProxyFactoryBean是在Spring IoC环境中,创建AOP应用的最底层办法,从中,可以看到一条实现AOP的基本线索。
Spring作为现在最优秀的框架之一,已被广泛的使用,51CTO也曾经针对Spring框架中的JDBC应用做过报道。
本文将从另外一个视角试图剖析出Spring框架的作者设计Spring框架的骨骼架构的设计理念,有那几个核心组件?为什么需要这些组件?它们又是如何结合在一起构成Spring的骨骼架构?Spring的AOP特性又是如何利用这些基础的骨骼架构来工作的?Spring中又使用了那些设计模式来完成它的这种设计的?它的这种设计理念对对我们以后的软件设计有何启示?本文将详细解答这些问题。
Spring的骨骼架构Spring总共有十几个组件,但是真正核心的组件只有几个,下面是Spring框架的总体架构图:图1.Spring框架的总体架构图从上图中可以看出Spring框架中的核心组件只有三个:Core、Context和Beans。
它们构建起了整个Spring 的骨骼架构。
没有它们就不可能有AOP、Web等上层的特性功能。
下面也将主要从这三个组件入手分析Spring。
Spring的设计理念前面介绍了Spring的三个核心组件,如果再在它们三个中选出核心的话,那就非Beans组件莫属了,为何这样说,其实Spring就是面向Bean的编程(BOP,Bean Oriented Programming),Bean在Spring 中才是真正的主角。
Bean在Spring中作用就像Object对OOP的意义一样,没有对象的概念就像没有面向对象编程,Spring中没有Bean也就没有Spring存在的意义。
就像一次演出舞台都准备好了但是却没有演员一样。
为什么要Bean这种角色Bean或者为何在Spring如此重要,这由Spring框架的设计目标决定,Spring为何如此流行,我们用Spring 的原因是什么,想想你会发现原来Spring解决了一个非常关键的问题他可以让你把对象之间的依赖关系转而用配置文件来管理,也就是他的依赖注入机制。
Spring缓存注解SpEL表达式解析缓存注解上 key、condition、unless 等 SpEL 表达式的解析SpEl ⽀持的计算变量:1)#ai、#pi、#命名参数【i 表⽰参数下标,从 0 开始】2)#result:CachePut 操作和后处理 CacheEvict 操作都可使⽤3)#root:CacheExpressionRootObject 对象计算上下⽂根对象/*** 缓存注解 SpEL 表达式计算上下⽂根对象*/class CacheExpressionRootObject {/*** 有效的缓存集合*/private final Collection<? extends Cache> caches;/*** ⽬标⽅法*/private final Method method;/*** ⽅法参数*/private final Object[] args;/*** ⽬标对象*/private final Object target;/*** ⽬标对象 Class 类型*/private final Class<?> targetClass;}缓存计算上下⽂【附加⽅法参数和返回结果作为计算变量】/*** 基于⽅法的表达式计算上下⽂* @since 4.2*/public class MethodBasedEvaluationContext extends StandardEvaluationContext {/*** ⽬标⽅法*/private final Method method;/*** 参数数组*/private final Object[] arguments;/*** 参数名发现者*/private final ParameterNameDiscoverer parameterNameDiscoverer;/*** 参数变量是否已经加载*/private boolean argumentsLoaded = false;public MethodBasedEvaluationContext(Object rootObject, Method method, Object[] arguments,ParameterNameDiscoverer parameterNameDiscoverer) {super(rootObject);this.method = method;this.arguments = arguments;this.parameterNameDiscoverer = parameterNameDiscoverer;}@Override@Nullablepublic Object lookupVariable(String name) {// 1)尝试从变量映射中读取指定名称的对象Object variable = super.lookupVariable(name);if (variable != null) {return variable;}// 2)未读到 && ⽅法参数未加载if (!this.argumentsLoaded) {// 加载⽅法参数lazyLoadArguments();this.argumentsLoaded = true;// 再次读取variable = super.lookupVariable(name);}return variable;}protected void lazyLoadArguments() {// ⽆参数则直接退出if (ObjectUtils.isEmpty(this.arguments)) {return;}// 读取⽬标⽅法的所有参数名称String[] paramNames = this.parameterNameDiscoverer.getParameterNames(this.method);// 计算形参个数,以解析到的参数名优先【可能存在可变参数】int paramCount = (paramNames != null ? paramNames.length : this.method.getParameterCount()); // 实际传⼊的参数个数int argsCount = this.arguments.length;for (int i = 0; i < paramCount; i++) {Object value = null;/*** 实际传⼊的参数个数 > 形参个数* && 将余下的所有⼊参都加⼊到数组中【⽬标⽅法最后⼀个参数是可变参数】*/if (argsCount > paramCount && i == paramCount - 1) {value = Arrays.copyOfRange(this.arguments, i, argsCount);}// 读取实际参数else if (argsCount > i) {// Actual argument found - otherwise left as nullvalue = this.arguments[i];}/*** 将 ai、pi、实际参数名称作为键,加⼊到计算变量映射中* a0、p0 都表⽰第⼀个参数,依次类推*/setVariable("a" + i, value);setVariable("p" + i, value);if (paramNames != null) {setVariable(paramNames[i], value);}}}}/*** 缓存计算上下⽂,⾃动将⽅法参数添加为计算变量。
SpringBoot注解解析⼤全(⾮常全哦!)使⽤注解的优势:1.采⽤纯java代码,不在需要配置繁杂的xml⽂件2.在配置中也可享受⾯向对象带来的好处3.类型安全对重构可以提供良好的⽀持4.减少复杂配置⽂件的同时亦能享受到springIoC容器提供的功能⼀、注解详解(配备了完善的释义)------(可采⽤ctrl+F 来进⾏搜索哦~~~~也可以收藏⽹页这样以后就不⽤往复查询了哦)@SpringBootApplication:申明让spring boot⾃动给程序进⾏必要的配置,这个配置等同于:@Configuration ,@EnableAutoConfiguration 和 @ComponentScan 三个配置。
@ResponseBody:表⽰该⽅法的返回结果直接写⼊HTTP response body中,⼀般在异步获取数据时使⽤,⽤于构建RESTful的api。
在使⽤@RequestMapping后,返回值通常解析为跳转路径,加上@esponsebody后返回结果不会被解析为跳转路径,⽽是直接写⼊HTTP response body中。
⽐如异步获取json数据,加上@Responsebody后,会直接返回json数据。
该注解⼀般会配合@RequestMapping⼀起使⽤。
@Controller:⽤于定义控制器类,在spring项⽬中由控制器负责将⽤户发来的URL请求转发到对应的服务接⼝(service层),⼀般这个注解在类中,通常⽅法需要配合注解@RequestMapping。
@RestController:⽤于标注控制层组件(如struts中的action),@ResponseBody和@Controller的合集。
@RequestMapping:提供路由信息,负责URL到Controller中的具体函数的映射。
@EnableAutoConfiguration:SpringBoot⾃动配置(auto-configuration):尝试根据你添加的jar依赖⾃动配置你的Spring应⽤。
Spring的核⼼组件详解Spring 总共有⼗⼏个组件,但是真正核⼼的组件只有三个:Core、Context 和 Bean。
它们构建起了整个 Spring的⾻骼架构,没有它们就不可能有 AOP、Web 等上层的特性功能。
⼀、Spring的设计理念Bean组件是 Spring核⼼中的重点,Spring 就是⾯向Bean编程的(Bean Oriented Programming:BOP)就像Object 对OOP的意义⼀样,没有对象的概念就像没有⾯向对象的编程,在Spring中没有Bean也就没有Spring存在的意义。
我们使⽤ Spring的主要⼀个原因就是 Spring会把对象之间的依赖关系转⽽⽤配置⽂件来管理。
也就是依赖注⼊机制。
⽽这个注⼊关系在⼀个叫 IOC的容器中管理,⽽IOC容器就是被Bean包裹的对象。
Spring正是通过把对象包装在Bean中从⽽达到管理这些对象及做⼀系列额外操作的⽬的。
⼆、Bean组件Bean组件在Spring的 org.springframework.beans 包下,在这个包下的所有类主要解决了3件事:Bean的定义、Bean的创建及对Bean的解析。
对Spring使⽤者来说唯⼀需要关⼼的就是Bean的创建,其他两个由Spring在内部完成。
BeanDefination:Bean的定义完整的描述了在 Spring配置⽂件中定义的<bean/>节点中所有的信息,包括各种⼦节点。
当Spring成功解析 <bean/> 节点后,在Spring内部它就被转化成 BeanDefinition对象,以后所有操作都是对这个对象操作。
Bean的解析过程⾮常复杂,功能被分的很细。
因为这⾥需要被扩展的地⽅很多,必须保证有⾜够的灵活性,以应对可能的变化。
Bean的解析主要就是对Spring配置⽂件的解析。
三、Context组件Context 在 Spring的 org.springframework.context 包下,给 Spring提供⼀个运⾏时的环境,⽤于保存各个对象的状态。
spring配置详解1.前⾔公司⽼项⽬的后台,均是基于spring框架搭建,其中还⽤到了log4j.jar等开源架包。
在新项⽬中,则是spring和hibernate框架均有使⽤,利⽤了hibernate框架,来实现持久化,简化sql操作等。
Hibernate配置⽂件可以有两种格式,⼀种是 hibernate.properties,另⼀种是hibernate.cfg.xml。
后者稍微⽅便⼀些,当增加hbm映射⽂件的时候,可以直接在 hibernate.cfg.xml ⾥⾯增加,不必像 hibernate.properties 必须在初始化代码中加⼊。
我们新项⽬中使⽤的是hibernate.cfg.xml格式。
不过在本⽂中不将细述,后续有机会再补上。
公司项⽬中,中间件主要有tomcat,webshpere,WebLogic。
以下,将对项⽬中spring基本配置,log4j的配置,还有中间件的相关参数配置做⼀个初步的介绍。
2.spring配置——以⽼GIS项⽬为例⼦GISV13中的配置涉及到了SpringMVC,IOC,AOP, Quartz⽅⾯的配置。
配置的实现是通过注记配置和XML配置来合作实现。
这⾥,我将按照Spring的配置流程,将其他⼏个⽅⾯的配置融合其中,来进⾏全⾯解析。
2.1SpringMVC的配置2.1.1.web.xml的配置Web程序中,当中间件启动时,中间件会⾸先读取web.xml中的配置。
在web.xml中可以配置监听器,过滤器,servlet映射等等。
在Spring 框架中,我们主要需配置容器初始化时读取的spring容器配置⽂件的路径以及springMVC中的分发器DispatcherServlet。
在GISV13的web.xml中,我们定义了如下内容:InitGISConfigServlet定义了容器启动时,⾸先要运⾏这个⽅法。
然后servletname为MVC的这部分便是定义了springMVC的分发器以及此servlet所对应的加载配置⽂件的路径。