打印机C6800操作说明书
- 格式:doc
- 大小:11.04 MB
- 文档页数:16
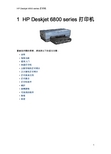
1 HP Deskjet 6800 series 打印机要查找问题的答案,请选择以下的适当主题:•说明•特殊功能•使用入门•连接打印机•从数字相机打印照片•从计算机打印照片•打印其他文档•打印提示•打印机软件•维护•故障排除•可选用的附件•规格•耗材2 特殊功能祝贺您!您购买的 HP Deskjet 打印机配备数种特殊功能:•内建连网功能:在不需要使用外接式打印服务器的情形下,连接到有线或无线网络。
•墨水备份模式:墨水备份模式可以让您在其他打印墨盒的墨水用完时,仅使用一个打印墨盒继续打印。
•“取消打印”按钮:只需按下一个按钮即可取消打印作业。
•在单张纸上打印多个页面:您可以使用打印机软件在单张纸上打印多达 16 个页面。
•无边界打印:在打印照片和卡片时,通过无边界打印功能充分利用整个页面的表面。
•数字照片打印:使用增强的数字照片打印功能。
•六种颜色墨水的可升级打印:使用照片打印墨盒增强照片打印。
•直接相机打印:使用打印机前方的 PictBridge 端口直接从数字相机打印照片。
•可选用的自动双面打印附件:购买自动双面打印附件以自动打印双面文档。
•可选用的具备小型纸盘的自动双面打印附件:购买可选用的具备小型纸盘的自动双面打印附件以自动打印双面文档,以及从打印机的后方装入小型介质。
•可选用的 250 张普通纸纸盘附件:购买可选用的 250 张普通纸纸盘附件以扩展打印机的纸张处理能力。
3 使用入门要获得打印机功能部件的概述,请参阅打印机功能部件页。
单击以下的适当主题,查阅相关的打印机功能部件说明:•按钮和指示灯•打印墨盒状态指示灯•纸盘•照片/信封进纸器•打印墨盒•墨水备份模式•自动纸张类型传感器•PictBridge 端口要获得可选用附件的说明,请参阅可选用的附件页。
3.1 打印机功能部件HP 打印机备有几个功能部件,可以使打印更容易、更有效。
1.按钮和指示灯2.纸盘3.照片/信封进纸器4.PictBridge 端口1.打印墨盒2.自动纸张类型传感器 (无图示)3.墨水备份模式(无图示)1.后端 USB 端口2.有线以太网端口可选用的附件自动双面打印附件(可选用)250 张普通纸纸盘附件(可选用)具备小型纸盘的自动双面打印附件(可选用)3.2 按钮和指示灯使用打印机按钮来打开和关闭打印机电源、取消打印作业,以及重新启动作业。


ACM680系列硬件说明书深圳科松电子有限公司一、................................................ 功能特性2二、............................................... 性能指标5三、............................................. 输入与输出6四、................................................. ACM680(系统安装7五、.............................................. 接线示意图8六、系统操作 (17)七、.......................................... 故障排除及诊断18一、功能特性ACM6800系列智能化门禁控制器,分为ACM6810、ACM6820、ACM6840三种款式;分别可控制一个、两个、四个单向刷卡的门;对于双向刷卡的门,ACM6820可控制一个,而ACM6840可控制两个;ACM6800系列门禁控制器采用全球最先进的MOTOROLA微控制芯片。
MOTOROLA微控制芯片具有速度快、功能强、强抗干扰的优良性能。
内置锁相模块,可以使用32KHZ的晶振产生高达32MHZ的频率,极有效地降低干扰及更高的稳定性能;在门禁系统设计中可支持最多64网络组,每一网络组下支持64网络主机,每一网络主机下支持8串行通信口,每一通信口支持运行64个门禁控制器;通过网络扩展,支持的门点数最多可达上万个。
ACM6800系列控制器既能通过密码键盘输入卡权限(此时卡用户数为100个),又可通过linkworks_xp门禁软件录入卡权限。
参阅图一各分图所示网络联接方式。
ACM6800系列控制器标准功能包括:门禁控制:支持Wiegand 26Bit Wiegand 32Bit Wiegand 40Bit支持ABA (第二轨道)支持生物识别技术支持指纹识别技术支持感应式支持密码键盘支持水印磁卡支持感应式IC卡支持多款带LCD的读卡器提供LCD显示的汉字与图型驱动ACM6810门禁控制器一个单向刷卡门ACM6820门禁控制器两个单向刷卡门或者一个双向刷卡门ACM6840门禁控制器四个单向刷卡门或者两个双向刷卡门输入和输出:ACM6810门禁控制器1组标准RJ45读卡器输入端口1组标准门状态输入端子1组出门请求按钮输入端子2组模拟或数字扩展输入端子2组输出端子---------- 1组门锁控制输出1组扩展输出2组TTL输出端子ACM6820门禁控制器2组标准RJ45读卡器输入端口2组标准门状态输入端子2组出门请求按钮输入端子4组模拟或数字扩展输入端子4组输出端子(可带12VDC电源输出)2组门锁控制输出2组扩展输出4组TTL输出端子ACM6840门禁控制器4组标准RJ45读卡器输入端口4组标准门状态输入端子4组出门请求按钮输入端子8组输出端子(可带12VDC电源输出)4组门锁控制输出4组扩展输出动态电压保护:所有输入/输出均带电压动态保护所有继电器输出带有瞬间过压保护所有继电器与主板用光耦隔离网络通讯:一个RS232接口,自动设置,直接或通过MODEM和PC通讯一个RS485网络通讯口,连接64个门禁控制器网络总长可达1200米通讯速率:1200、2400、4800、9600自行定义安全保护:RS485网络通讯采用完全的防雷安全模块,可抗击上万伏冲击雷电220V市电直接拉入8小时不损坏端口,一般的强电冲击可自动恢复DIP设置开关:SW 1—6位设置控制器地址SW 7 位设置MODEMSW 8 位设置冷热启动门禁控制数据库容量及性能:每个控制器32768个持卡人,增加RAM存贮器,可扩展至80000持卡人每个控制器可存贮,20000条进出事件或报警事件缓冲2种可编程进入密码控制----------- 卡带4位密码进入---------- 8位超级密码进入支持多卡同时刷卡开门区域防追踪(Anti —Passback协迫码进入报警多功能、可定义门控制时间组控制器内部逻辑连动控制64组即时控制器之间牵引联动控制任意输入输出点的远程手动控制支持MODEM远程通讯控制内存64K EPROM,512K RAM数据掉电保持时间超过150天多种系统板状态监测和自检----------- 外部电源掉电----------- 数据资料出错----------- 网络异常及系统复位等----------- 控制箱非法打开RS23接口(RS232Connector)RS48接口(RS485 Connector)A GND B磁(Door Sensor)出门按钮(Door P/B)图一.一6810单门系统图(密码键盘编程I GND (电锁输出公共端)100用户)辅助输入1(Alt Input1)辅助输入2(Alt Input2)读卡器接口+12VDC电锁常闭输出端)+5VDC什5V直流输入端)GND什5V直流地)GND (+12 V直流地)GND外部电锁电源输入地)+12VDC (+12直流输入端)①②③J7□_+12VDC常闭辅助输出端)GND (辅助输出公共端)_+12VDC常开辅助输出端)_+5VDC (1#TTL辅助输出端)GND (1#TTL辅助输出端)+5VDC (2#TTL辅助输出J5①②③④⑤⑥w②③④u1_u1o or&3i门禁主机图一.二6810单门系统图(电脑软件编程一32000用尸)6800系列门禁系统拓扑结构:LinkWorksXP 系统由主控系统、节点机以及控制器组成主控系统通过TCP/IP 连接若干节点(与节点通讯通过 Socket 通讯) 若干节点构成一个网络组(网络组为虚拟概念,系统最多可定义 64个网络组,每个网络组最多不超过64节点)同一网络组中的控制器所有属性相同,主控操作权限也相同一个RS485网络通讯口,最多可连接64个门禁控制器,控制器地址通过串口及其物理 地址来决定一个节点(通讯电脑)最多可支持 8个串口,每个子网下最多可连接 512个门禁控制 器 系统设计最多可达门数为上万个。
Contents CONTENTS (1)INTRODUCTION (2)PC SPECIFICATION (2)INSTALLATION (2)OPERATION (2)Start Up (2)Main Screen (3)View (3)Tests (4)System Menu (7)6800 USER INTERFACE FUNCTIONALITY (7)Data Store (7)Passwords (7)POSSIBLE PROBLEMS (8)IntroductionThe Linx 6800 Demonstrator is a Microsoft Windows® based application that runs on a PC or Laptop and accurately simulates the 6800 Printer User Interface allowing the user to navigate and perform a majority of the functions that can be achieved on the real printer.PC SpecificationThe PC or Laptop should be running Microsoft Windows® NT, 2000 or XP Pro. This software will NOT run on Windows 98 or 95.Minimum specification: Pentium 133 with 64M of RAM and 80M of hard disk space. InstallationOperationStart UpOn start up the following screen is displayed:The main view shows the top half of a 6800 keyboard with an additional Enter key placed in the top right hand corner.All keys on the simulated keyboard can be pressed with the mouse and operate in the same way as the corresponding keys on the real printer. The exceptions to this are the Start and Stop keys that do nothing.All other key operations should be performed using the PC keyboard.As with the real printer, all buttons and icons on the display area cannot be ‘pressed’ directly and have to be selected via the navigation keys.Main ScreenAccess to the Demonstrator menu bar is only via the mouse, use of the keyboard will control the menu on the 6800 screen.ViewSelecting the View menu provides the following functions:Double Size: Doubles the size of the view of the 6800 display. This provides a better view of the 6800 User Interface. The option can be toggled on or off:The Hot keys (and other keys) do not change size but are repositioned to correspond to the position of the icons on the re-sized display.Screenshot: Copies the current view of the 6800 display into a .bmp file. The user is asked to specify the name of the file. This image can then be used in documents or presentations as required.Settings: Allows the user to modify/view the name of the store file. This normally defaults to the file in the same directory as the Demonstrator executable.Exit: Exits the Demonstrator. This can also be achieved by pressing the button.TestsSelecting the Tests menu provides the following functions:Start error test/Stop error test: Starts and Stops the random error generator. Random errors are displayed at irregular intervals on the 6800 User Interface. This is used to simulate error conditions on the printer.Error now!: Generates a random error immediately.HelpSelecting the Help menu provides access to the About box:The About box shows the current version of the Demonstrator software along with the version of the 6800 software that to which the user interface corresponds.System MenuClicking on the icon displays the System menu. From here you can Close the application and view the About box.6800 User Interface FunctionalityThis document does not describe the use of the 6800 User Interface and the user should refer to the 6800 Operating Manual for details on printer operation. It should be noted though that the Demonstrator does not simulate printing or jet control and has a reduced set of options available to configure the printer. It is possible to create and save various items such as messages and logos as would be possible in the real printer.Data StoreAny information or data modified in the Demonstrator is saved in the file FULL_STORE.lnv that acts like the non-volatile memory on the printer.PasswordsPasswords are case sensitive on the Demonstrator and the default passwords used in the printer are stored in upper case so it is necessary to have Caps-Lock on when typing in a password.Possible ProblemsOn startup, the Demonstrator claims there are No datasets left in the search.Check the store file is not read-only. If so, make the file read/writeable.Check the store file exists. If not, copy the original file from the installation CD.Check the path to the store file is correct. Check the Settings option under the View menu.The store file may be corrupt. Overwrite the file with the original file from the installation CD.The Demonstrator appears to lose messages or the messages are corrupt.Make sure you shut the application down correctly by using the Exit option or pressing the button.The store file may be corrupt. Overwrite the file with the original file from the installation CD. Certain options in menus appear to have no or limited data in them.As the Demonstrator only simulates certain aspects of the printer operation some menu items will appear to have invalid data. This is likely to happen with data associated with printing or jet control functions.。
CM6800/1 低启动电流PFC/PWM二合一控制器一般说明:CM6800/1是一个具有PFC(功率因素校正)之开关电源控制器。
PFC可以容许使用较小的低損耗的bulk电容,降低电源线负载与开关FET所受的压力,使电源供应器能完全符合IEC-1000-2-3之规格。
CM6800/1的目的是作为已成為工业标准的ML-4824之BICMOS版本,所以線路上包括上升緣觸發(leading edge)的平均电流控制模式的升壓型之PFC和下降緣觸發的(trailing edge)PWM。
栅級驅動(Gate-driver)电流可达1A,可以大量减少外加驱动线路。
且这颗IC消耗功率低,故可增加电源供应器整体效率并降低零件損耗。
一旦负载忽然降低,则过电压比较器立即关掉PFC。
PFC亦具有峰值電流限制(peak current limiting)與輸入電壓太低(Input voltage brownout)之保護作用。
PWM可以在電壓或電流模式下運作。
頻率可高至250KHZ,並能將工作周期准確的限制在50%之內,以防變壓器飽和。
功能:z與ML4800,FAN6800/1腳對腳完全相同互用。
z在PWM增加一組folded-back電流限制z23V Bi-CMOS制程.z VIN OK保證在2.5V時開起PWM而不是1.5V。
z在同一IC中集成了具同步的leading edge PFC 與trailing edge PWMz slew rate 使transconductance error amplifier具有超快的響應z低啟動電流(100MA),低工作電流(3MA),低諧波失真,高PFPIN DESCRIPTION1 IEAO PFC跨導電流誤差放大器輸出2 I AC PFC增益控制信號參考輸入3 I SENSE PFC電流限制比較器電流檢測信號輸入4 V RMS PFC RMS 電源電壓補償信號輸入5 SS PWM軟啟動電容接點6 VDC PWM電壓回饋輸入7 RAMP1 振盪時序,由RT,CT決定振盪周期8 RAMP2 電流模式時,此腳位作為電流檢測輸入;電壓模式時,則為PFC輸出至PWM輸入9 DC I LIMIT PWM電流限制比較器輸入10 GND11 PWM OUT PWM驅動輸出12 PFC OUT PFC驅動輸出13 V CC14 V REF 內部7.5v基准電壓之緩沖輸出15 V FB PFC跨導誤差放大器輸入16 VEAO PFC跨導誤差放大器輸出一般功能说明:(Functional Deseription)CM6800/I 包括一組具平均電流模式控制的連續升壓型PFC之前端線路(Front End)與一組同步PWM之後端線路。
2C ONSUMABLES L ISTDescription Qty Life Fujitsu P/N Pick Rollers 1 Set600,000PA03575-K011 Separator Roller1600,000PA03575-K012 Brake Roller1600,000PA03575-K013Note:To insure the longest possible consumable life, it is strongly recommended that all the consumables listed above be replaced at the same time. Not replacing all the consumables at the same time will decrease the life of the consumables.NCR or Carbonless paper has chemical composition which damages the consumables listed above. Cleaning of these items will be needed more frequently to avoid feed problems. Also their life will be reduced if this paper is scanned.Pick RollersBrake Roller Separator Roller3R EPLACING THE P ICK R OLLERSWorn, defective, or improperly installed Pick Rollers will cause misfeeds and paper jams. The Pick Rollers have an approximate life of 600,000pages. If NCR or carbonless paper is used the life span of the PickRollers may be decreased by half.TabRoller CoverPick Roller•Make sure there is no paper in the stacker.•Grab the ADF Release Tab and lift it up to open the ADF.Note:When you stop pushing up on the ADF it stays at that location.•Open the Roller Cover by grabbing the tabs on the left and right sides with your fingers and pull down.•Pull out on the tab that locks the Pick Roller in place in the direction of the arrow and slide the Pick Roller off the shaft.•Repeat the procedure above to remove the second Pick Roller.Note:The roller shaft and the hole in the Pick Rollers are keyed and will only slide on in one orientation.•Install the new Pick Rollers by aligning the hole in the rollers with the roller shaft.4R EPLACING THE P ICK R OLLERS (CONT.)•Install the new Pick Rollersby aligning the hole in therollers with the roller shaft.•Close the Roller Cover.•Close the ADF Cover.•Reset the Pick RollerCounter in the SoftwareOperation Panel or on theScanner Operator Panel.5R EPLACING THE S EPARATOR R OLLERA worn or improperly installed Separator Roller will cause multiple feeds and paper jams. Separator Roller has an approximate life of 600,000pages. If NCR or carbonless paper is used the life span of the theserollers may be decreased by half.TabRoller CoverLeverSeparator RollerLeverSeparator Roller•Make sure there is no paper in the stacker.•Grab the ADF Release Tab and lift it up to open the ADF.Note:When you stop pushing up on the ADF it stays at that location.•Open the Roller Cover by grabbing the tabs on the left and right sides with your fingers and pull down.•Pull down the lever which is located on the right side of the Separator Roller.•Pull down the lever which is located on the left side of the Separator Roller.6•Pull the lever on the left sideof the Separator Rollertowards you and remove italong with the shaft.•Install the new SeparatorRoller by inserting the rightside of the shaft first, thenthe left side so that the tabfits in the groove.•Push up the lever which islocated on the left side of theSeparator Roller.•Push up the lever which islocated on the right side ofthe Separator Roller.TabSeparator RollerSeparator RollerSeparator RollerLever R EPLACING THE S EPARATOR R OLLER (CONT.)Separator RollerLever7R EPLACING THE S EPARATOR R OLLER (CONT.)•Close the Roller Cover.Note:Make sure that both ends of the cover are locked firmly.•Close the ADF Cover.•Reset the Separator Roller Counter in the Software Operation Panel or on the Scanner Operator Panel.Roller Cover8R EPLACING THE B RAKE R OLLERA worn or improperly installed Brake Roller will cause multiple feeds and paper jams. The Brake Roller has an approximate life of 600,000 pages. If NCR or carbonless paper is used the life span of the Brake Roller may be decreased by half.•Make sure there is no paperin the stacker.•Grab the ADF Release Taband lift it up to open the ADF.Note:When you stop pushing up on the ADF it stays at that location.•Grab the Roller Cover by thelower middle and lift to open.•Lift the left side of the BrakeRoller and then pull the shaftout from left to right.•Install the new Brake Rollerby inserting the right end ofthe shaft into the mountinghole, then place the left endinto the mounting bracket.•Close the Roller Cover.Roller CoverBrakeRollerBrakeRollerR EPLACING THE B RAKE R OLLER (CONT.)•Close the ADF Cover.•Reset the Brake Roller Counter in the Software Operation Panel or onthe Scanner Operator Panel.910C HECKING AND R ESETTING THE C ONSUMABLE & C LEANING C OUNTERS The following instructions show you how to check the life count of each consumable and also how to reset the counter after the consumables have been replaced. To insure accurate consumable life tracking, it is very important to reset the consumable counters every time consumables are replaced.C HECKING C ONSUMABLE C OUNTS•Turn on the scanner and confirm it is communicating properly to your PC.•From the S TART M ENU, select A LL P ROGRAMS/S CANNERU TILITY FOR M ICROSOFT W INDOWS/S OFTWARE O PERATIONP ANEL.•The S OFTWARE O PERATION P ANEL opens.•From the listing on the left, select Device SettingC HECKING AND R ESETTING THE C ONSUMABLE & C LEANING C OUNTERS (CONT .)CounterDescriptionTotal Page Count(ADF)Pages scanned by the fi-6800/6400Scanner.After Cleaning Number of pages scanned since the last time the scanner was cleaned.Brake Roller Number of pages scanned since the Brake Roller was replaced.Pick Roller Number of pages scanned since the Pick Rollers were replaced.Separator Roller Number of pages scanned since the Separation Rollers were replaced.Assist RollerNumber of pages scanned since the Assist Roller was replaced. This counter cannot be reset by the user.The screen on the previous page displays the Life Count of the Scannerand the number of pages scanned by each consumable.R ESETTING THE C ONSUMABLE C OUNTERS U SING THE S OFTWARE O PERATION P ANELOnce consumables are replaced, it is very important to reset theConsumable Counters. This will allow the user to accurately track the page count of each consumable.•Click the C LEAR B UTTON beside the replaced consumable.•Click the OK B UTTON.C HECKING AND R ESETTING THE C ONSUMABLE C OUNTERS (CONT.)R ESETTING THE C ONSUMABLE C OUNTERS U SING THE S CANNER M ENUThe consumable counters can also be reset from the scanner Operator Panel.•Make sure the scanner is on and Ready.•Press the M ENU B UTTON.•Press the [] or [] and select [23: Show/Clear Counters].•Press the F UNCTION/E NTER B UTTON.•Press the [] or [] until the replaced consumable is displayed on the LCD.•Press the C OUNTER R ESET B UTTON.•Make sure that YES is highlighted and press the F UNCTION/E NTERB UTTON to confirm.C LEANING L OCATIONS AND F REQUENCIESNote:The scanner will need to be cleaned more frequently than stated above if the following paper is scanned.•Paper with special coating such as carbonless paper (NCR).•Paper with large amount of printing. (Heavy toner or ink)•Paper filled in with Pencil.•Documents containing a large amount of calcium carbonate.•Documents with toner that is not fused properly.Cleaning ClothsCG90000-120001Cleaning SheetsCA99501-0016Cleaner F1PA03950-0352C LEANING MATERIALSCleaning WipesPA03951-0419Cleaning Swabs CG90000-120601LocationProtective PaperCleaning SheetLeft Hopper GuideCleaning SheetC LEANING THE R OLLERS WITH THE C LEANING S HEETSThe cleaning sheets are designed to remove only loose paper dust and ink from the rollers. Use them approximately every 10,000 sheets scanned.They are to be used in between the thorough cleanings of the ing the cleaning sheets does not take the place of the more com-plete cleanings described later in this section •Make sure the scanner is ON.•Press the M ENU B UTTON .•Press the [] or [] and select [23: Show/Clear Counters].•Press the F UNCTION /E NTER B UTTON .•Set the Hopper Guides to their maximum width.•Adjust the Stacker Extension to the length of the Cleaning Sheet and pull up on the Paper Stopper.Stacker ExtensionPaper StopperHopper Side Guide•Remove the protective paper from the cleaning sheet.•Place the cleaning sheet on the Hopper against the Left Hopper Guide, adhesive side up to clean the Upper Transport Path.•Press the S CAN B UTTON .•The cleaning sheet is fed through the scanner.•Place the same cleaning sheet on the Hopper against the Right Hopper Guide,adhesive side up.•Press the S CAN B UTTON .•The cleaning sheet is fed through the scanner.•Repeat the previous steps with the adhesive side face down to clean the lower Transport Path.•Press the S TOP B UTTON .•Reset the Cleaning Counter in the Software Operation Panel or on the Scanner Operator Panel.C LEANING THE R OLLERS WITH THE C LEANING S HEETS (CONT .)Right HopperGuideCleaning SheetC LEANING THE C ONSUMABLE F EED C OMPONENTSIt is very important to clean the scanner consumables on a regular basis to avoid mis-picking, double feeding and paper jam problems. These items should be cleaned every 10,000 sheets. More frequent cleaning will be required if scanning paper with a large amount of printing,documents filled out in pencil, or carbonless multipart forms.•Make sure there is no paper in the stacker.•Grab the ADF Release Tab and lift it up to open the ADF.•Remove the Pick Rollers (Refer to page 3).•Using a cloth with F1Cleaner or isopropyl alcohol gently wipe across the Pick Rollers, along the grooves of the roller surface.•Reinstall the Pick Rollers•Remove the Separator Roller (Refer to page 5).•Using a cloth with F1Cleaner or isopropyl alcohol gently wipe across the Separator Roller, along the grooves of the roller surface.•Reinstall the Separator Roller.Note:Proper cleaning of the Pick Rollers, Brake Roller and Separator Rollers will increase the life of each component.C LEANING THE C ONSUMABLE F EED C OMPONENTS (CONT.)•Remove the Brake Roller (Refer to page 8).•Using a cloth with F1Cleaner or isopropyl alcoholgently wipe along thedirection of the grooves ofthe roller surface•Reinstall the Brake Roller.•Reset the Cleaning Counter in the Software Operation Panel or on the Scanner Operator Panel.C LEANING THE P INCH AND F EED R OLLERSIt is very important to clean the scanner pinch and feed rollers on a regular basis to avoid paper feeding problems. These rollers should be cleaned every 10,000 sheets. More frequent cleaning will be required if scanning paper with a large amount of printing, documents filled out in pencil, or carbonless multipart forms.•Open the Top Cover by grabbing the Top Cover Release Tab and pushing up.•Clean the Feed Rollers in the upper area of the scanner with a lint free clothmoistened with F1 Cleaner or isopropyl alcohol. Clean the whole surface of the rollers by rotating them manually.Below is a location of the different types of rollers in the scanner.Top Cover Release TabTop CoverFeed RollersFeed RollersPinch RollersC LEANING THE P INCH AND F EED R OLLERS (CONT .)•Open the ADF.•Clean the Feed Rollers in the lower area of the scanner with a lint free cloth moistened with F1 Cleaner or isopropyl alcohol. Clean the whole surface of the rollers by rotating them manually.•Clean the Assist Roller in the roller area of the scanner with a lint free cloth moistened with F1 Cleaner or isopropyl alcohol. Clean the whole surface of the rollers by rotating them manually.•Clean the Pinch Rollers in the upper area of the scanner with a lint free cloth moistened with F1Cleaner or isopropyl alcohol.Clean the whole surface of the rollers by rotating them manually.•Clean the Pinch Rollers in the ADF of the scanner with a lint free cloth moistened with F1 Cleaner or isopropyl alcohol. Clean the whole surface of the rollers by rotating them manually.Feed RollersAssist RollerPinch RollersPinch Rollers•Close the ADF Cover.•Reset the Cleaning Counter in the Software Operation Panel or on the Scanner Operator Panel.C LEANING THE P APER P A TH S HEET G UIDESKeeping the transport path clean will avoid paper feeding issues and the marking of scanned paper.•Open the ADF.•Clean the metal sheet guides in the upper section of the ADF with a lint free cloth moistened with F1 Cleaner or isopropyl alcohol.•Clean the metal sheet guides in the lower section of the ADF with a lint free cloth moistened with F1 Cleaner or isopropyl alcohol.Note:If the transport path contains a large amount of paper dust use a vacuum cleaner to clean.•Reset the Cleaning Counter in the Software Operation Panel or on the Scanner Operator Panel.Dirty Glass Areas can cause vertical streaks in the scanned image. It isvery important to keep these areas free of paper dust, ink and toner.•Clean the Glass Areas on the upper side of the ADF with a lint free cloth.Note:Under normal conditions the Removable Glass assembly should nothave to be removed. If there is a large amount of paper dust in the scanner and the scanned images continue to have vertical streaks,follow the directions below to clean behind the glass.•Loosen the screw on the GlassAssembly. This is a captivescrew so it will not come free.•Tilt the Glass to the angle shownon the right.•Remove the Glass as you slide itto the right.•Clean the backside of the glassyou removed with a lint freecloth.•Using a cotton swab, clean theglass inside the area where theGlass was removed.•Reinstall the Glass Assembly.C LEANING THE G LASS AREASRemovable GlassNon-Removable GlassGlassC LEANING THE G LASS A REAS (CONT .)•Clean the Glass Areas on the lower side of the ADF with a lint freecloth.Note:Under normal conditions the Removable Glass assembly should nothave to be removed. If there is a large amount of paper dust in thescanner and the scanned images continue to have vertical streaks,follow the directions below to clean behind the glass.•Loosen the screw on the GlassAssembly. This is a captivescrew so it will not come free.•Tilt the Glass to the angle shownon the right.•Remove the Glass as you slide itto the left.•Clean the backside of the glassyou removed with a lint freecloth.•Using a cotton swab, clean theglass inside the area where theGlass was removed.•Reinstall the Glass Assembly.•Reset the Cleaning Counter in the Software Operation Panel or on theScanner Operator Panel.Removable GlassNon-Removable GlassGlassDirty Document Sensors can cause false paper jam messages.C LEANING THED OCUMENT S ENSORS•Open the scanner Top Cover.•Clean the Document Sensorin the top section of thescanner with a lint free cloth.•Open the ADF.•Clean the Document Sensors in the upper section of the ADF area withthe a lint free cloth moistened with F1 Cleaner or isopropyl alcohol.•Clean the Document Sensors in the lower section of the ADF area withthe a lint free cloth moistened with F1 Cleaner or isopropyl alcohol.•Close the ADF.•Reset the Cleaning Counter in the Software Operation Panel or on the Scanner Operator Panel.Document SensorDocument Sensors Document SensorsDocument SensorsDocument SensorsC LEANINGTHE H OPPER F RICTION P ADS•Make sure the Hopper is open.•Clean the Friction Pads with a lint free cloth moistened with F1 Cleaneror isopropyl alcohol.•Reset the Cleaning Counter in the Software Operation Panel or on theScanner Operator Panel.Friction PadsDirty Hopper Friction Pads can cause multifeeds when the Hopper only hasa few sheets stacked on it.Fujitsu Computer Products of America, Inc./fcpaPrinted in the U.S.A.。
复印机使用说明书
相关软件驱动在\\192.168.3.32\公共文件夹\资讯科技中心\软件\相关驱动\打印机
打印机安装流程在第八页
一、功能按键说明
如图:
“Reset”为还原设置,即还原为系统界面的默认设置,当出现设置错误的时候可以还原默认设置,让操作者重新设置。
“stop”为停止,停止机器继续操作,如:复印数量已足够而机器还继续复印的时候,可以按下此按钮停止复印机继续复印。
“Start”为开始运行,当操作者完成复印或其他设置后,按下此按钮进行复印操作。
“clear”为清除,当操作者输入数字时可以进行清除号码,重新输入。
“energy saver”为节能模式,当没使用者使用机器的时候可以按下此按钮,机器进入节能模式。
注:当使用者需要使用机器的时候,若机器处在节能模式下,则需要按下“energy saver”,并等待机器预热(2-8分钟)。
“display contrast”为屏幕深浅度设置。
“ON/OFF”为机器开关按钮。
注:其他上面没有进行说明的按钮为管理员按钮,一般无需使用。
二、复印说明
1.复印功能菜单说明
如图为复印功能的使用界面:
2.复印颜色选择
如图:在复印菜单中的左上方颜色按钮中选择需要的颜色:第一项为自动选择,复印出来的文件颜色为原稿的颜色;第二项为全彩(注:原稿为黑白则复印也为黑白);第三项为黑白(原稿为彩色的,复印效果变为黑白)。
3.纸张选择功能说明:
(1)按下“paper select”,在对话框中右边按钮中选择需要用的复印纸张类型,也可设置为“auto(自动)”。
(2)手动送纸,则选择“stack bypass”。
(3)选择后点击“DONE”。
4.复印比例功能说明:
(1)在复印功能菜单中选择“copy ratio”,在弹出的对话框中自行选择复印比例。
默认大小100%。
(2)左右两边的选项为系统设置的比例,中间部分为手动设置,按“—”、“+”进行比例设置。
(3)完成比例设置后按下“DONE”按钮。
5.其他复印功能说明:
第一选项为:两张单面的文件合并为一张双面的文件
第二选项为:一张双面的文件复印为一张双面的文件
第三选项为:一张双面的文件拆分为2张单面的文件复印
第四选项为:复印书本模式,把书本的两页或把两份文件并排在一起,合并为一张双面的文件。
三、传真功能操作
1把传真文件复印放到原稿台,盖好。
2点击“send”----“fax”,在对话框中输入对方传真号码。
3输入号码,稿件放在输稿器上,点击“OK”,开始传真。
四、如何安装打印.扫描驱动.
相关软件驱动在\\192.168.3.32\公共文件夹\资讯科技中心\软件\相关驱动\打印机1.打印
(1)开始----打印机与传真机----左上方“添加打印机”
(2)点击“下一步”-----选择“连接到此……”选项后点击“下一步”
(3)在新对话框中选择“创建新端口”,端口类型选择“TCP/IP”项,点击“下一步”
(4)再点“下一步”-----在对话框中输入打印机名:192.168. 3. 41 ,端口名会自动填充,点击“下一步”
(5)选择“标准—Generic network card”,点击“下一步”
(6)点击“完成”。
之后会自动返回到“添加打印机向导”,在厂商对话框中选择“canon”,打印机选框中选择“,然后点击“从磁盘安装”
------点击新对话框中的“浏览”---从跟机光碟中c6800\Driver\pcl5e_5c “找到如下图文件.
再选择c6800 添加安装.,下一步`直到完成安装`.即可使用打印.
2.扫描.
(1)安装扫描软件,从光碟中找到“ColorNetworkScanGear_V261_Win_ZH文件夹”在文件内找到setup.exe 进行安装.
(2)在复印机的“scan”菜单中选择“online”。
(3)点击“开始”---应用程序----“Network ScanGear”----- “ScanGear tool”
(4)进入对话框后点击“发现”------直接到出现打印机IP地址-------选定IP地址,点击“发现”按钮上方的“选择”按钮-------点击“终了”。
(5)可选择“photo shop”、“picasa”或其他图片应用软件中的的“导入”按钮,在“导入来源”中选择“color network scangear v2.61”
扫描功能均为默认.只需选择原稿放置方向即刻扫描. 扫描完毕关闭该扫描软件方可整理图片
注意事项.复印机的Scan 为Online 状态不能复印.
此选项为稿台和输送器的扫描选择
如有疑问,请与资讯科技科部sun联系,分机:8046.
广东车国会汽车服务有限公司员工内部使用
整理日期:2010_04_29
由sun.lu整理。