Agilent34972A数据采集仪操作规程
- 格式:doc
- 大小:24.50 KB
- 文档页数:2

1.目的:指导使用安捷伦34970A的人员进行正确的操作,确保数据准确及仪器的正常使用。
2. 适应对象:本公司所有使用安捷伦34970A的人员。
3.权责:此文件有品质部制定及管理。
4.安捷伦的设置4.1.使用前准备;4.1.1 安捷伦34970A测试仪一台、测试卡一张、RS232或者GPIB线一根。
4.1.2电脑。
4.1.3经过品质部的人员进行培训后使用该仪器。
4.2.使用方法4.2.1 RS232的接线图,如下所示4.2.2 34970A的端口设置确认电脑COM口设置,注意一定要保证电脑的COM设置和34970A RS-232设置一致!4.2.3 电脑端口设置第一步:在控制面板中打开系统属性对话框(for WinXP)第二步:打开硬件管理器第三步:检查并修改COM设置,使其和34970A RS-232设置一致4.2.4 GPIB的通讯线使用方法第一步:电脑开机后连接GPIB通讯线,按照步骤安装GPIB的驱动第二步:修改安捷伦34970A的参数设置,参照使用RS232的步骤,选择GPIB即可第三步:安捷伦34970A参数设置完成后即可进行联机,进行温度、电压、电流的采集。
5.软件设置第一步:点击“配置仪器”如果有仪器存在,先点击“删除仪器”。
点击“添加仪器”,然后点击“查找”查找到仪器后,点击“连接”,即可连上电脑第二步:点击“配置通道”将所需要的通道号进行选择,并选择相应的功能。
测量直流电压时,选择“直流电压”;测量温度时,选择相应类型的热电偶。
以使用K型热电偶进行温度测量为例,如下所示:第三步:点击“扫描和记录数据”点击“扫描和记录数据”,如下所示。
并点击选择框内的设置,进行相关的扫描时间设置。
完成扫描时间设置后点击确定即可。
如下图所示,开始温度记录。
如下图所思,已联机成功,并开始进行数据采集采集完成后,点击下图中的框内,即可结束采集。
然后到处数据至相应的文件夹内。
指定到相应的文件夹内即可。
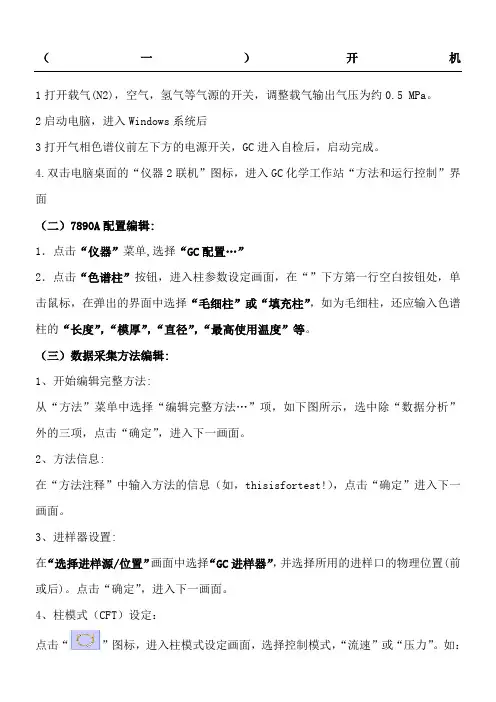
(一)开机1打开载气(N2),空气,氢气等气源的开关,调整载气输出气压为约0.5 MPa。
2启动电脑,进入Windows系统后3打开气相色谱仪前左下方的电源开关,GC进入自检后,启动完成。
4.双击电脑桌面的“仪器2联机”图标,进入GC化学工作站“方法和运行控制”界面(二)7890A配置编辑:1.点击“仪器”菜单,选择“GC配置…”2.点击“色谱柱”按钮,进入柱参数设定画面,在“”下方第一行空白按钮处,单击鼠标,在弹出的界面中选择“毛细柱”或“填充柱”,如为毛细柱,还应输入色谱柱的“长度”,“模厚”,“直径”,“最高使用温度”等。
(三)数据采集方法编辑:1、开始编辑完整方法:从“方法”菜单中选择“编辑完整方法…”项,如下图所示,选中除“数据分析”外的三项,点击“确定”,进入下一画面。
2、方法信息:在“方法注释”中输入方法的信息(如,thisisfortest!),点击“确定”进入下一画面。
3、进样器设置:在“选择进样源/位置”画面中选择“GC进样器”,并选择所用的进样口的物理位置(前或后)。
点击“确定”,进入下一画面。
4、柱模式(CFT)设定:点击“”图标,进入柱模式设定画面,选择控制模式,“流速”或“压力”。
如:压力,25psi;或流速,6.5ml/min。
5、分流不分流进样口参数设定:点击“”图标,进入进样口设定画面。
点击“模式”右方的下拉式箭头,选择进样方式为“不分流”(或分流方式,分流)。
输入进样口的温度(如250℃),输入隔垫吹扫流量(如3ml/min)。
在“分流出口吹扫流量”下边的空白框内输入吹扫流量(如0.75min后60ml/min);如选择分流方式,则要输入“分流比”。
6、柱温箱温度参数设定:点击“”图标,进入柱温参数设定。
在空白表框内输入温度,选中“柱温箱温度为开”左边的方框;℃/min—升温速率;输入合适的升温参数。
7、FID检测器参数设定:点击“”图标,进入检测器参数设定。
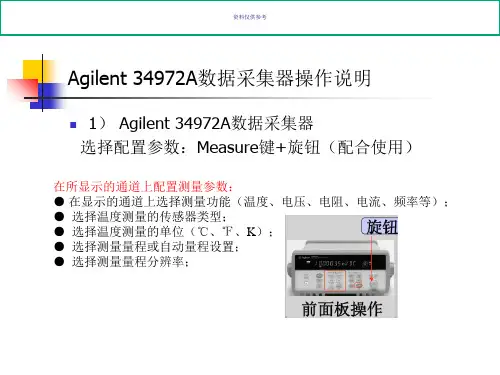
数据采集系统实验指导书杭州电子科技大学自动化学院二OO三年六月实验一:Agilent34970A数据采集仪基本操作实验一、实验目的1.了解Agilent34970A数据采集仪的基本结构和功能。
2.了解Agilent34901A测量模块的基本功能和工作原理。
3.学习Agilent34970A数据采集仪使用面板进行数据采集的方法。
二、实验要求1.根据Agilent34970A数据采集仪用户手册,掌握各开关、按钮的功能与作用。
2.通过Agilent34901A测量模块,分别对J型热电偶、Pt100、502AT热敏电组、直流电压、直流电流进行测量。
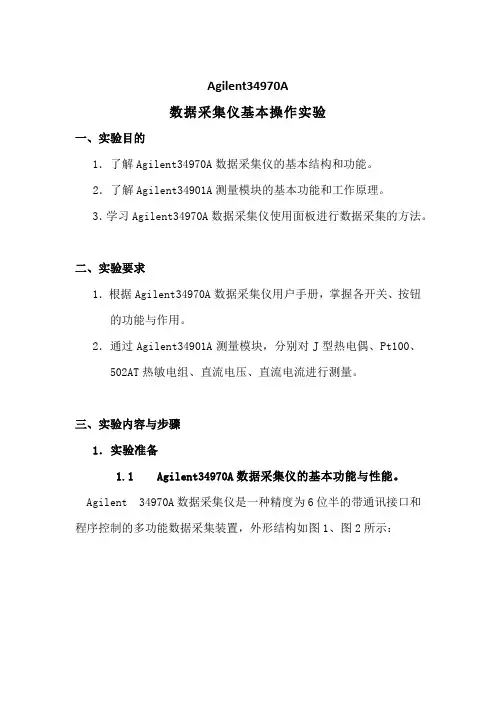
三、实验内容与步骤1.实验准备1.1 Agilent34970A数据采集仪的基本功能与性能。
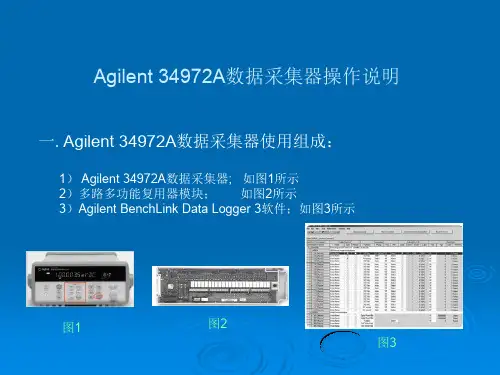
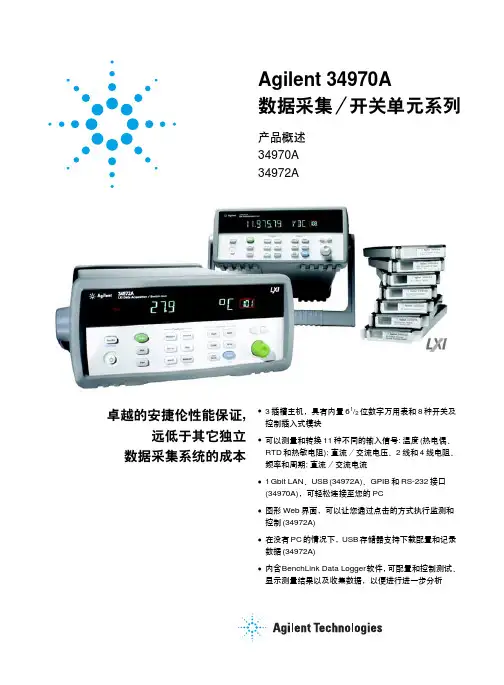
Agilent 34970A数据采集仪是一种精度为6位半的带通讯接口和程序控制的多功能数据采集装置,外形结构如图1、图2所示:图1 Agilent34970A数据采集仪外形图2 Agilent34970A数据采集仪后背板其性能指标和功能如下:1. 仪器支持热电偶、热电阻和热敏电阻的直接测量,具体包括如下类型:热电偶:B 、E 、J 、K 、N 、R|T 型,并可进行外部或固定参考温度冷端补偿。
热电阻:R 0=49Ω至2.1kΩ,α=0.000385(NID/IEC751)或α=0.000391的所有热电阻。
热敏电阻:2.2 kΩ、5 kΩ、10 kΩ型。
2. 仪器支持直流电压、直流电流、交流电压、交流电流、二线电阻、四线电阻、频率、周期等11种信号的测量。
3. 可对测量信号进行增益和偏移(Mx+B)的设置。
4. 具有数字量输入/输出、定时和计数功能。
5. 能进行度量单位、量程、分辨率和积分周期的自由设置。
6. 具有报警设置和输出功能。
7. 热电偶测量基本准确度:1.0℃,温度系数:0.03℃。
8. 热电阻测量基本准确度:0.06℃,温度系数:0.003℃。
9. 热敏电阻测量基本准确度:0.08℃,温度系数:0.003℃。
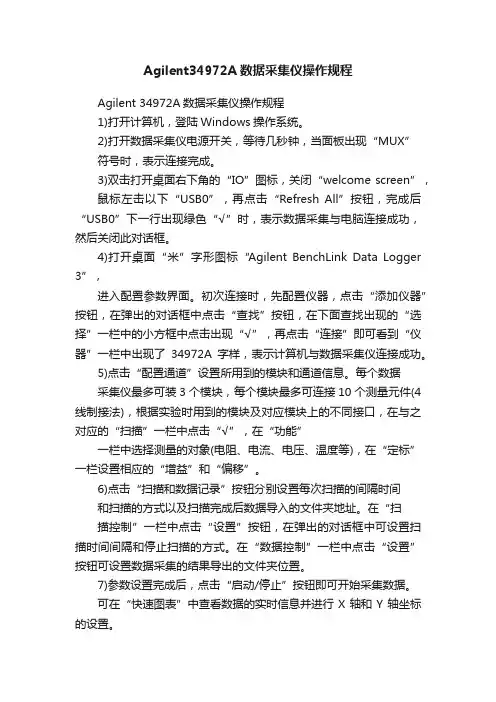
Agilent34972A数据采集仪操作规程Agilent 34972A数据采集仪操作规程1)打开计算机,登陆Windows操作系统。
2)打开数据采集仪电源开关,等待几秒钟,当面板出现“MUX”符号时,表示连接完成。
3)双击打开桌面右下角的“IO”图标,关闭“welcome screen”,鼠标左击以下“USB0”,再点击“Refresh All”按钮,完成后“USB0”下一行出现绿色“√”时,表示数据采集与电脑连接成功,然后关闭此对话框。
4)打开桌面“米”字形图标“Agilent BenchLink Data Logger 3”,进入配置参数界面。
初次连接时,先配置仪器,点击“添加仪器”按钮,在弹出的对话框中点击“查找”按钮,在下面查找出现的“选择”一栏中的小方框中点击出现“√”,再点击“连接”即可看到“仪器”一栏中出现了34972A字样,表示计算机与数据采集仪连接成功。
5)点击“配置通道”设置所用到的模块和通道信息。
每个数据采集仪最多可装3个模块,每个模块最多可连接10个测量元件(4线制接法),根据实验时用到的模块及对应模块上的不同接口,在与之对应的“扫描”一栏中点击“√”,在“功能”一栏中选择测量的对象(电阻、电流、电压、温度等),在“定标”一栏设置相应的“增益”和“偏移”。
6)点击“扫描和数据记录”按钮分别设置每次扫描的间隔时间和扫描的方式以及扫描完成后数据导入的文件夹地址。
在“扫描控制”一栏中点击“设置”按钮,在弹出的对话框中可设置扫描时间间隔和停止扫描的方式。
在“数据控制”一栏中点击“设置”按钮可设置数据采集的结果导出的文件夹位置。
7)参数设置完成后,点击“启动/停止”按钮即可开始采集数据。
可在“快速图表”中查看数据的实时信息并进行X轴和Y轴坐标的设置。


Keysight TechnologiesMigrating to the Latest Keysight Software for the 34972/70A Data Acquisition UnitsMigration GuideKeysight’s BenchVue Data Acquisition (DAQ) Control and Analysis app (BV0006B) is the next-generation software application for users that own Keysight’s 34972A or 34970A data acquisition units. Many of the features that were popular in the BenchLink Data Logger Pro Software (34830A); BenchLink Data Logger 3 software (34825A); or the previous BenchVue DAQ and DAQ Pro version apps (v3.x and below) have been updated and included in the modern BenchVue DAQ app with more features and updates to come. The table on page 3 provides easy reference regarding which features are available, enhanced, and ready for you to use with the new BenchVue DAQ app. Effortlessly, migrate from older DAQ software to the new BenchVue DAQ Control and Analysis app and start driving measurements to actionable insights faster today. BenchVue SoftwareKeysight BenchVue software for the PC eliminates many of the issues around bench testing. By making it simple to connect, control instruments, and automate test sequences you can quickly move past the test development phase and access results faster than ever before. You will derive answers faster by easily viewing, logging and exporting measurement data and screen images with only a few clicks of your mouse. Dedicated instrument apps allow you to quickly configure the most commonly used measurements and setups for each instrument family. BenchVue apps provide extensive data, trace and measurement logging capabilities and automation with Test Flow. BenchVue supports hundreds of Keysight instrument types and models all from one easy to use application. With BenchVue, you get more from your instruments.Test Flow AutomationIncluded with the DAQ app is BenchVue Test Flow which allows you to quickly build automated test sequences, send SCPI commands, and control multiple instruments. Gain deeper access to your instrument’s capabilities with Command Expert sequences integrated into Test Flow. The intuitive interface enables you to quickly create instrument test sequences significantly reducing test development time.Keysight continues to provide enhancements to the BenchVue DAQ app to integrate more Test Flow automatable controls (available late 2017) making it even easier to build test sequences.Keysight Software Features and Enhancements ComparisonsConclusionThe next-generation software for DAQ users is the BenchVue Data Acquisition Control and Analysis app (BV0006B). Most users will be able to replace their older BenchLink Data Logger Pro software with BenchVue’s DAQ app with little effort.The BenchVue DAQ app provides a modern software experience with an intuitive user interface that shortens the learning curve giving you to access your DAQ measurements and data faster, reducing your test and development time.Control, Automate and Simplify with BenchVueLearn more about the BenchVue Data Acquisition Control and Analysis app at/find/BenchVueDAQBenchVue connects to over 470 Keysight instruments and counting. To view the BenchVue supported instruments list visit:/find//BenchVueInstrumentsTo learn more about BenchVue software and its other time-saving apps visit:/find/BenchVueThis information is subject to change without notice.© Keysight Technologies, 2017Published in USA, March 28, 20175992-2223ENmyKeysight/find/mykeysightA personalized view into the information most relevant to you.Keysight Infoline/find/InfolineKeysight’s insight to best in class information management. Free access to your Keysight equipment company reports and e-library.KEYSIGHT SERVICESKeysight Services/find/serviceOur deep offering in design, test, and measurement services deploys an industry-leading array of people, processes, and tools. The result? We help you implement new technologies and engineer improved processes thatlower costs.Three-Year Warranty/find/ThreeYearWarrantyKeysight’s committed to superior product quality and lower total cost of ownership. Keysight is the only test and measurement company withthree-year warranty standard on all instruments, worldwide. And, we provide a one-year warranty on many accessories, calibration devices, systems andcustom products.Keysight Assurance Plans/find/AssurancePlansUp to ten years of protection and no budgetary surprises to ensure your instruments are operating to specification, so you can rely on accurate measurements.Keysight Channel Partners/find/channelpartnersGet the best of both worlds: Keysight’s measurement expertise and product breadth, combined with channel partner convenience.For more information on KeysightTechnologies’ products, applications or services, please contact your local Keysight office. The complete list is available at:/find/contactus Americas Canada (877) 894 4414Brazil 55 11 3351 7010Mexico001 800 254 2440United States (800) 829 4444Asia Pacific Australia 1 800 629 485China800 810 0189Hong Kong 800 938 693India 1 800 11 2626Japan 0120 (421) 345Korea 080 769 0800Malaysia 1 800 888 848Singapore 180****8100Taiwan0800 047 866Other AP Countries (65) 6375 8100Europe & Middle East Austria 0800 001122Belgium 0800 58580Finland 0800 523252France 0805 980333Germany ***********Ireland 1800 832700Israel 1 809 343051Italy800 599100Luxembourg +32 800 58580Netherlands 0800 0233200Russia 8800 5009286Spain 800 000154Sweden 0200 882255Switzerland0800 805353Opt. 1 (DE)Opt. 2 (FR)Opt. 3 (IT)United Kingdom0800 0260637For other unlisted countries:/find/contactus(BP-2-23-17)/go/quality Keysight Technologies, Inc.DEKRA Certified ISO 9001:2015Quality Management SystemEvolvingOur unique combination of hardware, software, support, and people can help you reach your next breakthrough.We are unlocking the future of technology.From Hewlett-Packard to Agilent to Keysight。
Agilent34970A数据采集仪基本操作实验一、实验目的1.了解Agilent34970A数据采集仪的基本结构和功能。
2.了解Agilent34901A测量模块的基本功能和工作原理。
3.学习Agilent34970A数据采集仪使用面板进行数据采集的方法。
二、实验要求1.根据Agilent34970A数据采集仪用户手册,掌握各开关、按钮的功能与作用。
2.通过Agilent34901A测量模块,分别对J型热电偶、Pt100、502AT热敏电组、直流电压、直流电流进行测量。
三、实验内容与步骤1.实验准备1.1 Agilent34970A数据采集仪的基本功能与性能。
Agilent 34970A数据采集仪是一种精度为6位半的带通讯接口和程序控制的多功能数据采集装置,外形结构如图1、图2所示:其性能指标和功能如下:1.仪器支持热电偶、热电阻和热敏电阻的直接测量,具体包括如下类型:热电偶:B、E、J、K、N、R|T型,并可进行外部或固定参考温度冷端补偿。
热电阻:R0=49Ω至 2.1kΩ,α=0.000385(NID/IEC751)或α=0.000391的所有热电阻。
热敏电阻:2.2 kΩ、5 kΩ、10 kΩ型。
2.仪器支持直流电压、直流电流、交流电压、交流电流、二线电阻、四线电阻、频率、周期等11种信号的测量。
3.可对测量信号进行增益和偏移(Mx+B)的设置。
4.具有数字量输入/输出、定时和计数功能。
5.能进行度量单位、量程、分辨率和积分周期的自由设置。
6.具有报警设置和输出功能。
7.热电偶测量基本准确度:1.0℃,温度系数:0.03℃。
8.热电阻测量基本准确度:0.06℃,温度系数:0.003℃。
9.热敏电阻测量基本准确度:0.08℃,温度系数:0.003℃。
10.直流电压测量基本准确度:0.002+0.005(读数的℅+量程的℅)。
11.直流电流测量基本准确度:0.08+0.01(读数的℅+量程的℅)。
Agilent液相色谱仪操作规程★样品与流动相要求:1.样品临用前用0.45um滤膜过滤(区别水相膜与有机相膜),或者临用前离心取上清液(转速1万,20分钟)2.缓冲溶液必须当天配制,每次使用前用0.45um的水相膜过滤,水要求使用当天的超纯水,甲醇或乙腈等有机溶剂要求使用色谱纯。
流动相临用前超声脱气20分钟★液相开机操作过程:1.首先要启动电脑,进入Windows 后, 电脑在后台自动运行Agilent bootp Service。
2.从上往下打开液相色谱仪各模块前左下方的电源开关,液相各模块进入自检,右上角的指示灯不同颜色闪烁几下,最后变成橘黄色(或灭掉ALS、RID),启动完成。
3. 双击电脑桌面的Instrument 1 联机图标,进入LC化学工作站(方法与运行控制界面)。
4. 调用或者编辑相应的操作方法。
★液相关机操作过程:1. 根据具体情况,使用水或溶剂,泵流量设为1.0ml/min,把系统的管道及柱子清洗干净。
2. 根据具体情况,不定时把A、B、C、D通道用有机溶剂冲洗干净,防止生长藻类等。
3. 把系统关闭(即把泵停下来及检测器的灯灭掉等),若有seal wash,把其清洗的水卡住。
4. 先退出LC化学工作站,从下往上关掉液相色谱仪各模块前左下方的电源开关。
5. 退出电脑Windows系统,关掉电脑电源。
★液相的数据采集操作过程:1.从化学工作站菜单的方法中编辑完整方法,或者调用方法, 一般是方法存在如D:\CHEM32\1\METHODS\___.M,即运行此方法。
2.从化学工作站菜单的仪器的启动系统,可点击桌面上的启动按纽,也可以点每一模块图标中的控制来开或关。
(若有手动Seal Wash 应先把打开,约每分钟20滴)3. 手动进样或自动进样器单针进样时:从运行控制中的样品信息输入样品信息4. 待工作站提示就绪(变绿色)、仪器基线平衡稳定后:手动进样: 若是VWD或DAD先按一下平衡,把基线调零,阀在Load的状态,用注射针取样品从手动进样阀口注入,把手动阀转向Inject的方向,开始做样采集数据。
Agilent34970A数据采集仪基本操作实验一、实验目的1.了解Agilent34970A数据采集仪的基本结构和功能。
2.了解Agilent34901A测量模块的基本功能和工作原理。
3.学习Agilent34970A数据采集仪使用面板进行数据采集的方法。
二、实验要求1.根据Agilent34970A数据采集仪用户手册,掌握各开关、按钮的功能与作用。
2.通过Agilent34901A测量模块,分别对J型热电偶、Pt100、502AT热敏电组、直流电压、直流电流进行测量。
三、实验内容与步骤1.实验准备1.1 Agilent34970A数据采集仪的基本功能与性能。
Agilent 34970A数据采集仪是一种精度为6位半的带通讯接口和程序控制的多功能数据采集装置,外形结构如图1、图2所示:其性能指标和功能如下:1.仪器支持热电偶、热电阻和热敏电阻的直接测量,具体包括如下类型:热电偶:B、E、J、K、N、R|T型,并可进行外部或固定参考温度冷端补偿。
热电阻:R0=49Ω至 2.1kΩ,α=0.000385(NID/IEC751)或α=0.000391的所有热电阻。
热敏电阻:2.2 kΩ、5 kΩ、10 kΩ型。
2.仪器支持直流电压、直流电流、交流电压、交流电流、二线电阻、四线电阻、频率、周期等11种信号的测量。
3.可对测量信号进行增益和偏移(Mx+B)的设置。
4.具有数字量输入/输出、定时和计数功能。
5.能进行度量单位、量程、分辨率和积分周期的自由设置。
6.具有报警设置和输出功能。
7.热电偶测量基本准确度:1.0℃,温度系数:0.03℃。
8.热电阻测量基本准确度:0.06℃,温度系数:0.003℃。
9.热敏电阻测量基本准确度:0.08℃,温度系数:0.003℃。
10.直流电压测量基本准确度:0.002+0.005(读数的℅+量程的℅)。
11.直流电流测量基本准确度:0.08+0.01(读数的℅+量程的℅)。
Agilent 34972A数据采集仪操作规程
1)打开计算机,登陆Windows操作系统。
2)打开数据采集仪电源开关,等待几秒钟,当面板出现“MUX”
符号时,表示连接完成。
3)双击打开桌面右下角的“IO”图标,关闭“welcome screen”,
鼠标左击以下“USB0”,再点击“Refresh All”按钮,完成后“USB0”下一行出现绿色“√”时,表示数据采集与电脑连接成功,然后关闭此对话框。
4)打开桌面“米”字形图标“Agilent BenchLink Data Logger 3”,
进入配置参数界面。
初次连接时,先配置仪器,点击“添加仪器”按钮,在弹出的对话框中点击“查找”按钮,在下面查找出现的“选择”一栏中的小方框中点击出现“√”,再点击“连接”即可看到“仪器”一栏中出现了34972A字样,表示计算机与数据采集仪连接成功。
5)点击“配置通道”设置所用到的模块和通道信息。
每个数据
采集仪最多可装3个模块,每个模块最多可连接10个测量元件(4线制接法),根据实验时用到的模块及对应模块上的不同接口,在与之对应的“扫描”一栏中点击“√”,在“功能”
一栏中选择测量的对象(电阻、电流、电压、温度等),在“定标”一栏设置相应的“增益”和“偏移”。
6)点击“扫描和数据记录”按钮分别设置每次扫描的间隔时间
和扫描的方式以及扫描完成后数据导入的文件夹地址。
在“扫
描控制”一栏中点击“设置”按钮,在弹出的对话框中可设置扫描时间间隔和停止扫描的方式。
在“数据控制”一栏中点击“设置”按钮可设置数据采集的结果导出的文件夹位置。
7)参数设置完成后,点击“启动/停止”按钮即可开始采集数据。
可在“快速图表”中查看数据的实时信息并进行X轴和Y轴坐标的设置。