推荐-NOC创作平台使用手册 精品
- 格式:doc
- 大小:5.42 MB
- 文档页数:43
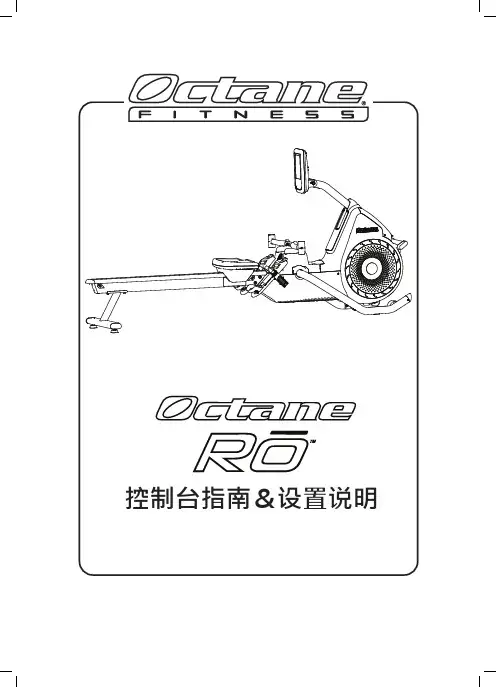
目录Octane Rō 控制台指南•控制台功能 (1)•动态显示器 (LCD) (2)•键盘按钮 (5)软件管理 (7)其他支持信息 (8)•清洁和维护 (8)•电源要求 (8)•重要安全信息 (8)•客户支持 (8)iOctane Rō™ 控制台指南选择Octane Rō 划船机,尽情享受健身乐趣!这款先进的划船机激发您不断挑战自我并指导您达到出色的锻炼效果。
标准控制台提供多种预设锻炼程序,通过先进的电子装置进行控制,让您保持训练兴趣和动力。
通过本指南来熟悉机器功能、数据显示器和键盘按钮;然后坐上机器,开始划船,选择锻炼程序并调整设置。
开始享受吧!控制台功能Octane Rō划船机标准控制台具有多项功能,可提升您的健身体验。
• 集成式LCD显示屏,提供重要的锻炼数据,包括一个数字转速表,可突出显示卡路里消耗/分和卡路里消耗峰值,以及间隔计数、距离、总卡路里消耗和划桨次数;• 无线心率显示(兼容 ANT+ 和 Bluetooth®设备);• 预设锻炼程序按钮,让您可以快速选择喜爱的锻炼。
REcoveRY SpRiNtQUickStaRtENtERPaUsEClEar tiMEMax 14 INtERval INtERval caloRiEGoalDistaNcegoalMaxciRcUit515带数字转速表的LCD预设锻炼程序按钮实时运动数据12动态显示器 (LCD)515 恢复或力量训练时间冲刺或有氧运动时间Ant+心率显示器蓝牙心率显示器距离计数器卡路里转速表心率功率间隔计数器阻力(等级)划桨计数器配速卡路里计数器锻炼时间锻炼程序显示Octane R ō 划船机控制台配有 LCD,显示重要锻炼数据,并突出显示锻炼的关键细节。
设置和进行锻炼时观察显示器 — 该显示器会提示您、指导您、鼓励您,并提供动态反馈。
显示说明恢复或力量训练时间在 MAX 14间隔训练 或 间隔训练 程序中,倒计时显示剩余恢复时间,以分和秒为单位。
User Guide PRNT001073-05ContentsAbout this User Guide (3)Box Contents (3)IntRoDUCtIon . . . . . . . . . . . . . . . . . . . . . . . . . . . . . . . . . . . . . . . . . . . . . . . . . . . . . . . . . . . . . . . .4 InstALLAtIon GUIDe . . . . . . . . . . . . . . . . . . . . . . . . . . . . . . . . . . . . . . . . . . . . . . . . . . . . . . . . . . .5 RedNet AM2 Connections and Features (5)Top Panel (5)Rear Panel (7)Physical Characteristics (8)Power Requirements (8)ReDnet AM2 oPeRAtIon . . . . . . . . . . . . . . . . . . . . . . . . . . . . . . . . . . . . . . . . . . . . . . . . . . . . . . . .9 First Use and Firmware Updates (9)Digital Clocking (9)Pull Up and Pull Down Operation (9)otHeR ReDnet sYsteM CoMPonents . . . . . . . . . . . . . . . . . . . . . . . . . . . . . . . . . . . . . . . . . .10 UsInG ReDnet ContRoL . . . . . . . . . . . . . . . . . . . . . . . . . . . . . . . . . . . . . . . . . . . . . . . . . . . . . . .10 Reverse ID (10)Signal Metering (10)ID (Identification) (11)Tools Menu (11)APPenDIx . . . . . . . . . . . . . . . . . . . . . . . . . . . . . . . . . . . . . . . . . . . . . . . . . . . . . . . . . . . . . . . . . . . .12 Connector Pinouts (12)Ethernet Connectors (Dante) (12)XLR Connectors (12)1/4” Jack Connector (12)PeRfoRMAnCe AnD sPeCIfICAtIons . . . . . . . . . . . . . . . . . . . . . . . . . . . . . . . . . . . . . . . . . . . .13 Focusrite RedNet Warranty and Service (15)Registering Your Product (15)Customer Support and Unit Servicing (15)Troubleshooting (15)About this User GuideThis user guide applies to the RedNet AM2 Dante headphone and line output interface. It provides information about installing and using the unit, and how it can be connected into your system.A RedNet System User Guide is also available from the RedNet product pages of the Focusrite website. The guide provides a detailed explanation of the RedNet system concept, that will help you achieve a thorough understanding of its capabilities. We recommend that all users, including those already experienced in digital audio networking, take the time to read through the System User Guide so that they are fully aware of all the possibilities that RedNet and its software have to offer. Should either user guide not provide the information you need, be sure to consult:/rednet, which contains a comprehensive collection of common technical support queries.Box Contents• R edNet AM2 unit• D C power supply• S afety information cut sheet• R edNet Getting Started Guide• P roduct Registration Card – please follow the instructions on the card as it provides links to: RedNet ControlRedNet PCIe drivers (included with RedNet Control download)Audinate Dante Controller (installed with RedNet Control)Dante™ and Audinate™ are registered trademarks of Audinate Pty Ltd.IntRoDUCtIonThank you for purchasing the Focusrite RedNet AM2.RedNet AM2 provides two channels of premium D-A conversion in the form of a stereo monitoring unit, combining headphone and line outputs for monitoring of signals from the Dante Audio-over-IP network.RedNet AM2 includes two line-output XLRs plus a stereo TRS 1/4” jack socket. It provides high-quality digital to analogue conversion for accurate monitoring on loudspeakers or headphones and is designed to drive high or low impedance headphones at high levels with significant audio output power. Two large volume control knobs are provided for Headphone and Line output levels, the latter featuring a mute button with associated LED.The compact unit, mounted in an enclosure based around a sturdy road-worthy aluminium extrusion, is fitted with non-slip feet and can either sit securely on a flat surface or be mounted on top of a mic stand using the 3/8” BSW threaded bush incorporated in the base.Dual locking etherCON connectors are included on the rear-panel to connect to the network and to daisy-chain to additional network devices.The unit is powered via Power over Ethernet (PoE) or via the rear-panel barrel connector and included DC power supply. Each PSU’s status can be monitored remotely over the network and on the top panel.Tailored for all environments, each unit features two network ports, PoE and DC power options, rugged construction with latching connectors and remote monitoring – RedNet AM2 is the perfect portable break-out solution for analogue monitoring from a Dante network.1 . Headphone Level PotControls the volume level sent to the stereo headphone jack.2 . Line out Level PotControls the volume level sent to the Line Output XLRs.3 . Power IndicatorBi-colour LED indicates the power source being used:• Green: Power over Ethernet (PoE)• Red: External DC supply4 . Rednet network status IndicatorTri-colour LED indicates the network status:• Red (flashing) – Device is attempting to identify a network• Red/Green (flashing) – Device is trying to lock to an identified network• Green – D evice is locked to the network and is capable of passing audioInstALLAtIon GUIDeRednet AM2 Connections and featurestop Panel HEADPHONE LINE OUT MUTE SIGNAL NETWORK POWER 01001016574325 . signal Level IndicatorTri-colour LED indicates the highest signal level of the network receivers:• Green: Signal present (illuminates at -42 dBFS)• Orange: -6 dBFS• Red: 0 dBFSID Indication – When the RedNet Control or Dante Controller applications send an ID command to the RedNet AM2 unit, the Network (4) and Signal (5) LEDs will cycle through green–orange–red states for 10 seconds.6 . Line out Mute / Reverse ID switchPress to mute the line output XLRs – the LED illuminates red when mute is active.Press-and-hold the Mute button for 3 seconds to ‘push’ Reverse ID to the RedNet Control application.7 . Headphone InputStandard 1/4” stereo Jack for headphones.HEADPHONE LINE OUT MUTE SIGNAL NETWORK POWER 01001067top Panel . . . Continued5Rear Panel1 . network Port 1 / Primary Power Input*RJ45 [etherCON] connector for the Dante network. Use standard Cat 5e or Cat 6 network cables to connect RedNet AM2 to an Ethernet network switch.Power over Ethernet (PoE) can be used to power the RedNet AM2. Connect an appropriately powered Ethernet cable to network port 1.2 . network Port 2Second RJ45 [etherCON] network port which can be used to daisy-chain additional devices.This port does not accept PoE input and does not pass power out.This port cannot be used as the secondary connection on redundant networks – network ports 1 and 2 always function as a 2-port switch.3 . secondary Power Input*DC input for use where Power-over-Ethernet (PoE) is not available. Can be used in conjunction with PoE.When both power supplies are available, PoE will be the default supply.4 . Line out xLRsTwo balanced output channels which can, for example, be used for monitor loudspeakers.(Passive speakers will require external amplification.)do not power-up RedNet AM2 while monitoring through headphones. Refer to the Appendix on page 12 for connector pinouts.1342Physical CharacteristicsRedNet AM2 dimensions are illustrated in the diagram above.RedNet AM2 weighs 0.81 kg and is equipped with rubber feet for desktop mounting. The baseplate includes a female 3/8” BSW thread so the unit can be mounted on a microphone stand.RedNet AM2 generates little significant heat and is cooled by natural convection. The ambient operating temperature of the device is 50 degrees Celcius.Power RequirementsRedNet AM2 can be powered from two separate sources: Power-over-Ethernet (PoE) or DC input via external mains supply.Standard PoE requirements are: 37.0–57.0 V @ 1–2 A (approx.) – as supplied by many suitably equipped switches and external PoE injectors. Note that PoE can only be accepted at Network Port 1 and that power is not transmitted as an output on Network Port 2.PoE injectors used should be Gigabit capable.To use the 12 V DC input, connect the external plugtop PSU supplied to an adjacent mains outlet.Only use the DC PSU supplied with RedNet e of other external supplies may affect performance or could damage the unit.When both PoE and external DC supplies are connected, PoE becomes the default supply.The power consumption of the RedNet AM2 is: PoE 11.0W and DC Supply 9.8WPlease note that there are no fuses in RedNet AM2, or other user-replaceable components of any type. Please refer all servicing issues to the Customer Support Team (see “Customer Support and Unit Servicing” on page 15).ReDnet AM2 oPeRAtIonfirst Use and firmware UpdatesYour RedNet AM2 may require a firmware update* when it is first installed and switched on. Firmware updates are initiated and handled automatically by the RedNet Control application.*It is important that the firmware update procedure is not interrupted – either by switching off power to the RedNet AM2 or the computer on which RedNet Control is running,or by disconnecting either from the network.From time to time Focusrite will release RedNet firmware updates within new versions of RedNet Control. We recommend keeping all RedNet units up to date with the latest firmware version supplied with each new version of RedNet Control.The RedNet Control application will automatically inform the user if there is a firmware update available.Digital ClockingEach RedNet AM2 will automatically lock to a valid Network Master via its Dante connection. Alternatively, if a Network Master is not already present, the unit can be chosen as the Network Master by the user.Pull Up and Pull Down operationRedNet AM2 is able to operate at a specified pull up or pull down percentage as selected in the Dante Controller application.otHeR ReDnet sYsteM CoMPonentsThe RedNet hardware range includes various types of I/O interface and PCIe/ PCIeR digital audio interface cards which are installed in the system’s host computer or in a chassis. All the I/O units can be considered as “Break-Out” (and/or “Break-In”) boxes to/from the network, and all are built in mains-powered, 19” rackmount housings, unless otherwise stated. There are also three software items, RedNet Control (see below), Dante Controller and Dante Virtual Soundcard.UsInG ReDnet ContRoLRedNet Control will reflect the status of the RedNet units present in the system, presenting an image representing each hardware unit.The illustration above shows a RedNet AM2 with the Line Out Mute inactive and shows signal present on both channels. It has PoE power available and has a locked network connection.PoE power input – Illuminates if DC power is being received via the Ethernet cable.DC supply power input – Illuminates if power is being received from the external DCsupply.Locked – Unit is successfully locked to the network (changes to the red cross if not locked).Network Master – Illuminated indicating that this unit is the network master.Reverse IDA Reverse ID request from a RedNet AM2 unit will flash the black background in the device GUI.signal MeteringBoth audio channels have a virtual signal level meter.ID (Identification)Clicking on the ID icon will identify the physical device being controlled by cycling its front panel “Network” and “Signal” LEDs through green–orange–red states for 10 seconds.tools MenuClicking on the Tools icon will gain access to the following system settings:Line Level setup – Sets the analogue line output level at 0 dBFS:• +18 dBu• +24 dBu (factory default setting)Mute (Line out) – On/Off state.Mute on Power-up – On/Off state (factory default is On).Attenuation (Headphone) – The headphone output volume can be attenuated for safety. Available settings are:• 0 dB• 6 dB• 12 dB (factory default setting)Preferred Master – On/Off state.APPenDIxConnector Pinoutsethernet Connectors (Dante) Connector type:Applies to: NETWORK 1 & 2xLR ConnectorsConnector type: XLR(M)-3 receptacle Applies to: LINE OUTPUT 1 & 21/4” Jack ConnectorConnector type: Stereo receptacleApplies to:Headphone output 18PoE information only applicable to Network port 1PeRfoRMAnCe AnD sPeCIfICAtIonsfocusrite Rednet Warranty and serviceAll Focusrite products are built to the highest standards and should provide reliable performance for many years, subject to reasonable care, use, transportation and storage.Very many of the products returned under warranty are found not to exhibit any fault at all. To avoid unnecessary inconvenience to you in terms of returning the product please contact Focusrite support.In the event of a Manufacturing Defect becoming evident in a product within 12 months from the date of the original purchase Focusrite will ensure that the product is repaired or replaced free of charge.A Manufacturing Defect is defined as a defect in the performance of the product as described and published by Focusrite. A Manufacturing Defect does not include damage caused by post-purchase transportation, storage or careless handling, nor damage caused by misuse.Whilst this warranty is provided by Focusrite the warranty obligations are fulfilled by the distributor responsible for the country in which you purchased the product.In the event that you need to contact the distributor regarding a warranty issue, or an out-of-warranty chargeable repair, please visit: /distributorsThe distributor will then advise you of the appropriate procedure for resolving the warranty issue. In every case it will be necessary to provide a copy of the original invoice or store receipt to the distributor. In the event that you are unable to provide proof of purchase directly then you should contact the reseller from whom you purchased the product and attempt to obtain proof of purchase from them.Please do note that if you purchase a Focusrite product outside your country of residence or business you will not be entitled to ask your local Focusrite distributor to honour this limited warranty, although you may request an out-of-warranty chargeable repair.This limited warranty is offered solely to products purchased from an Authorised Focusrite Reseller (defined as a reseller which has purchased the product directly from Focusrite Audio Engineering Limited in the UK, or one of its Authorised Distributors outside the UK). This Warranty is in addition to your statutory rights in the country of purchase.Registering Your ProductFor access to Dante Virtual Soundcard, please register your product at: /registerCustomer support and Unit servicingYou can contact our dedicated RedNet Customer Support team free of charge:Email: ***************************Phone (UK): +44 (0)1494 462246Phone (USA): +1 (310) 322-5500troubleshootingIf you are experiencing problems with your RedNet AM2, we recommend that in the first instance, you visit our Support Answerbase at: /answerbase。
视频创作一、竞赛目标鼓励参赛选手结合课堂学习、实践活动及生活实际,用自己的眼睛去观察和感知周围的世界、思考生活,把感悟融于小剧本中,用手机或DV设备进行拍摄,通过影像的视觉效果,表达自己的思想,从而反映自己眼中独有的世界。
二、参赛范围(一)参赛组别:小学组,初中组,高中组。
(二)参赛人数:1~4人。
(三)指导教师:1~2人(可空缺)。
三、作品主题不限主题。
四、作品要求(一)作品类型包括广告片、MV、短剧、纪录短片、戏剧等跟创意相关的视频。
(二)作品为利用手机或DV设备进行拍摄并播放的视频短片,形成一个完整的故事体系。
(三)内容要求原创、健康、积极向上。
(四)作品格式为3GP、AVI、MP4其中一种,分辨率不小于640*480。
(五)作品时长3~5分钟。
(六)每位/每队选手限提交1件作品。
(七)在提交作品的同时,还须提交作品工程文件、作品创作演示文稿(包含作者/团队介绍、作品创作思路、创作过程、原创内容说明等内容)。
五、作品提交(一)网站报送:选手须通过NOC网站()竞赛平台在线提交作品(有地方组委会的地区,由当地组委会统一提交)。
(二)光盘报送:选手须将作品申报表打印一份,随光盘一起快递至全国组委会(有地方组委会的地区,由当地组委会统一提交)。
光盘表面用光盘笔写明所参加赛项、选手姓名、作品名称等关键信息,不要贴标签,以免影响光驱读取。
光盘内容以参赛作品名称建立文件夹,文件夹下分别建立“报名表”、“参赛作品”、“创作演示文稿”为名称的二级文件夹,对应文件夹名称放入作品提交内容,并确保能够正常运行。
六、竞赛流程(一)报名:参赛选手须通过NOC网站竞赛平台在线报名(有地方组委会的地区,由当地组委会统一组织报名)。
(二)地方选拔:由地方组委会负责组织,确定地方奖项及报送全国决赛的作品(无地方组委会组织的作品,由全国组委会负责评审)。
(三)全国决赛:由全国组委会负责组织,对全部报送作品进行评审,确定全国决赛三等奖、二等奖及一等奖入围作品。

![scratch2.0入门中文使用教程Scratch 2.0中文入门指南[最新]](https://uimg.taocdn.com/12b378573169a4517623a36d.webp)
SCRATCH2.0入门中文使用教程1. Scratch的简介Scratch是 MIT (麻省理工学院) 发展的一套新的程序语言,可以用来创造交互式故事、动画、游戏、音乐和艺术。
很适合8岁以上儿童使用,目前1.4版已经完全支持中文界面,更方便使用,完全不用背指令,使用积木组合式的程序语言,让学习变得更轻松,并充满乐趣。
由于国外网站速度较慢,gateface门面,已经集成了scratch的程序,所以只要安装了伽卡他卡电子教室(15.5以上版本)或这个gateface5.5以上版本,都有scratch,不用另外安装。
(伽卡他卡电子教室集成了gateface,scratch在gateface的门面编辑器里,点击相应按钮,就可以启动scratch)Gateface门面中,集成的是离线程序,可以不用登录scratch网站,在本机使用。
搜索伽卡他卡电子教室或者gateface都可以到官网或者华军下载。
分享SCRATCH作品的方法:方法1:放到网站共享。
SCRATCH网站,可以上传sb2格式的文件,这样,别人通过访问SCRATCH网站来访问你的作品,需要在SCRATCH注册账号,分享上传时需要登录账号。
方法2:gateface门面,将sb2格式文件转化成swf格式的flash文件,放在gateface门面空间页面里,别人直接访问门面空间,就能看到你的作品。
1-1 下载与安装如果已经安装了伽卡他卡电子教室15.5以上版本或者gateface门面5.5以上版本,不需要另外安装离线版本,直接从gateface门面编辑器里启动离线程序即可使用。
在线版本不用安装,直接登录SCRATCH网站使用。
(1)首先登录官方网站页面:/(2)点击Download Scratch按钮(3)如果年龄小于13岁直接点击:Continue to Scratch download1(4)根据操作系统,选择下载。
(示例为Windows操作系统,点击ScratchInstaller1.4.exe)(5)选取存放文档位置(6)下载完成执行安装程序(7)选取安装目录,一般采用默认值就可以(8)选取开始菜单的资料夹,采用默认值就可以(9)接下来就开始进行安装,完成后按NEXT(10)安装完成后,系统会寻问是否启动Scracth及在桌面建立捷径,采用默认两个都选,按Finish(11)启动Scracth后是英文界面,两秒钟后Scracht会根据操作系统自动变成中文界面。

NOC产品介绍注重素质教育和能力培养是国家教育改革的方向。
《国家中长期教育改革和发展规划纲要(2010-2020年)》强调“强化信息技术应用。
提高教师应用信息技术水平,更新教学观念,改进教学方法,提高教学效果。
鼓励学生利用信息手段主动学习、自主学习,增强运用信息技术分析解决问题的能力”。
NOC教育系列产品是信息技术与教学实践相结合的产物,为素质教育和能力培养提供了一个创新实践的教学环境。
产品分为学生、教师和学校三大系列。
一、NOC创新实践课堂(学生)本工具包作为开发学生能力素质、提高创新能力、发展学习技能、拓展创造性思维的工具,为活动提供一个创新实践的软件平台。
工具包由《NOC创作平台》、《NOC创新实践平台》组成。
《NOC创新实践平台》为核心软件,《NOC创作平台》为基础多媒体创作工具。
《NOC创新实践平台》是一种创意思维训练、知识学习应用以及多媒体作品创作的工具平台软件。
具有易学易用、操作简便、内容制作方便快捷、动画设计功能强大、交互控制灵活多样、积木式制作方式等特点。
可以用来制作如下作品:·动画故事:已有素材电脑动画故事编创。
·创意绘画:自己动手进行创意绘画。
·电子贺卡:制作个性动画电子贺卡发送给朋友。
·益智游戏:设计制作趣味益智小游戏。
·电子相册:将拍摄的数码相片进行修饰,配上声音与文字组合生成电子相册。
·多媒体作品:为学生提供一种表达自己的全新多视角多媒体工具。
二、NOC创新教学工具包(教师)本工具包是一套集教学内容规划制作、教学资源整合管理、交互式多媒体课件与学件制作以及课堂教学艺术展示为一体的教学工具软件包。
工具包由《NOC 多媒体教学工具》、《NOC题库管理系统》组成。
《NOC多媒体教学工具》为核心工具,《NOC题库管理系统》作为备课、试题资源管理的辅助工具。
《NOC多媒体教学工具》是一个跨学科的通用课件与学件制作以及多媒体授课教学工具软件,具有易学易用的特点,使用者只需具有基本的电脑使用技能,就可以快速掌握并加以运用。

NOC资讯作者:来源:《中国信息技术教育》2009年第09期本栏目资讯详情见NOC官网/第七届NOC活动作品类申报火热进行中4月中旬,经过严密测试,NOC活动官方网站作品类申报平台(/)已经面向全国师生开通。
目前,第七届NOC活动作品申报呈现出一片火热态势。
为了避免作品提交过于集中造成网络拥堵,全国NOC组委会也将教师各赛项的作品提交截止日期延至5月15日。
据悉,作品申报分信息技术基础知识考核、填写项目申请表、参赛作品提交、报名完成四个步骤进行。
该申报平台通过对学生、教师和发明创新三类项目表格进行分类,可实现包括教师和学生竞赛在内的13个赛项的报名与作品提交。
平台内还发布有第七届NOC活动全国培训讲稿,将对各校NOC活动的开展起到一定的指导作用。
第七届NOC活动裁判(评委)第二期考核工作即将启动NOC活动全国组委会继3月底对申报漫画创作、动画制作、DV短片制作、主题网站(页)制作、教学实践评优、网络教研团队六赛项裁判(评委)的人员进行现场面试考核后,将于5月18-31日,开通专门的在线考核平台,对欲申报网络中文、网络英文、应用数学、智能机器人竞赛、优秀课件评选赛项裁判(评委)的人员进行在线考核。
届时,申请者不仅需要在专用平台上进行在线报名、在线限时答卷外,还要按照各赛项的要求在线提交相关文件,如代表作品、赛项建议稿、点评意见稿等。
具体流程和考核办法详见NOC官网上的“关于第七届全国中小学信息技术创新与实践活动裁判(评委)在线考核的通知”。
第七届NOC活动广州市赛前高级研讨及培训圆满结束4月26日,由NOC活动全国组委会办公室与广州市天河区教育局教研室联合举办的第七届NOC活动广州市赛前高级研讨及培训在广州市113中学东方校区礼堂拉开序幕。
会议由NOC活动全国组委会竞赛及课题管理部主任彭瑜主持,NOC活动全国组委会秘书长李维福出席培训并致辞。
培训中,NOC教师赛项裁判长蒋鸣和、NOC教师网络教研团队竞赛裁判长金陵、全国敏特教育服务中心学科研究部主任马燕分别对教学实践评优赛项、网络教研团队竞赛和敏特英语学习能力竞赛进行了精彩的赛项解读,得到与会代表的一致肯定和欢迎。

2016年“和教育杯”湖北省中小学电脑制作活动暨NOC活动细则2016年度湖北省中小学“电脑制作活动”暨“NOC活动”学生项目分初赛、复赛两个阶段进行,其细则如下。
一、初赛1.初赛报名2016年3月20日前,根据各地初赛组织情况,以市(州)活动组委会为单位填写“市(州)中小学学生初赛名单一览表”excel 表(附表5)后,登录初赛平台(/cs/),在“报名”管理中上传该表。
待省活动组委会设臵完成后,市(州)组委会在平台“数据导出”管理的“考生密码下发excel文件”中导出学生参赛用户名、密码,由市(州)组织,以县区为单位进行初赛。
市州组委会的账号、密码发送工作请与省组委会联系。
2.考核内容考核的题目由客观题加操作题组成,偏重操作及应用,适当增加一些与社会科技发展相符合的前沿性的内容进行命题。
小学、初中阶段考核内容结合湖北省教育信息化发展中心组编的《信息技术与网络》省编教材各模块制定选题,高中阶段考核内容按照国家制定的中小学信息技术课程标准,根据各学段的教学目标确定考核范围。
客观题主要考核基础知识,主要类型有选择题、判断题和填空题;操作题考核学生对计算机的操作能力,主要类型有游戏测试和软件界面模拟操作。
客观题和操作题均由考核系统自动评分。
3.考核方式初赛采取网络在线考核的形式进行。
各地可采用“竞赛网”平台()中的“湖北省信息技术创新与实践活动初赛平台”在线测试系统实施考核。
初赛成绩合格者发合格证书,作为学生综合素质评价的指标和逐步推行学生信息技术能力的评价依据。
为促进我省中小学信息技术教学质量的提高,凡开设信息技术课的小学毕业年级、初中二年级和高中二年级,原则上要求全员参加信息技术基础知识考核,各地可将考核成绩与信息技术课考试成绩结合起来,避免重复考核。
4.成绩查询初赛在线测试结束后,市(州)可以在平台“数据导出”管理的“成绩导出excel文件”中导出参赛考生的成绩。
考生也可以使用参赛用户名、密码登录平台,查看测试成绩分数及合格情况(60分及以上为合格,60分以下为不合格)。


文件编号:版本号:X.Y<V3Cmini>用户手册部门:可视化产品线编写:崔志刚审核:批准:日期: __________北京恒泰实达科技股份有限公司BEIJING E-TECHSTAR CO,LTD文件更改记录目录1 引言------------------------------------------------------------------------------------------------------------------------------ 11.1编写目的 ---------------------------------------------------------------------------------------------------------------- 11.2项目背景 ---------------------------------------------------------------------------------------------------------------- 11.3定义 ----------------------------------------------------------------------------------------------------------------------- 12 运行环境配置 ---------------------------------------------------------------------------------------------------------------- 12.1运行系统需在客户端安装的软件介绍及安装。
----------------------------------------------------------- 12.2运行系统需进行的环境配置。
使用PREMIEREADOBE®®ELEMENTS 8 EDITOR© 2009 Adobe Systems Incorporated. All rights reserved.使用 Adobe® Premiere® Elements 8 for Windows®This user guide is protected under copyright law, furnished for informational use only, is subject to change without notice, and should not be construed as a commitment by Adobe Systems Incorporated. Adobe Systems Incorporated assumes no responsibility or liability for any errors or inaccuracies that may appear in the informational content contained in this guide.This user guide is licensed for use under the terms of the Creative Commons Attribution Non-Commercial 3.0 License. This License allows users to copy, distribute, and transmit the user guide for noncommercial purposes only so long as (1) proper attribution to Adobe is given as the owner of the user guide; and (2) any reuse or distribution of the user guide contains a notice that use of the user guide is governed by these terms. The best way to provide notice is to include the following link. To view a copy of this license, visit /licenses/by-nc-sa/3.0/Adobe, the Adobe logo, Adobe Audition, Adobe Premiere, After Effects, Encore, Flash, Illustrator, Photoshop, and PostScript are either registered trademarks or trademarks of Adobe Systems Incorporated in the United States and/or other countries.Apple and Macintosh are trademarks of Apple Inc., registered in the United States and other countries. Microsoft and Windows are either registered trademarks or trademarks of Microsoft Corporation in the United States and/or other countries. Dolby is a trademark of Dolby Laboratories. Pentium is a trademark or registered trademark of Intel Corporation or its subsidiaries in the U.S. and other countries. Java is a trademark or registered trademark of Sun Microsystems, Inc. in the United States and other countries. All other trademarks are the property of their respective owners.Notices, Terms and Conditions pertaining to third party software are located at /go/thirdparty and incorporated by reference. This product includes software developed by the Apache Software Foundation (). © 1998-2000 Apache Software Foundation. All rights reserved.This program was written with MacApp®, © 1985-1988 Apple Computer, Inc.MPEG Layer-3 audio compression technology is licensed by Fraunhofer IIS and Thomson Multimedia.The Proximity/Merriam-Webster Inc./Franklin Electronic Publishers Inc. Database © 1990/1994 Merriam-Webster Inc./Franklin Electronic Publishers Inc., © 1994. All Rights Reserved. Proximity Technology Inc. The Proximity/Merriam-Webster Inc./Franklin Electronic Publishers Inc. © 1990 Williams Collins Sons & Co. Ltd. © 1997 - All rights reserved Proximity Technology Inc. © 1990 Williams Collins Sons & Co. Ltd. © 1990 - All rights reserved Proximity Technology Inc. © Oxford University Press © 2000. All rights reserved Proximity Technology Inc. © 1990 IDE a.s. © 1990 - All rights reserved Proximity Technology Inc.This product contains either BSAFE and/or TIPEM software by RSA Data Security, Inc.Portions include technology used under license from Autonomy, and are copyrighted.Portions Copyright © 1998 Gilles Vollant.This product includes software developed by the OpenSymphony Group (/).Portions of this code are licensed from Nellymoser, Inc. ()Sorenson Spark™ video compression and decompression technology licensed from Sorenson Media, Inc.Video compression and decompression is powered by On2 TrueMotion video technology. © 1992-2005 On2 Technologies, Inc. All Rights Reserved. ().Portions © Eastman Kodak company, and used under license. All rights reserved. Kodak is a registered trademark and Photo CD is a trademark of Eastman Kodak Company.This software is based in part on the work of the Independent JPEG Group.This product includes software developed by Fourthought, Inc.().Adobe Systems Incorporated, 345 Park Avenue, San Jose, California 95110, USA.Notice to U.S. Government end users: The software and documentation are “Commercial Items,” as that term is defined at 48 C.F.R. §2.101, consisting of “Commercial Computer Software” and “Commercial Computer Software Documentation,” as such terms are used in 48 C.F.R. §12.212 or 48 C.F.R.§227.7202, as applicable. Consistent with 48 C.F.R. §12.212 or 48 C.F.R. §§227.7202-1 through 227.7202-4, as applicable, the Commercial Computer Software and Commercial Computer Software Documentation are being licensed to U.S. Government end users (a) only as Commercial Items and (b) with only those rights as are granted to all other end users pursuant to the terms and conditions herein. Unpublished-rights reserved under the copyright laws of the United States. For U.S. Government end users, Adobe agrees to comply with all applicable equal opportunity laws including, if appropriate, the provisions of Executive Order 11246, as amended, Section 402 of the Vietnam Era Veterans Readjustment Assistance Act of 1974 (38 USC 4212), and Section 503 of the Rehabilitation Act of 1973, as amended, and the regulations at 41 CFR Parts 60-1 through 60-60, 60-250, and 60-741. The affirmative action clause and regulations contained in the preceding sentence shall be incorporated by reference.iii 目录第 1 章: Adobe Premiere Elements 快速入门首先执行的操作 . . . . . . . . . . . . . . . . . . . . . . . . . . . . . . . . . . . . . . . . . . . . . . . . . . . . . . . . . . . . . . . . . . . . . . . . . . . . . . . . . . . . . . . . . . . . . . . . . . . 1使用帮助并获取支持. . . . . . . . . . . . . . . . . . . . . . . . . . . . . . . . . . . . . . . . . . . . . . . . . . . . . . . . . . . . . . . . . . . . . . . . . . . . . . . . . . . . . . . . . . . . . . . . 2转换先前版本的目录. . . . . . . . . . . . . . . . . . . . . . . . . . . . . . . . . . . . . . . . . . . . . . . . . . . . . . . . . . . . . . . . . . . . . . . . . . . . . . . . . . . . . . . . . . . . . . . . 3在 Elements Organizer 和 Adobe Premiere Elements Editor 中工作 . . . . . . . . . . . . . . . . . . . . . . . . . . . . . . . . . . . . . . . . . . . . . . . . . . . . . . 3导入和管理照片及视频. . . . . . . . . . . . . . . . . . . . . . . . . . . . . . . . . . . . . . . . . . . . . . . . . . . . . . . . . . . . . . . . . . . . . . . . . . . . . . . . . . . . . . . . . . . . . . 4疑难解答提示 . . . . . . . . . . . . . . . . . . . . . . . . . . . . . . . . . . . . . . . . . . . . . . . . . . . . . . . . . . . . . . . . . . . . . . . . . . . . . . . . . . . . . . . . . . . . . . . . . . . . . 7第 2 章: Adobe Premiere Elements 工作区关于工作区 . . . . . . . . . . . . . . . . . . . . . . . . . . . . . . . . . . . . . . . . . . . . . . . . . . . . . . . . . . . . . . . . . . . . . . . . . . . . . . . . . . . . . . . . . . . . . . . . . . . . . . 8面板概述. . . . . . . . . . . . . . . . . . . . . . . . . . . . . . . . . . . . . . . . . . . . . . . . . . . . . . . . . . . . . . . . . . . . . . . . . . . . . . . . . . . . . . . . . . . . . . . . . . . . . . . . 12第 3 章: 项目创建新项目 . . . . . . . . . . . . . . . . . . . . . . . . . . . . . . . . . . . . . . . . . . . . . . . . . . . . . . . . . . . . . . . . . . . . . . . . . . . . . . . . . . . . . . . . . . . . . . . . . . . . . . 17创建即时影片项目. . . . . . . . . . . . . . . . . . . . . . . . . . . . . . . . . . . . . . . . . . . . . . . . . . . . . . . . . . . . . . . . . . . . . . . . . . . . . . . . . . . . . . . . . . . . . . . . . 18查看项目中的文件. . . . . . . . . . . . . . . . . . . . . . . . . . . . . . . . . . . . . . . . . . . . . . . . . . . . . . . . . . . . . . . . . . . . . . . . . . . . . . . . . . . . . . . . . . . . . . . . . 21查看剪辑属性 . . . . . . . . . . . . . . . . . . . . . . . . . . . . . . . . . . . . . . . . . . . . . . . . . . . . . . . . . . . . . . . . . . . . . . . . . . . . . . . . . . . . . . . . . . . . . . . . . . . 25项目设置和预设 . . . . . . . . . . . . . . . . . . . . . . . . . . . . . . . . . . . . . . . . . . . . . . . . . . . . . . . . . . . . . . . . . . . . . . . . . . . . . . . . . . . . . . . . . . . . . . . . . . 28还原更改. . . . . . . . . . . . . . . . . . . . . . . . . . . . . . . . . . . . . . . . . . . . . . . . . . . . . . . . . . . . . . . . . . . . . . . . . . . . . . . . . . . . . . . . . . . . . . . . . . . . . . . . 31存储和备份项目 . . . . . . . . . . . . . . . . . . . . . . . . . . . . . . . . . . . . . . . . . . . . . . . . . . . . . . . . . . . . . . . . . . . . . . . . . . . . . . . . . . . . . . . . . . . . . . . . . . 32使用暂存盘 . . . . . . . . . . . . . . . . . . . . . . . . . . . . . . . . . . . . . . . . . . . . . . . . . . . . . . . . . . . . . . . . . . . . . . . . . . . . . . . . . . . . . . . . . . . . . . . . . . . . . . 33第 4 章: 捕捉视频准备捕捉. . . . . . . . . . . . . . . . . . . . . . . . . . . . . . . . . . . . . . . . . . . . . . . . . . . . . . . . . . . . . . . . . . . . . . . . . . . . . . . . . . . . . . . . . . . . . . . . . . . . . . . . 35捕捉视频. . . . . . . . . . . . . . . . . . . . . . . . . . . . . . . . . . . . . . . . . . . . . . . . . . . . . . . . . . . . . . . . . . . . . . . . . . . . . . . . . . . . . . . . . . . . . . . . . . . . . . . . 38捕捉静帧和定时视频. . . . . . . . . . . . . . . . . . . . . . . . . . . . . . . . . . . . . . . . . . . . . . . . . . . . . . . . . . . . . . . . . . . . . . . . . . . . . . . . . . . . . . . . . . . . . . . 43第 5 章: 导入和添加媒体将文件添加到项目. . . . . . . . . . . . . . . . . . . . . . . . . . . . . . . . . . . . . . . . . . . . . . . . . . . . . . . . . . . . . . . . . . . . . . . . . . . . . . . . . . . . . . . . . . . . . . . . . 47使用来自 Photoshop Elements 的文件 . . . . . . . . . . . . . . . . . . . . . . . . . . . . . . . . . . . . . . . . . . . . . . . . . . . . . . . . . . . . . . . . . . . . . . . . . . . . . . . 54创建专业剪辑 . . . . . . . . . . . . . . . . . . . . . . . . . . . . . . . . . . . . . . . . . . . . . . . . . . . . . . . . . . . . . . . . . . . . . . . . . . . . . . . . . . . . . . . . . . . . . . . . . . . . 56处理脱机文件 . . . . . . . . . . . . . . . . . . . . . . . . . . . . . . . . . . . . . . . . . . . . . . . . . . . . . . . . . . . . . . . . . . . . . . . . . . . . . . . . . . . . . . . . . . . . . . . . . . . . 58处理长宽比和场选项. . . . . . . . . . . . . . . . . . . . . . . . . . . . . . . . . . . . . . . . . . . . . . . . . . . . . . . . . . . . . . . . . . . . . . . . . . . . . . . . . . . . . . . . . . . . . . . 59 5.1 音频导入. . . . . . . . . . . . . . . . . . . . . . . . . . . . . . . . . . . . . . . . . . . . . . . . . . . . . . . . . . . . . . . . . . . . . . . . . . . . . . . . . . . . . . . . . . . . . . . . . . . . . 62第 6 章: 用管理器管理剪辑在 Elements Organizer 中查看剪辑. . . . . . . . . . . . . . . . . . . . . . . . . . . . . . . . . . . . . . . . . . . . . . . . . . . . . . . . . . . . . . . . . . . . . . . . . . . . . . . . . 64在 Elements Organizer 中查找文件. . . . . . . . . . . . . . . . . . . . . . . . . . . . . . . . . . . . . . . . . . . . . . . . . . . . . . . . . . . . . . . . . . . . . . . . . . . . . . . . . . 65为文件添加标签 . . . . . . . . . . . . . . . . . . . . . . . . . . . . . . . . . . . . . . . . . . . . . . . . . . . . . . . . . . . . . . . . . . . . . . . . . . . . . . . . . . . . . . . . . . . . . . . . . . 66在 Elements Organizer 中将文件编组. . . . . . . . . . . . . . . . . . . . . . . . . . . . . . . . . . . . . . . . . . . . . . . . . . . . . . . . . . . . . . . . . . . . . . . . . . . . . . . . 69创建影集. . . . . . . . . . . . . . . . . . . . . . . . . . . . . . . . . . . . . . . . . . . . . . . . . . . . . . . . . . . . . . . . . . . . . . . . . . . . . . . . . . . . . . . . . . . . . . . . . . . . . . . . 71创建并编辑智能影集. . . . . . . . . . . . . . . . . . . . . . . . . . . . . . . . . . . . . . . . . . . . . . . . . . . . . . . . . . . . . . . . . . . . . . . . . . . . . . . . . . . . . . . . . . . . . . . 72第 7 章: 排列影片中的剪辑在场景轴中排列剪辑. . . . . . . . . . . . . . . . . . . . . . . . . . . . . . . . . . . . . . . . . . . . . . . . . . . . . . . . . . . . . . . . . . . . . . . . . . . . . . . . . . . . . . . . . . . . . . . 73创建幻灯片 . . . . . . . . . . . . . . . . . . . . . . . . . . . . . . . . . . . . . . . . . . . . . . . . . . . . . . . . . . . . . . . . . . . . . . . . . . . . . . . . . . . . . . . . . . . . . . . . . . . . . . 75创建画中画叠加 . . . . . . . . . . . . . . . . . . . . . . . . . . . . . . . . . . . . . . . . . . . . . . . . . . . . . . . . . . . . . . . . . . . . . . . . . . . . . . . . . . . . . . . . . . . . . . . . . . 77在时间轴中排列剪辑. . . . . . . . . . . . . . . . . . . . . . . . . . . . . . . . . . . . . . . . . . . . . . . . . . . . . . . . . . . . . . . . . . . . . . . . . . . . . . . . . . . . . . . . . . . . . . . 78编组、链接和停用剪辑. . . . . . . . . . . . . . . . . . . . . . . . . . . . . . . . . . . . . . . . . . . . . . . . . . . . . . . . . . . . . . . . . . . . . . . . . . . . . . . . . . . . . . . . . . . . . 89使用剪辑和时间轴标记. . . . . . . . . . . . . . . . . . . . . . . . . . . . . . . . . . . . . . . . . . . . . . . . . . . . . . . . . . . . . . . . . . . . . . . . . . . . . . . . . . . . . . . . . . . . . 91预览影片. . . . . . . . . . . . . . . . . . . . . . . . . . . . . . . . . . . . . . . . . . . . . . . . . . . . . . . . . . . . . . . . . . . . . . . . . . . . . . . . . . . . . . . . . . . . . . . . . . . . . . . . 94第 8 章: 编辑剪辑裁切剪辑 . . . . . . . . . . . . . . . . . . . . . . . . . . . . . . . . . . . . . . . . . . . . . . . . . . . . . . . . . . . . . . . . . . . . . . . . . . . . . . . . . . . . . . . . . . . . . . . . . . . . . . 101更改剪辑的速度和持续时间 . . . . . . . . . . . . . . . . . . . . . . . . . . . . . . . . . . . . . . . . . . . . . . . . . . . . . . . . . . . . . . . . . . . . . . . . . . . . . . . . . . . . . . . . 112冻结和定格帧 . . . . . . . . . . . . . . . . . . . . . . . . . . . . . . . . . . . . . . . . . . . . . . . . . . . . . . . . . . . . . . . . . . . . . . . . . . . . . . . . . . . . . . . . . . . . . . . . . . . 114处理源剪辑 . . . . . . . . . . . . . . . . . . . . . . . . . . . . . . . . . . . . . . . . . . . . . . . . . . . . . . . . . . . . . . . . . . . . . . . . . . . . . . . . . . . . . . . . . . . . . . . . . . . . . 116第 9 章: 应用过渡过渡基础知识 . . . . . . . . . . . . . . . . . . . . . . . . . . . . . . . . . . . . . . . . . . . . . . . . . . . . . . . . . . . . . . . . . . . . . . . . . . . . . . . . . . . . . . . . . . . . . . . . . . . 119应用过渡至剪辑 . . . . . . . . . . . . . . . . . . . . . . . . . . . . . . . . . . . . . . . . . . . . . . . . . . . . . . . . . . . . . . . . . . . . . . . . . . . . . . . . . . . . . . . . . . . . . . . . . 120创建专业过渡 . . . . . . . . . . . . . . . . . . . . . . . . . . . . . . . . . . . . . . . . . . . . . . . . . . . . . . . . . . . . . . . . . . . . . . . . . . . . . . . . . . . . . . . . . . . . . . . . . . . 126调整过渡. . . . . . . . . . . . . . . . . . . . . . . . . . . . . . . . . . . . . . . . . . . . . . . . . . . . . . . . . . . . . . . . . . . . . . . . . . . . . . . . . . . . . . . . . . . . . . . . . . . . . . . 127第 10 章: 应用效果效果基础知识 . . . . . . . . . . . . . . . . . . . . . . . . . . . . . . . . . . . . . . . . . . . . . . . . . . . . . . . . . . . . . . . . . . . . . . . . . . . . . . . . . . . . . . . . . . . . . . . . . . . 130查找和管理效果 . . . . . . . . . . . . . . . . . . . . . . . . . . . . . . . . . . . . . . . . . . . . . . . . . . . . . . . . . . . . . . . . . . . . . . . . . . . . . . . . . . . . . . . . . . . . . . . . . 131应用和删除效果 . . . . . . . . . . . . . . . . . . . . . . . . . . . . . . . . . . . . . . . . . . . . . . . . . . . . . . . . . . . . . . . . . . . . . . . . . . . . . . . . . . . . . . . . . . . . . . . . . 133处理效果预设 . . . . . . . . . . . . . . . . . . . . . . . . . . . . . . . . . . . . . . . . . . . . . . . . . . . . . . . . . . . . . . . . . . . . . . . . . . . . . . . . . . . . . . . . . . . . . . . . . . . 137更改效果属性 . . . . . . . . . . . . . . . . . . . . . . . . . . . . . . . . . . . . . . . . . . . . . . . . . . . . . . . . . . . . . . . . . . . . . . . . . . . . . . . . . . . . . . . . . . . . . . . . . . . 138使用运动效果重新定位、缩放或旋转剪辑 . . . . . . . . . . . . . . . . . . . . . . . . . . . . . . . . . . . . . . . . . . . . . . . . . . . . . . . . . . . . . . . . . . . . . . . . . . . . . 140叠加和透明度 . . . . . . . . . . . . . . . . . . . . . . . . . . . . . . . . . . . . . . . . . . . . . . . . . . . . . . . . . . . . . . . . . . . . . . . . . . . . . . . . . . . . . . . . . . . . . . . . . . . 143选择效果颜色和遮罩. . . . . . . . . . . . . . . . . . . . . . . . . . . . . . . . . . . . . . . . . . . . . . . . . . . . . . . . . . . . . . . . . . . . . . . . . . . . . . . . . . . . . . . . . . . . . . 148效果参考. . . . . . . . . . . . . . . . . . . . . . . . . . . . . . . . . . . . . . . . . . . . . . . . . . . . . . . . . . . . . . . . . . . . . . . . . . . . . . . . . . . . . . . . . . . . . . . . . . . . . . . 149第 11 章: 动画效果效果动画基础知识. . . . . . . . . . . . . . . . . . . . . . . . . . . . . . . . . . . . . . . . . . . . . . . . . . . . . . . . . . . . . . . . . . . . . . . . . . . . . . . . . . . . . . . . . . . . . . . . 177添加、拷贝和删除关键帧 . . . . . . . . . . . . . . . . . . . . . . . . . . . . . . . . . . . . . . . . . . . . . . . . . . . . . . . . . . . . . . . . . . . . . . . . . . . . . . . . . . . . . . . . . . 179调整关键帧 . . . . . . . . . . . . . . . . . . . . . . . . . . . . . . . . . . . . . . . . . . . . . . . . . . . . . . . . . . . . . . . . . . . . . . . . . . . . . . . . . . . . . . . . . . . . . . . . . . . . . 182控制关键帧之间的变化. . . . . . . . . . . . . . . . . . . . . . . . . . . . . . . . . . . . . . . . . . . . . . . . . . . . . . . . . . . . . . . . . . . . . . . . . . . . . . . . . . . . . . . . . . . . 184设置剪辑位置的动画. . . . . . . . . . . . . . . . . . . . . . . . . . . . . . . . . . . . . . . . . . . . . . . . . . . . . . . . . . . . . . . . . . . . . . . . . . . . . . . . . . . . . . . . . . . . . . 186运动跟踪效果 . . . . . . . . . . . . . . . . . . . . . . . . . . . . . . . . . . . . . . . . . . . . . . . . . . . . . . . . . . . . . . . . . . . . . . . . . . . . . . . . . . . . . . . . . . . . . . . . . . . 187效果蒙版. . . . . . . . . . . . . . . . . . . . . . . . . . . . . . . . . . . . . . . . . . . . . . . . . . . . . . . . . . . . . . . . . . . . . . . . . . . . . . . . . . . . . . . . . . . . . . . . . . . . . . . 190第 12 章: 创建字幕创建和裁切字幕 . . . . . . . . . . . . . . . . . . . . . . . . . . . . . . . . . . . . . . . . . . . . . . . . . . . . . . . . . . . . . . . . . . . . . . . . . . . . . . . . . . . . . . . . . . . . . . . . . 192编辑文本和设置文本格式 . . . . . . . . . . . . . . . . . . . . . . . . . . . . . . . . . . . . . . . . . . . . . . . . . . . . . . . . . . . . . . . . . . . . . . . . . . . . . . . . . . . . . . . . . . 198将样式应用到文本和图形 . . . . . . . . . . . . . . . . . . . . . . . . . . . . . . . . . . . . . . . . . . . . . . . . . . . . . . . . . . . . . . . . . . . . . . . . . . . . . . . . . . . . . . . . . . 201将图形和图像添加到字幕 . . . . . . . . . . . . . . . . . . . . . . . . . . . . . . . . . . . . . . . . . . . . . . . . . . . . . . . . . . . . . . . . . . . . . . . . . . . . . . . . . . . . . . . . . . 202排列字幕中的对象. . . . . . . . . . . . . . . . . . . . . . . . . . . . . . . . . . . . . . . . . . . . . . . . . . . . . . . . . . . . . . . . . . . . . . . . . . . . . . . . . . . . . . . . . . . . . . . . 204添加颜色和阴影到字幕. . . . . . . . . . . . . . . . . . . . . . . . . . . . . . . . . . . . . . . . . . . . . . . . . . . . . . . . . . . . . . . . . . . . . . . . . . . . . . . . . . . . . . . . . . . . 207为电视设计字幕 . . . . . . . . . . . . . . . . . . . . . . . . . . . . . . . . . . . . . . . . . . . . . . . . . . . . . . . . . . . . . . . . . . . . . . . . . . . . . . . . . . . . . . . . . . . . . . . . . 209导出和导入字幕 . . . . . . . . . . . . . . . . . . . . . . . . . . . . . . . . . . . . . . . . . . . . . . . . . . . . . . . . . . . . . . . . . . . . . . . . . . . . . . . . . . . . . . . . . . . . . . . . . 210第 13 章: 添加和混合音频使用背景音乐 . . . . . . . . . . . . . . . . . . . . . . . . . . . . . . . . . . . . . . . . . . . . . . . . . . . . . . . . . . . . . . . . . . . . . . . . . . . . . . . . . . . . . . . . . . . . . . . . . . . 212创建旁白. . . . . . . . . . . . . . . . . . . . . . . . . . . . . . . . . . . . . . . . . . . . . . . . . . . . . . . . . . . . . . . . . . . . . . . . . . . . . . . . . . . . . . . . . . . . . . . . . . . . . . . 214混合音频和调整音量. . . . . . . . . . . . . . . . . . . . . . . . . . . . . . . . . . . . . . . . . . . . . . . . . . . . . . . . . . . . . . . . . . . . . . . . . . . . . . . . . . . . . . . . . . . . . . 216第 14 章: 创建光盘菜单光盘类型和菜单选项. . . . . . . . . . . . . . . . . . . . . . . . . . . . . . . . . . . . . . . . . . . . . . . . . . . . . . . . . . . . . . . . . . . . . . . . . . . . . . . . . . . . . . . . . . . . . . 221使用菜单标记 . . . . . . . . . . . . . . . . . . . . . . . . . . . . . . . . . . . . . . . . . . . . . . . . . . . . . . . . . . . . . . . . . . . . . . . . . . . . . . . . . . . . . . . . . . . . . . . . . . . 222创建光盘菜单 . . . . . . . . . . . . . . . . . . . . . . . . . . . . . . . . . . . . . . . . . . . . . . . . . . . . . . . . . . . . . . . . . . . . . . . . . . . . . . . . . . . . . . . . . . . . . . . . . . . 227预览菜单. . . . . . . . . . . . . . . . . . . . . . . . . . . . . . . . . . . . . . . . . . . . . . . . . . . . . . . . . . . . . . . . . . . . . . . . . . . . . . . . . . . . . . . . . . . . . . . . . . . . . . . 232第 15 章: 存储和共享影片从“任务”面板共享. . . . . . . . . . . . . . . . . . . . . . . . . . . . . . . . . . . . . . . . . . . . . . . . . . . . . . . . . . . . . . . . . . . . . . . . . . . . . . . . . . . . . . . . . . . . . . 234使用快速共享 . . . . . . . . . . . . . . . . . . . . . . . . . . . . . . . . . . . . . . . . . . . . . . . . . . . . . . . . . . . . . . . . . . . . . . . . . . . . . . . . . . . . . . . . . . . . . . . . . . . 234共享到 DVD 或蓝光光盘. . . . . . . . . . . . . . . . . . . . . . . . . . . . . . . . . . . . . . . . . . . . . . . . . . . . . . . . . . . . . . . . . . . . . . . . . . . . . . . . . . . . . . . . . . 235共享以便在计算机上回放 . . . . . . . . . . . . . . . . . . . . . . . . . . . . . . . . . . . . . . . . . . . . . . . . . . . . . . . . . . . . . . . . . . . . . . . . . . . . . . . . . . . . . . . . . . 238共享到 Web . . . . . . . . . . . . . . . . . . . . . . . . . . . . . . . . . . . . . . . . . . . . . . . . . . . . . . . . . . . . . . . . . . . . . . . . . . . . . . . . . . . . . . . . . . . . . . . . . . . . 243共享到移动电话和播放器 . . . . . . . . . . . . . . . . . . . . . . . . . . . . . . . . . . . . . . . . . . . . . . . . . . . . . . . . . . . . . . . . . . . . . . . . . . . . . . . . . . . . . . . . . . 244共享到录像带 . . . . . . . . . . . . . . . . . . . . . . . . . . . . . . . . . . . . . . . . . . . . . . . . . . . . . . . . . . . . . . . . . . . . . . . . . . . . . . . . . . . . . . . . . . . . . . . . . . . 245共享到视频 CD . . . . . . . . . . . . . . . . . . . . . . . . . . . . . . . . . . . . . . . . . . . . . . . . . . . . . . . . . . . . . . . . . . . . . . . . . . . . . . . . . . . . . . . . . . . . . . . . . 248共享常用设置 . . . . . . . . . . . . . . . . . . . . . . . . . . . . . . . . . . . . . . . . . . . . . . . . . . . . . . . . . . . . . . . . . . . . . . . . . . . . . . . . . . . . . . . . . . . . . . . . . . . 248支持的存储和导出文件类型 . . . . . . . . . . . . . . . . . . . . . . . . . . . . . . . . . . . . . . . . . . . . . . . . . . . . . . . . . . . . . . . . . . . . . . . . . . . . . . . . . . . . . . . . 252压缩和数据速率基础知识 . . . . . . . . . . . . . . . . . . . . . . . . . . . . . . . . . . . . . . . . . . . . . . . . . . . . . . . . . . . . . . . . . . . . . . . . . . . . . . . . . . . . . . . . . . 254存档项目. . . . . . . . . . . . . . . . . . . . . . . . . . . . . . . . . . . . . . . . . . . . . . . . . . . . . . . . . . . . . . . . . . . . . . . . . . . . . . . . . . . . . . . . . . . . . . . . . . . . . . . 255第 16 章: Premiere Elements 键盘快捷键使用默认的快捷键. . . . . . . . . . . . . . . . . . . . . . . . . . . . . . . . . . . . . . . . . . . . . . . . . . . . . . . . . . . . . . . . . . . . . . . . . . . . . . . . . . . . . . . . . . . . . . . . 257自定快捷键 . . . . . . . . . . . . . . . . . . . . . . . . . . . . . . . . . . . . . . . . . . . . . . . . . . . . . . . . . . . . . . . . . . . . . . . . . . . . . . . . . . . . . . . . . . . . . . . . . . . . . 257第 17 章: 疑难解答资源与指南 . . . . . . . . . . . . . . . . . . . . . . . . . . . . . . . . . . . . . . . . . . . . . . . . . . . . . . . . . . . . . . . . . . . . . . . . . . . . . . . . . . . . . . . . . . . . . . . . . . . . . 259捕捉. . . . . . . . . . . . . . . . . . . . . . . . . . . . . . . . . . . . . . . . . . . . . . . . . . . . . . . . . . . . . . . . . . . . . . . . . . . . . . . . . . . . . . . . . . . . . . . . . . . . . . . . . . . 259导入. . . . . . . . . . . . . . . . . . . . . . . . . . . . . . . . . . . . . . . . . . . . . . . . . . . . . . . . . . . . . . . . . . . . . . . . . . . . . . . . . . . . . . . . . . . . . . . . . . . . . . . . . . . 260回放和预览 . . . . . . . . . . . . . . . . . . . . . . . . . . . . . . . . . . . . . . . . . . . . . . . . . . . . . . . . . . . . . . . . . . . . . . . . . . . . . . . . . . . . . . . . . . . . . . . . . . . . . 262创建 DVD . . . . . . . . . . . . . . . . . . . . . . . . . . . . . . . . . . . . . . . . . . . . . . . . . . . . . . . . . . . . . . . . . . . . . . . . . . . . . . . . . . . . . . . . . . . . . . . . . . . . . 263第 18 章: 术语表数码成像术语 . . . . . . . . . . . . . . . . . . . . . . . . . . . . . . . . . . . . . . . . . . . . . . . . . . . . . . . . . . . . . . . . . . . . . . . . . . . . . . . . . . . . . . . . . . . . . . . . . . . 2651第 1 章: Adobe Premiere Elements 快速入门Adobe® Premiere® Elements 8 软件集实用性和易用性于一体,让您能够轻松展现最佳的视频效果。
ARM® Cortex®-M32-bit MicrocontrollerNuMicro® FamilyNuMaker BrickUser ManualThe information described in this document is the exclusive intellectual property of Nuvoton Technology Corporation and shall not be reproduced without permission from Nuvoton. Nuvoton is providing this document only for reference purposes of NuMicro microcontroller based system design. Nuvoton assumes no responsibility for errors or omissions.All data and specifications are subject to change without notice.For additional information or questions, please contact: Nuvoton Technology Corporation.目錄1 簡介 (8)1.1特色 (8)2 NUMAKER BRICK 硬體介紹 (9)2.1模組分類 (10)2.1.1主控端 (11)2.1.2揚聲器模組 (14)2.1.3聲納模組 (16)2.1.4RGB LED 模組 (18)2.1.5振動感測模組 (20)2.1.6溫溼度感測模組 (22)2.1.7瓦斯感測模組 (24)2.1.8紅外線發射接收模組 (26)2.1.9按鍵模組 (28)2.1.10拓展模組 (30)2.2Nu-Link Me (33)2.3模組識別 (33)3 如何使用 NUMAKER BRICK (35)3.1.1支援 IDE (35)3.1.2安裝 Nu-Link Me 驅動程式 (35)3.1.3下載 NuMaker Brick 原始碼 (37)3.1.4連接 Nu-Link Me (38)3.1.5在 Keil uVision® IDE 使用 Nu-Link Me (39)4 NUMAKER BRICK APP (41)4.1支援版本 (41)4.2安裝說明 (41)4.3操作方法 (42)頁面說明 (46)4.44.4.1首頁 (46)4.4.2模組關聯頁面 (49)4.4.3電池頁面 (50)4.4.4揚聲器頁面 (52)4.4.5RGB LED 頁面 (54)4.4.6振動感測頁面 (56)4.4.7聲納頁面 (58)4.4.8溫溼度感測頁面 (60)4.4.9瓦斯感測頁面 (62)4.4.10紅外線模組頁面 (63)4.4.11按鍵頁面 (65)5 NUBRICK 參考應用 (66)5.1居家安全 (66)5.1.1居家安全模組連接 (66)5.1.2居家安全模組設定 (67)5.2廚房安全 (69)5.2.1廚房安全應用模組連接 (69)5.2.2廚房安全模組設定 (70)6 NUMAKER BRICK 各模組電路圖 (73)6.1主控端電路圖 (73)6.2揚聲器模組電路圖 (74)6.3聲納模組電路圖 (75)6.4RGB LED 模組電路圖 (76)6.5振動感測模組電路圖 (77)6.6溫溼度感測模組電路圖 (78)6.7瓦斯感測模組電路圖 (79)紅外線發射接收模組電路圖 (80)6.86.9按鍵模組電路圖 (81)6.10拓展模組電路圖 (82)6.11Nu-Link Me 電路圖 (83)6.12NuMaker Brick PCB 佈局 (84)7 REVISION HISTORY (86)圖目錄Figure 1-1 NuMaker Brick (8)Figure 2-1 NuMaker Brick 模組排列推疊示意圖 (9)Figure 2-2 NuMaker Brick 模組種類 (10)Figure 2-3 NuMaker Brick 主控端正面圖 (11)Figure 2-4 NuMaker Brick 主控端背面圖 (11)Figure 2-5 NuMaker Brick 揚聲器模組 (14)Figure 2-6 NuMaker Brick 聲納模組 (16)Figure 2-7 NuMaker Brick LED 模組 (18)Figure 2-8 NuMaker Brick 振動感測模組 (20)Figure 2-9 NuMaker Brick 溫溼度感測模組 (22)Figure 2-10 NuMaker Brick 瓦斯感測模組 (24)Figure 2-11 NuMaker Brick 紅外線發射接收模組 (26)Figure 2-12 NuMaker Brick 按鍵模組 (28)Figure 2-13 NuMaker Brick 拓展模組 (30)Figure 2-14 Nu-Link Me (33)Figure 3-1 Nu-Link Me 連接示意圖 (38)Figure 4-1 首頁 (46)Figure 4-2 模組連接狀態示意圖 (47)Figure 4-3 模組關聯頁面 (49)Figure 4-4 電池頁面 (50)Figure 4-5 揚聲器頁面 (52)Figure 4-6 RGB LED 頁面 (54)Figure 4-7 振動感測頁面 (56)Figure 4-8 聲納頁面 (58)Figure 4-9 溫溼度感測頁面 (60)Figure 4-10 瓦斯感測頁面 (62)Figure 4-11 紅外線模組頁面 (63)Figure 4-12 按鍵頁面 (65)Figure 5-1 居家安全模組連接示意圖 (66)Figure 5-2 居家安全模組關聯示意圖 (67)Figure 5-3 居家安全揚聲器模組設定示意圖 (67)Figure 5-4 居家安全振動模組設定示意圖 (68)Figure 5-5 居家安全聲納模組設定示意圖 (68)Figure 5-6 廚房安全模組連接示意圖 (69)Figure 5-7 廚房安全模組關聯示意圖 (70)Figure 5-8 廚房安全揚聲器模組設定示意圖 (70)Figure 5-9 廚房安全 RGB LED 模組設定示意圖 (71)Figure 5-10 廚房安全溫溼度模組設定示意圖 (71)Figure 5-11 廚房安全瓦斯感測模組設定示意圖 (72)Figure 6-1 主控端電路圖 (73)Figure 6-2 揚聲器模組電路圖 (74)Figure 6-3 聲納模組電路圖 (75)Figure 6-4 RGB LED 模組電路圖 (76)Figure 6-5 振動感測模組電路圖 (77)Figure 6-6 溫溼度感測模組電路圖 (78)Figure 6-7 瓦斯感測模組電路圖 (79)Figure 6-8 紅外線發射接收模組電路圖 (80)Figure 6-9 按鍵模組電路圖 (81)Figure 6-10 拓展模組電路圖 (82)Figure 6-11 Nu-Link Me 電路圖 (83)Figure 6-12 NuMaker Brick 正面 PCB 佈局 (84)Figure 6-13 NuMaker Brick 反面 PCB 佈局 (85)表目錄Table 2-1 分壓電阻與位址表 (33)Table 4-1 模組圖示表 (46)Table 4-2 模組資訊表 (47)Table 4-3 電池模組狀態欄參數表 (50)Table 4-4 電池模組控制欄參數表 (51)Table 4-5 揚聲器模組狀態欄參數表 (52)Table 4-6 揚聲器模組控制欄參數表 (53)Table 4-7 揚聲器模組命令欄參數表 (53)Table 4-8 RGB LED 模組狀態欄參數表 (54)Table 4-9 RGB LED 模組控制欄參數表 (55)Table 4-10 RGB LED 模組命令欄參數表 (55)Table 4-11 振動感測模組狀態欄參數表 (56)Table 4-12 振動感測模組控制欄參數表 (57)Table 4-13 聲納感測模組狀態欄參數表 (58)Table 4-14 聲納感測模組控制欄參數表 (59)Table 4-15 溫溼度感測模組狀態欄參數表 (60)Table 4-16 溫溼度感測模組控制欄參數表 (61)Table 4-17 瓦斯感測模組狀態欄參數表 (62)Table 4-18 瓦斯感測模組控制欄參數表 (62)Table 4-19 紅外線模組狀態欄參數表 (63)Table 4-20 紅外線模組控制欄參數表 (64)Table 4-21 紅外線模組命令欄參數表 (64)Table 4-22 按鍵模組狀態欄參數表 (65)Table 4-23 按鍵模組控制欄參數表 (65)1 簡介物聯網的應用時代已經來臨,其中又以感測器類型的物聯應用最為蓬勃發展,一種結合多種感測器類型與通訊模組整合的開發平台,對於物聯網應用的開發者而言,可以帶來極大的便利性,大幅縮減開發時程。
Unity Bike Desk Owner’s ManualTable of Contents WelcomeGetting StartedW elcomeW arrantySafetyTransportationStorageSpecificationsUnity Desk Assembly Assembly Instructions Unity Desk Operations LevelingSeat Adjustment Final Inspection 410193WelcomeCongratulations on choosing the Unity, by LifeSpan. Your new bike desk is the perfect complement to studying, screen time, or working from home. It provides a healthy opportunity to add light exercise to sedentary activities you’re already engaged in.Per the President’s Council on Fitness, family-wide need for exercise is pronounced. Fewer than 5 percent of adults achieve the suggested 30 minutes of daily activity, while office-working professionals are inactive for an average of 10 hours per day. Modest movement, such as pedaling on your new Unity bike, helps avoid these common pitfalls while improving your family’s mental and physical health.The Unity has been designed to feature a sophisticated aesthetic, modest footprint, and smooth, distraction-free pedaling, perfect for your TV area, living room, or home office. To ensure zero costs of use and allow placement anywhere, the bike operates without electricity or batteries. Just sit and pedal! Before you assemble or operate your product, please read this manual thoroughly. Important information, including safety precautions, assembly instructions, and proper operation information are included. After assembly is complete, review the Final Inspection section to ensure safe operation. Should you need to contact LifeSpan customer service, please visit the customer service section of . Submitted service requests will be responded to within one business day. Consumers in the United States and Canada can also dial (877) 654-3837, option 4.Neither LifeSpan Fitness nor its representatives can accept responsibility for any damages orinjury incurred as a result of information presented in this manual except under the termsof the product warranty.45WarrantyYour LifeSpan Unity comes with the following limited warranty valid in North America.LifeSpan warrants the equipment it manufactures is free from defects inmaterials and workmanship under normal use and services. The periods above are based on the date of purchase. During these periods, LifeSpan will replace defective parts. Should your Unity Bike Desk need service or assistance during the warranty period, do not return it to the store that it was purchased. Instead, please visit our website at , click on “Customer Service” and complete the form to request assistance or call 877.654.3837 option 4 for a customer service agent. To get assistance you will need the unique product serial number located on the underside of the frame.LifeSpan reserves the right to make changes and improvements to our products without incurring any obligations to similarly alter any product purchased. In order to insure our product warranty and to ensure the safe and efficient operation of your LifeSpan product, only authorized parts can be used. The warranty is void if any parts other than those provided by LifeSpan are used.Exclusions and Limitations:• This warranty does not apply to any defects caused by negligence, misuse, improper assembly, or maintenance, accident, or “act of God.”• Physical damage to table top due to misuse or accident.• This warranty does not apply to discoloration of paints or plastics.• LifeSpan shall not be responsible for incidental or consequential damages. •This warranty is non-transferable form the original owner.RegistrationShould you need to process a warranty claim make sure you retain your purchase receipt to verify the date of purchase and register your LifeSpan product online. To complete the registration go to and select “Product Registration”.Warranty Frame PartsUnity Bike Desk 3 Years 1 YearSafetyWhen using your Unity bike desk, basic precautions should always be followed, including:• Never operate this bike desk if it has been damaged.• Do not use outdoors or in areas of high humidity orextreme temperature changes.• Use this product for its intended use as described in thisOwner’s Manual.• Do not use attachments that are not recommended byLifeSpan.• Always keep a clear path around this product foraccess to, passage around and emergency dismount.At a minimum there should be a clear path on at leastone side and front or back of the product. Minimumclearances are specified below.Safety Clearance6Children and Pets• Keep children under 10 years of age away from playing on or using your bike desk at all times.• When in use, keep others away from moving parts including the pedals and cranks.• This desk bike can be used by children 10 years of age and older and those with reduced physical ability or sensorycapacity under supervision and instruction concerningproper use in a safe manner.• Although the Unity Bike Desk is not intended for seriousexercise, always consult a physician before beginning anexercise program. If you experience chest pains, nausea,dizziness or shortness of breath, stop exercising immediatelyand consult your physical before continuing.• Keep the product on a solid and level surface at all times.• Wear shoes with high traction rubber sole during use.7TransportationThe Unity comes with integrated transport wheels, located on the front of the bike’s frame. To safely transport the desk, position yourself in front of the desk, facing the seat. To place the bike on the transport wheels, tip the desk forward until the roller wheels contact the floor. You can then pull or push the Unity to the desired location. Prior to lowering the bike to its regular position, verify the rear seat area is clear of walls and other objects.StorageWhen storing your Unity bike desk, keep it in a clean, dry environment. To prevent dust and dirt build up, cover the product with a clean, non-abrasivecover.8SpecificationsUnity Bike DeskSeat Adjustable; Polyurethane FoamPedaling Bi-Directional; forward and backwardMax User Weight400 lb (181.4 kg)Desk Size*31.5 W x 24D in / 80 W x 61 D cmNet Weight80.5 lb (36.5 kg)Power NoneAssembled Size47L x 31.5W x 41H in / 120 L x 80 W x 104 H cmFrame Welded Steel Frame Construction9Assembly InstructionsAt LifeSpan we strive to make our equipment easy to assemble and start using. Parts that can be pre-assembled are always assembled and tested on the product line.Prior to starting the assembly process, take all the parts out of the box, remove plastic bags and lay everything out on the floor to become familiar with the components. Lay the desktop face down on a non abrasive surface. Since your desk is a heavy piece of equipment, it is recommended that you use two people during assembly and follow these assembly instructions to reduce any problems that may occur.10Assembly Instructions11Assembly InstructionsStep 1: Attach Base Foot to Seat Slide FrameA. Position Seat Slide Frame (1) on floor as shown in figure 1.B. Remove the two pre-installed M8X15L Bolts, Lock Washers and Washers(12) from Seat Slide Frame.C.C onnect the Rear Base Foot (2) to the Seat Slide Frame (1) with the twoM8x15L Bolts, Lock Washers and Washers (12).Assembly InstructionsStep 2: Attach Drive System to Seat Slide FrameA. Remove the four Phillips Head Screws(14) attaching the Seat Slide FrameBase Cover (4) to the Seat Slide Frame (1) and remove the Cover.B. Remove the two pre-installed M8x50L Bolts, Lock Washers, Washers andNuts (13) from the Seat Slide Frame (1).C. Slide the Drive System (3) and the Seat Slide Frame (1) together andconnect with the M8x50L Bolts, Lock Washers and Washers (13). Fullytighten all hardware.Assembly InstructionsStep 3: Right and Left Pedal AssemblyA. Identify which pedal goes on the right side and which goes on the leftside by locating the “R” on the back of the Right Pedal (6) and the “L” on the back of the Left Pedal (5).B. Hand tighten the Right Pedal into the Right Crank Arm (R) by turningclockwise.C. Hand tighten the Left Pedal into the Left Crank Arm (L) by turningcounter clockwise. Be careful not to cross thread the threads.D. Tighten both pedals with the provided 15mm wrench.Assembly InstructionsStep 4: Attach SeatA. Remove the four M8x15L Screws and Washers (15) from the base of theSeat (7).B. Attach the Seat (7) to the Seat Side Frame (1) with the four M8x15L Screwsand Washers (15).E.the A. B. C. Assembly InstructionsAssembly InstructionsStep 7: Attach Desk & Supports to Desk BaseA. Remove the two M8x15L Screws and Washers (19) from the ends of theLeft and Right Desk Attachment Frames (9)(10).B. Position the Desktop over the Desk Base Frame(8) and slide the Left andRight Desktop Attachment Frames(9)(10) into the Desk Base Frame .C. Slide the frames all the way down and tighten the two M8 x 15 screws withWashers(19), one on each side. Fully tighten all hardware.D. Fully Tighten the the four M8x15L Screws and Washers(18) to fully securethe Desktop to the Attachment Frames (9)(10) from Step 6C.OperationsLevelingLifeSpan's Unity Bike Desk comes with two leveling feet located on bottom of Desk Base Frame (8). Locate your Unity Bike Desk on a solid, level surface. Try to rock in all directions to see if any of the feet are not touching the floor. If the Unity Bike Desk rocks, adjust the feet that are not touching the floor downward to eliminate any rocking. Once the frame is completely stable,secure the feet in place by tightening the lock nut on each foot.Seat AdjustmentSeat AdjustmentPull the blue Seat Height Adjustment Lever(C) and move the Seat up or down to desired position. Release and allow the mechanism to lock into place.Final Inspection After your Unity bike desk has been assembled it is necessary to perform a final visual inspection and test of features. Thoroughly look at the bike from all angles. After visually checking your finished product, does anything look out of place? If so, please review assembly instructions for those areas and make needed adjustments. Next, confirm all bolts have been properly tightened. Then test the adjustment of the seat, making sure it fully locks in different selected positions. Check the pedals, inspecting for smooth movement and normal function. Next verify the work surface. Is the desktop placed in a comfortable position? If not, review Step 6 and make needed adjustments before use.Unity Bike Desk。
Leo WarrenStudent | @leowarren34Autodesk Inventor –A Beginner’s Guide (as fast as possible)1Leo Warren•College Student•Using Autodesk Inventor since 2017 release•Autodesk Student Ambassador Diamond•Student Collaborator•DIY enthusiast and Maker –Design -> Make2The Design Course3Learning ObjectivesKnow how parts and assemblies worktogether.1234Develop skills insketchingDevelop skills in creating and modifying features.Understand how constraints work4On the Class Page you will find the dataset to download.Download then extract to C:\\DriveYou can also download the handout which will containfurther details and images as well as extension tasks,The relevant files and handout pages will be highlightedfor each exercise.5ComplianceAs said earlier –I am a student.This means I use an Autodesk Educational License.In respect of compliance and the license terms, the filesprovided in the dataset are only to be used for thisclass.Non-Compliance is taken seriously, so delete thedataset once you are finished. Any files you created arefine to keep as long as they don’t contain any filesbelonging to the dataset.It is also for this reason that I am not following thestandard extract location like you would see with otherAutodesk University Classes.6Class Q&ADue to most classes being pre-recorded questions can be asked either in theclass page in the class Q&A at the time below7EducationDid you know that Autodesk offers free software for Students and Teachers?https:///education/home8Welcome to InventorWHAT IS AUTODESK INVENTOR?WHY DID I CREATE THIS CLASS?WHAT TO EXPECT FROM THIS CLASS?9EXTENSIONEXERCISE 2.2EXERCISE 2How this class will workEXERCISE 1WINEGLASSGetting used to Inventor Launching the Part Environment Parametric Sketching RevolveFillets TABLETOPParametric SketchingParametersExtrudeHolePatternsTABLE ASSEMBLYLaunching the AssemblyEnvironmentUsing the Place CommandGrounding PartsJointsPatternsAssembly ModificationsDegrees of FreedomContent CentreBolted ConnectionsModelling in the Context ofan AssemblyMORE JOINTS & BONUS CONTENTParametric SketchingSweepsSharing SketchesSurfacesSplitSolidsFilletsDemo Pause, Have a go 10Setup & Exercise 1Handout Pages: 7-33Relevant Dataset Files: C:\Inventor A Beginner's Guide (As Fast As Possible) -EDU463362-L\Exercise 1 -Wineglass\Staging Files11Parts and AssembliesWhat are Parts and Assemblies? What is a Subassembly?Parts Subassembly Top Level AssemblyPartsSubassembly12WineglassWhy model a Wineglass?What will we cover in this exercise?What should we have at the end?13Setup & Exercise 1 Demo Watch the demo then pausethe video and have a go14Exercise 1 –What did we learn?INVENTOR PART GUIREVOLVEPARAMETRIC SKETCHING MODIFYING SOLIDS 15Exercise 2Handout Pages: 34-50Relevant Dataset Files: C:\Inventor A Beginner's Guide (As Fast As Possible) -EDU463362-L\Exercise 2 -Table\Staging Files\Table16TableThe Main ProjectSpread over Exercise 2 & Exercise 2.2Exercise 2: Model the Table TopExercise 2.2: Building the Table with the files in the datasetWhat will we cover in this exercise?What should we have at the end?17Exercise 2 DemoWatch the demo then pausethe video and have a go18Exercise 2 –What did we learn?PARAMETRIC SKETCHINGMODIFYINGEXTRUDINGPATTERNS19Exercise 2.2Handout Pages: 51-71Relevant Dataset Files: C:\Inventor A Beginner's Guide (As Fast As Possible) -EDU463362-L\Exercise 2 -Table20TableLast exercise we made the tabletop, in this exercisewe’re going to build on it using files from the dataset.What are we going to cover in this exercise?What should we have at the end?21Exercise 2.2 DemoWatch the demo then pausethe video and have a go22Exercise 2.2 –What did we learn?INVENTOR ASSEMBLY GUICONTENT CENTREJOINTSBOLTED CONNECTION 23Conclusion How do you feel about 3D CAD now?Is 3D CAD for you?Where next?24What Did We Achieve In This Class?25ProgressionWhere to go next?Handout and Dataset –Extension Activities as well as Bonus ContentFurther Exploration in to Inventor –More Parts & Assemblies as well as Drawings and Presentations.Master the basics then move over to the Simulation, FEA, Weldments and Design AcceleratorsDo another class on Inventor –There are many on the internet –they will cover similar things but with adifferent dataset.Trial Expired? Try Fusion 360 –Free personal edition available with a similar environment to Inventor witheverything you need for 3D Modelling.Practice your modelling skills by modelling different things around you.26Further ResourcesIn the handout:Part 6 –Assembly Exercise 2 –Pages 74 –86Part 8 –Bonus Content –Pages 88 –103YouTube:Inventor –TFI -https:///c/TFICADTips/featuredFusion 360 –Lars Christensen -https:///user/cadcamstuff Autodesk:Autodesk Knowledge Network: https:///Inventor Forums -https:///t5/inventor/ct-p/70Fusion Forums -https:///t5/fusion-360/ct-p/1234Autodesk Design Academy -/Autodesk University: https:///autodesk-university/27Q&A Reminder & FeedbackThere will be a Q&A –feel free to ask questions about the class and InventorIf the Q&A has already passed then feel free to ask in the comments of the classpageFeel free to provide feedback in the class pageClick the recommend button if you enjoyed the class28Autodesk and the Autodesk logo are registered trademarks or trademarks of Autodesk, Inc., and/or its subsidiaries and/or affiliates in the USA and/or other countries. All other brand names, product names, or trademarks belong to their respective holders. Autodesk reserves the right to alter product and services offerings, and specifications and pricing at any time without notice, and is not responsible for typographical or graphical errors that may appear in this document.© 2020 Autodesk. All rights reserved.29。
NOC创作平台使用教程深圳市恩欧希互联科技有限公司目录2.1.52.2.9.21.安装注册1.1安装NOC创作平台的运行环境如下。
硬件:PentiumIII 1G以上,256M以上内存,200M以上硬盘剩余空间,4M 以上显存,VGA 卡,声卡,音箱。
推荐使用Pentium IV 2G以上,512M内存,16M显卡,1024x768显示模式。
软件:中文Windows XP/Windows 20XX/Windows Vista/Windows 7环境。
安装步骤:按照安装提示做即可。
1.2注册1.2.1注册账号(1)登录网站。
(2)注册新用户。
(3)填写真实用户信息。
1.2.2.打开“开始菜单”运行程序(如图1)图11.2.3 登录运行软件时请输入用户名、密码(如图2)。
图21.2.4 登录成功运行NOC创作平台,选择菜单上“帮助─关于NOC创作平台”项,显示“已登录NOC服务器”表示注册成功(如图3)。
图32.NOC创作平台使用说明2.1界面介绍NOC创作平台采用流行的操作界面风格,使用过Windows的人对此极容易上手。
打开NOC创作平台,建立新节目,看到画面中有这几个部分(如图4)。
现将主界面的组成介绍如下。
图1菜单:可完成软件的主要功能;编辑区:摆放和编辑对象的地方,每一个页面对应一个编辑区;工具窗:生成对象的工具按钮箱;效果窗:修饰对象外观的按钮箱;属性窗:设定页和对象属性的窗口;节目窗:管理页,素材,图片,声音和影像的窗口。
下面具体介绍各部分的功能。
2.1.1菜单加速条菜单加速条也叫菜单工具条,是菜单功能项的图标化。
每个图标对应一种菜单项的功能。
在下面的介绍中,凡是对象的编辑,都需要在选中对象后才能进行操作(如图2)。
图2新页:建立新的页面。
在一个节目中建立新页面。
打开节目:打开一个NOC创作平台格式的多媒体节目。
保存页:保存当前页面。
打印:打印当前页面,此项功能在现有版本中未提供。
剪切:对象的编辑。
清除选中的对象,并将对象保存在剪贴板中。
复制:对象的编辑。
复制选中的对象。
粘贴:对象的编辑。
粘贴复制了的对象。
复制后的对象默认与原对象重叠。
恢复:对象的编辑。
恢复上一步的操作,俗称反悔操作。
重做:对象的编辑。
恢复操作的逆操作,即撤消恢复。
复合:对象的编辑。
将多个对象合成一个新对象,这个对象称为复合对象,对象的相对位置保持不变,相当于焊接起来。
在NOC创作平台中,复合对象的内部对象仍旧保持原有的属性,可通过设置复合对象的属性来达到控制内部对象的效果,如可设置复合对象的内部对象的循环属性,让内部对象循环运动。
拆解:复合操作的逆操作。
将复合对象分解为多个对象。
轨迹:对象的编辑。
是一种起到“开关”作用的对象,将对象设置为“轨迹”这一特殊的对象。
在NOC创作平台中,对象的平移运动需要指定运动的轨迹。
轨迹对象可作为其对象的运动轨迹。
可通过轨迹按钮,将普通的线段、矩形、椭圆、多边形等对象设置成可充当轨迹的“轨迹对象”。
当一个对象被设置成轨迹后,其颜色发生变化,一般为红色,并且标志有绿色的起点和红色的终点,利用画点工具可改变起点和终点的位置。
旋转:对象的编辑。
将对象旋转。
前移:对象的编辑。
将对象向前移一层。
选中对象后,点击此按钮即可。
在NOC创作平台中,页面上的对象是有层次的,具有前后关系,对象可相互遮挡。
每个对象都有层数属性,层数越大,对象的相对位置越往前。
在同一页面中,对象最大的层数不超过对象的数量,最小层数为1。
有的软件中也称为上移。
后移:类似于前移操作。
将对象向后移一层。
有的软件中也称为下移。
移到最前:对象的编辑。
将对象移到最前,此时层数为1。
选中对象后,点击此按钮即可。
移到最后:对象的编辑。
将对象移到最前。
类似于移到最前操作。
全屏:将编辑方式设置为全屏方式,以便观察屏幕效果。
利用鼠标右键的菜单也可实现编辑窗口和全屏两种方式的切换。
网格:用来设置编辑状态时的网格,是一种起到“开关”作用的对象。
网格可用来调整对象的位置。
坐标系:在页面中设置坐标系。
进行此操作后,在编辑和运行测试状态都显示坐标系。
运行:运行节目起始页。
运行时并不一定是从当前页开始,而是从起始页开始。
节目的起始页可以在菜单的“设置”栏中设置。
结束运行可单击鼠标右键选择“退出”或按ESC键即可。
测试:运行当前页。
结束测试可单击鼠标右键选择“退出”即可。
2.1.2工具箱图3与图4分别为工具箱和效果栏,下面具体介绍各按钮的大致功能。
图3 图4选择:对象选择按钮。
编辑对象时必须先选中对象,然后才能进行其他操作。
点:画点按钮。
点击此工具后,出现如下选项。
,各项功能依次为:“画点”──最常用。
直接产生一个点。
“起点”──设定轨迹的起点,常用于运动轨迹的调整。
“终点”──设定轨迹的终点,常用于运动轨迹的调整。
“添加点”──给线段或多边形增加控制点,以调整线段形状。
直线:画直线的工具。
基本操作为鼠标的拖动、松开。
单击结束画线。
矩形:画矩形的工具。
基本操作为鼠标的拖动、松开。
单击结束操作。
在画矩形时先按住键盘的Shift键可画正方形。
圆角矩形:画圆角矩形的工具。
基本操作同画矩形。
圆角的大小可用鼠标拖动对象的右上角的黑点来调整。
在画圆角矩形时先按住键盘的Shift键可画圆角正方形。
椭圆:画椭圆的工具。
基本操作同画矩形,即鼠标拖动、松开,单击鼠标结束操作。
在画椭圆时先按住键盘的Shift键可画正圆。
多边形:画多边形的工具。
基本操作是鼠标的多次单击和移动,双击鼠标结束操作。
此工具同时可画任意线,操作类似于Windows画笔中的“铅笔”,即拖动鼠标。
双击结束操作。
画多边形时注意效果栏的状态,此按钮选中时则绘制的是封闭线段。
曲线:画光滑曲线或封闭图形的工具。
基本操作类似于画多边形。
在曲线中的黑色点称为控制点,在NOC创作平台中,多边形或者曲线的控制点位置、数量都可以调整。
文字:文字工具。
拖动鼠标、松开,生成一个文字对象。
双击该对象,可进入文字输入状态。
单击文字对象外区域可结束操作。
图片:图片工具。
基本操作类似于文字工具。
在图片对象放置相应的图片文件有几种方法,可双击图片对象,可在属性窗中输入文件名,也可在节目区的“图片”中直接选取。
声音:声音工具。
基本操作同图片对象。
动画:动画工具。
动画包括GIF动画和AVI动画。
基本操作同图片对象。
函数对象:提供丰富的函数功能,可以方便的制作常规函数、参数方程、极坐标方程曲线。
函数曲线可以动态变化且可作为对象运动的轨迹。
截取:可将当前的设计画面选择区域捕捉,存为BMP文件。
笔色:设置对象边框的颜色。
选取此工具,然后利用效果栏的调色板选取颜色,最后单击对象区域即可。
沾色笔:设置对象的透明色,操作类似于笔色。
也可用来取得屏幕区域的颜色。
填色:设置对象的填充颜色。
操作类似于笔色。
笔刷:设置对象的填充图案。
操作类似于笔色。
2.1.3效果栏调色板:16种常见的颜色。
可直接选取使用,也可双击颜色块编辑新的颜色。
前景/背景颜色:单击此工具后,在调色板上选取颜色,此时左键设置前景色,右键设置背景色。
封闭/断开:控制绘制图形的封闭/断开。
填充/透明:控制绘制图形的填充/透明。
粗细:控制绘制图形边框的粗细。
线段类型:控制绘制图形边框的类型。
颜色:显示鼠标光标当前位置的颜色。
2.1.4属性窗对象属性设置窗口(如图5)。
在NOC创作平台中,主要的工作就是对象属性的设置。
所有对象的属性都是图中所示的三项。
其中“属性”项用于调整对象的外观,“动作”项用于实现对象的动画和特效,“交互”项用于实现对象的交互功能。
图52.1.5节目区节目区可完成素材的基本管理。
在图6标签的相应位置上单击鼠标右键,可对素材的路径进行设置。
图62.2操作介绍利用NOC创作平台制作一个完整的作品需要如下几个步骤:建立一个节目文件;建立一个或多个页文件;在页面上创建对象;通过设置对象的属性、动作及交互来编辑对象。
上述步骤中,最后一个步骤是主要针对对象的操作,通过设置对象动作来实现动画功能;通过设置对象交互来实现交互功能。
2.2.1建立一个新节目打开NOC创作平台,在菜单项中选择“新节目”(如图7)。
图7分别在输入框中输入节目名和存放目录,其中存放目录可通过右边的按钮选择。
注意:若直接输入存放路径,则不能超过两级目录。
2.2.2页的创建、编辑、运行和测试每个节目都包含一个或几个页文件,当你创建新页时,系统会自动给页命名为页面1,页面2……依次命名。
你也可以改变页文件名,方法是点击页面,按F4或者按鼠标右键选择“属性”,调出属性窗,在页名项中重新命名即可。
添加页是往节目中装入已建好的页。
点击主菜单项的“添加页”选项。
出现页文件对话框,选中要添加的页即可。
你可以将页移出节目。
具体做法是在节目区中选取要移去的页,然后按下键盘的“Delete”键即可。
页是一种特殊的对象,它也具有属性和特效,但又能包含其他对象。
为区别于其他对象,我们称之为页,有时候也称为页面。
运行节目要设定起始运行页,这在菜单栏的“设置”中进行。
点击菜单工具栏的运行按钮即可,按键盘的“ESC”键或点击鼠标右键选择“退出”即可从运行状态退出。
测试单个页的效果,可点击菜单工具栏的测试按钮即可,退出测试状态的方法是按键盘的“ESC”键或点击鼠标右键选择“退出”即可。
页的动作属性中有许多特效,如扫描显示、移动显示、百叶窗、栅条显示、马赛克显示,设定特技效果可变换页面切换效果。
2.2.3对象的创建和编辑所有的对象都是在页上创建,多媒体创作的基本内容之一就是对象的创建和编辑。
NOC创作平台所提供的对象有12种,全部放在工具窗中。
我们看到NOC创作平台所提供的作图工具类似于画笔中的工具。
然而与画笔所画出的图形不同的是,NOC创作平台中的图形可任意调整、编辑,是一种矢量图形。
在编辑页面的对象时,若选择全屏编辑方式,可按菜单工具栏的全屏按钮,亦可在屏幕空白处点击鼠标右键选择“全屏”。
按键盘的“ESC”键可快速退出。
2.2.3.1几何对象类(1)画直线。
操作:选取此工具,在编辑区按下鼠标左键,拖动鼠标,然后松开鼠标即生成一直线。
编辑:选中此直线,然后用鼠标光标对准线上的黑点,拖动即可调整其大小;拖动其他位置可调整线段位置;还可调整线段的粗细和类型,如设置为虚线,此操作要选取效果窗中的工具。
例1:画一红色的粗虚线。
操作步骤:①画一直线:选中画直线工具,在页面上拖动鼠标,松开即形成直线。
此时默认的颜色为黑色,粗细为1,实线;②将直线变粗:选中此线段,点击效果窗中的箭头按钮,将线段粗度值调大,如值为7;③将直线着色:选中此线段,点击工具窗中的着色按钮,然后在效果窗的调色板中选取红色,再移动鼠标时,鼠标光标为笔形,点击该线段即看到线段颜色变为红色;④将线段类型设为虚线:选中此线段,点击效果窗中的线段类型按钮,点击向下箭头按钮,选中虚线类型,此时可看到该线段为虚线了。