Testlink 1.9.3升级至1.9.6的完全手册
- 格式:docx
- 大小:96.15 KB
- 文档页数:5

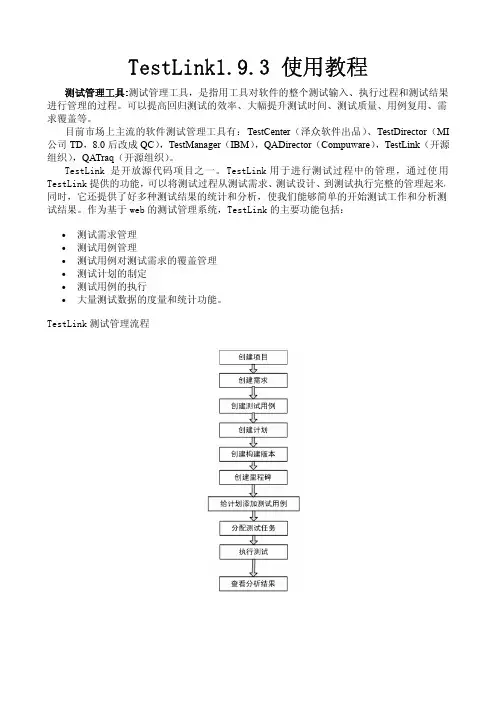
Testlink用户指南Version 1.0版本目录1. Testlink 简介 (4)2. 界面摘要 (4)3. 用户角色 (5)4. 系统登录与个人设置 (6)5. 工作流程 (8)5.1. 项目准备 (8)5.2. 创建项目 (8)5.3. 创建需求清单 (9)5.4. 开发用例 (10)5.5. 用例与需求映射 (11)5.6. 创建测试计划 (12)5.7. 创建测试版本 (13)5.8. 用例加入测试计划 (14)5.9. 分配测试任务 (14)5.10. 执行测试 (14)5.11. 查看进度报告 (16)5.12. 文档归集 (16)1.Testlink 简介基于WEB的测试项目管理系统,主要功能是:测试项目管理、产品需求管理、测试用例管理、测试计划管理、测试用例的创建、管理和执行,并且还提供报表统计功能。
2.界面摘要3.用户权限用户角色属性与其操作权限有关,系统预置了7种角色,每种角色的权限允许重新定义,通常而言,常用的权限有新建测试项目、定义功能需求、创建测试用例集、开发测试用例、创建测试计划、创建里程碑、执行测试、查看进度报告等。
角色分类角色权限定义4.系统登录与个人设置外网登陆:网关端口暂未映射公司内网:http://192.168.8.97/testlink所有人先在此登陆页面注册账号,注册后账号权限为guest,几乎没有任何权限,管理员可以对测试部以外人员分配权限,测试组人员权限随测试项目临时分配,每个账号在不同的项目中会有不同的操作权限。
内网登录testlink页面,点击“New User?”注册账号依次填写账户信息,建议FirstName填中文“姓”,LastName填中文“名字”,否则生成测试报告等文档时会显示中文姓名颠倒。
登录系统后可以在用户编辑中选择语言类型,默认为英文,可选简体中文。
5.工作流程测试主管需求管理员5.1.项目准备测试项目的发起人为产品经理、项目经理、研发人员,发起人邮件通知测试组闫伟,说明测试对象、测试焦点、期望完成时限,测试对象相关的产品文档(如spec、设计流程图)一并提供,如文档不齐备至少列出待测物的功能性及非功能性需求清单。
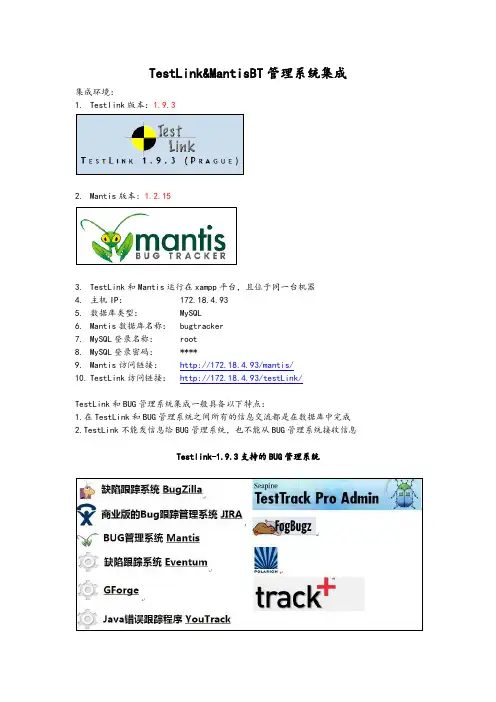
TestLink&MantisBT管理系统集成集成环境:1.Testlink版本:1.9.32.Mantis版本: 1.2.153.TestLink和Mantis运行在xampp平台,且位于同一台机器4.主机IP:172.18.4.935.数据库类型:MySQL6.Mantis数据库名称:bugtracker7.MySQL登录名称:root8.MySQL登录密码:****9.Mantis访问链接:http://172.18.4.93/mantis/10.TestLink访问链接:http://172.18.4.93/testLink/TestLink和BUG管理系统集成一般具备以下特点:1.在TestLink和BUG管理系统之间所有的信息交流都是在数据库中完成2.TestLink不能发信息给BUG管理系统,也不能从BUG管理系统接收信息Testlink-1.9.3支持的BUG管理系统一、执行测试用例,设置用例状态:Failed,默认情况下TestLink无法直接点击BUG管理系统二、修改TestLink主配置文件:config.inc.php位置:C:\xampp\htdocs\testlink\config.inc.php三、修改TestLink下的Mantis配置文件:mantis.cfg.php位置:C:\xampp\htdocs\testlink\cfg\mantis.cfg四、保存文件即可,无需重启xampp,即可看到失败的用例后显示:小蜘蛛Testlink集成Mantis使用手册1、执行用例,结果为失败,点击图表2、弹出添加问题框,点击‘访问问题跟踪系统(Mantis)’,页面跳转到mantis登陆页面3、登陆Mantis,,点击‘提交问题’,完整填写BUG信息,记录BUG编号:28014、将BUG编号填入添加问题框的‘Mantis问题编号’例如:2801,点击‘添加问题’5、添加问题成功6、查看TestLink失败的用例,下方列出了该失败用例的关联的BUG,点击可以查看BUG具体情况。
User Manual TestLink 1.6Copyright © 2004,2005 TestLink Development TeamPermission is granted to copy, distribute and/or modify this document under the terms of the GNU Free Documentation License, Version 1.2 or any later version published by the Free Software Foundation; with no Invariant Sections, no Front-Cover Texts, and no Back-Cover Texts. The license is available in "GNU Free Documentation License" homepage.1. General informationTestLink is web based Test Management system. This manual should serve as source for users to understand processes and organization of testing with TestLink. See to Installation manual for more information about system requirements, installation steps and configuration. The latest documentation is available on or .See an example of TestLink workflow:1.Administrator create a product “Fast Foo” and a user Adam with rights“leader” and Bela with rights “Senior tester”.2.Adam imports Software Requirements and for part of these requirementsgenerates empty Test cases.3.Bela describe test sneario of these Test cases that are organizedaccording to Components and Categories.4.Adam creates Keyword: “Regression” and assignes this keyword to tenof these test cases.5.Adam creates a Test Plan “Fish & Chips”, Build “Fish 0.1” and addTest Cases with keywords “Regression”.6.Adam and Bela execute and record the testing with result: 5 passed, 1failed and 4 are blocked.7.Developers make a new build “Fish 0.2” and Bela tests the failed andblocked test cases only. Exceptionaly all these five Test cases passed.8.Manager would like to see results. Administrator explain him that he cancreate account himself on the login page. Manager do it. He has “Guest”rights and could see results and Test cases. He can see that everything passed in overal report ;-) and problems in build “Fish 0.1” in a report for particular Build. But he can change nothing.2. Overall structureThere are three cornerstones: Product, Test Plan and User. All other data are relations or attributes for this base. First, definition of a couple of terms that are used throughout the documentation.2.1 Products and Test PlansProduct: A product is something that will exist forever in TestLink. Products will undergo many different versions throughout their life times. Product includes Test Specification with Test Cases and should be sorted via Keywords.Test Plan: Test Plans are created when you'd like to execute test cases. Test plans can be made up of the test cases of one or many products. Test Plan includes Builds, Test Case Suite and Test Results.2.2 Test Case CategorizationTestLink breaks down the test case structure into three levels components, categories, and test cases. These levels are persisted throughout the application.Component: Components are the parents of categories. Each component can have many categories.Category: Categories are the parents of test cases. Each category can have many test cases.Test Case: Test cases are the fundamental piece of TestLink.Test Specification: All components, categories and test cases within Product. Test Case Suite: All components, categories and test cases within Test Plan.2.3 UsersAn User has a Role, that defines available TestLink features. See more in chapter User Administration.The next picture shows common activity according to user roles:Illustration 1: Functionality overview3. Test Specification3.1 Creating Test CasesTester must follow this structure: component, category and test case. At first you create component(s) for your product. You can fill description which can be printed then. Component includes categories. Category has the similar meaning but is second level of Test Specification and includes just Test Cases.User can also copy or move Test Cases.Test Cases has next parts:∙Title: could include either short description or abbreviation (e.g.TL-USER-LOGIN)∙Summary: should be really short; just for overview.∙Steps: describe test scenario (input actions); can also include precondition and cleanup information here.∙Expected results: describe checkpoints and expected behaviour a tested product or system.3.2 Deleting Test CasesTest cases, categories, and components may be deleted from a test plan by users with lead permissions from the "delete test cases" screen. Deleting data may be useful when first creating a test plan since there are no results. However, Deleting test cases will cause the loss of all results associated with them. Therefore, extreme caution is recommended when using this functionality.3.3 Requirements relationTest cases could be related with software/system requirements as n to n. The functionality must be enabled for a product. User can assign Test Cases and Requirements via link Assign Requirements in the main screen.4. Keywords4.1 Using keywordsKeywords were created to give users another level of depth when categorizing test cases. Keywords serve as a collection of Test cases with some attribute within a Test specification. You can use it to define e.g.∙Regression or Sanity set∙Reviewed Test cases∙Set of test cases valid for one platform4.2 Keyword CreationAt this time keywords can only be created by users with the mgt_modify_key rights. These rights are currently held only by Leaders. Once a keyword or grouping of keywords have been created users may assign them to test cases.4.3 Assigning KeywordsKeywords may be assigned to test cases either from the assign keyword screen (in batch) or via the test case management (individually).4.4 Filter by KeywordUsers have the ability to filter by Keywords for:∙Search Test Cases in Test Specification.∙Add groups of Test cases in a Test case Suite (Test plan).∙Execute test screen.5. Requirement based testing5.1 IntroductionTo proof that a system is build as specified, testers use requirement based testing. For every requirement, they design one or more test cases. At the end of the test execution a test manager reports on the tests that are executed and the requirements that are covered. Based on this information the client and the various stakeholders decide whether a system can be transferred to the next test phase or can go live. To ensure that a system is build as specified, test managers use a combination of risk and requiremetn-based testing to ensure that a system is build as specified from the customer and stakeholders perspective. As a result, this complete testing delivers the following advantages:∙Linking risks and requirements will reveal vague or missing requirements.This is especially interesting for risks with a high priority.∙Testing can be focused on the most important parts of an information system first: covering the risks with the highest priority.∙Communicating in the same language as the client and the stakeholders.This makes it easier to report on the status of the test project. Beside that a better founded decision can be made whether to invest more in testing or take the risk.∙The risks and their priority make negotiating on the test project in times of pressure easier. What risks have to be covered within this test project and which ones can be postponed. Risk and requirement-based testing results in a better controlled test project. The communication with the client and the stakeholders improved. The test manager begins testing with risks with the highest priority. The process is streamlined and the end result is higher quality.5.2 AvailabilityThe functionality is available on product level. I.e. Administrator should enable it for a specified product (Edit Product link in Main window). Otherwise links are not shown.There are two user levels for this feature. The most of roles can view requirement but not modify. Refer to User section for more.5.3 Requirements SpecificationRequirements are bunched to one or more System/Software/User Requirement Specifications.Illustration 2: Dependencies between requirement related objectsCreate a document with Requirements:1.Click Requirements Specification in Main window. The List of RequirementSpecification window is shown.2.Press Create button to create a document.3.Adjust Title, Scope and eventually Count of Test cases. The lastparameter is used for statistics. Use only if you have a valid Requirement document but not all requirements are available at the moment in TestLink.Default value 'n/a' means that the current count of requirements in a specification is used.4.Press Create button to add data to database. You can see the title ofyour new created document in the table of List of Requirement Specification window.5.Click the title of document for next work. The Requirement Specificationwindow is shown.Each Requirement Specification has own statistics and report related to included data.All Specification could be printed via Print button in the Requirement Specification window. Administrator can define company, copyright and confident text via configuration files.5.4 RequirementsEach requirement has Title, Scope (html format) and Status. Title must not be unique and has max. 100 characters. Scope paramter is text in HTML format. Status can have vale VALID or NOT_TESTABLE. A NOT_TESTABLE requirements are not counted to metrics.Requirements could be created/modified or deleted manually via TestLink interface or imported as CSV file.5.4.1 Import requirementsTestLink support two types of CSV. The first 'simple' is composed from title and scope in each row. The second 'Export from Doors' try to detect header and chooses correct fields. Import compare titles and allow to solve conflicts. There are three ways: update, create requirements with same title and skip adding the conflicted ones).5.4.2 Requirements to Test Case relationTest cases are related with software/system requirements as * to *. I.e. you can assign more Test cases to one Requirement and more requirements could be covered by one Test Case. User can assign Requirements to Test Cases via the Assign Requirements link in the Main window.A coverage of Test Specification could be view via pressing the button Analyse in the Requirement Specification window.5.4.3 Requirement based ReportNavigate to Reports and Metrics menu. There is Requirements based Report link. Requirements in currect Requirement Specification and Test Plan are analysed for this report. All the latest result of test cases (available in Test Plan) are proceeded for each requirement. The result with the highest priority is applied for the requirement. Priority from the highest are: Failed, Blocked, Not Run and Passed.Example of requirement coverageA requirement is covered by three Test Cases. Two of them are includedin the current Test Suite. One passed and one was not tested for the Build1. Now Requirement has overall result: Not Run. Second test case was tested with Build 2 and passed. So Requirement passed too.6. Products6.1 OverviewProducts are the cornerstone of TestLink. Products are releases of your company that may change their features and functionality over time but for the most part remain the same.6.2 Creating new productsCreate a new product is admin right. You cannot create products with the same name. You can assign a color of backgroung to product for a better lucidity.Things to note when creating a new product:∙Deleting Products themselves is not recommended from the system, because the deletion of products would either orphan lots of test plan cases or lead to their deletion.∙Test Plans represent the testing of a product at a certain point of time.What this means is that All Test Plans are created from Product test cases.∙TestLink has the ability to import your data into a product. Data is read in CSVs form and is explained further in the import section.7. Test Plans7.1 Creating a new Test PlanTest plans are the basis for test case execution. Test plans are made up of test cases imported from products at a specific point of time. Test plans can only be created by leads. Test plans may be created from other test plans. This allows users to create test plans from test cases that at a desired point in time. This may be necessary when creating a test plan for a patch. In order for a user to see a test plan they must have the propper rights. Rights may be assigned (by leads) in the define User/Project Rights section. This is an important thing to remember when users tell you they can't see the project they are working on7.2 BuildsBuilds are a specific release of software. Each project in a company is most likely made up of many different builds. In TestLink execution is made up of both builds and test cases. If there are no builds created for a project the execution screen will not allow you to execute. The metrics screen will also be completely blank. Builds currently cannot be edited or deleted.7.3 Deleting TestPlansTest plans may be deleted from the main page by users with lead permissions. Deleting test plans permanently erases the test plan and all of its corresponding data (test cases, results, etc). The deleting of data is a scary prospect and should be reserved to extreme cases. TestLink also allows users to deactivate test plans so that they no longer appear as a menu option.8. Test Case Suite8.1 Adding new Test CasesTest Case Suite is set of test cases which are defined to be run within Test Plan. Test case Suite is created via Add Test Cases from Test Specification to Test Plan. Test cases are added including Steps and Expected result. So, you must use 'Update modified Test Cases' page to update test scenario (version of test case).Data from multiple products can be added into one test plan. Test Specification data can be filtered by keywords (adjusted in navigation pane).Once data has been imported into a test plan it will be marked with checkmark. If a test case has already been imported it will be ignored if it is imported again.8.2 Removing Test Cases from Test Case SuiteTest cases, categories, and components may be deleted from a test plan by users with Leader permissions from the "Remove test cases" page. Deleting data may be useful when first creating a test plan since there are no results. However, Deleting test cases will cause the loss of all results associated with them. Therefore, extreme caution is recommended when using this functionality.8.3 PriorityTestLink gives users with Leader rights the ability to assign ownership and priority to test cases. General Risk/Ownership is done at the category level. TestLink currently does not allow users to assign risk or ownership at the individual test case level.Risk levels are low, medium, high and Importance levels are 3, 2, 1. Users can rank the combinations of risk and importance (L1, L2, L3, M1, H2, M3, H1, H2, H3) as priority A,B,C.Assigning risk, importance, ownership, and priority are all optional and will default to priority B in the metrics screen.8.4 OwnershipOwnership affects both the execution and metrics screens. In the execution screen users have the ability to sort the executable test cases by the ones they have ownership of. In the main metrics screen there is a table that shows the remaining test cases by ownership. If there are no test case owners it defaults to none.A Tester can also see a metrics of own executed tests in main page if these metrics are enabled (see Installation manual).9. Test Execution9.1 GeneralTest execution is available when:1. A Test Specification is written.2. A Test Plan is created.3.Test Case Suite (for the Test Plan) is defined.4. A Build is created.5.The Test plan is assigned to testers (otherwise they cannot navigate tothis Test Plan).Select a required Test Plan in main page and navigate to the 'Execute tests' link. Left pane serves for navigation in Test Case Suite via tree menu, filtering and define a tested build.9.2 NavigationThe navigation pane consists from a 'Filter & Settings' box and a tree menu with Test Case Suite.9.2.1 Filtering Test CasesThis table allows the user to filter test cases for smart navigation before they are executed.∙Owner: Users can filter test cases by their owner. Ownership is determined at the category level, is determined by leads, and can be changed at the Assign Risk and Ownership page under metrics.∙Keyword: Users can filter test cases by keyword. Keywords are set either using the Create/Edit/Delete Test Cases or by the Assign Keywords To Multiple Cases. Keywords can only be created, edited, or deleted by leads but may be assigned to test cases by testers.∙Result: Users can filter test cases by results. Results are what happened to that test case during a particular build. Test cases can pass, fail, be blocked, or not be run.9.2.2 Define a tested buildUsers can filter test cases by builds. Builds are the basic component for how test cases are tracked. Each test case may be run once and only once per build. Builds can be created by leads using the Create New Build page.9.2.3 Tree menuThe tree menu in navigation pane includes Test Case Suite colored by results.Menu colored: By default the tree will be sorted by the results for the defined build that is chosen from the dropdown box.Example TC colored according to the buildUser selects build 2 from the dropdown box and doesn't check the "most current" check box. All test cases will be shown with their status from build 2. So, if test case 1 passed in build 2 it will be colored green.Second possibility Last result is that menu is colored according to the latest test result.Example TC colored according to the latest resultUser selects build 2 from the dropdown box and this time checks the "most current" check box. All test cases will be shown with most current status.So, if test case 1 passed in build 3, even though the user has also selected build 2, it will be colored green.9.3 Execution9.3.1 Test StatusExecution is the process of assigning a result (pass, fail, blocked) to a test case for a specific build. 'Blocked' test case is not possible to test for some reason (e.g. a problem in configuration disallows to run a tested functionality).9.3.2 Insert Test resultsTest Results screen is shown via click on an appropriate component, category or test case in navigation pane. The title shows the current build and owner. The colored bar indicate status of the test case. Yellow box includes test scenario of the test case.The indication that the test case was updated or deleted in test Specification is not supported in 1.5 version.Updated Test Case: Users will see the American flag if the original version of the test case (on the management side) has been updated. If users have the proper rights they can go to the update/delete test case page either through clicking on the test case number next to the flag or through the link on main page. It is not necessary for users to update test cases if there has been a change. They simply have the option of doing so if they wish.Deleted Test Case: Users will see the "x" symbol if the original version of the test case (on the management side) has been deleted. If users have the proper rights they can go to the update/delete test case page either through clicking on the test case number next to the "x" or through the link on main page.10. Test Reports and MetricsThe metrics pages sum up the results of execution into reports. Metrics are broken down by both individual builds and across all builds.10.1 General Test Plan MetricsThis page shows you only the most current status of a test plan. For instance, you have test case 1 which was executed in builds 1,2, and 3. Build 1 2 3 Status Pass Fail Blocked Since the most recent result of the test case is blocked the result on the "Across All Builds" page would be blocked. If a user would go and change the status of build 3 to something else or not run the current result would be fail.(in TL 1.0.4: View Project Status Across All Builds)10.2 Metrics of active BuildThis report shows the detailed results for a particular build defined in navigation pane.(in TL 1.0.4: View Status by an Individual Build)10.3 The Overall Build StatusView The Overall Build Status This report show a high level view of each build's result.10.4 Query MetricsQuery results for specific test cases based on keyword, component, owner, last result, and 1 or more builds. For example if you wanted to know if a test case has failed, passed, blocked, or has not been run in builds 2, 3, and 4 you would want to use this query functionality. Additionally you could determine if test cases assigned to a tester have been executed in a set of builds. This is important because test passes may occur over multiple builds, and multiple test passes may occur during the development cycle. This is especially handy at the end of a development cycle when you want to know if certain cases have been run over the past few builds of the product. This functionality differs from other reports which display results on a specific build, or all builds.Export to MS Excel is also available.10.5 Test ReportView Status By Individual Test Cases This report shows each test case's result for every build. An user can navigate to Test Execution screen via link for each test Status.Export to MS Excel is also available.10.6 Blocked/Failed Test CasesThese reports show all of the currently blocked or failing test cases. 10.7 Total Bugs For Each Test CaseThis report shows each test case with all of the bugs filed against it for the entire project. This metrics are available only if Bug Tracking System is connected.10.8 E-mail Test reportEmail Test Plan Info This page allows users to email the results of the entire test Plan or for a particular build. It also allows users to email the status of a component11. User Administration11.1 Account settingsEvery user on the system will also be able to edit their own information via the Account settings window (link Personal in menu bar).TestLink allows users with administrator rights to create, edit, and delete users within the system. However, TestLink does not allow administrators to view or edit user's passwords. If users forget their passwords there is link on the login screen, that will mail the user their password based upon their user name and the email address they entered.11.2 Role PermissionsTestLink is built with 6 different default permission levels built in. Changing of these rights is handled by the user administration link which is accessible by admins. These permission levels are as follows:∙Guest: A guest only has permission to view test cases and project metrics.∙Test Executor: A tester outside of the company that only has permissions to run tests allotted to them. (initially in 1.0.4 - otester)∙Test Designer: A user can fully work with Test Specification and Requirements.∙Test Analyst: A tester can view,create, edit, and delete test cases as well as execute them. Testers lack the permissions to manage test plans, manage products, create milestones, or assign rights. (initially tester, senior tester)∙Test Leader: A lead has all of the same permissions as a Tester but also gains the ability to manage test plans, assign rights, create milestones, and manage keywords∙Admininstrator: An admin has all of the same permissions as a lead but gains the ability to manage productsNote: Test plan related features needs also assign a Test Plan to be available. See Test Plan Assignment.11.2.1 User RolesThere are predefined user roles. Adminstrator gives appropriate ability to modify data within TestLink. Each user has assigned just one of these roles. If you view the table you will see rows for each of the permissions levels (guest ,tester, senior tester, leader, admin). The column next to the row holds all of the different rights levels which will be defined below. These levels have been determined as standard for the use but they are free to be edited or define a new roles (for experienced administrator). The user table contains a foreign key that points to the appropriate permission level in the rights table. RoleList of Rights Ability Guest mgt_view_tc, mgt_view_key, tp_metrics Browse data only.Test Executor tp_execute,tp_metricsExecute test only. Test Analyst tp_execute,tp_metrics, tp_create_build, mgt_view_tc,mgt_modify_tc, mgt_view_key, mgt_view_req Edit test Specification and execute tests.Test Designer tp_metrics, mgt_view_tc, mgt_modify_tc, mgt_view_key, mgt_modify_req, mgt_view_req Edit Test Specification and Requirements.Test Leader tp_execute, tp_create_build,tp_metrics, tp_planning, tp_assign_rights, mgt_view_tc, mgt_modify_tc, mgt_view_key, mgt_modify_key, mgt_view_req, mgt_modify_reqAll Test Plan right, edit test Specification and execute tests. Administrator tp_execute, tp_create_build, tp_metrics, tp_planning, tp_assign_rights, mgt_view_tc, mgt_modify_tc, mgt_view_key, mgt_modify_key, mgt_view_req, mgt_modify_req, mgt_modify_product, mgt_users Everything possible. Only this role can maintain products and users. Table 1: Role description11.2.2 Rights DefinitionsNext tables list keywords used for definition of role abilities.RightDescription mgt_view_tc Viewing Test Specification (data of component, category, and testcase)mgt_modify_tc Edit Test Specification (create,modify,delete,order, move, and copycomponents, categories, and test cases)mgt_view_keyViewing keywordsRight Descriptionmgt_modify_key Modifying keywordsmgt_modify_product Create,edit and delete productsmgt_view_req View requirementsmgt_modify_req Create,edit, associate and delete requirements Table 2: Product related RightsRight Descriptiontp_execute Ability to execute test cases (insert test results) tp_create_build Ability to create buildstp_metrics Viewing metricstp_planning create, edit, delete Test Plans, assign risk/ownership, milestones, edit Tes Case Suitetp_assign_rights Assigning the rights to view projectsTable 3: Test Plan related Rights11.3 Test Plan AssignmentUsers can see only assigned Test Plans. In order to gain test plan permissions a user with lead or admin status must give them rights through the “Define user/project rights” link under “Test Plan Management”.All users in the system will by default not have permissions to view newly created test plans (except for the test plan creator who can give themselves permissions at creation). Zero test plan permissions means that users will not see any Test Plans in the Test Plan dropdown box on main screen.There is a table with Test Plan rights (i.e. which users can see which Test plan). This table is made up of a combined user id and project id. The main page contains code which checks to see if the logged in user has the appropriate permissions (and then shows the allowed projects. It is not recommended that this be hacked with.。
第一步,项目组应当向测试管理部提出新产品申请并提交相关人员名单;测试管理部在testlink系统中新建该测试产品并加入人员。
Testlink按照产品(而非项目)的级别进行需求和测试案例的管理。
如果某个项目是为了建立一个新的产品,则需要在testlink中申请新的测试产品条目。
如果某个项目是为了优化改进已有产品,则使用已存在的测试产品条目。
如果某个项目涉及多个产品,则应首先分解项目至产品级别(为每个相关产品分别提出需求)。
注:现阶段,各产品部门并没有维护一份完整的产品系统需求说明书(即整个产品的需求全集),并在每个版本持续维护。
这样安排的目的在于,按照产品的模块和子模块分类,可以得出整个产品的需求全集。
如果今后业务部门开始维护产品级别的系统需求说明书,则testlink应当转而以项目为基础进行管理,需求模块也相应只记录每个版本改变的需求,这也更符合testlink本身的架构设计。
在新建测试产品页面,需要填写的栏位包括:•名称:测试产品名称。
如果某个产品较为复杂,也可以分解到模块级别,以该产品的每个模块作为一个测试产品•前缀:该测试产品下的测试案例的通用前缀(在测试案例建立的时候自动插入到案例标志前),前缀的格式应当为:“TC-”+测试产品简称•产品描述:对于该产品的目的,功能等方面的一个简要描述。
•增强功能:一般需要勾选的是“启用需求功能”,“启用测试优先级”。
•可用性:一个产品在新建立的时候应当勾选“活动的”,当其不再被使用,则应取消勾选“活动的”。
一般不应勾选“公共”,则只有被加入到该产品的成员才可以在测试产品下拉菜单中看到该产品;如果勾选“公共”,则所有testlink用户都可以看到。
第二步,项目经理或测试经理将初始的需求集和需求加入到需求模块中,或对现有的需求集和需求进行修改。
Testlink中的需求是按照模块(而非项目版本)安排的。
需求的树形结构应当为:产品-》模块-》子模块-》系统需求。
Testlink问题及解决方法1testlink怎么设置中文?简单的方式是设置角色的语言改成简体中文,刷新一下即可2.设置测试用例的所有者(给测试人员分派测试任务)(找不到)3.实验一需要和mantis集成吗?实验一暂时不需要和mantis集成,到实验二mantis的时候再集成4.逗号分隔值(Comma-Separated Values,CSV,有时也称为字符分隔值,因为分隔字符也可以不是逗号),其文件以纯文本形式存储表格数据(数字和文本)。
5.文档中的“产品”也就是“测试项目”6.怎样查看需求的覆盖率?点击-需求-找到具体的模块点开,在右侧显示需求7.版本管理在哪?版本管理就是构建管理8.怎样查看和保存分析结果测试报告结果-报告格式-MS word,会自动弹出保存框9.执行的时候怎样判断一个测试是通过还是失败?一个测试用例如果是只有一个步骤的话,该步骤的通过或失败可以直接判断;如果一个测试用例有多个步骤,则如果其中有任意一个步骤的执行失败的话,该测试用例的结果就是失败,只有全部步骤都通过该测试用例才是通过。
如:一个包含4步的测试用例,第2步执行结果失败了,那么该测试用例就是失败的,后2步不用再执行了。
这4步全对,该测试用例才是通过的。
简化步骤指导首先需要配置好Testlink1、创建项目:(测试项目管理-新建项目,勾选下面所有复选框)(FR)用户管理:创建用户产品设置:(测试计划在特定时间里描绘产品的测试。
这句话的意思就是说所有的测试计划需要根据产品测试用例来创建。
)这里的产品也就是项目2、创建测试需求规格、需求创建需求规格:需求-在测试产品中下拉选择对应的项目-需求规约-选中项目-点击-新建需求规约(客户端、服务器)创建需求:选中产品下的需求规格点击-创建新需求(状态、类型、需要的测试用例数)(登录、订票)3、创建测试用例创建测试集:(测试套件(Test Suites))主页-测试规约-选中产品点击-右侧新建测试集创建测试用例:选中测试集点击-创建测试用例-点击保存-创建步骤(注意每次创建一步,写完之后再接着写下一步)例如:需求关联:主页-需求-指派需求-选中测试树中的一个测试用例(左侧)-选中需求指派(包含有效需求和已指派的需求)需求-选中需求-可以查看需求覆盖情况4、为需求指派用例需求关联:主页-需求-指派需求-选中测试树中的一个测试用例(左侧)-选中需求指派(包含有效需求和已指派的需求)需求-选中需求-可以查看需求覆盖情况5、创建测试计划测试计划是执行测试用例的基础,测试计划由测试用例组成主页-测试计划管理-创建(勾选活动和公共两个复选框)创建测试里程碑:(明确每个测试阶段的开始与结束时间)-测试管理-编辑/删除里程碑版本管理(Builds/Release)(本版本叫构建管理):主页-测试计划管理-构建管理安排测试人员:测试计划管理-指派用户角色6、为计划添加用例添加测试用例到测试计划:选择当前测试计划(列表)-选择添加/删除测试用例到测试计划选择测试集(左侧)-选择用户、构建、测试用例-添加选择的测试用例(成功变色、也可删除)7、分配测试任务设置测试用例的所有者:主页-测试集-指派执行测试用例-选中左侧测试集-保存(可以指派给多人),指派给相应的人员以后,可以让该人员使用其用户名和密码登陆testlink来执行测试用例;也可以由admin来执行,例如:我们将一部分测试用例的执行任务分配给了用户chang1,我们使用chang1,密码123登陆以后,就可以执行该测试用例。
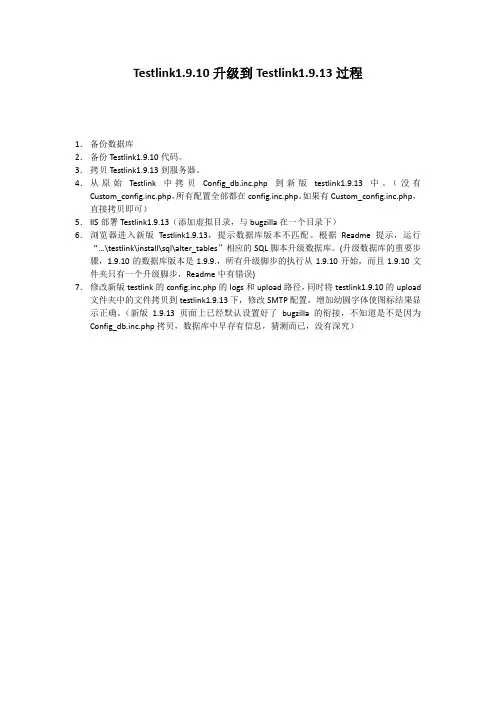
Testlink1.9.10升级到Testlink1.9.13过程
1.备份数据库
2.备份Testlink1.9.10代码。
3.拷贝Testlink1.9.13到服务器。
4.从原始Testlink中拷贝Config_db.inc.php到新版testlink1.9.13中。
(没有Custom_config.inc.php,所有配置全部都在config.inc.php。
如果有Custom_config.inc.php,直接拷贝即可)
5.IIS部署Testlink1.9.13(添加虚拟目录,与bugzilla在一个目录下)
6.浏览器进入新版Testlink1.9.13,提示数据库版本不匹配。
根据Readme提示,运行“…\testlink\install\sql\alter_tables”相应的SQL脚本升级数据库。
(升级数据库的重要步骤,1.9.10的数据库版本是1.9.9.,所有升级脚步的执行从1.9.10开始,而且1.9.10文件夹只有一个升级脚步,Readme中有错误)
7.修改新版testlink的config.inc.php的logs和upload路径,同时将testlink1.9.10的upload 文件夹中的文件拷贝到testlink1.9.13下,修改SMTP配置,增加幼圆字体使图标结果显示正确。
(新版 1.9.13页面上已经默认设置好了bugzilla的衔接,不知道是不是因为Config_db.inc.php拷贝,数据库中早存有信息,猜测而已,没有深究)。
精心整理2019年-9月...点击测试项目,右侧页面内容中会有“new test suite”的按钮,点击可以创建test suite(测试集——可以理解成测试项目的一个功能模块)。
Test suite 创建完成以后,刷新用例树(左侧页面内容,update tree),可以看到用例树中已经出现了我们刚才创建的测试集。
点击测试集,右侧页面内容中会出现“create test case(s)”的按钮,点击可以创建新的测试用例。
测试用例创建完毕以后,刷新用例树,则会看到用例树中test suite 的下一级中出现了我们刚刚创建的testcase。
注:用例是可以指定版本的——因为随着需求的变化,或者其他某些因素,用例是要不断变化的,需要用版本号来区别这种变化。
PS:选择不同的level,右侧页面中会出现不尽相同的各种按钮——每个按钮对应的操作与其字面意思是相对应的,例如a) 用例树中我们选择的是一个 test project,右侧页面中会出现如下按钮:New test suite ——创建测试集Reorder children ——对该测试项目的子项(test suite)进行重新排序Import test suite ——导入测试集Export all test suites ——导出所有的测试集b) 用例树中我们选择的是一个 test suite,右侧页面中会出现如下按钮:...2019年-9月...Export ——导出用例5. 为需求指派用例:主页左边的列表栏,”Requirements”的子菜单中有“Assign Requirements”的选项。
选择以后,会进入”specification”类似的界面。
左侧用例树中选择某个测试用例,右边页面内容会出现需求列表。
前面我们已经说过,测试用例是与需求的某一个Req 相对应的。
在合适的Req 前面的复选框中打勾,然后点击下面的”Assign”按钮,就完成需求的指派了。
TestLink测试⽤例管理⼯具使⽤说明
TestLink使⽤说明
1. 打开⽹页,登录账号:(这⾥的账号是已经注册过的,并且拥有admin权限,可以创建⽤户。
当然也可以通过点击登录页⾯的“新⽤户
注册”按钮进⾏注册,但是权限是guest)
2. ⽤户管理——创建⽤户:
点击“⽤户管理”按钮:
拉到最底部——点击“创建”,进⼊“创建⽤户”界⾯:
“创建⽤户”界⾯:
3. 点击“注销”按钮,切换⾄登录页⾯:
输⼊刚创建好的⽤户名和密码,点击“登录”:
4. 点击“测试项⽬管理”按钮,进⼊项⽬管理窗⼝:
点击创建:
填写项⽬信息 --> 点击“创建”:
5. 在主页⾯右上⾓“测试产品”下拉框中,选择对应测试项⽬名称:
6. 关键字管理——点击“关键字管理”按钮:
点击“新建关键字”:
输⼊关键字和描述,点击保存:
7. 编写测试⽤例:
点击“编写测试⽤例”,进⼊测试⽤例编写:
可以指派关键字(关键字在上⼀步创建):
创建测试⽤例集:
创建测试⽤例:
分别填写测试⽤例标题、前提、重要性、测试⽅式、指派关键字等 --> 点击“保存”:
点击“创建步骤”:
输⼊步骤动作和预期结果,点击保存或保存并退出:
8. 点击移动/复制可复制相似度⾼的⽤例,只需修改部分选项,提⾼测试⽤例编写效率:
9. 执⾏测试⽤例:
回到主页⾯,点击“测试计划管理”:
点击创建:
添加测试⽤例到测试计划:
测试⽤例变成黄⾊,说明添加成功:
点击执⾏测试:
创建新版本:
再次点击执⾏测试:
选择测试版本:
标记测试⽤例:通过/失败/锁定。
使用XAMPP集成testlink+mantis详细配置注:本文档仅适用于windows x86系统,使用XAMPP集成testlink+mantis配置,一、安装前准备1、XAMPP-5.6.15下载:/archives/1442、testlink-1.9.3:/3、mantisbt-1.2.19:/二、安装XAMPP1、执行xampp-win32-5.6.15-1-VC11-installer.exe默认安装即可,2、启动xampp-control,如下:3、启动Apache和Mysql,点击”start”即可,注:如果apache与MYSQL启动不成功,可能是80端口与3306端口被占用;解决方法一:将暂用此端口的进程关闭1.打开运行-》输入CMD 进入命令行模式2.在命令行模式中输入netstat -a -n -o3.查看0.0.0.0:80所对应的PID(即进程号)4.按CTRL+SHIFT+ESC键打开WINDOWS任务管理器,选择进程标签,然后在菜单栏的查看-》选择列里勾上PID(进程标识符),根据第三部所查到的PID的进程,KILL掉该进程,再重新安装APACHE即可还有你修改了, apache/conf/httpd listen12.34.56.78:80 改成(其他)例如8080的话,那么在浏览器里访问就要加,不能是localhost:8080**使用说明:** netstat -ano查看端口使用情况**或者netstat -ano|findstr 80**C:Documents and Settingscjx>netstat -ano|findstr 804、输入http://localhost/xampp;进入XAMPP配置页面,配置相关内容;5、三、配置Testlink1、将testlink文件夹复制到C:\xampp\htdocs下,文件夹名称为:testlink2、新建数据库testlink,如下点击”Admin”进入phpMyAdmin,3、修改数据库root密码,修改C:\xampp\phpMyAdmin\config.inc文件,如下4、打开浏览器,输入http://localhost/testlink/进行配置,如下,a) 点击”New installation”b) 勾选条款,Continuec) Continued) Database host:填写localhost或者本机IP均可Database name: testlink(与刚新建的数据库名称一致)Table prefix: 此处置空,不填写,e) 输入数据库管理用户及密码和testlink访问数据库的用户及密码,此两处可以一致,f) 安装成功,点击下方Testlink即可进入Testlink登录界面,管理员:admin,密码:admin四、配置mantis1、将mantis文件夹复制到C:\xampp\htdocs下,2、新建数据库,进入phpMyadmin新建数据库mantis,3、浏览器输入http://localhost/mantis/admin/install.php进入mantis配置界面,设置好后如下,4、复制Installing Database下sql语句,手动在phpMyadmin里执行这些sql语句,执行成功后如下,注:去掉第一行Database Creation Suppressed, SQL Queries follow,错误:重复主键,此语句在执行前应删除,此问题忽略即可,注意:Mantis的设置是这样保存的:在config_defaults_inc.php中保存Mantis的默认设置,用户自己的设置信息保存在config_inc.php中。
testlink安装文档千里2016-03-181.软件准备1.操作系统:Windows All1、安装软件xampp-portable-win32-5.6.20-0-VC11-installertestlink-1.9.02、涉及到php配置文件修改等操作,建议使用Editplus进行编辑2.安装xampp1.双击运行xampp-portable-win32-5.6.20-0-VC11-installer.exe,进入到安装界面,运行安装程序会出现如下警告,点击OK忽略警告进入到正式安装界面即可。
2.进入安装界面,直接【Next】3.选择要安装的组件,Apache、MySQL、PHP是必须选择的,也可以全部选择。
4.选择xampp的安装路径,默认即可。
5.查看更多xampp的信息,建议不勾选6.进入安装界面,等待安装完成即可。
7.结束安装,打开xampp的控制面板8.选择语言,任意选择均可,我选择美国英语9.xampp的控制台界面,Apache和MySQL需要手工启动10.成功启动的界面如下,如果启动不成功,可能原因是端口被占用导致,可参考后面常见问题处理来修改端口。
3.设置数据库密码:1.通过命令提示行,进入到mysql的应用程序目录2.输入mysql –u root –p 进入到mysql的操作界面3.使用set password = password(‘123456’);修改mysql的密码4.安装testlink拷贝testlink-1.9.0的安装包解压到C:\xampp\htdocs下,并修改文件夹名为testlink 在浏览器输入http://localhost/testlink 打开testlink的安装页面。
2.全新安装,直接进入到下一步3.进入到PHP配置页面,依次解决失败的条件3.1 如果提示PHP version版本过低,则重新下载高版本的xampp3.2 Maximum Session Idle Time before Timeout和Checking max. execution time (Parameter max_execution_time)问题的处理解决方案:修改C:\xampp\php\php.inisession.gc_maxlifetime = 2400max_execution_time = 120在xampp控制面板重新启动服务,错误提示消失;3.3 Checking Postgres DatabaseChecking LDAP library5. 填写数据库相关配置6.填写数据库访问的用户名和密码7.安装成功,点击红色框处的超链接进入到testlink的登录界面8.testlink的主页,登录窗口如下:9.设置用户相关信息10.设置用户信息及设置testlink的语言,可设置中文界面5.常见问题处理:1.修改apache的端口:这时候可以通过需要修改apache的端口来解决,具体操作如下:在目录C:\xampp\apache\conf寻找文件httpd.conf,用记事本或者EditPlus 3打开,找到Listen 80,修改为8000以后的端口,如:Listen 8081,然后就可以启动apache了。
TestLink安装配置手册范围本文仅作为安装和配置TestLink的参考文档。
本文的第一部分为TestLink的安装步骤,第二部分是TestLink的配置方法。
本文和其他相关文档可在TestLink网站上找到。
您也可以在TestLink的论坛中寻求帮助一般TestLink安装的步骤如下:1.下载TestLink2. 解压文件3. 创建数据库4. 导入缺省数据5. 编辑配置文件6.PHP文件扩展7. 登录TestLink系统需求要使TestLink正常运行,需要安装以下软件:MySQL 4.1.x及以上php 4.3.x及以上WebServer (Apache 1.3.x或2.0.x及以上,IIS 3及以上,等等,更详细的信息请参见<php安装目录>/install.txt)对于操作系统平台没有特别要求(TestLink已经在Linux 和MS Win32平台上测试通过)你也可以将数据库与TestLink分别安装在不同的服务器上安装步骤在安装TestLink之前应先完成以下步骤:1. 安装环境:Webserver、php4和MySQL,安装方法参见这些应用软件的安装文档。
我是在winXP下安装的,webserver是IIS,PHP5.1.2,MySql的版本是5.0.18IIS的安装就不多说了,下面主要讲讲PHP从5.0开始,PHP对MySql的支持需要手动配置将php_mysql.dll 和libmySQL.dll 文件拷贝到winnt\system32目录里,这两个文件可以在PHP安装目录里找到。
编辑<windows>目录下php.ini,将;extension=php_mysql.dll前面的“;”去掉2. 将TestLink的安装文件复制到服务器上。
3. 解压缩Testlink的安装文件。
自动安装手工安装创建MySQL数据库CREATE DATABASE testlink CHARACTER SET utf8 COLLATE utf8_general_ci创建数据表# mysql -u <user> -p<password><dbname><<testlinkdir>/install/sql/testlink_create_tables.sql 导入缺省数据# mysql -u <user> -p<password> <dbname><<testlinkdir>/install/sql/testlink_create_default_data.sql 也可以使用mysql客户端工具进行创建数据库的操作。
Testlink 1.9.3升级至1.9.6的完全手册Testlink 从1.9.3升级到1.9.6,性能上有所优化,也修改了原来的部分缺陷,本次升级不支持自动升级,需要手动升级。
一、更新安装环境Testlink1.9.6 要求软件环境分别为:- web-server: Apache 1.2 , 2.x- PHP 5.3- DBMS: MySQL 5.x , Postgres 8.x,9.x , MS-SQL 2005/2008如果原来的环境版本没有到位的话,需要升级,否则部署会不成功。
二、数据迁移由于数据库结构的变化,需要手动升级,升级步骤如下:1.备份TestLink 1.9.3数据库使用客户端导出SQL语句即可,存放在本地路径2.安装TestLink 1.9.4程序包安装步骤具体见:/lijun_li/archive/2012/11/29/392224.html3.导入TestLink 1.9.3数据库1.创建新的数据库用于导入备份的数据库,例如testlink196(使用客户端新建数据库的话,需注意把数据库的字符类型改为UTF-8,否则导入后会乱码)2.将备份的testlink1.9.3的数据导入新建的数据库3.使用客户端,打开新建的数据库,找出安装包中的以下SQL文件,依次执行:- 1.9.3 升级至1.9.4/5a) install/sql/alter_tables/1.9.4/<your_db>/DB.1.5/step1/db_schema_update.sqlb) install/sql/alter_tables/1.9.4/<your_db>/DB.1.5/stepZ/z_final_step.sql- 1.9.4/5 升级至1.9.6a) install/sql/alter_tables/1.9.6/<your_db>/DB.1.6/step1/db_schema_update.sqlb) install/sql/alter_tables/1.9.6/<your_db>/DB.1.6/stepZ/z_final_step.sql如果testlink原先的版本过低,请先把数据库升级至1.9.3,升级方法类似4.更新TestLink1.9.6配置文件进入新安装的TestLink1.9.6数据库配置文件,更新链接的数据库链接到testlink_196:编辑Testlink目录下的config_db.inc.php,修改’DB_NAME’的值为:testlink196保存后在浏览器访问testlink,使用之前的老用户账户登录,能成功登录进去并看到之前的测试用例和测试计划。
5.更新缺失的数据库表对比备份的TestLink 1.9.3和新安装的TestLink 1.9.6数据库表,发现还需要在testlink_new增加以下视图:last_executionslast_executions_by_platformtcversions_last_active_bare_bones执行以下SQL语句即可:CREATE VIEW /*prefix*/last_executions AS(SELECT tcversion_id,testplan_id,platform_id,build_id, MAX(id) AS idFROM /*prefix*/executionsGROUP by tcversion_id,testplan_id,platform_id,build_id);CREATE VIEW /*prefix*/last_executions_by_platform AS(SELECT E.tcversion_id,E.testplan_id,E.platform_id,MAX(E.id) AS idFROM /*prefix*/executions EJOIN /*prefix*/builds B ON B.active = 1 AND B.testplan_id = E.testplan_idGROUP by tcversion_id,testplan_id,platform_id);CREATE VIEW /*prefix*/tcversions_last_active_bare_bones AS(SELECT NHTCV.parent_id AS tcase_id, max(TCV.id) AS tcversion_idFROM /*prefix*/nodes_hierarchy NHTCVJOIN /*prefix*/tcversions TCV ON TCV.id = NHTCV.idWHERE TCV.active = 1GROUP BY NHTCV.parent_id, TCV.tc_external_id);三.缺陷关联配置Testlink1.9.6的关联缺陷系统可以在页面进行配置,而不像以前的版本,需要在源代码中进行配置,下面以关联jira为例,演示如何配置关联的jira:点击创建,输入缺陷管理系统的名称,关联类型选为jiradb(我们的缺陷管理系统为jira),使用jiradb的好处是不用单独去申请一个具备查看所有缺陷权限的账号。
点击”show configuration example“,后,下面会出现配置的例子在configuration中输入相关的配置,其中,jira的格式如下所示:<!-- Template jiradbInterface --><issuetracker><dbhost>DBhost</dbhost><dbname>dbname</dbname><dbtype>dbtype</dbtype><dbuser>dbuser</dbuser><dbpassword>dbpassword</dbpassword><uriview>http://192.168.192.44/browse/</uriview><!—说明:这里的地址是缺陷访问的地址,跟数据库地址不一样--><uricreate>http://10.10.192.44/rest/quickedit/1.0/userpreferences/create/</uricreate><!--Configure This if you want NON STANDARD BEHAIVOUR for considered issue resolved --><resolvedstatus><status><code>80</code><verbose>resolved</verbose></status><status><code>90</code><verbose>closed</verbose></status></resolvedstatus></issuetracker>依次编辑项目,关联上缺陷系统,勾选issue Tracker intergration里面的“活动的”前面的按钮,如下图所示:保存完成后,在用例执行时,可以看到缺陷的链接按钮,以及跳转至jira系统的链接,如下图所示:四.更换LOGOTestlink1.9.6 的LOGO配置和1.9.3有些差异,登录LOGO,系统登陆后左上方的LOGO,和报告里面的公司LOGO,分别用的3张图片,三张图片大小尺寸都有所差异,操作如下:第一步:根据页面尺寸,分别上传三张图片至“..\testlink196\gui\themes\default\images”例如,图片名称分别为company_logo.png、logo_login.png、logo_navbar.png第二步打开文件“config.inc.php”,搜索"Company_logo"把$tlCfg->company_logo = 'company_logo.png';$tlCfg->logo_login = 'tl-logo-transparent-25.png';$tlCfg->logo_navbar = 'tl-logo-transparent-12.5.png';修改为:$tlCfg->company_logo = 'company_logo.png';$tlCfg->logo_login = 'logo_login.png';$tlCfg->logo_navbar = 'logo_navbar.png';五.邮箱配置打开Testlink配置文件config.inc.php或custom_config.inc.php (在Testlink安装目录下),找到下面的位置。
$g_smtp_host = 'mailserver'; # SMTP server MUST BE configured (SMTP服务器地址,必须配置)# Configure using custom_config.inc.php$g_tl_admin_email = '123@'; # for problem/error notification (管理员账户的邮件地址,主要接收发生的一些问题,或错误,等信息)$g_from_email = '123@'; # email sender(发送邮件的邮件地址)$g_return_path_email = '123@';(具体用处未知,和sender保持一致即可)# Urgent = 1, Not Urgent = 5, Disable = 0$g_mail_priority = 5; (发送邮件的优先级,设为5)# Taken from mantis for phpmailer configdefine ("SMTP_SEND",2);$g_phpMailer_method = SMTP_SEND;// Configure only if SMTP server requires authentication$g_smtp_username = '123'; # user (用于发送邮件的账户的用户名)$g_smtp_password = '123456'; # password (用于发送邮件的账户的密码)按上以上说明配置完成后,Testlink即可发送邮件。