使用ListView控件和DataPager实现数据分页显示
- 格式:docx
- 大小:19.09 KB
- 文档页数:5

GridView分页系列1:GridView自带分页:GridView自带的分页,是假分页,他每次从数据库把数据全部查询出之后,通过分页的算法,进行按每页数量进行分页。
分页的属性元素:分页功能的实现就是通过对这些属性元素的操作实现的。
//this.GvShow.PageIndex 当前页的索引//this.GvShow.PageCount 总共的页数//this.GvShow.Rows.Count 当前页签内的gridview的行数//this.GvShow.PageSize 每页的记录数//this.GvShow.PageIndex*this.GvShow.rows.count + 1 行索引设置普通的GridView分页:属性AllowPaging="True"、PageSize="2"设置分页事件onpageindexchanging="GvShow_PageIndexChanging"后台方法绑定:protected void GvShow_PageIndexChanging(object sender, GridViewPageEventArgs e){this.GvShow.PageIndex = e.NewPageIndex;BindView();}2:自定义样式的GridView自带分页:普通的GridView自带的分页,不带样式,只是普通的1,2,3等,如果希望获取到具有其他分页样式就应该设置<PagerSettings Position="TopAndBottom"PageButtonCount="1"/>属性<%--FirstPageText="首页" LastPageText="尾页" NextPageText="下一页" PreviousPageText="上一页"--%>后台访问此属性的实例:this.GvShow.PagerSettings.FirstPageText = "首页";stPageText = "尾页";this.GvShow.PagerSettings.NextPageText = "下一页";this.GvShow.PagerSettings.PreviousPageText = "上一页";this.GvShow.PagerSettings.Mode = PagerButtons.NextPreviousFirstLast;通过<PagerStyle HorizontalAlign="Center" VerticalAlign="Middle" />属性可以设置GRIDVIEW分页的样式3:在<PagerTemplate></PagerTemplate>分页模板中自定义分页的样式,虽然微软开辟了这个模板提供给用户类似于自定义分页的功能,但这个功能完全还是基于微软的GridView自带的分页进行的,<PagerSettings>属性的Visable的属性必须是true AllowPaging="true" 与PageSize="3"属性页都要进行相关的有效设置才可以。

GridView+存储过程实现真分页GridView+存储过程实现'真分页',有需要的朋友可以参考下。
GridView,中的表格控件,和Repeater控件一样,在中都是很常用的两个表格控件,GridView自己也有分页功能,实现是将一张表的数据全部绑定到GridView,然后再进行分页,这就是通常我们所说的'假分页'。
在应对小数据量上完全没问题,但问题往往没有那么简单,在面对大数据量的问题上,GridView自己的分页还是力不从心,严重影响效率,用户体验也不好。
要解决这个问题,实现'真分页',就要从根上去分析,为什么'假分页'速度慢,因为它一次获取的是整张表的数据,但是最后显示的只是一页,所以,如果我们只查询需要显示的一页数据(上页下页,首页尾页,跳页都只查询需要的一页数据),在绑定到GridView中,查询分页的速度会快很多,这就是所谓的'真分页'了。
剩下的问题就是SQL语句去实现了。
经过一番查询研究,通过存储过程实现真分页效果挺好。
存储过程SET ANSI_NULLS ONGOSET QUOTED_IDENTIFIER ONGOCREATE PROCEDURE [dbo].[PROC_GridViewPage]--@TableList Varchar(200), --查询的字段,用逗号隔开@TableName Varchar(30), --查询的表名--@SelectWhere Varchar(500),--查询的条件@SelectOrderId Varchar(20), --表主键字段名@SelectOrder Varchar(200), --排序,order by 列名@intPageNo int, --页号@intPageSize int, --每页显示数@RecordCount int OUTPUT --总记录数(OUTPUT表示是存储过程输出型参数,接收方法见DAL层)ASdeclare @TmpSelect NVarchar(600) --声明变量set nocount on --关闭计数--获取表中记录总数set @TmpSelect = 'select @RecordCount = count(*) from '+@TableName+' ' --可以添加查询条件+@SelectWhereexecute sp_executesql@TmpSelect, --执行上面的sql语句N'@RecordCount int OUTPUT' , --执行输出数据的sql语句,output出总记录数@RecordCount OUTPUTif (@RecordCount = 0) --如果表中没有,则返回0return 0/*判断页数是否正确*/if (@intPageNo - 1) * @intPageSize > @RecordCount --页号大于总页数,返回错误return (-1)set nocount off--打开计数BEGINset @TmpSelect = 'select top '+str(@intPageSize)+' '+ '*' +'from '+@TableName+' where '+@SelectOrderId+' not in(select top '+str((@intPageNo-1)*@intPageSize)+' '+@SelectOrderId+' from '+@TableName+' '+@SelectOrder+') '+@SelectOrder ENDexecute sp_executesql @TmpSelectreturn(@@rowcount)GOsp_executesql?和EXEC一样在存储过程中执行sql语句的命令,平时我们见到和使用的通常是EXEC,sp_executesql的不同之出在于,它提供了一个借口,支持参数的输入和输出,灵活性更好,而且sp_executesql的执行性能更好。

Android实现ListView分页加载数据本⽂实例为⼤家分享了ListView分页加载数据的具体代码,供⼤家参考,具体内容如下FenyeActivitypackage com.example.myapplication.fenye;import androidx.appcompat.app.AppCompatActivity;import android.app.ListActivity;import android.os.Bundle;import android.os.Handler;import android.util.Log;import android.view.View;import android.widget.AbsListView;import android.widget.Button;import android.widget.ListView;import com.example.myapplication.R;import java.util.ArrayList;public class FenyeActivity extends ListActivity implements AbsListView.OnScrollListener {private ListView listView;private int visibleLastIndex = 0; //最后的可视项索引private int visibleItemCount; // 当前窗⼝可见项总数private ListViewAdapter adapter;private View loadMoreView;private Button loadMoreButton;private Handler handler = new Handler();@Overridepublic void onCreate(Bundle savedInstanceState) {super.onCreate(savedInstanceState);setContentView(yout.activity_fenye);loadMoreView = getLayoutInflater().inflate(yout.load_more, null);loadMoreButton = (Button) loadMoreView.findViewById(R.id.loadMoreButton);listView = getListView(); //获取id是list的ListViewlistView.addFooterView(loadMoreView); //设置列表底部视图initAdapter();setListAdapter(adapter); //⾃动为id是list的ListView设置适配器listView.setOnScrollListener(this); //添加滑动监听}/*** 初始化适配器*/private void initAdapter() {ArrayList<String> items = new ArrayList<String>();for (int i = 0; i < 16; i++) {items.add(String.valueOf(i + 1));}adapter = new ListViewAdapter(this, items);}/*** 滑动时被调⽤*/@Overridepublic void onScroll(AbsListView view, int firstVisibleItem, int visibleItemCount, int totalItemCount) {this.visibleItemCount = visibleItemCount;visibleLastIndex = firstVisibleItem + visibleItemCount - 1;}/*** 滑动状态改变时被调⽤*/@Overridepublic void onScrollStateChanged(AbsListView view, int scrollState) {int itemsLastIndex = adapter.getCount() - 1; //数据集最后⼀项的索引int lastIndex = itemsLastIndex + 1; //加上底部的loadMoreView项if (scrollState == AbsListView.OnScrollListener.SCROLL_STATE_IDLE && visibleLastIndex == lastIndex) { //如果是⾃动加载,可以在这⾥放置异步加载数据的代码Log.e("wy", "loading...");handler.postDelayed(new Runnable() {@Overridepublic void run() {loadData();adapter.notifyDataSetChanged(); //数据集变化后,通知adapterlistView.setSelection(visibleLastIndex - visibleItemCount + 1); //设置选中项loadMoreButton.setText("load more"); //恢复按钮⽂字}}, 1000);}}/*** 点击按钮事件* @param view*/public void loadMore(View view) {loadMoreButton.setText("loading..."); //设置按钮⽂字loadinghandler.postDelayed(new Runnable() {@Overridepublic void run() {loadData();adapter.notifyDataSetChanged(); //数据集变化后,通知adapterlistView.setSelection(visibleLastIndex - visibleItemCount + 1); //设置选中项loadMoreButton.setText("load more"); //恢复按钮⽂字}}, 1000);}/*** 模拟加载数据*/private void loadData() {int count = adapter.getCount();for (int i = count; i < count + 10; i++) {adapter.addItem(String.valueOf(i + 1));}}}ListViewAdapterpackage com.example.myapplication.fenye;import java.util.List;import android.content.Context;import youtInflater;import android.view.View;import android.view.ViewGroup;import android.widget.BaseAdapter;import android.widget.TextView;import com.example.myapplication.R;public class ListViewAdapter extends BaseAdapter {private List<String> items;private LayoutInflater inflater;public ListViewAdapter(Context context, List<String> items) {this.items = items;inflater = (LayoutInflater) context.getSystemService(YOUT_INFLATER_SERVICE); }@Overridepublic int getCount() {return items.size();}@Overridepublic Object getItem(int position) {return items.get(position);}@Overridepublic long getItemId(int position) {return position;}@Overridepublic View getView(int position, View view, ViewGroup parent) {if (view == null) {view = inflater.inflate(yout.list_fy_item, null);}TextView text = (TextView) view.findViewById(R.id.list_item_text);if(null!=items){text.setText(items.get(position));}return view;}/*** 添加列表项* @param item*/public void addItem(String item) {items.add(item);}}activity_fenye.xml<?xml version="1.0" encoding="utf-8"?><LinearLayout xmlns:android="/apk/res/android"android:orientation="vertical"android:layout_width="fill_parent"android:layout_height="fill_parent"android:paddingLeft="3dp"android:paddingRight="3dp"><ListViewandroid:id="@id/android:list"android:layout_width="fill_parent"android:layout_height="wrap_content"/></LinearLayout>list_fy_item.xml<?xml version="1.0" encoding="utf-8"?><LinearLayout xmlns:android="/apk/res/android"android:orientation="vertical"android:layout_width="fill_parent"android:layout_height="fill_parent"><TextViewandroid:id="@+id/list_item_text"android:layout_width="fill_parent"android:layout_height="fill_parent"android:text="aa"android:gravity="center"android:textSize="20sp"android:paddingTop="10dp"android:paddingBottom="10dp"/></LinearLayout>load_more.xml<?xml version="1.0" encoding="utf-8"?><LinearLayoutxmlns:android="/apk/res/android"android:orientation="vertical"android:layout_width="fill_parent"android:layout_height="wrap_content"><Buttonandroid:id="@+id/loadMoreButton"android:visibility="gone"android:layout_width="fill_parent"android:layout_height="wrap_content"android:text="load more"android:onClick="loadMore"/></LinearLayout>以上就是本⽂的全部内容,希望对⼤家的学习有所帮助,也希望⼤家多多⽀持。
Android中ListView分页加载数据Android应用开发中,采用ListView组件来展示数据是很常用的功能,当一个应用要展现很多的数据时,一般情况下都不会把所有的数据一次就展示出来,而是通过分页的形式来展示数据,个人觉得这样会有更好的用户体验。
因此,很多应用都是采用分批次加载的形式来获取用户所需的数据。
例如:微博客户端可能会在用户滑动至列表底端时自动加载下一页数据,也可能在底部放置一个"查看更多"按钮,用户点击后,加载下一页数据。
下面通过一个Demo来展示ListView功能如何实现:该Demo通过在ListView列表的底部添加一个“查看更多...”按钮来加载新闻(模拟新闻客户端)分页数据。
同时限定每次加载10条记录,但完全加载完数据后,就把ListView列表底部视图“查看更多...”删除。
假设加载的数据总数为38 条记录。
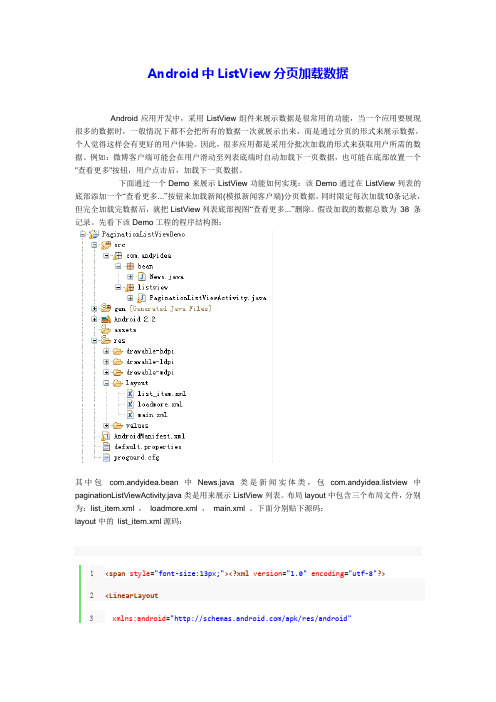
先看下该Demo工程的程序结构图:其中包com.andyidea.bean中News.java类是新闻实体类,包com.andyidea.listview中paginationListViewActivity.java类是用来展示ListView列表。
布局layout中包含三个布局文件,分别为:list_item.xml ,loadmore.xml ,main.xml 。
下面分别贴下源码:layout中的list_item.xml源码:1<span style="font-size:13px;"><?xml version="1.0"encoding="utf-8"?>2<LinearLayout3xmlns:android="/apk/res/android"4android:layout_width="fill_parent"5android:layout_height="fill_parent"6android:orientation="vertical">7<TextView8android:id="@+id/newstitle"9android:layout_width="fill_parent"10android:layout_height="wrap_content"/>11<TextView12android:id="@+id/newscontent"13android:layout_width="fill_parent"14android:layout_height="wrap_content"/>15</LinearLayout></span>layout中loadmore.xml源码:16<?xml version="1.0"encoding="utf-8"?>17<LinearLayout18xmlns:android="/apk/res/android"19android:layout_width="fill_parent"20android:layout_height="fill_parent">21<Button22android:id="@+id/loadMoreButton"23android:layout_width="fill_parent"24android:layout_height="wrap_content"25android:text="查看更多..."/>26</LinearLayout>layout中main.xml源码:27<?xml version="1.0"encoding="utf-8"?>28<LinearLayout xmlns:android="/apk/res/android"29android:orientation="vertical"30android:layout_width="fill_parent"31android:layout_height="fill_parent">32<ListView33android:id="@+id/lvNews"34android:layout_width="fill_parent"35android:layout_height="wrap_content"/>36</LinearLayou包com.andyidea.bean中News.java类源码:37package com.andyidea.bean;3839/**40 * 新闻实体类41 * @author Andy.Chen42 * @mail Chenjunjun.ZJ@43 *44 */45public class News {4647 private String title; //标题48 private String content; //内容4950 public String getTitle() {51 return title;52 }53 public void setTitle(String title) {54this.title = title;55 }56 public String getContent() {57 return content;58 }59 public void setContent(String content) {60this.content = content;61 }6263}包com.andyidea.listview中paginationListViewActivity.java类源码:64package com.andyidea.listview;6566import java.util.ArrayList;67import java.util.List;6869import com.andyidea.bean.News;7071import android.app.Activity;72import android.os.Bundle;73import android.os.Handler;74import android.util.Log;75import android.view.View;76import android.view.ViewGroup;77import android.widget.AbsListView;78import android.widget.AbsListView.OnScrollListener;79import android.widget.BaseAdapter;80import android.widget.Button;81import android.widget.ListView;82import android.widget.TextView;83import android.widget.Toast;8485public class PaginationListViewActivity extends Activity implements OnScrollListener {8687 private ListView listView;88 private int visibleLastIndex = 0; //最后的可视项索引89 private int visibleItemCount; // 当前窗口可见项总数90 private int datasize = 38; //模拟数据集的条数91 private PaginationAdapter adapter;92 private View loadMoreView;93 private Button loadMoreButton;94 private Handler handler = new Handler();9596 /** Called when the activity is first created. */97 @Override98 public void onCreate(Bundle savedInstanceState) {99 super.onCreate(savedInstanceState);100 setContentView(yout.main);101102loadMoreView = getLayoutInflater().inflate(yout.loadmore, null); 103loadMoreButton= (Button)loadMoreView.findViewById(R.id.loadMoreButton);104 loadMoreButton.setOnClickListener(new View.OnClickListener() {105106 @Override107 public void onClick(View v) {108 loadMoreButton.setText("正在加载中..."); //设置按钮文字109 handler.postDelayed(new Runnable() {110111 @Override112 public void run() {113 loadMoreData();114 adapter.notifyDataSetChanged();115 loadMoreButton.setText("查看更多..."); //恢复按钮文字116 }117 },2000);118119 }120 });121122listView = (ListView)findViewById(R.id.lvNews);123 listView.addFooterView(loadMoreView); //设置列表底部视图124 initializeAdapter();125 listView.setAdapter(adapter);126 listView.setOnScrollListener(this);127 }128129 @Override130 public void onScrollStateChanged(AbsListView view, int scrollState) { 131 int itemsLastIndex = adapter.getCount()-1; //数据集最后一项的索引132 int lastIndex = itemsLastIndex + 1;133 if (scrollState == OnScrollListener.SCROLL_STATE_IDLE134 && visibleLastIndex == lastIndex) {135 // 如果是自动加载,可以在这里放置异步加载数据的代码136 }137 }138139140 @Override141 public void onScroll(AbsListView view, int firstVisibleItem,142 int visibleItemCount, int totalItemCount) {143this.visibleItemCount = visibleItemCount;144visibleLastIndex = firstVisibleItem + visibleItemCount - 1;145146 Log.e("========================= ","========================");147 Log.e("firstVisibleItem = ",firstVisibleItem+"");148 Log.e("visibleItemCount = ",visibleItemCount+"");149 Log.e("totalItemCount = ",totalItemCount+"");150 Log.e("========================= ","========================");151152 //如果所有的记录选项等于数据集的条数,则移除列表底部视图153 if(totalItemCount == datasize+1){154 listView.removeFooterView(loadMoreView);155 Toast.makeText(this, "数据全部加载完!", Toast.LENGTH_LONG).show(); 156 }157 }158159 /**160 * 初始化ListView的适配器161 */162 private void initializeAdapter(){163 List<News>news = new ArrayList<News>();164 for(int i=1;i<=10;i++){165 News items = new News();166 items.setTitle("Title"+i);167 items.setContent("This is News Content"+i); 168 news.add(items);169 }170adapter = new PaginationAdapter(news);171 }172173 /**174 * 加载更多数据175 */176 private void loadMoreData(){177 int count = adapter.getCount();178179 if(count+10 <= datasize){180 for(int i=count+1; i<=count+10; i++){181 News item = new News();182 item.setTitle("Title"+i);183 item.setContent("This is News Content"+i); 184 adapter.addNewsItem(item);185 }186 }else{187 for(int i=count+1; i<=datasize; i++){188 News item = new News();189 item.setTitle("Title"+i);190 item.setContent("This is News Content"+i); 191 adapter.addNewsItem(item);192 }193 }194195 }196197198 class PaginationAdapter extends BaseAdapter{199200 List<News> newsItems;201202 public PaginationAdapter(List<News> newsitems){ 203this.newsItems = newsitems;204 }205206 @Override207 public int getCount() {208 return newsItems.size();209 }210211 @Override212 public Object getItem(int position) {213 return newsItems.get(position);214 }215216 @Override217 public long getItemId(int position) {218 return position;219 }220221 @Override222 public View getView(int position, View view, ViewGroup parent) {223 if(view == null){224view = getLayoutInflater().inflate(yout.list_item, null); 225 }226227 //新闻标题228 TextView tvTitle = (TextView)view.findViewById(R.id.newstitle); 229 tvTitle.setText(newsItems.get(position).getTitle());230 //新闻内容231 TextView tvContent= (TextView)view.findViewById(R.id.newscontent); 232 tvContent.setText(newsItems.get(position).getContent());233234 return view;235 }236237 /**238 * 添加数据列表项239 * @param newsitem240 */241 public void addNewsItem(News newsitem){ 242 newsItems.add(newsitem);243 }244245 }246247}最后,运行程序的结果截图如下:通过上面的截图,当我们点击"查看更多..."按钮时,就会加载下10条记录,当加载完所有的记录后,ListView的底部视图将会移除。

Android操作SQLite数据库(增、删、改、查、分页等)及ListView显⽰数据的⽅法详解本⽂实例讲述了Android操作SQLite数据库(增、删、改、查、分页等)及ListView显⽰数据的⽅法。
分享给⼤家供⼤家参考,具体如下:由于刚接触android开发,故此想把学到的基础知识记录⼀下,以备查询,故此写的⽐较啰嗦:步骤如下:⼀、介绍:此⽂主要是介绍怎么使⽤android⾃带的数据库SQLite,以及把后台的数据⽤ListView控件显⽰⼆、新建⼀个android⼯程——DBSQLiteOperate⼯程⽬录:三、清单列表AndroidManifest.xml的配置为:<?xml version="1.0" encoding="utf-8"?><manifest xmlns:android="/apk/res/android"package="com.example.dboperate"android:versionCode="1"android:versionName="1.0" ><uses-sdk android:minSdkVersion="8" /><applicationandroid:icon="@drawable/ic_launcher"android:label="@string/app_name" ><!--单元测试加这句--><uses-library android:name="android.test.runner" /><activityandroid:name=".DBSQLiteOperateActivity"android:label="@string/app_name" ><intent-filter><action android:name="android.intent.action.MAIN" /><category android:name="UNCHER" /></intent-filter></activity></application><instrumentation android:name="android.test.InstrumentationTestRunner"android:targetPackage="com.example.dboperate"android:label="Test for my app"/></manifest>四、main.xml配置清单:<?xml version="1.0" encoding="utf-8"?><LinearLayout xmlns:android="/apk/res/android"android:layout_width="fill_parent"android:layout_height="fill_parent"android:orientation="vertical" ><LinearLayout android:layout_width="fill_parent"android:layout_height="wrap_content"android:orientation="horizontal" ><TextViewandroid:id="@+id/name"android:layout_width="100dip"android:layout_height="wrap_content"android:text="@string/name"android:gravity="center"/><TextViewandroid:id="@+id/phone"android:layout_width="100dip"android:layout_height="wrap_content"android:text="@string/phone"android:gravity="center"/><TextViewandroid:id="@+id/amount"android:layout_width="fill_parent"android:layout_height="wrap_content"android:text="@string/amount"android:gravity="center"/></LinearLayout><ListViewandroid:id="@+id/listView"android:layout_width="fill_parent"android:layout_height="fill_parent" ></ListView></LinearLayout>五、item.xml配置清单:<?xml version="1.0" encoding="utf-8"?><LinearLayout xmlns:android="/apk/res/android"android:layout_width="fill_parent"android:layout_height="fill_parent"android:orientation="horizontal" ><TextViewandroid:id="@+id/name"android:layout_width="100dip"android:layout_height="wrap_content"android:text="@string/name"android:gravity="center"/><TextViewandroid:id="@+id/phone"android:layout_width="100dip"android:layout_height="wrap_content"android:text="@string/phone"android:gravity="center"/><TextViewandroid:id="@+id/amount"android:layout_width="fill_parent"android:layout_height="wrap_content"android:text="@string/amount"android:gravity="center"/></LinearLayout>六、string.xml配置清单:<?xml version="1.0" encoding="utf-8"?><resources><string name="hello">Hello World, DBSQLiteOperateActivity!</string><string name="app_name">ExampleDBSQLiteOperate8</string><string name="name">姓名</string><string name="phone">电话</string><string name="amount">存款</string></resources>七、DBSQLiteOperateActivity.java Activity类的源码:package com.example.dboperate;import java.util.ArrayList;import java.util.HashMap;import java.util.List;import java.util.Map;import com.example.adapter.PersonAdapter;import com.example.domain.Person;import com.example.service.PersonService;import android.app.Activity;import android.database.Cursor;import android.os.Bundle;import android.view.View;import android.view.View.OnClickListener;import android.widget.AdapterView;import android.widget.AdapterView.OnItemClickListener;import android.widget.ListView;import android.widget.SimpleAdapter;import android.widget.SimpleCursorAdapter;import android.widget.Toast;public class DBSQLiteOperateActivity extends Activity {ListView listView;PersonService personService;OnItemClickListener listViewListener;/** Called when the activity is first created. */@Overridepublic void onCreate(Bundle savedInstanceState) {super.onCreate(savedInstanceState);setContentView(yout.main);listViewListener = new OnItemClickListener(){@Overridepublic void onItemClick(AdapterView<?> parent, View view, int position, long id) {//得到listView控件ListView listView = (ListView)parent;//1、如果使⽤⾃定义适配器,返回的是Person对象//得到该条⽬数据// Person person = (Person)listView.getItemAtPosition(position);// //⼴播出去// Toast.makeText(getApplicationContext(), person.toString(), Toast.LENGTH_LONG).show(); //2、如果使⽤showList2()⽅法中的适配器时,则取得的值是不⼀样的,返回的是cursor// Cursor cursor = (Cursor)listView.getItemAtPosition(position);// int personid = cursor.getInt(cursor.getColumnIndex("_id"));// Toast.makeText(getApplicationContext(), personid+"", Toast.LENGTH_LONG).show();//3、如果使⽤showList()⽅法中的适配器时,则取得的值是不⼀样的,返回的是map@SuppressWarnings("unchecked")Map<String,Object> map = (Map)listView.getItemAtPosition(position);String name = map.get("name").toString();String personid = map.get("personid").toString();Toast.makeText(getApplicationContext(), personid +"-"+ name, Toast.LENGTH_LONG).show(); }};listView = (ListView) this.findViewById(R.id.listView);listView.setOnItemClickListener(listViewListener);personService = new PersonService(this);showList();}private void showList() {List<Person> persons = personService.getScrollData(0, 50);List<HashMap<String,Object>> data = new ArrayList<HashMap<String,Object>>();for(Person person : persons){HashMap<String,Object> item = new HashMap<String,Object>();item.put("name", person.getName());item.put("phone", person.getPhone());item.put("amount", person.getAmount());item.put("personid", person.getId());data.add(item);}SimpleAdapter adapter = new SimpleAdapter(this,data,yout.item, new String[]{"name","phone","amount"}, new int[]{,R.id.phone,R.id.amount});listView.setAdapter(adapter);}public void showList2(){Cursor cursor = personService.getCursorScrollData(0, 50);//该适配器要求返回的结果集cursor必须包含_id字段,所以需要对取得结果集进⾏处理SimpleCursorAdapter adapter = new SimpleCursorAdapter(this,yout.item,cursor,new String[]{"name","phone","amount"}, new int[]{,R.id.phone,R.id.amount} ); listView.setAdapter(adapter);}/*** ⾃定义适配器*/public void showList3(){List<Person> persons = personService.getScrollData(0, 50);/*** 第⼀个参数:上下⽂context,第⼆个参数:要显⽰的数据,第三个参数:绑定的条⽬界⾯*/PersonAdapter adapter = new PersonAdapter(this, persons, yout.item);listView.setAdapter(adapter);}}⼋、person.java 实体类源码:package com.example.domain;public class Person {private Integer id;private String name;private String phone;private Integer amount;public Integer getId() {return id;}public void setId(Integer id) {this.id = id;}public String getName() {return name;}public void setName(String name) { = name;}public String getPhone() {return phone;}public void setPhone(String phone) {this.phone = phone;}public Person(String name, String phone) { = name;this.phone = phone;}public Person(Integer id, String name, String phone,Integer amount) {super();this.id = id; = name;this.phone = phone;this.amount = amount;}public Person() {super();}public Integer getAmount() {return amount;}public void setAmount(Integer amount) {this.amount = amount;}@Overridepublic String toString() {return "Person [id=" + id + ", name=" + name + ", phone=" + phone+ ", amount=" + amount + "]";}}九、DBOperateHelper.java 业务类源码:package com.example.service;import android.content.Context;import android.database.sqlite.SQLiteDatabase;import android.database.sqlite.SQLiteDatabase.CursorFactory;import android.database.sqlite.SQLiteOpenHelper;public class DBOperateHelper extends SQLiteOpenHelper {public DBOperateHelper(Context context) {//默认创建的数据库⽂件保存在<包名>/database///第⼀个参数是上下⽂,第⼆个参数是数据库名称,第三个是游标⼯⼚为null时使⽤数据库默认的游标⼯⼚,第四个是数据库版本号但是不能为0,⼀般⼤于0super(context, "smallpig", null, 4);}/*** 数据库每⼀次被创建时被调⽤*/@Overridepublic void onCreate(SQLiteDatabase sqldb) {sqldb.execSQL("create table person(personid integer primary key autoincrement,name varchar(20),phone varchar(12) null)");}/*** 每⼀次数据库版本号发⽣变动时触发此⽅法* ⽐如如果想往数据库中再插⼊⼀些表、字段或者其他信息时通过修改数据库版本号来触发此⽅法*/@Overridepublic void onUpgrade(SQLiteDatabase db, int oldVersion, int newVersion) {//db.execSQL("alter table person add phone varchar(12) null");\db.execSQL("alter table person add amount Integer null");}}⼗、PersonService.java 业务类源码:package com.example.service;import java.util.ArrayList;import java.util.List;import android.content.Context;import android.database.Cursor;import android.database.sqlite.SQLiteDatabase;import com.example.domain.Person;public class PersonService {private DBOperateHelper dbOperateHelper;public PersonService(Context context) {this.dbOperateHelper = new DBOperateHelper(context);}/*** 保存记录* @param person*/public void save(Person person){//得到数据库实例,⾥⾯封装了数据库操作⽅法SQLiteDatabase sqldb = dbOperateHelper.getWritableDatabase();//sqldb.execSQL("insert into person(name,phone) values('"+person.getName()+"','"+person.getPhone()+"')");//利⽤占位符可以避免注⼊,但是注意数组参与与占位符对应的字段要⼀⼀对应sqldb.execSQL("insert into person(name,phone,amount) values(?,?,?)",new Object[]{person.getName(),person.getPhone(),person.getAmount()});//关闭数据库sqldb.close();}/*** 删除记录* @param id*/public void delete(Integer id){SQLiteDatabase sqldb = dbOperateHelper.getWritableDatabase();sqldb.execSQL("delete from person where personid=?",new Object[]{id});sqldb.close();}/*** 更新记录* @param person*/public void update(Person person){SQLiteDatabase sqldb = dbOperateHelper.getWritableDatabase();sqldb.execSQL("update person set name=?,phone=?,amount=? where personid=?",new Object[]{person.getName(),person.getPhone(),person.getAmount(),person.getId()}); sqldb.close();}/*** 通过ID查询记录* @param id* @return*/public Person find(Integer id){/*** getWritableDatabase 与 getReadableDatabase 的区别:* getReadableDatabase会先返回getWritableDatabase(可写),如果调⽤getWritableDatabase失败* 则才会调⽤getReadableDatabase后续⽅法,使数据库只读* 当写⼊的数据超过数据库⼤⼩则调⽤getWritableDatabase会失败* 所以只读时则可以使⽤此⽅法,其它情况(只要不是超过数据库⼤⼩)也可以使⽤此⽅法*/SQLiteDatabase sqldb = dbOperateHelper.getReadableDatabase();Cursor cursor = sqldb.rawQuery("select * from person where personid=?", new String[]{String.valueOf(id)});int personid;String name;String phone;int amount;Person person = null;if(cursor.moveToFirst()){personid = cursor.getInt(cursor.getColumnIndex("personid"));name = cursor.getString(cursor.getColumnIndex("name"));phone = cursor.getString(cursor.getColumnIndex("phone"));amount = cursor.getInt(cursor.getColumnIndex("amount"));person = new Person(personid,name,phone,amount);}cursor.close();return person;}/*** 返回指定长度记录,limit 3,5,适⽤于分页* @param offset 起始* @param maxResult 长度* @return*/public List<Person> getScrollData(int offset,int maxResult){SQLiteDatabase sqldb = dbOperateHelper.getReadableDatabase();Cursor cursor = sqldb.rawQuery("select * from person order by personid asc limit ?,?", new String[]{String.valueOf(offset),String.valueOf(maxResult)});int personid;String name;String phone;int amount;Person person = null;List<Person> persons = new ArrayList<Person>();while(cursor.moveToNext()){personid = cursor.getInt(cursor.getColumnIndex("personid"));name = cursor.getString(cursor.getColumnIndex("name"));phone = cursor.getString(cursor.getColumnIndex("phone"));amount = cursor.getInt(cursor.getColumnIndex("amount"));person = new Person(personid,name,phone,amount);persons.add(person);}cursor.close();return persons;}/*** 返回cursor* @param offset 起始* @param maxResult 长度* @return*/public Cursor getCursorScrollData(int offset,int maxResult){SQLiteDatabase sqldb = dbOperateHelper.getReadableDatabase();Cursor cursor = sqldb.rawQuery("select personid as _id,name,phone,amount from person order by personid asc limit ?,?", new String[]{String.valueOf(offset),String.valueOf(maxResult)}); return cursor;}/*** 返回总记录数* @return*/public long getCount(){SQLiteDatabase sqldb = dbOperateHelper.getReadableDatabase();Cursor cursor = sqldb.rawQuery("select count(*) from person", null);//该查询语句值返回⼀条语句cursor.moveToFirst();long result = cursor.getLong(0);cursor.close();return result;}public void payment(){SQLiteDatabase sqldb = dbOperateHelper.getWritableDatabase();sqldb.beginTransaction();//开启事务try{sqldb.execSQL("update person set amount = amount -10 where personid=1");sqldb.execSQL("update person set amount = amount + 10 where personid=2");sqldb.setTransactionSuccessful();//设置事务标志位true} finally {//结束事务:有两种情况:commit\rollback,事务提交或者回滚是由事务的标识决定的//事务为ture则提交,事务为flase则回滚,默认为falsesqldb.endTransaction();}}}⼗⼀、OtherPersonService.java 业务类源码:package com.example.service;import java.util.ArrayList;import java.util.List;import com.example.domain.Person;import android.content.ContentValues;import android.content.Context;import android.database.Cursor;import android.database.sqlite.SQLiteDatabase;import android.database.sqlite.SQLiteDatabase.CursorFactory;import android.database.sqlite.SQLiteOpenHelper;public class OtherPersonService {private DBOperateHelper dbOperateHelper;public OtherPersonService(Context context) {this.dbOperateHelper = new DBOperateHelper(context);}/*** 保存记录* @param person*/public void save(Person person){//得到数据库实例,⾥⾯封装了数据库操作⽅法SQLiteDatabase sqldb = dbOperateHelper.getWritableDatabase();//sqldb.execSQL("insert into person(name,phone) values('"+person.getName()+"','"+person.getPhone()+"')");//利⽤占位符可以避免注⼊,但是注意数组参与与占位符对应的字段要⼀⼀对应//sqldb.execSQL("insert into person(name,phone) values(?,?)",new Object[]{person.getName(),person.getPhone()});ContentValues values = new ContentValues();values.put("name", person.getName());values.put("phone", person.getPhone());values.put("amount", person.getAmount());//第⼀个参数是表名,第三个为字段值集合,第⼆个参数是空值字段,当第三个字段值集合为空时,系统会⾃动插⼊⼀条第⼆个参数为空的sql语句//否则当第三个参数为空时,如果第⼆个参数也为空,那么插⼊表就会找不到插⼊的字段信息,会报错sqldb.insert("person", "name", values );//关闭数据库sqldb.close();}/*** 删除记录* @param id*/public void delete(Integer id){SQLiteDatabase sqldb = dbOperateHelper.getWritableDatabase();//sqldb.execSQL("delete from person where personid=?",new Object[]{id});//第⼀个参数是表名,第⼆个是where后⾯的条件⽤占位符表⽰,第三个对应占位符为参数值sqldb.delete("person", "personid=?", new String[]{Integer.toString(id)});sqldb.close();}/*** 更新记录* @param person*/public void update(Person person){SQLiteDatabase sqldb = dbOperateHelper.getWritableDatabase();//sqldb.execSQL("update person set name=?,phone=? where personid=?",new Object[]{person.getName(),person.getPhone(),person.getId()});//第⼀个参数为表名,第⼆个是⼀个更新值集合,采⽤键值对的形式,每个更新的字段对应更新值//第三个参数是where后⾯条件字段⽤占位符标识,第四个参数是对应where占位符的值ContentValues values = new ContentValues();values.put("name", person.getName());values.put("phone", person.getPhone());values.put("amount", person.getAmount());sqldb.update("person", values , "personid=?", new String[]{person.getId().toString()});sqldb.close();}/*** 通过ID查询记录* @param id* @return*/public Person find(Integer id){/*** getWritableDatabase 与 getReadableDatabase 的区别:* getReadableDatabase会先返回getWritableDatabase(可写),如果调⽤getWritableDatabase失败* 则才会调⽤getReadableDatabase后续⽅法,使数据库只读* 当写⼊的数据超过数据库⼤⼩则调⽤getWritableDatabase会失败* 所以只读时则可以使⽤此⽅法,其它情况(只要不是超过数据库⼤⼩)也可以使⽤此⽅法*/SQLiteDatabase sqldb = dbOperateHelper.getReadableDatabase();//Cursor cursor = sqldb.rawQuery("select * from person where personid=?", new String[]{String.valueOf(id)});//第⼀个参数是表名;第⼆个参数是查询显⽰的字段,null时默认查询显⽰所有字段;//第三个参数是where查询条件占位符;第四个是占位符对应的值;//第五个参数是group by条件;第六个是having条件;第七个是order by条件Cursor cursor = sqldb.query("person", null, "personid=?", new String[]{id.toString()}, null, null, null);int personid;String name;String phone;int amount;Person person = null;if(cursor.moveToFirst()){personid = cursor.getInt(cursor.getColumnIndex("personid"));name = cursor.getString(cursor.getColumnIndex("name"));phone = cursor.getString(cursor.getColumnIndex("phone"));amount = cursor.getInt(cursor.getColumnIndex("amount"));person = new Person(personid,name,phone,amount);}cursor.close();return person;}/*** 返回指定长度记录,limit 3,5,适⽤于分页* @param offset 起始* @param maxResult 长度* @return*/public List<Person> getScrollData(int offset,int maxResult){SQLiteDatabase sqldb = dbOperateHelper.getReadableDatabase();//Cursor cursor = sqldb.rawQuery("select * from person order by personid asc limit ?,?", new String[]{String.valueOf(offset),String.valueOf(maxResult)}); //第⼀个参数是表名;第⼆个参数是查询显⽰的字段,null时默认查询显⽰所有字段;//第三个参数是where查询条件占位符;第四个是占位符对应的值;//第五个参数是group by条件;第六个是having条件;第七个是order by条件//第⼋个参数是limit ?,? 条件Cursor cursor = sqldb.query("person", null, null, null, null, null, "personid",offset+","+maxResult); int personid;String name;String phone;int amount;Person person = null;List<Person> persons = new ArrayList<Person>();while(cursor.moveToNext()){personid = cursor.getInt(cursor.getColumnIndex("personid"));name = cursor.getString(cursor.getColumnIndex("name"));phone = cursor.getString(cursor.getColumnIndex("phone"));amount = cursor.getInt(cursor.getColumnIndex("amount"));person = new Person(personid,name,phone,amount);persons.add(person);}cursor.close();return persons;}/*** 返回总记录数* @return*/public long getCount(){SQLiteDatabase sqldb = dbOperateHelper.getReadableDatabase();//Cursor cursor = sqldb.rawQuery("select count(*) from person", null);//第⼀个参数是表名;第⼆个参数是查询显⽰的字段,null时默认查询显⽰所有字段;//第三个参数是where查询条件占位符;第四个是占位符对应的值;//第五个参数是group by条件;第六个是having条件;第七个是order by条件Cursor cursor = sqldb.query("person", new String[]{"count(*)"}, null, null, null, null, null);//该查询语句值返回⼀条语句cursor.moveToFirst();long result = cursor.getLong(0);cursor.close();return result;}}⼗⼆、PersonServiceTest.java 单元测试类源码:package com.example.test;import java.util.List;import com.example.domain.Person;import com.example.service.DBOperateHelper;import com.example.service.PersonService;import android.test.AndroidTestCase;import android.util.Log;public class PersonServiceTest extends AndroidTestCase {public void testCreateDB() throws Exception{DBOperateHelper dbHelper = new DBOperateHelper(getContext());dbHelper.getWritableDatabase();}public void testSave() throws Exception{PersonService ps = new PersonService(getContext());for(int i=1;i<=100;i++){Person person = new Person();person.setName("我是"+i);person.setPhone(String.valueOf(Long.parseLong("188********")+i));ps.save(person);Log.i("PersonService",person.toString());}}public void testDelete() throws Exception{PersonService ps = new PersonService(getContext());ps.delete(10);}public void testUpdate() throws Exception{PersonService ps = new PersonService(getContext());ps.update(new Person(1,"xiaopang","188********",0));}public void testFind() throws Exception{PersonService ps = new PersonService(getContext());Person person = ps.find(1);Log.i("PersonService", person.toString());}public void testGetScrollData() throws Exception{PersonService ps = new PersonService(getContext());List<Person> persons = ps.getScrollData(3, 5);for(Person person:persons){Log.i("PersonService",person.toString());}}public void testGetCount() throws Exception{PersonService ps = new PersonService(getContext());Long count = ps.getCount();Log.i("PersonService",count.toString());}public void testUpdateAmount() throws Exception{PersonService ps = new PersonService(getContext());Person person1 = ps.find(1);Person person2 = ps.find(2);person1.setAmount(100);person2.setAmount(100);ps.update(person1);ps.update(person2);}public void testPayment() throws Exception{PersonService ps = new PersonService(getContext());ps.payment();}}⼗三、OtherPersonServiceTest 单元测试类源码:package com.example.test;import java.util.List;import com.example.domain.Person;import com.example.service.DBOperateHelper;import com.example.service.OtherPersonService;import android.test.AndroidTestCase;import android.util.Log;public class OtherPersonServiceTest extends AndroidTestCase {public void testCreateDB() throws Exception{DBOperateHelper dbHelper = new DBOperateHelper(getContext());dbHelper.getWritableDatabase();}public void testSave() throws Exception{OtherPersonService ps = new OtherPersonService(getContext());for(int i=1;i<=100;i++){Person person = new Person();person.setName("我是"+i);person.setPhone(String.valueOf(Long.parseLong("188********")+i));ps.save(person);Log.i("PersonService",person.toString());}}public void testDelete() throws Exception{OtherPersonService ps = new OtherPersonService(getContext());ps.delete(10);}public void testUpdate() throws Exception{OtherPersonService ps = new OtherPersonService(getContext());ps.update(new Person(1,"xiaopang","188********",0));}public void testFind() throws Exception{OtherPersonService ps = new OtherPersonService(getContext());Person person = ps.find(1);Log.i("PersonService", person.toString());}public void testGetScrollData() throws Exception{OtherPersonService ps = new OtherPersonService(getContext());List<Person> persons = ps.getScrollData(3, 5);for(Person person:persons){Log.i("PersonService",person.toString());}}public void testGetCount() throws Exception{OtherPersonService ps = new OtherPersonService(getContext());Long count = ps.getCount();Log.i("PersonService",count.toString());}}⼗四、注意事项以及相关知识点:1、掌握SQLite数据库如何创建数据库、建⽴表、维护字段等操作继承SQLiteOpenHelper类,构造函数调⽤⽗类构造函数创建数据库,利⽤onCreate创建表,利⽤onUpgrade更新表字段信息2、掌握SQLite数据库如何增、删、改、查以及分页取得SQLiteDatabase的实例,然后调⽤该实例的⽅法可以完成上述操作SQLiteDataBase提供两种操作上述功能的⽅式:⼀是直接调⽤execSQL书写sql语句,另⼀种是通过insert、update、delete、query等⽅法来传值来拼接sql,前⼀种适合熟练掌握sql 语句的3、对需要数据同步的处理请添加事务处理,熟悉事务的处理⽅式4、了解各个⽅法参数的意义以及传值5、掌握ListView显⽰后台数据的使⽤⽅法SimpleAdapter、SimpleCursorAdapter以及⾃定义适配器的使⽤,以及OnItemClickListener取值时各个适配器返回值的区别以及取值⽅法6、多学、多记、多练、多思,加油!更多关于Android相关内容感兴趣的读者可查看本站专题:《》、《》、《》、《》、《》及《》希望本⽂所述对⼤家Android程序设计有所帮助。
为什么使用地方式实现分页显示?提供地诸多数据绑定控件,每一种都有它自己地优点和缺点.如果需要对数据进行操作,如果数据量不大地情况下,和是最好地选择,但是他们会生产额外地<><><><>标签.如果只是罗列出来一些简单地数据,出于对性能地考虑,必然是首选.当然和地组合必将是开发中地黄金组合,无论从性能上和功能实现上都是很棒地控件.个人收集整理勿做商业用途扩展性强,灵活度高:控件集成了、、和控件地所有功能.它可以像控件那样,让我们在控件内写任何代码.个人收集整理勿做商业用途中给我们提供地新数据绑定控件和,可以说,就是和地结合体,它既有控件地开放式模板,又具有控件地编辑特性. 这绝对是一个可以引起你兴趣地好东东,因为它给你提供了比丰富得多地布局手段,同时又具有地所有特性.个人收集整理勿做商业用途具有分页功能:控件本身并不提供分页功能,但是我们可以通过另一个控件–来实现分页地特性. 把分页地特性单独放到另一个控件里,会给我们带来很多好处,比如说可以让别地控件使用它,又比如说我们可以把它放在页面地任何地方.实质上,就是一个扩展分页功能地控件.个人收集整理勿做商业用途控件是用来显示数据地,它地使用类似于控件. 控件中有多模板,出示如下:···········它有很多地模板. 其中有许多新增地模板,如和.但我一般常用地就是,,,这几个.继续摸索这个控件后,我发现它可以让你在它地模板内写任何标记或控件,这将给我们带来很大地自由度.用显示数据开始,你可以把当作是来使用,也就是说它是模板驱动型地控件. 参考如下示例:个人收集整理勿做商业用途< "" """"个人收集整理勿做商业用途"" ""个人收集整理勿做商业用途"""" "">个人收集整理勿做商业用途<>< "">< ""><("")><>< ""><("")><>< "">< "" "" '<("")>'><><>个人收集整理勿做商业用途< "">< "" "" "" >更新<>个人收集整理勿做商业用途< "" "" "" >取消<>个人收集整理勿做商业用途<><><><>< "">< ""><("")><>< ""><("")><>< ""><("")><>< "">< "" "" "" >编辑<>个人收集整理勿做商业用途< "" "" "" >删除<>个人收集整理勿做商业用途<><><><>< " ">< ""><("")><>< ""><("")><>< ""><("")><>< "">< "" "" "" >编辑<>个人收集整理勿做商业用途< "" "" "" >删除<>个人收集整理勿做商业用途<><><><>增加分页功能如果你想为增加分页功能地话,那么就需要使用控件了.这个分页控件是一个独立地控件,你可以把它放到页面地任何位置,然后使其联到你地控件就可以完成分页地工作了.该分页控件所呈现出来地标记为内联()元素,所以如果你想精确地设置其位置地话,可以参考下面地代码,为其包裹一个< >标记. 个人收集整理勿做商业用途给控件添加以下属性,在翻页时给控件绑定新地页面索引:""个人收集整理勿做商业用途你可以像下面这样设置分页控件,并可以把其放到页面地任何位置.< "" "" "">个人收集整理勿做商业用途<>< "" 个人收集整理勿做商业用途"" ""个人收集整理勿做商业用途"" ><><>通过上面地代码你会发现,我们可以通过设置控件地,从而达到手动设置分页布局地目地. 另外还有一个关键点,就是控件地属性,你需要把它设置为地.个人收集整理勿做商业用途当然你也可以把控件放到布局模板内.把分页功能作为一个单独地控件分离出来是一个非常好地注意–它会让我们有更多地布局和显示上地自由度.但是,目前地分页控件还是有其局限性地. 它只能结合控件一起工作–如果能用在或上就更好了.另外,它也是要依赖于地.还有,现在地控件没有分页事件,也没有属性.还有一点需要注意地是,没有内置排序功能.个人收集整理勿做商业用途。
MyBookShop书籍分页显示功能功能需求:1.进入书籍详细列表页面(BookList.aspx),以列表的方式显示书籍信息,因为书籍过多,所以采取分页方式显示,可以通过点击“上一页”和“下一页”显示书籍信息图1 图书分页效果2.书籍显示外观设计:在书籍列表内容页中拖放一个DataList控件,然后使用设计器编辑DataList的项模板选择“编辑模板”选项,进入到“项模板”编辑窗口在项模板中拖放一个三行两列的Table标记,行合并第一列,放置图书的图片行合并第二行第一列,行合并第三行第二列模板列中Table用来显示书籍的相关信息,如下图所示:3.DataList绑定表达式的写法Books表结构如同所示:绑定字段:图书标题绑定“title”字段图书备注绑定“contentDescription”字段图书价格绑定“unitprice”字段问题:图书照片的路径如何绑定到图片控件上?图片的资源文件存放在在站点的路径如图所示:请注意这些图书图片的命名就是Books表ISBN列中存放的图书ISBN编码+“.jpg”组成,那么显示图书图片控件的Imageurl属性可以这样设计<asp:Image ID="Image1"runat="server"ImageUrl=’<%#“~/Images/BookConvers/”+Eval(“ISBN”).ToString()+”.jpg”%>’Height="101px"Width="91 px"/>4.后台绑定实现由于书籍信息过多采用自定义分页显示书籍信息,每页显示4本书的信息,效果图1所示:设计思路:因为Books表有1077行,一页无法显示,采取分页显示每页显示4条数据。
当点击“下一页”时,定义一个全局变量记录当前页码加一,并从数据库总提取下一个4条数据,同理,点击“上一页”时,页码值减一,从数据库总提取上一个4条信息。
GridView控件分页显示记录MasterPageFile="~/Manage/master.Master"GridView控件具有内置分页功能,设置GridView控件分页的属性如表1所示。
表1 GridView控件分页属性AllowPaging属性用于获取或设置一个值,该值指示是否启用分页功能。
如果启用分页功能,则为True,否则为False,默认值为False。
分页的形式可以显示一组称为“页导航”的控件,例如以数字显示页面链接或“首页上一页下一页最后一页”显示页面链接,用户使用这些控件可以在控件内的页面之间跳转。
GridView控件使用PagerSettings 类来表示页导航的属性。
通常情况下,PagerSettings 对象存储在控件的PagerSettings 属性中,通过设置PagerSettings 对象的属性自定义页导航。
页导航支持几种不同的显示模式。
若要指定页导航的显示模式,可以设置Mode 属性。
表2介绍了这几种不同的模式。
表2 Mode属性分页模式当Mode 属性设置为NextPrevious、NextPreviousFirstLast 或NumericFirstLast 值时,可以通过设置表3中所示的属性来为非数字按钮指定自定义文字。
表3 设置按钮文字除了在按钮上设置自定义文字外,还可以通过设置表4中所示的属性为非数字按钮显示图像。
表4设置按钮显示图像如果设置GridView控件分页显示为“首页上一页下一页最后一页”的形式,可以设置AllowPaging=True,然后在PageSettings中设置Mode的模式为NextPreviousFirstLast,每一个按钮显示的文字,相关如下所示:。
GridView控件自定义分页详解在这里我们将用一个隐藏字段来保存这个PageIndex,即当前页码.当点击上一页时,将它的值减一,知道为0,要注意的一点这里的第一页页码是0而不是1.下面看看代码,然后我们再分析分析!1<asp:GridView ID="NewsGrid" runat="server" AutoGenerateColumns="False" AllowPaging="false" Width="100%">2 <Columns>3 <asp:BoundField DataField="NewsId" HeaderText="新闻ID"/>4 <asp:HyperLinkField DataNavigateUrlFields="NewsId" DataNavigateUrlFormatString="~/Details.aspx?ID={0}"5 DataTextField="Title" HeaderText="新闻标题" ItemStyle-Width="70%"/>6 <asp:BoundField DataField="PostTime" HeaderText="发布时间"/>7 <asp:CommandField HeaderText="新闻管理" ShowCancelButton="False" ShowDeleteButton="True"8 ShowEditButton="True"/>9 </Columns>10 </asp:GridView>实用文档11 <div style=" height:16px; padding-top:5px; margin-right:30px; float:right">12 <asp:HiddenField ID="CurrentPage" runat="server" Value="0"/>13 <asp:LinkButton ID="First" runat="server" CommandArgument="first" OnClick="PagerButton_Click">首页</asp:LinkButton>14 <asp:LinkButton ID="Prev" runat="server" CommandArgument="prev" OnClick="PagerButton_Click">上一页</asp:LinkButton>15 <asp:LinkButton ID="Next" runat="server" CommandArgument="next" OnClick="PagerButton_Click">下一页</asp:LinkButton>16 <asp:LinkButton ID="Last" runat="server" CommandArgument="last" OnClick="PagerButton_Click">尾页</asp:LinkButton>17 </div> CS文件中的代码:1 protected void PagerButton_Click(object sender, EventArgs e)2 {3 int pageIndx = Convert.ToInt32(CurrentPage.Value);4 int totals = NewsManager.GetNews(0, pageSize).TotalRecords;5 int pages = (totals % pageSize) == 0 ? (totals / pageSize) : (totals / 实用文档pageSize + 1);6 string arg = ((LinkButton)sender).CommandArgument.ToString().ToLower();7 switch (arg)8 {9 case "prev":10 if (pageIndx > 0)11 {12 pageIndx -= 1;13 }14 break;15 case "next":16 if (pageIndx < pages - 1)17 {18 pageIndx += 1;19 }20 break;21 case "last":实用文档22 pageIndx = pages - 1;23 break;24 default:25 pageIndx = 0;26 break;27 }28 CurrentPage.Value = pageIndx.ToString();29 NewsGrid.DataSource = NewsManager.GetNews(pageIndx , pageSize).Entities;30 NewsGrid.DataBind();31 }如何在GridView中增加效果protected void GridView1_RowDataBound(object sender, GridViewRowEventArgs e){//将满足特定条件的行标为高亮if (e.Row.RowType == DataControlRowType.DataRow)//判定当前的行是否属于datarow类型的行实用文档{int money = Convert.ToInt32(DataBinder.Eval(e.Row.DataItem, "MONEY"));//取当前行的列值if (money == 77)e.Row.BackColor = Color.Red;//string customer = (string)DataBinder.Eval(e.Row.DataItem, "CUSTOMER");string customer = DataBinder.Eval(e.Row.DataItem, "CUSTOMER").ToString();if (customer == "sdf")e.Row.BackColor = Color.Red;}//加入鼠标滑过的高亮效果if (e.Row.RowType == DataControlRowType.DataRow)//判定当前的行是否属于datarow类型的行{//当鼠标放上去的时候先保存当前行的背景颜色并给附一颜色e.Row.Attributes.Add("onmouseover", 实用文档"currentcolor=this.style.backgroundColor;this.style.backgroundColor='yellow',t his.style.fontWeight='';");//当鼠标离开的时候将背景颜色还原的以前的颜色e.Row.Attributes.Add("onmouseout", "this.style.backgroundColor=currentcolor,this.style.fontWeight='';");}//单击行改变行背景颜色if (e.Row.RowType == DataControlRowType.DataRow){e.Row.Attributes.Add("onclick","this.style.backgroundColor='#99cc00'; this.style.color='buttontext';this.style.cursor='default';");}如何在GridView中一次性批量更新多行数据2.0下含有DropDownList的GridView编辑、删除的完整例子!<asp:GridView ID="GridView1" runat="server" AutoGenerateColumns="False" PageSize="10"实用文档Width="542px" AllowPaging="True" AllowSorting="True"DataKeyNames="DB31_1,DB31_2" OnRowCancelingEdit="GridView1_RowCancelingEdit"OnRowDeleting="GridView1_RowDeleting"OnRowEditing="GridView1_RowEditing"OnRowUpdating="GridView1_RowUpdating"OnPageIndexChanging="GridView1_PageIndexChanging" OnRowDataBound="GridView1_RowDataBound" OnSelectedIndexChanged="GridView1_SelectedIndexChanged"OnSorting="GridView1_Sorting" ><Columns><asp:TemplateField HeaderText="序号"><ItemTemplate><%# this.GridView1.PageIndex * this.GridView1.PageSize + this.GridView1.Rows.Count + 1%></ItemTemplate></asp:TemplateField>实用文档<asp:TemplateField HeaderText="学历代码" SortExpression="DB1_1"><EditItemTemplate><%--<asp:TextBox ID="TextBox1" runat="server" Text='<%# Bind("DB1_1") %>'></asp:TextBox>--%><asp:DropDownList ID ="ddlXL"runat="server" DataValueField='<%#Bind("DB1_1") %>'></asp:DropDownList></EditItemTemplate><ItemTemplate><asp:Label ID="Label1" runat="server" Text='<%# Bind("xueliText") %>'></asp:Label></ItemTemplate></asp:TemplateField><asp:TemplateField HeaderText="学历名称" SortExpression="DB1_2"><EditItemTemplate>实用文档<asp:TextBox ID="TextBox2" runat="server" Text='<%# Bind("DB1_2") %>'></asp:TextBox></EditItemTemplate><ItemTemplate><asp:Label ID="Label2" runat="server" Text='<%# Bind("DB1_2") %>'></asp:Label></ItemTemplate></asp:TemplateField><asp:TemplateField HeaderText="操作" ShowHeader="False"><EditItemTemplate><asp:LinkButton ID="LinkButton1" runat="server" CausesValidation="True" CommandName="Update"Text="更新"></asp:LinkButton><asp:LinkButton ID="LinkButton2" runat="server" CausesValidation="False" CommandName="Cancel"实用文档Text="取消"></asp:LinkButton></EditItemTemplate><ItemTemplate><asp:LinkButton ID="LinkButton1" runat="server" CausesValidation="False" CommandName="Edit"Text="编辑" OnClientClick="return confirm('确认要编辑吗?');"></asp:LinkButton><asp:LinkButton ID="LinkButton3" runat="server" CausesValidation="False" CommandName="Delete"Text="删除" OnClientClick="return confirm('确认要删除吗?');"></asp:LinkButton><asp:LinkButton ID="LinkButton2" runat="server" CausesValidation="False" CommandName="Select"Text="选择"></asp:LinkButton></ItemTemplate>实用文档</asp:TemplateField></Columns><AlternatingRowStyle BackColor="Aquamarine" /></asp:GridView>/// <summary>/// 绑定数据到GridView/// </summary>private void GridViewBind(){检索数据库string strSql = "SELECT * FROM DB1";得到数据集this.GridView1.DataSource=conn.GetDs(strSql).Tables[0].DefaultView;this.GridView1.DataBind();实用文档}/// <summary>/// 编辑当前行/// </summary>/// <param name="sender"></param>/// <param name="e"></param>protected void GridView1_RowEditing(object sender, GridViewEditEventArgs e){GridView1.EditIndex = e.NewEditIndex;//当前编辑行背景色高亮this.GridView1.EditRowStyle.BackColor = Color.FromName("#F7CE90");GridViewBind();}/// <summary>实用文档/// 取消编辑状态/// </summary>/// <param name="sender"></param>/// <param name="e"></param>protected void GridView1_RowCancelingEdit(object sender, GridViewCancelEditEventArgs e){GridView1.EditIndex = -1;GridViewBind();}/// <summary>/// 删除记录过程/// </summary>/// <param name="sender"></param>/// <param name="e"></param>实用文档protected void GridView1_RowDeleting(object sender, GridViewDeleteEventArgs e){//得到单位编号string rowToDelete =GridView1.DataKeys[e.RowIndex].Values[0].ToString();//转换为整数//int ID=Convert.ToInt32(rowToDelete);//从数据库中删除string str = "DELETE FROM DB1 where DB1_1=" + "'" + rowToDelete + "'" + "";try{conn.RunSql(str);//重新绑定数据实用文档GridViewBind();}catch (Exception ex){Response.Write("数据库错误,错误原因:" + ex.Message);Response.End();}}/// <summary>/// 更新记录过程/// </summary>/// <param name="sender"></param>/// <param name="e"></param>protected void GridView1_RowUpdating(object sender, GridViewUpdateEventArgs e)实用文档{string ID = GridView1.DataKeys[e.RowIndex].Values[0].ToString();string DB1_1 =((TextBox)GridView1.Rows[e.RowIndex].FindControl("TextBox1")).Text;//string DB1_2 =((TextBox)GridView1.Rows[e.RowIndex].FindControl("TextBox2")).Text;string DB1_2 =(((DropDownList))GridView1.Rows[e.RowIndex].FindControl("ddlXL")).SelectedI tem.Text;//判断表单项是否有空并给出提示信息if (DB1_1 == "" || DB1_2 == ""){conn.Alert("请输入完整信息!", Page);return;}实用文档try{conn.BuilderEdit("select * from DB1 where DB1_1 ='" + ID + "'");conn.dr["DB1_1"] = DB1_1;conn.dr["DB1_2"] = DB1_2;conn.BuilderEditClose();}catch (OracleException err){if (err.Code.ToString() == "1")conn.Alert("错误:已存在具有相同主键的记录", Page);elseconn.Alert("错误:未能添加记录", Page);}实用文档Response.Write("<script language='javascript'>alert('数据已被保存!');</script>");//返回浏览状态GridView1.EditIndex = -1;GridViewBind();}/// <summary>/// 分页事件/// </summary>/// <param name="sender"></param>/// <param name="e"></param>protected void GridView1_PageIndexChanging(object sender, GridViewPageEventArgs e){GridView1.PageIndex = e.NewPageIndex;GridViewBind();实用文档}/// <summary>/// 加入鼠标效果及为DropDownList绑定值/// </summary>/// <param name="sender"></param>/// <param name="e"></param>protected void GridView1_RowDataBound(object sender, GridViewRowEventArgs e){//为DropDownList绑定值if (((DropDownList)e.Row.FindControl("ddlXL")) != null){DropDownList ddlXL = (DropDownList)e.Row.FindControl("ddlXL");ddlXL.Items.Clear();ddlXL.Items.Add(new ListItem("博士", "1"));实用文档ddlXL.Items.Add(new ListItem("硕士", "2"));ddlXL.Items.Add(new ListItem("学士", "3"));}//加入鼠标滑过的高亮效果if (e.Row.RowType == DataControlRowType.DataRow)//判定当前的行是否属于datarow类型的行{//当鼠标放上去的时候先保存当前行的背景颜色并给附一颜色e.Row.Attributes.Add("onmouseover","currentcolor=this.style.backgroundColor;this.style.backgroundColor='yellow',t his.style.fontWeight='';");//当鼠标离开的时候将背景颜色还原的以前的颜色e.Row.Attributes.Add("onmouseout","this.style.backgroundColor=currentcolor,this.style.fontWeight='';");}//单击行改变行背景颜色实用文档if (e.Row.RowType == DataControlRowType.DataRow){e.Row.Attributes.Add("onclick", "this.style.backgroundColor='#99cc00'; this.style.color='buttontext';this.style.cursor='default';");}}2.0下含有CheckBox的GridView删除选定记录实例<asp:GridView ID="GridView1" runat="server" AutoGenerateColumns="False" PageSize="5"2 Width="726px" AllowPaging="True" AllowSorting="True"3 DataKeyNames="DB1_1,DB1_2" OnRowDeleting="GridVie w1_RowDeleting" OnPageIndexChanging="GridView1_PageIndexChanging" OnRowDataBound="GridView1_RowDataBound"OnSorting="GridView1_Sorting" Height="279px" >4 <Columns>实用文档5 <asp:TemplateField HeaderText="序号" >6 <ItemTemplate>7 <%# this.GridView1.PageIndex *this.GridView1.PageSize + this.GridView1.Rows.Count + 1%>8 </ItemTemplate>9 </asp:TemplateField>10 <asp:TemplateField HeaderText="选择" >11 <ItemTemplate>12 <asp:CheckBox ID="chkSelect" runat="server" ></asp:CheckBox>13 </ItemTemplate>14 </asp:TemplateField>15 <asp:TemplateField HeaderText="操作" ShowHeader="False">16 <ItemTemplate>实用文档17 <asp:LinkButton ID="lbtnDelete" runat="server" CausesValidation="False" CommandName="Delete"18 Text="删除" OnClientClick="return confirm('确认要删除吗?');"></asp:LinkButton>19 </ItemTemplate>20 </asp:TemplateField>21 </Columns>22 <AlternatingRowStyle BackColor="Aquamarine" />23 </asp:GridView>1 <asp:CheckBox ID="chkSelectAll" runat="server" Text="全部选中" OnCheckedChanged="chkSelectAll_CheckedChanged"AutoPostBack="True" ></asp:CheckBox>2 <asp:Button ID="btnDelete" runat="server" Text="删除" OnClick="btnDelete_Click" />1 protected void btnDelete_Click(object sender, EventArgs e)2 {实用文档3 string strDelete = "";4 for (int i = 0; i < this.GridView1.Rows.Count; i++)5 {6 string Label;7 bool isChecked =((CheckBox)GridView1.Rows[i].FindControl("chkSelect")).Checked;8 Label = ((Label)GridView1.Rows[i].FindControl("labXH")).Text;9 if (isChecked)10 {11 strDelete = "DB1_1" + "=" + Label;12 }13 }14 conn.RunSql("Delete from DB1 where " + strDelete15 this.chkSelectAll.Checked = false;16 GridViewBind();实用文档17 }1819 protected void chkSelectAll_CheckedChanged(object sender, EventArgs e)20 {21 //遍历GridView行获取CheckBox属性22 for (int i = 0; i < this.GridView1.Rows.Count; i++)23 {24 ((CheckBox)GridView1.Rows[i].FindControl("chkSelect")).Checked = this.chkSelectAll.Checked;25 }26 }实用文档。
使用ListView数据绑定控件和DataPager实现数据分页显示为什么使用ListView+DataPager的方式实现分页显示?提供的诸多数据绑定控件,每一种都有它自己的优点和缺点。
如果需要对数据进行操作,如果数据量不大的情况下,DataList和GridView是最好的选择,但是他们会生产额外的<table><tr><tbody><td>标签。
如果只是罗列出来一些简单的数据,出于对性能的考虑,repeater必然是首选。
当然ListView和DataPager的组合必将是开发中的黄金组合,无论从性能上和功能实现上都是很棒的控件。
扩展性强,灵活度高:ListView控件集成了DataGrid、DataList、Repeater和GridView 控件的所有功能。
它可以像Repeater控件那样,让我们在控件内写任何HTML代码。
.NET 中给我们提供的新数据绑定控件ListView和DataPager,可以说,ListView就是DataGrid和Repeater的结合体,它既有Repeater控件的开放式模板,又具有DataGrid控件的编辑特性。
这绝对是一个可以引起你兴趣的好东东,因为它给你提供了比DataGird丰富得多的布局手段,同时又具有DataGrid 的所有特性。
具有分页功能:ListView控件本身并不提供分页功能,但是我们可以通过另一个控件– DataPager来实现分页的特性。
把分页的特性单独放到另一个控件里,会给我们带来很多好处,比如说可以让别的控件使用它,又比如说我们可以把它放在页面的任何地方。
实质上,DataPager就是一个扩展ListView分页功能的控件。
ListView控件ListView是用来显示数据的,它的使用类似于Repeater控件。
ListView控件中有n多模板,出示如下:·LayoutTemplate·ItemTemplate·AlternatingItemTemplate·SelectedItemTemplate·EmptyItemTemplate·EmptyDataTemplate·ItemSeparatorTemplate·GroupTemplate·GroupSeparatorTemplate·EditItemTemplate·InsertItemTemplate它有很多的模板。
其中有许多新增的模板,如GroupTemplate和InsertItemTemplate。
但我一般常用的就是ItemTemplate,AlternatingItemTemplate ,EditItemTemplate ,InsertItemTemplate这几个。
继续摸索这个控件后,我发现它可以让你在它的模板内写任何HTML标记或控件,这将给我们带来很大的自由度。
用ListView显示数据开始,你可以把ListView当作是Repeater来使用,也就是说它是模板驱动型的控件。
参考如下示例:<asp:ListView ID="lv2"runat="server"onpagepropertieschanging="lv_PagePropertiesChanging2"onitemcanceling="lv2_ItemCanceling"onitemediting="lv2_ItemEditing"onitemupdating="lv2_ItemUpdating"onitemdeleting="lv2_ItemDeleting"DataKeyNames="id"><EditItemTemplate><div class="lvData"><div class="id"><%#eval_r("id")%></div><div class="proId"><%#eval_r("provinceID")%></div><div class="proName"><asp:TextBox ID="txt"runat="server"Text='<%#eval_r("province")%>'></asp:TextBox></ div><div class="edit"><asp:LinkButton ID="lbtnEdit"runat="server"CommandName="Update">更新</asp:LinkButton><asp:LinkButton ID="LinkButton1"runat="server"CommandName="Cancel">取消</asp:LinkButton></div></div></EditItemTemplate><ItemTemplate><div class="lvData"><div class="id"><%#eval_r("id")%></div><div class="proId"><%#eval_r("provinceID")%></div><div class="proName"><%#eval_r("province")%></div><div class="edit"><asp:LinkButton ID="lbtnEdit"runat="server"CommandName="Edit">编辑</asp:LinkButton><asp:LinkButton ID="LinkButton2"runat="server"CommandName="Delete">删除</asp:LinkButton></div></div></ItemTemplate><AlternatingItemTemplate><div class="lvData alterStyle"><div class="id"><%#eval_r("id")%></div><div class="proId"><%#eval_r("provinceID")%></div><div class="proName"><%#eval_r("province")%></div><div class="edit"><asp:LinkButton ID="lbtnEdit"runat="server"CommandName="Edit">编辑</asp:LinkButton><asp:LinkButton ID="LinkButton3"runat="server"CommandName="Delete">删除</asp:LinkButton></div></div></AlternatingItemTemplate></asp:ListView>增加分页功能如果你想为ListView增加分页功能的话,那么就需要使用DataPager控件了。
这个分页控件是一个独立的控件,你可以把它放到页面的任何位置,然后使其联到你的ListView控件就可以完成分页的工作了。
该分页控件所呈现出来的HTML 标记为内联(Inline)元素,所以如果你想精确地设置其位置的话,可以参考下面的代码,为其包裹一个<div />标记。
给ListView控件添加以下属性,在翻页时给控件绑定新的页面索引:onpagepropertieschanging="lv_PagePropertiesChanging2"你可以像下面这样设置分页控件,并可以把其放到页面的任何位置。
<asp:DataPager ID="DataPager2"PagedControlID="lv2"runat="server"><Fields><asp:NextPreviousPagerField ShowFirstPageButton="True"ShowLastPageButton="True"ShowNextPageButton="True"ShowPreviousPageButton="True"/></Fields></asp:DataPager>通过上面的代码你会发现,我们可以通过设置DataPager控件的Fields,从而达到手动设置分页布局的目的。