java实验报告实验六Java图形用户界面
- 格式:doc
- 大小:550.00 KB
- 文档页数:26
西安邮电大学(计算机学院)课内实验报告实验名称:图形用户界面专业名称:计算机科学与技术班级:计科1405班学生姓名:高宏伟学号:04141152指导教师:刘霞林实验日期:2016.11.24一、实验目的了解图形用户界面基本组件窗口、按钮、文本框、选择框、滚动条等的使用方法,了解如何使用布局管理器对组件进行管理,以及如何使用Java 的事件处理机制。
二、实验要求1. 掌握使用布局管理器对组件进行管理的方法。
2. 理解Java 的事件处理机制,掌握为不同组件编写事件处理程序的方法。
3. 掌握编写独立运行的窗口界面的方法。
4. 掌握组件的使用方法。
5. 了解对话框的使用方法。
三、实验内容(一)算术测试。
✧实验要求:编写一个算术测试小软件,用来训练小学生的算术能力。
程序由3个类组成,其中Teacher类对象负责给出算术题目,并判断回答者的答案是否正确;ComputerFrame类对象负责为算术题目提供视图,比如用户可以通过ComputerFrame类对象提供的GUI界面看到题目,并通过该GUI界面给出题目的答案;MainClass是软件的主类。
✧程序模板:Teacher.javapublic class Teacher{ int numberOne,numberTwo;String operator="";boolean right;public int giveNumberOne(int n){ numberOne=(int)(Math.random()*n)+1;return numberOne;}public int giveNumberT wo(int n){ numberTwo=(int)(Math.random()*n)+1;return numberTwo;}public String giveOperator(){ double d=Math.random();if(d>=0.5)operator="+";elseoperator="-";return operator;}public boolean getRight(int answer){ if(operator.equals("+")){ if(answer==numberOne+numberTwo)right=true;elseright=false;}else if(operator.equals("-")){ if(answer==numberOne-numberTwo)right=true;elseright=false;}return right;}}ComputerFrame.javaimport java.awt.*;import java.awt.event.*;public class ComputerFrame extends Frame implements ActionListener { TextField textOne,textTwo,textResult;Button getProblem,giveAnwser;Label operatorLabel,message;Teacher teacher;ComputerFrame(String s){ super(s);teacher=new Teacher();setLayout(new FlowLayout());textOne=【代码1】 //创建textOne,其可见字符长是10textTwo=【代码2】 //创建textTwo,其可见字符长是10textResult=【代码3】 //创建textResult,其可见字符长是10operatorLabel=new Label("+");message=new Label("你还没有回答呢");getProblem=new Button("获取题目");giveAnwser=new Button("确认答案");add(getProblem);add(textOne);add(operatorLabel);add(textTwo);add(new Label("="));add(textResult);add(giveAnwser);add(message);textResult.requestFocus();textOne.setEditable(false);textTwo.setEditable(false);【代码4】//将当前窗口注册为getProblem的ActionEvent事件监视器【代码5】//将当前窗口注册为giveAnwser的ActionEvent事件监视器【代码6】//将当前窗口注册为textResult的ActionEvent事件监视器 setBounds(100,100,450,100);setVisible(true);validate();addWindowListener(new WindowAdapter(){ public void windowClosing(WindowEvent e) { System.exit(0);}});}public void actionPerformed(ActionEvent e){ if(【代码7】) //判断事件源是否是getProblem{ int number1=teacher.giveNumberOne(100);int number2=teacher.giveNumberTwo(100);String operator=teacher.givetOperator();textOne.setText(""+number1);textTwo.setText(""+number2);operatorLabel.setText(operator);message.setText("请回答");textResult.setText(null);}if(【代码8】) //判断事件源是否是giveAnwser{ String answer=textResult.getText();try{int result=Integer.parseInt(answer);if(teacher.getRight(result)==true){ message.setText("你回答正确");}else{ message.setText("你回答错误");}}catch(NumberFormatException ex){ message.setText("请输入数字字符");}}textResult.requestFocus();validate();}}MainClass.javapublic class MainClass{ public static void main(String args[]){ ComputerFrame frame;frame=【代码9】//创建窗口,其标题为:算术测试}}✧实验后的练习:1. 给上述程序增加测试乘、除的功能。
java图形用户界面实验报告Java图形用户界面实验报告一、引言图形用户界面(Graphical User Interface,简称GUI)是现代软件开发中不可或缺的一部分。
通过GUI,用户能够直观地与程序进行交互,提高了软件的易用性和用户体验。
本实验旨在通过使用Java编程语言,实现一个简单的GUI应用程序,并介绍相关的技术和方法。
二、实验目标本实验的目标是设计并实现一个简单的GUI应用程序,要求具备以下功能:1. 显示一个窗口,并在窗口中心显示一个标签;2. 在窗口中添加一个按钮,并实现按钮的点击事件;3. 当按钮被点击时,标签的文本发生变化。
三、实验过程1. 环境准备在开始实验之前,需要确保已经安装了Java开发环境(JDK)和集成开发环境(IDE),例如Eclipse或IntelliJ IDEA。
2. 创建GUI应用程序首先,创建一个Java项目,并创建一个名为"GUIApplication"的类。
在该类中,引入Java的GUI库,并继承JFrame类,实现一个窗口。
3. 设计窗口布局在窗口的构造方法中,设置窗口的标题、大小和关闭方式。
然后,创建一个JPanel对象,并将其添加到窗口中。
在JPanel中,使用布局管理器(例如FlowLayout或GridBagLayout)来安排组件的位置和大小。
4. 添加标签和按钮在JPanel中,创建一个JLabel对象,并设置其文本和位置。
然后,创建一个JButton对象,并设置其文本和点击事件。
在点击事件中,通过修改JLabel的文本来实现标签内容的变化。
5. 运行程序完成以上步骤后,编译并运行程序。
将会显示一个窗口,其中包含一个标签和一个按钮。
当按钮被点击时,标签的文本会发生变化。
四、实验结果经过以上步骤,成功实现了一个简单的GUI应用程序。
运行程序后,窗口显示如下图所示:(插入程序运行截图)在窗口中心显示了一个标签,标签的文本为"Hello, GUI!"。
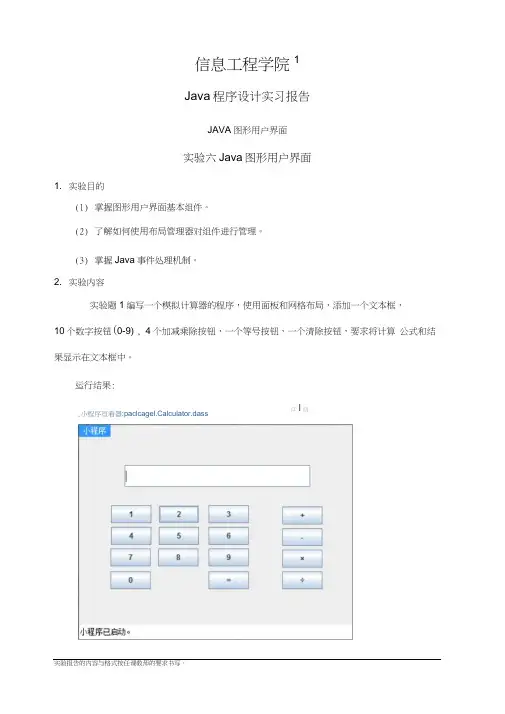
信息工程学院1Java 程序设计实习报告JAVA 图形用户界面实验六Java 图形用户界面1. 实验目的(1) 掌握图形用户界面基本组件。
(2) 了解如何使用布局管理器对组件进行管理。
(3) 掌握Java 事件处理机制。
2. 实验内容实验题1编写一个模拟计算器的程序,使用面板和网格布局,添加一个文本框,10个数字按钮(0-9) , 4个加减乘除按钮,一个等号按钮,一个清除按钮,要求将计算 公式和结果显示在文本框中。
运行结果:实验报告的内容与格式按任课教师的要求书写。
,小程序亘看器:paclcagel.Calculator.dass口 I 回加法:主要代码:private void in itComp onen ts() {jButt on1 = :new javax.swing.JButton();jButt on2 = :new javax.swing.JButton();jButt on3 = :new javax.swing.JButton();jButt on4 = :new javax.swing.JButton();jButt on5 = :new javax.swing.JButton();jButt on6 = :new javax.swing.JButton();jButt on7 = :new javax.swing.JButton();jButt on8 = :new javax.swing.JButton();jButt on9 = :new javax.swing.JButton();jButto n10 =new javax.swing.JButton();jButto n11 =new javax.swing.JButton();jButto n12 =new javax.swing.JButton();jButto n13 =new javax.swing.JButton();jButto n14 =new javax.swing.JButton();jButto n15 =new javax.swing.JButton();jTextField1 =new javax.swing.JTextField();setStub( null ); jButton1 .setText( "3" );jButton1 .addActionListener( new java.awt.event.ActionListener() {public void actionPerformed(java.awt.event.ActionEvent evt) {jButton1ActionPerformed(evt); }});jButton2 .setText( "1" );jButton2 .addActionListener( new java.awt.event.ActionListener() {public void actionPerformed(java.awt.event.ActionEvent evt) {jButton2ActionPerformed(evt); }});jButton3 .setText( "5" );jButton3 .addActionListener( new java.awt.event.ActionListener() {public voidactionPerformed(java.awt.event.ActionEvent evt) { jButton3ActionPerformed(evt);}});jButton4 .setText( "2" );jButton4 .addActionListener( new java.awt.event.ActionListener() {public void actionPerformed(java.awt.event.ActionEvent evt) {jButton4ActionPerformed(evt); }});jButton5 .setText( "6" );jButton5 .addActionListener(newjava.awt.event.ActionListener() {public void actionPerformed(java.awt.event.ActionEvent evt) {jButton5ActionPerformed(evt); }});jButton6 .setText( "8" );jButton6 .addActionListener( newjava.awt.event.ActionListener() {public voidactionPerformed(java.awt.event.ActionEvent evt) {jButton6ActionPerformed(evt); }});jButton7 .setText( "4" );jButton7 .addActionListener( newjava.awt.event.ActionListener() {public void actionPerformed(java.awt.event.ActionEvent evt) {jButton7ActionPerformed(evt); }});jButton8 .setText( "7" );jButton8 .addActionListener( newjava.awt.event.ActionListener() {public void actionPerformed(java.awt.event.ActionEvent evt) {jButton8ActionPerformed(evt); }});jButton9 .setText( "0" );jButton9 .addActionListener( newjava.awt.event.ActionListener() {public voidactionPerformed(java.awt.event.ActionEvent evt) {jButton9ActionPerformed(evt); }});jButton10 .setText( "9" );jButton10 .addActionListener( new java.awt.event.ActionListener() {public void actionPerformed(java.awt.event.ActionEvent evt) { jButton10ActionPerformed(evt);}});jButton11 .setText( "\u00f7" );jButton11 .addActionListener( new java.awt.event.ActionListener() {public void actionPerformed(java.awt.event.ActionEvent evt) {jButton11ActionPerformed(evt); }});jButton12 .setText( "\u00d7" );jButton12 .addActionListener( new java.awt.event.ActionListener() {public void actionPerformed(java.awt.event.ActionEvent evt) {jButton12ActionPerformed(evt); }});jButton13 .setText( "-" );jButton13 .addActionListener( new java.awt.event.ActionListener() {public void actionPerformed(java.awt.event.ActionEvent evt) {jButton13ActionPerformed(evt);});jButton14 .setText( "+" );jButton14 .addActionListener( newjava.awt.event.ActionListener() {public voidactionPerformed(java.awt.event.ActionEvent evt) {jButton14ActionPerformed(evt);}});jButton15 .setText( "=" );jButton15 .addActionListener( newjava.awt.event.ActionListener() {public voidactionPerformed(java.awt.event.ActionEvent evt) {jButton15ActionPerformed(evt);}});实验题2 编写一个程序,有一个窗口,该窗口为BorderLayout 布局。
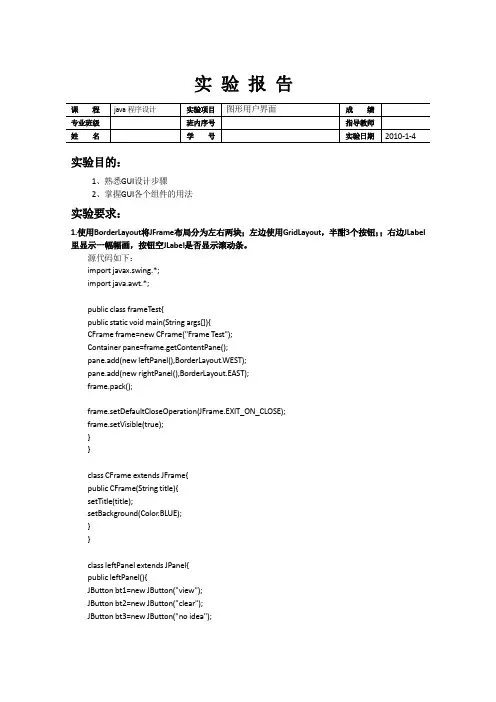
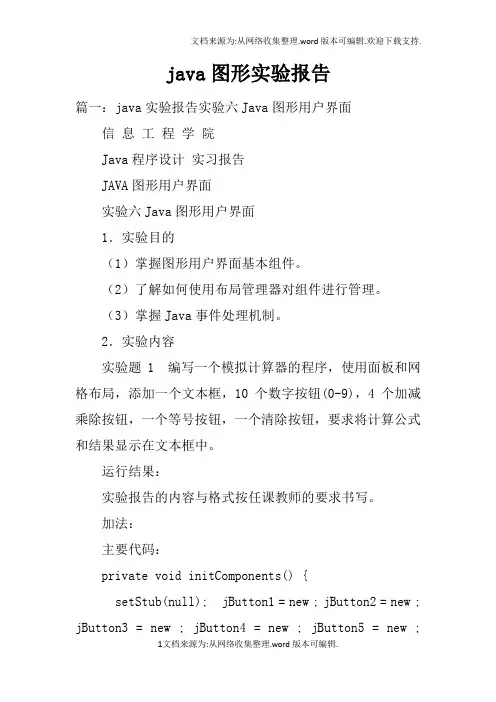
java图形实验报告篇一:java实验报告实验六Java图形用户界面信息工程学院Java程序设计实习报告JAVA图形用户界面实验六Java图形用户界面1.实验目的(1)掌握图形用户界面基本组件。
(2)了解如何使用布局管理器对组件进行管理。
(3)掌握Java事件处理机制。
2.实验内容实验题1 编写一个模拟计算器的程序,使用面板和网格布局,添加一个文本框,10个数字按钮(0-9),4个加减乘除按钮,一个等号按钮,一个清除按钮,要求将计算公式和结果显示在文本框中。
运行结果:实验报告的内容与格式按任课教师的要求书写。
加法:主要代码:private void initComponents() {setStub(null); jButton1 = new ; jButton2 = new ; jButton3 = new ; jButton4 = new ; jButton5 = new ;jButton6 = new ; jButton7 = new ; jButton8 = new ; jButton9 = new ; jButton10 = new ; jButton11 = new ; jButton12 = new ; jButton13 = new ; jButton14 = new ; jButton15 = new ; jTextField1 = new ;jButton1.setText("3"); jButton1.addActionListener(new {public voidactionPerformed( evt) {jButton2.setText("1"); jButton2.addActionListener(new}); } jButton1ActionPerformed(evt); {public voidactionPerformed( evt) {jButton3.setText("5"); jButton3.addActionListener(new}); } jButton2ActionPerformed(evt); {public voidactionPerformed( evt) {jButton4.setText("2"); jButton4.addActionListener(new}); } jButton3ActionPerformed(evt); {public voidactionPerformed( evt) {jButton5.setText("6");}); } jButton4ActionPerformed(evt);jButton5.addActionListener(new {public voidactionPerformed( evt) {jButton6.setText("8"); jButton6.addActionListener(new}); } jButton5ActionPerformed(evt); {public voidactionPerformed( evt) {jButton7.setText("4"); jButton7.addActionListener(new}); } jButton6ActionPerformed(evt); {public voidactionPerformed( evt) {jButton8.setText("7"); jButton8.addActionListener(new}); } jButton7ActionPerformed(evt); {public voidactionPerformed( evt) {jButton9.setText("0");jButton9.addActionListener(new}); } jButton8ActionPerformed(evt); {public voidactionPerformed( evt) {jButton10.setText("9"); jButton10.addActionListener(new}); } jButton9ActionPerformed(evt); {public voidactionPerformed( evt) {jButton11.setText("\u00f7"); jButton11.addActionListener(new}); } jButton10ActionPerformed(evt); {public voidactionPerformed( evt) {jButton12.setText("\u00d7"); jButton12.addActionListener(new}); } jButton11ActionPerformed(evt); {public voidactionPerformed( evt) {jButton13.setText("-"); jButton13.addActionListener(new}); } jButton12ActionPerformed(evt); {public voidactionPerformed( evt) {篇二:JAVA实验报告附件2:实验报告封皮20 —学年第学期课程实验报告学院:计算机科学技术专业:软件工程班级:姓名:学号:任课教师:王薇实验日期:XX年 11 月 02 日-1--2-实验日期:XX年 11 月 06 日-3--4-篇三:java图形用户界面实验报告南京工程学院实验报告课程名称 JAVA基础实验项目名称图形用户界面设计实验学生班级实验学生姓名学号同组学生姓名无实验时间 XX年11月实验地点实验成绩评定指导教师签字年月日一、实验目的和要求1.目的:掌握java AWT及Swing组件的使用方法,包括窗口、框架、对话框、布局方式、面板、文本编辑器、按钮、组合框等,合理利用委托事件处理模型,掌握不同组件,不同事件的事件处理方法,设计出能够响应事件的java图形用户界面。
JA V A实验报告实验目的:学习组件布局和组件事件的处理。
实验要求:编写程序,实现成绩的查询和排序。
具体要求为:①选择合适的布局管理设计美观的界面,包含成绩输入、成绩查询、成绩排序功能。
②成绩输入:从界面上输入学生的学号和成绩,点击“确认”按钮进行保存。
③成绩查询:输入学生的学号,点击“查询”按钮,显示该学生成绩。
④成绩排序:点击“排序”按钮,将按成绩从高到低显示学生的学号和成绩。
实验步骤:①定义一个类表示学生,包含学号和成绩两个域;②用java提供的V ector或Arrays类(也可使用自定义类)存储输入的学生信息,使用java 提供的方法或使用自定义方法实现学生信息的查询和排序;③界面设计,可考虑以下的界面设计策略:ⅰ在界面上放置成绩查询、成绩输入、成绩排序三个按钮和一个文本区:按下成绩输入按钮则弹出一个窗口,该窗口上有学号输入和成绩输入文本框,输入完毕关闭窗口后输入的学生信息出现在文本区中;按下成绩查询按钮弹出一个与成绩输入类似的窗口,在学号文本框中输入学号后,在成绩文本框中立即显示成绩;按下排序按钮,在文本区中显示排序后的结果。
ii 可在界面上用三个Panel分别实现查询、输入、排序功能,分别在各Panel上放置按钮、文本框、文本区等控件。
此步中,要求学生会使用各种布局管理器设计美观的界面。
④为程序添加事件处理机制。
ⅰ为查询、输入、排序按钮添加事件处理;ⅱ为学号、成绩输入文本框添加事件处理;ⅲ为窗口的关闭添加事件处理。
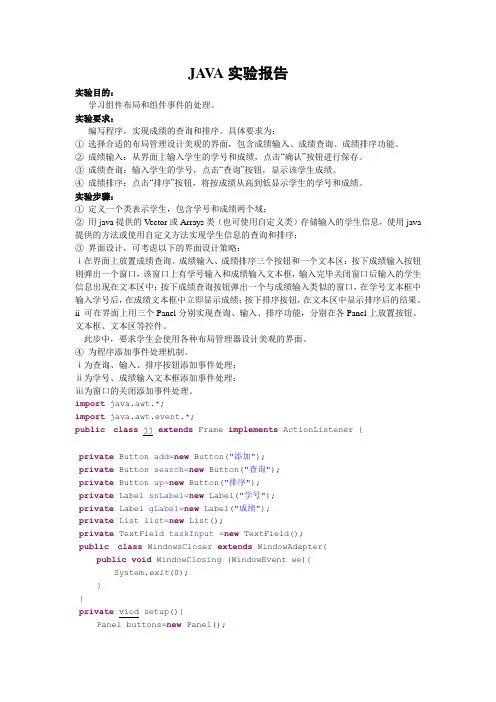
import java.awt.*;import java.awt.event.*;public class jj extends Frame implements ActionListener {private Button add=new Button("添加");private Button search=new Button("查询");private Button up=new Button("排序");private Label snLabel=new Label("学号");private Label gLabel=new Label("成绩");private List list=new List();private TextField taskInput =new TextField();public class WindowsCloser extends WindowAdapter{public void WindowClosing (WindowEvent we){System.exit(0);}}private viod setup(){Panel buttons=new Panel();buttons.setLayout(new FlowLayout());buttons.add(add);buttons.add(search);buttons.add(up);Panel input =new Panel();input.setLayout(new BorderLayout());input.add("West",snLabel);input.add("Center",taskInput);input.add("west",snLabel);input.add("Center",taskInput);Panel top=new Panel();top.setLayout(new GridLayout(2,1));}public TaskList(){}public void actionperformed(ActionEvent ae) {}public static void main (String args[]){List t1 =new List();}}。
实验一、安装JDK并熟悉java的运行环境实验二、基本语法练习实验三、面向对象编程实验(4)实验四、异常处理实验实验五、小应用程序实验实验六、图形图像实验实验七、GUI(图形用户接口)实验(4)实验八、多线程实验实验九、输入输出流实验(4)实验十、数据库应用实验(4)实验一、安装JDK并熟悉java的运行环境一、实验目的熟悉JA V A的运行环境及学习简单的编程。
二、预习内容安装工具软件的基本方法。
三、实验设备与环境装有JA V A语言工具软件(Eclipse )的微机若干四、实验内容安装Eclipse及JA V A的核心编译程序J2SDK。
1、打开Eclipse的安装盘安装Eclipse。
2、在相同目录下安装J2SDK。
3、打开Eclipse软件对J2SDK文件进行配置。
4、编写一应用程序,在屏幕上显示“HELLO WORLD”和爱心标志。
Pulic class Hello{public static void main(String args[]){//在屏幕上显示“HELLO WORLD”和爱心标志}}5、编写一小程序实现上述功能:在屏幕上显示“HELLO WORLD”和爱心标志。
实验结果五、注意事项⒈认真填写实验报告⒉遵守实验室各项制度,服从实验指导教师的安排⒊按规定的时间完成实验六、说明本次实验建议学时数2学时七、实验总结与体会实验二、基本语法练习一、实验目的⒈熟悉Java的基本语法⒉编写应用程序接收命令行参数⒊编写应用程序接收用户从键盘的输入⒋掌握字符串与数组的基本方法二、预习内容java编程的基本结构三、实验设备与环境装有JA V A语言工具软件(Eclipse )的微机若干四、实验内容⒈编写一个应用程序求若干个数的平均数,原始数字要求从命令行输入。
应用程序中main方法的参数String类型的数组args能接受用户从命令行键入的参数。
(1)编辑A verage.java。
class A verage{public static void main(String args[ ]){double n,sun=0;for (int l=0;l<args.legth;l++){sum=sum+Double.valueOf(arg[l].doubleV alue();)}n=sum/args.length;System.out.println(“average=”+n);}}命令行参数:12.34 34.45 21212121注意:1)参数的个数可以利用args.length来取得。
实验3 图形用户界面编程(设计性实验)一、实验目的1、熟悉Swing的基本组件,包括文本输入框、多行文本输入框、按钮、列表框等;2、熟悉常用的布局管理器3、了解GUI图像用户界面的设计方法4、掌握Java组件的事件处理机制5、熟悉基于内部类和匿名类的事件处理方式二、实验要求1、学生应做到独立上机操作2、编程前应将程序的设计构想完成,主要包括所要创建的类的结构及属性和行为。
3、上机输入和调试自己所编的程序,并存在自己的软盘上。
4、检查实验结果是否正确。
5、上机结束后,写出实验报告,要求附运行界面、源代码。
实验报告中应对实验结果进行分析,尤其是针对错误输出的分析。
三、实验内容1. 选做:编写程序,显示一个窗口,窗口中包含一个按钮。
当单击按钮时将弹出另一个窗口。
2. 编写一个简单的计算器程序,实现两个数相加。
在文本框输入两个实数,点击“相加”按钮实现两个实数相加,并在标签中显示相加结果。
点击“清除”完成对文本框和运行结果的清除。
四、实验代码及结果1、import javax.swing.*;import java.awt.event.*;import java.awt.*;public class TestFrame{public static void main(String args[]){JFrame f=new JFrame("Test");f.setSize(400,200);f.setLayout(new FlowLayout(FlowLayout.CENTER));f.setDefaultCloseOperation(JFrame.EXIT_ON_CLOSE);JButton b=new JButton("确定");b.addActionListener(new ButtonHandler());f.add(b);f.setVisible(true);}}class ButtonHandler implements ActionListener{public void actionPerformed(ActionEvent e){JFrame fr=new JFrame("Hello");fr.setSize(200,100);fr.setVisible(true);}}import javax.swing.*;import java.awt.event.*;import java.awt.*;public class TestCalculator implements ActionListener{JFrame f;JTextField t1;JTextField t2;JTextField t3;JButton b1;JButton b2;public TestCalculator(){f=new JFrame("Calculate");f.setSize(400,200);f.setLayout(new GridLayout(2,3));f.setDefaultCloseOperation(JFrame.EXIT_ON_CLOSE);t1=new JTextField();t2=new JTextField();t3=new JTextField();b1=new JButton("add");b2=new JButton("clear");b1.addActionListener(this);b2.addActionListener(this);f.add(t1);f.add(t2);f.add(t3);f.add(b1);f.add(b2);f.setVisible(true);}public void actionPerformed(ActionEvent e){if(e.getSource()==b1){String s1=t1.getText();String s2=t2.getText();int a=Integer.valueOf(s1).intValue();int b=Integer.valueOf(s2).intValue();int c=a+b;t3.setText(Integer.toString(c));}else{t1.setText(" ");t2.setText(" ");t3.setText(" ");}}public static void main(String args[]){ TestCalculator test=new TestCalculator(); }}。
java实验报告:实验六一、实验目的本次实验的主要目的是深入理解和掌握 Java 中的一些关键概念和技术,包括面向对象编程的特性、异常处理机制以及文件操作等。
通过实际的编程实践,提高我们运用 Java 解决实际问题的能力。
二、实验环境本次实验使用的开发工具是 IntelliJ IDEA,操作系统为 Windows 10。
三、实验内容(一)面向对象编程实践1、定义一个名为“Student”的类,包含学生的姓名、学号和成绩等属性,并实现相应的 getter 和 setter 方法。
2、在主函数中创建“Student”类的对象,并对其属性进行赋值和输出。
(二)异常处理1、编写一个方法,实现两数相除的运算。
如果除数为 0,抛出“ArithmeticException”异常。
2、在主函数中调用该方法,并使用trycatch 语句捕获并处理异常。
(三)文件操作1、创建一个文本文件,并向其中写入一些数据。
2、读取该文件中的数据,并将其输出到控制台。
四、实验步骤(一)面向对象编程实践1、首先,在 IntelliJ IDEA 中创建一个新的 Java 项目。
2、然后,创建“Student”类,代码如下:```javapublic class Student {private String name;private int studentId;private double score;public String getName(){return name;}public void setName(String name) {thisname = name;}public int getStudentId(){return studentId;}public void setStudentId(int studentId) {thisstudentId = studentId;}public double getScore(){return score;}public void setScore(double score) {thisscore = score;}}```3、在主函数中创建“Student”类的对象,并对其属性进行赋值和输出,代码如下:```javapublic class Main {public static void main(String args) {Student student = new Student();studentsetName("张三");studentsetStudentId(1001);studentsetScore(905);Systemoutprintln("学生姓名:"+ studentgetName());Systemoutprintln("学生学号:"+ studentgetStudentId());Systemoutprintln("学生成绩:"+ studentgetScore());}}```(二)异常处理1、编写一个名为“divide”的方法,实现两数相除的运算,代码如下:```javapublic class ExceptionHandling {public static double divide(double num1, double num2) {if (num2 == 0) {throw new ArithmeticException("除数不能为 0");}return num1 / num2;}public static void main(String args) {try {double result = divide(10, 0);Systemoutprintln("结果:"+ result);} catch (ArithmeticException e) {Systemoutprintln("捕获到异常:"+ egetMessage());}}}```(三)文件操作1、创建一个名为“FileOperation”的类,用于实现文件的写入和读取操作,代码如下:```javaimport javaioBufferedWriter;import javaioFileWriter;import javaioIOException;import javaioBufferedReader;import javaioFileReader;public class FileOperation {public static void writeToFile(String filePath, String content) {try (BufferedWriter writer = new BufferedWriter(new FileWriter(filePath))){writerwrite(content);} catch (IOException e) {eprintStackTrace();}}public static String readFromFile(String filePath) {StringBuilder content = new StringBuilder();try (BufferedReader reader = new BufferedReader(new FileReader(filePath))){String line;while ((line = readerreadLine())!= null) {contentappend(line)append("\n");}} catch (IOException e) {eprintStackTrace();}return contenttoString();}public static void main(String args) {String filePath ="testtxt";String data ="这是写入文件的内容";writeToFile(filePath, data);String readData = readFromFile(filePath);Systemoutprintln("读取到的文件内容:\n" + readData);}}```五、实验结果(一)面向对象编程实践成功创建了“Student”类的对象,并正确地对其属性进行了赋值和输出。
画板程序一、软件系统分析和设计方案1、功能需求分析设计类似于Windows画板的程序,程序可以通过功能菜单(或工具条)进行功能选择操作,在画板中可以用鼠标操作绘制不同颜色的点,直线,多边形和椭圆,可以保存和打开自定义的图形文件。
2、结构设计过程经过对需求的分析,我们设计的画图板界面主要包括菜单栏、工具栏、画板三个部分。
菜单栏包含文件、编辑、帮助等常见功能菜单,实现打开保存文件等功能;工具栏主要包括画笔、矩形、椭圆、直线、刷子、橡皮、文字、颜色等工具,可完成一些基本操作;画板能够编辑处理图片及文字。
而代码实现上采用面向对象的思想,将上述组件封装与一个画板类中布局并实现功能;通过一个窗框类实现画板对象;最后在主类中建立窗框对象。
思路如下图:二、软件实现和代码编写具体代码及详细注释如下:import java.awt.*;import java.awt.event.*;import java.awt.geom.*;import javax.swing.*;import javax.swing.UIManager.*;import java.io.*;import java.util.Vector;//主类建立窗框public class DrawPad {public static void main(String[] args) {try {// 优化UI效果for (LookAndFeelInfo info : UIManager.getInstalledLookAndFeels()) { if ("Nimbus".equals(info.getName())) {UIManager.setLookAndFeel(info.getClassName());break;}}} catch (Exception e) {System.out.println(e);}new DrawFrame();}}// 添加窗口和画板组件class DrawFrame extends JFrame {public DrawFrame() {DrawPanel panel = new DrawPanel();add(panel);setTitle("简单JAVA画板");setBounds(100, 100, 800, 600);setVisible(true);setDefaultCloseOperation(JFrame.EXIT_ON_CLOSE);}}// 定义绘画点的基本属性class position implements Serializable {int x;int y;int type;String s;Color color;}// 定义画板组件class DrawPanel extends JPanel implements ActionListener, MouseListener, MouseMotionListener {JMenuBar mb;// 菜单栏JMenu menu1, menu2, menu3;JMenuItem i1, i2, i3, i4;JPanel jp1; // 工具栏public JButton anj0, anj1, anj2, anj3, anj4, anj5, anj6, anj7, anj8, anj9,anj10;JLabel l1, lcolor;Vector<position> thedraw = new Vector<position>(); // 保存画图轨迹的数组int style = 0; // 保存画图类型,默认为画笔int x1 = 0;// 保存点的坐标int x2 = 0;int y1 = 0;int y2 = 0;String input = "";// 默认输入文字内容Color linecolor = Color.BLACK; // 默认线的颜色public DrawPanel() {setBackground(Color.WHITE);setLayout(new BorderLayout());setCursor(Cursor.getPredefinedCursor(Cursor.CROSSHAIR_CURSOR));// 上部菜单栏mb = new JMenuBar();mb.setCursor(Cursor.getPredefinedCursor(Cursor.DEFAULT_CURSOR));add(mb, BorderLayout.NORTH);// 加入菜单栏的组件menu1 = new JMenu(" 文件");menu2 = new JMenu(" 编辑");menu3 = new JMenu(" 帮助");i1 = new JMenuItem("打开", new ImageIcon("img/open.png"));i2 = new JMenuItem("保存", new ImageIcon("img/save.png"));i3 = new JMenuItem("清空", new ImageIcon("img/clear.png"));i4 = new JMenuItem("关于简单JAVA画板", new ImageIcon( "img/about.png"));menu1.add(i1);menu1.addSeparator();menu1.add(i2);menu2.add(i3);menu3.add(i4);mb.add(menu1);mb.add(menu2);mb.add(menu3);add(mb, BorderLayout.NORTH);// 侧边工具栏jp1 = new JPanel();jp1.setBackground(Color.LIGHT_GRAY);jp1.setLayout(new BoxLayout(jp1, BoxLayout.Y_AXIS));jp1.setCursor(Cursor.getPredefinedCursor(Cursor.DEFAULT_CURSOR));add(jp1, BorderLayout.WEST);// 加入工具栏的组件anj0 = new JButton("画笔", new ImageIcon("img/pen.png"));anj1 = new JButton("刷子", new ImageIcon("img/brush.png"));anj2 = new JButton("橡皮", new ImageIcon("img/erease.png"));anj3 = new JButton("文字", new ImageIcon("img/word.png"));anj4 = new JButton("直线", new ImageIcon("img/sline.png"));anj5 = new JButton("矩形", new ImageIcon("img/rec.png"));anj6 = new JButton("圆矩", new ImageIcon("img/frec.png"));anj7 = new JButton("椭圆", new ImageIcon("img/eli.png"));anj10 = new JButton("");lcolor = new JLabel("■");// 会变色的方块l1 = new JLabel(" 颜色");anj10.add(lcolor);anj10.add(l1);jp1.add(anj0);jp1.add(anj1);jp1.add(anj2);jp1.add(anj3);jp1.add(anj4);jp1.add(anj5);jp1.add(anj6);jp1.add(anj7);jp1.add(anj10);// 事件处理i1.addActionListener(this);i2.addActionListener(this);i3.addActionListener(this);i4.addActionListener(this);anj0.addActionListener(this);anj1.addActionListener(this);anj2.addActionListener(this);anj3.addActionListener(this);anj4.addActionListener(this);anj5.addActionListener(this);anj6.addActionListener(this);anj7.addActionListener(this);anj10.addActionListener(this);addMouseListener(this);addMouseMotionListener(this);}// 记录鼠标选择的功能public void actionPerformed(ActionEvent e) {if (e.getSource() == anj0)style = 0;else if (e.getSource() == anj1)style = 1;else if (e.getSource() == anj2)style = 2;else if (e.getSource() == anj3) {style = 3;input = JOptionPane.showInputDialog("输入文字后在画板上点击放置");} else if (e.getSource() == anj4)style = 4;else if (e.getSource() == anj5)style = 5;else if (e.getSource() == anj6)style = 6;else if (e.getSource() == anj7)style = 7;else if (e.getSource() == anj10) {linecolor = JColorChooser.showDialog(null, "请选择颜色", Color.BLACK);lcolor.setForeground(linecolor);} else if (e.getActionCommand().equals("关于简单JAVA画板")) {JOptionPane.showMessageDialog(null,"这是一个简单的JAVA画板。
Java图形用户界面设计实验总结1. 简介本文档是关于Java图形用户界面(GUI)设计实验的总结。
我们将对Java GUI 的基本概念和原理进行介绍,并提供一些实验总结和经验分享。
Java GUI是一种用于创建用户友好界面的技术,在开发各种应用程序时非常重要。
2. Java GUI的基本概念和原理2.1 Java GUI库Java提供了一些库来帮助开发人员创建GUI应用程序。
其中最常用的库是Java Swing和JavaFX。
Swing提供了一组类和方法,用于创建和管理各种GUI组件,例如按钮、文本框、标签等。
JavaFX是一个更现代化的GUI库,提供了更好的图形渲染和动画效果。
2.2 GUI组件Java GUI应用程序通常由一系列GUI组件组成。
最常见的GUI组件包括:•按钮(Button):用于触发各种操作;•标签(Label):用于展示文本信息;•文本框(TextField):用于输入文本;•列表框(ListBox):用于显示一个选项列表;•组合框(ComboBox):同时兼具列表框和文本框的功能;•复选框(CheckBox):用于选择一个或多个选项;•单选按钮(RadioButton):用于从一组选项中选择一个。
2.3 事件处理Java GUI应用程序通常需要对用户的操作做出响应。
为此,需要使用事件处理机制。
事件处理机制通常由两个主要部分组成:事件源和事件监听器。
事件源可以是任何GUI组件,例如按钮、文本框等。
事件监听器是一个类,用于响应和处理特定事件。
3. 实验总结和经验分享在完成Java GUI设计实验时,我得出了以下总结和经验分享:•熟悉GUI组件的使用:在开始实验之前,我花了一些时间学习和理解不同GUI组件的使用方法。
这让我能够更好地选择和使用适当的组件来实现我的GUI应用程序。
•构建用户友好的界面:一个好的GUI应用程序应该是用户友好的。
在实验中,我学会了如何通过合理的布局、适当的颜色和字体选择来创建一个用户友好的界面。
2012—2013学年第 1 学期合肥学院数理系实验报告课程名称:《面向对象程序设计》实验项目:图形用户界面实验类别:综合性□设计性√验证性□专业班级:10信息与计算科学班姓名:学号:实验地点:校内机房实验时间:2012.11.19 —2012.11.25指导教师:钱泽强成绩:一、实验目的掌握Java中图形界面设计的基本元素和方法,熟练使用常用组件设计图形界面,掌握布局管理器的使用,掌握事件的处理方法。
二、实验内容1、设计图形界面,掌握FlowLayout、BorderLayout、CardLayout、GridLayout布局管理器的使用,并掌握组件的精确定位方式;2、掌握事件处理的三种常见的实现方式:·通过主类创建监听器对象的实现方式;·通过自定义内部类创建监听器对象的实现方式;·在注册时通过匿名类直接创建监听器对象的实现方式。
3、设计图形用户界面的应用程序。
三、实验方案(程序设计说明)[题目1] 编写图形界面用户程序,采用事件处理的三种实现方法求一个数的平方。
1、在图形界面中提供“文本框、标签、按钮”,文本框用于输入数据,标签显示数据的平方,单击按钮可以实现求数据的平方;2、分别采用事件处理的三种方法实现。
[题目2] 编写图形界面用户程序,实现“幸运数”游戏。
要求如下:1、在图形界面用户程序中提供“按钮、标签”等组件;2、标签用于显示随机数,单击按钮可以改变随机数并实现对随机数的判断:若两数相等,则出现相等提示,否则出现不等提示。
四、实验程序和运行结果请附页记录正确的源程序五、实验总结六、教师评语及成绩1、求平方import javax.swing.*;import java.awt.*;import java.awt.event.*;//通过主类创建监听器对象class myFrame extends JFrame implements ActionListener{ JLabel l; JButton b; JTextField t;myFrame(JFrame f){ l=new JLabel("0"); b=new JButton("求平方"); t=new JTextField("0");f.setLayout(null);f.add(l); f.add(b); f.add(t);t.setBounds(1,1,60,20); b.setBounds(71,1,60,20); l.setBounds(141,1,60,20);b.addActionListener(this); }public void actionPerformed(ActionEvent e){ int x=Integer.parseInt(t.getText());int y=x*x; l.setText(Integer.toString(y)); }}//通过自定义内部类创建监听器对象class myFrame extends JFrame{ JLabel l; JButton b; JTextField t;myFrame(JFrame f){ l=new JLabel("0"); b=new JButton("求平方"); t=new JTextField("0");f.setLayout(null);f.add(l); f.add(b); f.add(t);t.setBounds(1,1,60,20); b.setBounds(71,1,60,20); l.setBounds(141,1,60,20); BHandler h=new BHandler();b.addActionListener(h); }private class BHandler implements ActionListener {public void actionPerformed(ActionEvent e){ int x=Integer.parseInt(t.getText());int y=x*x; l.setText(Integer.toString(y)); }}}//在注册时通过匿名类直接创建临听器对象class myFrame extends JFrame{ JLabel l; JButton b; JTextField t;myFrame(JFrame f){ l=new JLabel("0"); b=new JButton("求平方"); t=new JTextField("0");f.setLayout(null);f.add(l); f.add(b); f.add(t);t.setBounds(1,1,60,20); b.setBounds(71,1,60,20); l.setBounds(141,1,60,20);b.addActionListener(new ActionListener(){public void actionPerformed(ActionEvent e){ int x=Integer.parseInt(t.getText());int y=x*x; l.setText(Integer.toString(y)); }});}}public class test {public static void main(String[] args) {JFrame jf=new JFrame("平方数"); jf.setBounds(100,100,400,300); jf.setDefaultCloseOperation(JFrame.EXIT_ON_CLOSE);jf.setVisible(true);myFrame myf=new myFrame(jf); }}2、幸运数import javax.swing.*;import java.awt.*;import java.awt.event.*;import java.util.Random;class myJFrame extends JFrame implements ActionListener{ private JButton jb;private JLabel [] jl;public myJFrame(JFrame f){ f.setSize(300,300);f.setLayout(new FlowLayout());jl=new JLabel[3];for(int i=0; i<3; i++){ jl[i]=new JLabel("*");f.add(jl[i]); }jl[2].setText("试一试");jb=new JButton("开始");jb.addActionListener(this);f.add(jb);}public void actionPerformed(ActionEvent e){ Random x=new Random();Random y=new Random();jl[0].setText(Integer.toString(x.nextInt(10)));jl[1].setText(Integer.toString(x.nextInt(10)));if (jl[0].getText().equals(jl[1].getText()))jl[2].setText("恭喜您");elsejl[2].setText("再试试");}}public class test{public static void main(String[] args) {JFrame f=new JFrame("我的窗口");f.setBounds(100,100,400,300);f.setVisible(true);f.setDefaultCloseOperation(JFrame.EXIT_ON_CLOSE); myJFrame m=new myJFrame(f); }}。
java实验报告GUI与JDBCJava 实验报告:GUI 与 JDBC一、实验目的1、深入理解和掌握Java 图形用户界面(GUI)的设计和实现方法,能够使用常用的 GUI 组件创建具有交互功能的界面。
2、熟悉和掌握 Java 数据库连接(JDBC)技术,能够实现与数据库的连接、数据查询、插入、更新和删除等操作。
3、通过将 GUI 与 JDBC 结合,开发具有实际应用价值的数据库管理系统,提高综合运用 Java 知识解决实际问题的能力。
二、实验环境1、操作系统:Windows 102、开发工具:Eclipse IDE3、数据库:MySQL 80三、实验内容(一)GUI 设计1、创建一个简单的登录界面,包括用户名和密码输入框以及登录和取消按钮。
使用布局管理器对界面组件进行合理布局,使其美观、易用。
2、设计一个主界面,包含菜单、工具栏、列表框、文本框等组件。
实现菜单和工具栏的功能响应,如文件的打开、保存,数据的查询、添加、修改和删除等。
(二)JDBC 操作1、建立与 MySQL 数据库的连接,配置数据库驱动程序和连接参数。
2、实现对数据库中用户表的查询操作,将查询结果显示在列表框中。
3、完成用户信息的添加、修改和删除功能,并及时更新界面显示。
(三)GUI 与 JDBC 整合1、在登录界面中,验证用户输入的用户名和密码是否与数据库中的用户信息匹配。
若匹配成功,进入主界面;否则,提示登录失败。
2、在主界面中,通过菜单或工具栏触发相应的 JDBC 操作,实现对数据库的管理,并将操作结果实时反馈到界面上。
四、实验步骤(一)GUI 设计步骤1、创建一个新的 Java 项目,并在项目中创建一个新的 Java 类作为登录界面。
2、导入所需的 GUI 组件库,如`javaawt`和`javaxswing`。
3、使用`JFrame`类创建登录窗口,并设置窗口的标题、大小和位置等属性。
4、在窗口中添加用户名和密码输入框,使用`JTextField`类创建。
南京工程学院实验报告课程名称 JAVA基础实验项目名称图形用户界面设计实验学生班级实验学生姓名学号同组学生姓名实验时间实验地点实验成绩评定指导教师签字年月日一、实验目的和要求1.掌握Java Swing组建的使用方法,包括窗口、框架、对话框、面板、文本编辑框、按钮、组合框等多种布局方式,掌握窗口菜单和快捷菜单设计方式。
2.理解委托时间处理模型,掌握不同组件、不同事件的事件处理方法,设计出能够响应事件的Java图形用户界面。
3.熟悉在组件上绘图的方法。
二、实验题目用表格存储并显示个人所得税税率表,给定一个月收入值,计算应缴的个人所得税。
三、实验方法与步骤(需求分析、算法设计思路、流程图等)算法设计思路:本次实验题目为计算个人所得税,所以本人从网上找到了国家最新的税收政策,以下为截图:因此,我设计了以下核心算法public void actionPerformed(ActionEvent e){if(e.getSource()==button_b){doublewage=Double.parseDouble((String)text_wage.getText());double tax = 0;if(wage<=3500)tax=0;if(wage>3500&&wage<=5000)tax=(wage-3500)*0.03;if(wage>5000&&wage<=8000)tax=(wage-3500)*0.1-105;if(wage>8000&&wage<=12500)tax=(wage-3500)*0.2-555;if(wage>12500&&wage<=38500)tax=(wage-3500)*0.25-1005;if(wage>38500&&wage<=58500)tax=(wage-3500)*0.3-2755;if(wage>58500&&wage<=83500)tax=(wage-3500)*0.35-5505;if(wage>83500)tax=(wage-3500)*0.45-13505;text.setText(""+tax);}}以上算法是根据税率表设计的,具体为:我国规定个人收入在3500元起征个人所得税,分了多个阶段:3500以下:不收税3500以上到5000以下部分:3%5000以上到8000以下部分:10%8000以上到以下部分:20%125000以上到385000以下部分:25%385000以上到585000以下部分:30%585000以上到835000以下部分:35%83500以上:45%首先算出每个阶段的速扣数,然后用此公式:应纳个人所得税税额=(应纳税所得-扣除标准)*适用税率-速算扣除数。
java图形实验报告范文篇一:java实验报告实验六Java图形用户界面信息工程学院Java程序设计JAVA图形用户界面实验六Java图形用户界面1.实验目的(1)掌握图形用户界面基本组件。
(2)了解如何使用布局管理器对组件进行管理。
(3)掌握Java事件处理机制。
2.实验内容实验题1编写一个模拟计算器的程序,使用面板和网格布局,添加一个文本框,10个数字按钮(0-9),4个加减乘除按钮,一个等号按钮,一个清除按钮,要求将计算公式和结果显示在文本框中。
运行结果:的内容与格式按任课教师的要求书写。
加法:主要代码:etStub(null);jButton1=newjava某.wing.JButton();jButton2=newjava某.wing.JButton();jButton3=newjava某.wing.JButton();jButton4=newjava某.wing.JButton();jButton5=newjava某.wing.JButton();jButton6=newjava某.wing.JButton();jButton7=newjava某.wing.JButton();jButton8=newjava某.wing.JButton();jButton9=newjava某.wing.JButton();jButton10=newjava某.wing.JButton();jButton11=newjava某.wing.JButton();jButton12=newjava某.wing.JButton();jButton13=newjava某.wing.JButton();jButton14=newjava某.wing.JButton();jButton15=newjava某.wing.JButton();jTe某tField1=newjava某.wing.JTe某tField();jButton1.etTe某t("3");jButton1.addActionLitener(newjava.awt.event.ActionLitener (){publicvoidactionPerformed(java.awt.event.ActionEventevt){jButton2.etTe某t("1");jButton2.addActionLitener(new});}jButton1ActionPerformed( evt);java.awt.event.ActionLitener(){publicvoidactionPerformed(java.awt.event.ActionEventevt){jButton3.etTe某t("5");jButton3.addActionLitener(new});}jButton2ActionPerformed( evt);java.awt.event.ActionLitener(){publicvoidactionPerformed(java.awt.event.ActionEventevt){jButton4.etTe某t("2");jButton4.addActionLitener(new});}jButton3ActionPerformed( evt);java.awt.event.ActionLitener(){publicvoidactionPerformed(java.awt.event.ActionEventevt){jButton5.etTe某t("6");});}jButton4ActionPerformed(evt);jButton5.addActionLitener(newjava.awt.event.ActionLitener(){ publicvoidactionPerformed(java.awt.event.ActionEventevt){jButton6.etTe某t("8");jButton6.addActionLitener(new});}jButton5ActionPerformed( evt);java.awt.event.ActionLitener(){publicvoidactionPerformed(java.awt.event.ActionEventevt){jButton7.etTe某t("4");jButton7.addActionLitener(new});}jButton6ActionPerformed( evt);java.awt.event.ActionLitener(){publicvoidactionPerformed(java.awt.event.ActionEventevt){jButton8.etTe某t("7");jButton8.addActionLitener(new});}jButton7ActionPerformed( evt);java.awt.event.ActionLitener(){publicvoidactionPerformed(java.awt.event.ActionEventevt){jButton9.etTe某t("0");jButton9.addActionLitener(new});}jButton8ActionPerformed( evt);java.awt.event.ActionLitener(){publicvoidactionPerformed(java.awt.event.ActionEventevt){jButton10.etTe某t("9");jButton10.addActionLitener(new});}jButton9ActionPerformed (evt);java.awt.event.ActionLitener(){publicvoidactionPerformed(java.awt.event.ActionEventevt){jButton11.etTe某t("\u00f7");jButton11.addActionLitener(new});}jButton10ActionPer formed(evt);java.awt.event.ActionLitener(){publicvoidactionPerformed(java.awt.event.ActionEventevt){jButton12.etTe某t("\u00d7");jButton12.addActionLitener(new});}jButton11ActionPer formed(evt);java.awt.event.ActionLitener(){publicvoidactionPerformed(java.awt.event.ActionEventevt){jButton13.etTe某t("-");jButton13.addActionLitener(new});}jButton12ActionPerformed(ev t);java.awt.event.ActionLitener(){publicvoidactionPerformed(java.awt.event.ActionEventevt){篇二:JAVA实验报告附件2:实验报告封皮20—学年第学期课程实验报告学院:计算机科学技术专业:软件工程班级:姓名:学号:任课教师:王薇实验日期:2022年11月02日-1--2-实验日期:2022年11月06日-3--4-篇三:java图形用户界面实验报告南京工程学院实验报告课程名称JAVA基础实验项目名称图形用户界面设计实验学生班级实验学生姓名学号同组学生姓名无实验时间2022年11月实验地点实验成绩评定指导教师签字年月日一、实验目的和要求1.目的:掌握javaAWT及Swing组件的使用方法,包括窗口、框架、对话框、布局方式、面板、文本编辑器、按钮、组合框等,合理利用委托事件处理模型,掌握不同组件,不同事件的事件处理方法,设计出能够响应事件的java图形用户界面。
信息工程学院Java程序设计实习报告JAVA图形用户界面实验六Java图形用户界面1.实验目的(1)掌握图形用户界面基本组件。
(2)了解如何使用布局管理器对组件进行管理。
(3)掌握Java事件处理机制。
2.实验内容实验题 1 编写一个模拟计算器的程序,使用面板与网格布局,添加一个文本框,10个数字按钮(0-9),4个加减乘除按钮,一个等号按钮,一个清除按钮,要求将计算公式与结果显示在文本框中。
运行结果:实验报告的内容与格式按任课教师的要求书写。
加法:主要代码:private void initComponents() {jButton1 = new javax、swing、JButton();jButton2 = new javax、swing、JButton();jButton3 = new javax、swing、JButton();jButton4 = new javax、swing、JButton();jButton5 = new javax、swing、JButton();jButton6 = new javax、swing、JButton();jButton7 = new javax、swing、JButton();jButton8 = new javax、swing、JButton();jButton9 = new javax、swing、JButton();jButton10 = new javax、swing、JButton();jButton11 = new javax、swing、JButton();jButton12 = new javax、swing、JButton();jButton13 = new javax、swing、JButton();jButton14 = new javax、swing、JButton();jButton15 = new javax、swing、JButton();jTextField1 = new javax、swing、JTextField();setStub(null);jButton1、setText("3");jButton1、addActionListener(new java、awt、event、ActionListener() {public void actionPerformed(java、awt、event、ActionEvent evt) {jButton1ActionPerformed(evt);}});jButton2、setText("1");jButton2、addActionListener(new java、awt、event、ActionListener() {public void actionPerformed(java、awt、event、ActionEvent evt) {jButton2ActionPerformed(evt);}});jButton3、setText("5");jButton3、addActionListener(new java、awt、event、ActionListener() {public void actionPerformed(java、awt、event、ActionEvent evt) {jButton3ActionPerformed(evt);}});jButton4、setText("2");jButton4、addActionListener(new java、awt、event、ActionListener() {public void actionPerformed(java、awt、event、ActionEvent evt) {jButton4ActionPerformed(evt);}});jButton5、setText("6");jButton5、addActionListener(new java、awt、event、ActionListener() {public void actionPerformed(java、awt、event、ActionEvent evt) {jButton5ActionPerformed(evt);}});jButton6、setText("8");jButton6、addActionListener(new java、awt、event、ActionListener() {public void actionPerformed(java、awt、event、ActionEvent evt) {jButton6ActionPerformed(evt);}});jButton7、setText("4");jButton7、addActionListener(new java、awt、event、ActionListener() {public void actionPerformed(java、awt、event、ActionEvent evt) {jButton7ActionPerformed(evt);}});jButton8、setText("7");jButton8、addActionListener(new java、awt、event、ActionListener() {public void actionPerformed(java、awt、event、ActionEvent evt) {jButton8ActionPerformed(evt);}});jButton9、setText("0");jButton9、addActionListener(new java、awt、event、ActionListener() {public void actionPerformed(java、awt、event、ActionEvent evt) {jButton9ActionPerformed(evt);}});jButton10、setText("9");jButton10、addActionListener(new java、awt、event、ActionListener() {public void actionPerformed(java、awt、event、ActionEvent evt) {jButton10ActionPerformed(evt);}});jButton11、setText("\u00f7");jButton11、addActionListener(new java、awt、event、ActionListener() {public void actionPerformed(java、awt、event、ActionEvent evt) {jButton11ActionPerformed(evt);}});jButton12、setText("\u00d7");jButton12、addActionListener(new java、awt、event、ActionListener() {public void actionPerformed(java、awt、event、ActionEvent evt) {jButton12ActionPerformed(evt);}});jButton13、setText("-");jButton13、addActionListener(new java、awt、event、ActionListener() {public void actionPerformed(java、awt、event、ActionEvent evt) {jButton13ActionPerformed(evt);}});jButton14、setText("+");jButton14、addActionListener(new java、awt、event、ActionListener() {public void actionPerformed(java、awt、event、ActionEvent evt) {jButton14ActionPerformed(evt);}});jButton15、setText("=");jButton15、addActionListener(new java、awt、event、ActionListener() {public void actionPerformed(java、awt、event、ActionEvent evt) {jButton15ActionPerformed(evt);}});实验题2 编写一个程序,有一个窗口,该窗口为BorderLayout布局。
窗口的中心添加一个Panel容器:pCenter,pCenter的布局就是7行7列的GridLayout布局,pCenter 的中放置49个标签,用来显示日历。
窗口北面添加一个Panel容器pNorth,其布局就是FlowLayout布局,pNorth放置两个按钮:nextMonth与previousMonth按钮,单击nextMonth,可以显示当前月的下一个月的日历;单击previousMonth按钮,可以显示当前月的上一个月的日历。
窗口的南面添加一个Panel容器pSouth,其布局就是FlowLayout 布局,pSouth中放置一个标签用来显示一些信息。
运行结果如图所示。
图3、8 运行结果图[基本要求] 编写完整程序。
运行结果:主要代码:private JLabel[] buttonDay = new JLabel[42];private JButton[] buttonWeek = new JButton[7];private JLabel labelMonth = new JLabel();private JButton buttonLastMonth = new JButton();private JButton buttonNextMonth = new JButton();private JPanel pCenter=new JPanel();private JPanel pNorth=new JPanel();private JPanel pSouth=new JPanel();private JLabel time=new JLabel();public Calender() {super("Calender");setBounds(250, 200, 600, 500);setDefaultCloseOperation(JFrame、EXIT_ON_CLOSE);buttonLastMonth、setText("上月");buttonLastMonth、addActionListener(this);pNorth、add(buttonLastMonth);buttonNextMonth、setText("下月");buttonNextMonth、addActionListener(this);pNorth、add(buttonNextMonth);getContentPane()、add(pNorth,BorderLayout、NORTH);getContentPane()、add(pCenter,BorderLayout、CENTER);pCenter、setLayout(new GridLayout(7,7));for (int i = 0; i < 7; i++) {buttonWeek[i] = new JButton();buttonWeek[i]、setText(stringWeekCn[i]);pCenter、add(buttonWeek[i]);}for (int i = 0; i < 42; i++) {buttonDay[i] = new JLabel();buttonDay[i]、setText(" ");pCenter、add(buttonDay[i]);}实验题3 实现如图3、9所示的布局方式功能:前两个文本框输入整型数据。