海能达PD980对讲机产品介绍
- 格式:pptx
- 大小:3.13 MB
- 文档页数:3

PDT数字中转通信系统设计方案海能达通信股份有限公司1需求描述全新的Hytera PDT常规数字无线通讯系统可以彻底改变用户的通讯现状。
Hytera PDT常规数字无线通讯系统具有频谱效率高、语音清晰、电池使用时间长、通信保密性强、抗干扰能力强、通讯距离远以及系统构建成本较低等特点。
在相同频率资源下,利用TDMA技术实现了两倍的呼叫容量;可以向下兼容现有模拟通讯设备,方便用户从模拟向数字过渡,并具备单呼、组呼、全呼、紧急呼叫、遥毙/复活等多种功能,同时系统还支持短信、GPS等数据传输增值功能。
设备提供IP网络接口,可以通过因特网扩大覆盖范围,实现大范围的语音覆盖。
2方案介绍2.1设计原则依据要求,海能达公司设计针对性的数字对讲系统解决方案,该方案遵循以下设计原则:1、先进性原则:系统整体上从资源配置(包括硬件设备,技术手段)到功能用途等均要有一定的领先水准。
2、可靠性原则:系统的各项资源包括硬件设备等的可靠性要有一定的高标准,工作稳定,易于维护;在出现硬件故障时,要有可靠的备用手段。
3、技术成熟性原则:系统应尽量采用先进成熟的技术,使之建成后就能投入实际使用,达到设计的使用效果。
4、可扩展原则:系统总体架构合理,设计容量适度,并且要有可扩展性,在保护原来投资的前提下可增加资源扩容,包括通信覆盖及距离的增加。
2.2建设目标●系统规划要求1网络要求有效覆盖范围医院大楼。
2覆盖率:基本实现全楼无盲区3工作模式:能够在12.5KHz的信道上同时中继2路话路或数据。
●终端技术要求1终端设备能够兼容模拟信号,能够在数字和模拟两种模式下的扫描切换。
2终端设备要求防水、抗摔、一次充电能工作模拟在10小时以上,数字在14小时以上。
●系统结构要求1每个通信基站包含:中继台、天馈、电源、备用电源、避雷、机箱、安装配件等设备。
2通信基站采用模块化结构,并符合我国国家信息产业部颁布的相关技术标准。
2.3建设方案(参考)(1)系统共使用400-470MHz频谱内的4对12.5KHz带宽的频点,收发频率间隔10MHz,频点的选择应满足避免产生三阶互调的要求。

麒麟区林业局森林防火通信指挥系统建设技术方案曲靖盛宇电子商贸有限公司二零一六年十二月目录1系统建设概述 (6)1.1 概述 (6)1.2 整体思路 (7)1.3 指导思想 (9)1.4 设计原则 (9)1.5 设计依据 (10)1.6 建设目标 (10)2系统建设方案 (12)2.1 系统总体设计 (13)2.2 建设内容 (13)2.3 基站无线覆盖 (18)2.4 频率设计要求 (19)3系统功能与特点介绍 (20)3.1 系统功能介绍 (20)3.2 系统特点及MTBF指标 (22)3.3 基本业务功能 (24)3.4 补充业务功能 (26)4系统性能参数 (29)4.1 系统技术指标 (29)5系统设备介绍 (32)5.1 基站系统 (32)5.2 核心网设备 (39)5.3DVRS全网录音系统 (48)5.3.1 总体拓扑结构图 (48)5.3.2 功能介绍 (49)5.3.3 录音系统性能 (52)5.4PDT集群网管系统 (52)5.4.1 配置管理 (53)5.4.2 用户管理 (56)5.4.3 安全管理 (58)5.4.4 设备监控 (58)5.4.5 故障管理 (63)5.4.6 远程维护 (64)5.5有线电话互联系统 (65)5.5.1 PSTN网关概述 (65)5.5.2 PSTN网关性能及特点 (66)5.5.3 多业务开放路由器 (66)5.6 统一调度平台设计 (68)5.6.1 系统结构 (68)5.7终端介绍 (80)5.7.1 MD780G数字集群车载台 (80)5.7.2 MD780数字集群基地台 (86)5.7.3 PD780G数字集群手持机 (92)5.7.4 PD980数字集群对讲机 (99)6系统工程要求 (107)6.1 电源 (107)6.2 安装机房的场地要求 (107)6.3设备安装说明 (108)6.4天线安装 (109)6.5 系统接地及防雷 (111)6.6 室外天馈系统防雷与接地 (112)7海能达公司简介 (113)7.1技术实力 (115)7.2质量保证 (117)1系统建设概述1.1概述森林防火通信系统是在通信网络、计算机网络和信息应用技术基础上建立的综合通信保障系统,是确保森林防火通信畅通,实现信息共享和发布,提高现代森林防火信息化应用的重要手段和重要森林防火基础设施。
hgdera td 370对讲机使用说明
Hytera 同频中继这样玩!(设置和技巧)自从 Hytera 推出了具备同频中继机能的 PD-980 之后,PA 发现了如果联合 Hytera 自家一个特别有的机能:虚拟集群,就可以实现:如果同频中继启动,用户自动使用中继,增加通信距离或覆盖纵深、同频中继关闭(如没电),用户自动进入直通,全程自适应,不需要人为干扰。
暂时由于机能设计的先进特性,只有 Hytera 的设备可以实现。
关键点:第一,用户的设置。
要使用上述同频中继自适应机能,只需在CPS写频软件中,设置收发频率必须同频,然后,写入数字频道的各项设置时,把 [ 时隙 ] 选择为 [ 虚拟集群 ] ,虚拟集群指定发射时隙设置为1,没有了,就这样简单。
(所有的用户都这样设置)
第二,同频中继的设置。
同上设置,唯一不同是虚拟集群指定发射时隙,该项机能选择默认的:无,完成。
原理:由于默认大家都处于时隙1通信,关闭同频中继,这时候彼此工作于直频,都能通,同频中继启动后,就把接收到的1时隙向2时隙转发,由于用户设置了虚拟集群,因此自动扫描两条时隙,既可以接收直达的时隙1信号,亦能接收经转发的时隙2信号。
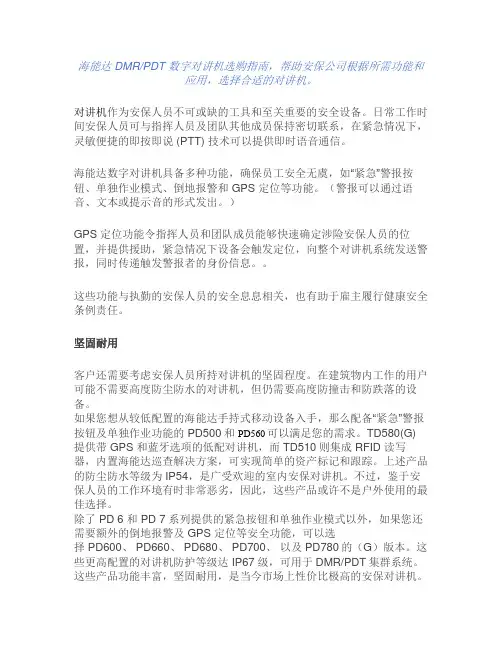
海能达 DMR/PDT 数字对讲机选购指南,帮助安保公司根据所需功能和应用,选择合适的对讲机。
对讲机作为安保人员不可或缺的工具和至关重要的安全设备。
日常工作时间安保人员可与指挥人员及团队其他成员保持密切联系,在紧急情况下,灵敏便捷的即按即说 (PTT) 技术可以提供即时语音通信。
海能达数字对讲机具备多种功能,确保员工安全无虞,如“紧急”警报按钮、单独作业模式、倒地报警和 GPS 定位等功能。
(警报可以通过语音、文本或提示音的形式发出。
)GPS 定位功能令指挥人员和团队成员能够快速确定涉险安保人员的位置,并提供援助,紧急情况下设备会触发定位,向整个对讲机系统发送警报,同时传递触发警报者的身份信息。
这些功能与执勤的安保人员的安全息息相关,也有助于雇主履行健康安全条例责任。
坚固耐用客户还需要考虑安保人员所持对讲机的坚固程度。
在建筑物内工作的用户可能不需要高度防尘防水的对讲机,但仍需要高度防撞击和防跌落的设备。
如果您想从较低配置的海能达手持式移动设备入手,那么配备“紧急”警报按钮及单独作业功能的 PD500和PD560可以满足您的需求。
TD580(G) 提供带 GPS 和蓝牙选项的低配对讲机,而TD510则集成 RFID 读写器,内置海能达巡查解决方案,可实现简单的资产标记和跟踪。
上述产品的防尘防水等级为 IP54,是广受欢迎的室内安保对讲机。
不过,鉴于安保人员的工作环境有时非常恶劣,因此,这些产品或许不是户外使用的最佳选择。
除了 PD 6 和 PD 7 系列提供的紧急按钮和单独作业模式以外,如果您还需要额外的倒地报警及 GPS 定位等安全功能,可以选择 PD600、 PD660、 PD680、 PD700、以及 PD780的(G)版本。
这些更高配置的对讲机防护等级达 IP67 级,可用于DMR/PDT集群系统。
这些产品功能丰富,坚固耐用,是当今市场上性价比极高的安保对讲机。
不过,海能达顶级配置的安全对讲机非PD980莫属。
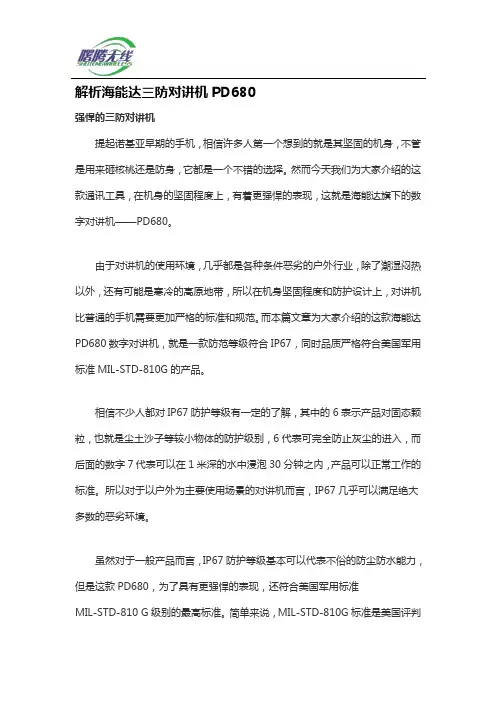
解析海能达三防对讲机PD680强悍的三防对讲机提起诺基亚早期的手机,相信许多人第一个想到的就是其坚固的机身,不管是用来砸核桃还是防身,它都是一个不错的选择。
然而今天我们为大家介绍的这款通讯工具,在机身的坚固程度上,有着更强悍的表现,这就是海能达旗下的数字对讲机——PD680。
由于对讲机的使用环境,几乎都是各种条件恶劣的户外行业,除了潮湿闷热以外,还有可能是寒冷的高原地带,所以在机身坚固程度和防护设计上,对讲机比普通的手机需要更加严格的标准和规范。
而本篇文章为大家介绍的这款海能达PD680数字对讲机,就是一款防范等级符合IP67,同时品质严格符合美国军用标准MIL-STD-810G的产品。
相信不少人都对IP67防护等级有一定的了解,其中的6表示产品对固态颗粒,也就是尘土沙子等较小物体的防护级别,6代表可完全防止灰尘的进入,而后面的数字7代表可以在1米深的水中浸泡30分钟之内,产品可以正常工作的标准。
所以对于以户外为主要使用场景的对讲机而言,IP67几乎可以满足绝大多数的恶劣环境。
虽然对于一般产品而言,IP67防护等级基本可以代表不俗的防尘防水能力,但是这款PD680,为了具有更强悍的表现,还符合美国军用标准MIL-STD-810 G级别的最高标准。
简单来说,MIL-STD-810G标准是美国评判装备在湿热环境中表现的军标,对于耐高温低温、防水防摔性都提出了很高的要求,最后一个字母“G”意味着其已经达到了很高的等级。
所以从综合表现上来看,这款海能达PD680的表现还是非常强悍的,几乎可以在任何高温低温、潮湿恶劣的环境中正常工作。
金属超薄机身设计在多数人印象中,具有出色三防能力的产品相对而言都要有着非常臃肿的身材,无论是三防手机还是其他电子产品,总是比常规产品看起来更加笨重。
然而海能达PD680在机身设计上,却有着更为轻薄的表现。
虽然使用了全金属机身设计,但无论是厚度还是重量,甚至优于其他不具有三防特点的常规对讲机。
DIGITAL PORTABLE RADIO数字手持终端OWNER’S MANUAL使用说明书Instructional IconsIndicates functions that are available on digital channel only.Indicates functions that are available on analog channel only.Functions marked with no function icons are available on both analog and digital channels.DisclaimerHytera Communications Corporation Limited (the Company) endeavors to achieve the accuracy and completeness of this manual, but no warranty of accuracy or reliability is given. All the specifications and designs are subject to change without notice due to continuous technology development. No part of this manual may be copied, modified, translated, or distributed in any manner without the express written permission of us.We do not guarantee, for any particular purpose, the accuracy, validity, timeliness, legitimacy or completeness of the Third Party products and contents involved in this manual.If you have any suggestions or would like to learn more details, please visit our website at:.RF Radiation InformationThis product must be restricted to operations in an Occupational/Controlled RF exposure Environments. Users must be fully aware of the hazards of the exposure and able to exercise control over their RF exposure to qualify for the higher exposure limits.RF Radiation ProfileRadio Frequency (RF) is a frequency of electromagnetic radiation in the range at which radio signals are transmitted. RF technology is widely used in communication, medicine, food processing and other fields. It may generate radiation during use.RF Radiation SafetyIn order to ensure user health, experts from relevant industries including science, engineering, medicine and health work with international organizations to develop standards for safe exposure to RF radiation. These standards consist of:●United States Federal Communications Commission, Code of Federal Regulations; 47CFR part 2 sub-part J;●American National Standards Institute (ANSI)/Institute of Electrical and Electronic Engineers (IEEE) C95. 1-1992;●Institute of Electrical and Electronic Engineers (IEEE) C95.1-1999;●International Commission on Non-Ionizing Radiation Protection (ICNIRP) 1998.FCC RegulationsFederal Communication Commission (FCC) requires that all radio communication products should meet the requirements set forth in the above standards before they can be marketed in the U.S, and the manufacturer shall post a RF label on the product to inform users of operational instructions, so as to enhance their occupational health against exposure to RF energy.Operational Instructions and Training GuidelinesTo ensure optimal performance and compliance with the occupational/controlled environment RF energy exposure limits in the above standards and guidelines, users should transmit not more than 50% of the time and always adhere to the following procedures:●RF energy will be generated only when the radio is transmitting.●The radio must be 2.5 centimeters away from human body when transmitting.EU Regulatory ConformanceAs certified by the qualified laboratory, the product is in compliance with the essential requirements and other relevant provisions of the Directive 1999/5/ EC.Please note that the above information is applicable to EU countries only.ContentsItems in the Package ----------------------------------------1 Product Overview --------------------------------------------2 Product Controls ---------------------------------------------------2 Programmable Keys ----------------------------------------------3 Before Use ------------------------------------------------------3 Assembling the Radio --------------------------------------------3 Charging the Battery----------------------------------------------4 Checking the Battery Power ------------------------------------5 Status Indication ---------------------------------------------5 LCD Icon-------------------------------------------------------------5 LED Indicator -------------------------------------------------------6 Menu Navigation----------------------------------------------7 Basic Operations ---------------------------------------------8 Powering On/Off ---------------------------------------------------8Adjusting the Volume ---------------------------------------------8 Selecting a Zone ---------------------------------------------------8 Selecting a Channel -----------------------------------------------8 Inputting via Keypad ----------------------------------------------9 Locking and Unlocking the Keypad ---------------------------9 Managing the Contacts-------------------------------------------9 Call Services ---------------------------------------------------10Private Call ------------------------------------------------------10 Group Call -------------------------------------------------------11 Calling on Analog Channel (No Signaling) --------------11 Emergency Alarm -------------------------------------------------11Message Service -----------------------------------------12 Troubleshooting ----------------------------------------------13 Care and Cleaning -------------------------------------------14 Optional Accessories ---------------------------------------153To remove the battery, please turn off the radio first. Then slide the battery latch upwards to unlock the battery. Programmable KeysSK1to the corresponding Feature Book for feature details.Assembling the Radio 1. Assembling the Battery2. Assembling the Antenna”Assemble DisassembleNote4 3. Assembling the Belt Clip12Remove the screws Assemble the Belt ClipCharging the Battery Please use the charger specified by the Company, and follows thecharging steps as shown below.Read the Safety Information Booklet in advance to get necessary safety information. ●To achieve optimal battery performance, please charge the battery for at least 5 hours before initial use.Do not hold the radio by its antenna, otherwise the performance and lifespan of the antenna will be reduced.CautionChecking the Battery PowerYou may check the current battery power by holding down the programmed Battery Power Indicator key preset by your dealer. And release the key to exit. Battery power indications are listed below:DIconLED IndicatorD7Powering On/Off Adjusting the Volume Selecting a ZoneA zone is a group of channels exhibiting the same property, which is programmed by your dealer and can facilitate convenient management over the channel. The radio supports up to 3 zones, each with a maximum of 16 channels. You can switch to the appropriate zone by pressing the programmed Zone Up or Zone Down key preset by your dealer.Selecting a ChannelAfter the radio is powered on, you can rotate the Channel Selector knob to select an appropriate channel. You can also switch to the designated channel by pressing the programmed Preset Channel key preset by your dealer.If the Channel Notify feature is enabled, you will hear the corresponding channel number when switching to any channel.Selecting a Zone Selecting a Channel8Inputting via KeypadYou can input alias, call numbers and messages via the keypad of theradio. Besides, you may need to do the following during inputting.●●●Locking and Unlocking the KeypadWhen the keypad is not in use, you can lock the keypad to avoidmishandling. You can lock or unlock the keypad through any of thefollowing methods:●Key Combination: Press the OK●Programmable Key: Press the programmedby your dealer.●Menu Navigation: Go to “Settings -> Radio Settings -> Keypad Lock”to enable or disable the feature.»Enable: The keypad will be locked automatically if there is no radiooperation within the preset time. After this feature is enabled, youcan press the Up/Down key to set the Keypad Auto Lock DelayTime.»Disable: The keypad will not be locked automatically. However, youcan lock or unlock the keypad via the key combination or KeypadLock key mentioned above.configure other lockable keys or knobsManaging the ContactsYou can manage the contacts via the “Contact” menu.Contact ListThe Contact List is used to save Private Call/Group Call/All Call contactsinformation such as Call Alias, Call Type and Call ID. You can accessthe “Contact List” menu via the “Contact” menu or by pressing theprogrammed Contact List key.In the “Contact List” menu, you can check the contact information, editor delete the private contact. You can send to a private call contact thefollowing commands: Alert Call, Radio Check, Remote Monitor, RadioEnable or Radio Disable. Please refer to Feature Book for more details.New ContactYou can add and save a new contact to the contact list. The number andalias of each contact must be unique.Note10After the radio is powered on, you can make and receive calls. To ensure optimal volume of the receiving radio, keep the microphone about 2.5 toPrivate CallInitiating a Private CallWhen initiating a private call, the radio will display the icon . Youcan make a private call through the following ways:Preset ContactIn the home screen, hold down the PTT key to initiate a Private Call to the Private Call contact preset for the current channel.You may request your dealer to preset a regular Private Call contact, Group Call contact or an All Call contact for each digital channel.Contact List or Call Logs1. Go to “Menu -> Contact -> Contact List” or “Menu -> Call Logs -> Outgoing/Incoming/Missed”.2. Use the Up/Down key to select an appropriate contact.3. Hold down the PTT key to initiate a Private Call.Manual Dial1. Go to “Menu -> Contact -> Manual Dial”.2. Input a Private Call number via the numeric keypad.3. Hold down the PTT key to initiate a Private Call.●display the call type (private call ID/ group call ID).●If the Default Numeric Key Selection feature is enabled by your dealer, you can enter a private call number in the home screen, and then press the PTT key to transmit the call. However, if the DTMF keypad is enabled, the number entered in the home screen is a phone number. You can dial the private call number through the menu “Manual Dial” only.Note11Receiving and Responding to a Group CallAfter receiving a group call, the radio will display the icon . You canhold down the PTT key to call back within the preset time.Call on Analog Channel (No Signaling)On an analog channel, you can hold down the PTT key and talk to the microphone to transmit, and release the PTT key to receive.Please refer to the corresponding Feature Book for operation description on how to make and receive calls on the analog channel with signaling.Emergency CallIn case of emergency, you can use this feature to ask for help from your companion or the control center. The Emergency Call has the highest priority which can terminate the ongoing calls with lower priorities on the current channel. You can make an emergency call even when your radio is transmitting or receiving.This feature needs to be configured and enabled by your dealer. Please refer to the corresponding Feature Book for details.Receiving and Responding to a Private CallAfter receiving a private call, the radio will display the icon, thenyou can listen without any operation. You can hold down the PTT key to call back within the preset time. If you do not respond it, the radio will display appropriate indications.Group CallInitiating a Group CallWhen initiating a group call, the radio will display the icon. Youcan make a group call through the following ways. The operation is similar to initiating a private call.Preset ContactIn the home screen, hold down the PTT key to initiate a Group Call to the Group Call contact preset for the current channel.Contact List1. Go to “Menu -> Contact -> Contact List”.2. Use the Up/Down key to select an appropriate contact.3. Hold down the PTT key to initiate a Group Call.Manual DialThe operation is the same as initiating a private call.This feature allows you to edit and send a new message, to directly send a quick text message and to forward the messages in the Inbox, Outbox and Drafts.Sending a message1. Go to “Menu -> Message -> New Msg” to enter the relevant screen.2. Type the text and press the OK key. Save it to Drafts, or send it to aprivate call contact or a group call contact.3. Select the contact or input the contact number manually.4. Press the OK key to send the message. When the message is sentsuccessfully, the radio will display the prompt “Send Success!”.Quick TextQuick Text are frequently used messages preset by your dealer. You can choose to edit and send any entry.InboxThe radio saves the received messages into the Inbox and marks every message with a corresponding icon to indicate its status.● : Read message● : Unread messageWhen the Inbox is full, the radio will display theicon , and theearliest message will be overwritten by the latest one automatically. Outbox The radio will save the sent messages into the OutBox and marks every message with a corresponding icon to indicate its status.● : The message is sent successfully.● : The message is not sent successfully. In this case, you canresend it.When the Outbox is full, the earliest message will be overwritten by the latest one automatically.DraftsThe radio saves the edited messages into the Drafts. When the Drafts is full, the earliest message will be overwritten by the latest one automatically. After the message in the Drafts is sent successfully, it will be removed from the Drafts and be saved into the Outbox. If not sent successfully, the message will be saved into the Drafts and the Outbox.1214To guarantee optimal performance as well as a long service life of the product, please follow the tips below.Product CareKeep the product far away from substances that can corrode the circuit.Product Cleaning●Clean up the dust and fine particles on the product surface and charging piece with a clean and dry lint-free cloth or a brush regularly.●Use neutral cleanser and a non-woven fabric to clean the keys, control knobs and front case after long-time use. Do not use chemical preparations such as stain removers, alcohol, sprays or oil preparations, so as to avoid surface case damage.●Make sure the product is completely dry before use.Caution H M N O 4PC45 Programming Cable (USB Port)The following items are the main optional accessories for the radio. Formore information of other accessories, please consult your local dealer.Use the accessories specified by Hytera only. If not, theCompany shall not be liable for any losses or damagesarising out of use of unauthorized accessories.CautionBL2010 2000mAh Li-Ion battery,MCA08 MCU Multi-unit Charger (for ThickBattery),CH10A06 Dual Pocket MCU Charger Kit (forLi-ion/Ni-MH Batteries),PS7501 Switching Power Adapter for MCUMulti-unit Rapid-rate Charger,MCA05 Battery Optimizing SystemEAN21 3-wire Surveillance Earpiece with TransparentAcoustic Tube(Beige),ESN14 Remote Earbud,EHN20 Remote Swivel Earset,EHN21 Remote C-Earset,EAN22 Detachable Earpiece with Transparent AcousticNCN011 Nylon Carrying Case (half-folded)(non-swivel) (black)SM26N2 Waterproof Remote Speaker Microphone(IP54),EAN24 2-wire Surveillance Earpiece with TransparentAcoustic Tube (Beige),EWN08 Digital Wireless Covert Earpiece (FlatpackSensor)图标说明:表示数字信道独有的功能,只能在数字信道上使用。
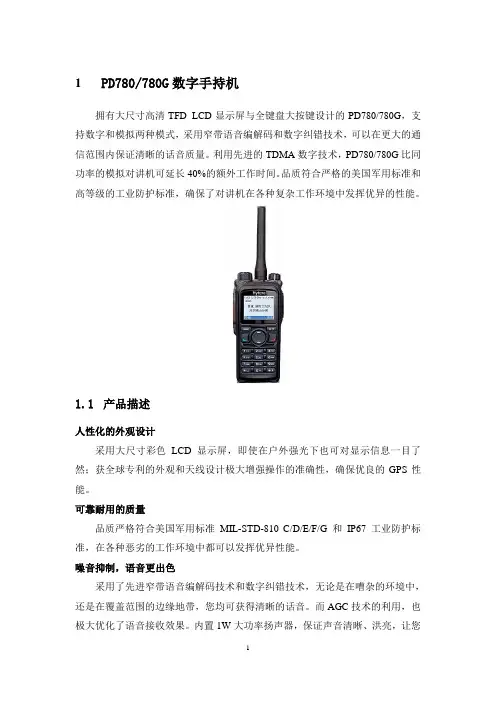
1PD780/780G数字手持机拥有大尺寸高清TFD LCD显示屏与全键盘大按键设计的PD780/780G,支持数字和模拟两种模式,采用窄带语音编解码和数字纠错技术,可以在更大的通信范围内保证清晰的话音质量。
利用先进的TDMA数字技术,PD780/780G比同功率的模拟对讲机可延长40%的额外工作时间。
品质符合严格的美国军用标准和高等级的工业防护标准,确保了对讲机在各种复杂工作环境中发挥优异的性能。
1.1产品描述人性化的外观设计采用大尺寸彩色LCD 显示屏,即使在户外强光下也可对显示信息一目了然;获全球专利的外观和天线设计极大增强操作的准确性,确保优良的GPS性能。
可靠耐用的质量品质严格符合美国军用标准MIL-STD-810 C/D/E/F/G 和IP67 工业防护标准,在各种恶劣的工作环境中都可以发挥优异性能。
噪音抑制,语音更出色采用了先进窄带语音编解码技术和数字纠错技术,无论是在嘈杂的环境中,还是在覆盖范围的边缘地带,您均可获得清晰的话音。
而AGC技术的利用,也极大优化了语音接收效果。
内置1W大功率扬声器,保证声音清晰、洪亮,让您轻松保持通讯畅通。
更持久的电池使用时间相比模拟对讲机,数字对讲机电池可获得近40%的额外工作时间。
更高的频谱利用率,信道倍增TDMA双时隙技术使频谱利用率大幅提高,数字对讲机可在原有的频率资源基础上容纳多一倍的信道,极大地缓解了频谱资源日益短缺的压力。
双时隙虚拟集群功能作为海能达PDT产品特有的功能,双时隙虚拟集群技术可以将当前空闲的时隙分配给需要通话的组员,更好地提高了频带利用率。
在某些紧急情况下,助您及时传递重要信息。
语音加密功能除了提供数字技术固有的加密,还可提供更高级别的加密能力(如256位加密算法)和扰频功能(可选)。
丰富的业务功能除了传统的通信业务外,还支持多种数据业务和可选功能,如文本消息、扫描、紧急报警、倒放报警(选配)、自动登记和单独工作等功能。
开放的二次开发接口提供开放的侧面二次开发接口,允许用户或第三方厂商开发更丰富的应用软件来扩展对讲机功能。
致用户非常感谢您使用海能达设计和生产的PDT 数字中转台。
强大的数字功能、人性化的外观设计、卓越的通信品质,带给您全新的数字通信体验,为应急通讯提供坚实可靠的保障!为了确保您最大限度地享用本产品所带来的各项便利,请于使用前详细阅读本手册和《安全信息手册》。
本手册适用于以下机型:RD980图标说明本手册中会使用以下图标,各图标含义如下:注意:表示可能会损坏本产品的事项。
备注:表示有助于您更好地了解和使用本产品的事项。
*表示本中转台当前版本不支持的功能项或部件,将在后续版本支持。
版权信息Hytera 为海能达通信股份有限公司(以下简称“我司”)在中华人民共和国和世界其他国家和/或地区的商标或注册商标。
我们仅对我司的商标及产品名称享有所有权,本手册中可能提及的其他商标和产品名称为各自所有者所有。
本手册介绍的产品中可能包括存储于内存或其他媒介中的计算机程序。
我司对此等程序享有的专有权利受中华人民共和国或其他国家及相关国际法的保护。
购买本产品并不意味着我司以明示或暗示方式向购买者授予有关此等电脑程序的权益。
未经我司事先书面授权,任何企业、组织或个人不得对计算机程序进行任何形式的复制、更改、散发、反编译和反向工程。
本产品嵌入的AMBE+2TM语音编解码技术受知识产权保护,包括Digital Voice Systems, Inc.的专利权、版权和商业秘密。
该语音编解码技术经单独授权供该产品使用。
明确禁止该技术使用者对其进行反编译、逆向工程或反汇编目标代码,或以任何其他方式将目标代码转换成可读取的格式。
美国专利号:#6,912,495 B2, #6,199,037 B1, #5,870,405, #5,826,222, #5,754,974,#5,701,390, #5,715,365, #5,649,050, #5,630,011, #5,581,656, #5,517,511, #5,491,772,#5,247,579, #5,226,084 和#5,195,166。
天逸AD980卡拉OK机技术参数外观与风格尺寸:520x380x175mm重量:5.0kg延时范围:50ms-200ms话筒输入阻抗:600ohm谐波失真:≤0.5%信噪比:>80dB频响(音乐):20Hz-20kHz频响(延时):100Hz-7kHz使用弧线型喷砂工艺处理的铝合金面板,配合全金属按钮,总体感觉简洁、流畅、高档,有进口产品的韵味。
功能特点1、高品质数码混响;2、高保真前级放大;3、话筒信号谐波激励功能;4、四级常用延时调节;5、输入输出断电直通;6、话筒和音乐独立调节。
可充当:卡拉OK前级HI-FI前级可搭配:中高级HI-FI功放及不带卡拉OK功能的AV功放配入门级纯后级,一般很少专门搭配卡拉OK混响立体声前级放大素质与搭配1、三菱顶级数码卡拉OK芯片M65831;2、音乐及话筒通道前级采用优质运放NE5532放大;3、金属化属酯电容;4、优质断电器做断电直通功能;5、高级铝合金面板及金属按钮总体评价在AD780的基础上改进而成,面板造型和旋1、外观:A、铝合金面板弧线型凹槽,特殊喷砂工艺,立体感强,面板很生动,很有灵性;B、整机金属按键的大小及排布合理美观,操作性好;C、整体感觉简洁、流畅,颇具高档器材的风范。
2、功能定位:A、可以在其目前的系统中直接添加AD980,来改善卡拉OK的声音质量,适合卡拉OK发烧友,喜欢唱歌的用户;B、AD980可以作为一台有着相当素质的前级,接驳一些纯后级类产品,同时还可以提供很好的卡拉OK效果。
3、目标消费群:A、卡拉OK发烧友;B、适合喜欢唱歌的入门级的HI-FI发烧友;需要卡拉OK且要求较高的音响发烧友;C、专业卡拉OK场合。
4、搭配推荐:特别适合于进口功放,同时适合于其他中高级功放。
5、综合评价:外观时尚,卡拉OK效果出色,性价比高。
SM58简介:SM58一直都是全世界专业表演者的首选,是一个真正的音响界的传奇,虽然“58”的外观常被模仿,但他生动有力的声音和坚固可靠的性能是永远无法模仿的。