数码摄像机使用说明书
- 格式:pdf
- 大小:384.58 KB
- 文档页数:25
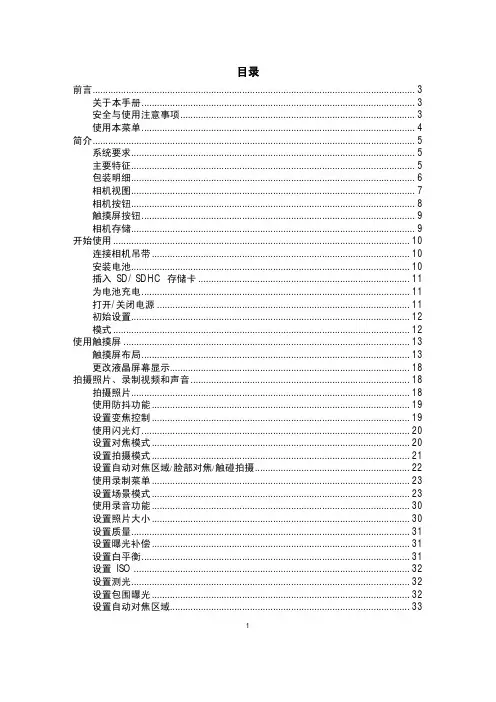
目录前言 (3)关于本手册 (3)安全与使用注意事项 (3)使用本菜单 (4)简介 (5)系统要求 (5)主要特征 (5)包装明细 (6)相机视图 (7)相机按钮 (8)触摸屏按钮 (9)相机存储 (9)开始使用 (10)连接相机吊带 (10)安装电池 (10)插入 SD/ SDHC 存储卡 (11)为电池充电 (11)打开/关闭电源 (11)初始设置 (12)模式 (12)使用触摸屏 (13)触摸屏布局 (13)更改液晶屏幕显示 (18)拍摄照片、录制视频和声音 (18)拍摄照片 (18)使用防抖功能 (19)设置变焦控制 (19)使用闪光灯 (20)设置对焦模式 (20)设置拍摄模式 (21)设置自动对焦区域/脸部对焦/触碰拍摄 (22)使用录制菜单 (23)设置场景模式 (23)使用录音功能 (30)设置照片大小 (30)设置质量 (31)设置曝光补偿 (31)设置白平衡 (31)设置 ISO (32)设置测光 (32)设置包围曝光 (32)设置自动对焦区域 (33)1设置自动对焦灯 (33)设置锐利度 (33)设置饱和度 (34)设置对比度 (34)设置闪光灯 (35)设置拍摄模式 (35)设置对焦模式 (35)设置色彩模式 (35)设置数码变焦 (36)设置日期印记 (36)设置自动查看 (37)录像 (37)播放 (39)文件导航 (39)单个导航模式查看 (39)以照片流模式查看 (39)以缩略图模式查看 (40)以日历模式查看 (40)缩放图像 (41)播放视频 (42)播放录音 (42)播放语音备忘录 (42)音量控制 (43)播放菜单 (43)使用设置菜单 (53)设置声音 (53)设置节能方式 (53)设置 LCD 节能 (54)设置日期时间 (54)设置语言 (54)设置文件编号 (54)设置电视输出 (54)设置 LCD 亮度 (55)设置内存工具 (55)全部重置 (55)建立连接 (56)连接相机与电视 (56)连接相机与计算机 (56)连接相机与打印机 (57)设置打印模式菜单 (58)附录 (59)关于文件夹和文件名 (59)故障排除 (59)规格 (60)2前言关于本手册本手册旨在帮助您使用新的数码相机。
M 2525数码数码摄像机摄像机摄像机使⽤⼿册使⽤⼿册使⽤⼿册欢迎欢迎<备忘录>>⽬录前⾔ (8)关于本⼿册 (8)版权 (8)免责声明 (8)安全警告和注意事项 (11)1产品介绍 (16)1.1系统需求 (16)1.2特点 (16)1.3数码摄像机及配件 (17)1.4关于本产品 (18)1.5调整液晶显⽰器 (19)2开始使⽤ (20)2.1插⼊SD卡 (20)2.2装⼊电池 (21)2.3将电池充电 (23)2.4触碰屏幕功能⼿势 (24)2.4.1触碰点选 (24)2.4.2滑动 (25)22.4.3旋转 (25)2.5按键功能的说明 (26)2.6有关LED指⽰灯 (28)2.7开始使⽤之前 (29)2.7.1语⾔设定 (29)3使⽤数码摄像机 (30)3.1录像模式 (30)3.2声⾳录制模式 (31)3.3拍照模式图标 (32)拍摄//播放影像 (34)4拍摄4.1拍摄影像 (34)4.2录像暂停 (34)4.3拍摄照⽚ (34)4.4录⾳模式 (34)播放影⽚//录⾳ (35)4.5播放影⽚拍摄//检视照⽚ (38)4.6拍摄4.6.1拍摄照⽚ (38)4.6.2检视影像 (38)5影⽚播放模式 (39)35.1影⽚播放模式图标 (39)5.2录⾳播放模式 (40)5.3照⽚播放模式 (42)6使⽤选单 (44)6.1影⽚选单 (44)6.1.1品质 (44)6.1.2分辨率 (45)6.1.3预录功能 (46)6.1.4定时拍摄 (46)6.1.5双码流录制 (46)6.1.6脸部追踪 (47)6.1.7场景模式 (47)6.1.8⽩平衡 (48)6.1.9特效 (48)6.1.10测光 (49)6.1.11曝光补偿 (49)6.1.12背光 (50)6.1.13对⽐ (50)6.1.14锐利度 (51)6.1.15动作侦测 (52)6.1.16慢动作视频 (54)4影⽚//录⾳播放选单 (55)6.2影⽚6.2.1档案保护 (55)6.2.2播放 (56)6.2.3删除 (56)6.3拍照选单 (58)6.3.1品质 (58)6.3.2分辨率 (59)6.3.3拍照模式 (59)6.3.4预览延时 (60)6.3.5脸部追踪 (60)6.3.6场景模式 (60)6.3.7⽩平衡 (61)6.3.8特效 (61)6.3.9测光 (62)6.3.10ISO值设定 (62)6.3.11曝光补偿 (63)6.3.12背光 (63)6.3.13对⽐ (63)6.3.14锐利度 (64)6.4照⽚播放选单 (65)6.4.1档案保护 (65)6.4.2幻灯⽚设定 (66)56.4.3幻灯⽚效果 (66)6.4.4删除 (66)6.4.5DPOF (67)6.4.6旋转 (68)6.5设定选单 (69)6.5.1电视输出格式 (69)6.5.2档案编号 (70)6.5.3⽇期/时间 (70)6.5.4格式化 (70)6.5.5恢复原⼚设定 (71)6.5.6LCD亮度 (71)6.5.7时间/⽇期打印 (71)6.5.8⾃动关机 (72)6.5.9语⾔ (72)6.5.10频率 (72)6.5.11信息 (73)6.5.12声⾳ (73)6.5.13触控屏幕校正 (74)6.5.14开机画⾯ (74)6.5.15数码变焦 (74)7电脑及电视连接 (75)67.1连接至电脑 (75)7.2连接至电视 (75)8安装软件 (77)9编辑软件 (78)10附录 (79)规格规格 (79)故障排除 (82)78 前⾔前⾔感谢您购买这台先进的摄像机。
数码摄像机使用说明书使用说明书: 数码摄像机一、前言数码摄像机是一种先进的影像记录工具,用于拍摄和保存高质量的电子影像。
本使用说明书将详细介绍数码摄像机的功能、操作以及日常维护。
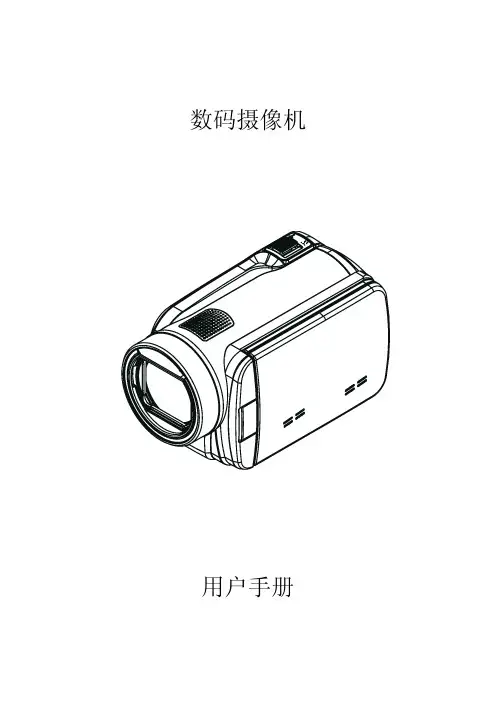
二、产品概述数码摄像机是一款小巧便携的摄像设备,具备高清晰度拍摄、数字存储以及其他丰富功能。
它不仅可以拍摄高品质的视频,还支持拍摄静态照片和音频录制。
三、摄像功能1. 开机与关机在摄像机上方的电源按钮上长按3秒,摄像机即可开机。
要关闭摄像机,同样按住电源按钮3秒即可。
2. 拍摄视频数码摄像机支持录制高清晰度的视频。
在摄像机开机状态下,按下“录制”按钮即可开始录制视频。
按下“停止”按钮可以停止录制。
3. 拍摄照片摄像机还支持拍摄高质量的静态照片。
在摄像机开机状态下,按下“拍照”按钮即可拍摄照片。
四、存储与传输1. 存储媒介这款数码摄像机使用内置存储卡进行数据存储。
插入适配卡可以进行拍摄,拍摄的视频和照片均会存储在存储卡中。
2. 数据传输摄像机支持通过USB接口与电脑进行数据传输。
使用随附的数据线将摄像机与电脑连接后,即可将拍摄的影像文件传输到电脑中。
五、功能设置1. 摄像参数调整在摄像机的菜单界面上,用户可以根据实际需求调整摄像参数。
比如调整白平衡、曝光、对焦等设置。
2. 画面预览摄像机配备了高分辨率的视觉屏幕,可以方便地预览拍摄的视频和照片。
六、日常维护1. 电池使用摄像机使用电池供电,在使用前请确保电池已充满电。
如果电池电量过低,建议及时充电以免影响使用。
2. 存储卡维护存储卡是数据的主要存储媒介,应定期整理存储卡中的数据,并注意保持存储卡的清洁。
七、安全注意事项1. 使用环境请在干燥、通风的环境中使用摄像机,避免摄像机与水或其他液体接触。
2. 电池使用使用摄像机时,请确保使用充电宝或合适的电源适配器,严禁擅自更换电池。
3. 摄像过程中在摄像或拍摄过程中,请注意不要将摄像机指向强光源,以免损坏镜头。
八、故障排除1. 无法开机请确认电池电量是否耗尽,如果是,请及时充电;如果不是,请联系售后维修。

User manualThe smallest high definition camera in the worldPrefaceThank you for purchasing our product, high definition digital camcorder, exquisite special sport design with multi-function.This user manual will give you full instruction of using the product, and also provide you information of the product in detail. Please read this manual carefully before using the product. Please keep this manual well. We hope our product could satisfy your need and wish to serve you for long-term.No further notice will be informed if technical specification or appearance of this product changed. SummaryThis high-tech mini HD camcorder is designed for the demand of the market. This product has the most electronic functions such as HD digital video, digital photo, USB data transfer, HDMI output…Large range of application, memorize every wonderful moment......Features●High Definition videos or photos●Lens: 5.0 mega pixel, CMOS●Video format: 1280×720, 30Fps, MOV●Photo format: 3200×2400 jpeg, 8.0 mega pixel.●Interface: USD2.0 / HDMI●HDMI Port: Support to display on high definition TV directly●High capacity Lithium-ion rechargeable battery●Support micro SD cardConfigurationA MODEB RESETC FAST FORWARDD FAST BACKWARDE RECORDF POWEROPERATING INSTRUCTION◆Charging the Battery1. Using the charger: One end of the USB cable connects the charger and another links to the USB port ofthe camcorder, camcorder light will flash when charging. After full charge, red light keeps on.2. Connect computer: Connecting the USB cable to computer could charge too, red indicator light flashwhen charging.◆Inserting &Taking out Storage Card( Micro SD card)1. Carefully insert the storage card into the card slot.2. To remove the card, push the card in lightly, and then release it, when the card is rebounded then pull itout.Note:1. Before using micro SD card. Please check whether it is locked;2. Please make sure micro SD card is oriented in the right direction. Inserting micro SDcard in the wrong direction might cause damage to the product and the micro SD card;3. If the card is not compatible with the product, it might not be read. In this case, take outthe card and insert it again, or change another micro SD card.◆Power onPress the POWER button slightly, red light on and off quickly then turn to blue, this device is powered on.◆Video mode1. This product automatically goes to video mode after it is powered on. The blue indicator light begins to light always.2. Press RECORD button to start taking video, the blue and red indicator light begin to bright always. Press RECORD button again to stop recording, the blue indicator light always on and red light off.◆Photo mode1. After power on this device, press the MODE button. The blue indicator light begins to flash always.2. Press RECORD button to take photo, the red light bright always and the blue light flash twice, And then enter to the standby mode again, the red light off and blue indicator light flash always.◆HDMI mode1. Connect the product to the TV or PC using HDMI line. Turn on the product to go to Video mode, then can see the frames which the same with the product’s lens. Press the Record button, It begin to take video. And can see the frames in the TV or PC immediately. Press the Record button can play the current video.2. Press the Mode button, enter into photo mode. Press the mode button again to enter into review mode. Press direction key forwards and backwards to review pictures and video taken.◆Review mode1. Turn on the product to go to Video mode. Press mode key to enter into Photo mode. And then press mode key to enter into Review mode. Press direction key forwards and backwards to review pictures or videos taken.2. User can press direction key to review taken pictures or videos. Press Record key to play the video in the TV. Press mode to exit.3. Delete While reviewing (reviewing pictures/video), press Mode key for 3 seconds, it will enter into setting mode. Press mode key to go to deleting display. Press the direction key to choose deleting option, press mode key to confirm.◆Setting mode1. Regardless of video/camera/review mode, press Mode key for 3 seconds to enter into setting mode. Pressing Mode key could enter each setting Menu (For detailed setting information, please refer to setting table).2. At any menu mode, pressing direction key will enable user to go to menu setting options to choose desired setting, then press Mode to confirm.3. At any mode or menu setting, press the record key can exit current setting to original mode.File storing◆USB Storage ModeIf had inserted micro SD card into product, after connect with computer, you can find two removable disks from “My computer” (one is internal storage, the other is external storage card); find the stored videos and pictures under “Removable hard disk/ DCIM/100MEDIA”, data can be saved, transferred, cut, copied and deleted through computer system.Tips:If the displayed picture is tagged with" ", then it is a video. Press Record key to play the video. Pressing Record key again it will come to pause. While playing video, you can use direction key to forward or backward playing. To exit playing mode, you have to press Record key to pause first, and then press direction key to go to the next file.◆Connecting product to TV or PC1. Connecting product to TV with an HDMI cable to review pictures and videos.2. Connecting product to PC with an HDMI cable to review pictures and videos. Functions of keysVideo ModePower Button Turn on or off the productRecord Button Take Video or Pause take videoMode Button Enter into photo modePhoto ModeRecord Button Take Video or Pause take videoMode Button Enter into review modeHDMI ModePower Button Turn on or off the productRecord Button Take Video or Pause take video or play video Mode Button Enter into photo mode/enter into review mode Forwards Next video or pictureBackwards Last video or pictureMode & Menu settingMode Menu SettingTaking Videos Size1280*720/848*480/640*480/320*240EV+0/-0.3/-0.7/-1/-1.3/-1.7/-2/+2.0/+1.7/+1.3/+1/+0.7/0.3 White B Auto/Sunny/Cloudy/Tungsten/FluorescentContrast Standard/Hard/SoftSharpness Standard/Hard/SoftEffect Vivid/monochrome/negative/sepia/art/offDuration No/15min/30min/45minRecycle No/1min/5min/10min/15min/20minPictures Size8M/5MEV+0/-0.3/-0.7/-1/-1.3/-1.7/-2/+2.0/+1.7/+1.3/+1/+0.7/0.3 Quality Fine/good/normalWhite B Auto/Sunny/Cloudy/Tungsten/FluorescentContrast Standard/Hard/SoftSharpness Standard/Hard/SoftEffect Off/Art/Sepia/Negative/ Monochrome/Vivid Selftimer No/YesBurst No/3pics/5picsTips:1.No drive is needed to be installed. U disc can only be used when the video camerais on.2. The TV and PC must have the HDMI port then the product can connect to it.Review Delete No/YesSlide Show No/1Second/3Second/5SecondSystem Volume0/1/2/3 (8)Language English/Japanese/Simplified Chinese/Chinese Traditional Date000 00 00Clock00:00Format Cancel/YesSys.reset No/YesAuto off Off/1minute/3minute/5minuteLight Freq50HZ/60HZVersion V.0000 00 0000SpecificationsSensor5M pixel CMOS sensorVideo Video format: 1280 * 720 30fps, MOV Photo Photo format: 3200 * 2400, jpeg Video output HDMI, support 720P output modeStorage Internal: 32MExternal: support 32GB (Max.)Interface: HDMI / USB2.0Battery500mAh lithium-ion rechargeable batteryWorking temperature-10℃ - 50℃Working humility 15% - 85%Product size: 108mm (L) * 28mm (W) * 18mm (H) (Approx.)Products weight36gTroubleshooting◆Cannot take pictures, videos and record voice?Please check if had inserted the micro SD already, and if this micro SD card have enough place.◆Images cannot be transferred to HDTV screen?Please make sure that HDMI cable is completely plugged into TV’S HDMI port. Please use the HDMI cable comes along with the HDDV.◆Pictures and videos taken are not clear?Please check whether lens is covered with any dirty. If so, clean the lens before using it.。

数码摄像机用户手册在使用数码摄像机之前请阅读以下内容 安全说明•请勿扔放、穿刺或拆解数码摄像机。
•请谨慎操作数码摄像机,否则可能损坏内部元件。
•请勿将数码摄像机暴露在高温环境内,避免接触水。
操作时间较长时,数码摄像机体可能会变热。
••在使用数码摄像机之前测试正确操作。
•只使用厂商提供的附件。
只使用与该数码摄像机相符的电池。
••如果长时间不使用,请将电池取出。
产品信息•数码摄像机的设计和规格如有变更,恕不另行通知,包括原始产品规格、软件和本用户手册。
本用户手册是数码摄像机的一般参考指南。
••本手册中的插图可能与数码摄像机的实际设计和屏幕上看到的不同。
目录在使用数码摄像机之前请阅读以下内容 (2)第1节 了解本数码摄像机 (4)第2节 入门 (7)第3节 享受录制模式 (9)第4节 享受播放模式 (20)第5节 设置你的数码摄像机 (25)第6节 在TV上观看照片和录像 (29)第7节 在PC上查看录像和照片 (30)第8节 将文件上传到Internet (31)第9节 规格与系统要求 (34)第10节 故障排除 (36)第1节了解本数码摄像机产品概述本数码摄像机拥有500万像素传感器,可以拍摄H.264格式的电影。
通过利用H.264技术,在有限内存内可拍摄更多的视频图像。
达到1600万像素的高质量图像也可以顺畅输出。
利用彩色LCD监视器,用户可以合成图像并轻松对其进行检查。
本数码摄像机3英寸(16:9)液晶觸摸屏,是操作本机的理想平台。
选项选单触手可及,只要触摸面板,即可直接快速地选择选项。
本数码摄像机还拥有1920x1080高清分辨率电影录制功能。
也可通过HDMI线将本机连接到HDTV,并在HDTV的宽屏幕上轻松播放录制的高清晰度视频。
此外,本数码摄像机还具备一项高级上传特点:利用独家内置的“Internet Direct”应用,你可以轻松地将本数码摄像机拍摄到的视频上传至互联网。
本数码摄像机可自动调节ISO感光度和彩色平衡,或者用户可手动更改这些设置,并具有120x数字变焦提升了摄像与拍照时的用户控制。
迷你数码摄像机使用手册目录1.本摄像机的产品说明(a) 系统需求 (01)(b) 特色 (01)(c) 拆开摄像机的包装 (02)(d) 关于本摄像机 (02)(d1) 前视图 (02)(d2) 顶视图 (03)(d3) 底视图 (03)(d4) 后视图 (04)(d5) 侧视图 (04)(d6) TFT彩屏图 (05)(d7) 按键说明 (06)2.开始使用本摄像机 (07)(a)插入 SD 记忆卡 (07)(b)装入电池 (08)3. 拍照模式 (09)a.) 拍照功能表1 (10)b.) 拍照功能表2 (11)4. 录像模式 (12)a.) 录像功能表 (13)5. 回放模式 (14)6. 工具菜单 (15)7. 连接到电脑和电视 (16)8. 摄像头功能 (17)9. 移动硬盘空间功能 (17)10. 简易问题处理 (18)1. 本摄像机的产品说明请仔细阅读本章节,了解本摄像机的特色与功能。
本章的说明也包括系统需求,包装内容物和硬件的说明。
(a)系统需求本摄像机适用于一台有下列规格的个人电脑:z Windows XP/2000/ME/98SE 操作系统z Intel Pentium III 500MHz 或以上的CPU 处理器z标准或高于USB 1.1的集线端口z4倍速或更快的CD-ROM 光驱z至少200兆硬盘空间(b)特色本摄像机拥有下列特色和功能:z数码摄像机z数码相机(最高1200万像素)z内置白光灯z摄像头z支持 SDHC卡z特殊大头贴功能此外,本摄像机还有4倍数码变焦,可移动硬盘空间和SD读卡器功能。
01(c)拆开摄像机的包装包装中应带有以下配置,如有任何配件遗失或者损坏,请立即联系你的供应商。
配置:摄像机USB/A V 连接线安装光盘(驱动和应用程序)使用手册(d) 关于本摄像机请参照以下图解,使自己熟悉摄像机的各个按钮和控制功能。
(d1) 前视图02(d3) 底视图03(d5) 侧视图04(d6) TFT彩屏图(90 度)05(d7) 按键说明按键 名称功能开关按键长按住开关启动或关闭摄像机电源录像和拍照按键按此键拍照或录像四向导航键左键进入时间时效 右键进入像素调整 上键进入放大变焦 下键进入缩小变焦“OK” 按键确认设置模式按键按此键切换拍照,录像或回放模式灯光按键按此键可以打开白光灯062. 开始使用本摄像机阅读此章节学习如何使用本摄像机, 这章节包括基本功能如开机,电池装入,插入记忆卡和其他简单设置。
锐银数码摄像机使用说明书
数码摄像机的使用方法简单的说就是:给电池充电--安装电池、DVD磁带---将开关打到拍摄档---使用正确的方法拿住、拿下镜头盖---取景---调焦---拍摄。
虽然看似简单,但是其中也还是有很多的细节需要大家注意。
下面简单的介绍一下数码相机的正确使用方法。
1、安装镜头:摄像机是在安装镜头之后才可以使用的,而镜头是需要根据实际的情况来选择的。
安装镜头的时候,要先将摄像头以及镜头的保护盖先去掉,然后再轻轻地将镜头旋转进入摄像机的镜头借口而,并且一定要安装到位,不要有松动。
2、调整镜头光圈与对焦:将摄像机上的电子快门和逆光补偿的开关都关闭,然后将摄像机对准自己所要拍摄的地方,对镜头的光圈和对焦环进行相应的调整,是自己看到的监视器上的兔小效果达到最好的状态。
如果说摄像机在使用的时候是在那种光照度变化比较大的场合的话,那么最好是使用自动光圈的镜头,并且注意将摄像机的电子快门关闭。
3、后焦距的调整:后焦距也有着背焦距一说,,它是指在给摄像机安装上标准的镜头之后,被拍摄物体的像是刚哈偶可以落成在C CD图像传感器的那个靶面上面。
一般来说,在一些配接定焦镜头的场合是不许哟对摄像机的后焦进行调整的,因为一般的摄像机在出厂的时候他们对后焦都是做过一定得调整了。
但是如果在拍摄的过程中出现了图像不清晰的情况,那么就要首先来对镜头的接口进行检查。
如果接口正确,那么就应该对摄像机的后焦进行相应的调整了。